Week 2: Laser Cutting and Vinyl Cutting
Please see the results of our group assignment in the Purple Anteaters folder.
Vinyl Cutting
For the vinyl cutting portion of the assignment, I first started printing my lab's logo. I had to cut it twice since the force wasn't strong enough to cleanly cut through the vinyl during my first attempt. The end product looked pretty clean:
I was very impressed by how well the small details came out and wanted to see how detailed the vinyl cutter could be. I decided to do a sticker of a person's face. I took a picture, made it high contrast, applied it through an Andy Warhol poster maker and then made the resulting PNG black and white. The vinyl cutter was able to cut out even the tiny details of hair and facial features:

Laser Cutting
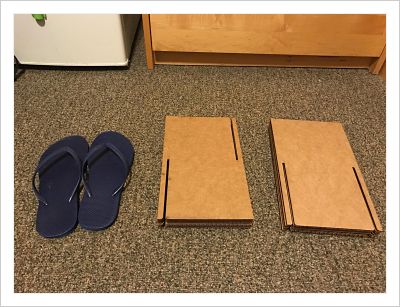
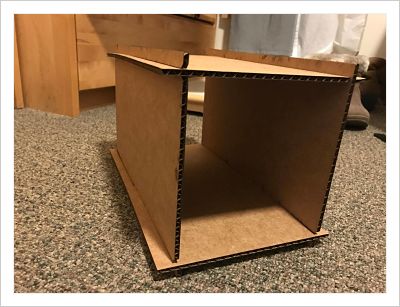
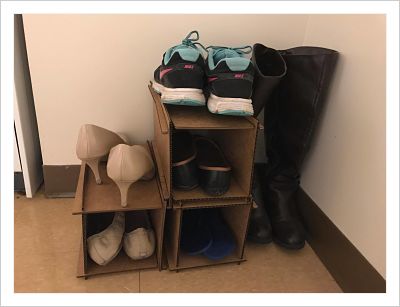
The laser cutting portion of the assignment requested that we make a parametric press fit kit out of cardboard. I designed a kit meant to build into various shoe rack designs. There were two pieces in the kit, which I designed using Antimony and CorelDraw:
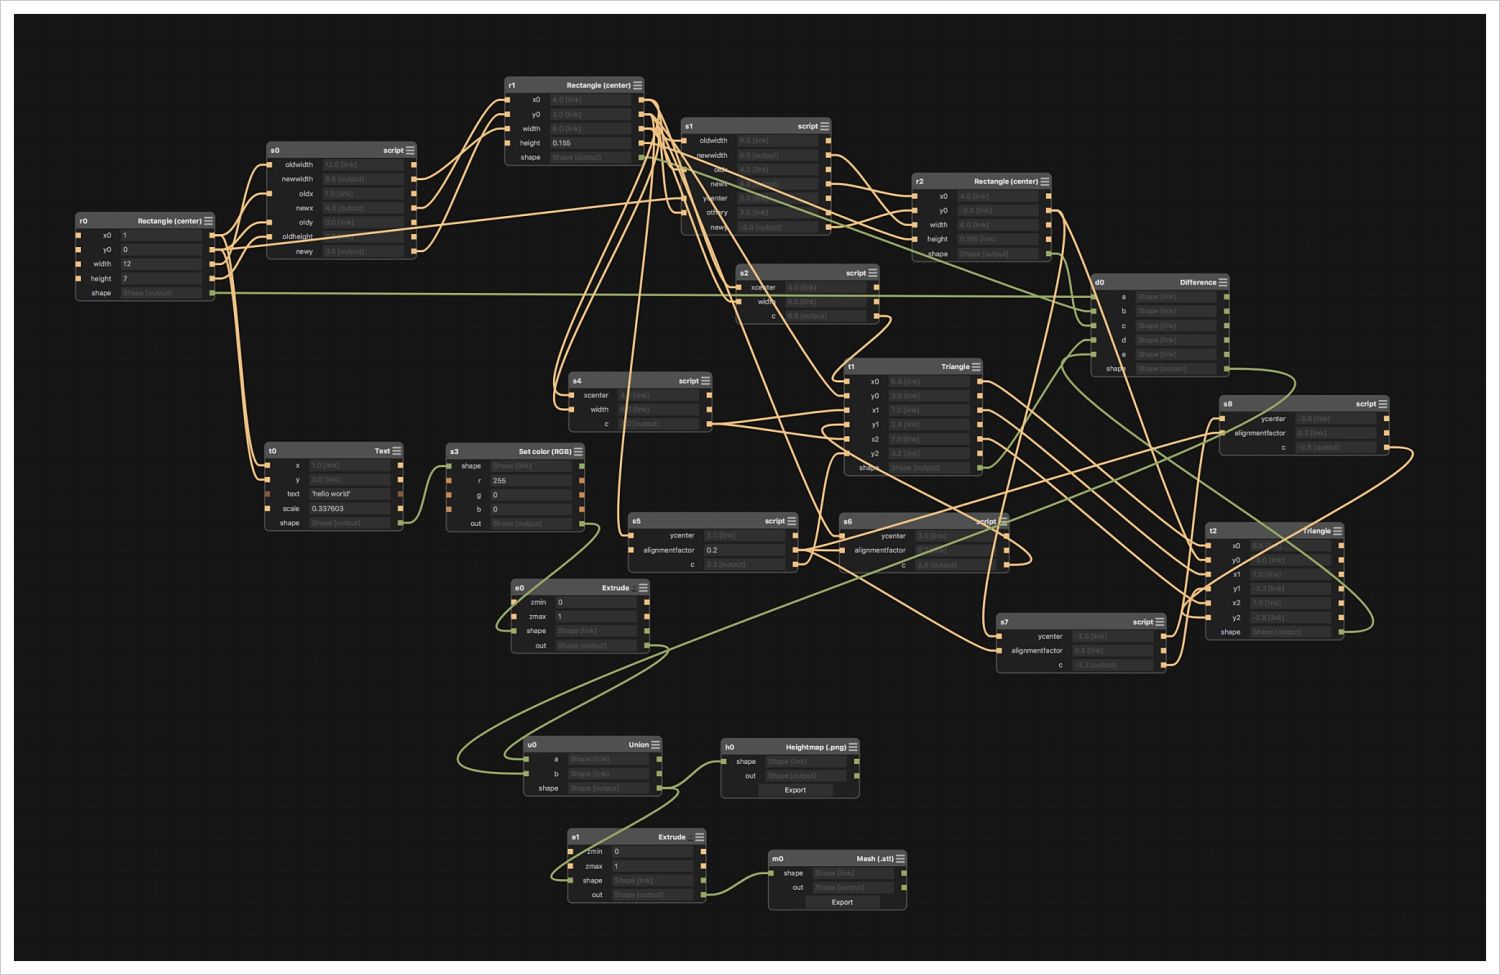
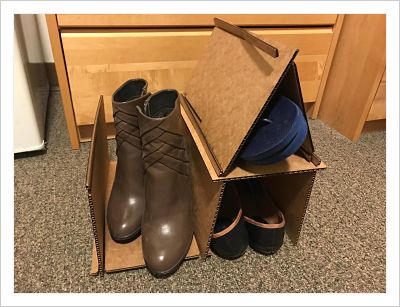
The knowledge that we gleaned in the group assignment about chamfers and the kerf of the laser cutter came in handy during the design process. The cardboard pieces slid in very snugly and I didn't have to make any adjustments to my design. I was able to make and stack triangular prisms, boxes, and various 90-degree stair-like shapes.
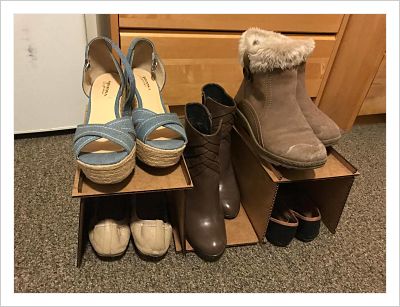
However, after playing with the pieces for a while (sliding in and out for various configurations), the cardboard pieces at the edges would start to crease. This did not noticeably decrease the stability of the structures, however. I was surprised by how sturdy the cardboard was in holding up some of my heavier shoes.