10: Machine Design
add an output device to a microcontroller board
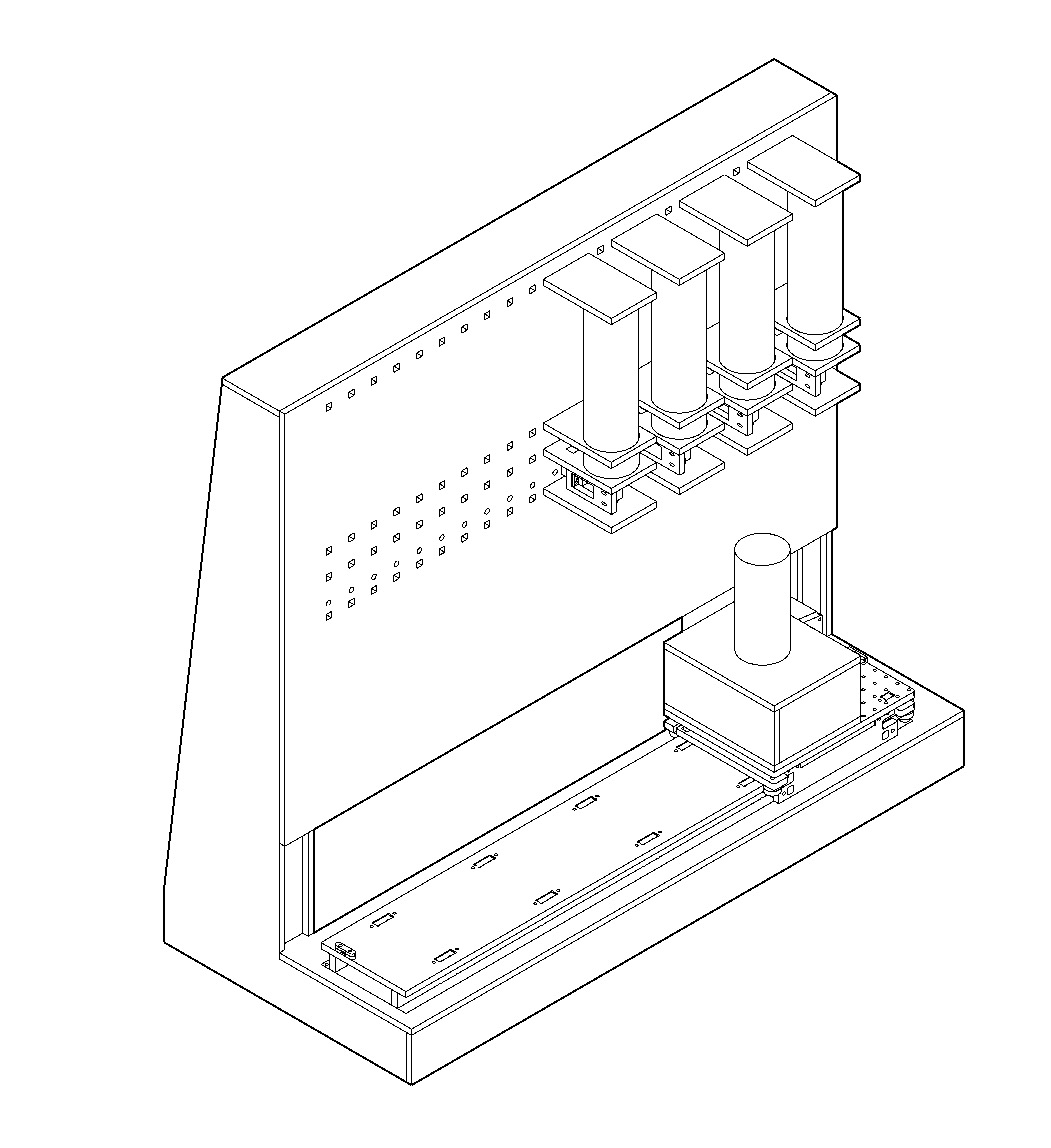
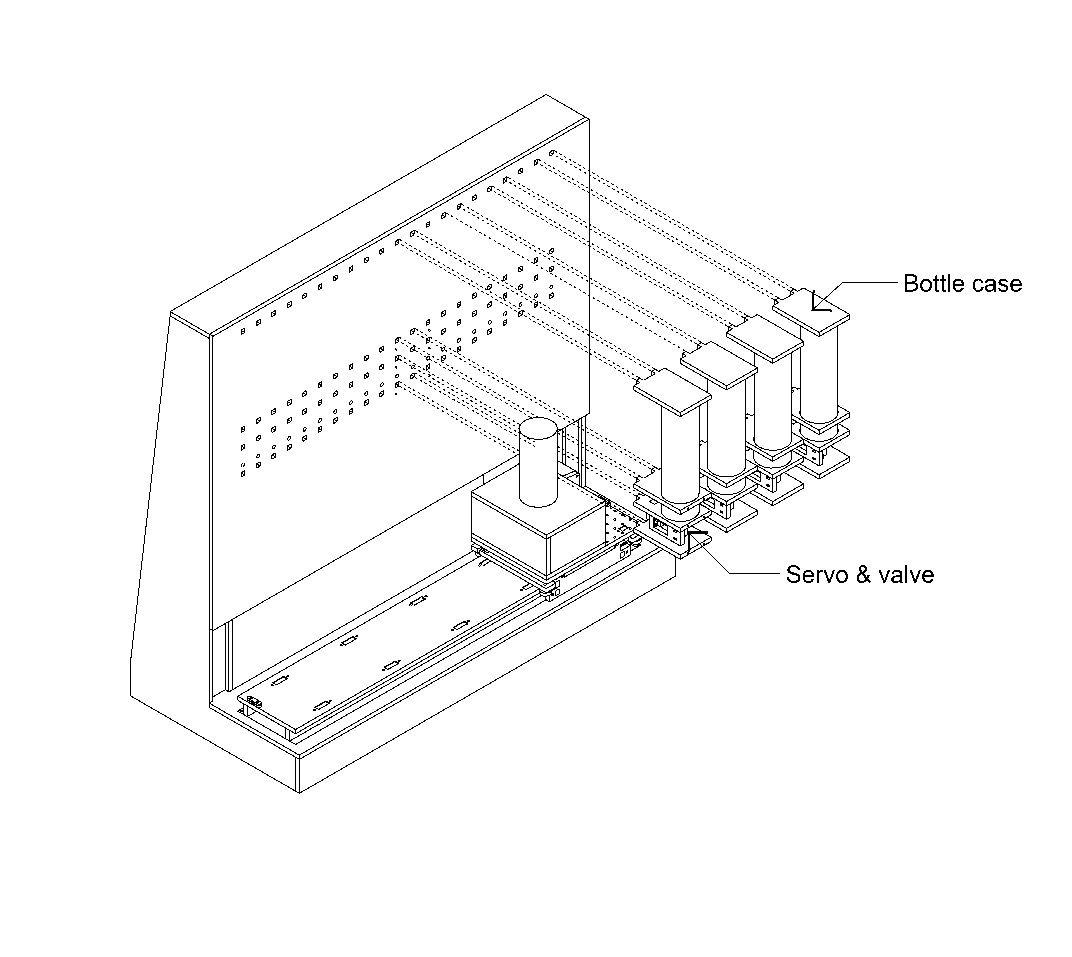
Our team has decided to make a machine that makes and mixes drinks this week. On Monday night we came up with a suitable name for this machine - "Lowering the Bar." When the chassis team designed the chassis and the back board, the dispenser team (Dalma, Emily and I) designed how the dispensers could attach to the chassis.
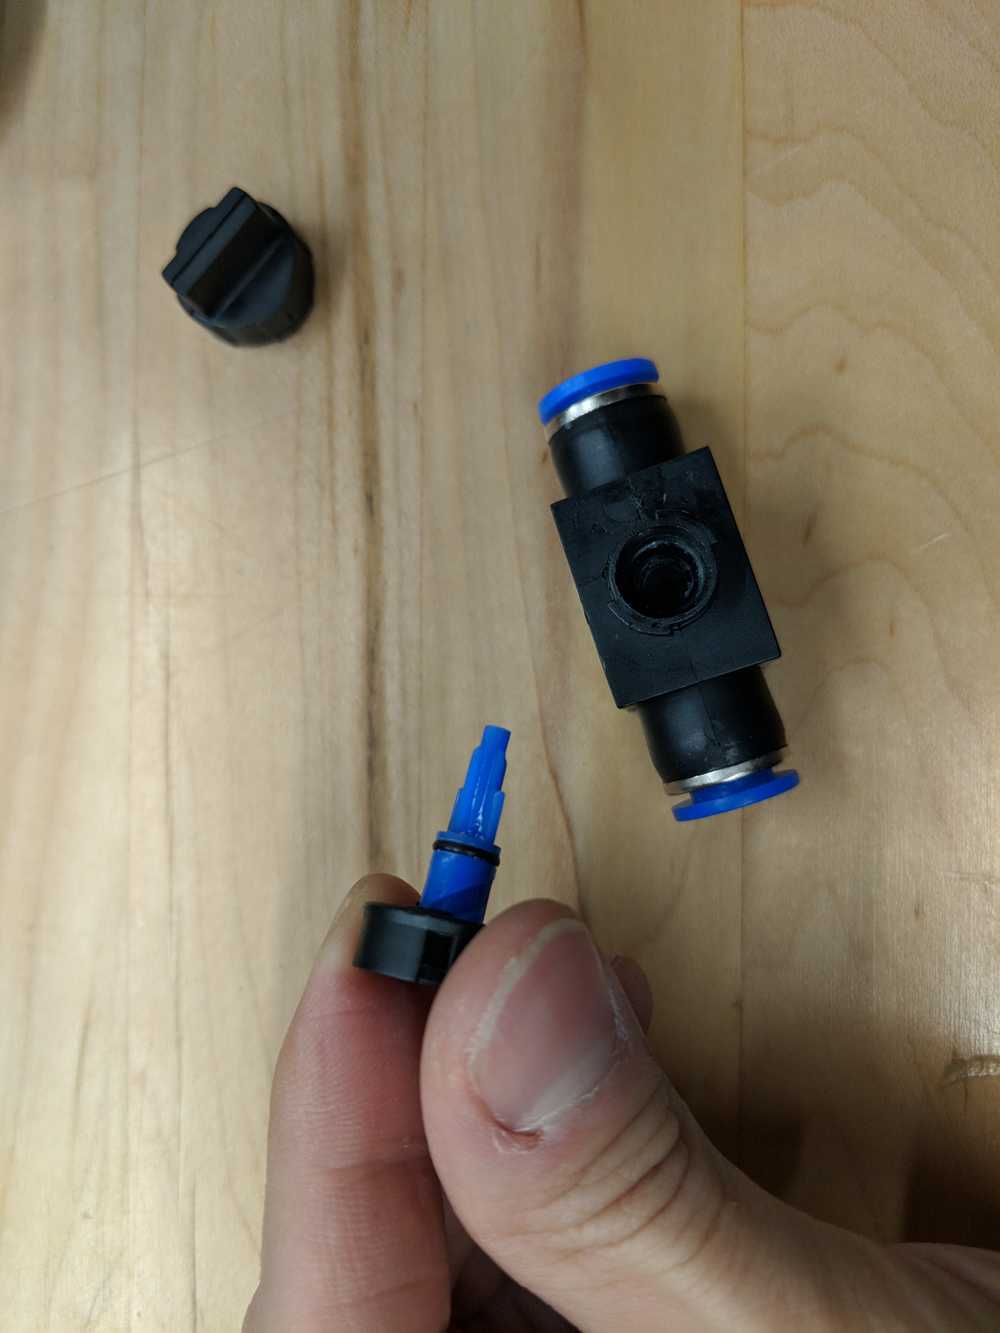
We were thinking of either using pressurized solenoid valves or using the servo. We chose the servo after Axel has shown us a valve that we can work with.
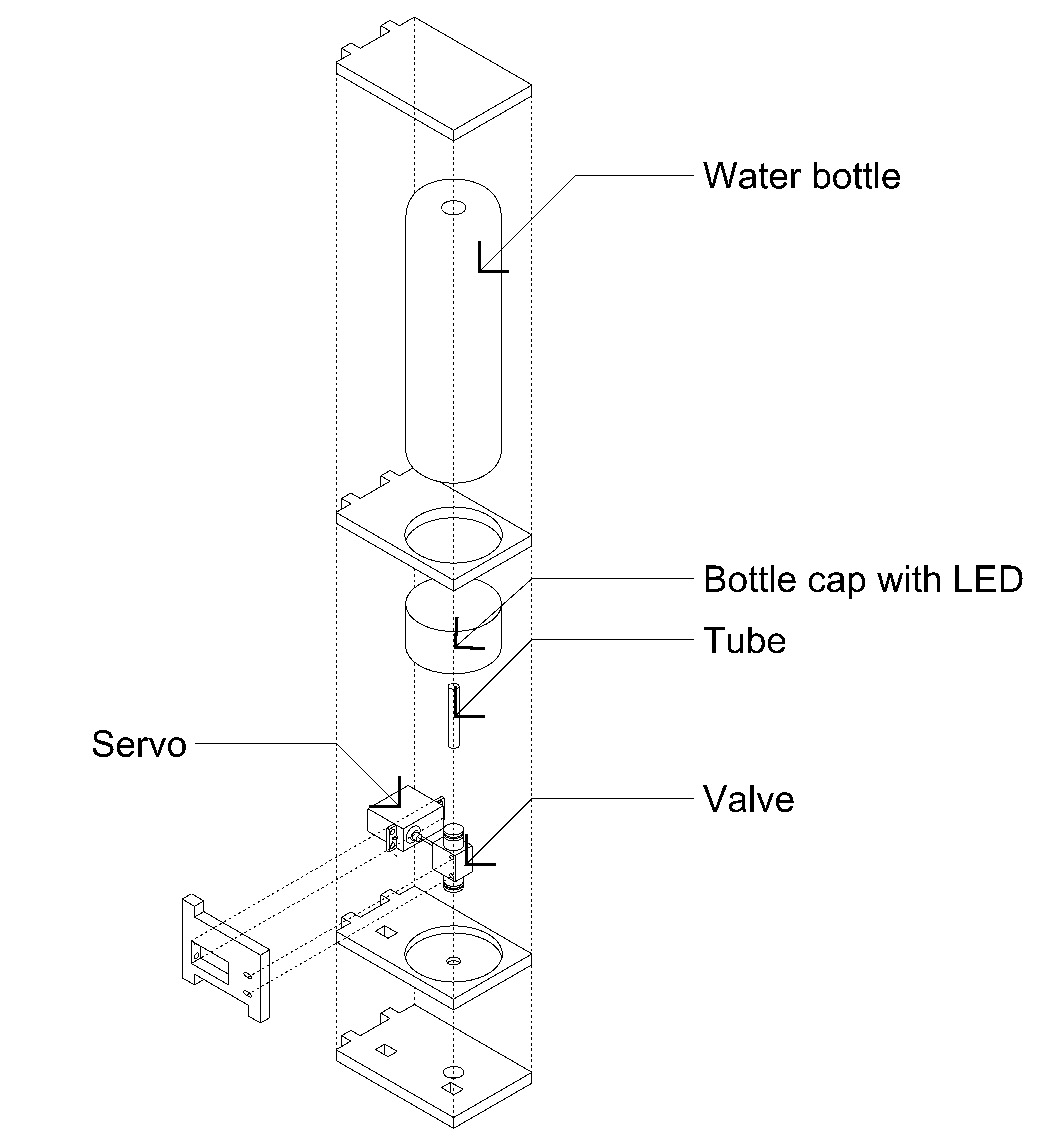
We wanted to keep the machine simple - and that drove a lot of our thinking in designing the dispenser. One of the strategy was to use found objects : a water bottle that we can buy, valves from Axel, and the servo - our task then was to figure out how each of these things interface with one another.
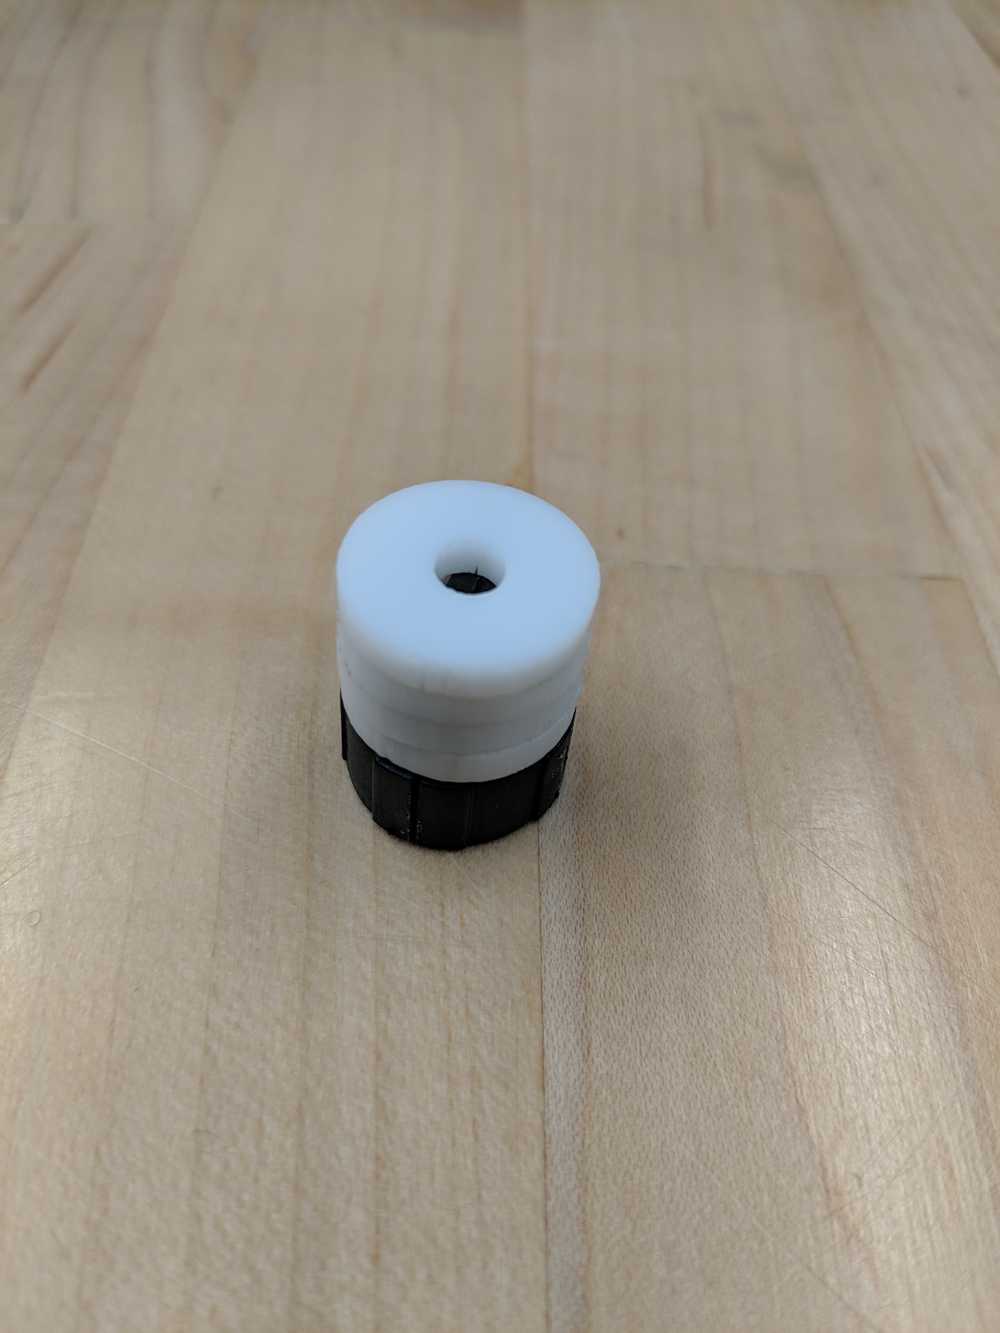
Joint iteration 1 - lasercut acrylic that fits with the notches on the valve. This was too fragile to handle the load of the servo.

Joint iteration 2 - glued joint between the valve and servo arm. It worked fine, but this was a permanent interface between the servo and valve so we wanted to find another way.
Joint iteration 3(Final) - lasercut acrylic that is in the negative shape of the valve handle. This allowed us to have a good contact between the valve and the servo and also not permanently fix the two together.
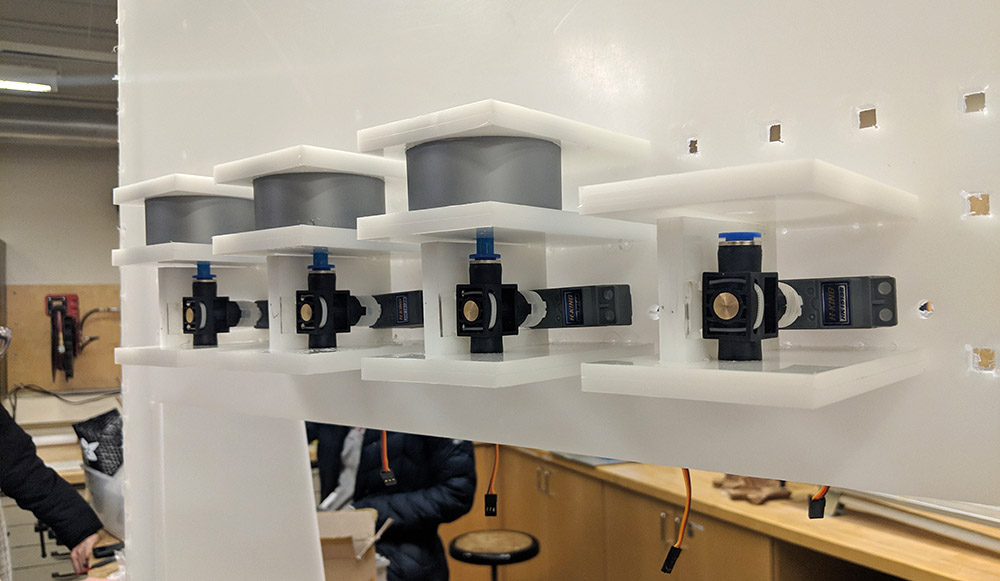
Then we moved onto assembly. We handed our internal chassis design to Molly so she could prep the mill file together earlier, so the distance between servo and the valves were not quite correct by the time we figured out the interface. We were hoping to screw the motor and the valve to the vertical HDPE piece but ended up zip ties.
We double checked that each of the servo-valve interface was oriented the same way and its range of motion was compatible with that of the valve (0-90 degrees). We did this by using Dalma's servo board from Output week and testing each of them individually; we then tested the setup with the water dripping - and it worked pretty well, no drips, or sputters.
Dispensers attached to the chassis.
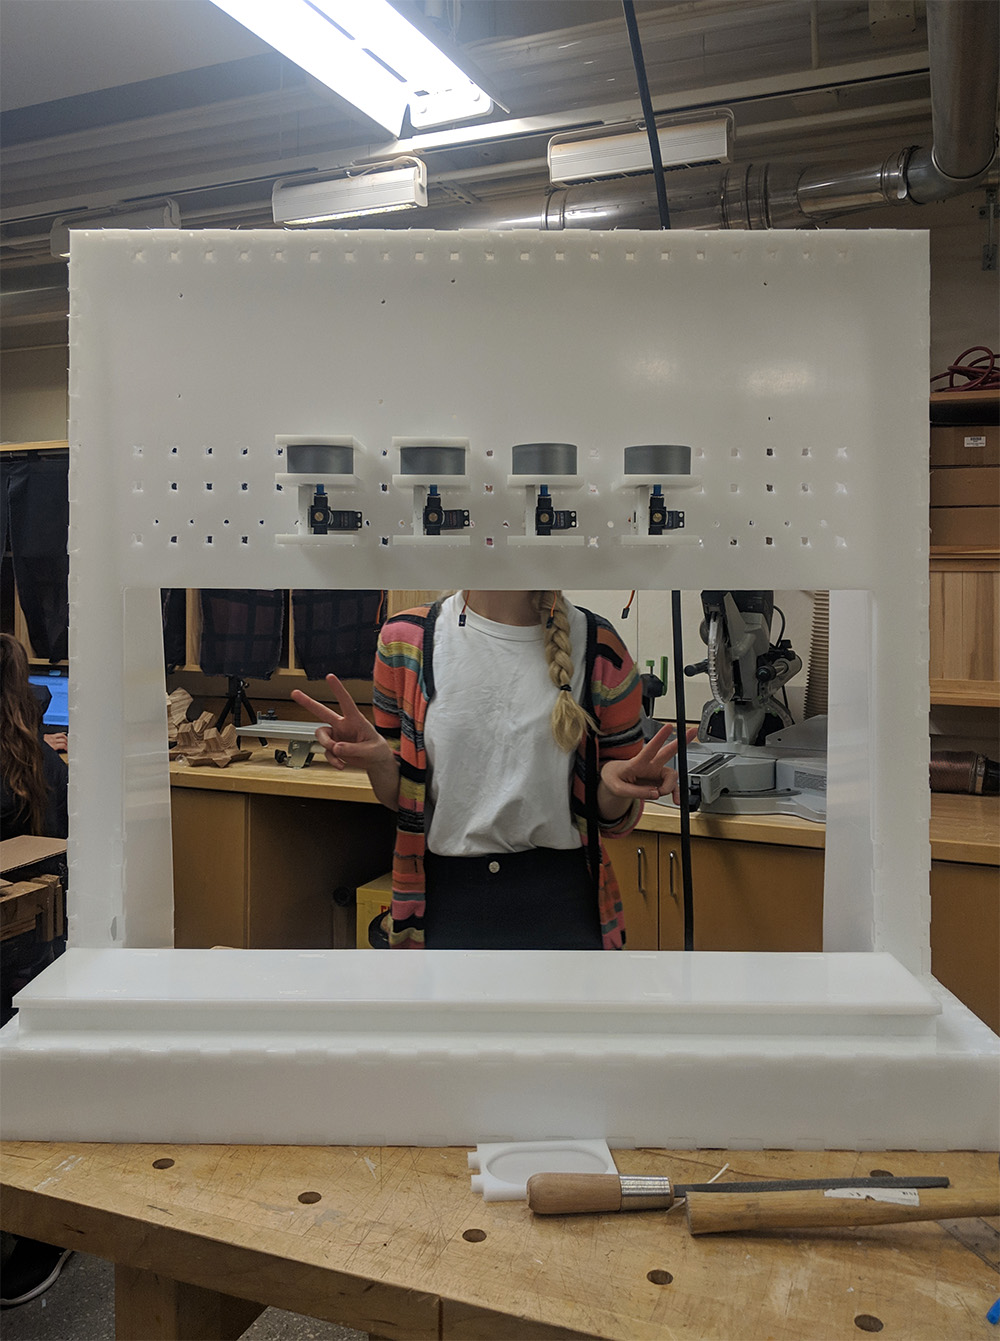
Water test with other parts integrated.
Calibrating the range of motion for the servo-valve; we wanted to minimize the excessive rotation of the servo; this was done primarily relying on our ears - as we could hear the servo making noise while trying to reach the angle out of the range. Rafa and I did this for each of the dispensers; red LED indicates closed, green open.