5: Computer-Controlled Machining
make something big!
This week is kind of a relief for me because I was in a mad rush to catch up with previous week and this week I could take on something that is more familiar for me. I wanted to keep the idea simple and jump into the production as soon as I could, so I decided to make a bookshelf from the OSB sheet. I was intrigued by Neil's comment during the lecture about having minimum number of cuts to save space on the board, so I set out to create the largest bookshelf that I could create from a single 4 x 8 OSB sheet with the added constraint to use minimum number of cutpaths.
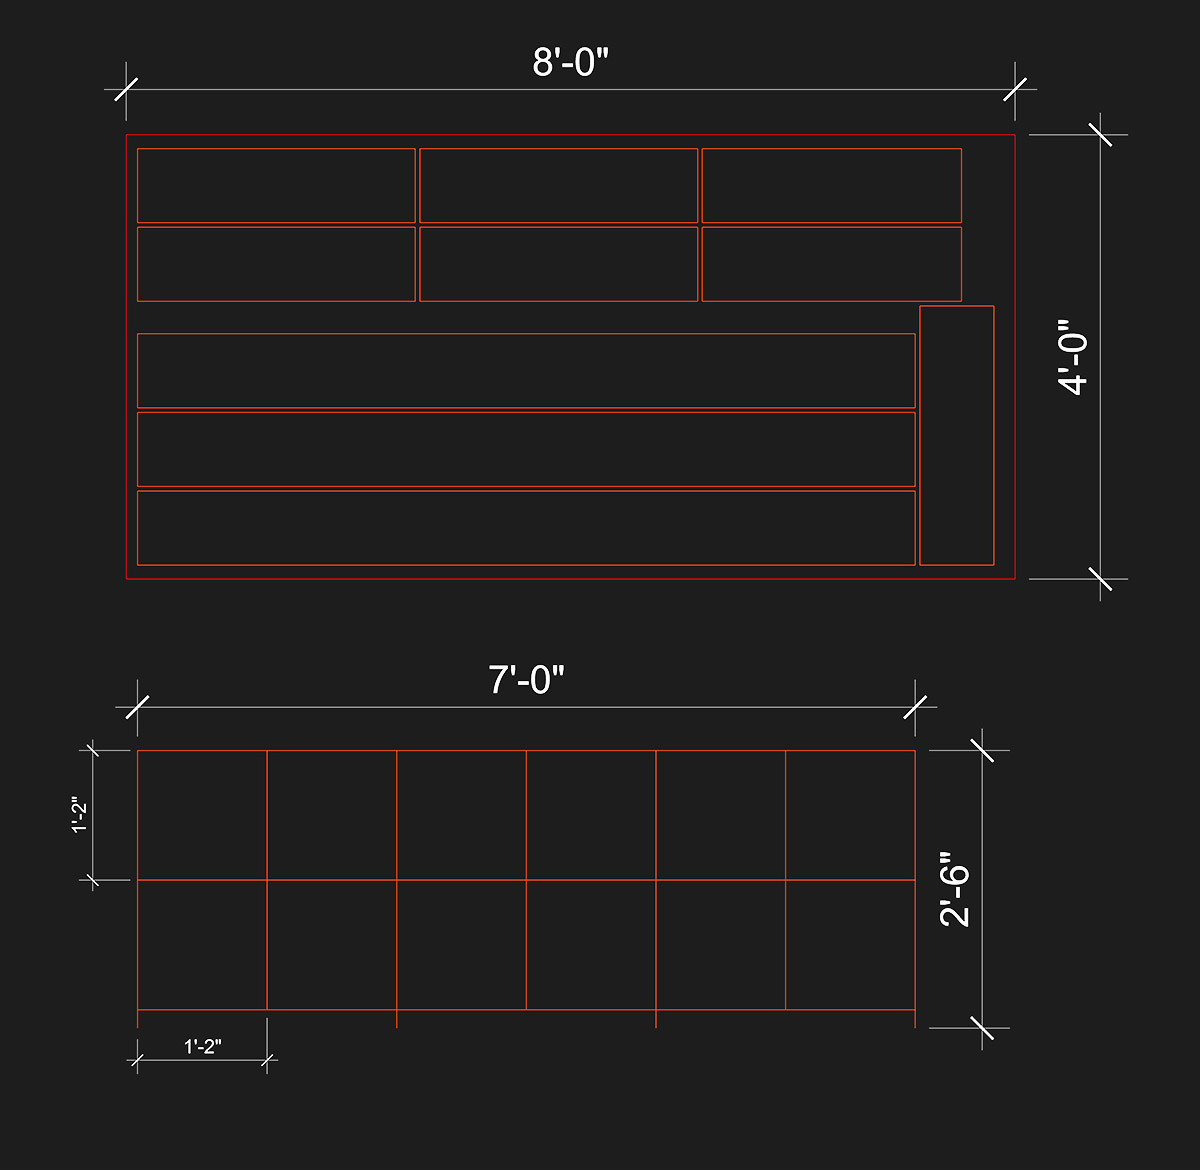
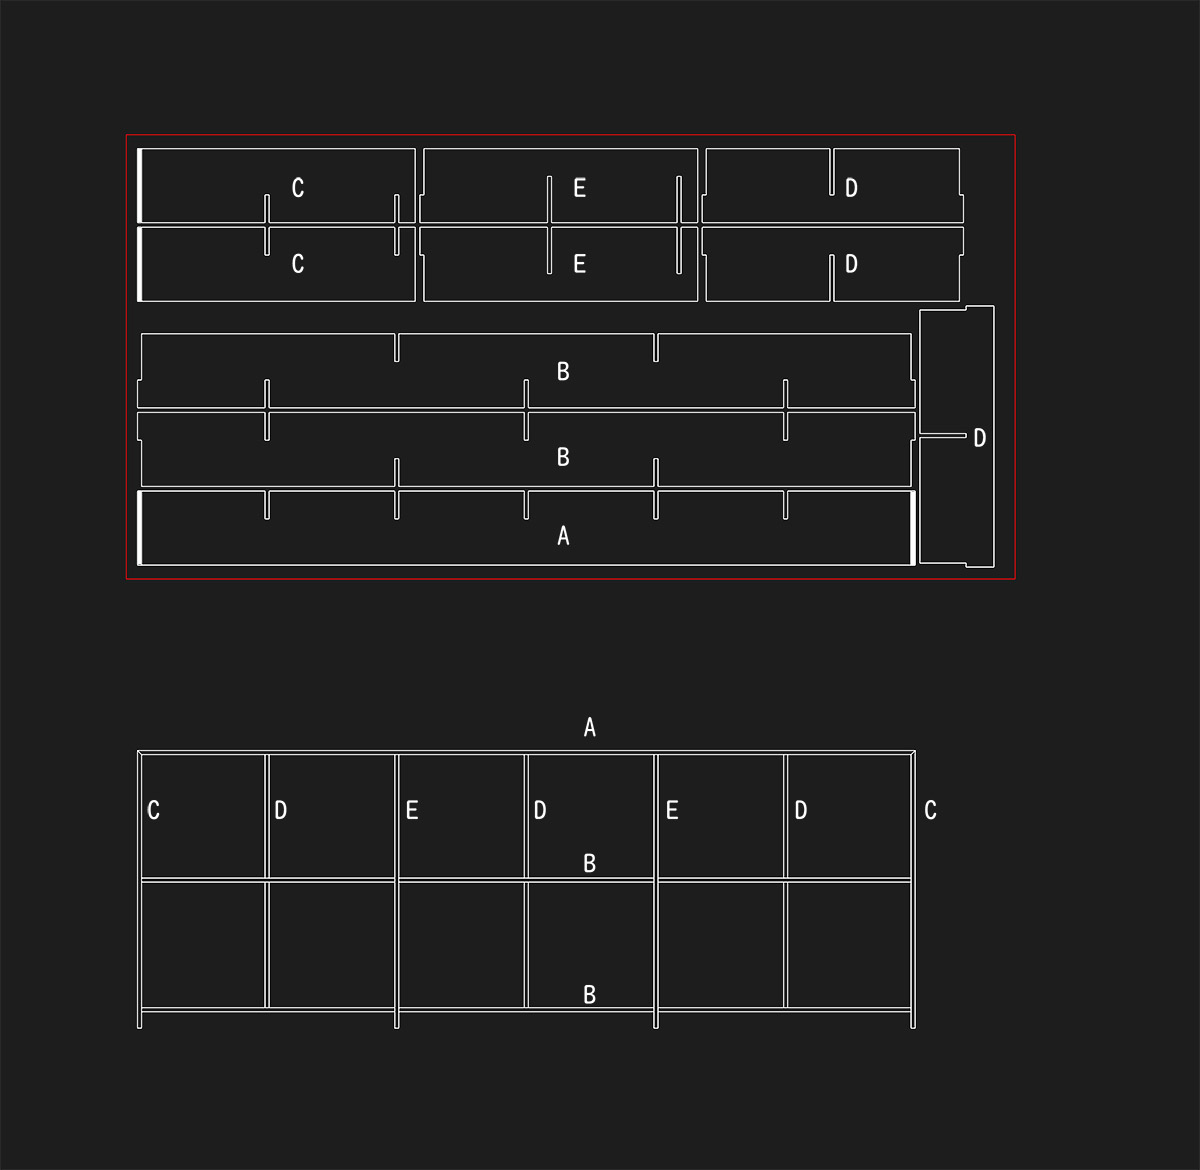
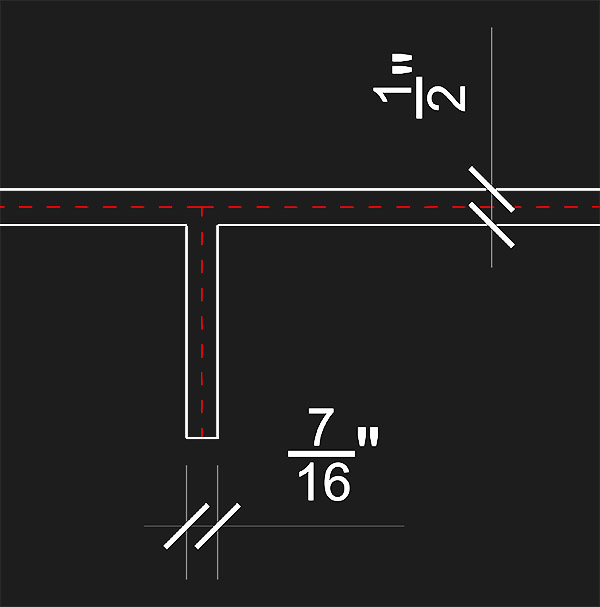
So here are the rough design for the shelf. After playing with different number of cells, depth of the shelf, unit size, I came to a conclusion that 12 cells of 14 x 14" squares could pretty much occupy the entire 4 x 8 board with minimum amount of scrap. I then set out to apply thickness of the material (7/16") and notching for rigid connections between the pieces. I oriented the pieces so that the router bit would travel the least.
N51 shop had 3/8" compression bit and 1/2" flat end mill. Since the thickness of the OSB was 7/16" I had to either do a single pass of 3/8" and hope that the kerf would make it more or less fittable with 7/16", or use a 1/2" bit, or use an alternative method of using a smaller, say 1/8" bit to go around and cut exactly the 7/16" thickness for the notches.
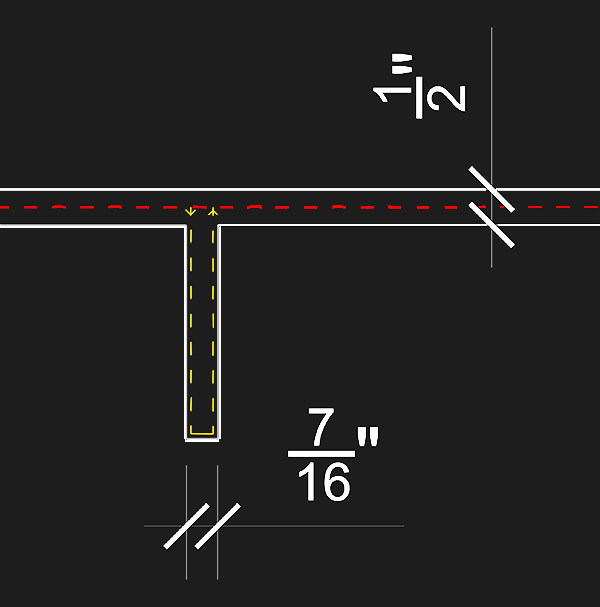
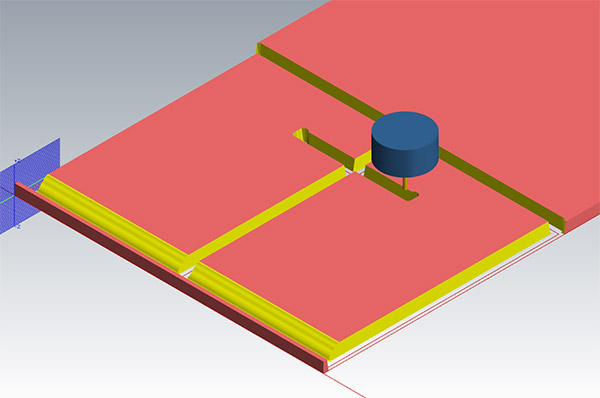
So now on to some tests. This is a screenshot of Mastercam showing two tests - how notches will fit and if I could do a mitered corner. This setup is showing a 3/8" bit going through the board once, and refining the corner with an 1/8" flat end mill.
Since I have originally drawn the notch as 7/16" in rhino and imported the curves in mastercam as such, there was a mismatch in the profile of the 3/8" router bit and the corner cleanup line of 1/8" inch.
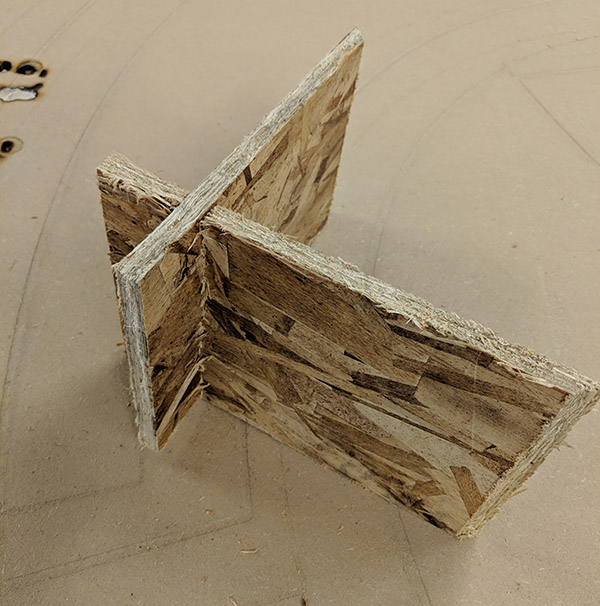
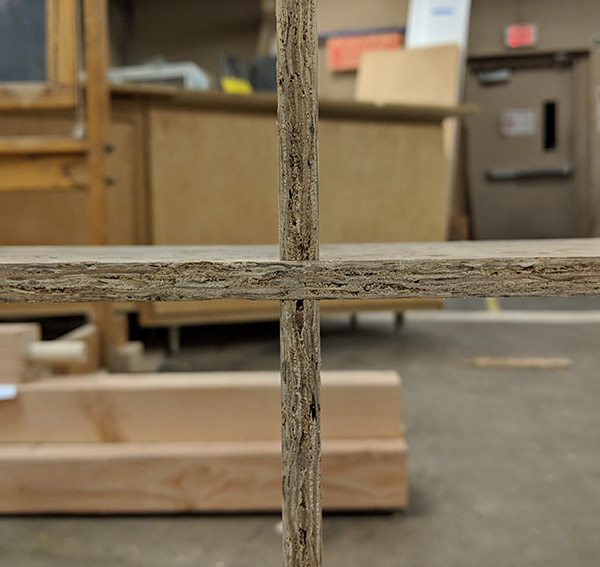
Anyways the first 3/8" notch proved to be too tight. The mitered corner seemed to work fine with 1/4" ball end mill.
What's strange was that the actual notch size was smaller than 3/8" (about 10mil smaller) - contraty to Neil's comment about how there will be more material cut away than the diameter of the router bit.

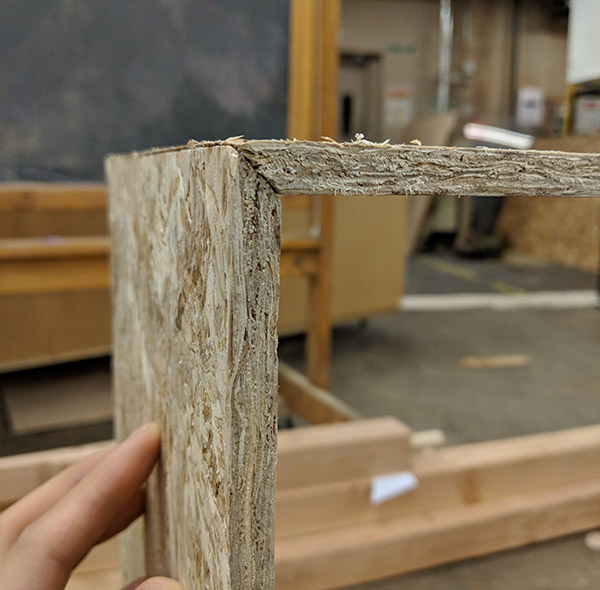
I did the same test with 1/2" flat end mill, and sure enough, the pieces fit together but loosely. Also the flat end mill left a lot of splinters on the path.
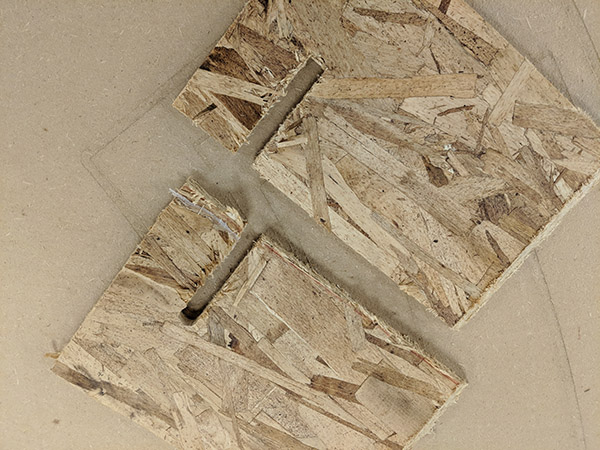
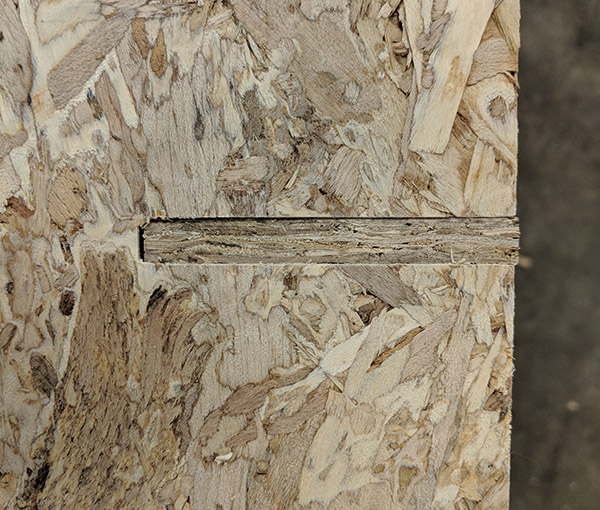
I tried one more option, which was to plane the surface of the OSB down to 3/8" using a planing router bit. You can tell the difference in the photo by how light it looks compared to the original surface- and this fit snug with the 3/8" notch.
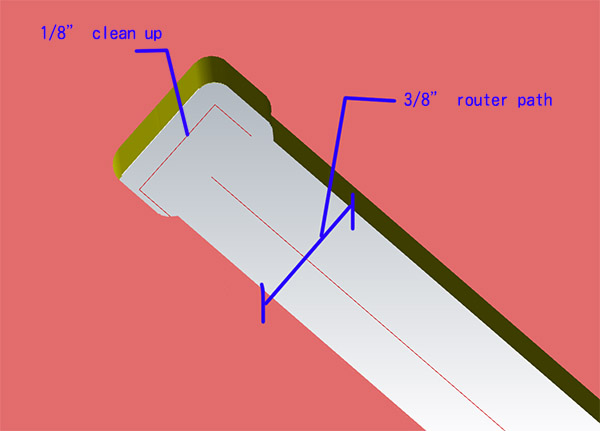
Having done some tests I was ready to put together the mastercam file for the shelf. The order of cutting the material is important because if you cut the outline of the material first the material might move around when cutting the interior cuts. So my order of the cuts are: 0) 2 1/2" surfacing mill to even out any irregularities of the OSB sheet and thin it down to 3/8" thickness 1) green lines: 1/8" flat end mill, corner refinements to the edge of the notch. 2) cyan surfaces: 1/4" ball end mill, to cut the mitered surface, 3) orange lines: 3/8" compression bit interior cut lines, 4) red lines: 3/8" compression bit, exterior cut lines.

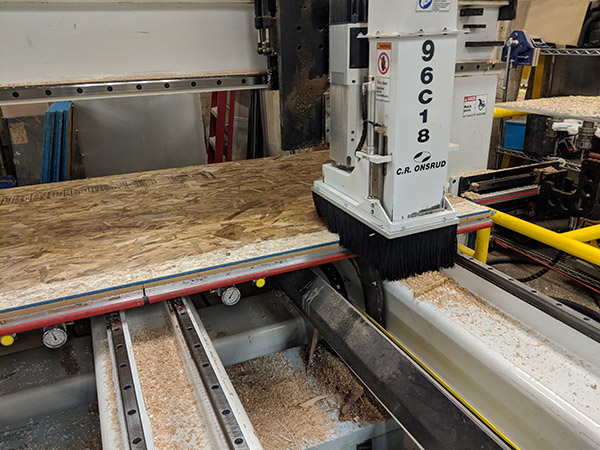
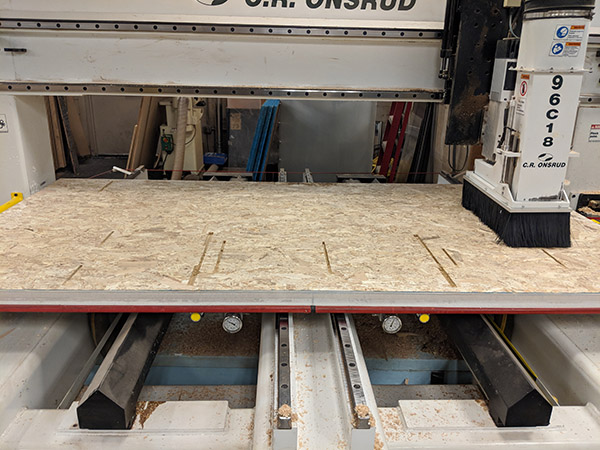
Surfacing in action.
Interior cuts after 1/8" corners and miter cuts.
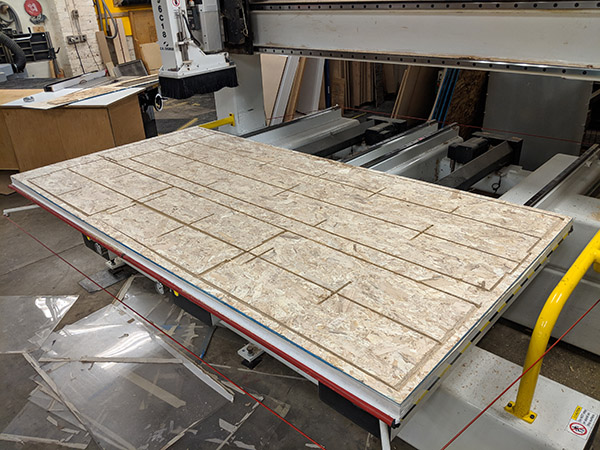
The board after the milling has finished. In the end what took the most time was the surfacing job - it took around 30-40 minutes to surface both sides, whereas the rest of the cutting took about 10 minutes total. If I had tested some parameters of the surfacing mill I probably could have brough down the cutting time to something more reasonable around 15minutes or so.
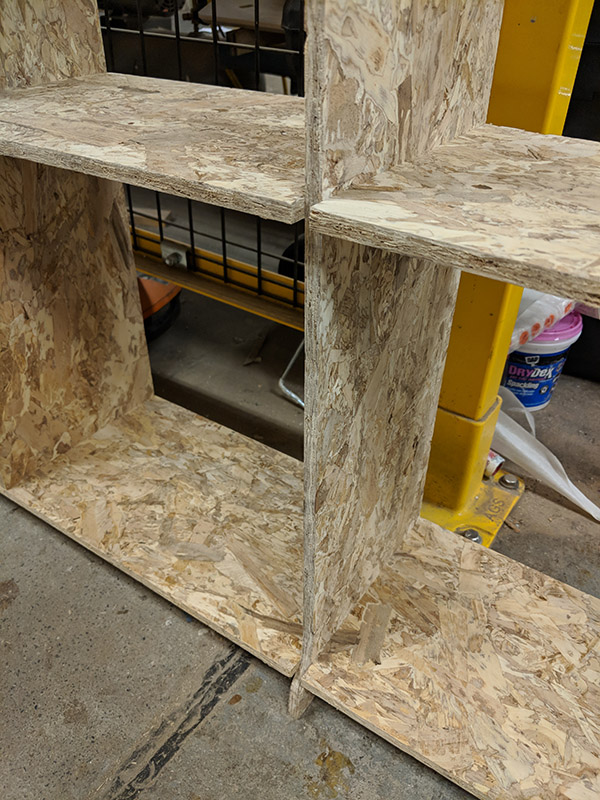
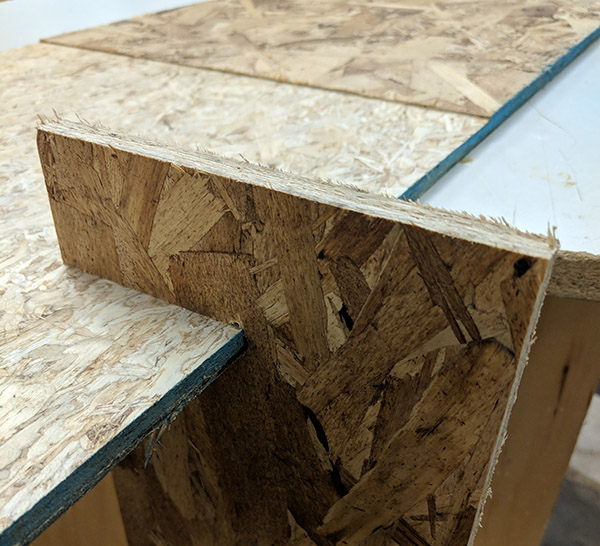
Another hour of sanding off the rough edges and assembly here is the final piece. I am happy that the assembly was pretty snug and frictionless thanks to the tests Dalma and I did earlier. I ended up nail gunning some of the joints (the mitered joint for example) but the snug fit helped to stabilize the piece pretty well, even without any back piece.
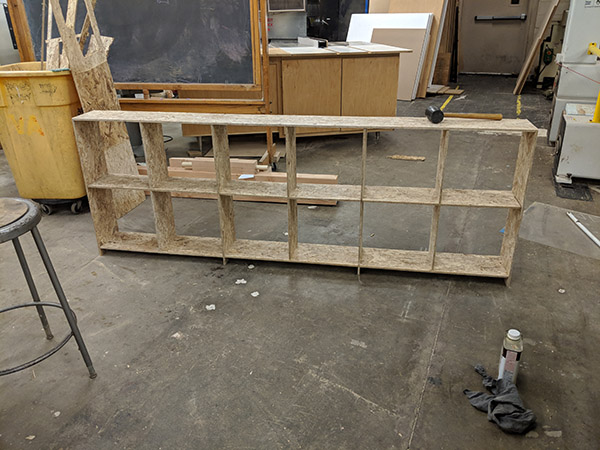
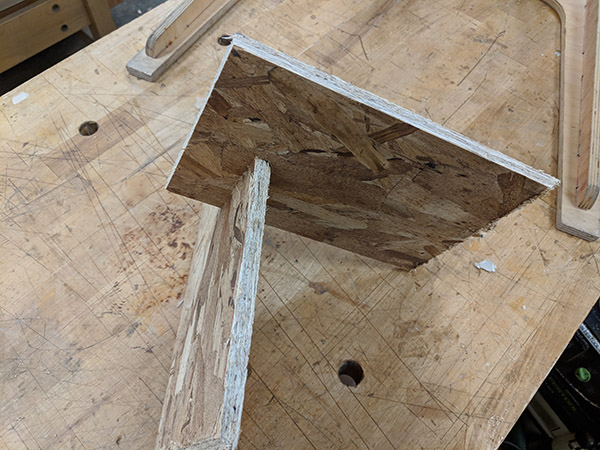
One thing that I noticed during the assembly was that one piece had been moving during the outer cut and had a funky profile; maybe for the pieces that are vulnerable to moving I could skip an inch so that it stays in place, and manually cut it out afterwards.