Week 2: Embedded Programming
Although I've dabbled a bit with electronics in the past, I am still very much of a beginner when it comes to embedded systems and micro-controllers. I have also joined a lab full of people who are very proficient in these areas, so I am glad to be given the opportunity to reinforce my skills.
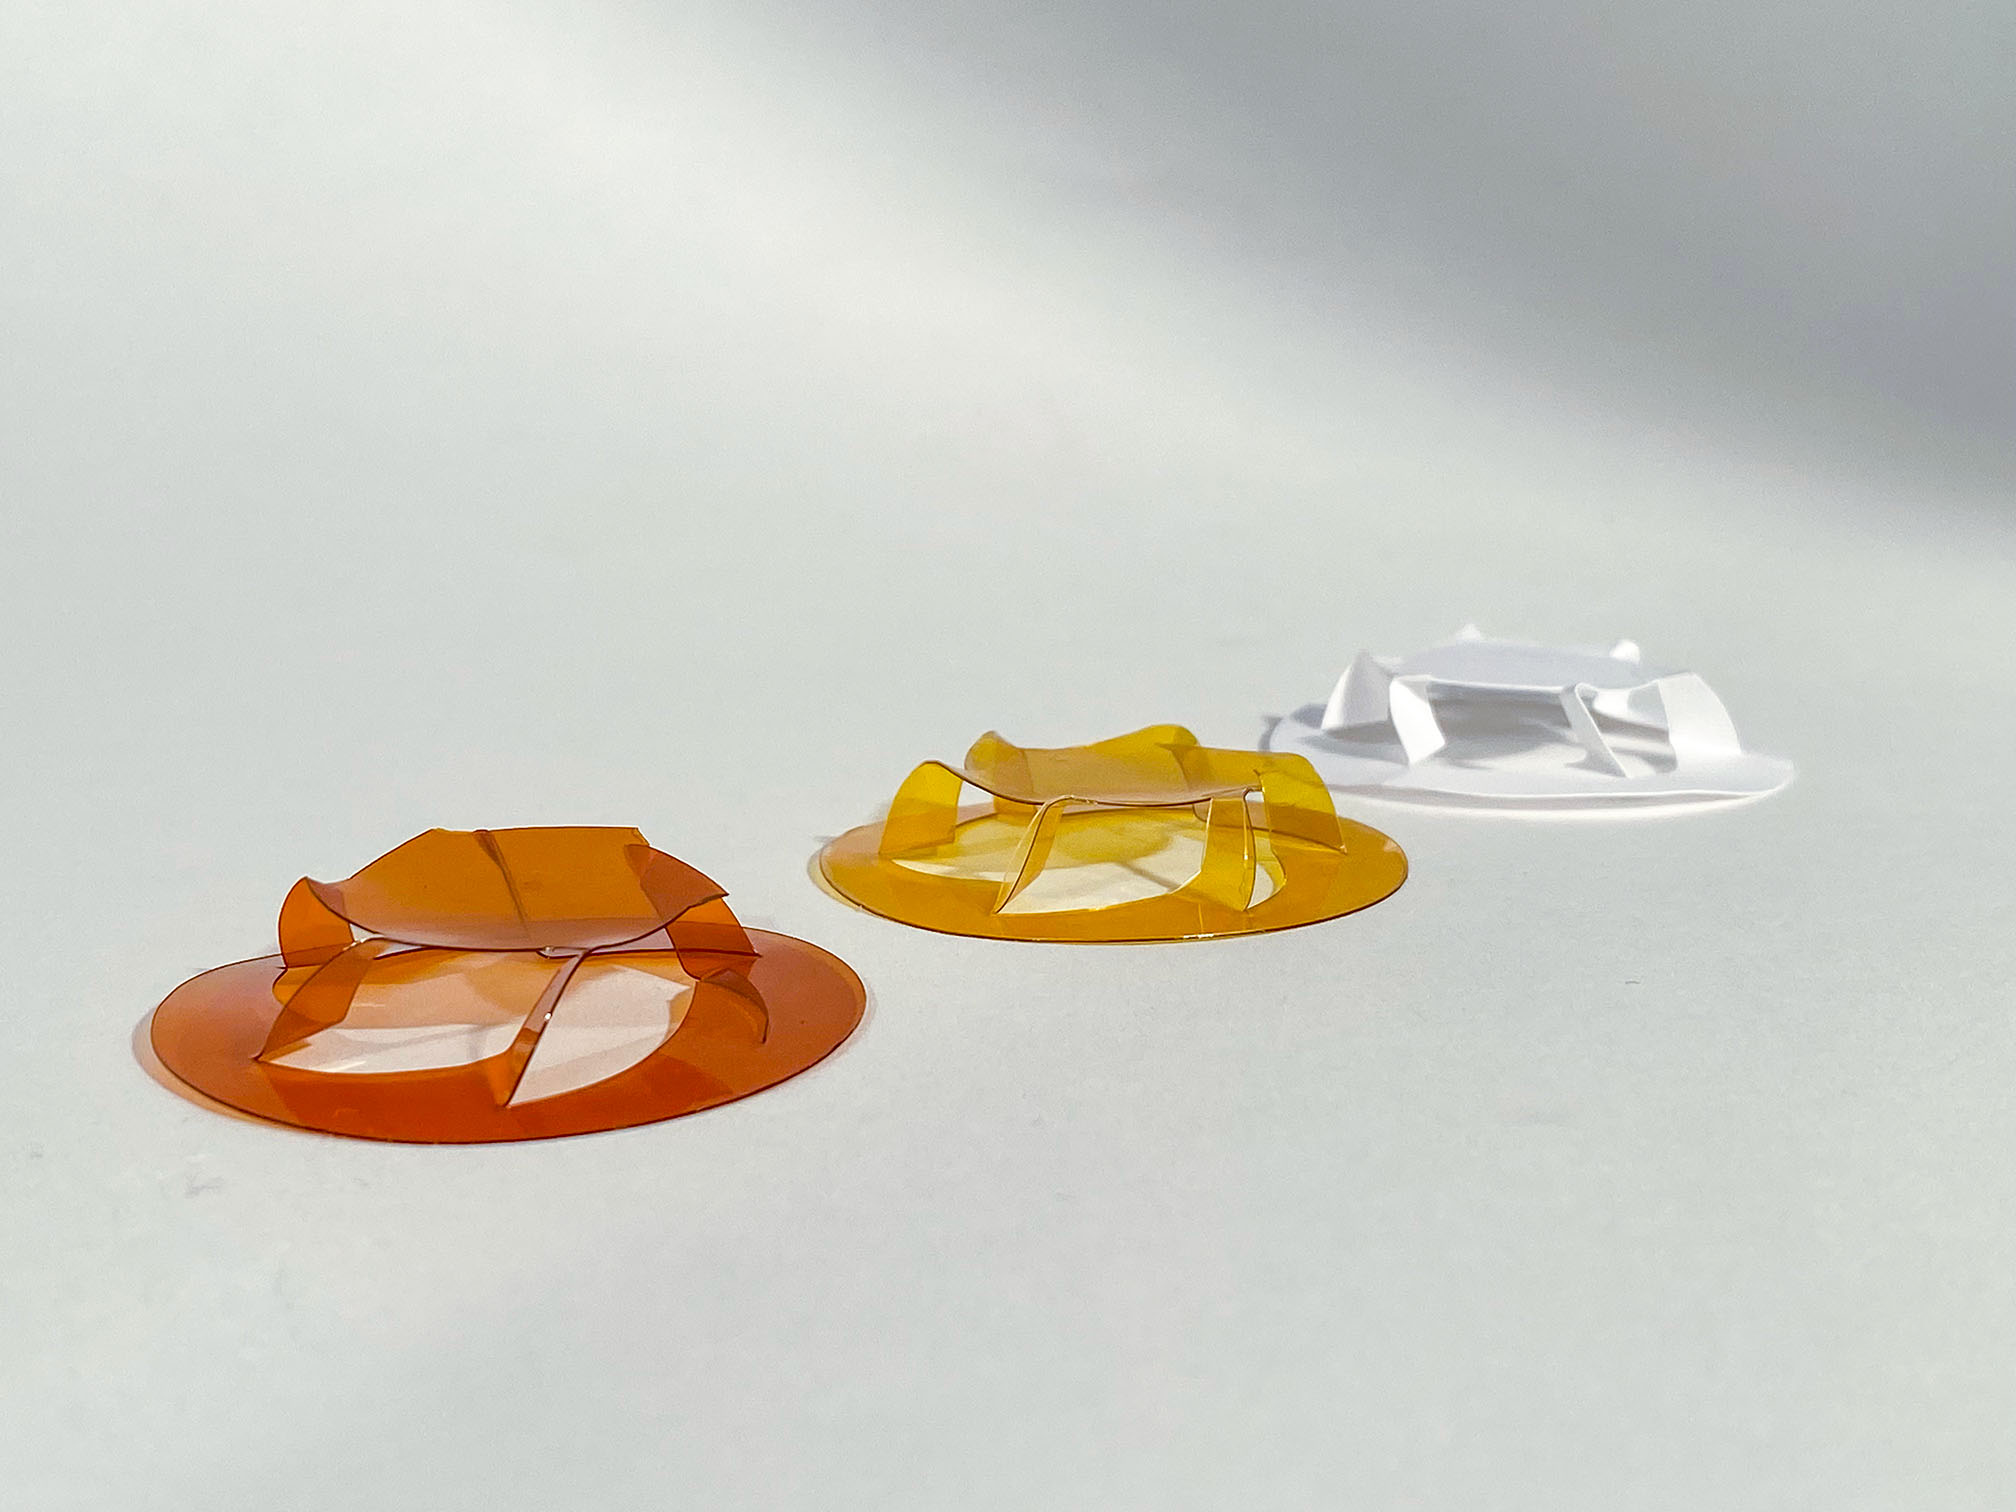
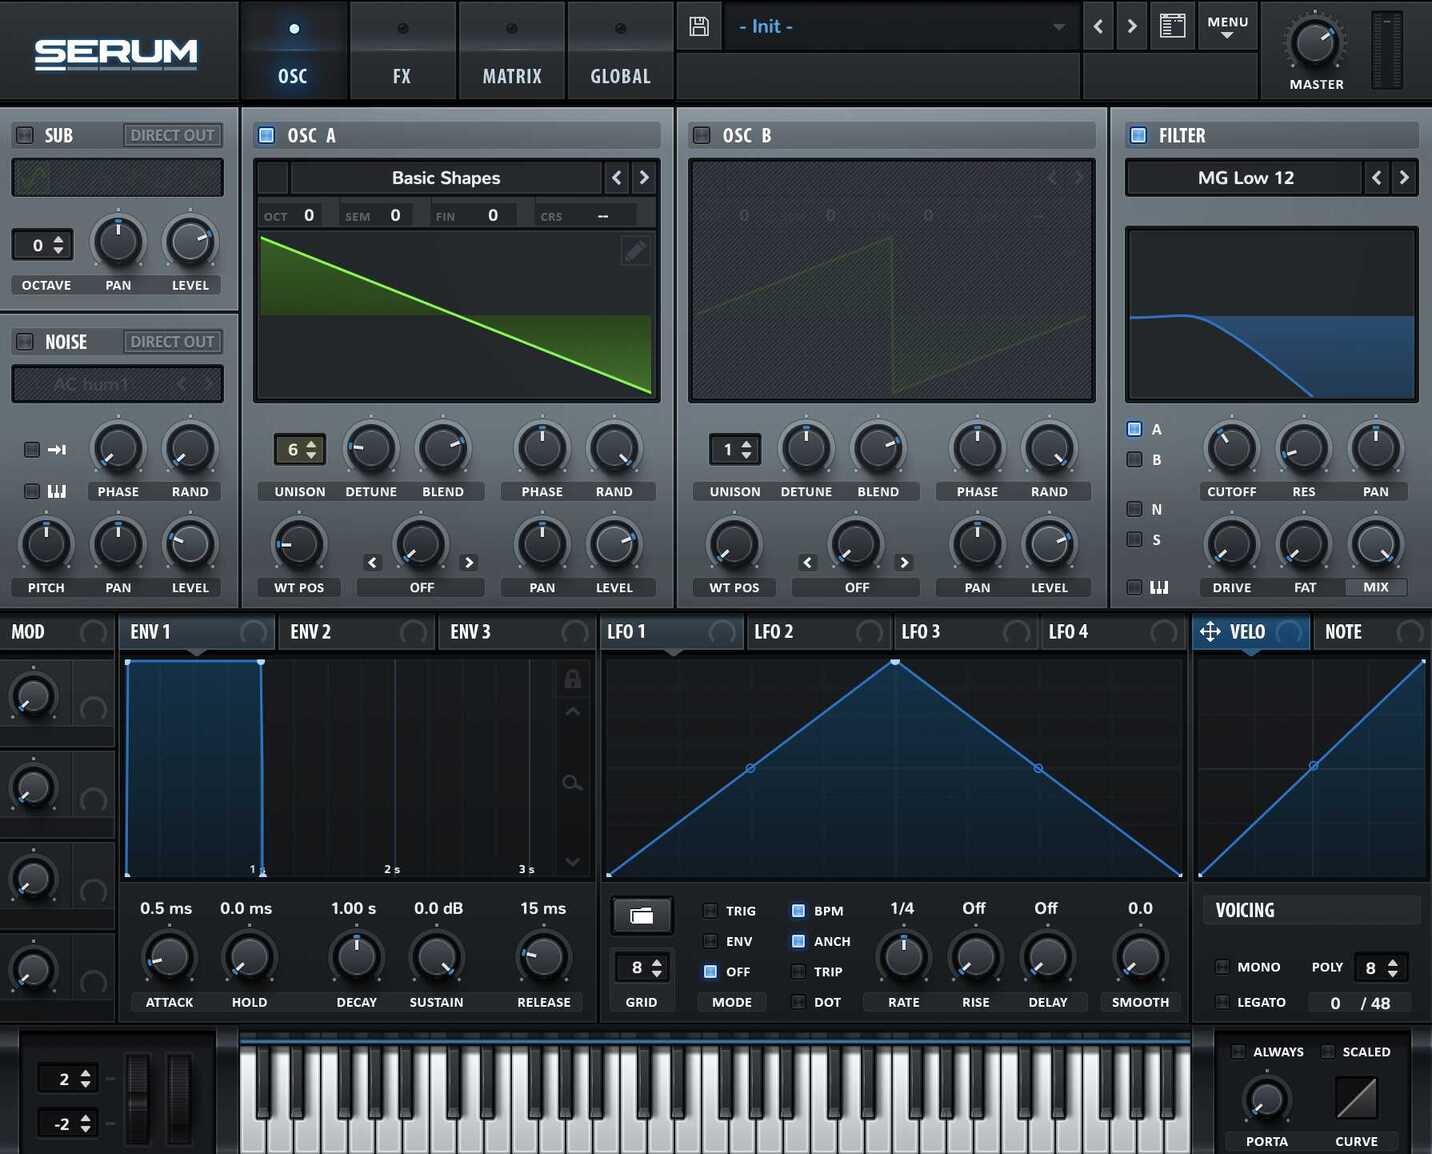
I started my adventure this week by teaming up with Lucy from my cohort, who designed amazing kirigami buttons on Week 1, which can measure very gradual increases in capacitance, using the CapacitiveSensor Arduino library and RC step response. We immediately thought of using them to make a keyboard where finger pressure would be mapped to the cutoff frequency of the lowpass filter of a synth that the keyboard would control. We made an initial prototype using an Arduino Mega board, which we connected via USB to a laptop running Ableton Live. We used a Python script to read the serial port and communicate with a Node.js server running a websocket protocol, with which our Max MSP component in Ableton was communicating. We gathered values and mapped to the cutoff frequency of a Serum patch.

This little experiment got Lucy, Mili (Ozgun's adorable doggo) and me very excited so we were keen to explore more and build a full 12-key keyboard with capacitive sensing. But, before that, I attempted to understand better the seeed XIAO RP2040 that I had collected from CBA. After going through some of the datasheet, I was ready to try out a few experiments. I have used C quite extensively in the past so this step did not scare me too much (yet). Either in an attempt to be different, or due to a true calling for understanding, I aimed not to use Arduino IDE but stick with my trusted VS Code. This meant that I could not follow most of the Arduino-based tutorials, so I had to follow the guidelines of the pico-sdk GitHub repo. My first issue arised when I couldn't isntall the arm-none-eabi-gcc package using Homebrew due to a a library (gmp.h) that could not be found. To solve the issue, I installed the corresponding version of GCC manually. I then wrote some code to blink the LED of the RP2040 and spell "Hello World" in morse code.


The Pico SDK provides an additional CMake command pico_add_extra_outputs which allows the compiler to output a .uf2 file which I was able to put on the RP2040 after plugging it in bootloader mode. The result was good, except that it felt a bit counterintuitive, since the LED has a bright blue colour when the LED is technically off. This is something I should look into in the future.

After this first experiment with the RP2040 microcontroller, Lucy and I wanted to keep exploring this idea of developping a full synth with kirigami buttons. In order to have better control, we used the Seeed XIAO SAMD21 microcontroller that embeds QTouch, which is a peripheral for capacitive touch measurement. Given that the microcontroller has 7 pins embedding QTouch, we were able to design 7 buttons (perfect for an extended pentatonic scale). Since we have not been trained to cut PCBs yet, we used a breadboard and soldered some adapters to make our microcontroller suited. Then, we cut out more buttons and soldered wires to all of them, which we connected to our breadboard. This allowed us to create the first KIRIGAMIDI device: A MIDI controller using Kirigami capacitive sensors.

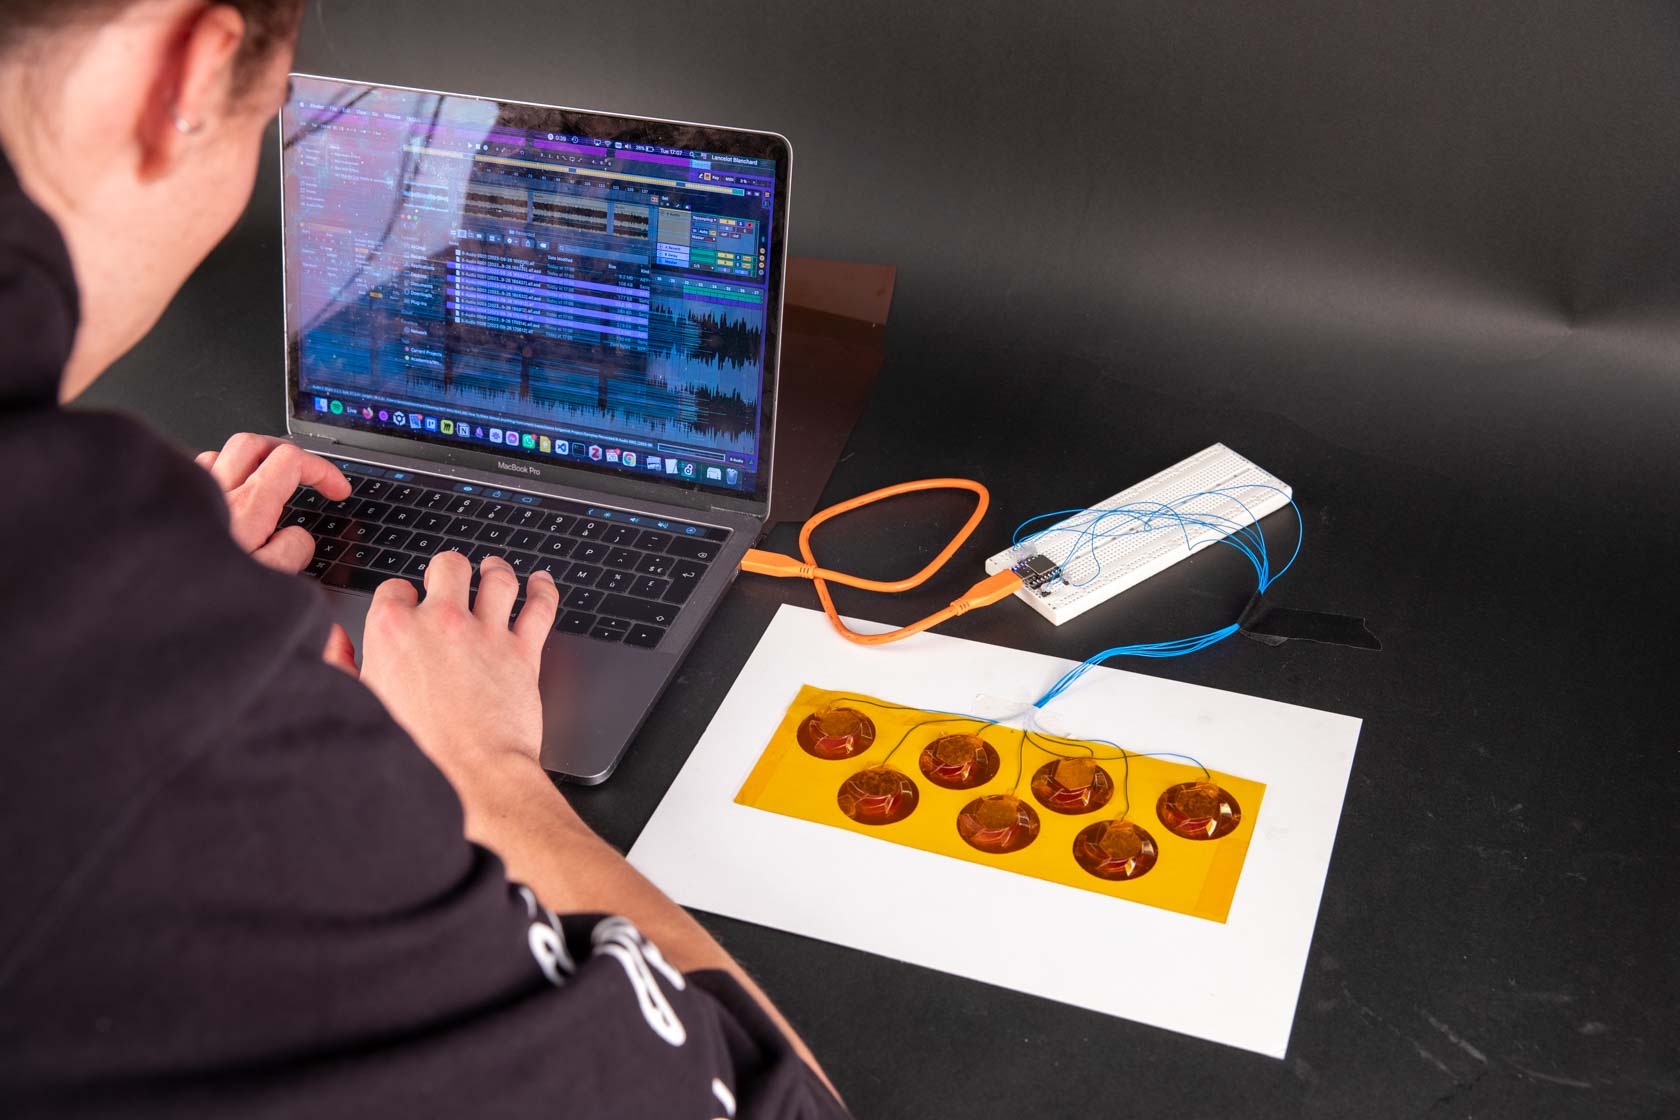
The values of all of the sensors were written to the serial port, and we used Max MSP and its integration into Ableton Live to read the port and retrieve the values at a rate of 100ms. We mapped every button to the cutoff filter of a different note that was synthesised using the Serum VST, and we obtained a great prototype:
The main problem to note was that the sensors were easily outputting wrong values, which meant that the keyboard was frequently playing by itself. This is probably due to the wires being very thin and interfering with each others. We chose these wires for aesthetic reasons, but they did not deliver the expected technical results. Another potential reason is that the sensors are too close to each other, or that the paper we used is slightly conductive (as opposed to the polyamide). However, these problems resulted in a range of new creative uses of the keyboard, which was fun! I plan to improve the system over time.
Notes to a future me (learning outcomes):
- Aesthetics can sometimes get in the way of technical performance
- Capacitance is hard to measure
- Doggos always make great demos