week 4: make something BIG
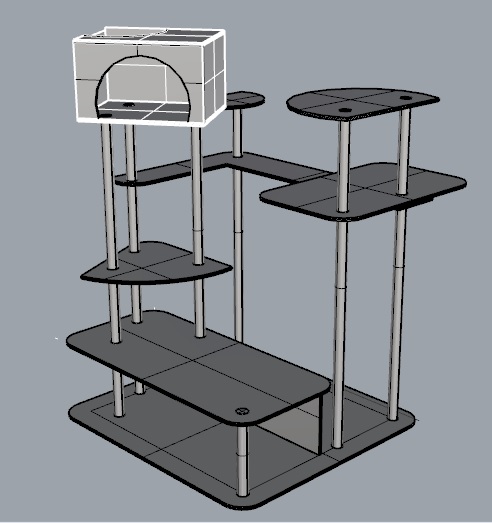
this week's assignment was deligtfully open-ended: make something BIG. while i was excited about the freedom, i was a little trepidatious about the design: as an EECS student, i'm pretty much entirely unfamiliar with mechanical design. i figured sticking with something simple would be best, but the question of what to make was a tough one to answer. being an undergrad, i inhabit a very small space with no room to store a large project... luckily, opportunity presented itself when a grad student friend of mine mentioned she wanted a cat tree. something like this, perhaps:
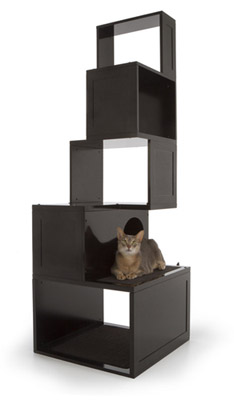
le modern
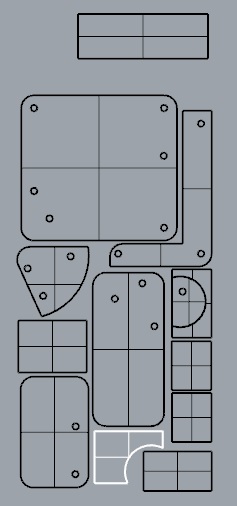
my grad student friend mocked up a design, which i then manipulated in rhino (with much help from ta extraordinaire james coleman and fellow classmate jeff) to create a more feasible design.
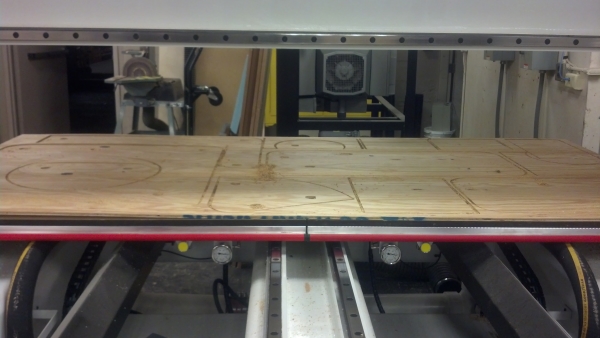
using the onsrud
cutting the pieces on the onsrud was absurdly fast: it took less than five minutes to complete the entire job. the hard part was converting my rhino file to a toolpath in mastercamm; luckily my paths were fairly simple, but the software has a lot of nuances that needed to be taken into consideration. some tips:
- USE A TEMPLATE. don't try to start from scratch in mastercamm; capitalise on the fact that other people have done this a lot more than you and use a finished file as a jumping-off point.
- split your CAD file into layers before importing it into mastercamm. each layer should correspond to a different cut. this will make selecting features to cut much easier.
- check, check, and check again. and then have a ta check your work. twice.
- cut test features. make sure your tolerances with actually work as opposed to theoretically work.
i ran into a whole lot of trouble in mastercamm. after i sent my first mastercamm file to the onsrud, it was quickly discovered that the origin had been incorrectly set (i will maintain that this isn't my fault, since i was not the one to do the origin-setting) because the machine attempted to ignore the sacrificial layer of mdf and cut straight to the aluminum. the tas stopped this quickly, but not after destroying a sheet of plywood (luckily, no endmills were harmed). after several hours of debugging the error was determined and fixed, and my parts were cut successfully! or not. turns out i mismeasured the width of my support posts in the wrong direction and all the holes were too small. luckily, the second cut went much smoother. after only one full day of frustration, i finally had parts.
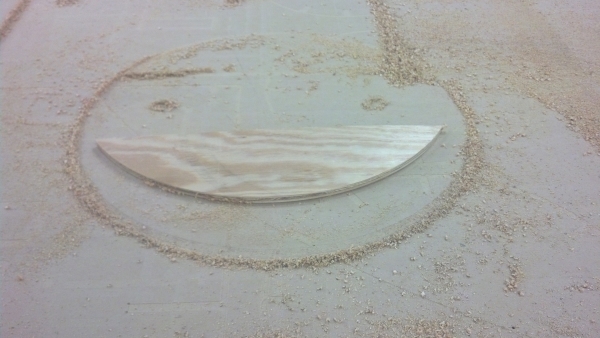
and even an accidental smiley face.
putting it all together
so, now i had the parts. but how to get from the parts to the finished product?
the answer turns out to be a combination of circ saws, L-brackets, power drills, bandsaws, and about a pint of wood glue. also a lot of time and sweat.
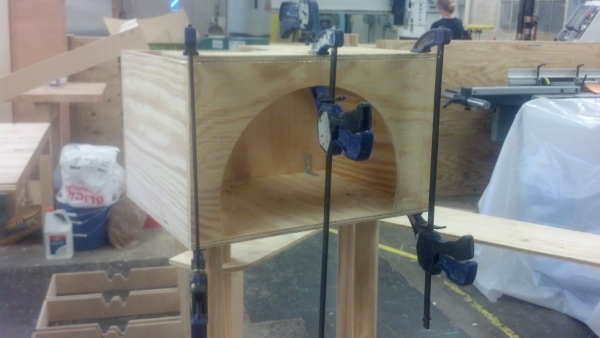
clamps make everything better. and also hold the roof in place.
fixing accidental mismeasurements--made one post too short.
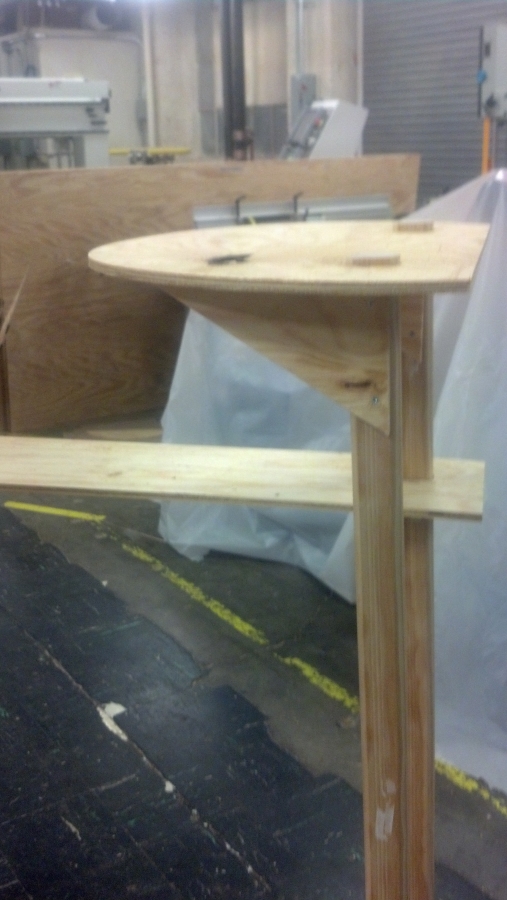
preventing gravity from sending cats flying.
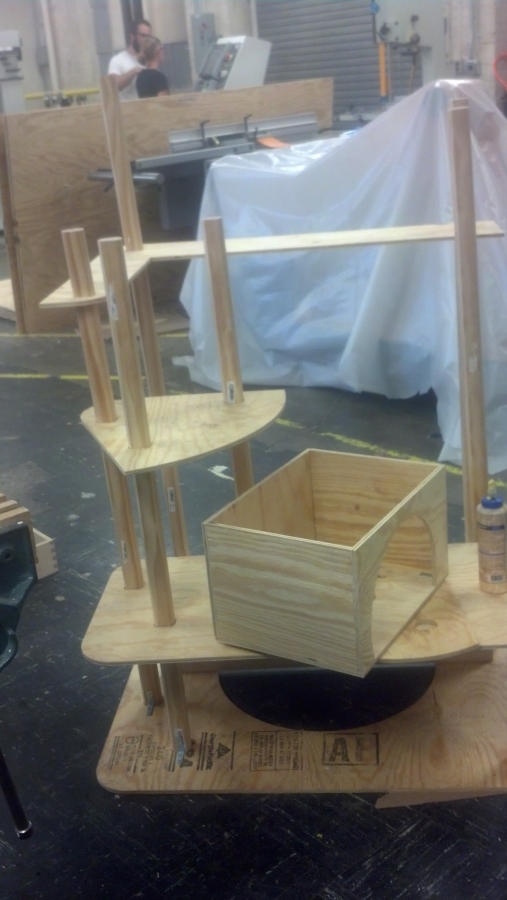
halfway there!
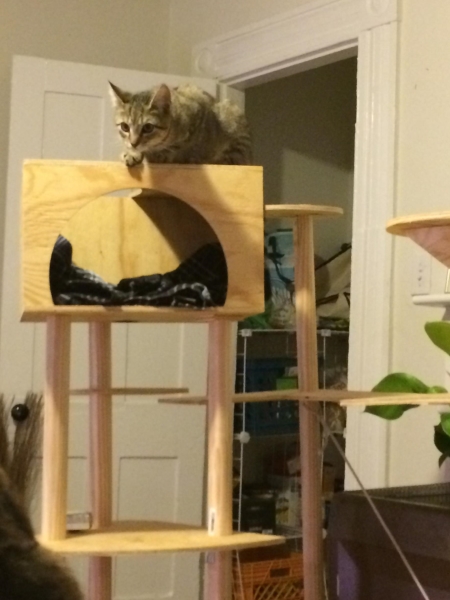
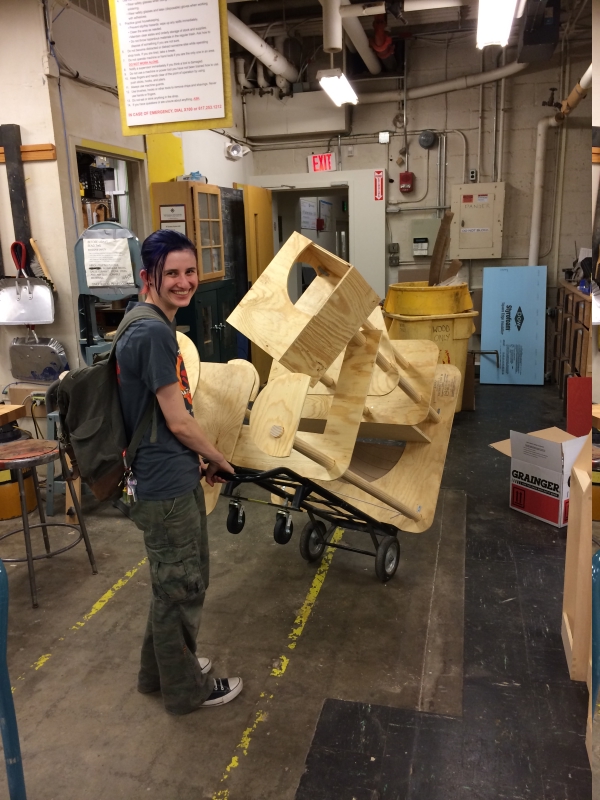
a full day of hard work later, though, i finally had a finished cat tree! a finished, very heavy cat tree that i had to haul from N51 to EAsT camPUS.
update!
cats love the tree. it had to be sawn in half to fit through the door (whoops), but it survived the ordeal and is quickly becoming a favourite toy.