week 9: input devices
input devices this week. i didn't have much time (another big exam week, plus i'll be going out of town for almost a full week starting thursday), so i wanted to keep things pretty simple. i decided to make a capacitive touch sensor from graphite; i thought it would be cool to play around with some really simple materials and see what kind of response i could get.
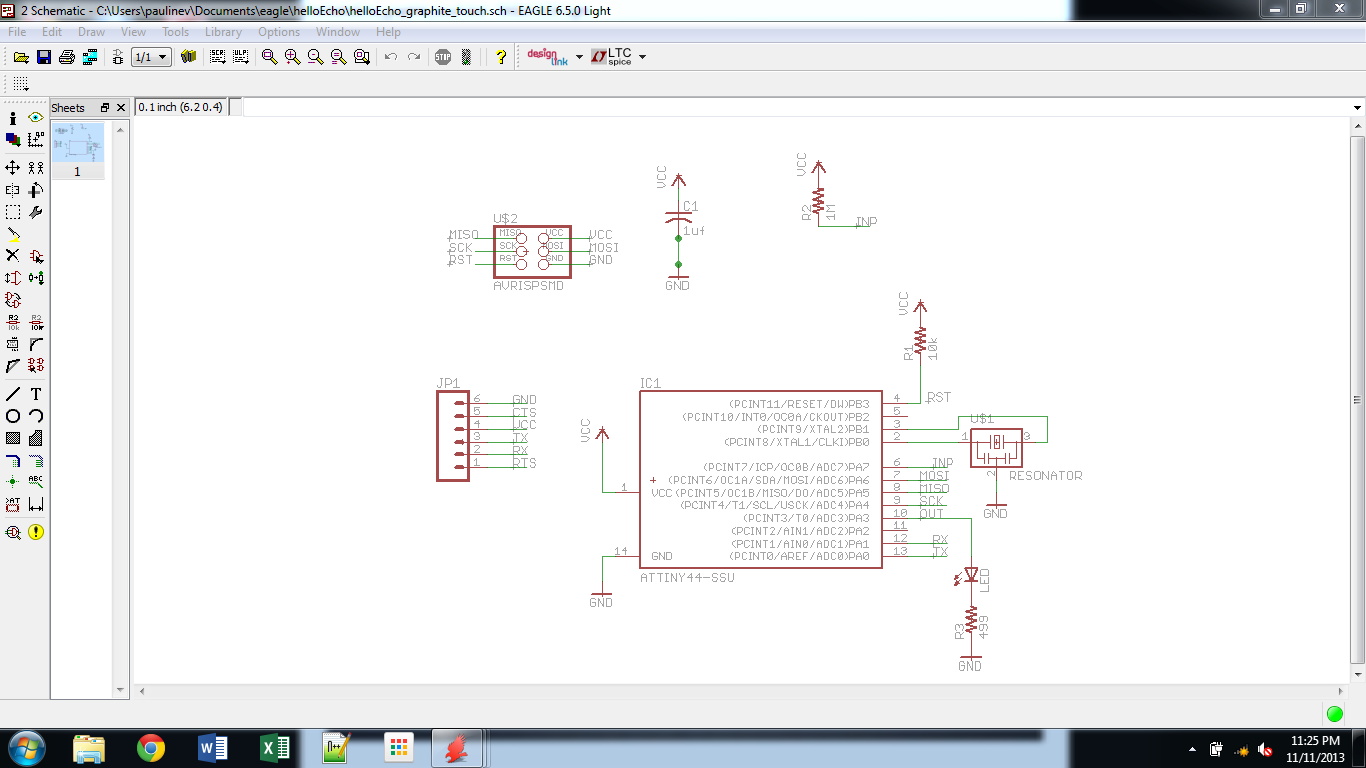
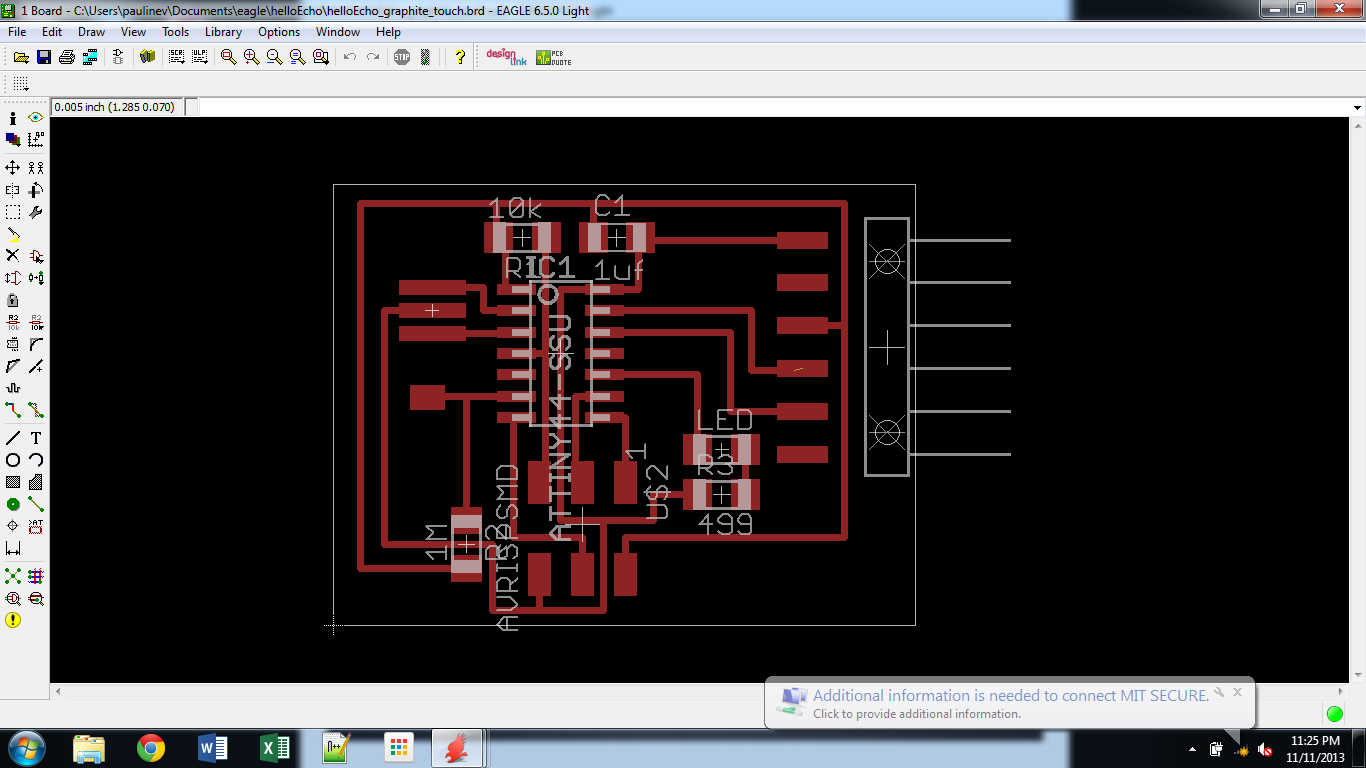
board design
i decided to stick with what i knew this week and reuse the attiny44 board from embedded programming week. it only needed a few tweaks to work with my touch sensor, and so board design was relatively straightforward. i added a solder pad and a megaohm pull-up resistor for the sensor and removed the button (since i no longer really needed it for anything). a little bit of board rearranging and it was good to go.
milling and stuffing
it actually became a bit of a struggle to mill this board... a multitude of small things kept going wrong. first, there was no double-stick tape anywhere to be found. james the hero went to verdes and bought some. then, the bed wasn't flat so my z-zeroing kept going off-kilter, and i had to restart the job halfway through. and THEN when i tried to cut out the board the double-stick tape gave up and the board lept off the bed and i just barely saved it. i cut it out on the bandsaw, so it's much less pretty than it could have been. all things considered, the board actually ended up looking pretty nice once i deburred and stuffed it.
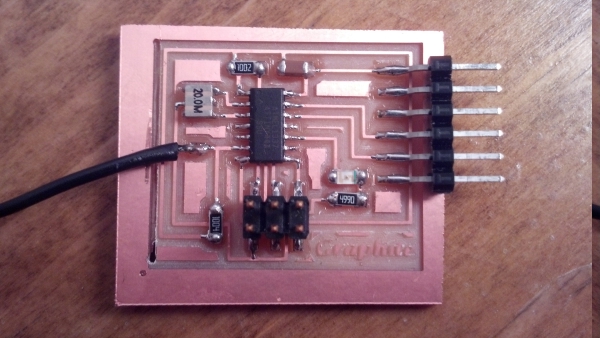
in case you can't tell, that says "graphite" in the lower-right corner.
programming
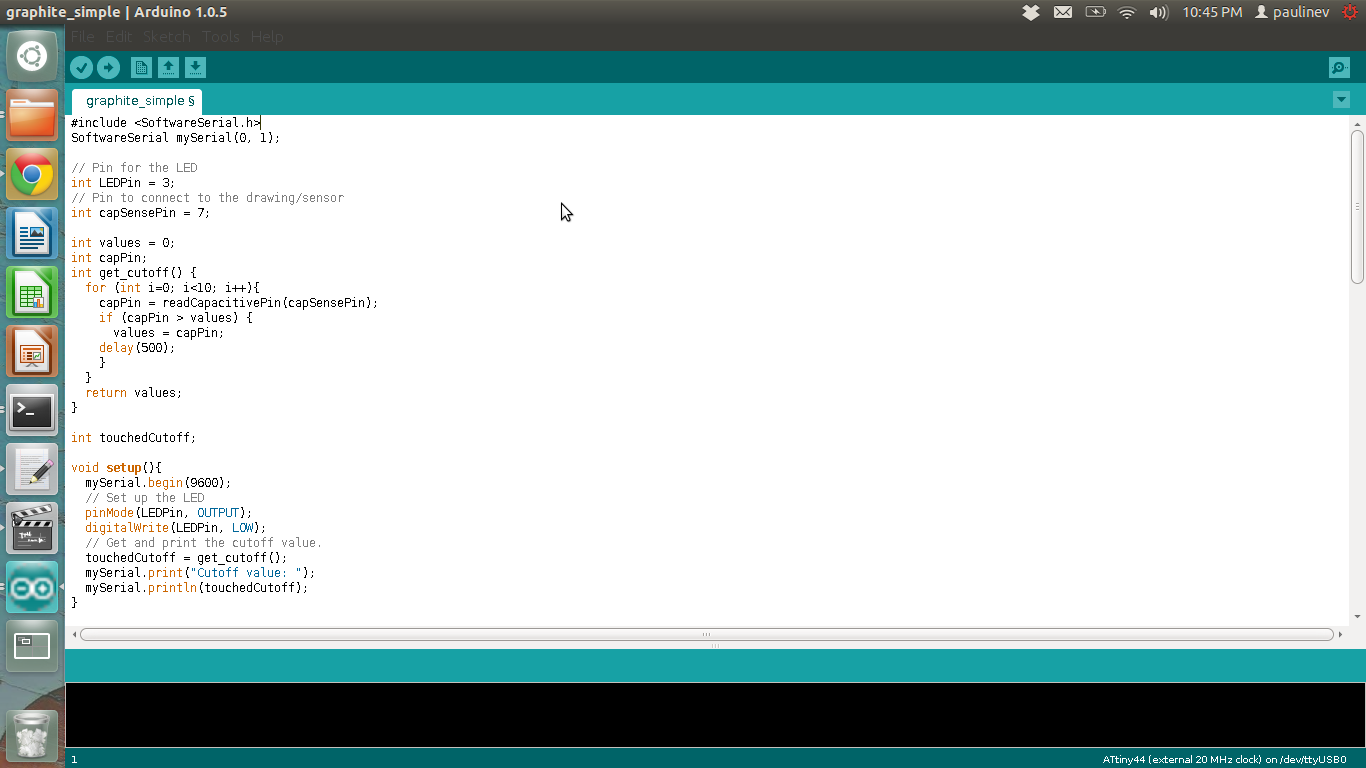
i used arduino to write code for this week, but i dabbled a bit more in C than i have in the past. i got some help from this guy--i tested his code verbatim on an arduino and it worked beautifully. the touch sensor was so sensitive you didn't even have to make contact with the paper for it to trigger the LED; it was awesome. translating that arduino code to the attiny44 took a little bit of work; i ended up writing extra functionality to determine the LED turn-on cutoff dynamically (based off of capacitance values observed during startup rather than hardcoding a value) and changing around the registers used to store capacitance data. i also (finally!) managed to figure out serial communication using the SoftwareSerial library, which made debugging a LOT easier. for those who are interested, here's a quick step-by-step to running serial communication on an attiny44 through arduino; i make no promises that this will work for any of the other tiny family chips, but i believe that it should (with the possible exception of the tiny85).
- include the SoftwareSerial library: put "#include <SoftwareSerial.h>" at the beginning of your code.
- immediately after the include line, type "SoftwareSerial mySerial(0, 1);". This initializes the rx and tx pins to 0 and 1, respectively (this corresponds to 12 and 13 on the attiny44). if you're using other pins for tx and rx, your code should reflect that.
- in your setup() function, start up serial communication with "mySerial.begin(9600)". you can change 9600 to another baud rate; i find that 9600 works consistently and well on the attiny.
- any time you want to send something to the serial console, use "mySerial.print(thing)" or "mySerial.println(thing)" (but replace "thing" with what you actually want to send).
i was surprised that my board worked pretty much flawlessly as soon as i plugged it in... i guess i accumulated some good karma from all the trouble i had milling it, because i was able to burn the bootloader and start running code as soon as i plugged it into my computer. i tested out its basic functionality by running the "blink" code example:
i then soldered on the connector to my graphite sketch, uploaded the code, and voila! works like a charm. you can see in the video that the sensor wasn't working very well farther from the paperclip connector; about halfway through i get fed up with this and add some more graphite, which vastly improves its performance. see for yourself!
files
eagle schematic
eagle board file
traces and cutout
arduino code