week 7: embedded programming
microcontrollers week! this was a lot of fun for me; i'm very familiar with the arduino platform and was really looking forward to learning about different architectures. unfortunately i ran into a lot of little issues along the way so i didn't get everything i wanted to do done... hopefully i'll have some more time this weekend or next week to continue working on projects.
attiny44
programming my attiny44 board was far more work than i expected. first, i tried just using the c code that neil posted (hello.ftdi.44.echo.c and hello.ftdi.44.echo.c.make)--since i'm running linux, it was a little tough to find pertinent tutorials. generally linux and mac are similar, but in this case not so much. luckily i found a few that worked out well; some of the best for getting started with c are irina's and laia's. after building my board, i followed irina's tutorail to get the echo code running. i was able to programme the fuses correctly, but for some reason the python script that was supposed to open a window to echo back characters froze up. i'm pretty sure it was a permissions issue, because i ran into something similar again later when i worked on...
programming the attiny44 with arduino
first things first, i would not have survived this experience without this fabacademy page or ferdinand meier's page. total lifesavers. i started off following the fabacademy page: got the board files installed, checked that the ftdi cable was recognized (ftdi drivers are standard with linux distros after 11.10), attempted to give avrdude sudo permissions as in the "If You Are Using Linux" section of the tutorial, and... nope. avrdude hadn't gotten the correct permissions. so i tried running arduino as root... and lost the attiny support files. i eventually figured out that arduino actually has a separate "root" sketchbook, so i had to recopy the files to there. and i still wasn't good to go! the serial port option was greyed out. turns out that i actually had to edit the port permissions (for me, the board showed up in /dev/ttyUSB0) so that the arduino software could access it--more detailed instructions are in ferdinand's tutorial, and i'll summarize here as well. then FINALLY things worked and i was able to push simple code to my board.
in summation, here are the steps i took to get the arduino ide working on linux with the attiny:
- install the arduino software from arduino.cc. on linux, you'll also need Java, avr-gcc, and avr-libc; from a terminal, type "sudo apt-get install default-jre gcc-avr avr-libc" and hit enter. this should install everything you need to get arduino running.
- download the attiny support files, here.
- extract the attiny files, then copy the folder inside the attiny-master folder (called attiny).
- find the location of your arduino sketchbook--if you open the arduino ide, you can find this under "preferences."
- you'll need to make a new folder inside your arduino sketchbook. open the sketchbook folder, then create a folder called "hardware" and paste the attiny folder inside that.
- note that you'll also need to do this for arduino's root sketchbook folder--on my computer, arduino had different sketchbooks when run as root user and regular user. to find this one, open arduino as root ("sudo ./arduino") and check the preferences again. if it's the same as before, great! if not, run through the same steps as above. you may need to run as root to edit the sketchbook; you can open a root terminal by typing "sudo -i" in a normal terminal and then use the mkdir and mv commands to make the same directory structure as before.
if this is really confusing, try running the steps below, replacing "/sketchbook" with the location of your sketchbook and "your-username" with your username. i make no promises that this will work, but it functioned for me.
sudo -i
cd sketchbook/
mkdir hardware
mv ../home/your-username/sketchbook/hardware ~/sketchbook/hardware
exit
once you have all that working--directories made, attiny files installed, etc.--you'll need to make a couple more things happen before you can start sending code to your board.
- you need to check which port your board is connected to. first, type "sudo dmesg -C" (this clears all prior messages and makes things easier to read).
- plug in your board with the ftdi cable.
- type "dmesg". you should see something telling you where your board is connected: mine looked like "ttyUSB0." this means it's in /dev/ttyUSB0.
- give arduino access to this port with "sudo chmod a+rw /dev/ttyUSB0".
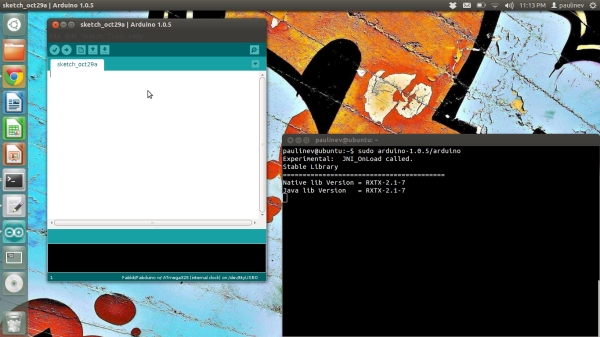
hard part's done! now you can actually run the arduino software. go ahead and open it up as a root user--you'll see something like this:
then, connect your programmer to your computer with the mini-usb and to your board with the six-pin rainbow cable. make sure you orient it correctly! lining up the ground pins is a good way to go. once you're all connected, go back to the arduino software--you have to set it up correctly before using it. under the tools menu, you should see an option called "Board." hover over it and select "ATtiny44 (external 20MHz clock)." go back to the tools menu; under "Serial port," you should see the port you found in the last step. select it. then, (still in the tools menu) under "Programmer," select "USBtinyISP." that's it for setup; at this point, you should be able to burn the bootloader ("Burn bootloader," again in the tools menu) and it should work. if it doesn't, one of several things has gone wrong. you may have oriented your rainbow cable wrong; check it. you may not have selected the right options from the tools menu. you might not have run arduino as root. you might have the wrong serial port. or, you could have messed up your board somewhere... if that's the case, use a multimeter to check continuity.
i'm going to assume that you got your bootloader burned correctly, though, because if so you can actually just upload code now! under the "File" menu in arduino there should be a submenu called "Examples" and a submenu inside that called "01. Basics." choose the file called "Blink." it'll open a new arduino window (but keep the same settings, so no worries there). change the led pin (the variable is called "led") to correspond to your led pin; mine was 3, but yours could be different. check this site for the attiny44 to arduino pin mapping; it's not intuitive and isn't just a direct mapping to the attiny pins. then, click the little arrow at the top (when you hover over it it should say "upload") to send your code! everything should work and you should see the led on your board blinking. if the led isn't blinking but everything went fine in terms of setup and the code successfully uploaded, one of two things happened: you set the wrong pin for the led, or you put the led in backwards. check both of these things.
in summary...
the result of all this work is a bit of fun. here's the led blinking, as well as some code i wrote that turns the light on when you push the button:
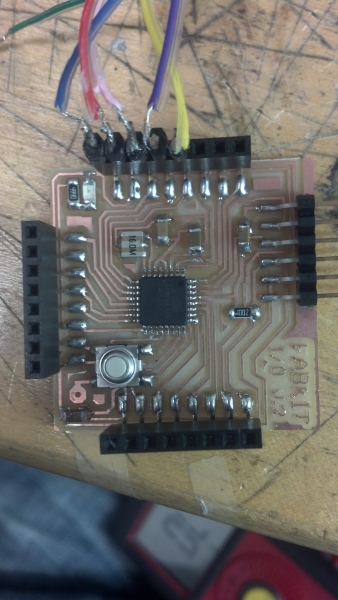
getting that working was a great feeling, so i thought i'd get ambitious and try making my own arduino. all went well: i got the pngs from this site, milled a beautiful board, soldered all the components, did the necessary arduino setup, and... nada. derp. i checked my board and was shocked to find a short between the power and ground pins on the ftdi header! turns out that i did the biggest stupid and used the wrong component (you actually DO need through-hole female headers), which created a bridge between power and ground at the edge of the board. sigh. i attempted to just bend its pins up (to move it away from the power/ground rails) and managed to rip half the traces off my board. i think it might actually be less work to just remake the board, but i don't have time this week so i'll work on it more next week. oh well. it looks pretty, at the very least.