3D Printers & Scanners
This weeks assignment were to create and print a 3D printed part that could not have been (easily) done using subtractive methods, the second part of the assignment involved scanning a model, and treating the mesh in order to reprint it.
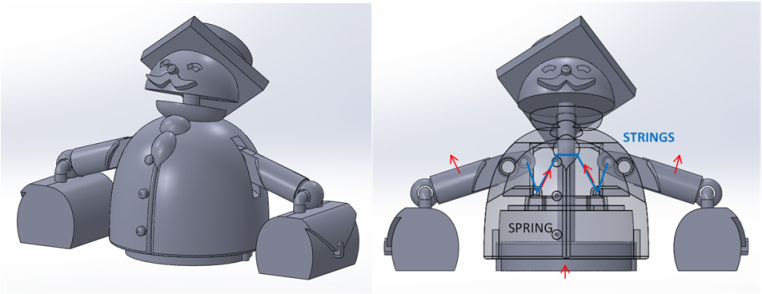
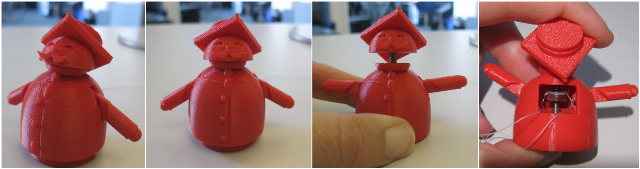
3D printed part: A shouting professor! |
|---|
I designed the professor to 'open his mouth' and flap his arms and briefcases if the base is pushed upwards.
|
The body, arms, and briefcases are printed at once, the head and base separately. All you need to add is a screw, a spring and some strings.
|
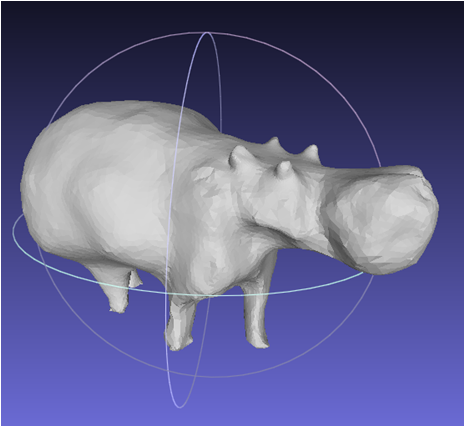
3D scanned part: A hippo! |
|---|
I scanned a carved wodden hippo, and it turned out to be pretty hard because of it's shiny surface and multiple undercuts. In the end I succeeded by placing the hippo in the center of a large piece of fabric, and taking 25 pictures from a low angle (but closely zoomed in on the object), with even and diffused lighting.
|
Next I loaded them into 123D Catch from Autodesk, which gave me a coarse, but pretty nice mesh. Then I used Meshmixer, also from Autodesk, to clean the shape using the drag/draw tools, and saved it to an obj.-file. I then loaded the obj-file into Meshlab and used it to repair all the faulty surfaces (deleting self-intersecting surfaces, and non-manifold edges), close whatever holes that left, and saving it as a graphics stl-file. Finally, I loaded the graphics stl file into Solidworks as a solid body and made sure there were no faulty geometries, then I sent it off to the powder printer!
|