Input Device
This week I am researching on strain gauge as my input device.
Strain gauge is going to be used in my final project as well.
-------------
What is a strain gauge?
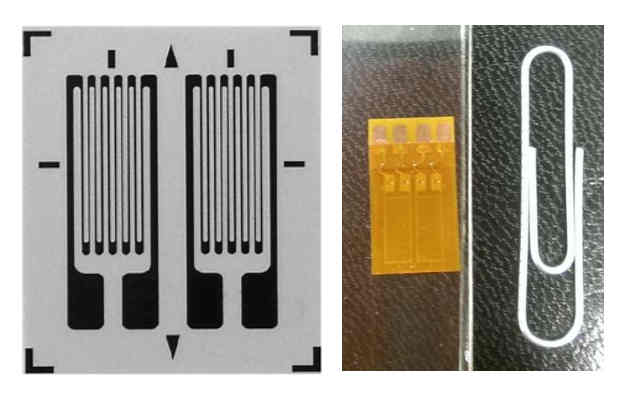
Strain gauge measures strain on an object. It is basically a metal
foil pattern. As the object that strain gauge attached on deforms, the foil
deforms, causing its electrical resistance to change. This resistance change
is proportional to strain, where k, the gauge factor(or GF) is a constant.
-------------

-------------
Problem Statement
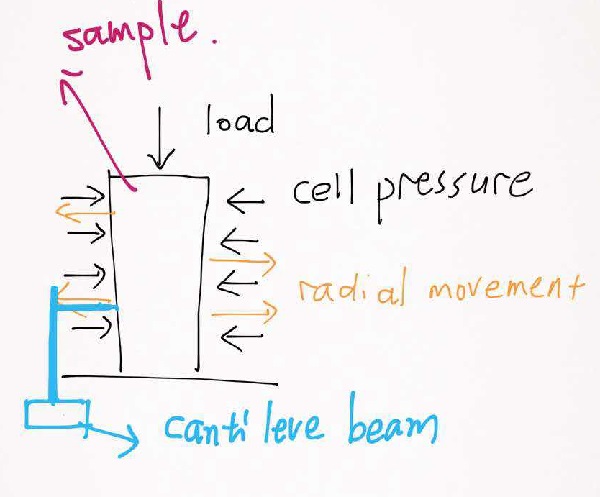
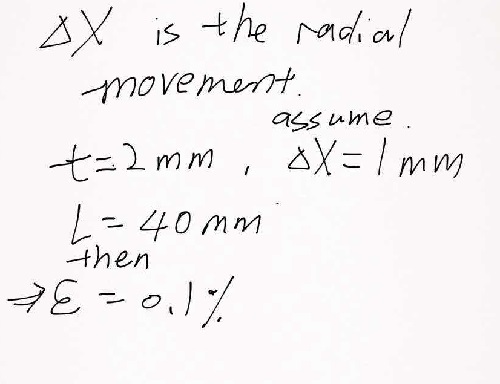
The objective is to measure the radial movement of the sample during Ko
consolidation.

-------------
-------------
-------------
-------------
-------------
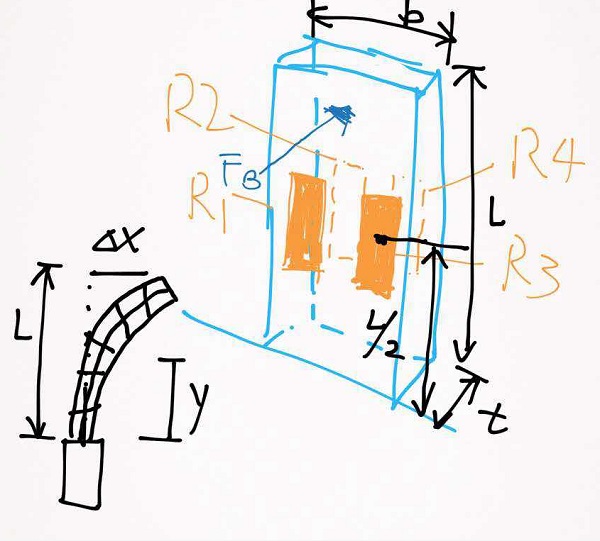
Calculations for Strain

-------------

-------------
-------------
-------------
-------------
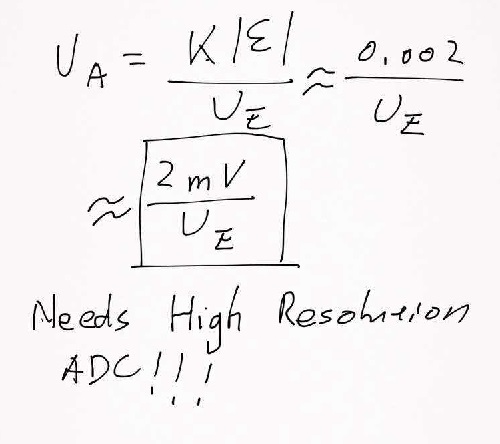
Data Acquisition System
-------------
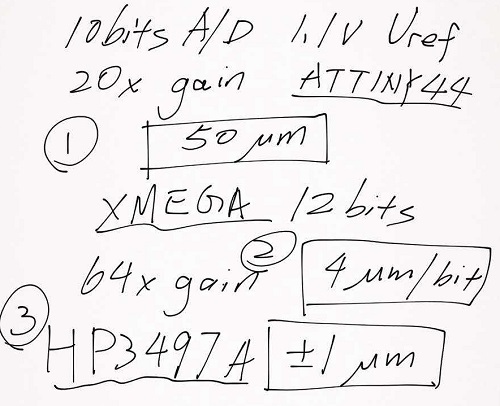
HP3497A used in the lab, has a resolution of +- 1 mircovolt.
Option 1: use XMega and Op amp to achieve mircovolt resolution.
a lot of stuff to learn for accurate ADC.
Option 2: use HP3497A, everything is ready to go
-------------
-------------
Choose Right Type of Strain Gauge
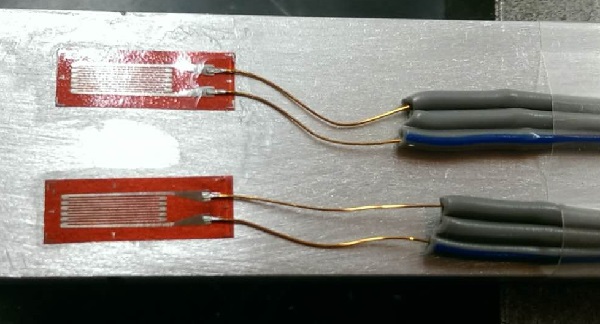
I brought Vishay WK-06-250PD-10C/W, the range is +- 1.5% strain.
It has two foils in each piece, making it easilier to align and attach the
gauge to a cantilever beam. The resistance for each foil is 1000 ohm.
-------------
-------------
-------------
Installing the Strain Gauge
Strain Gauges Installation Manual
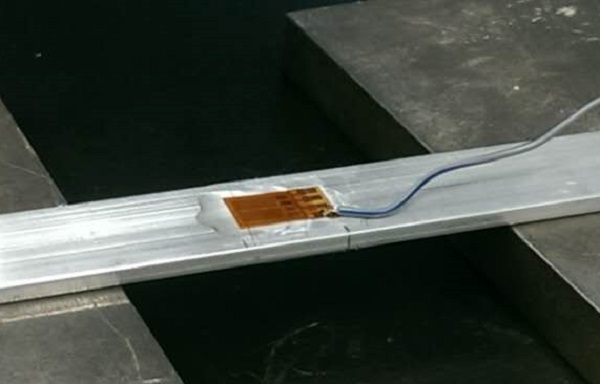
After picking a strain gauge, I started to attach strain gauge to a metal bar.
One can't just tape a strain gauge to a bar, the strain gauge has to become
one with the metal bar.
Procedures for Installing Strain Gauge
1. Sand the metal bar with 150 grit sand paper
2. Wet sand the metal bar with 400 grit sand paper
3. Treat the surface with phosphoric acid
4. Use neutralizer to neutralize the pH value

3. Position the gauge with installation tape
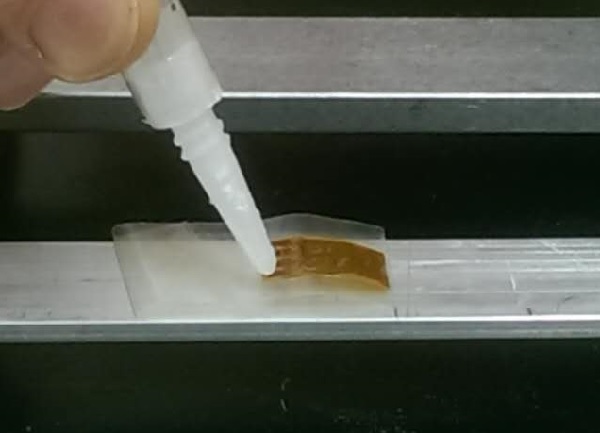
4. Apply a thin layer of glue to the backside of gauge
5. Firmly press down the gauge on top of of installation with a PTFE sheet
6. Wait for 12hours for glue to cure
7. Peel off the installation tape by shearing motion
8. Apply a thin layer of epoxy on the gauge, but not on the connection tab
It is recommended to use the installation tape and PTFE sheet of the same brand of glue.
-------------
Soldering the Strain Gauge
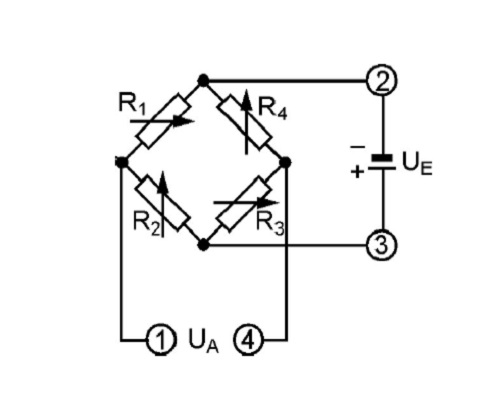
solder the strain gauge so that they form four active wheatstone bridge circuit.
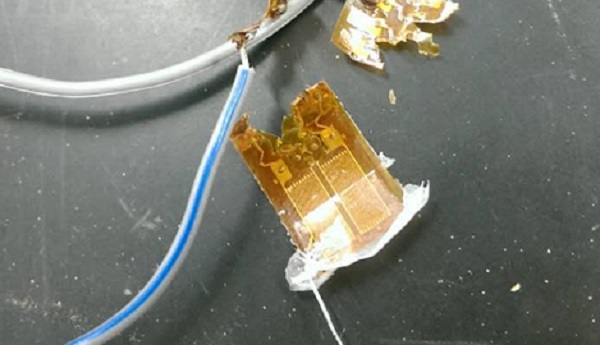
After soldering the wire, I check the resistance, but it is about 7 mega ohm, which means I had a broken circuit.
I have to scape off the strain gauge, and repeat all the process all over. Strain gauge is really fragile
before attaching to the metal bar. but after the installation, strain gauge is very resilient.
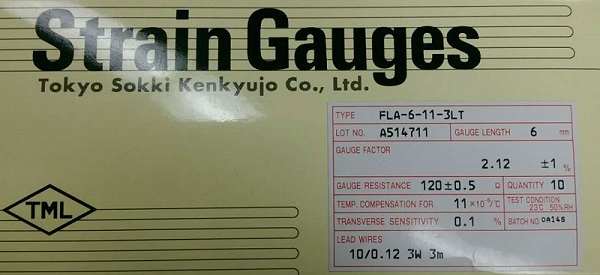
To save some effort, I bought strain gauges from Sokki Kenkyujo Co., they are pre-soldered with lead wire.
the resistance is 120 ohm. The sensitive will reduce because the resistance is less than vishay from Mirco Measurement.
-------------
Material List
Micro Measurement Product
1.M-Prep Neutralizer 5A $15 x1
2.M-Prep Conditioner 5A $15 x1
3.PCT-2M Installation Tape $15 x1
4.Vishay WK-06-250PD-10C/W $10 x2
-------------
Tokyo Sokki Kenkyujo Product
1.CN-E adhesive $8 x1
2.FLA-6-11-3LT $6 x4
-------------
-------------