Week Four: 3D Printing and Scanning
This week's assignment was to 3D print something, and then 3D scan something (with an option to also 3D-print a copy of the thing we scanned.)
3D Printing: Modular Storage
This week's project was a very small, 3D printed, modular storage unit. "Wait," you might say, "but why do you need a very small modular storage unit?" To understand my reasons for needing a very small modular storage unit, you need to know two fun and/or slightly embarrassing facts about me:
1. I have a lot of lipstick.
2. I still buy lipstick sometimes anyway.
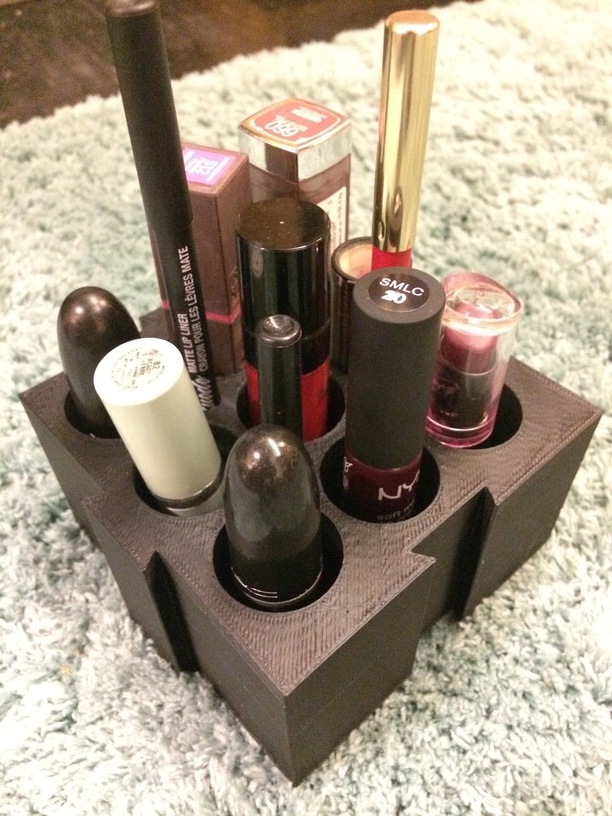
These two facts combine to create a situation in which I need a large (and expanding) quantity of lipstick storage. Pursuant to that, this summer I purchased the following storage cube from the Container Store.
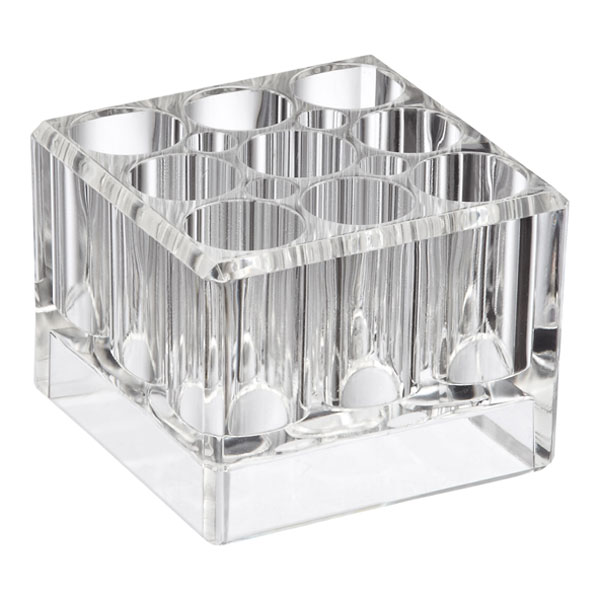
It has nine slots, which seems like a good amount. Unfortunately, that's still not enough to store all the lipstick I have. (I know, I know. It's a very first world problem that I have.) I also realized that it was likely that I would end up having more lipstick in the future than I even have now, and thus I would probably need even more storage, and I didn't like the idea of continually having to buy more nine-well cubes. There were also a few other minor issues: primarily, the existing cube did not have large enough holes to contain the square lipsticks that I own. Given my various dissatisfactions with my off-the-shelf solution, I realized it would be better to 3D print the thing I actually wanted, instead of buying four of a thing whose features were not right for my use. I've been intending to make this project all this summer, before I even decided to take this class, and now I'm going to actually make it.
I began by measuring all of the dimensions on the real-life version of the cube, in the hopes of replicating them in CAD.
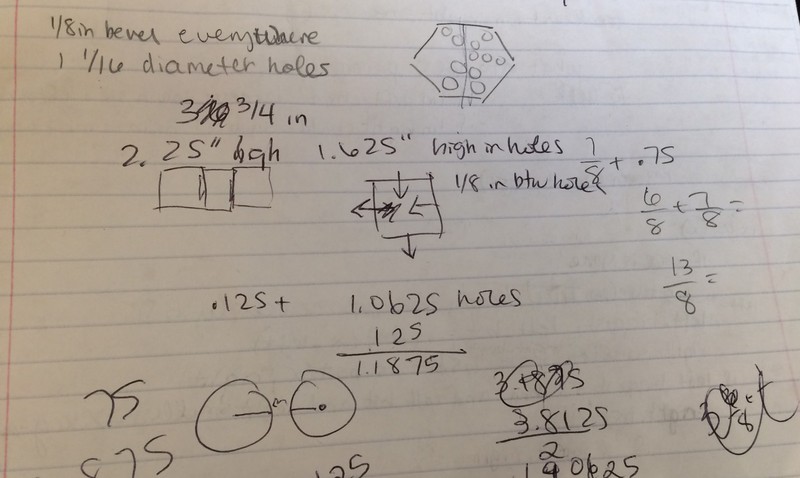
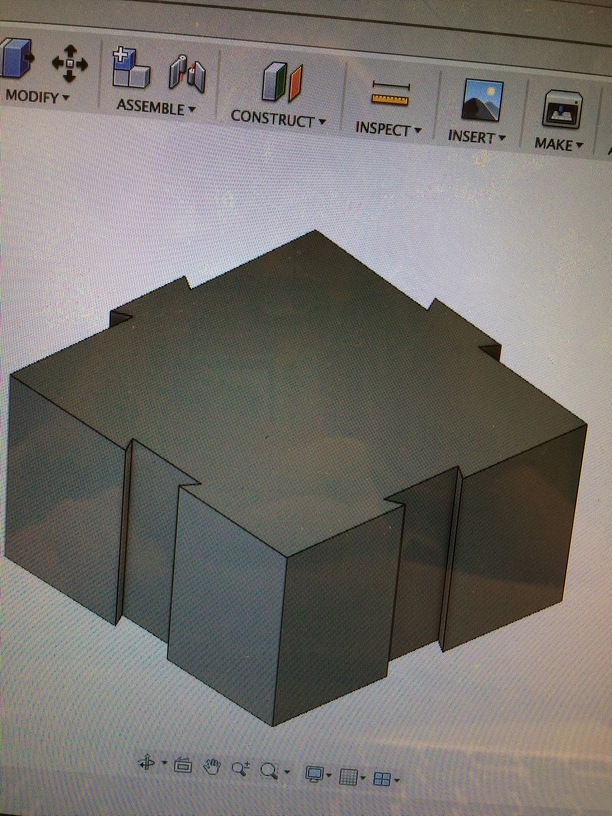
You might notice from my measurements and the photo of the cube that the original cube had bezels, but I had other plans. I was interested in making these modular: in the expectation that I will buy more lipstick in the future, I would like to be able to print more storage and have it connect seamlessly with the storage I already have, instead of having a lot of loose cubes clunking around. So I decided to make the cubes would fit together like adjacent puzzle pieces, with matching notches or pegs on adjacent sides of the cube.
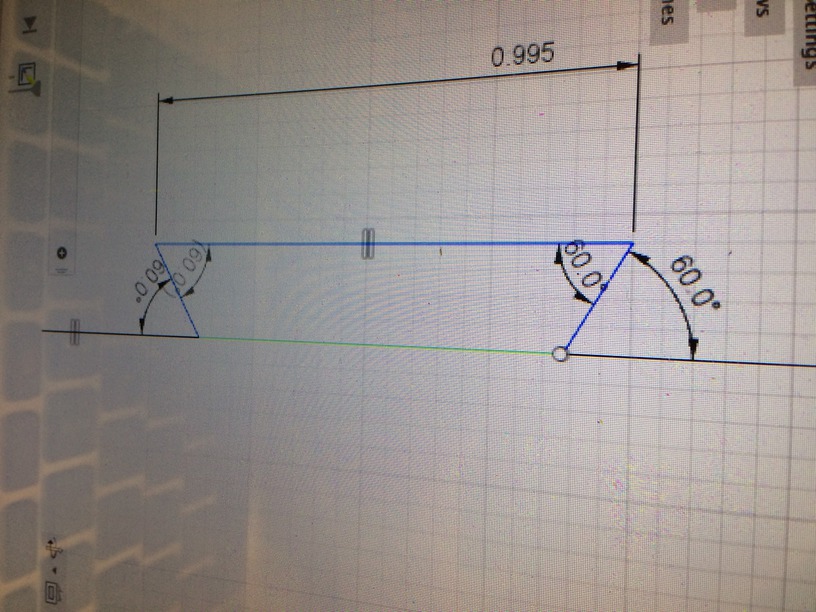
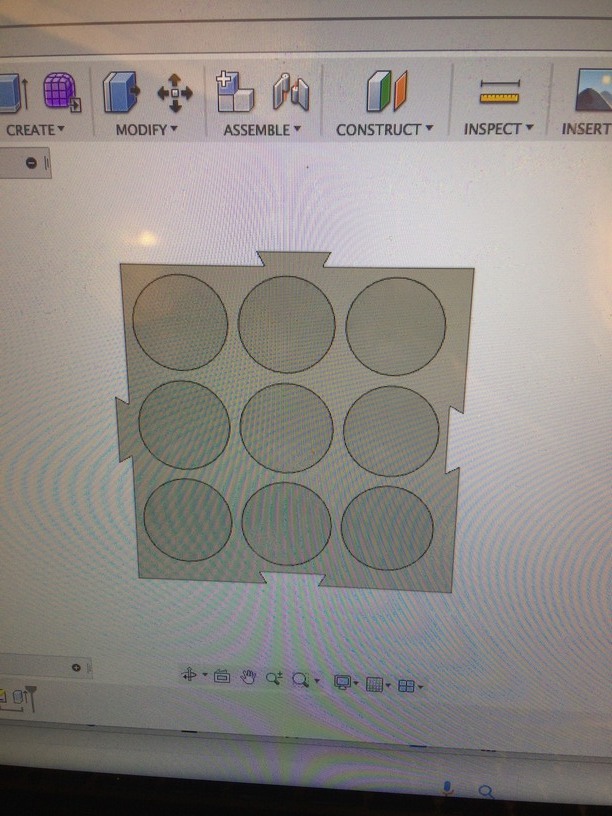
In order to make the notches and pegs fit together, though, I knew they had to be exactly symmetrical to fit together properly. In particular, the pegs had to be located on exactly the same place on each side as each other and as the slots they would eventually go into - eyeballing this wouldn't be enough. At the same time, I couldn't just use the Circular Pattern tool, because the notches and the slots were perfect mirror images of each other, so I also figured out how to use the Symmetry tool. I then realized that in order for the pegs and notches to slide into each other smoothly, the pegs would have to be very slightly smaller than the notches they went into. So I added angle constraints on the notches and pegs, to keep them all the same shape, then deleted the circular pattern constraint, added an equality constraint between the two pegs, and then constrained the peg length to be slightly smaller than the notch length.
It was time to move on to adding the wells for the actual lipsticks. One of the things I learned at this stage was that it's hard to carve out pieces from the entire body after you've already extruded it in 3D, so it was important to do the overall shape of the cube in a sketch, including the pegs and notches, and then and only then add all the holes.
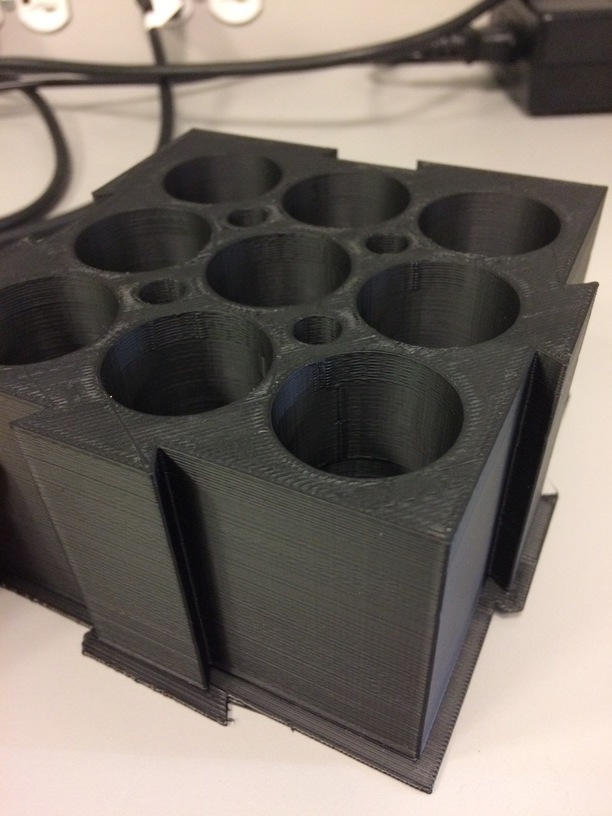
I then moved on to printing. I doubled up my print with another student in the class, who was printing two different things of her own, so I'm not sure how much of the time to print was due to that, but it took a whopping 22 hours to print.
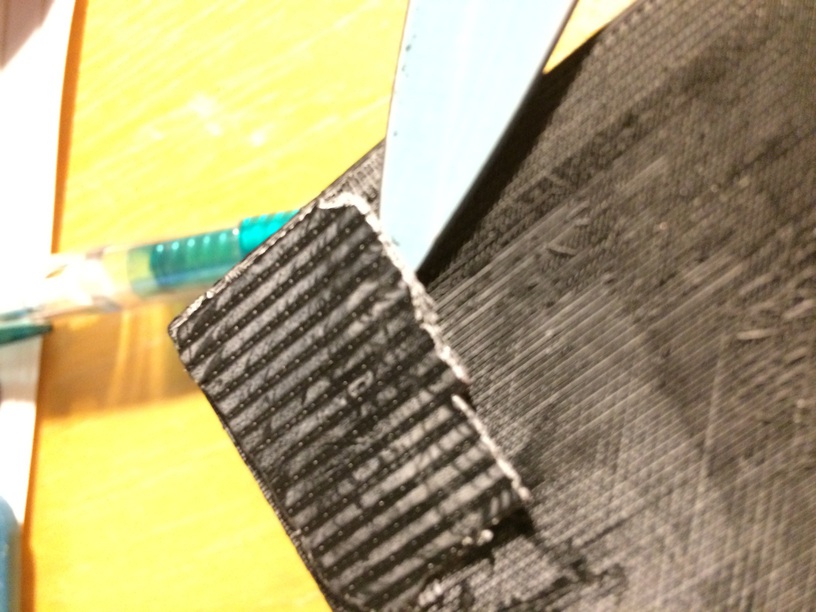
You'll notice, however, that there is a weird sheet of printed plastic attached to the bottom. I'm not certain of the reason for this - I'm pretty sure it wasn't in my original design in Fusion360, and it didn't show up in the STL either - but it was entirely detachable with a knife and some force.
There are, however, some things I would change if I were to do this again. First, it prints way too slowly; I feel like reducing the amount of random dead material sitting about in the middle of the cube where you can't see it - maybe by making it hollow? - would increase print speed without changing the design. I'm not sure how to hollow things out in Fusion360, though. Second, I would figure out a way to print very small peg-notch combinations to test them: I guessed at the size difference between the two that would make them slide smoothly, but I'd really like to find out what the optimal size difference for joints is. I want these joints to be as tight as possible, to make them feel solid and not rickety, but still slide smoothly without you having to push hard on them. I'd also like to change the color of the plastic to white. Finally, I'd like to change the shape of the pegs, so they didn't go all the way down, but instead are supported from underneath by a thin layer of plastic, to prevent modules from sliding apart if you pick them up separately.
3D Scanning: Origami
This is a Froebel star.
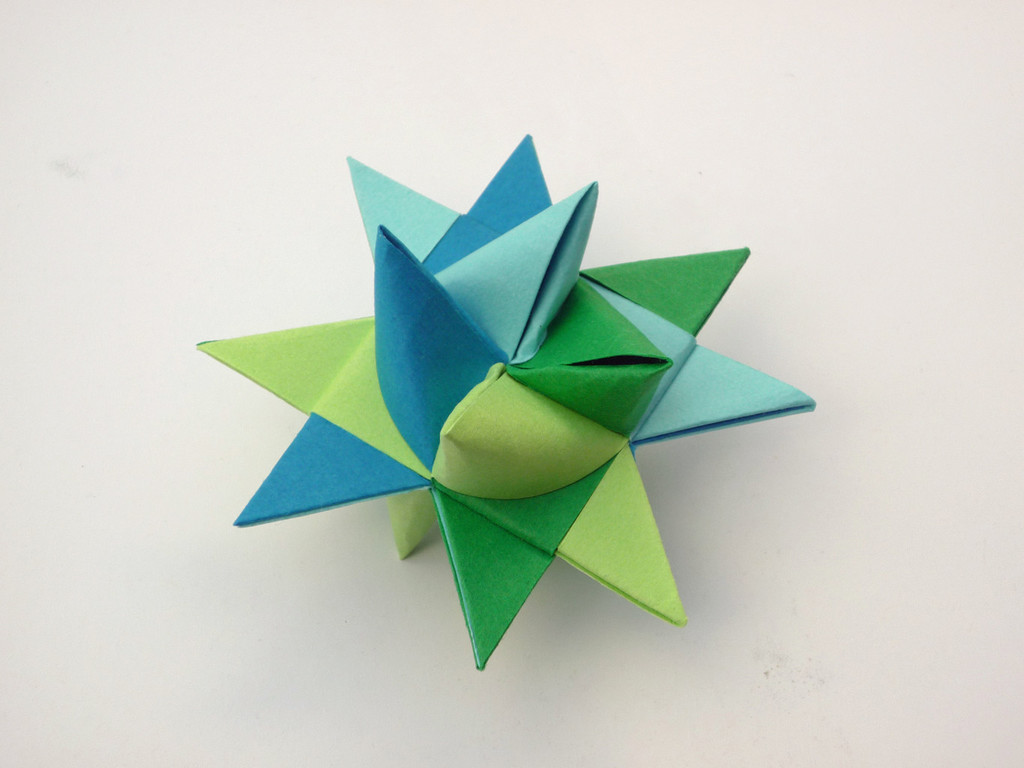
It is 1) an absurdly complicated piece of origami, requiring 4 strips of paper of terribly inconvenient dimensions (1:25 to 1:30) and about fourty steps to produce and 2) a traditional German/Scandinavian Christmas decoration. You should also know that 3) my grandmother's family was from Denmark; these three facts combine to form a family story about how my uncle, as a child, upon being given a completed Froebel star by one of our Danish family members, sat down and reverse-engineered it - i.e., figured out the entire forty-step process of folding one. What can I say: I come from a long line of nerds.
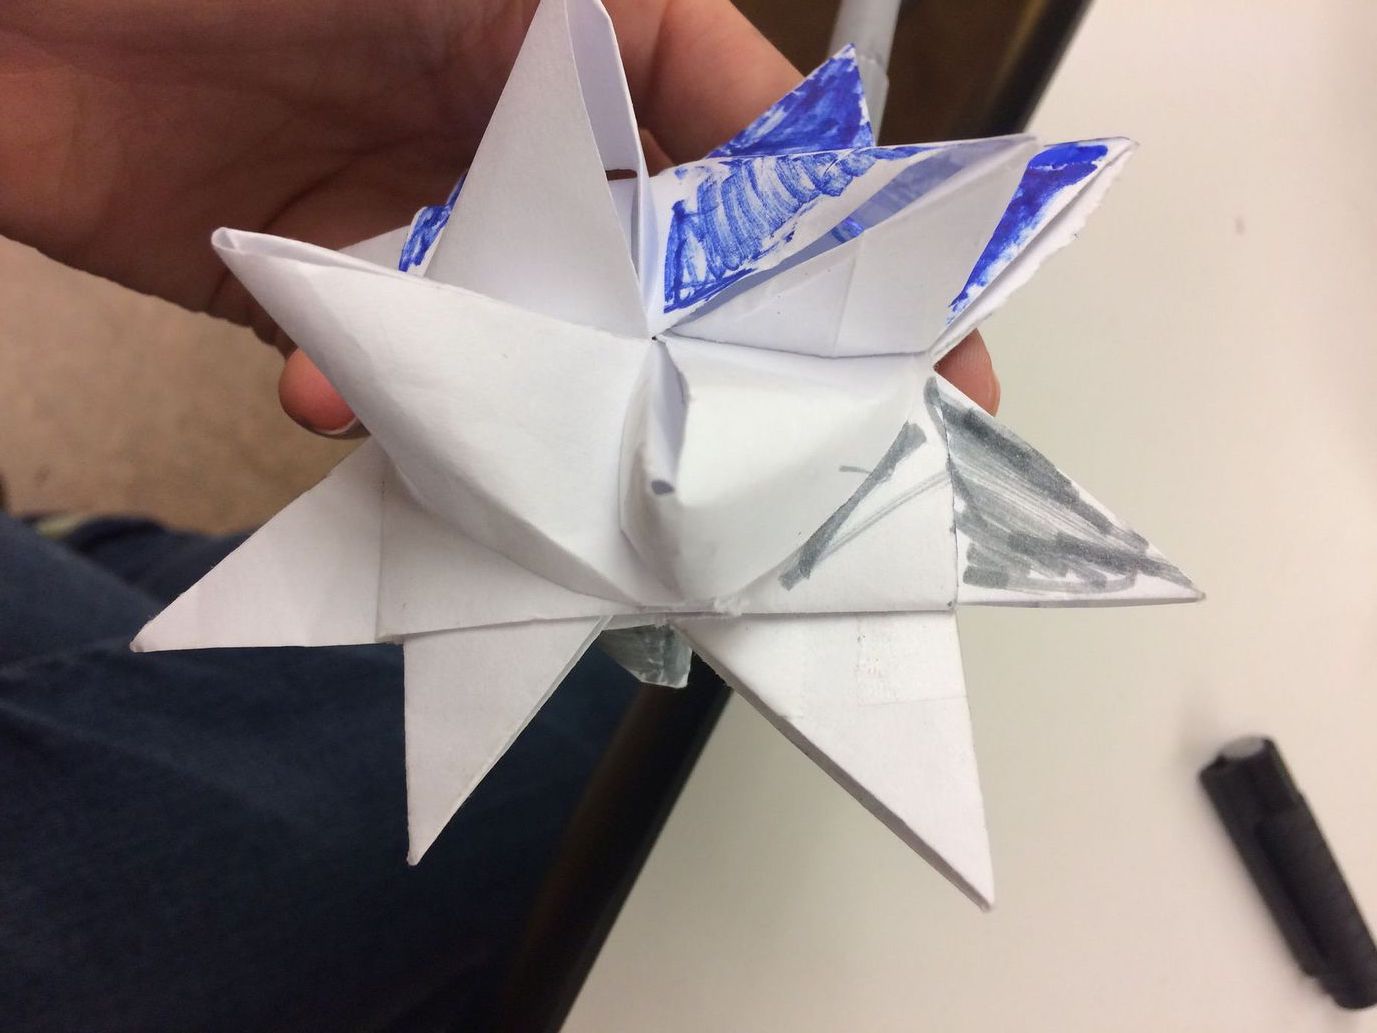
In any case, I decided to 3d scan a Froebel star. I figured the geometry was complex enough that it would provide an interesting test of the capabilities Sense2 we were using in the EECS lab. Unfortunately, technical difficulties intervened - specifically, a driver issue, valiantly resolved by our valiant section leader. But in the end I was able to fold and scan it! Two issues I encountered were the need for support and the need for contrast. The Froebel star has points on all sides, so if you don't hold it up in the air somehow during scanning, the scanner will be unable to capture it; at the same time, the paper I used was thin enough that when I jerry-rigged an origami-holder out of alligator clips, it just fell over. So I stuck a piece of copper wire inside of it, which worked. Second, the Sense2 does not scan white things well - it kept giving the error LOST TRACKING - so I ended up coloring in my already-folded piece of origami with a Sharpie.
This greatly improved its scanning ability. It seems odd that it would have trouble with the color white specifically - perhaps it's a contrast issue and all our beige lab counters are too close to white? - but that was definitely the issue. The next step was to erase the ad-hoc supports I constructed, and remove some of the artifacts that ended up in the scan against my best efforts.
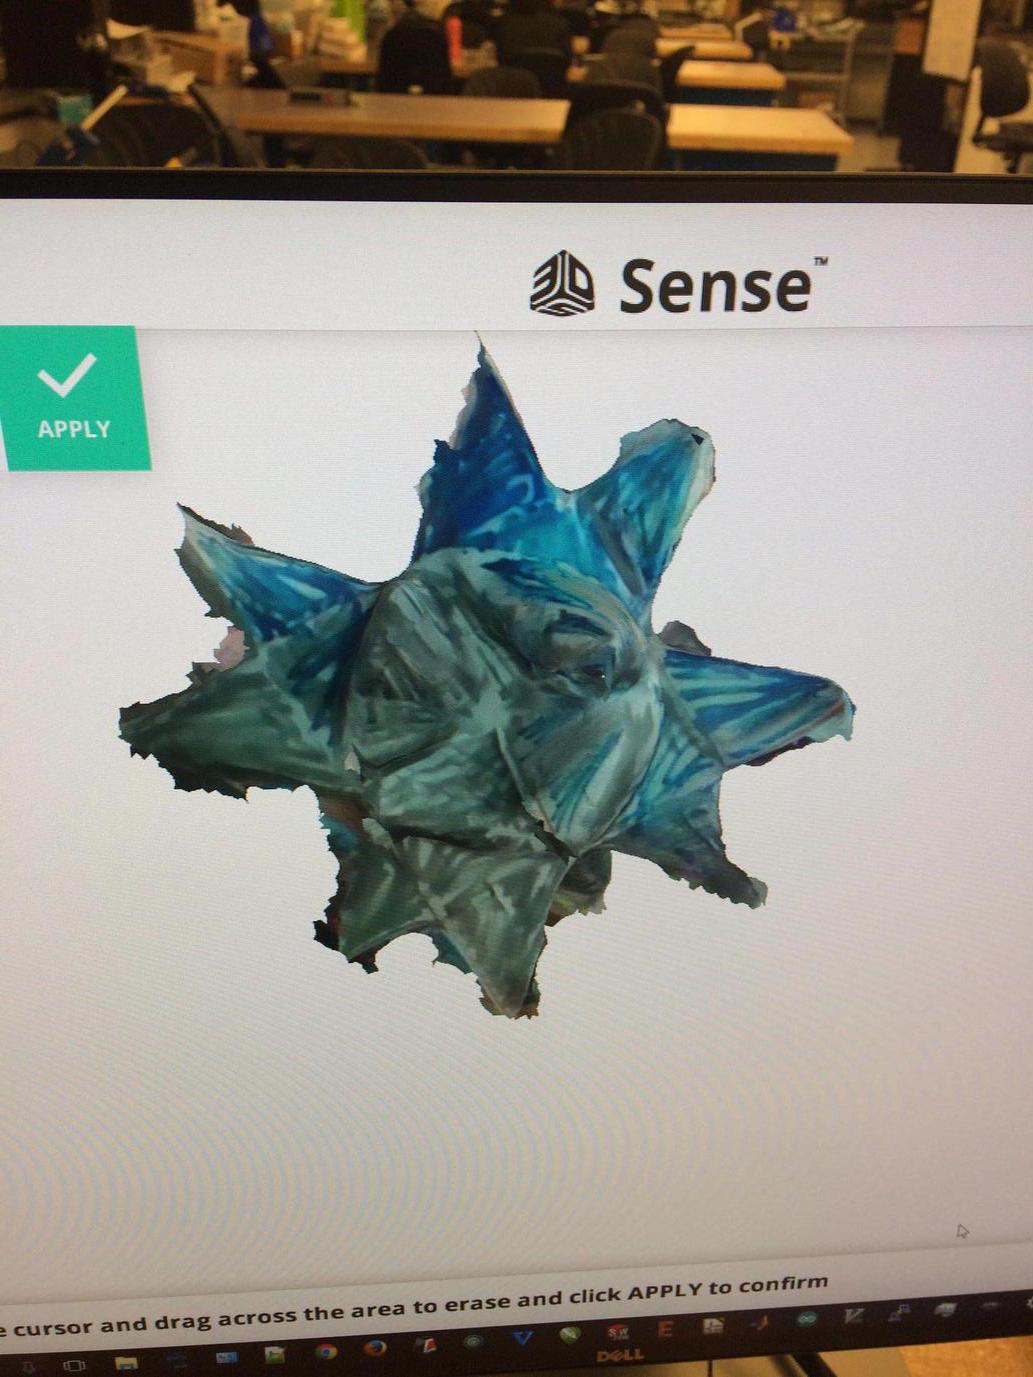
I can't say I was that pleased with the resolution here, but I also imagine trying to reconstruct 3d surfaces from images is a rather hard problem, so I don't think it's subjectively bad, even if this mesh would be pretty difficult to 3d print.