Kim
0
1
10
11
100
0101
0110
0111
1000
1001
1010
1011
1100
1101
1110
1111
final
These days, in the computer age, designers tend to start their design from digital tools and platforms.
Traditional methods such as sketching, hand modeling, crating have transformed the digital world with modeling interfaces.
It brought designers many new potentials and power to simulate and test before they materialize their design. Still, the computer interface took away many creative tools and methodologies that designers used to have.
Much intuitive craft, including sculpting, carving have been replaced by shiny computer models. Is there any way to bring the art back but engineered and made it in digital fabrication?
The first 3D scanning technique I tested was Photogrammetry. It extracts a 3D model from calculating the angles and distances of multiple pictures taken from the camera. You can do it with any digital camera with the software, but it is even simpler and popular now. I could take multiple pictures from my phone and attach and generate a mesh model from my phone. The application I used was Polycam.
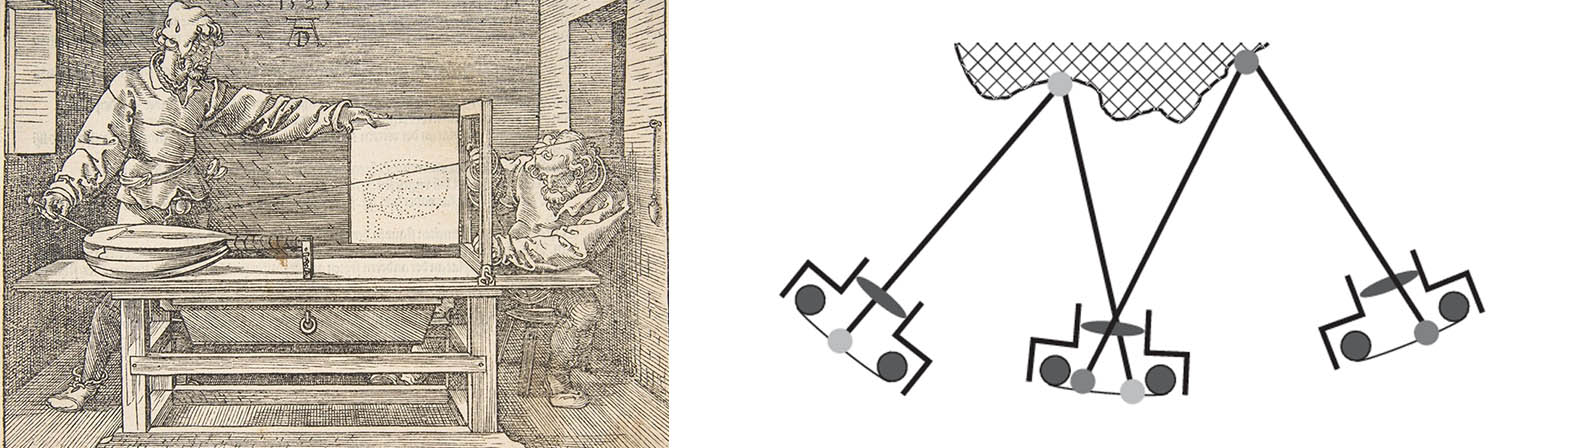
Renaissance painter and theorist Dürer's work on proportion introduces the modification of human proportions by mathematical simulation(Vier Bücher von Menschlicher Proportion). He already introduced the mathematical rules of perception that are the base of photogrammetry.
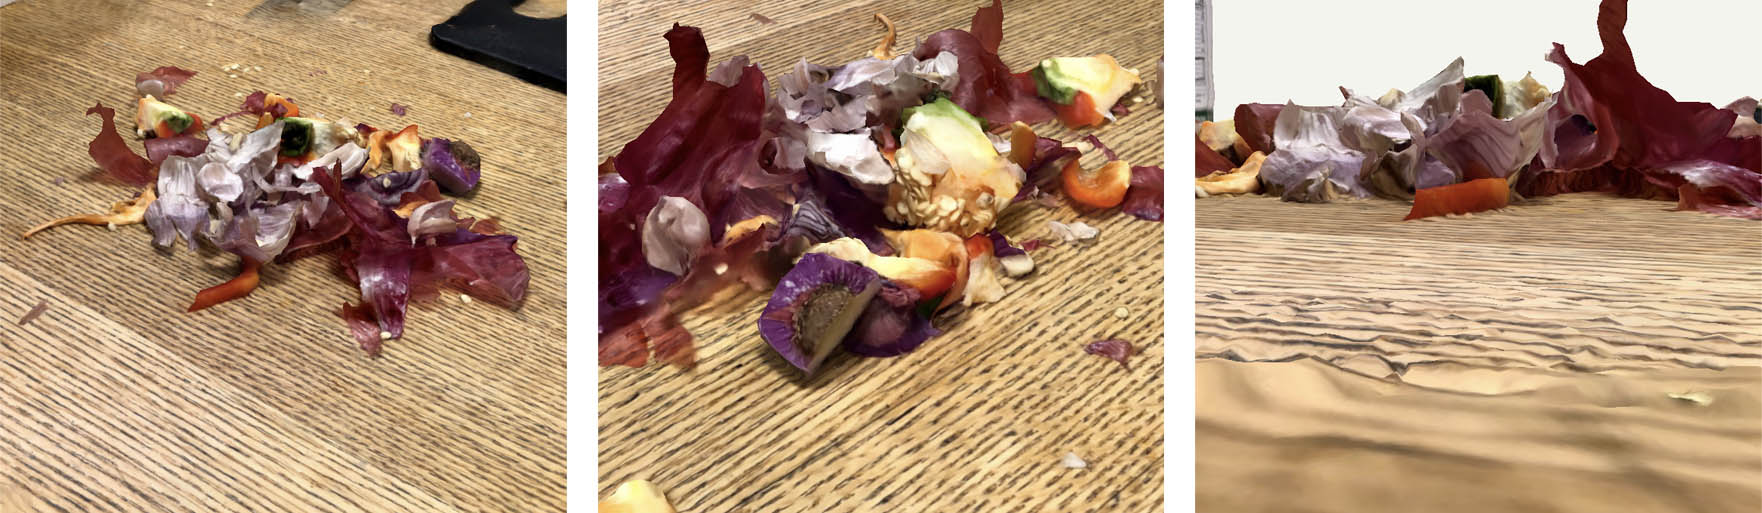
The limitation of photogrammetry is it is affected by light and reflection a lot. Also, the generated mesh is not accurate but more regenerated through images.
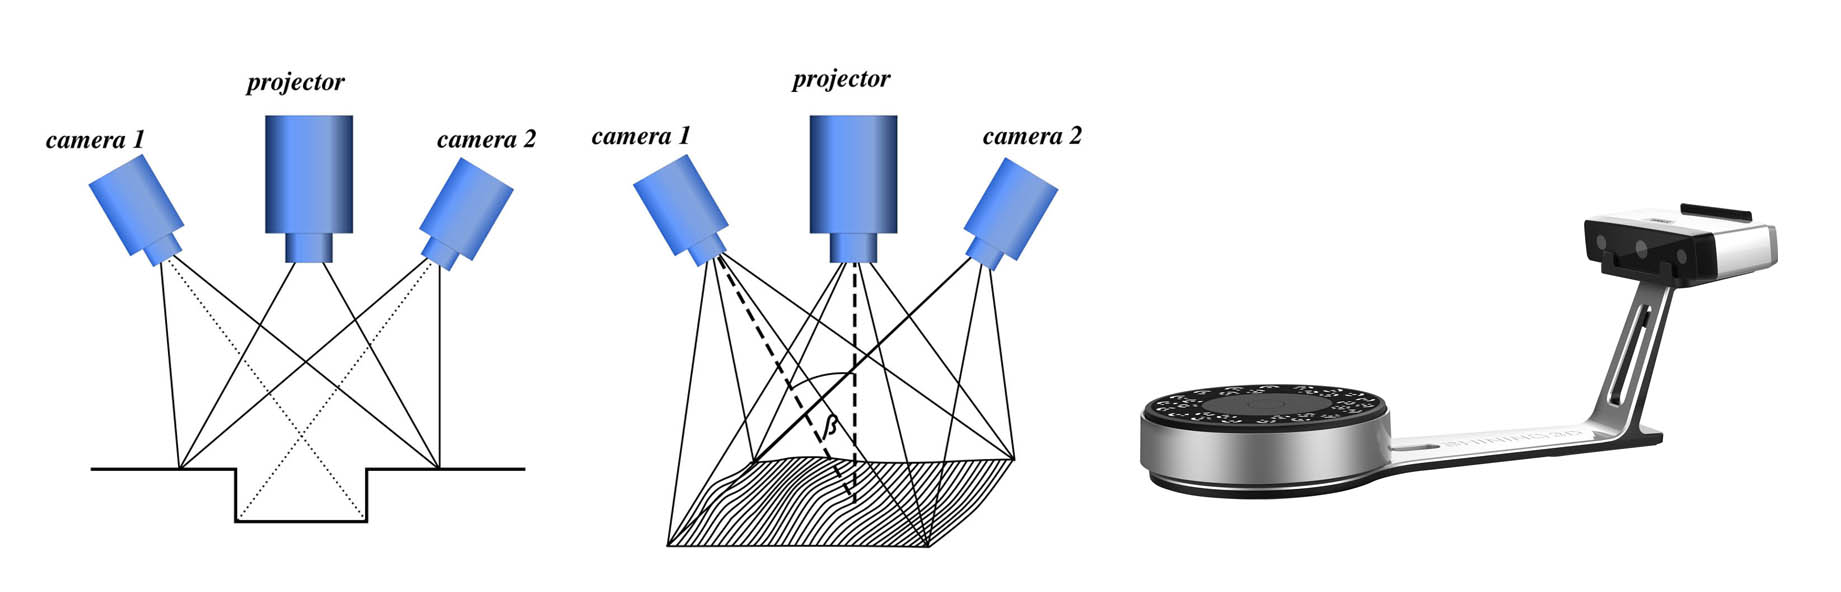
The 3D scanner I used for scanning my tiny wale is EinScan-SP, which uses Structured Light Scanning. It is the scanning technology using a light projector and two cameras. The projector is shooting different light patterns, and two cameras are obtaining changing angles between patterns. Also, the projector shoots RGB light to capture the colors of the measured points.
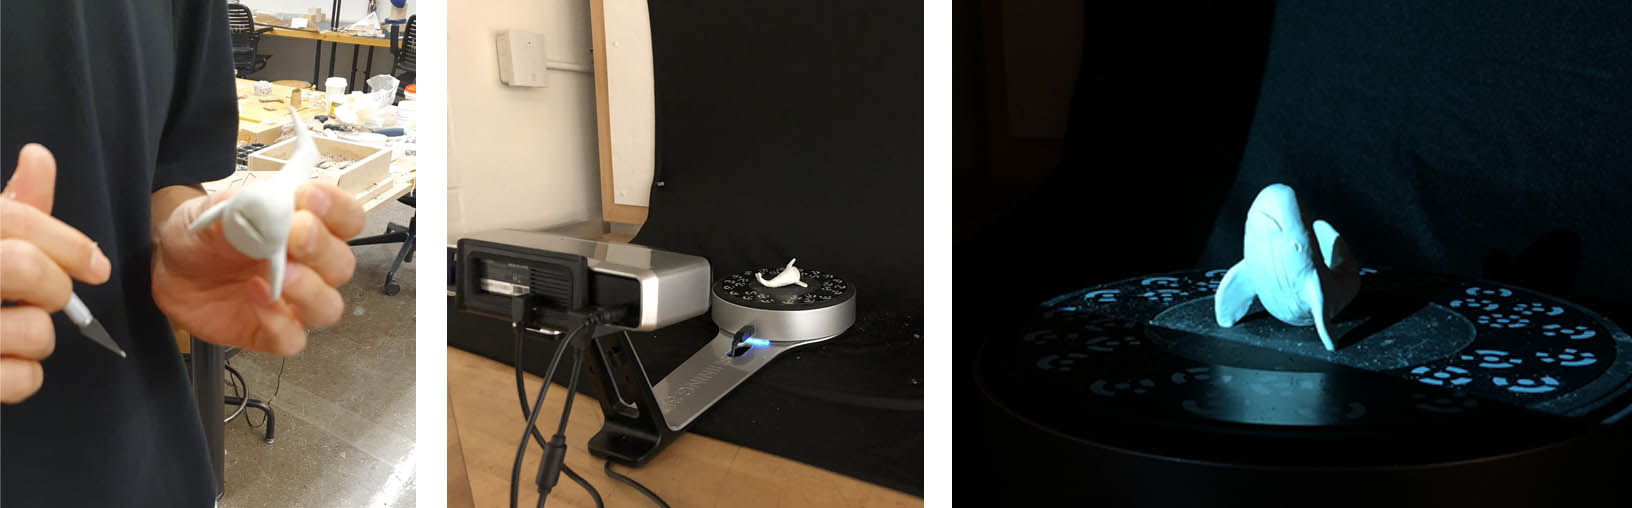

I started the scanning and printing practice by making a clay sculpture of a whale. I just intuitively made a wale sculpture about 2.5in with oil-based white clay. Afterward, I used EinScan-SP with a turntable to scan the tiny sculpture. I scanned 2 rounds to capture the entire model without any blind spots. The program EXscan helped align two different scans automatically. I could get .asc file, which is a point cloud with RGB information. Then I could make a mesh model .obj with the texture map
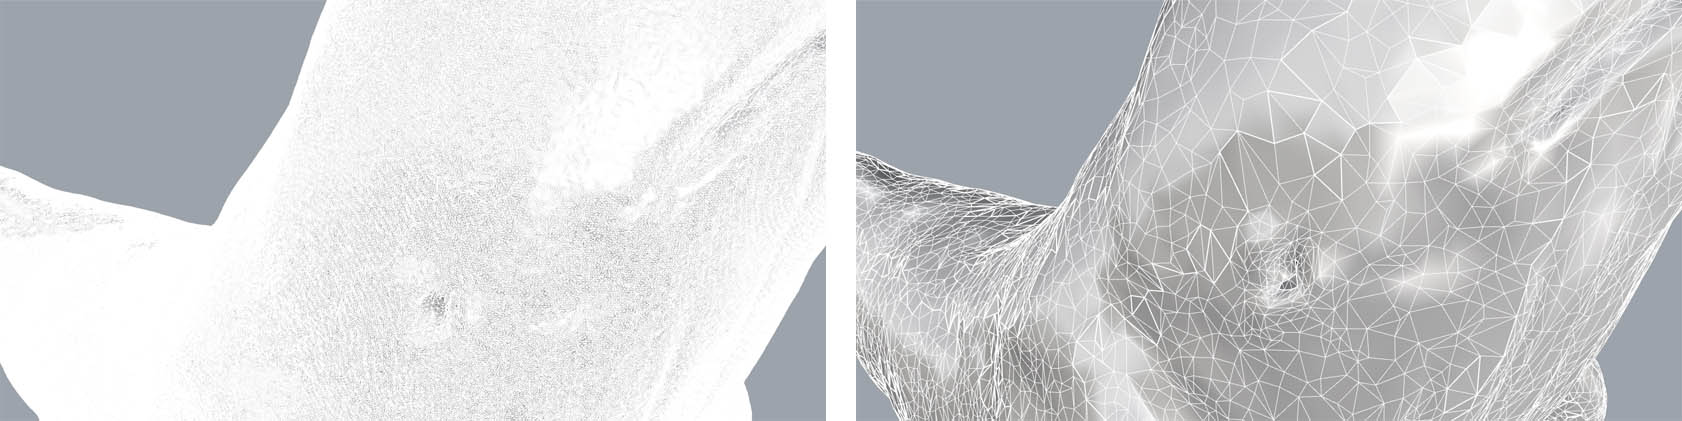
To optimize the mesh model for the 3D scanning, I reduced the mesh to 10% faces from the 3D scanned model. The file size shrank from 108MB to 3MB, and it is difficult to tell the difference from the scale model in a 2in model.


After the whale model was ready, I made a bubble that would capture the whale. I generated random points on the sphere surface and made Voronoi from points. Them I made smoothen mesh out of Voronoi sphere.
I used two different 3D printers. First, I used Creality CR10 for my final project studies. You can find how I printed mockup machine parts with PLA on the final project page. Then I used Stratasys F170 for this week's assignment, printing that a subtractive process cannot make.
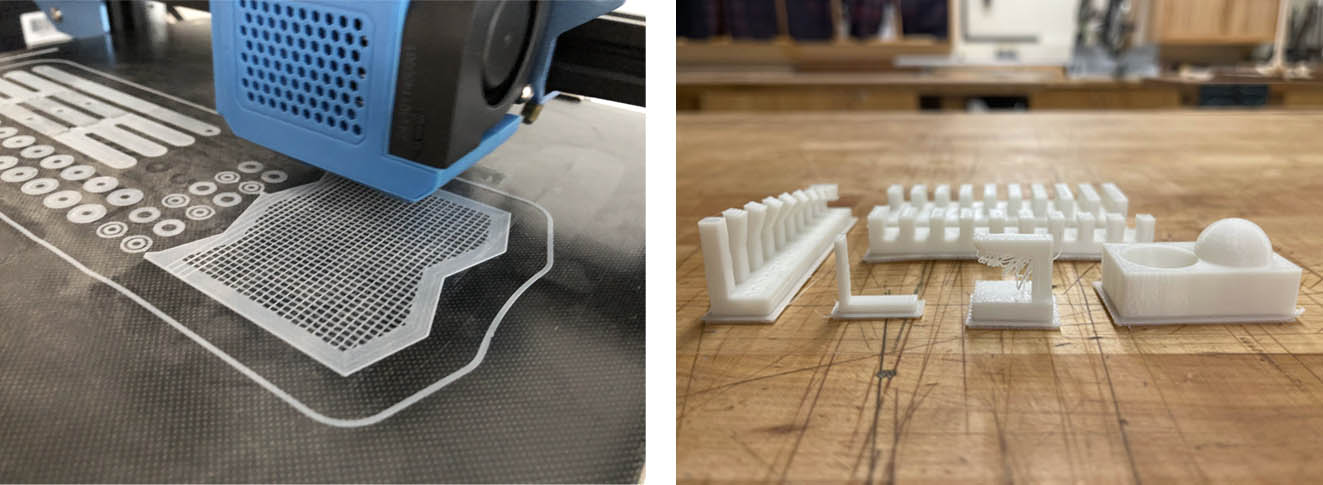
1. Make every printing object sit on same Z level. The left picture above is the failure from object being floated from ground level.
2. Dimension of printed objects are not exactly identical to the one from 3D model. If you're making joint, test 3D print first to find the correct actual printed dimensions.
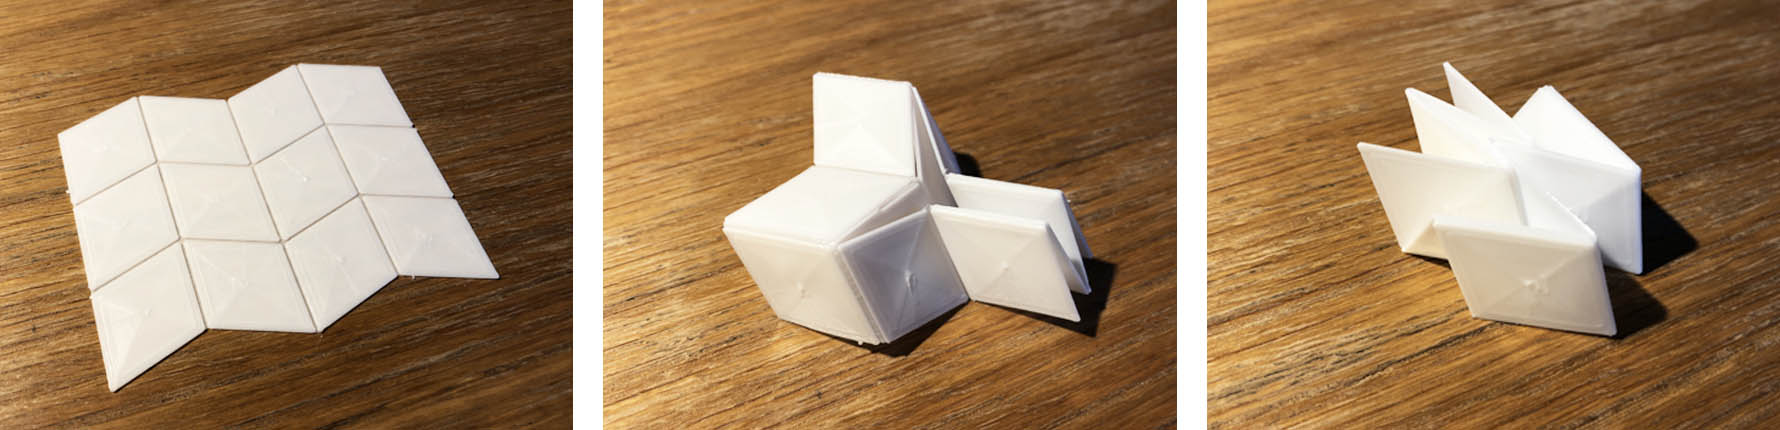
I also had fun testing origami print with two different thickness, thin part for folding and thick part for faces. I heated with heat gun and folded the pattern. As I described earlier, check final project to see more PLA print practices.
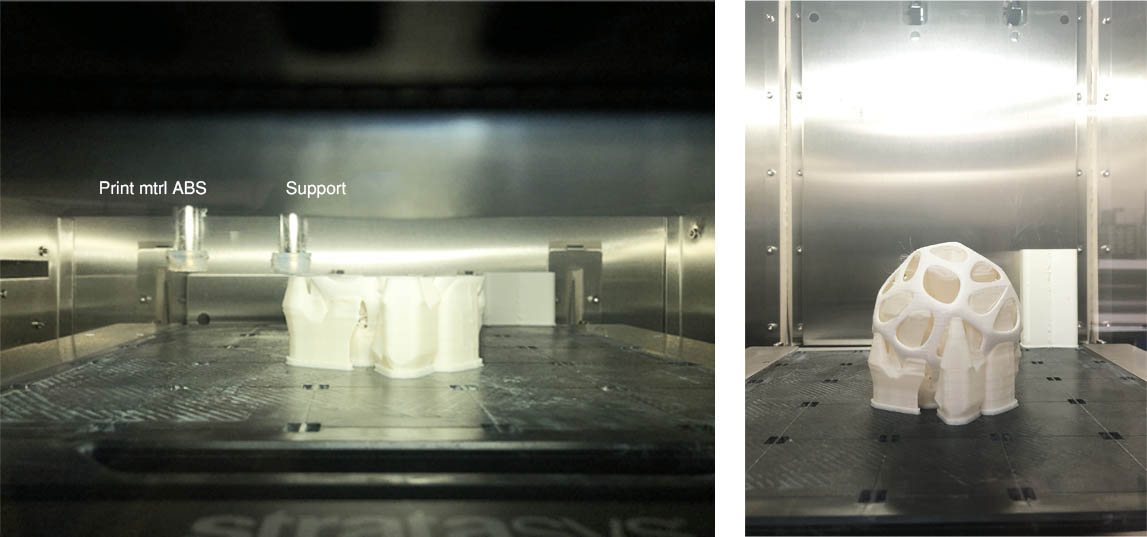
As you can see in the left image above, F170 has two nozzles. In the architecture shop, we have ABS material for the print and support material soluble in sodium hydroxide.
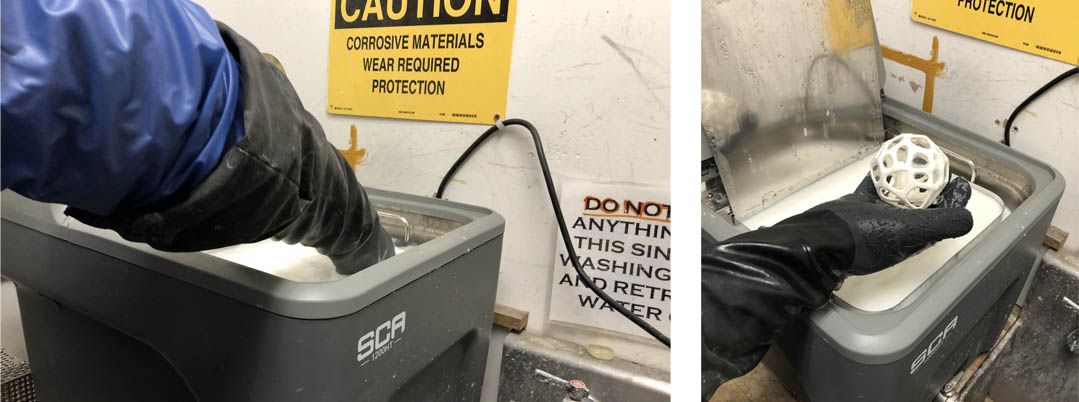
You print with the support material and put the printed model in the NaOH tank at 70 degrees Celsius for hours to dissolve support material.
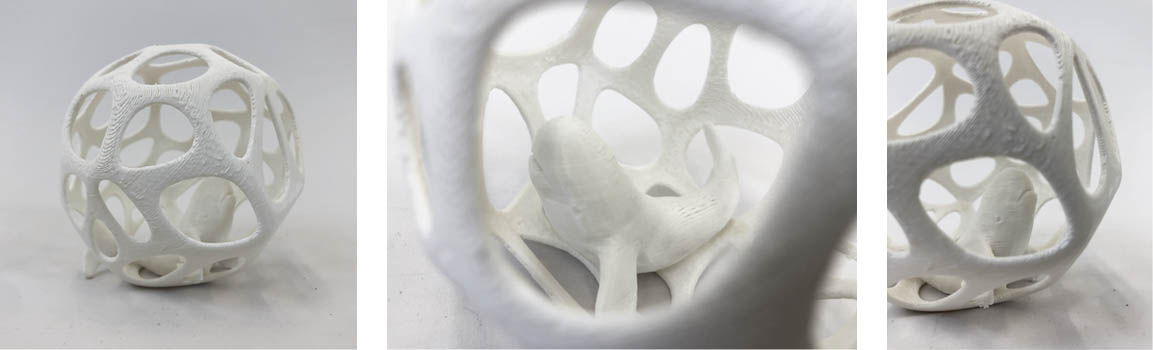
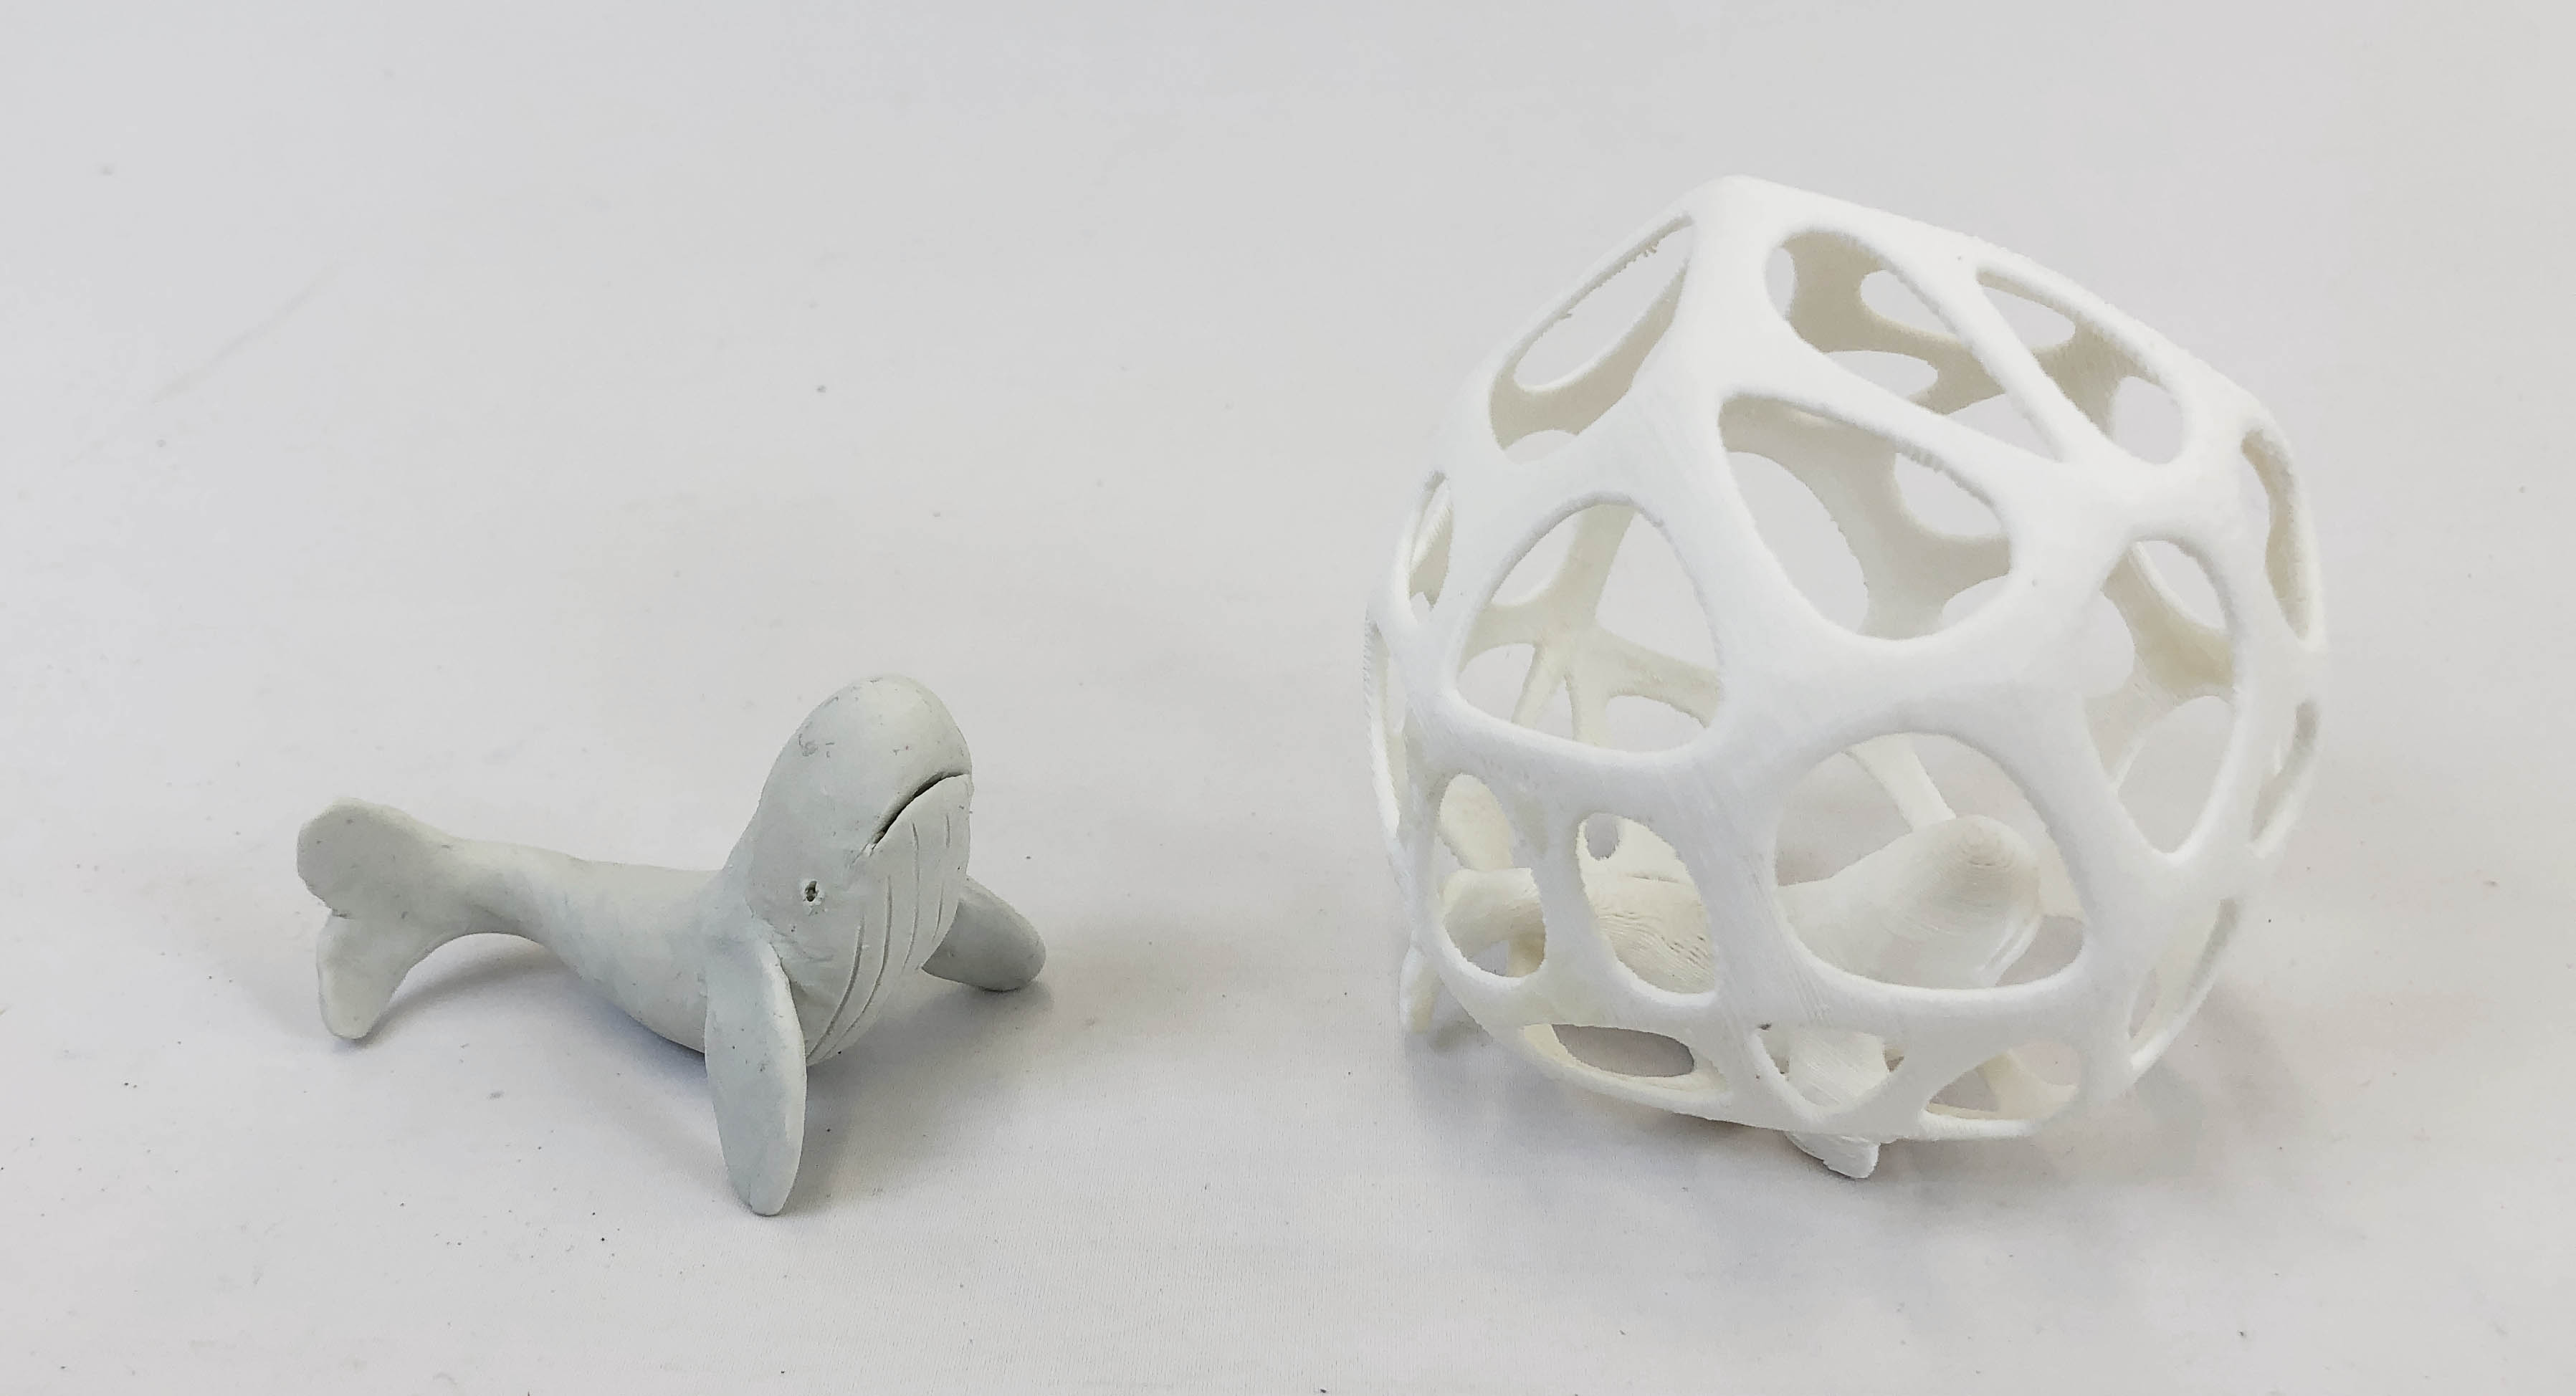
Original clay sculpture was scanned and printed. It contains the original form but is crafted in a different material(ABS), scaled, and captured in the bubble, which cannot be carved by hand.
Here, I want to quote Heideger from his writing 'The question concerning technology'.
"...Techne is the name not only for the activities and skills of the craftsman, but also for the arts of mind and the fine arts. Techne belongs to bringing-forth, to poesis; it is something poietic."
3D printer
- Stratasys F170 (ABS+soluble support)
- Creality CR10 (PLA)
- Sindoh 3DWOX
3D scanner
- Einscan-SP
- iPhone
Rhino+Grasshopper
Creality Slicer
EXScan
Polycam
Files