Kim
0
1
10
11
100
0101
0110
0111
1000
1001
1010
1011
1100
1101
1110
1111
final
I named this stool "Shape Magnatic" but what it's actually doing is Kinematic coupling. Zain explained me what I am trying to do.
Kinematic Couplings are mechanical structures that are often used in precision fixturing applications. Machines such as robot arms can grab tools by precisely deploying two machine parts together in high precision.
As you can see in the picture below, typical kinematic coupling uses three balls to meet two points each, with a Hertz contact interface. It gives high precision up to 0.01μm.
I'm trying to make a stool/side table that can be coupled with low precision but high stability.

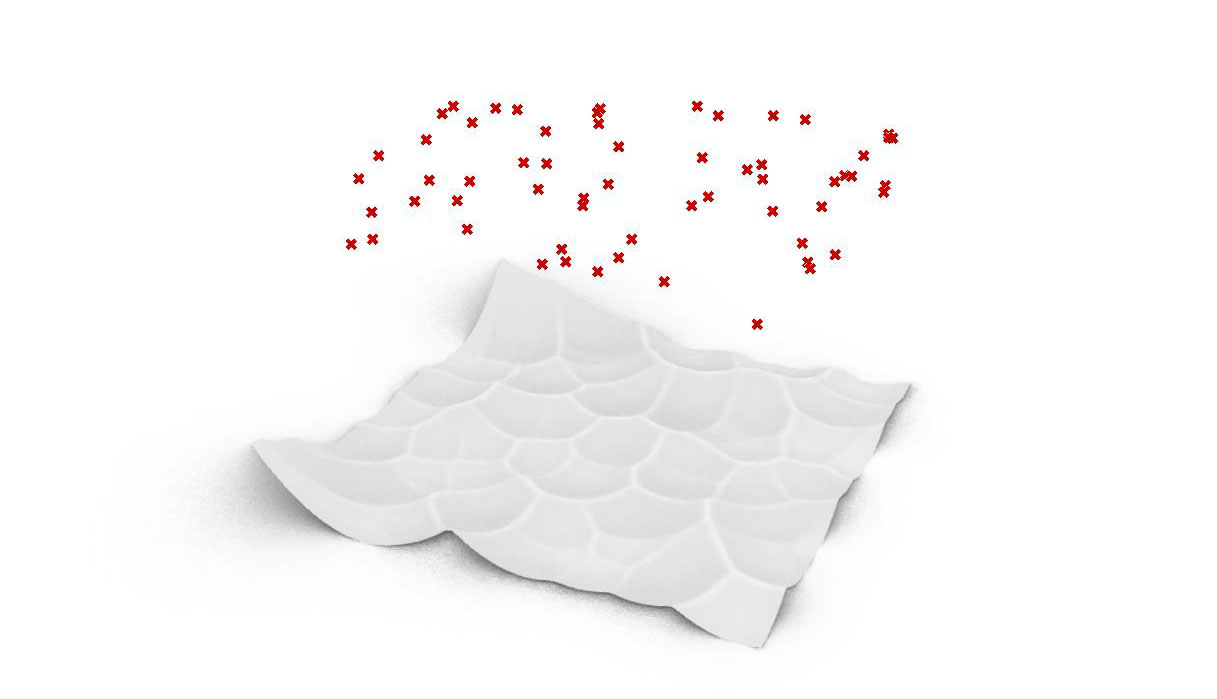
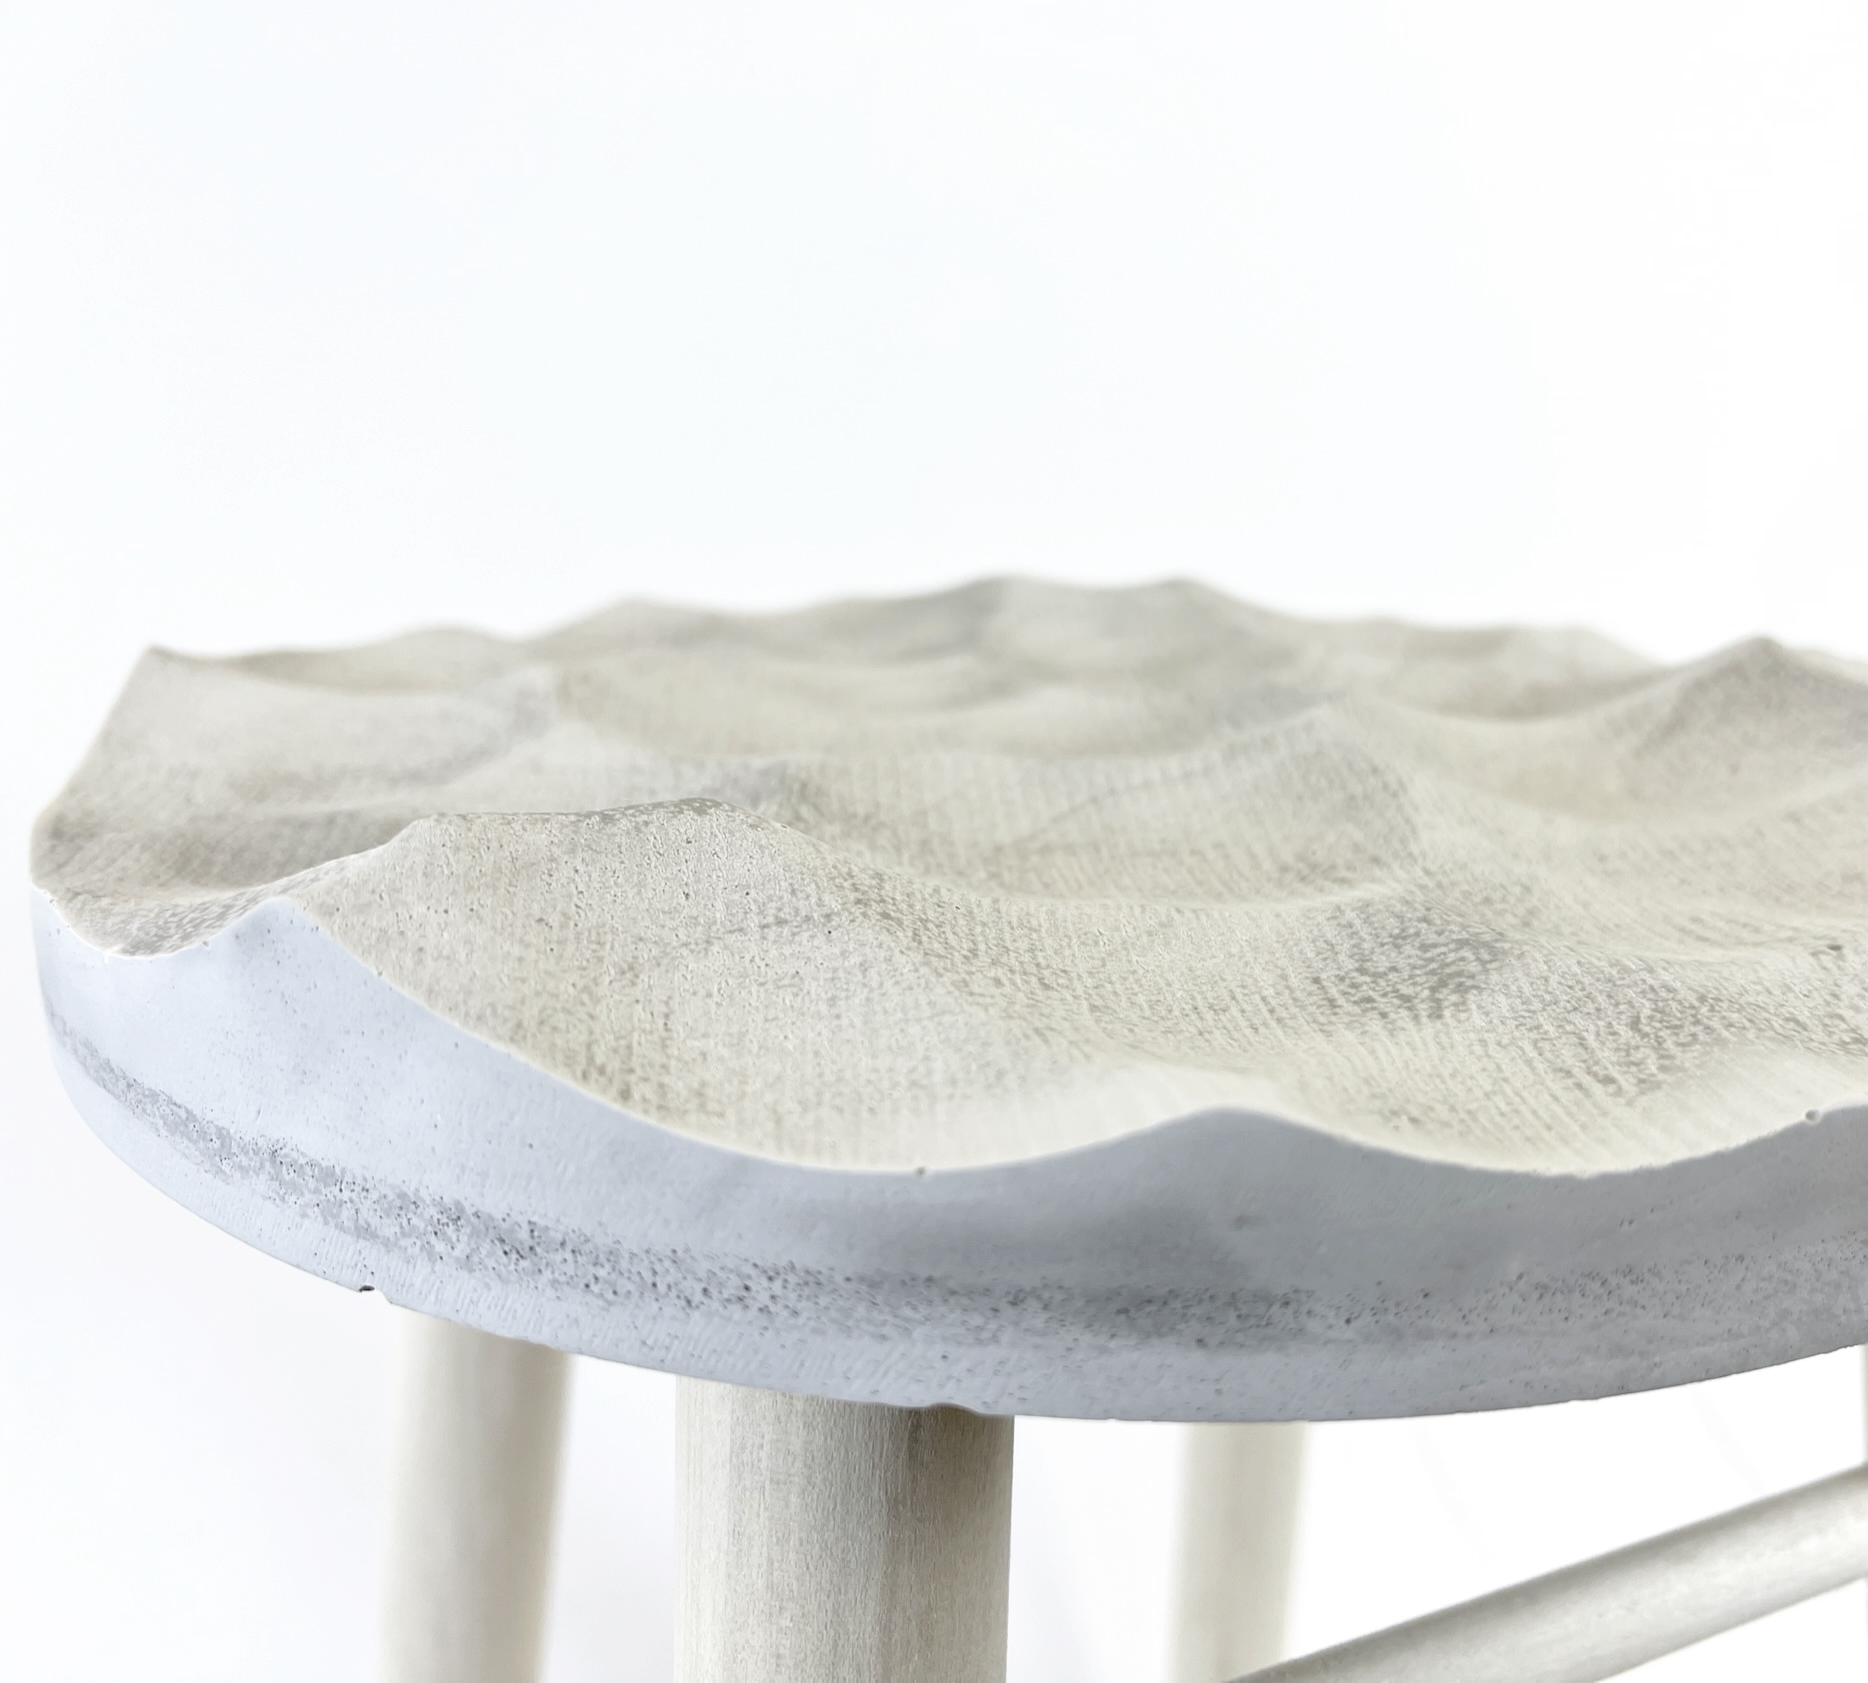
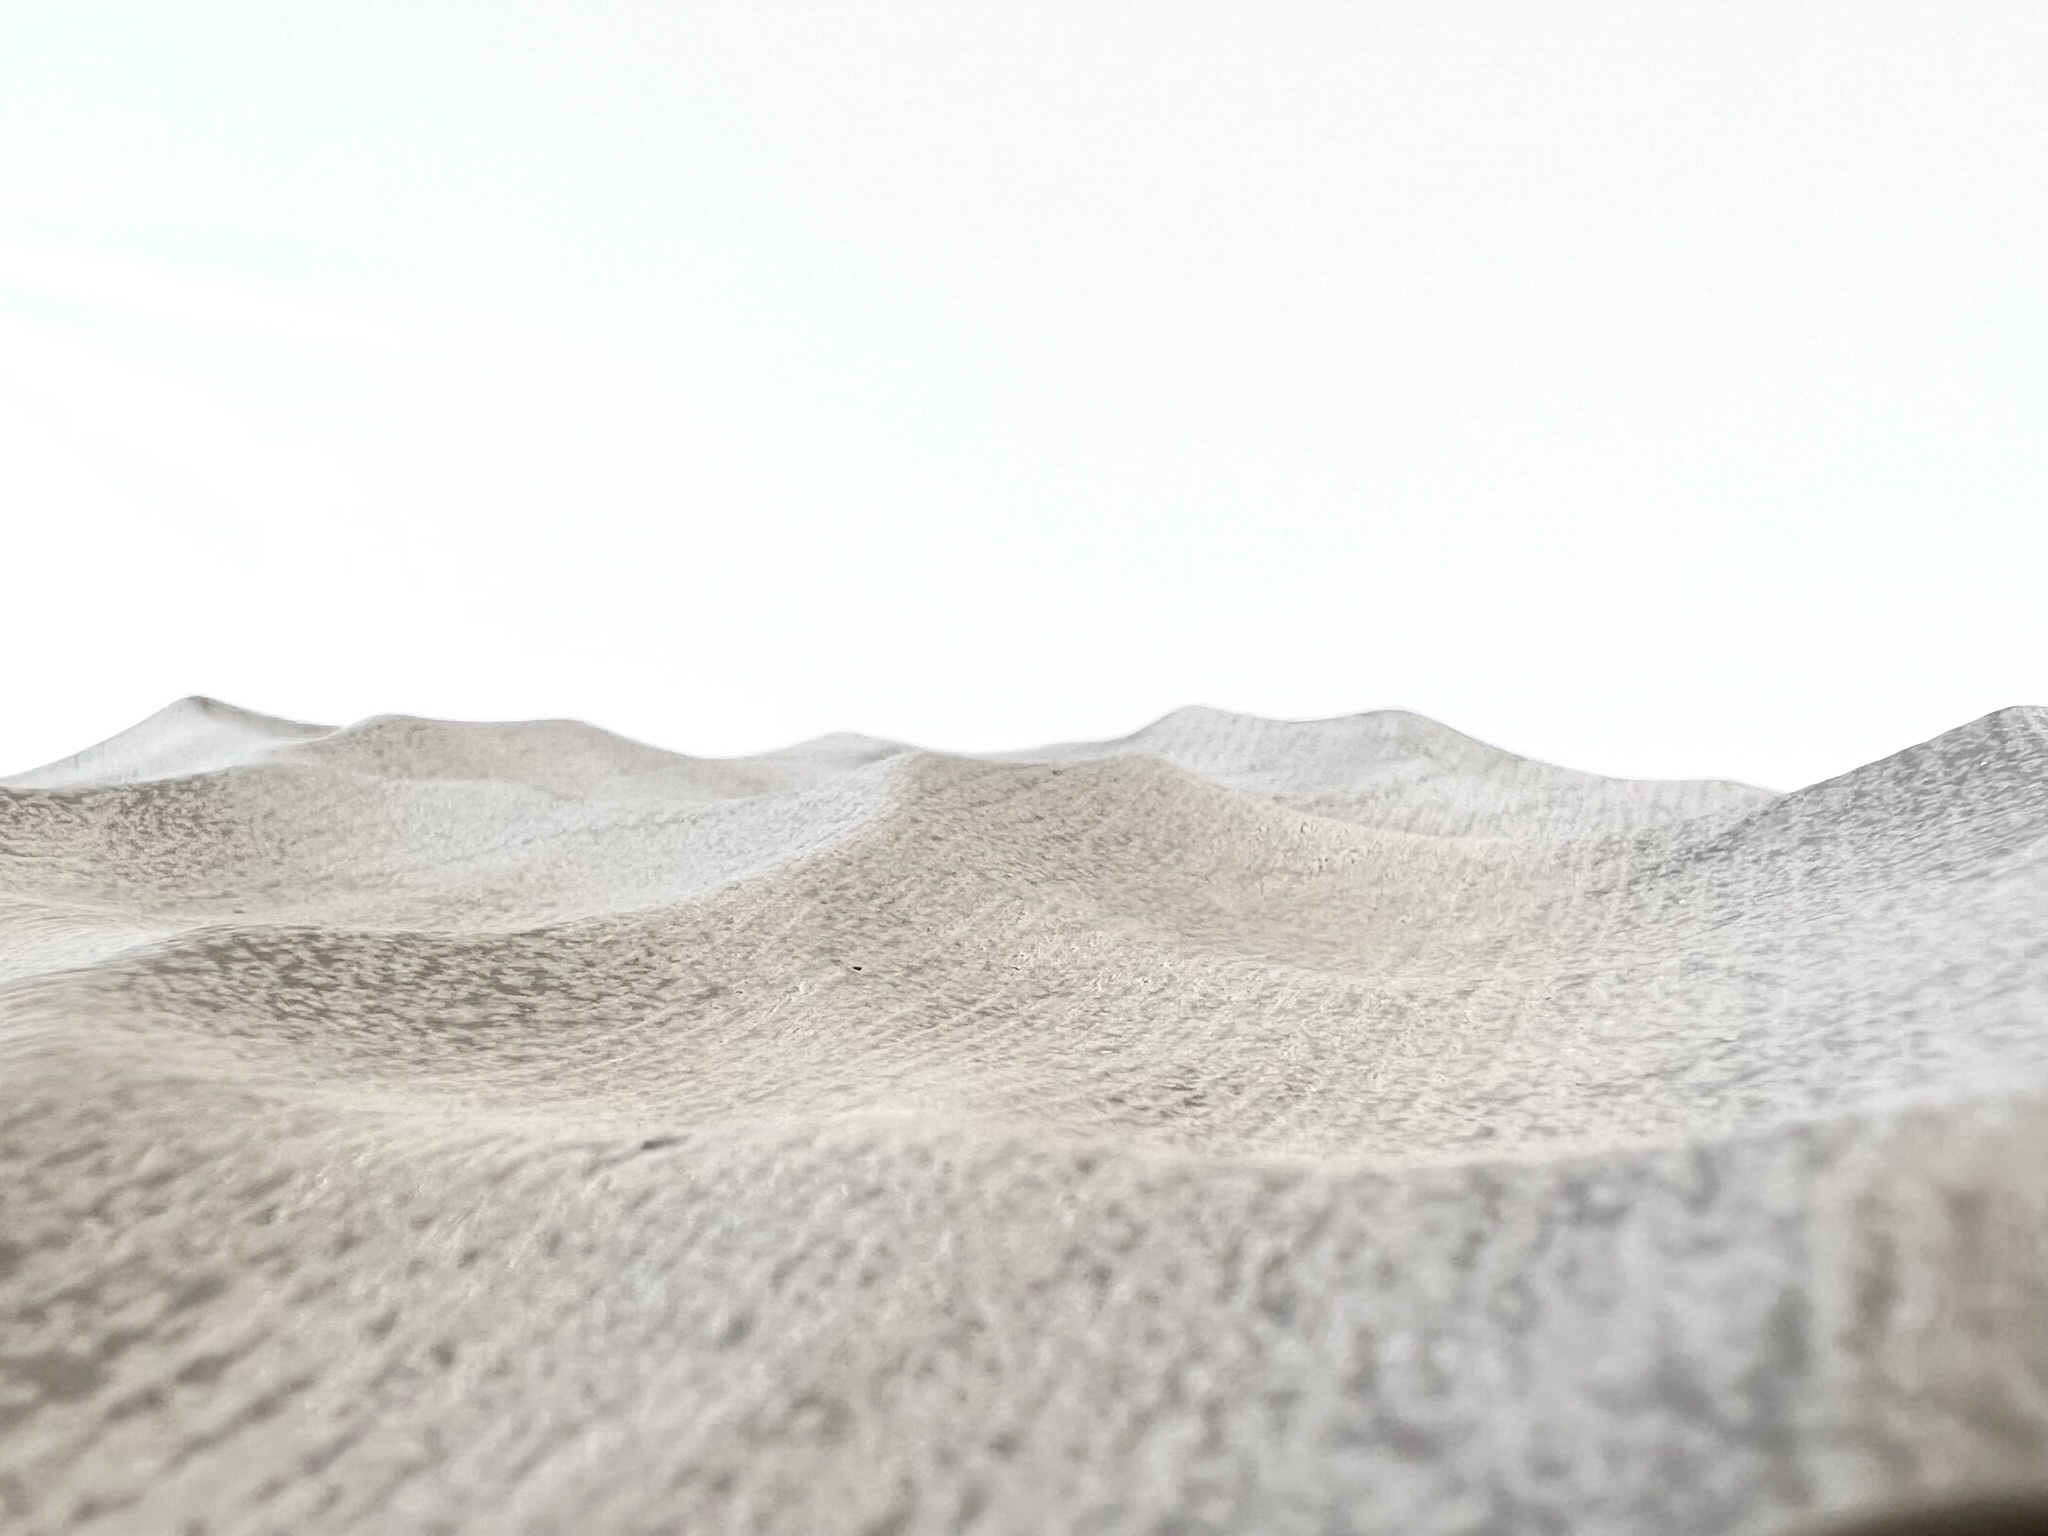
To make a highly stable and low precise kinematic coupling system, I made many random points that will shape a curved surface, with many contact points and surfaces to make it more stable.
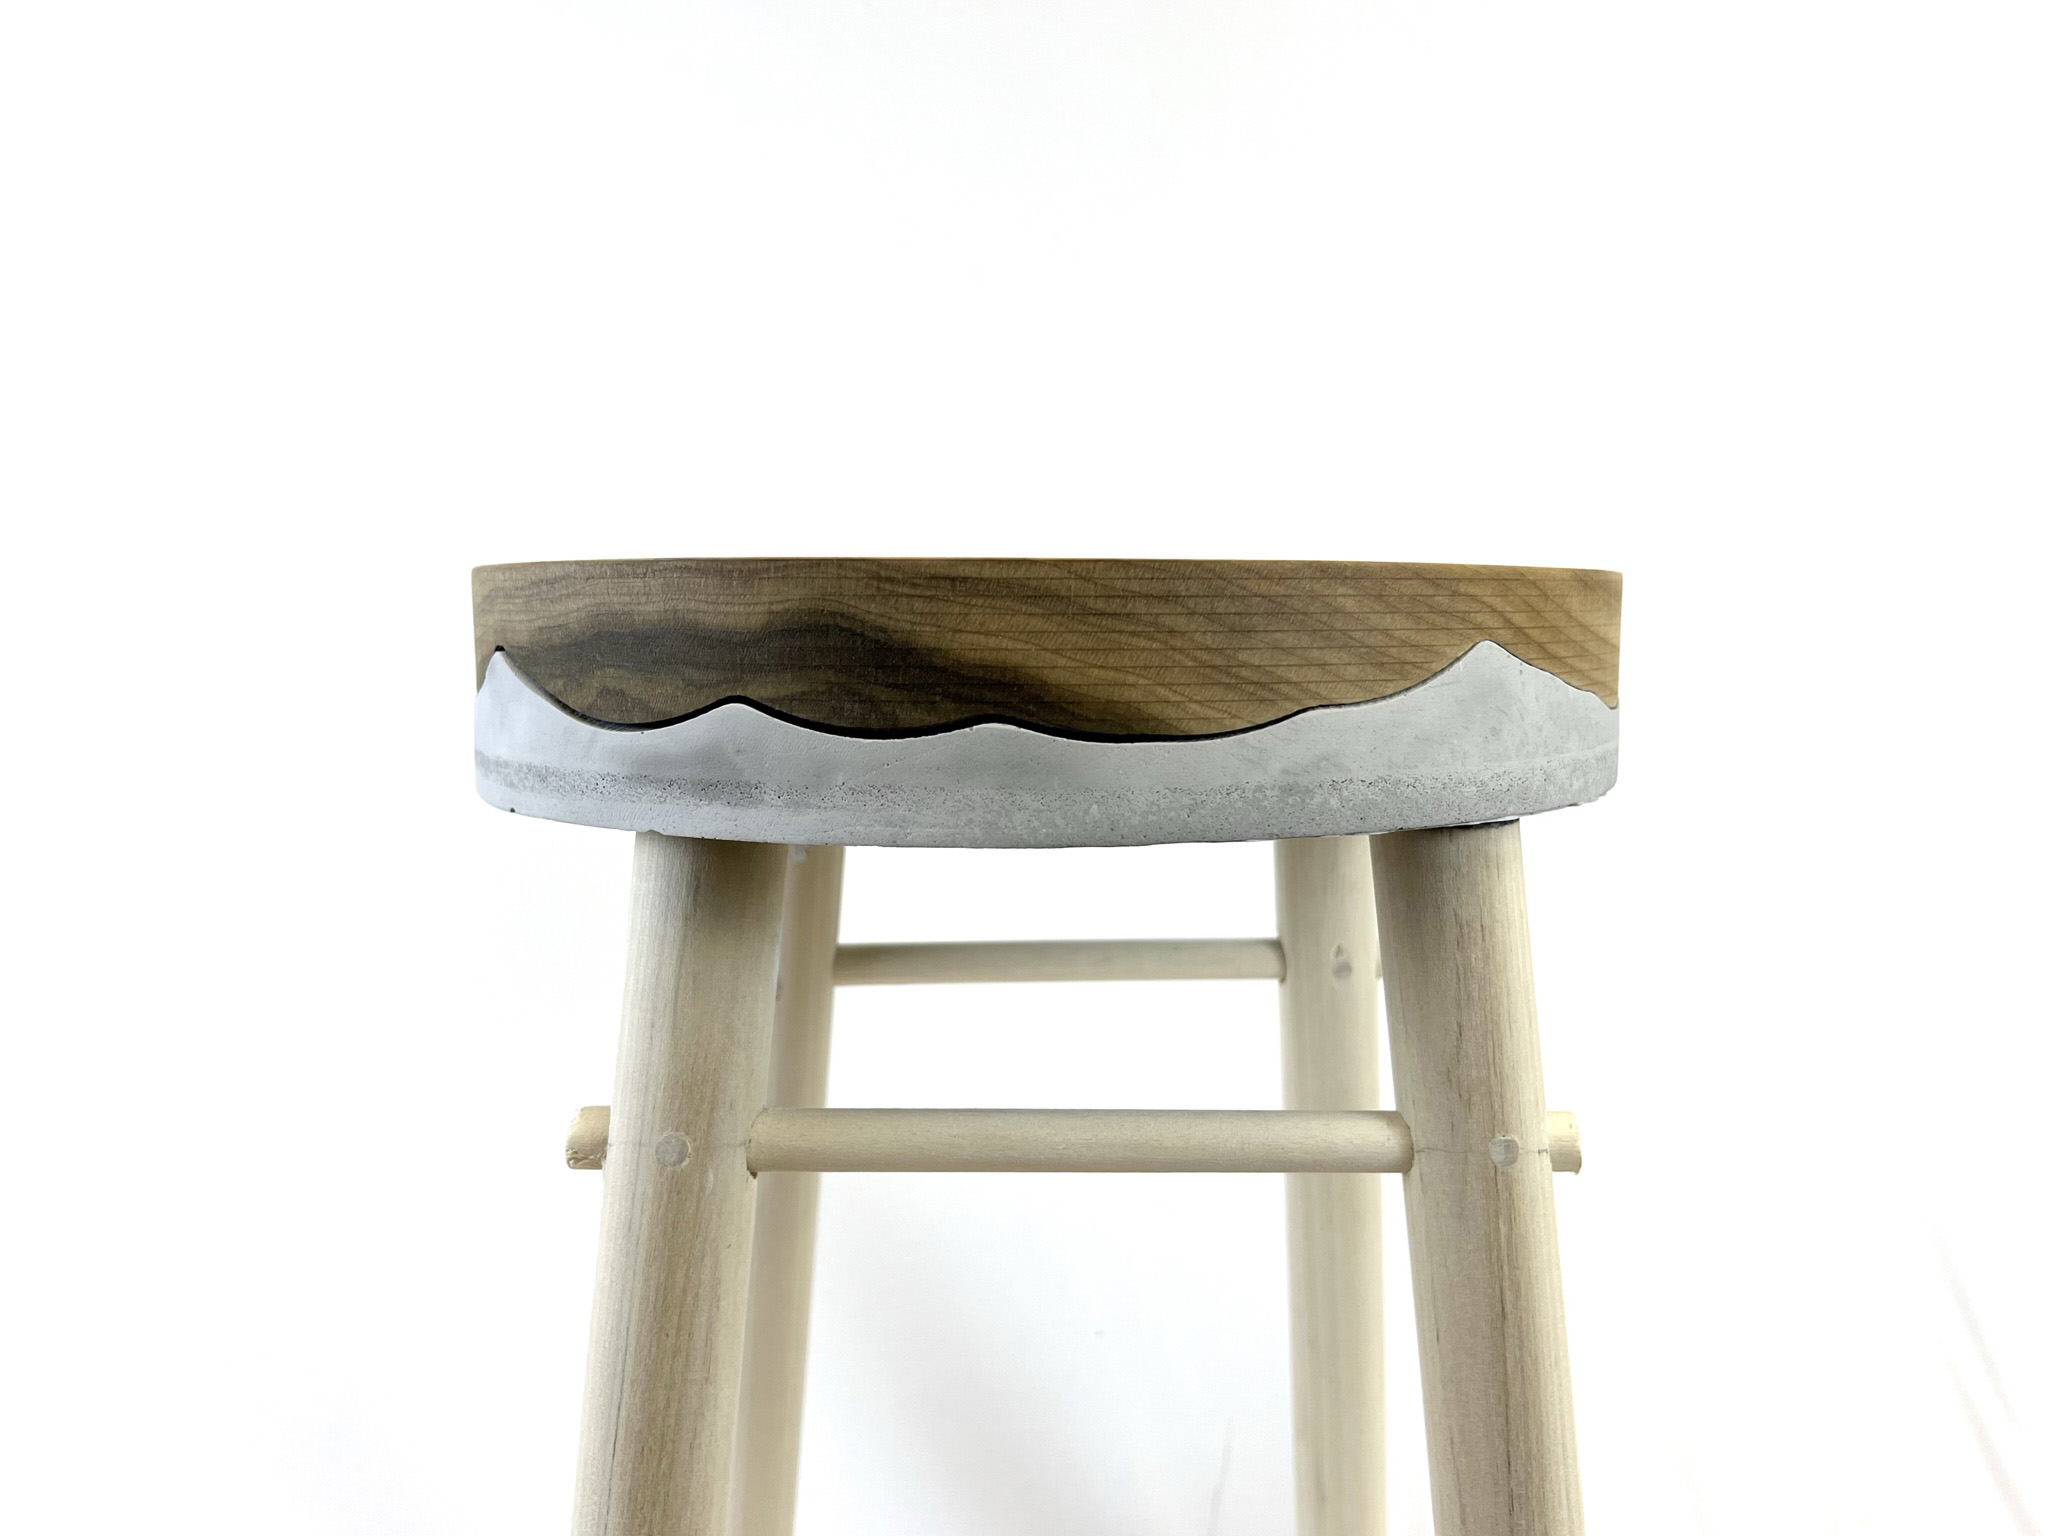
Then I made this into a round stool form with top and bottom parts. I milled both parts because I wanted to use the mold for another piece of furniture.
I used a C.R ONSURD CNC machine to mill Poplar wood, which is soft enough to mill in a fast feed.
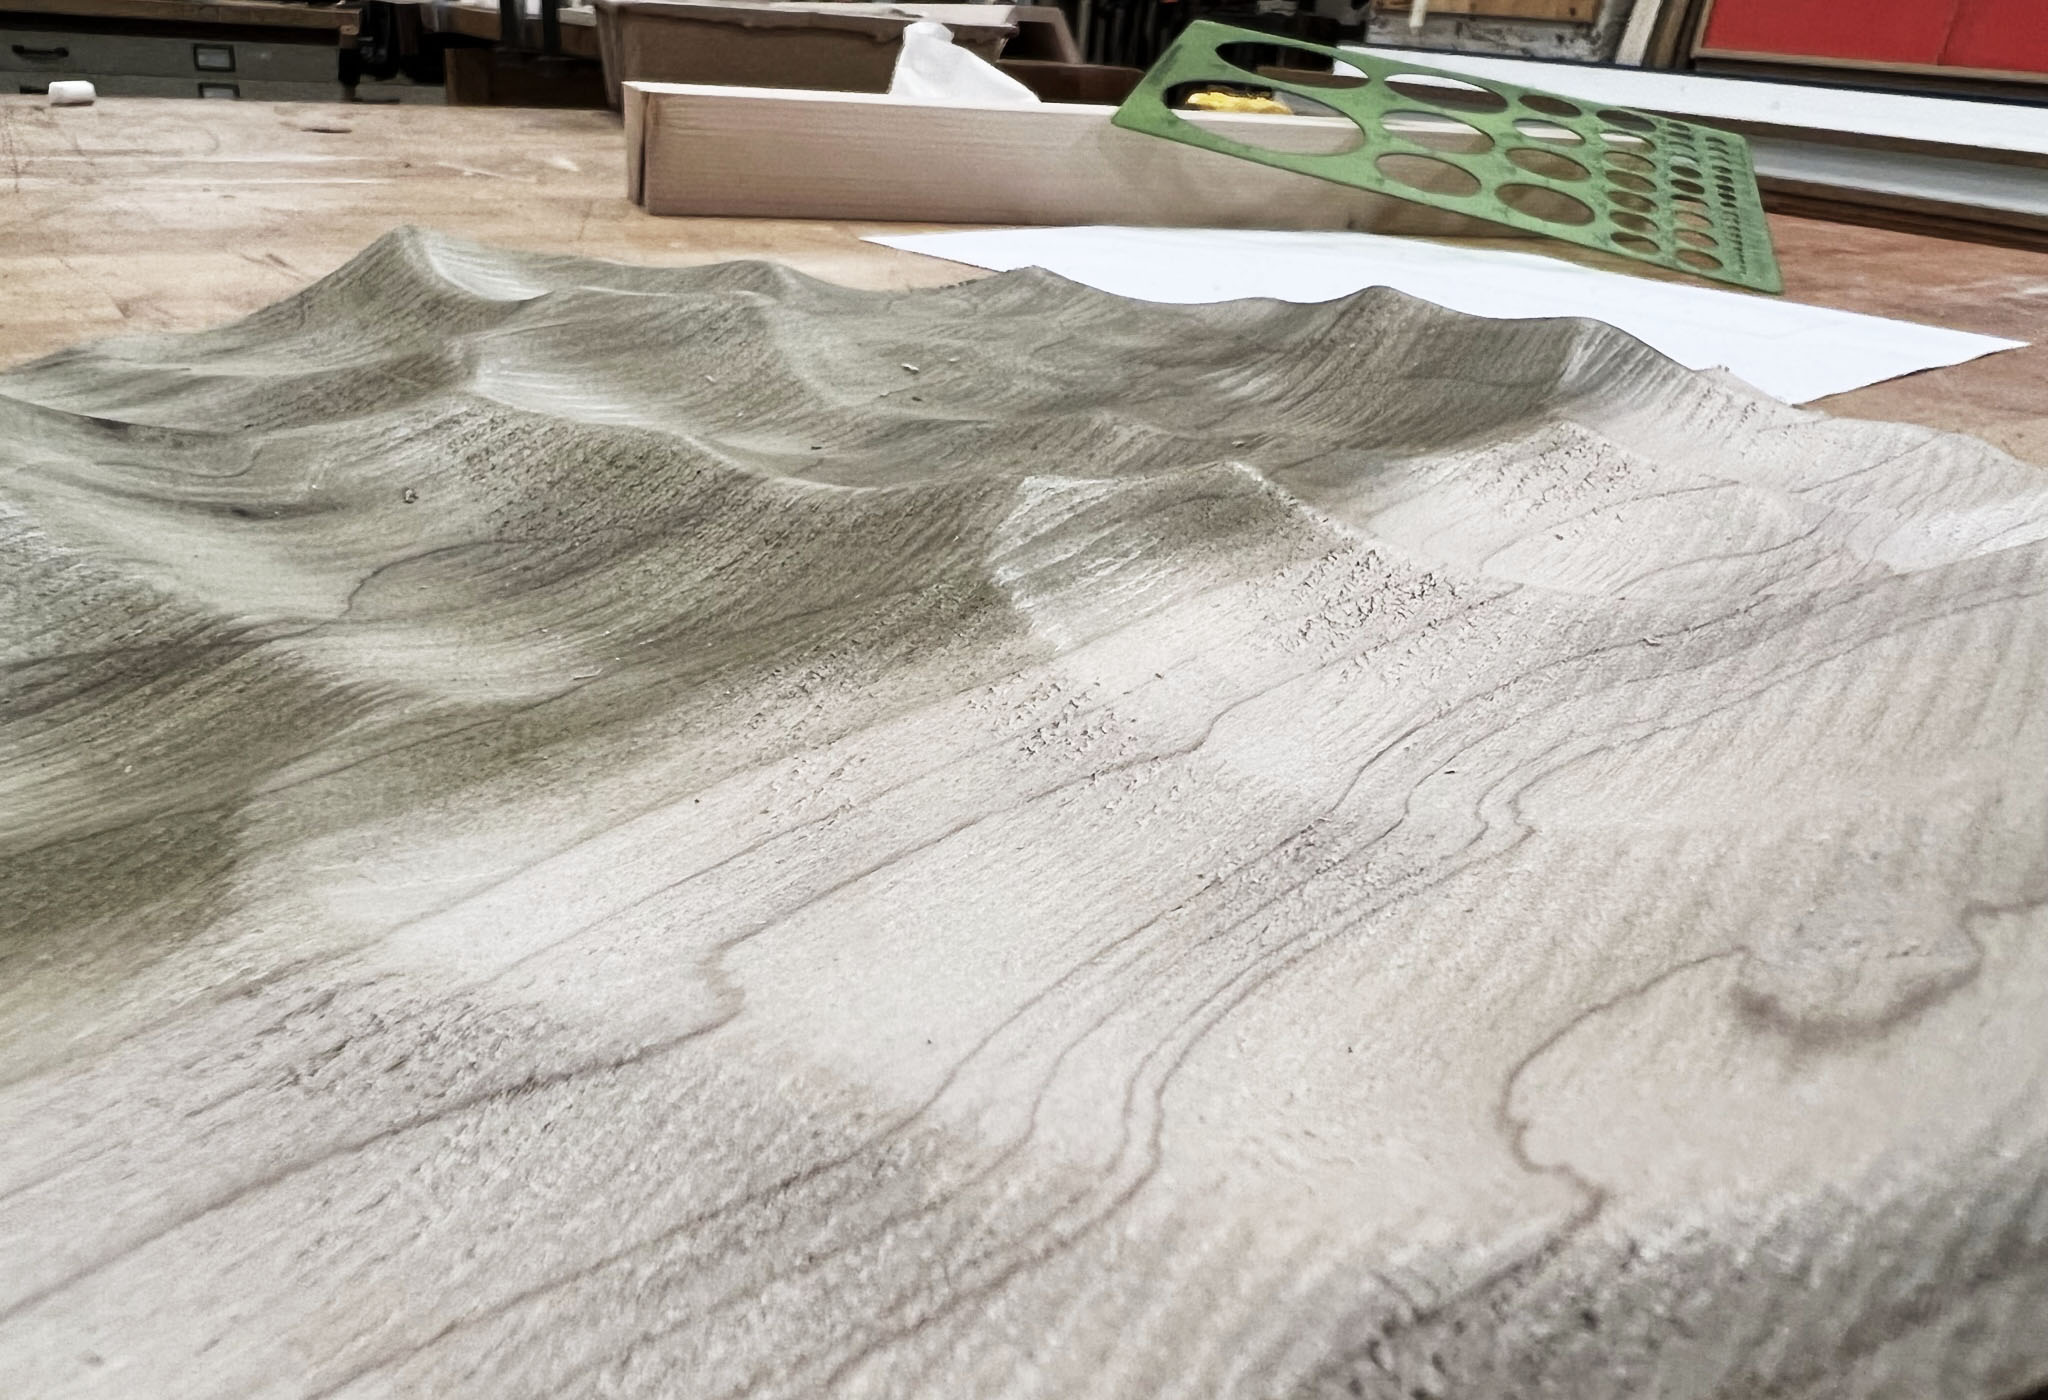
I made a complicated MasterCAM file and G-code that takes hours to mill. Chris suggested I change my milling to little rough, but it can be done in less than 30 minutes. I was worried if the surface would turn out smooth enough, but Chris was right. The result was good enough. I want to try a different path that leaves a more interesting milling path or reduce step-over small enough not to see any milling path.
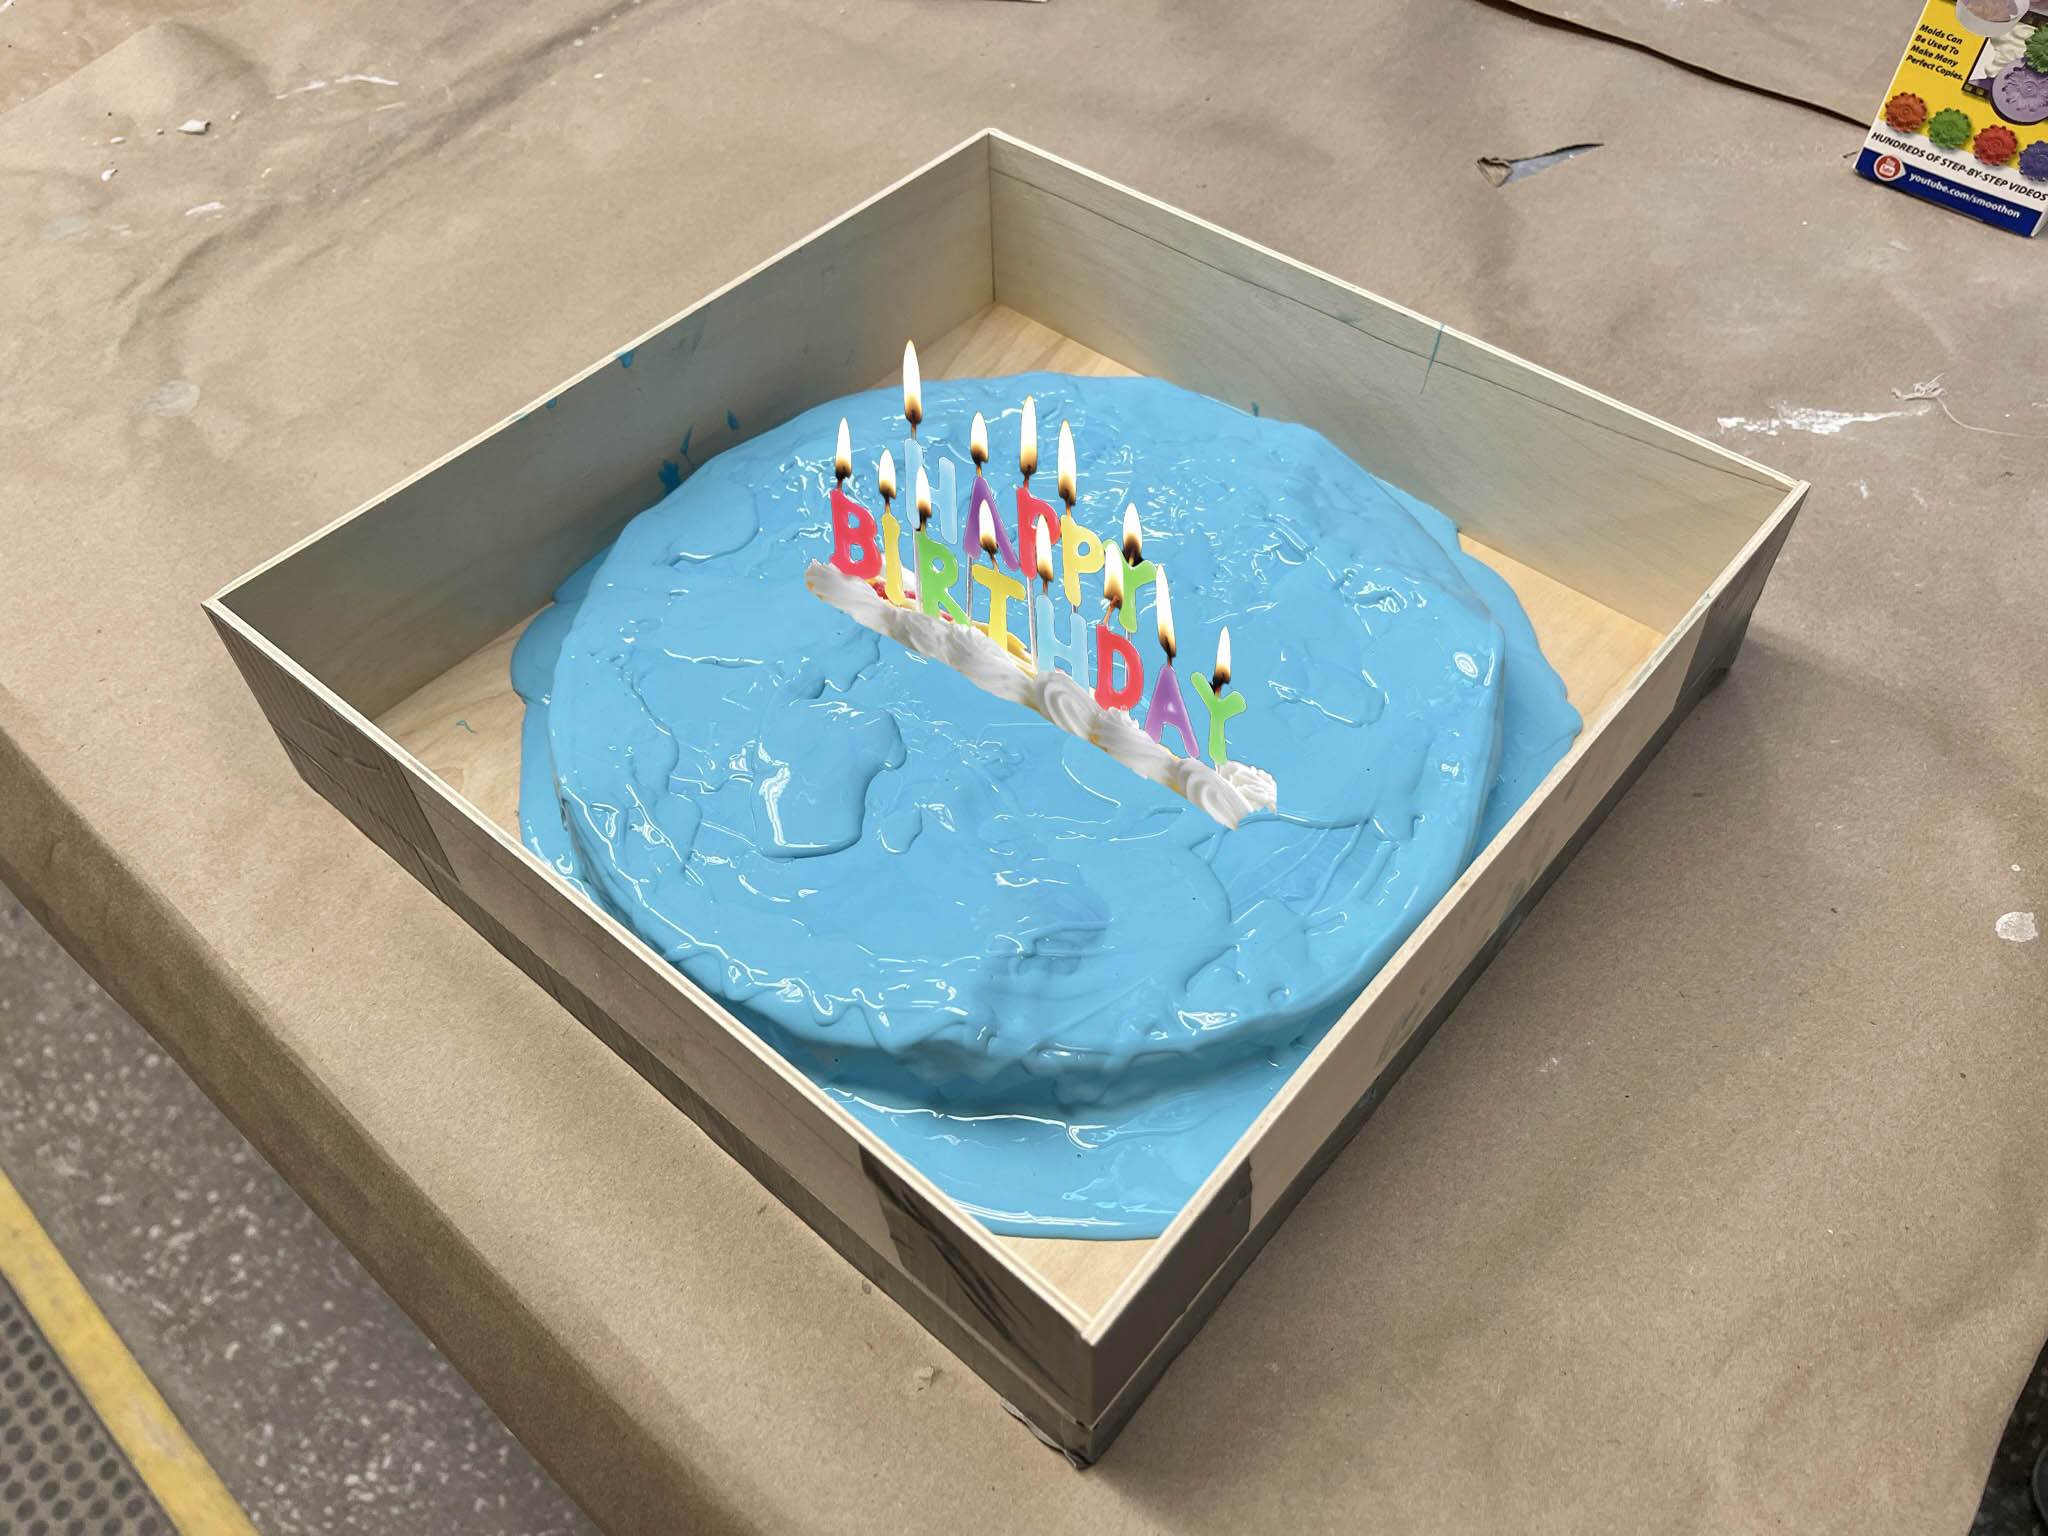
I made something bigger than it was supposed to be. I didn't want to waste all oomoo that everyone needed to share, so I talked through this to Gil and made a thin surface to make elastic oomoo mold and used plaster to secure oomoo to keep its shape.
The first step is to make a box around the object in the size of the mold. Then I poured oomoo carefully to the surface of the object. This surface will help me take out my cast easier. This method saves a lot of material compared to filling the mold with oomoo. The surface cover turned like a very unhealthy birthday cake.
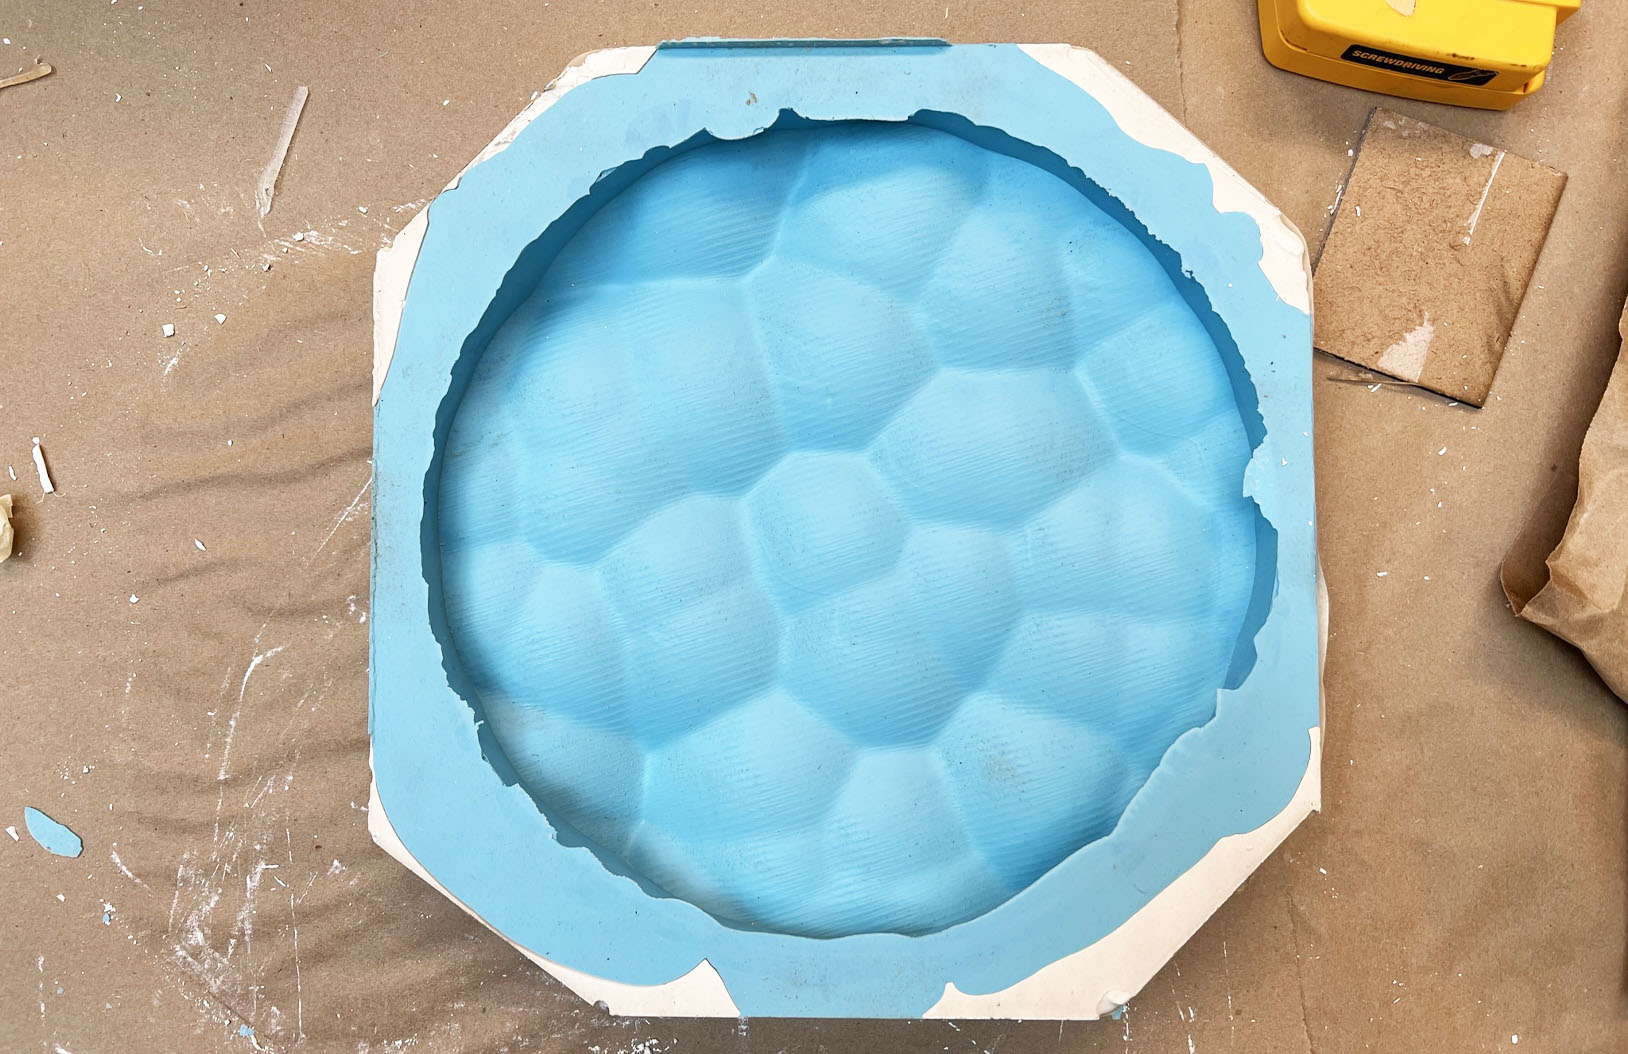
After oomoo got secured, I made a divider for the corner to use less plaster for the mold. The mold came out pretty nice, but I had to break the plaster mold in half to take the positive mold out. The plaster part is the jig to hold a thin oomoo surface in shape. Therefore, it didn't impact the casting quality.
The mold is ready! I made a stool leg separately to cast with the stool top. It's not captured in the picture, but I put meshes inside the cast to reinforce it. Also, I put a screw to the stool leg to make a stronger connection with the casting part.
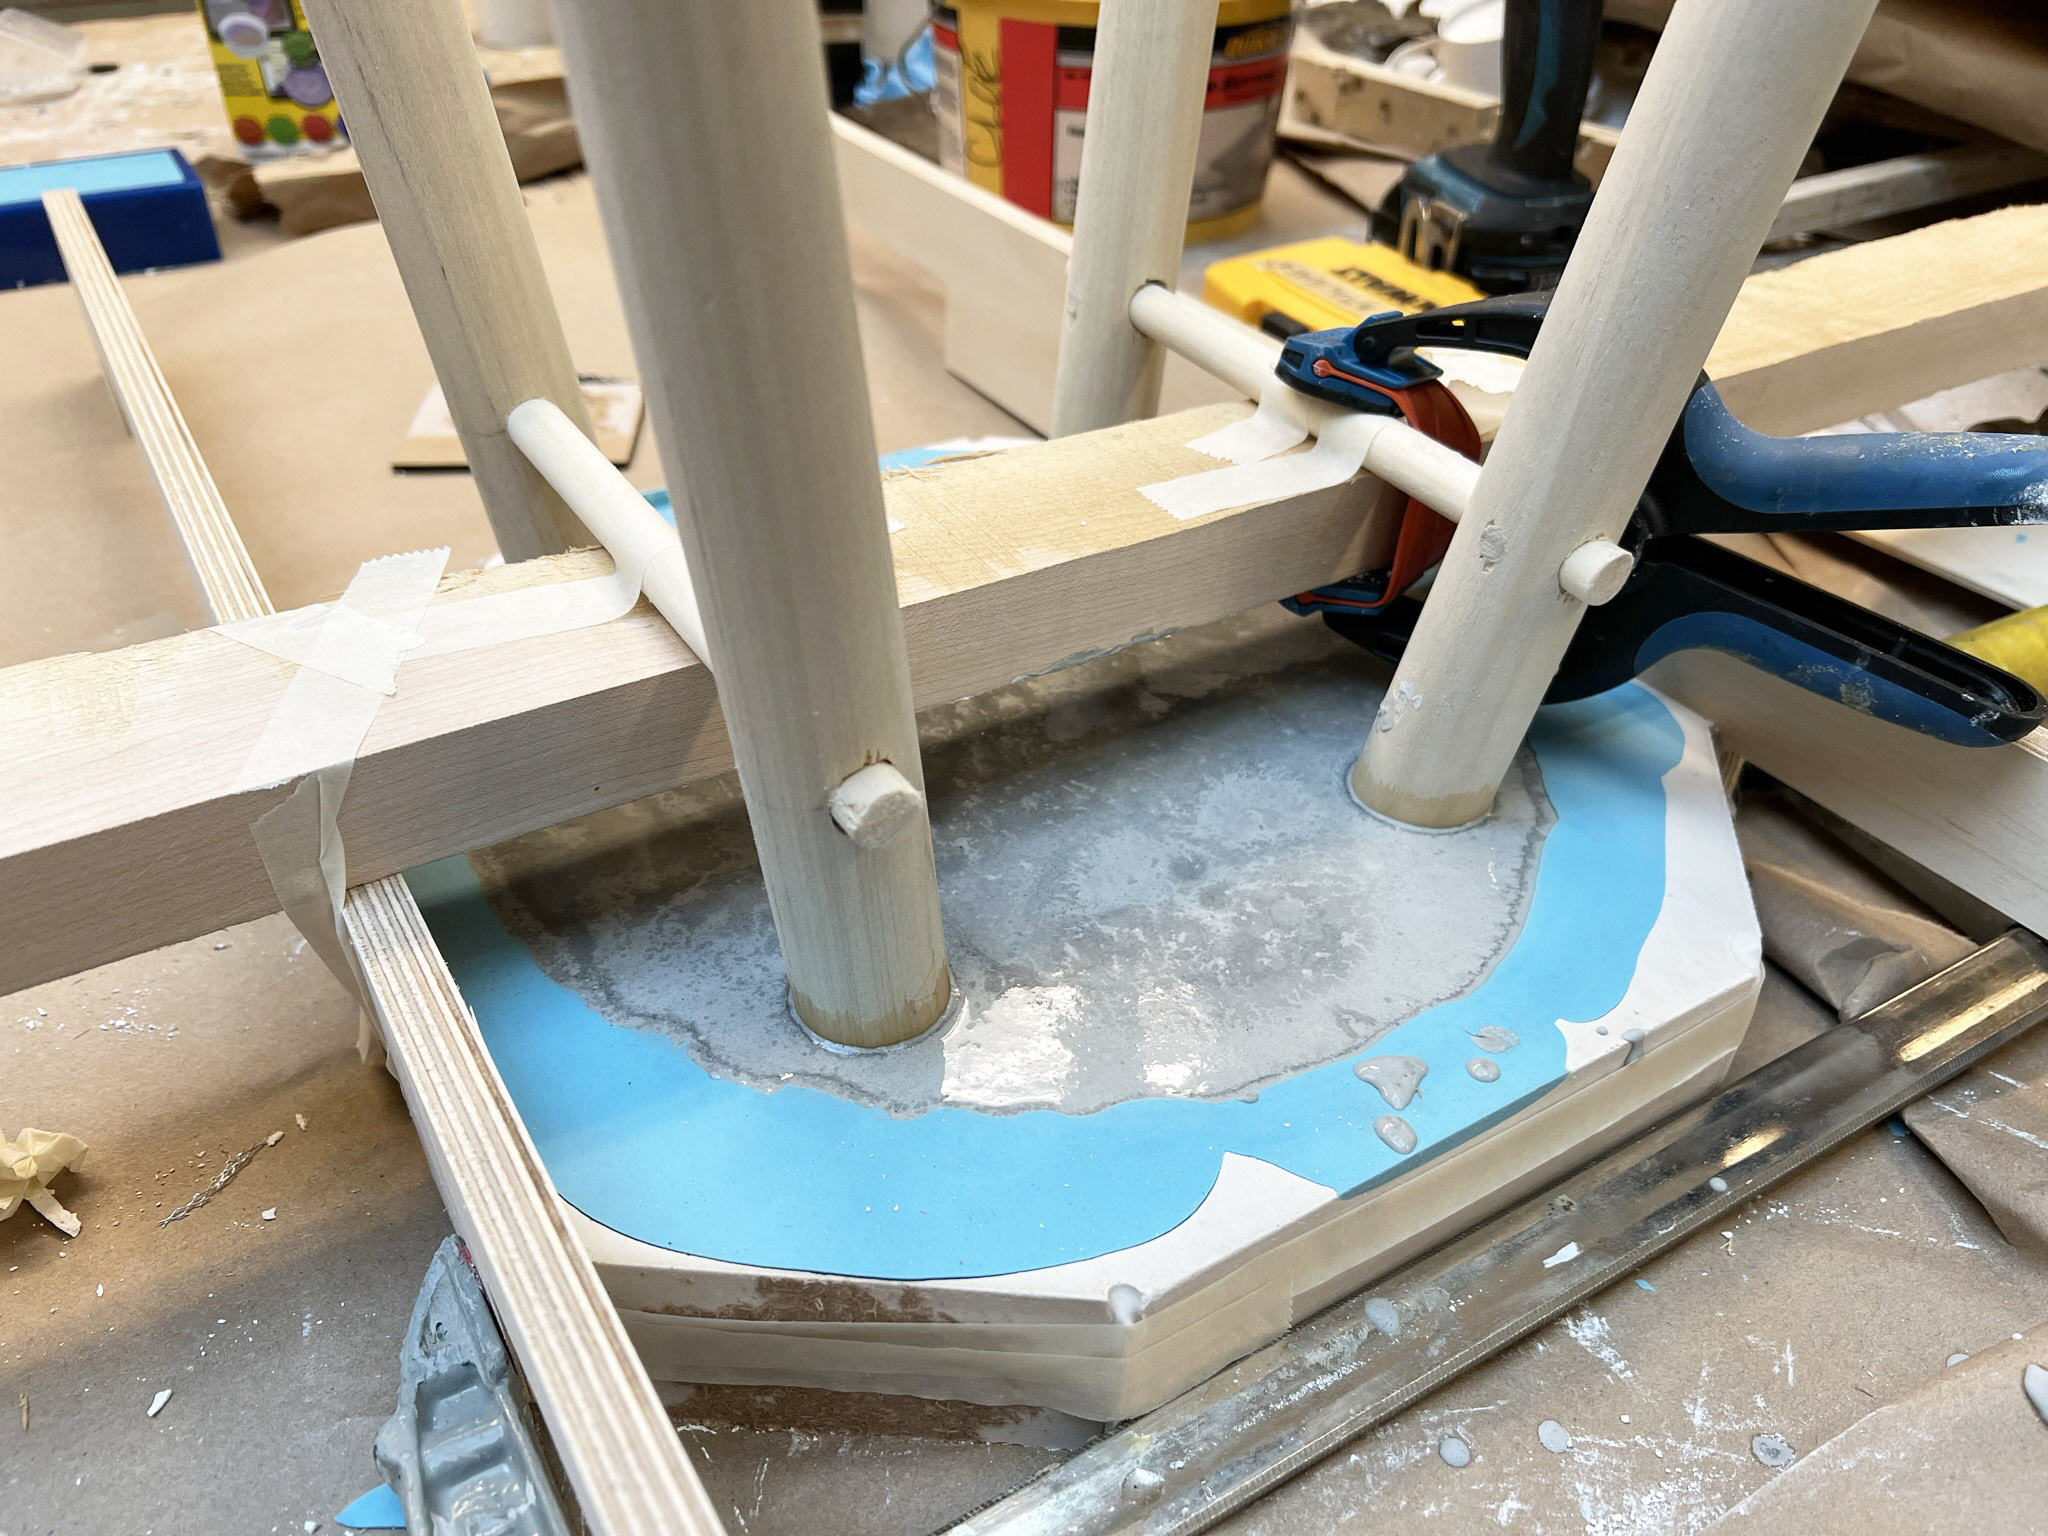
I clamped another jig to place the stool leg parallel to the stool top surface. I used Rockite for the cast, which secures fast and is stronger than the plaster. (Rockite: 4,500psi, Plaster: 2800psi) The metal wire that I connected four legs diagonally reinforces the structure of the casted part.
To use as the side table, you can throw anything from your pocket to here. it won't let your keys, wallet, coins, and airbuds slide and fall.
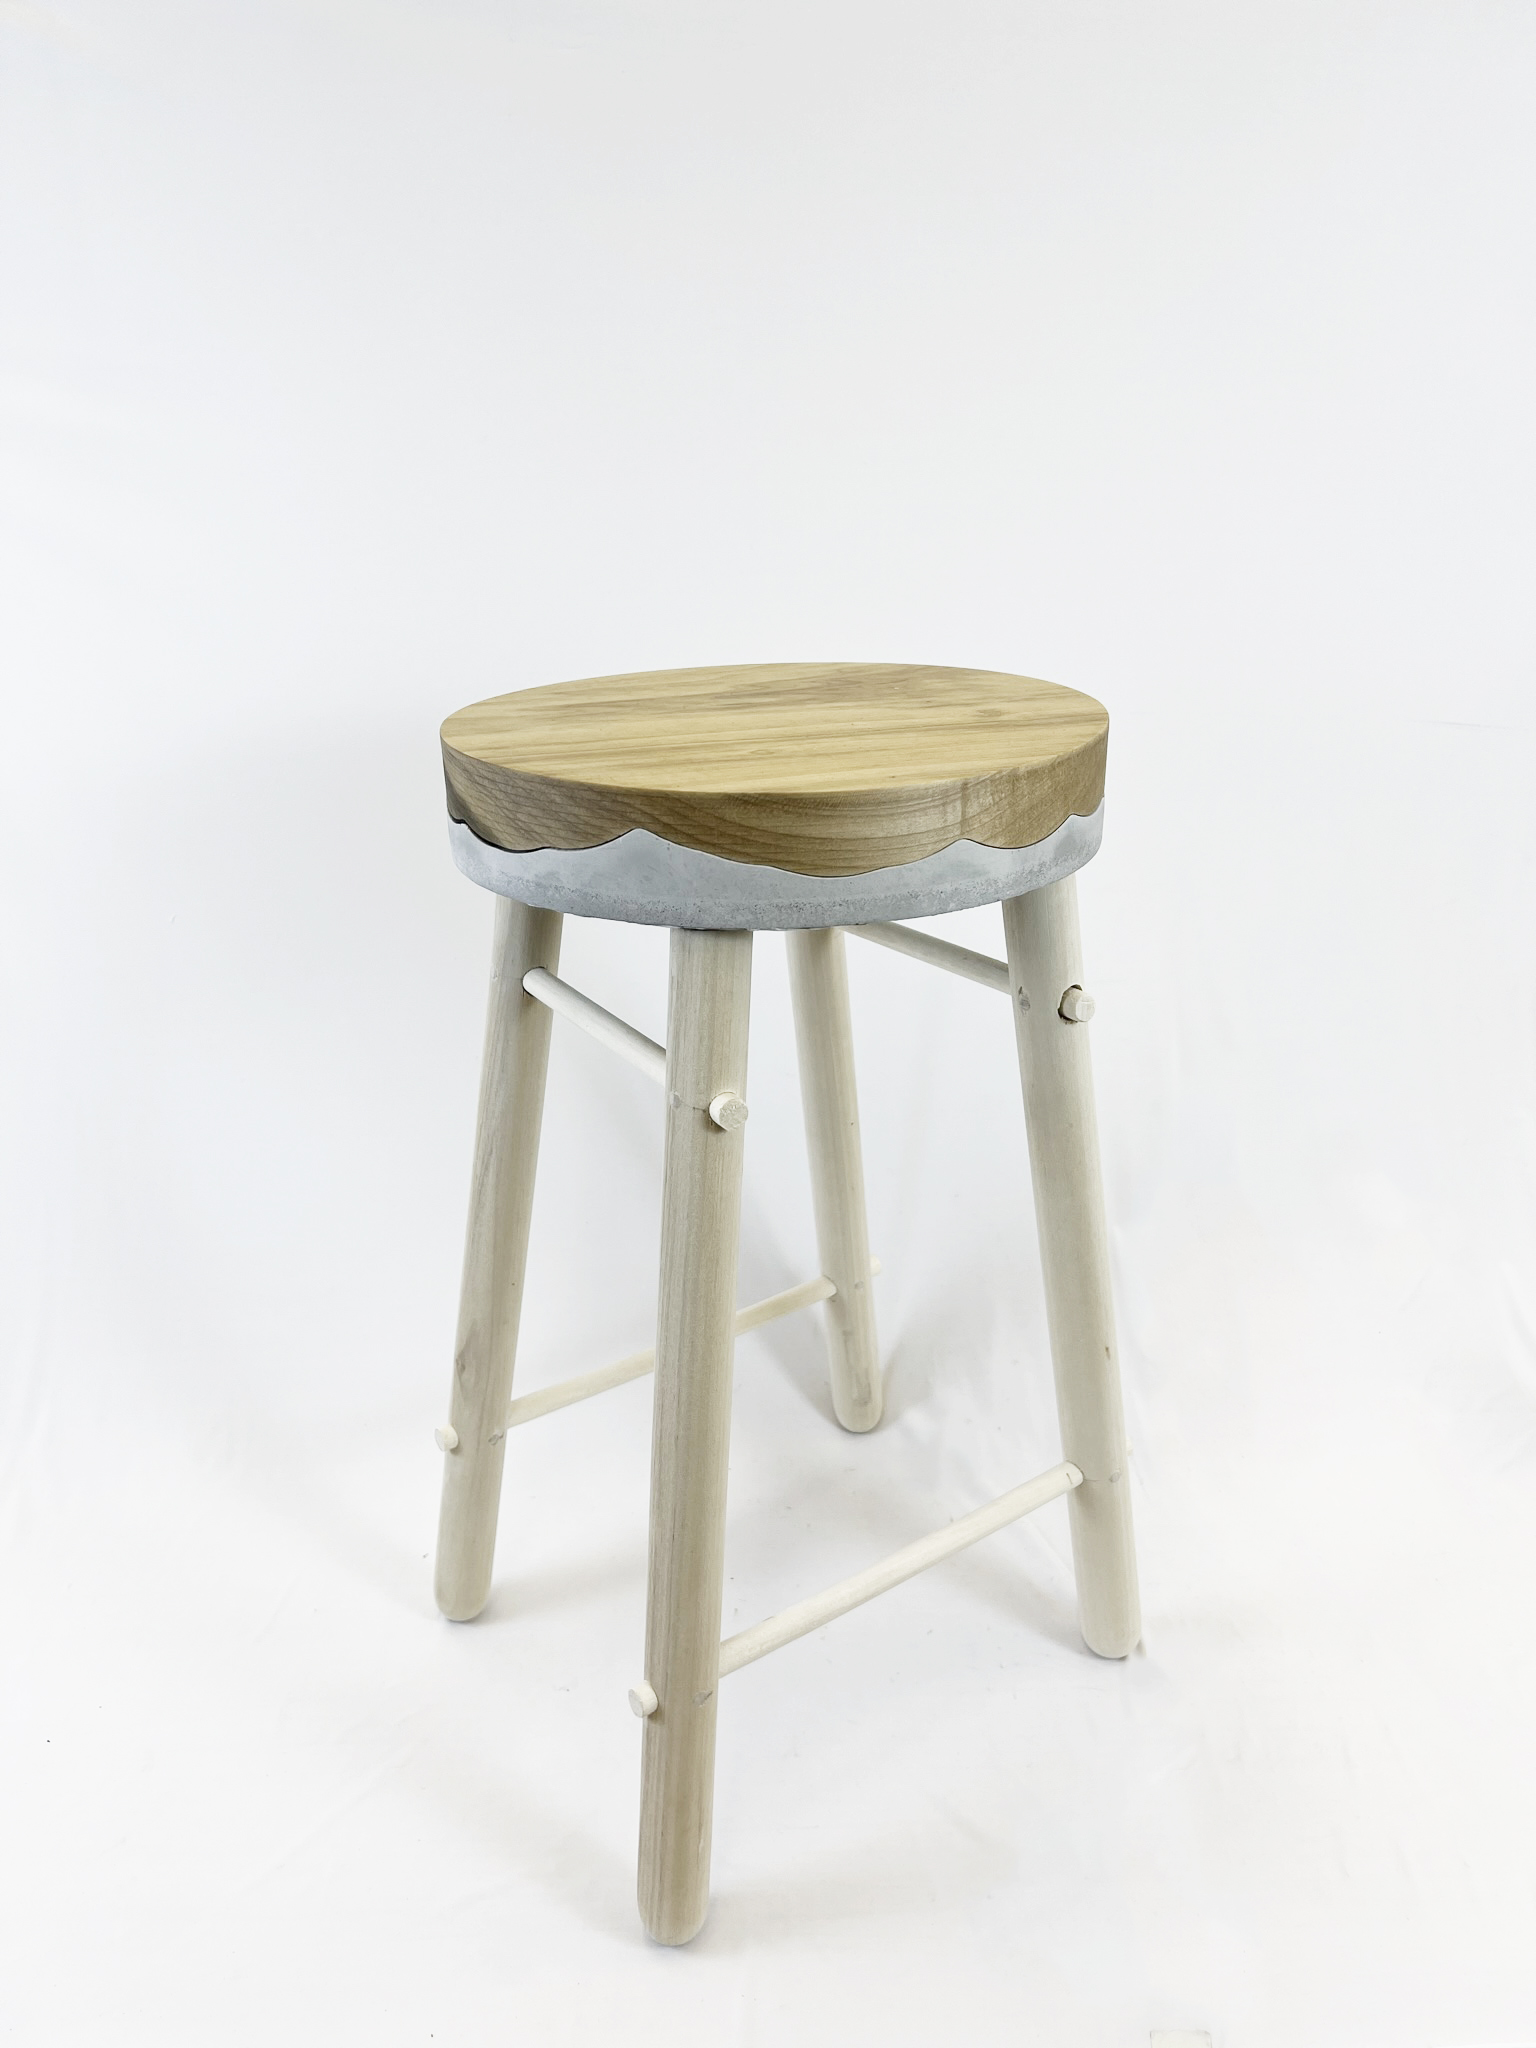
When using this as a stool, you can slide and fit the top part on top of the casted surface.
C.R. ONSURD (CNC)
MasterCAM
Rhino+Grasshopper
Files