Week 8 - Molding and Casting
Design mold + Mill + 3-Step Cast
Motivation
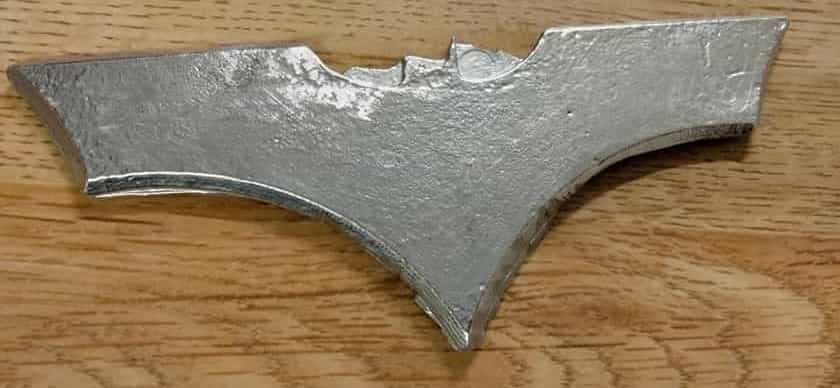
I'm Batman! ... No, don't believe it? Ok, me neither. But I am a huge fan. However, that really wasn't the point of this particular bismuth alloy casted batarang. In my final project, there is a nose bridge that allows people to adjust the mask to the shape of their nose, and typically these are malleable thin sheets of metal. I wanted to see if I could cast one, but rather than create a boring nose bridge, I figured I'd make something else that was thin and flat (more on this below) to see if the casted bismuth can deform and be machined properly at that thinness.
Planning

We used a 3 stage molding/casting process. Why? We wanted flexible molds to avoid certain problems such as trying to pull out a rigid object from a rigid mold. Therefore we first mill our object surrounded by some walls so that we can pour a flexible material into it and retrieve a casted mold. Then we pour our desired material into said casted mold to get our final object.
The cad was pretty straightforward from here. I needed to cad my model directly (not the inversion as it would be in a 2 step modling/casting process) and put it in my stock material which would provide the walls for my casted mold. The design was not parametric to save time but actually came back to bite me later when I had to readjust the size of the batarang when I realized I needed more offset than I realized. You need about 1/4" between the wall and your object when milling with a 1/4" end mill and since I was casting a mold (not the actual object) I needed another offset to account for the soon to be casted "walls" of my mold.
The software I used to cad is FreeCad and my step file can be found here
Milling
We use a wax for the base stock because it is easy to mill. We used the shopbot as we did in week 4 with minimal adjustment to the cam. I believe the adjustment were to the spindle speed (12,000 rpm), feed rate (200), stepdown (0.2), and ramp type/angle. This makes sense for the most part since you can go faster and cut more with wax than OSB because of the difference in shearing properties.
Thin features as usual get damaged in the milling process. One of my bat ears were slightly clipped so anything less than 0.05 in I would say is a no go. Other than this small hiccup, the milling went smoothly.
Casting (Oomoo)
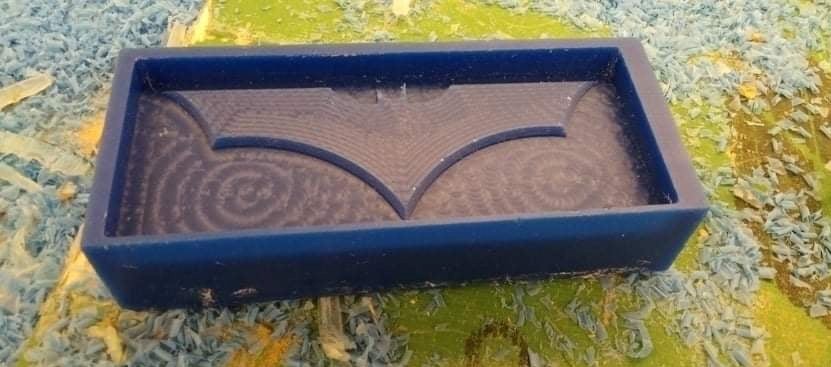
Once the "mold of the mold" was done came the casting in Oomoo - a silicone that is safe on skin, with high thermal properties (melts around 500 F), cheap, and environmentally friendly (once casted). The process is super simple:
- Pour water into cavity and pour into a seperate cup to get volume of mold
- Split water into 2 equal amounts and mark slightly above the water line because excess material will be left behind
- Pour out water thouroughly (use air gun if needed) and add mixing agents A,B to each cup
- Pour less viscous material into the other scraping the cup as much as possible (note: this is not a resin so the amounts don't need to be perfectly 1:1)
- Mix slowly (this is NOT some egg wash) to avoid introducing bubbles until consistent color
- Pour slowly at high vantage point while cupping the edge to get a thin strand of oomoo pouring out into a section of your cavity. No need to move around just avoid the bubbles by maintaining the stream and have the pile deposited pool over your object over time
- Wait approx 2 hours (check your mixing cup not your object to see if oomoo is done by checking tackiness and retractiveness)
- Please make sure to close the lids of the mixing agents because the oxidation will cure the materials in the bottle! My cast took a little longer because some of my agents had cured prior to me using them (yep, for some reason it took longer not shorter dueto the pre-cured materials), but it turned out pretty well with little bubbles. My image of my mold will be up later. Thank you.
Casting (Bismuth Alloy)

HE NEEDS SOME TALCUM POWDER!
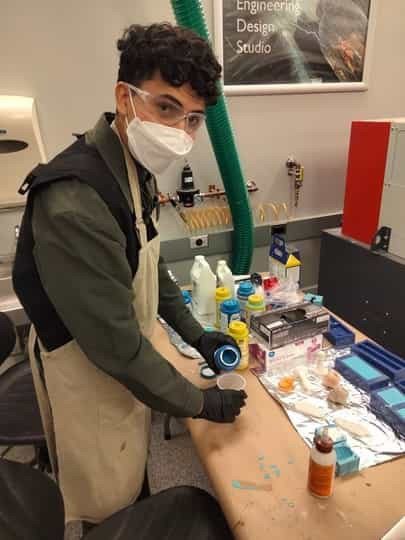
Finally, comes the cast. I wanted to use the bismtuh metal allow (traces of antimony) so use oven to heat timble of bismuth pieces to 415 F and melt it. Make sure to first coat your mold with talcum powder to help with cohesion of metal otherwise you will get a porous finish like the image above. Wear a face mask, heat protective gloves, and pour carefully using two hands on the tongs. The metal cools within 10-15 minutes. The alloy is very brittle so don't go slamming the finished object on the edge of a table.
Overall, it was a success, but not where I wanted it to be. In my first cast (image above), it was very pourous with a lot of excess material. This is due to two reasons. Firstly, Anthony and I forgot the powder to coat my mold so that didn't help the overflow of the material nor the diffusion. Secondly, my mold was incredibly shallow due to the thinness of my object so open face pouring is unlikely to be the way to go for thin materials. Even after adding the talcum powder and being more careful with my pour in the second cast, I still got a decent amount of excess because I was trying to fill my sharp features (see image at top of page). The end result however is decent. For single part casts with metal, I would recommend adding a layer of oomu on top of the mold to create a seal, rubber banding the slabs together, and pouring the metal through a cutout in the side of your mold as you hold the slabs vertically so the metal can drip down into small/sharp features while minimzing overflow due to the pressure.
Group Assignment
Ok the group assignment is to characterize the different casting materials by looking at their safety sheets and test casts. Basically, avoid eye/skin contact with all products (i.e. wear vinyl gloves, long sleeves, and safety glasses) and work in a "well ventilated area". However, all materials (i.e. oomoo, snadstone, hydrostone) are techincally all safe on skin.
Oomoo (from Smooth-On) is a silicone that once poured gives you about 25 min before it starts to cure (but try to do it in 10 minutes). The oomoo in my exprience doesn't have a 75 min cure time and takes more like about 2 hours to fully cure. Just check the tackiness (stickiness) and retractiveness of your mixing cup to see if your cast is ready. Finally, while the mix is 1:1 by volume, the ratio is quite robust to perturbations, unlike resins. This stuff oxidizes really quickly (about a year without opening, and 24 hours if left open overnight).
The last two I will explain together because I didn't use them, but they are similar --- hydrostone and drystone. Both come in a powdered form and mix with water to form a creamy solution. The ratios are 100:22 (powder:water) by weight. Deviations will change the consistency and thus alter curing time slightly. The curing time is on average 30 minutes and finished products are akin to concrete with high compression and low tension.
Finishing tool paths on the wax mold (e.g. scallop, parallel, contour) have minimal effects on the final product appearance.