Land is tied to food, which is tied to life, family, and social belonging. Vridge, which has taken on many names since I first thought of the idea, is fundamentally a way of disrupting contemporary relations (or lack thereof) between community anchors and food.
The first task was clarifying the system that would be used. We explored several alternatives to traditional farming over the summer, including rooftops, basements, and everything in between. Space became the largest consideration for this project, and therefore I turned to a hydroponic solution. Hydroponics is the process of growing plants without the use of soil. In its place, various types of media are used, including coco noir, clay pebbles, hemp maps, etc. I originally opted for hemp maps, because those seemed to be the most practical and easiest to use at scale. (But this eventually changed)
Next, I had to sketch out possible designs for the system. There are various "grow tents" and appliances for both traditional and hydroponic growing. None of them, however, are suited for more than a small family or apartment. The purpose of vridge was to expand the market to a commercial or semi-commerical scale, so that community anchors (schools, community centers, shelters, food pantries, hospitals, churches) could make use of hydroponics in the absence of arable land. The form factor I decided on was akin to a refrigerator (hence the name of the project). Obviously, I wouldn't be starting at that scale, but something a bit more manageable given my lack of experience in fabrication.
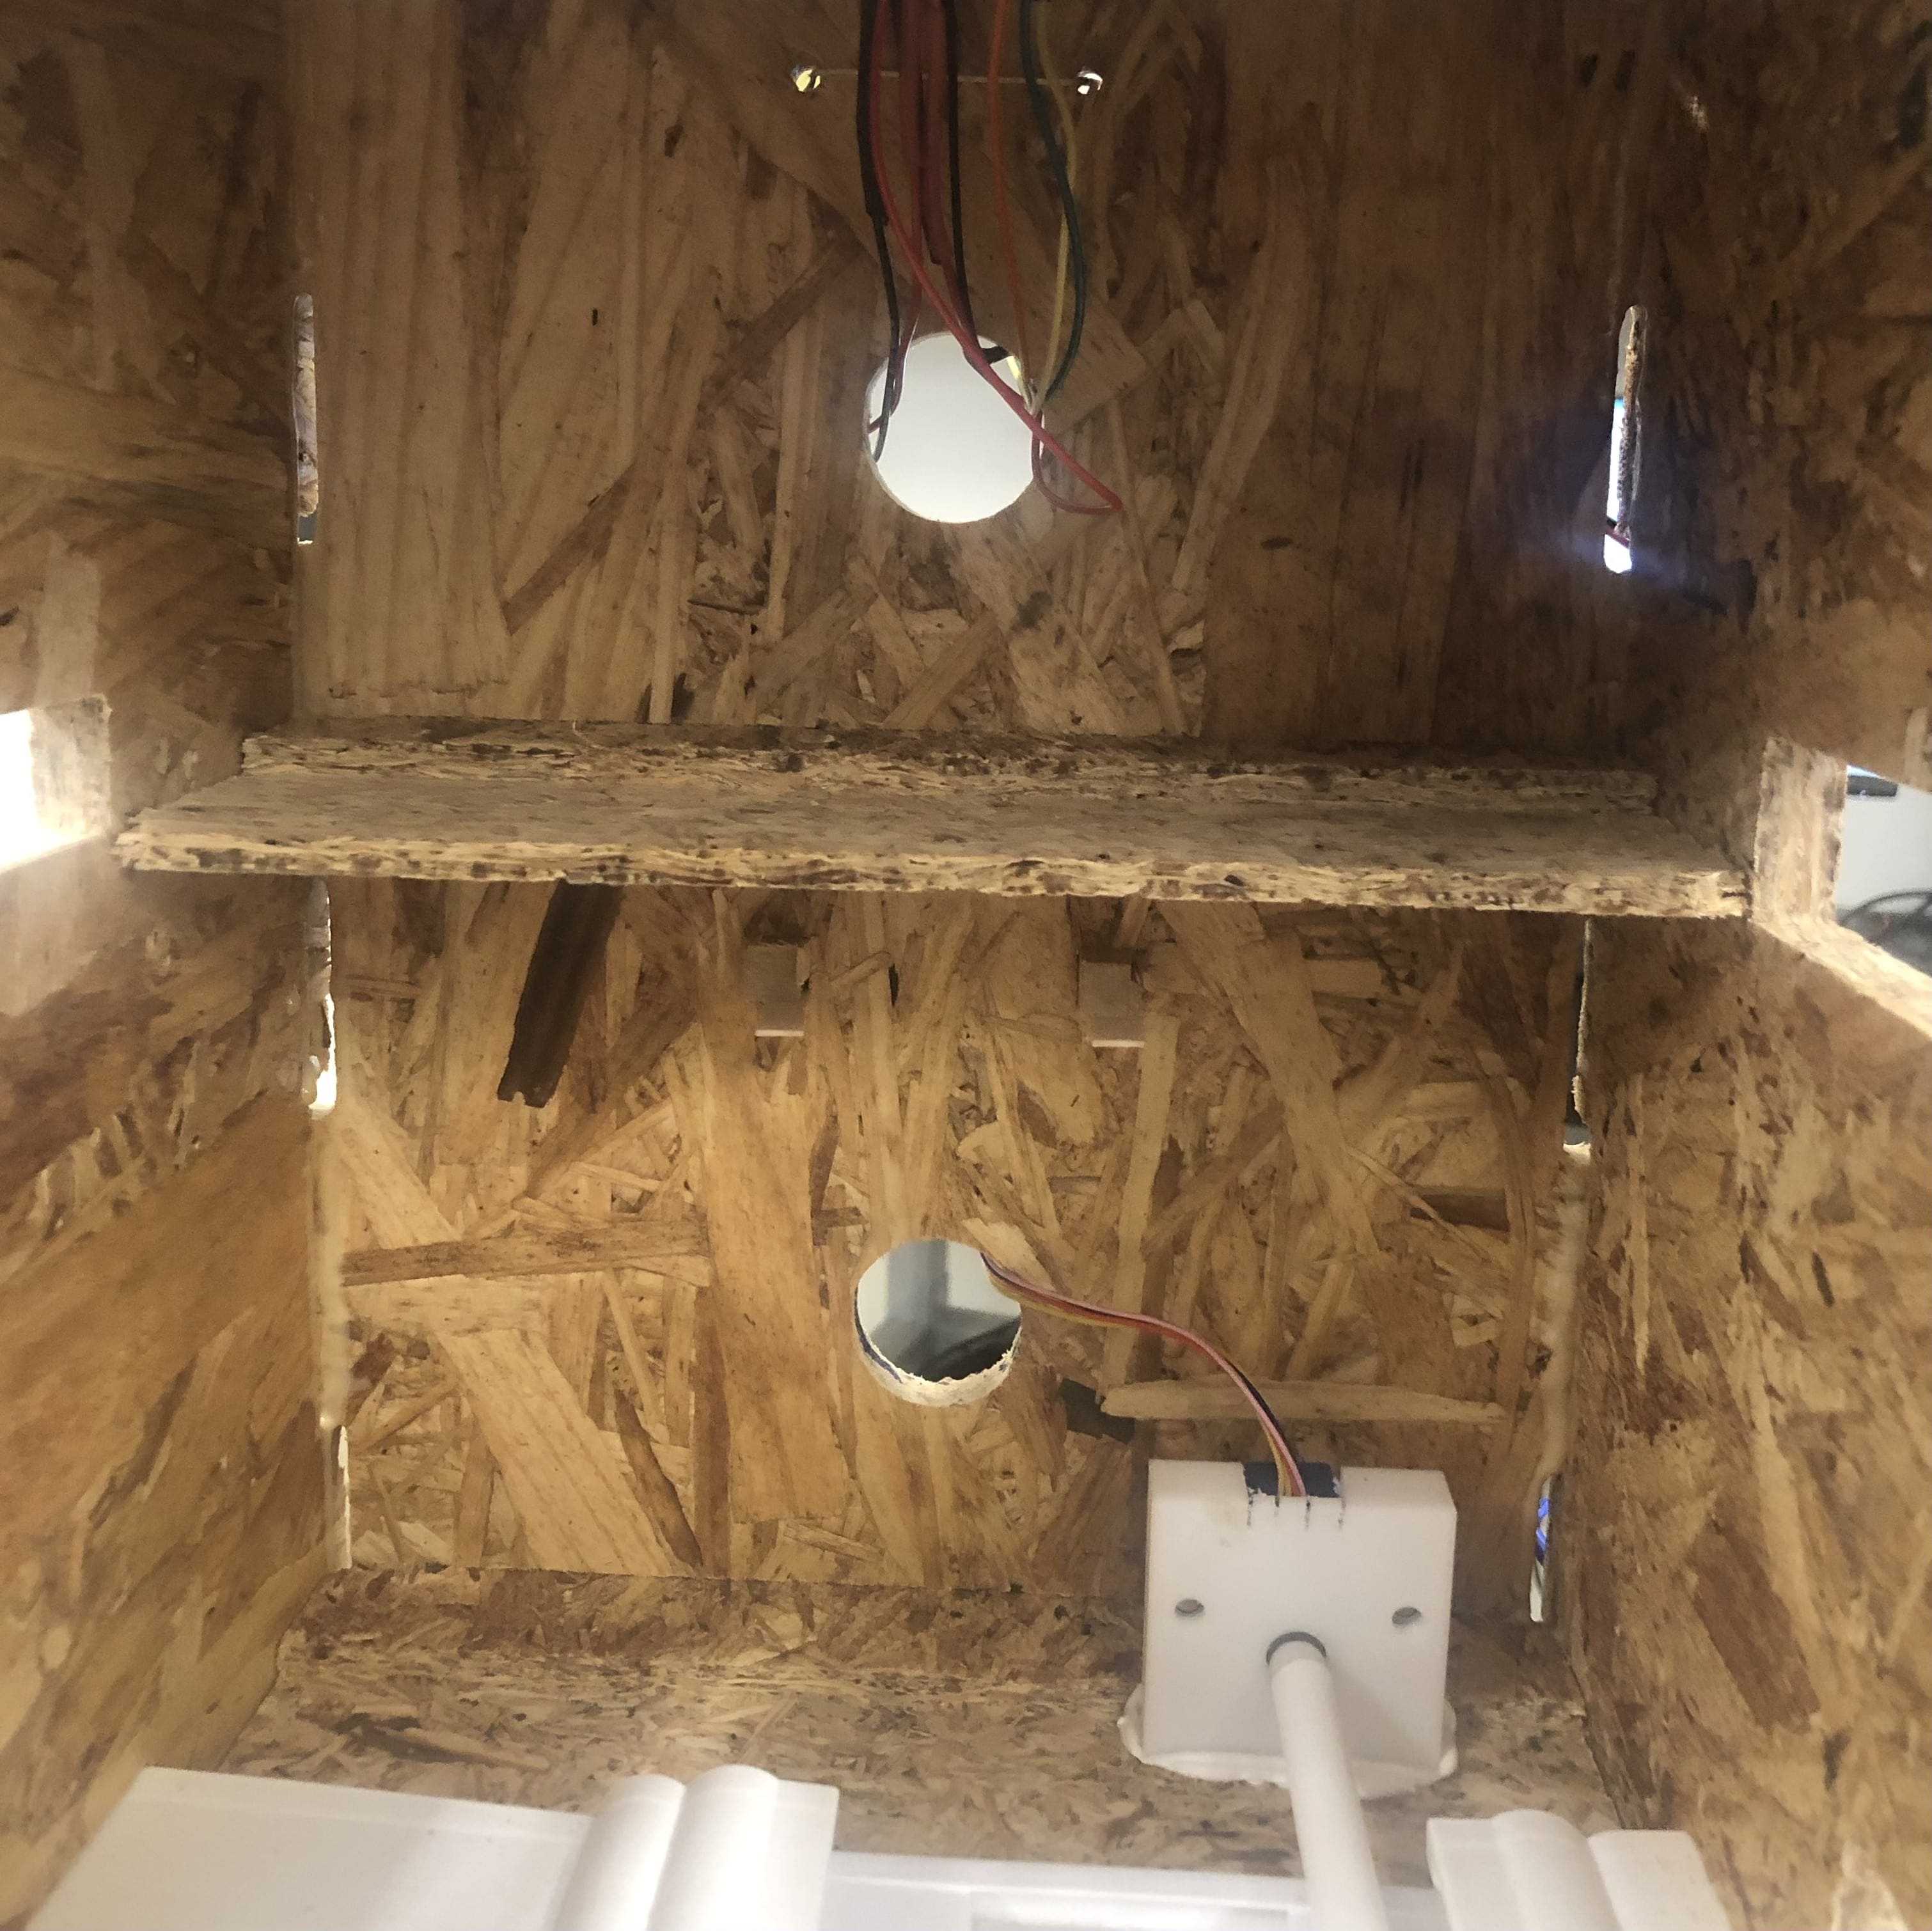
I settled on a multi-shelf design, that had staggered rows to make the most effective use of the enclosed space.
Two shelves
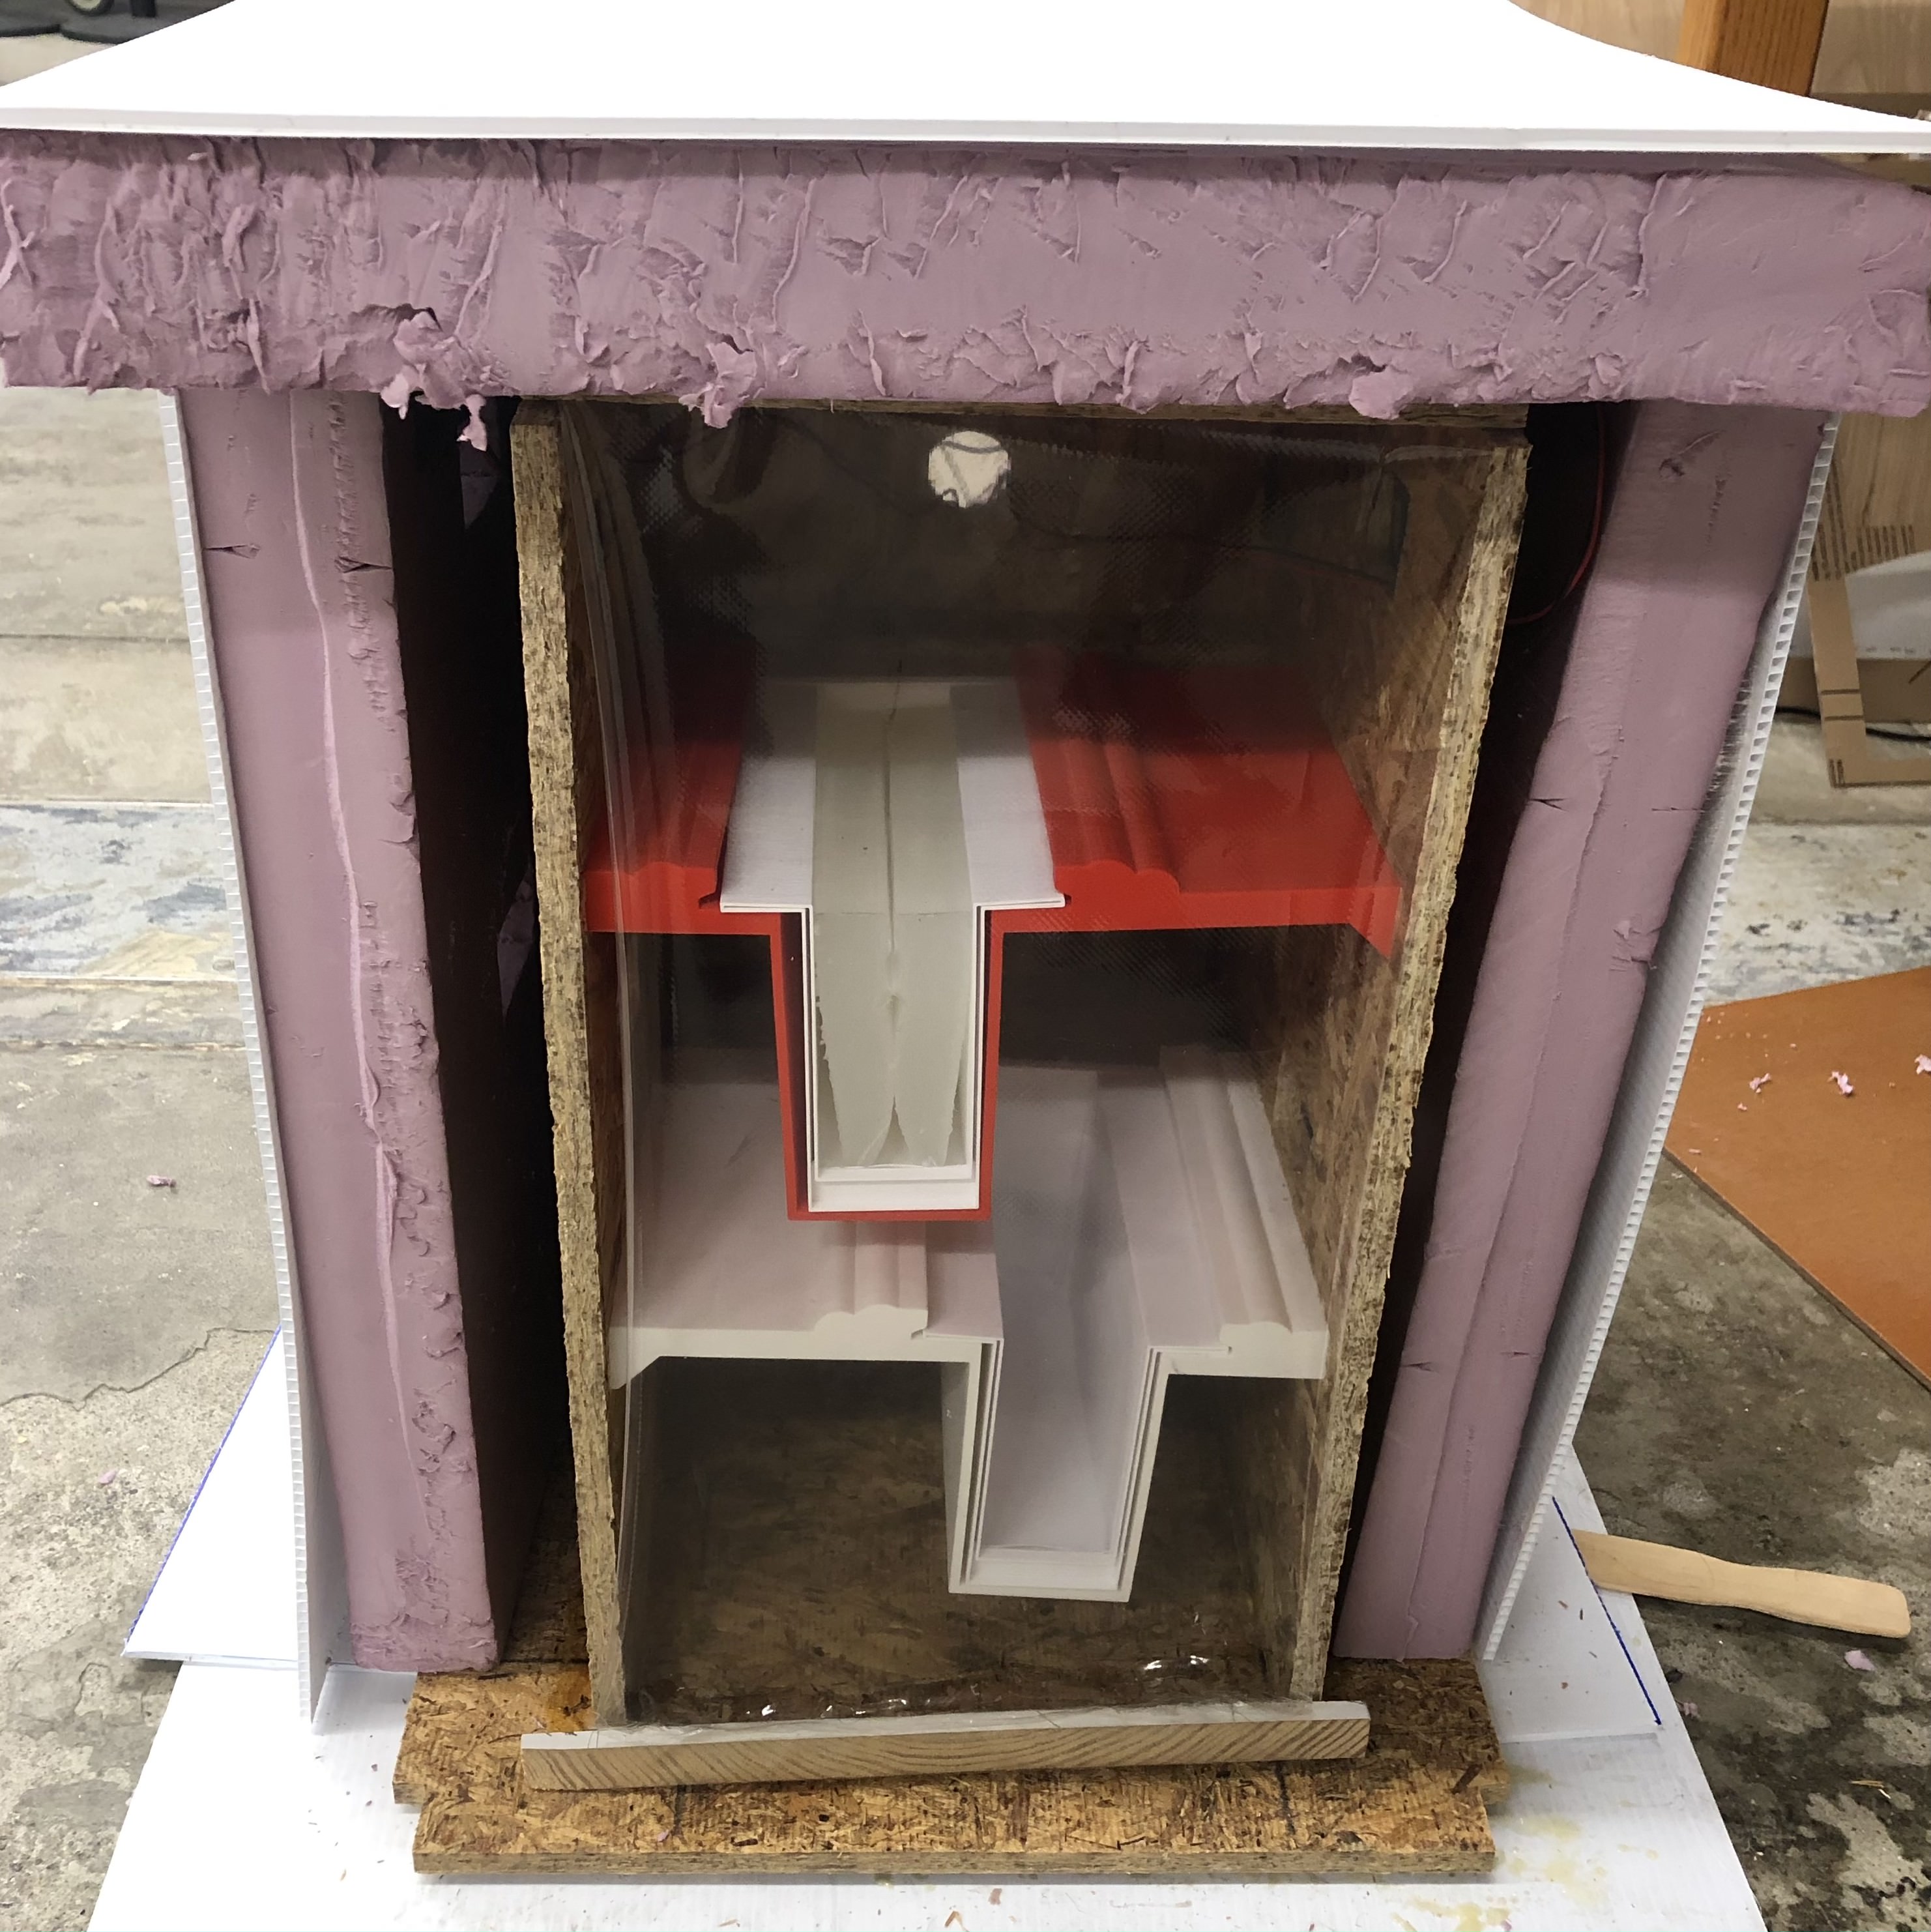
There were several levels to the system: the primary functions including water and light, followed by air flow, humidity and temperature. Following those would be higher-level functions, including nutrient dosing, pH, CO2 distribution, and pest control. Embedded in the structural design would be ease/automation of sowing, monitoring and harvesting.
I decided to focus on only one function and dedicate the rest of my time to fleshing out the structure (which would be most useful for later iterations). I thought that light would be the simplest output, but airflow turned out to be the best option. The programming was relatively straight-forward (though not easy for me). Using a thermistor, I was able to "measure" the ambient temperature. The fans would activate if the reading reached above a certain value. The only tricky part was providing power to the 5V fans. I had to solder a connection from the FTDI cable and then make use of a FET.
While deciding these things, I was introduced to silicone molds/cast during week eight. This fundamentally changed the course of my project. Before, I was trying to think of ways to make hemp maps accessible to communities, since the project always had an outward focus. I wanted to reject the idea of making community anchors pay for upkeep on what I hoped would be a durable good. The Eco-Flex 00-30 proved to be a revolutionary step in my design process. It meant that I could have one, long-lasting medium that would not need to be replaced after every harvest, and could be quickly cleaned given the right design. I chose to make a ribbed interior to accommodate different sizes of seeds based on the optimal sowing depth (about twice the size of the seed). And before you ask, yes, I did test the silicone, and I was able to germinate a cucumber seed (albeit with a janky setup).
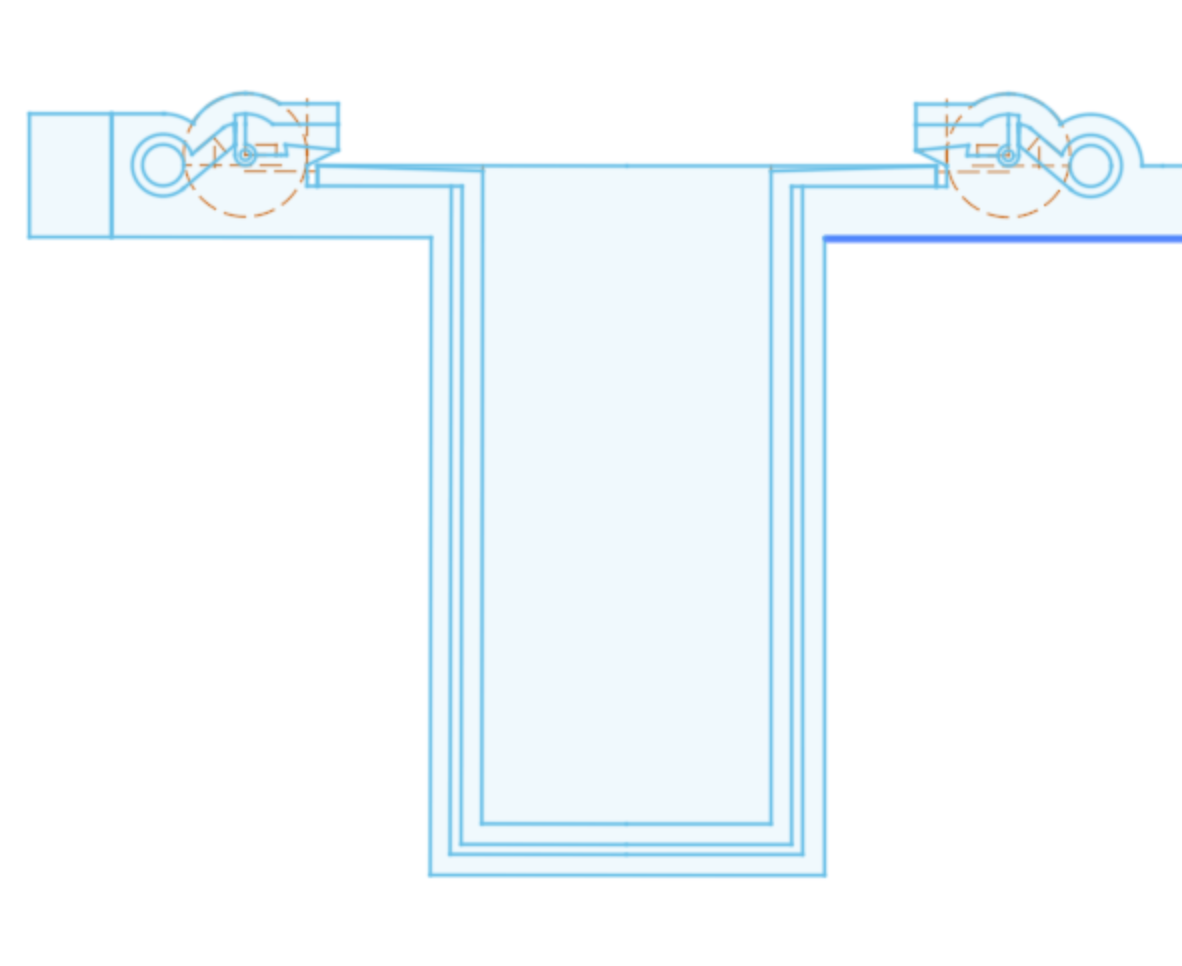
After that, the rest of the design fell into place. The one major change was including a drip irrigation system into the final project. Initially, I thought the long-term vision would involve pumps that continuously circulated water. But a more passive, user-friendly option was creating a drip-irrigation system (which does what the name implies, significantly reducing water and power usage).
Modeled drip irrigation on sides
Something that I am looking forward to (which I think would be a true innovation in enclosed hydroponic growing) is the use of Peltier modules for thermoelectric cooling. I did not want to fry any boards to test it, but I believe it to be an efficient option for a closed system like vridge. By applying current through the module, you can produce a temperature gradient across both faces, which can heat or cool depending on the polarity. Using this in conjunction with a heat sink would enable me to more precisely control temperature beyond just activating the fans.
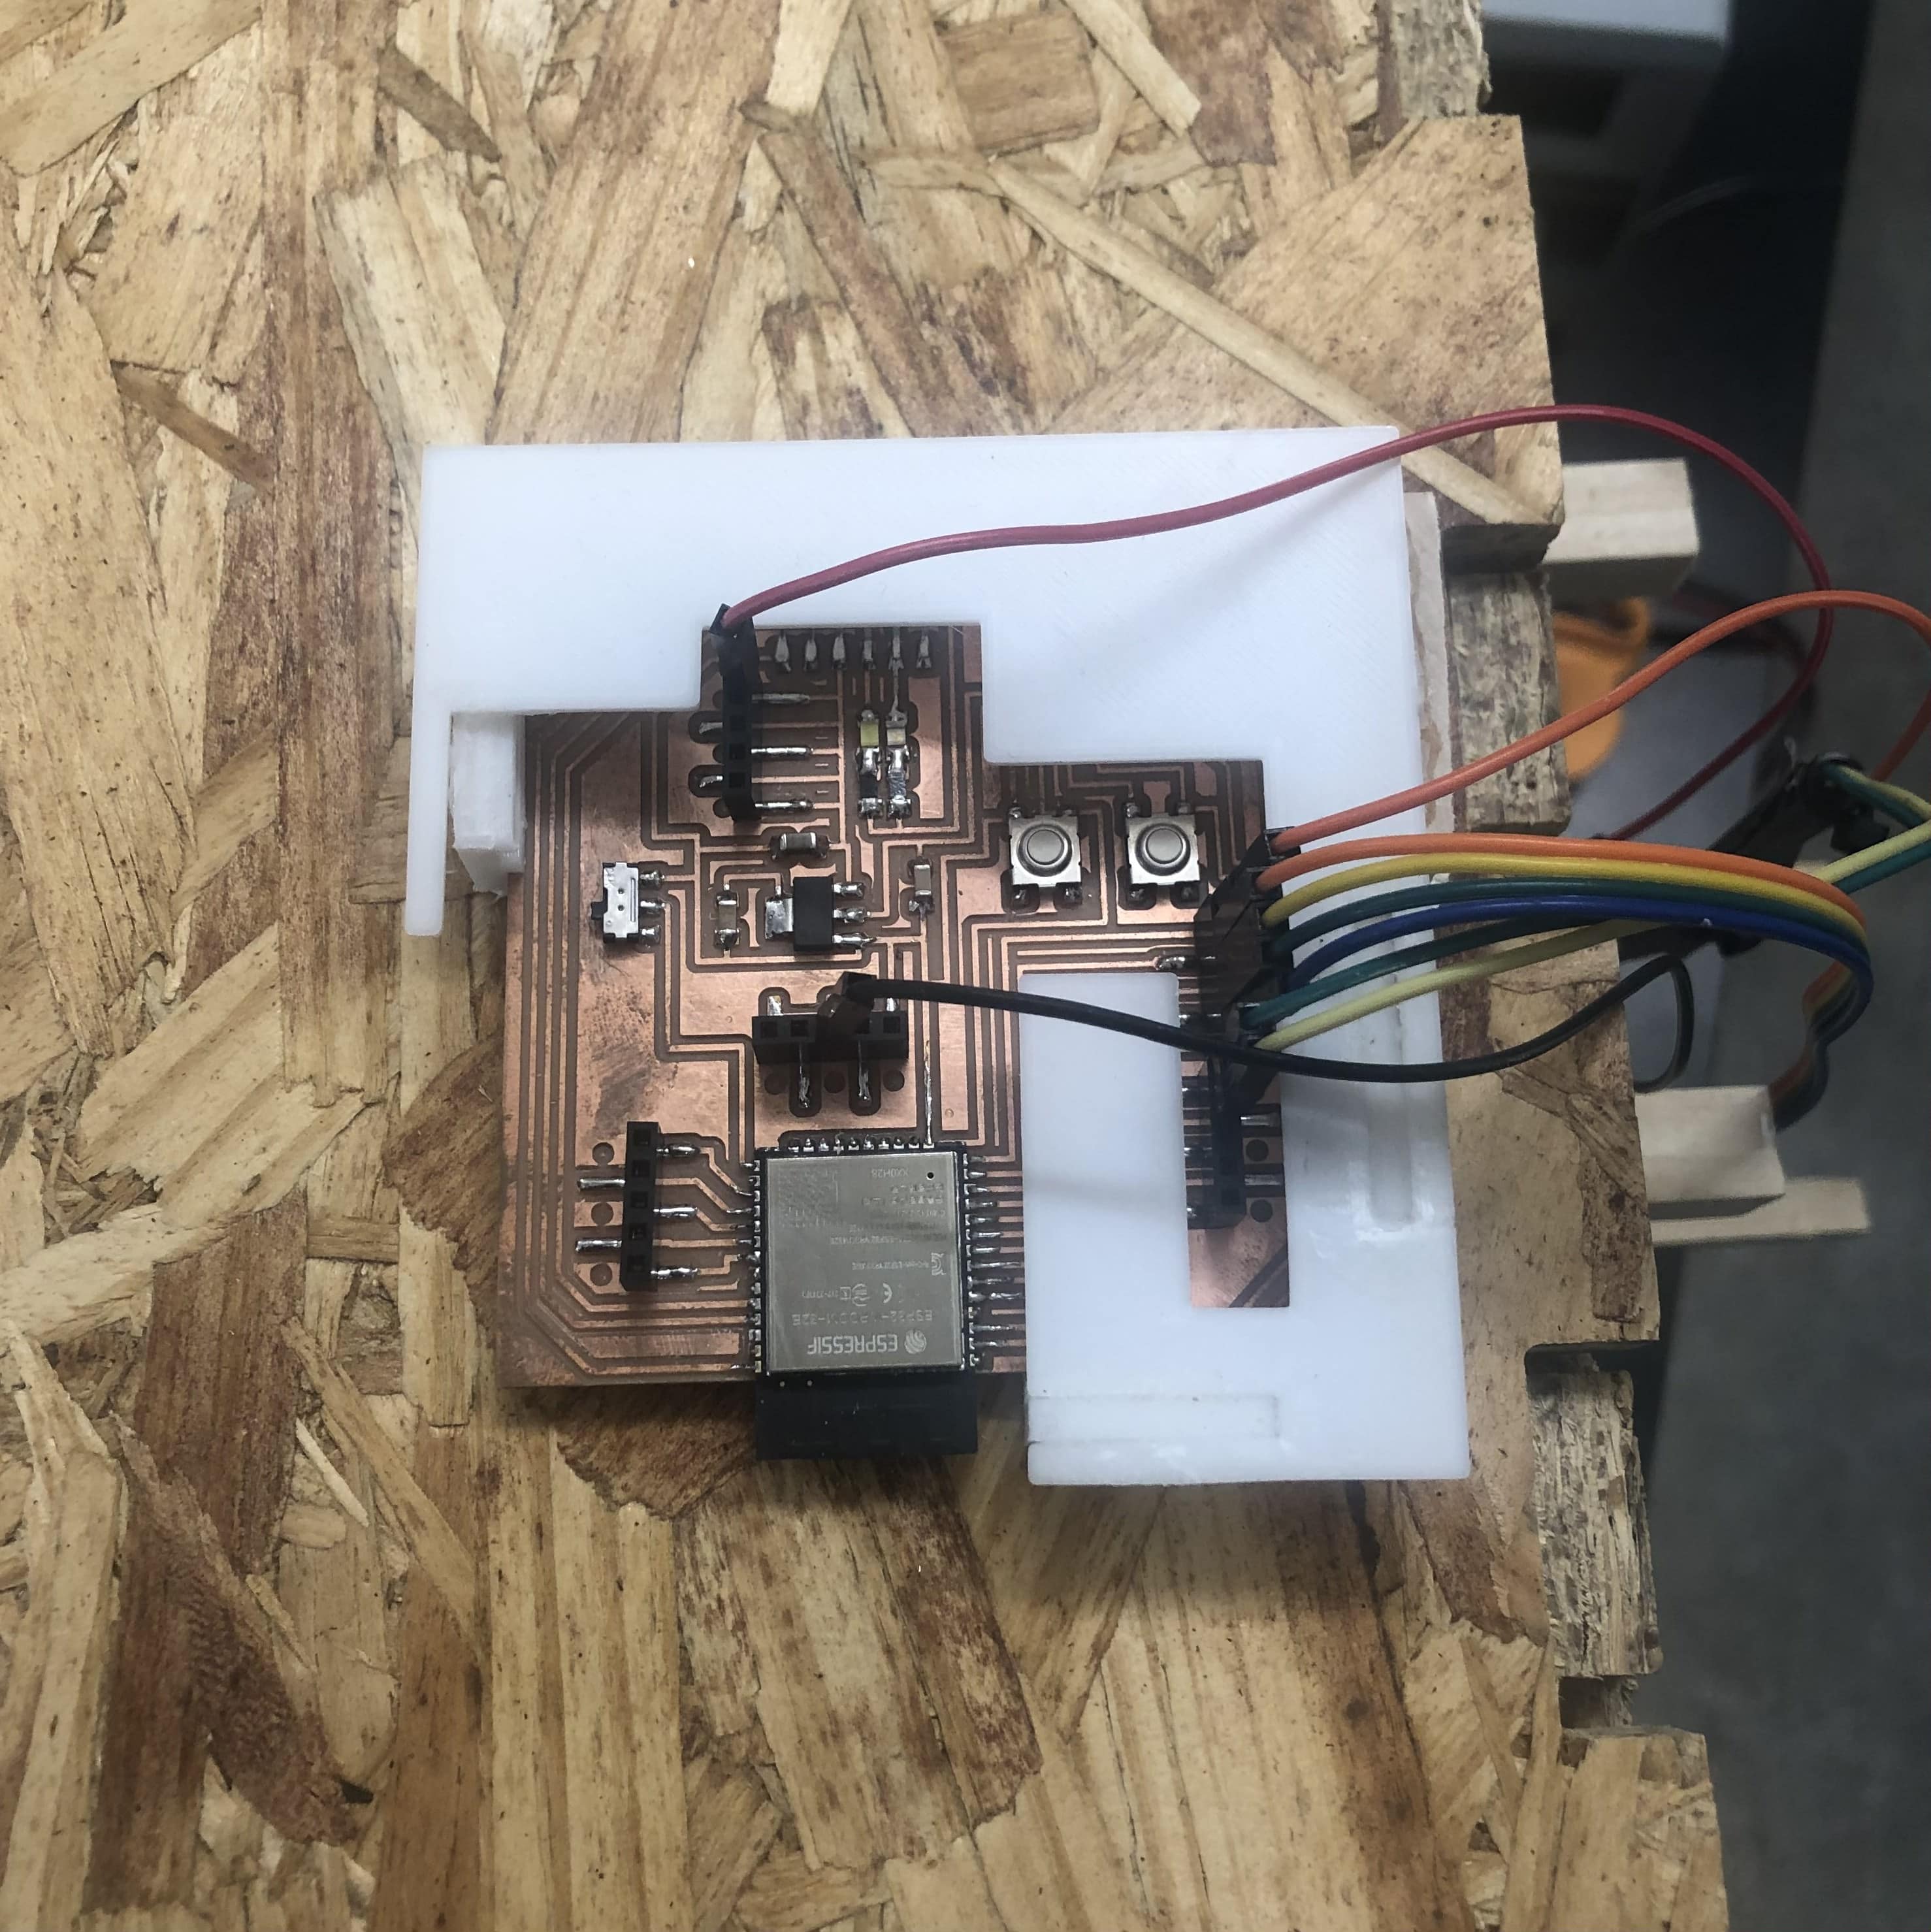
For the electronics, I designed the system below.
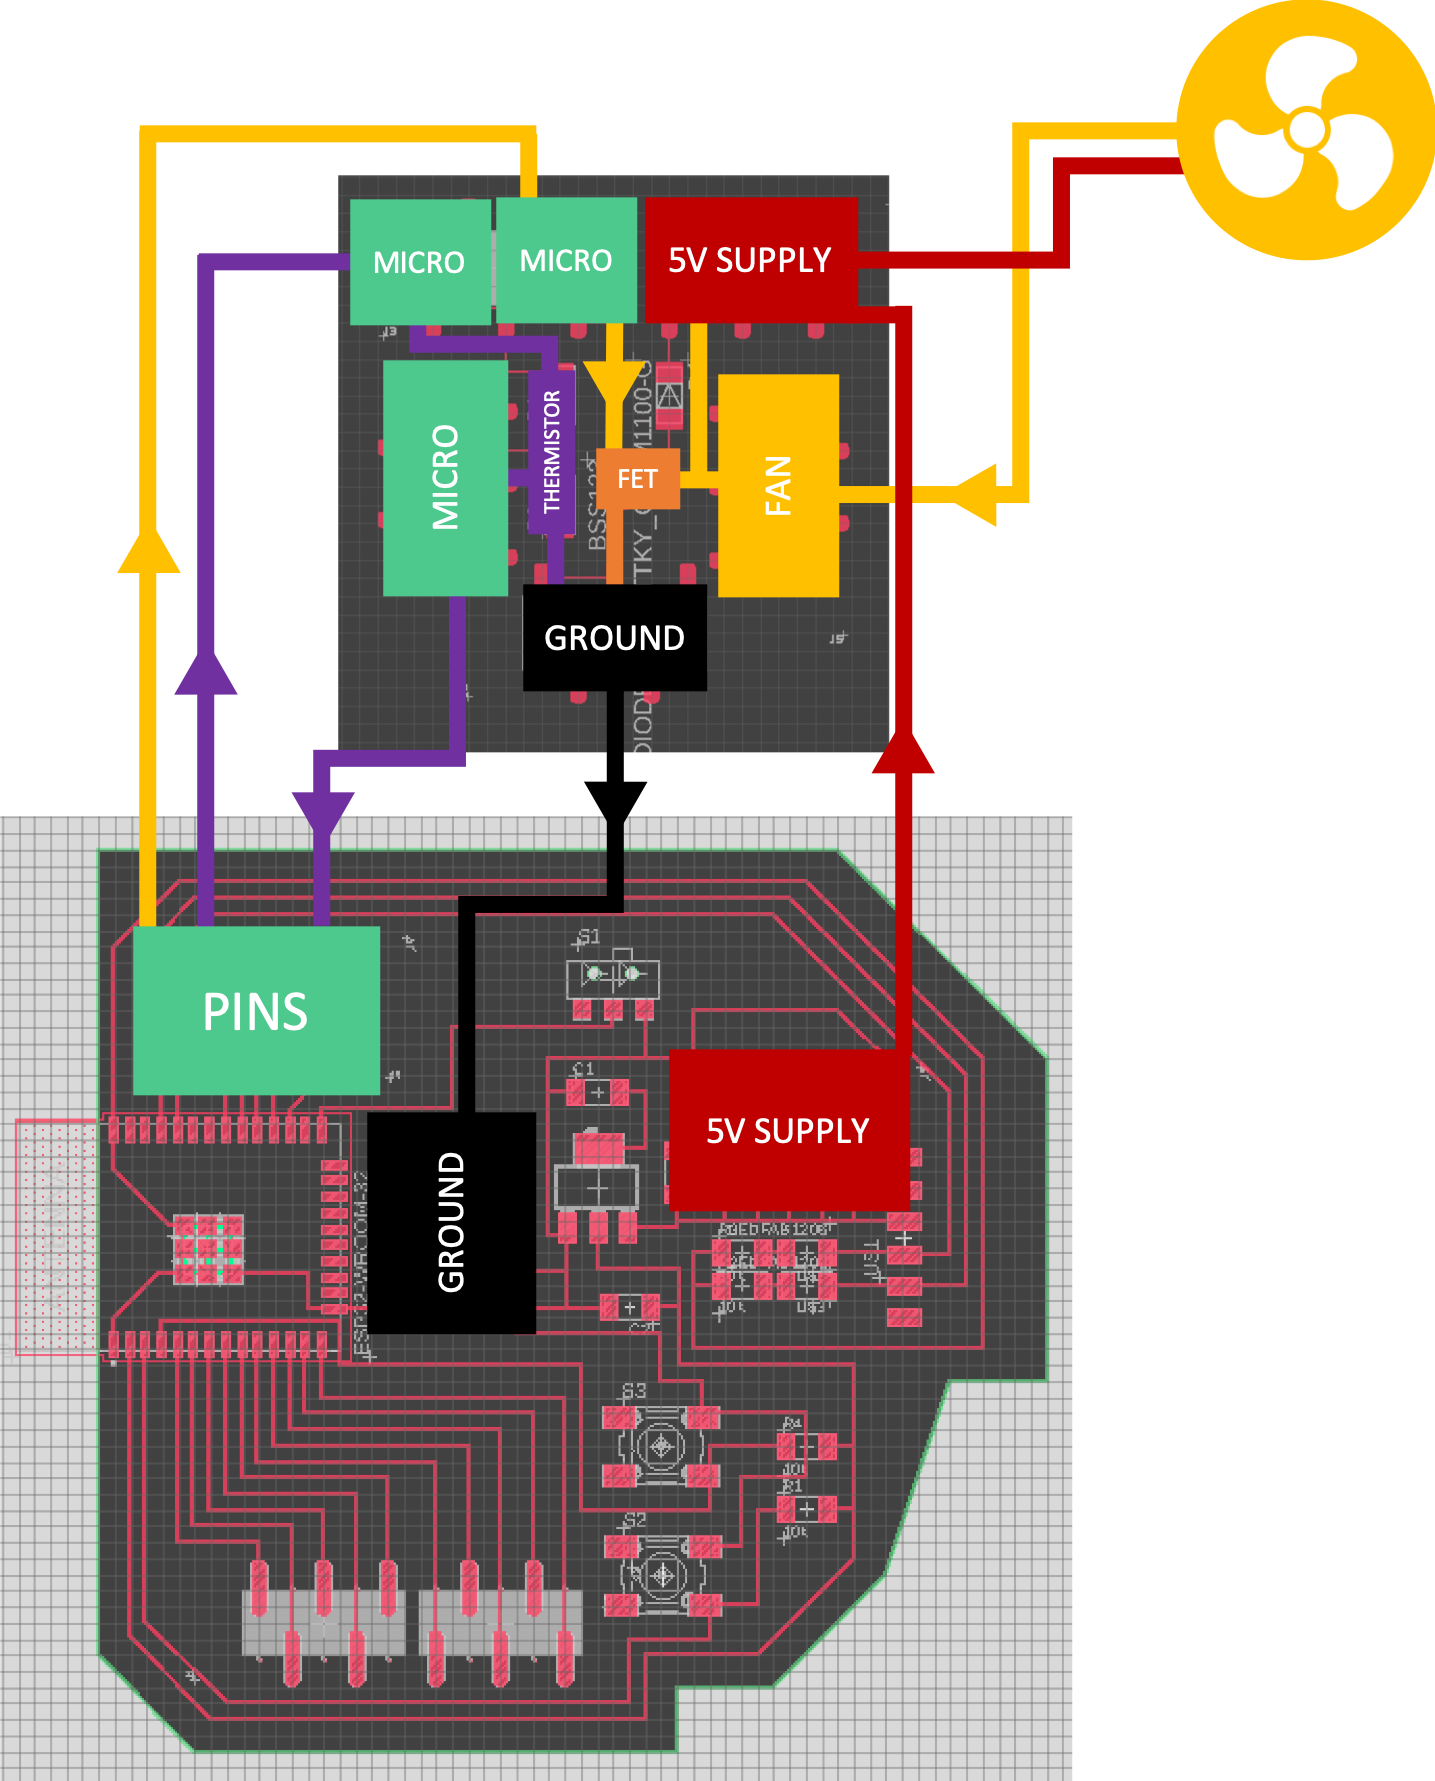
The main board was made for Week 5, and had enough pins to support all the supplemental components. The best parts about the board included a ground connection and 5V power connection, which was pulled directly from the VCC tooth of the FTDI cable. For a small component like a fan, this meant that I did not need an external power source.
To sense temperature, I designated a pin on the main board as an output to the mini board. This was connected to the thermistor/resistor pair, which passed back to a separate input pin on the main board. Based on the input pin, the temperature would be read.
Based on the reading of the temperature (ie if the temperature was above a certain value), another pin on the main board designated as an output would be set to HIGH and pass through the FET gate. This would allow current to flow through the fans (which were connected to the 5V power supply).
There were 15 possible pins able to be used. This will allow me to add more components in the future, though I will likely need to get a separate 5V source for anything more than a few fans.
Packaging the Components
Because I was working with many wired components, I designed and 3D printed mounts and covers for the boards in order to keep them in an organized place on the unit.
Holder for the main board on top of the unit
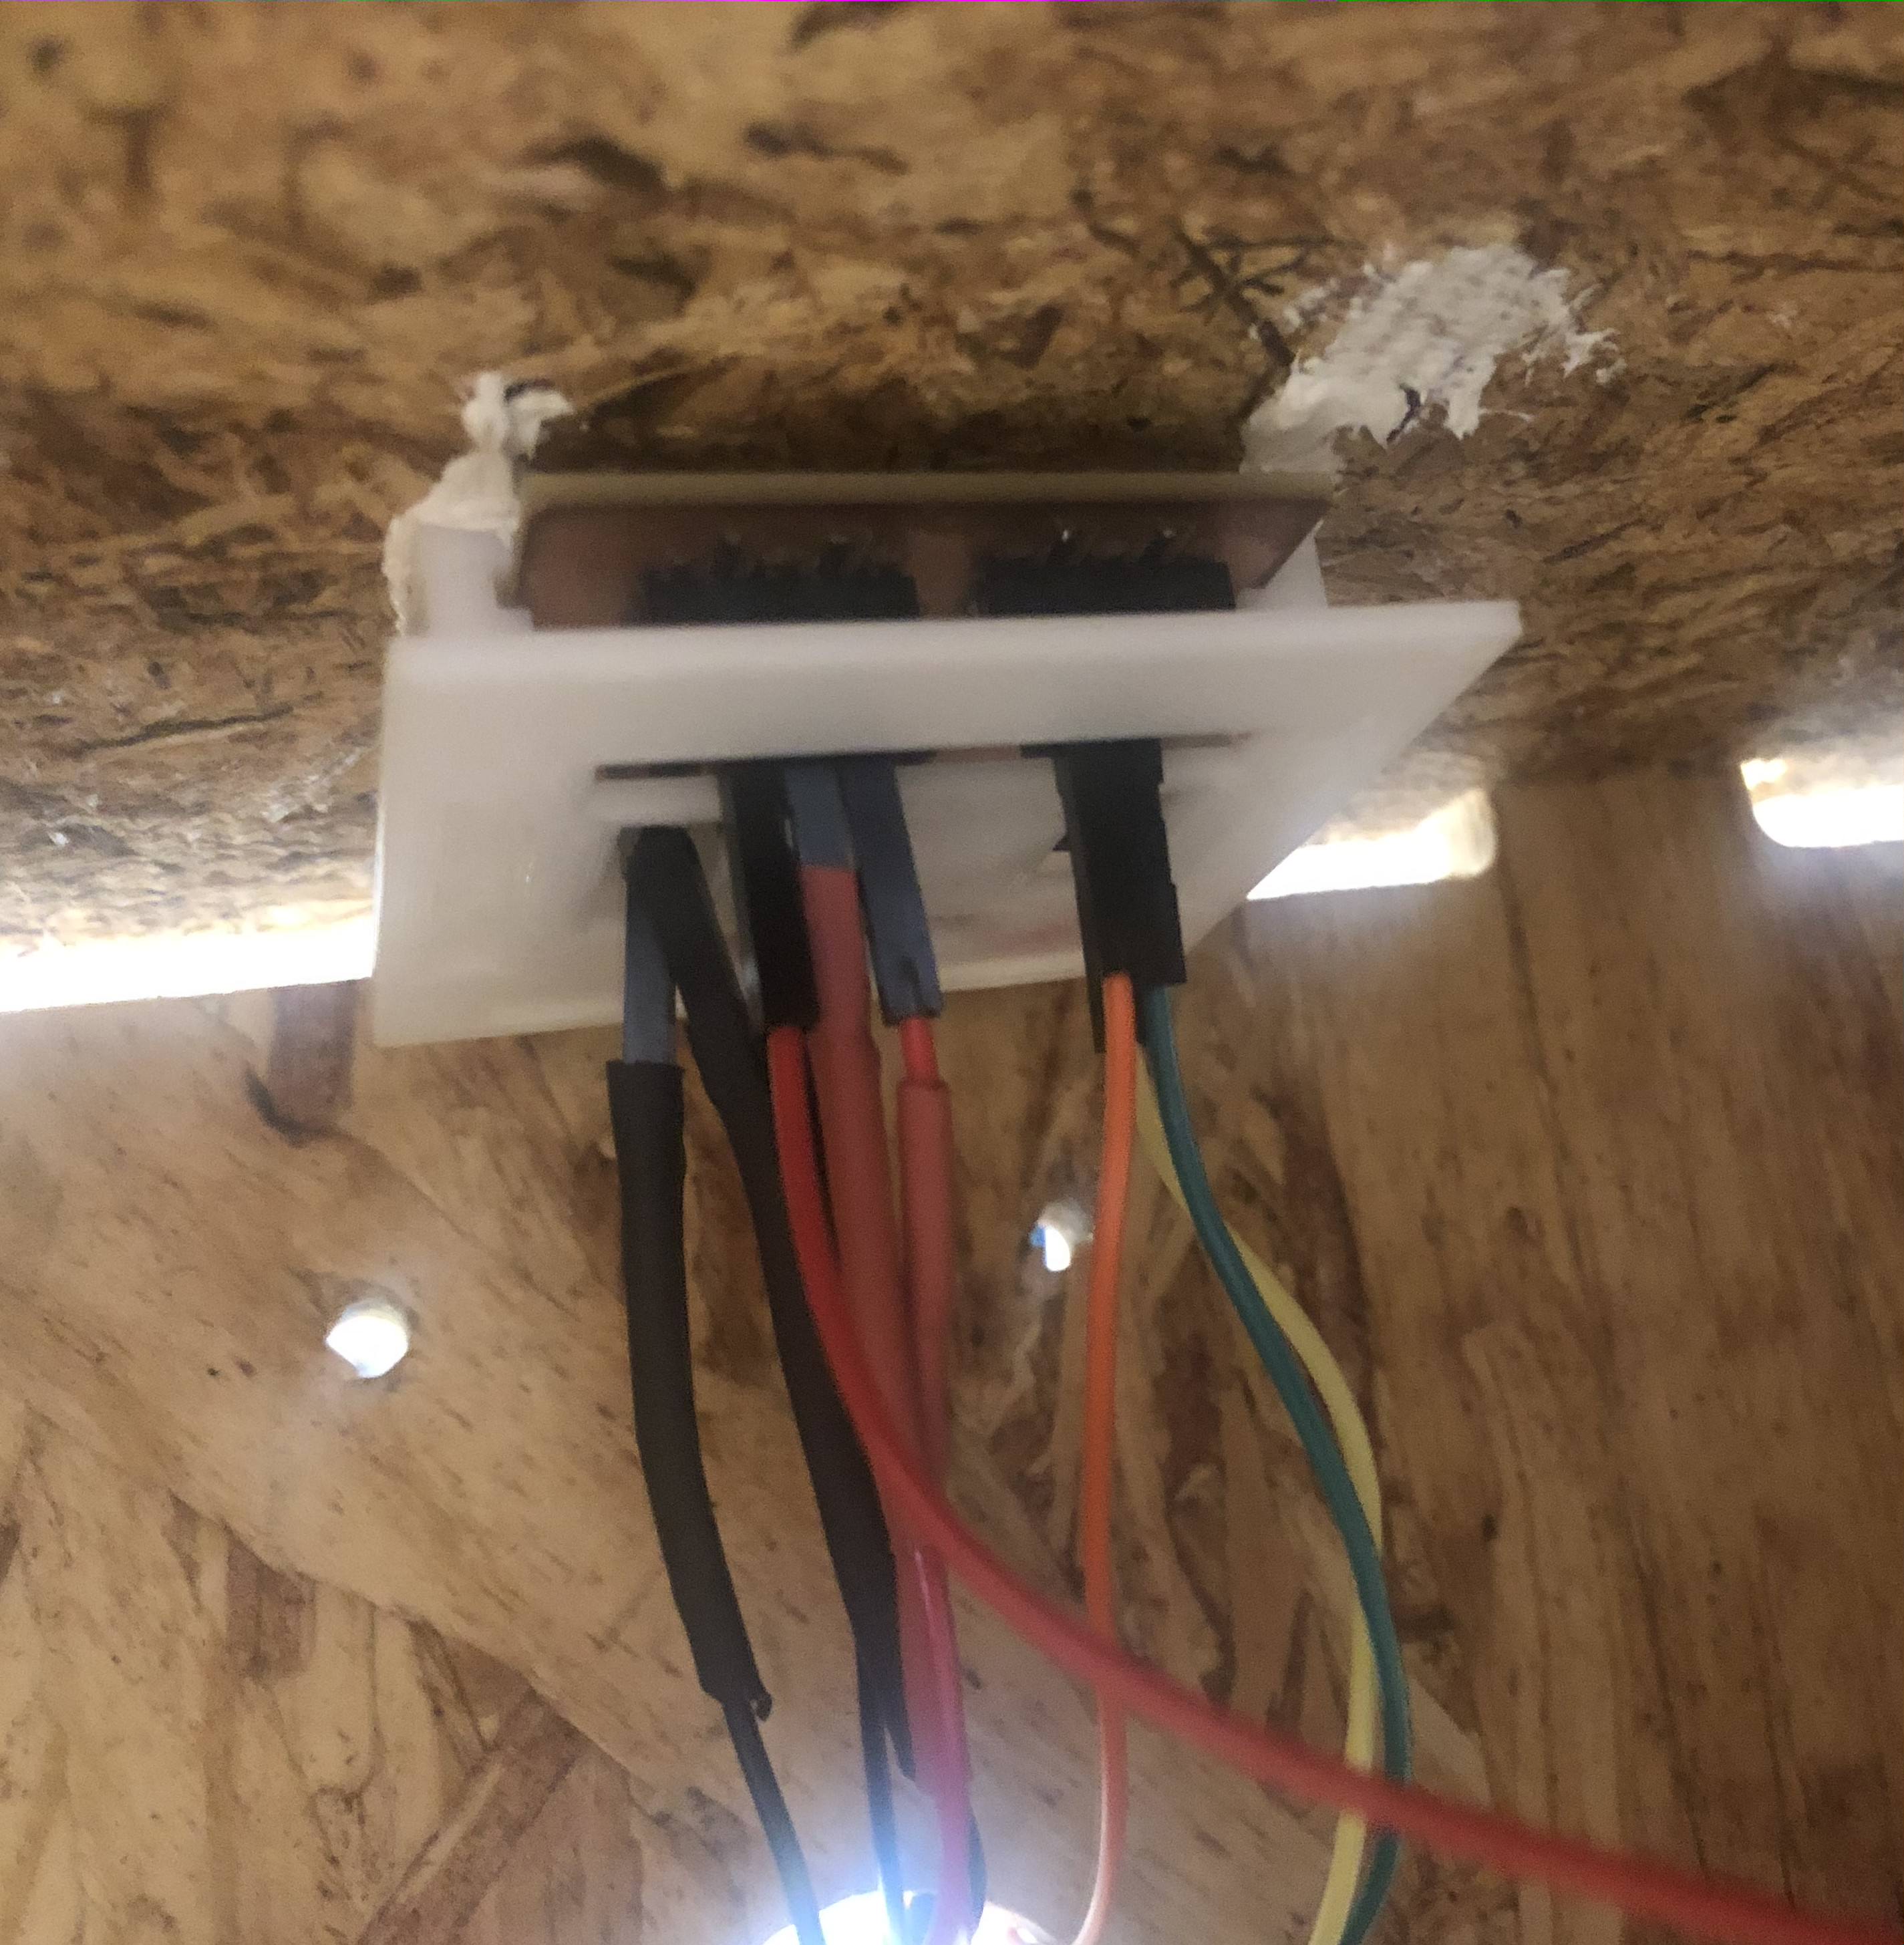
Holder for the temperature/fan control board on the ceiling inside the unit
Irrigation System Setup and Operation
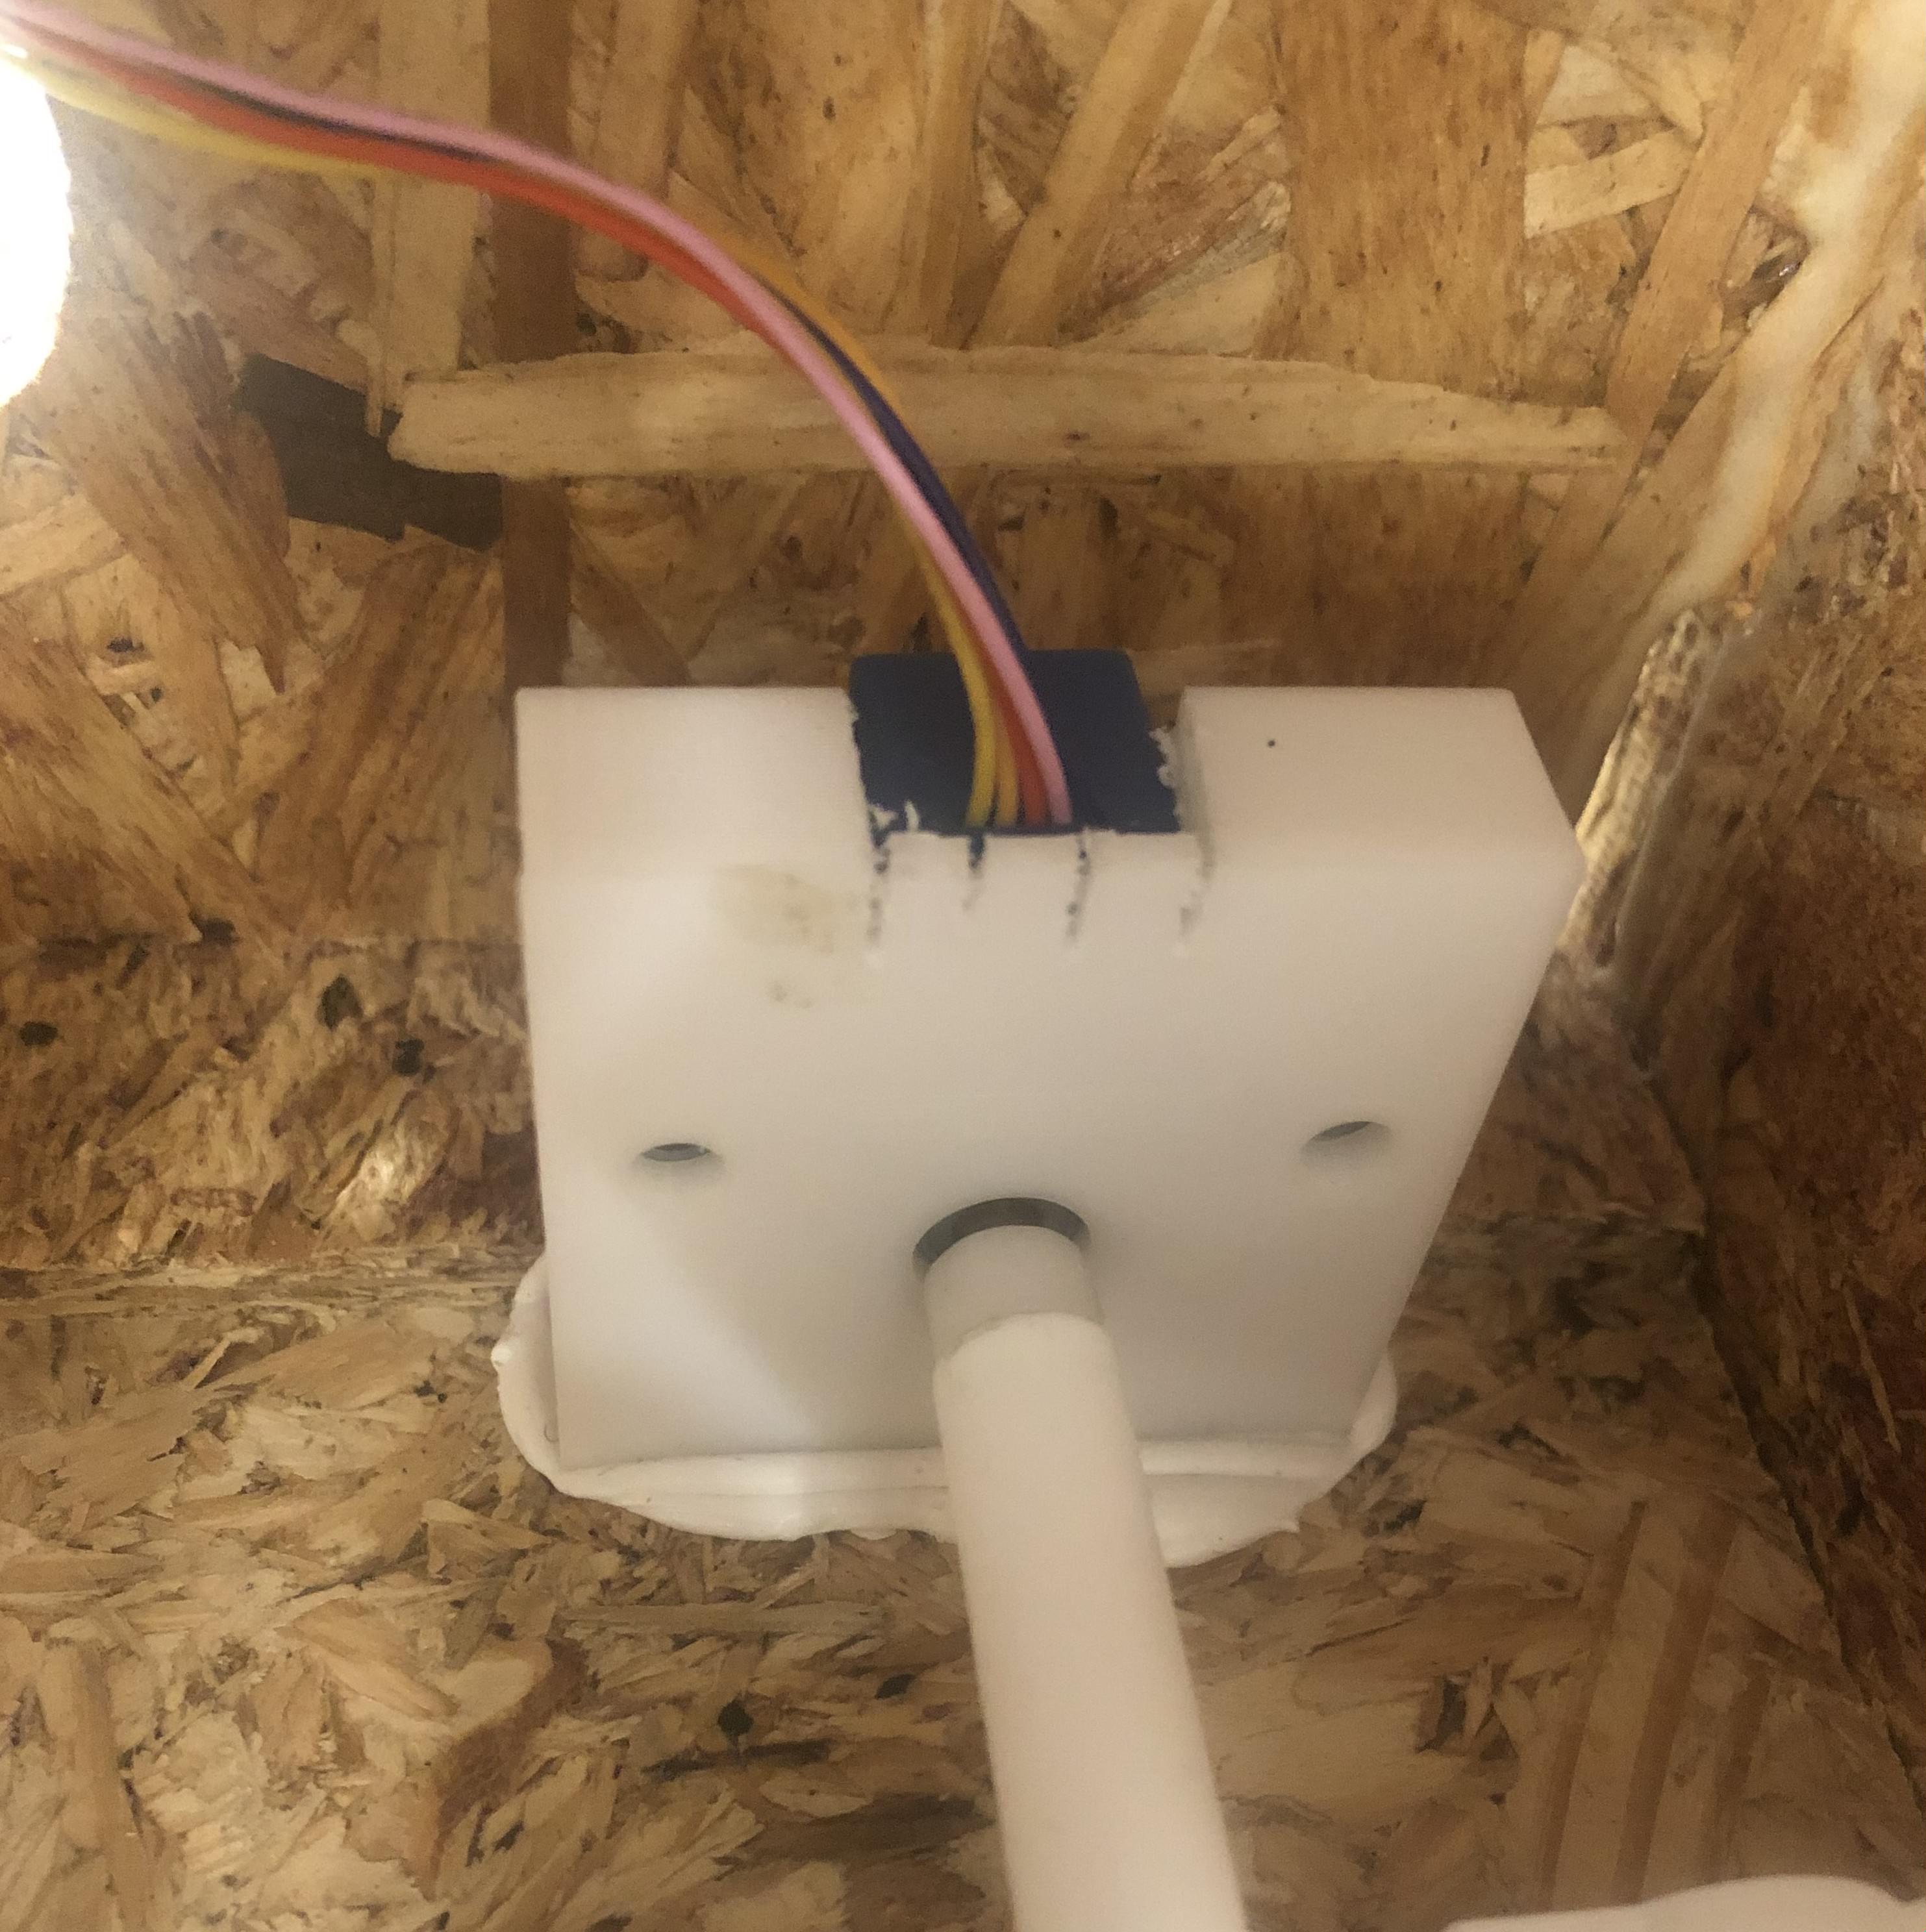
I first mounted the stepper motor I previously tested within the box using a holder I 3D printed (I did have to cut out the top of the part, because the wires wouldn't fit, as evidenced by the score marks).Mounted Stepper Motor
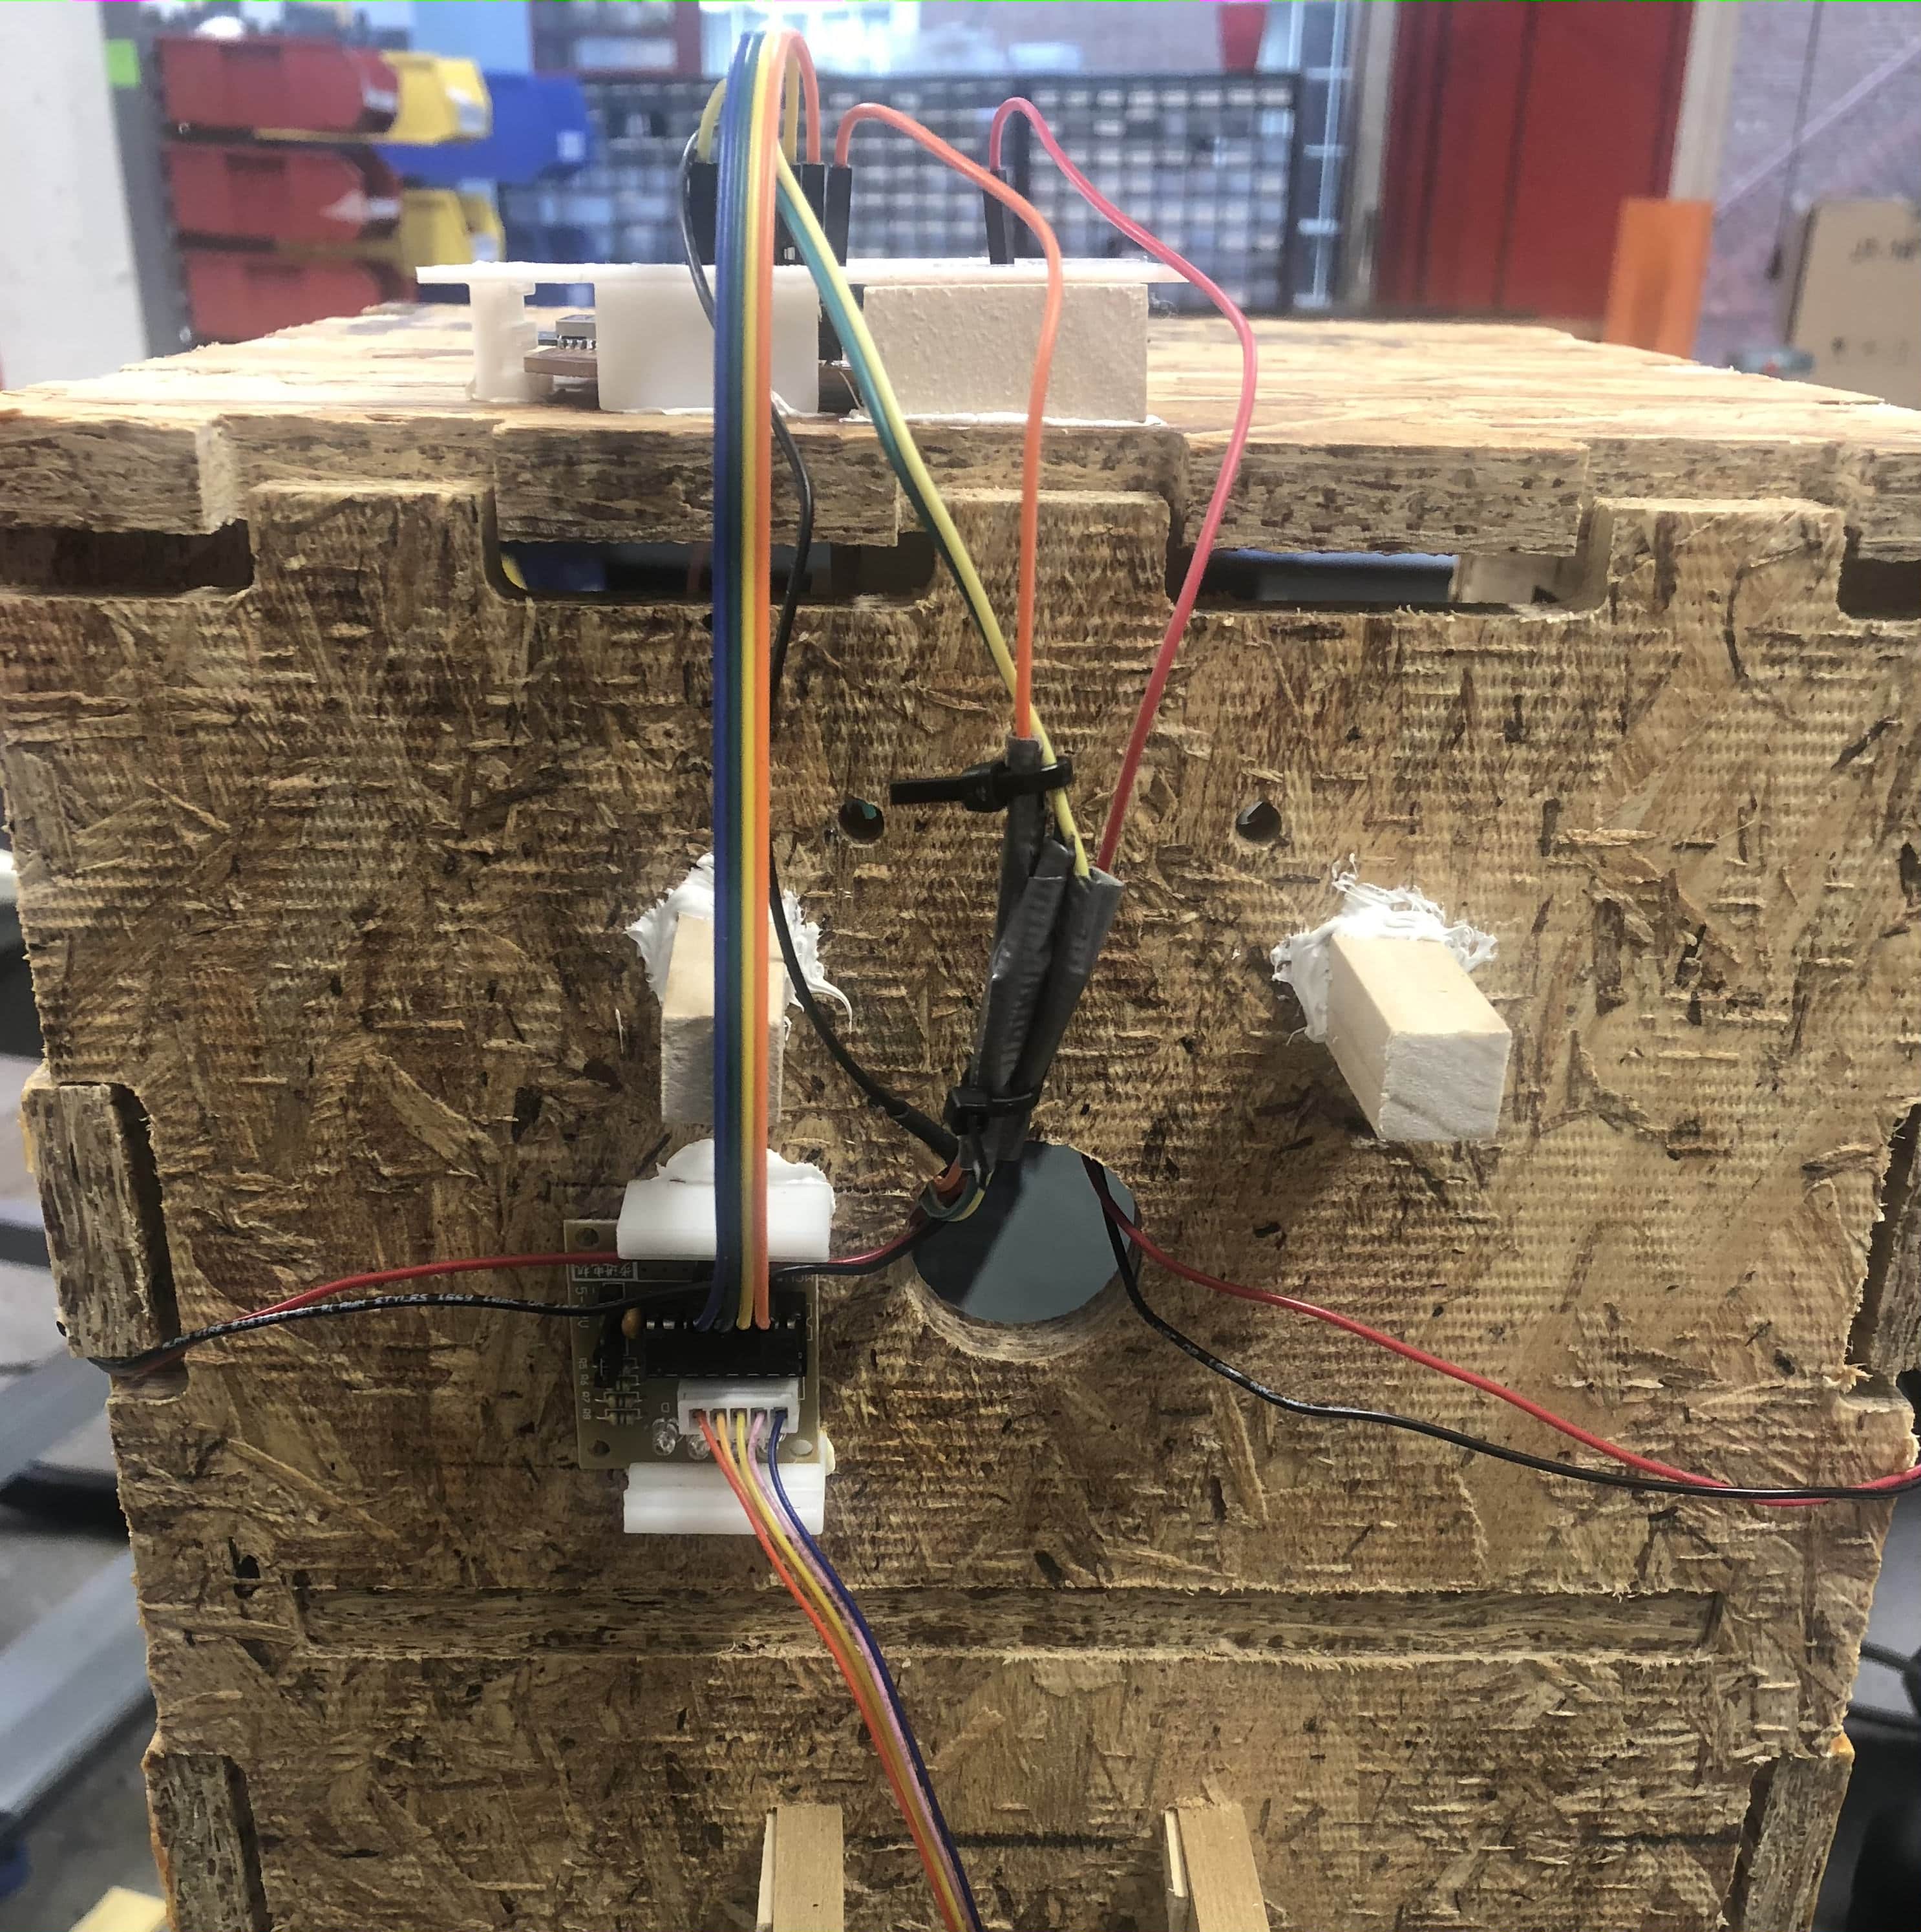
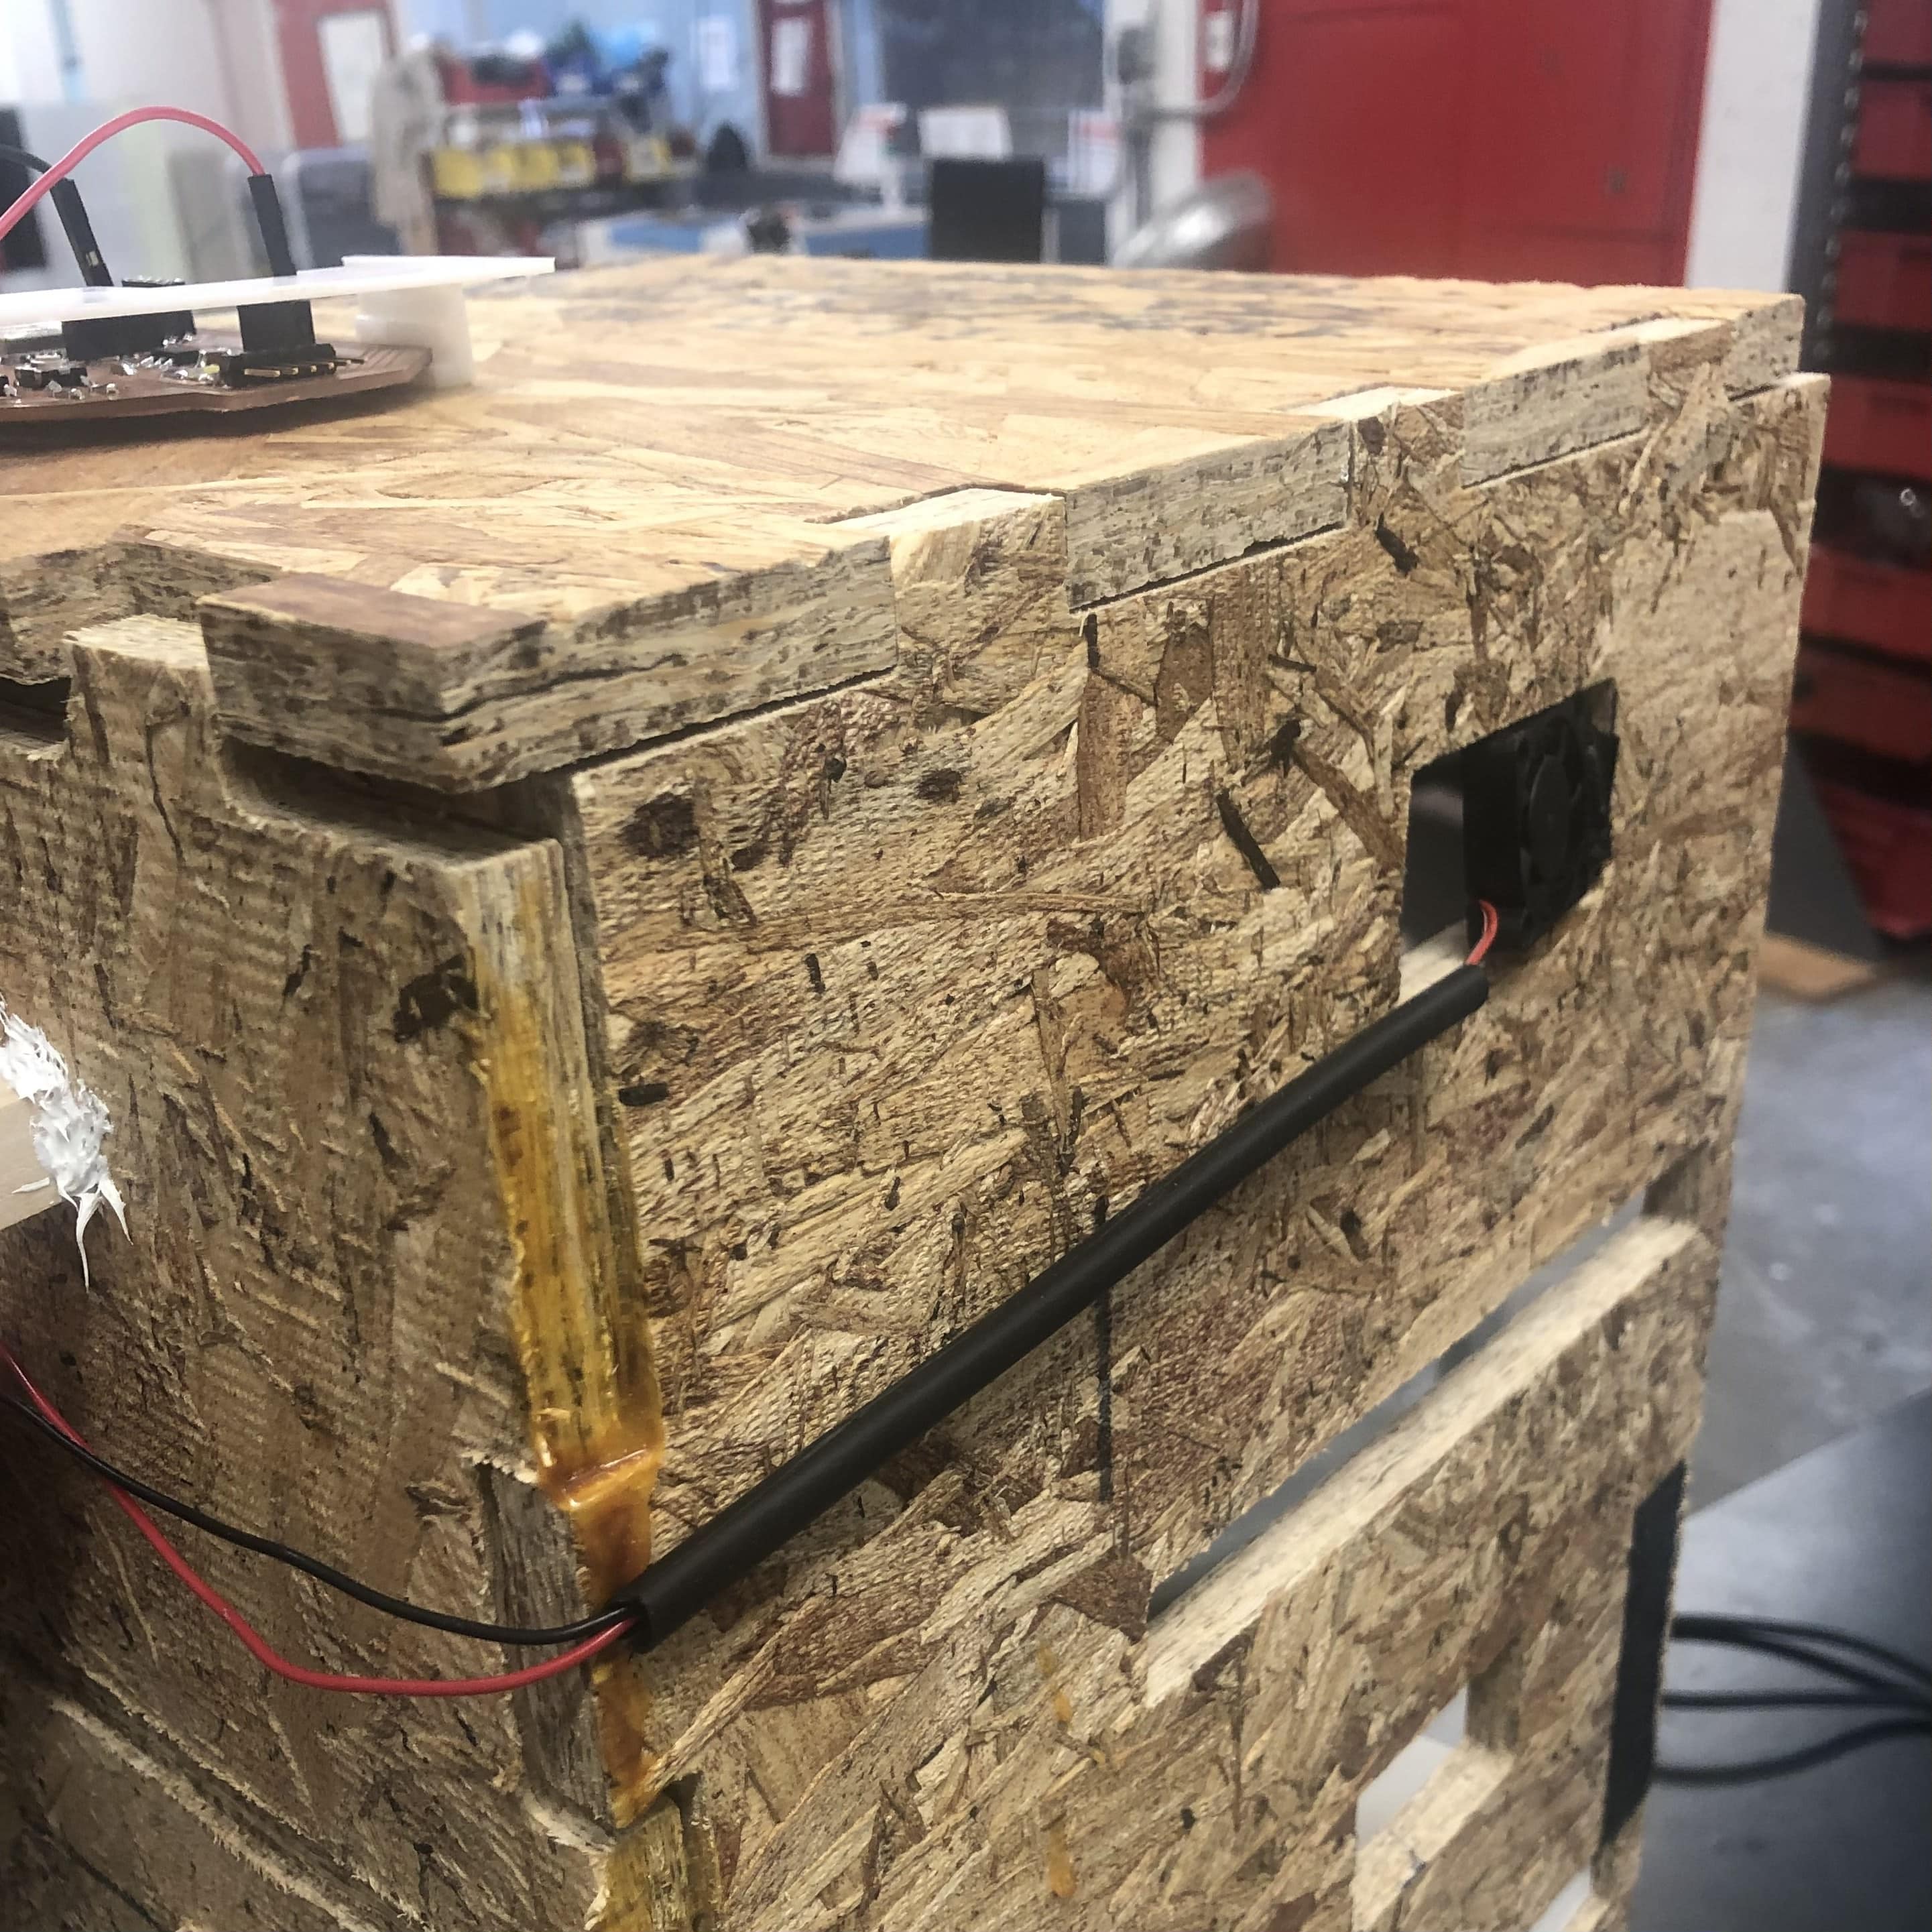
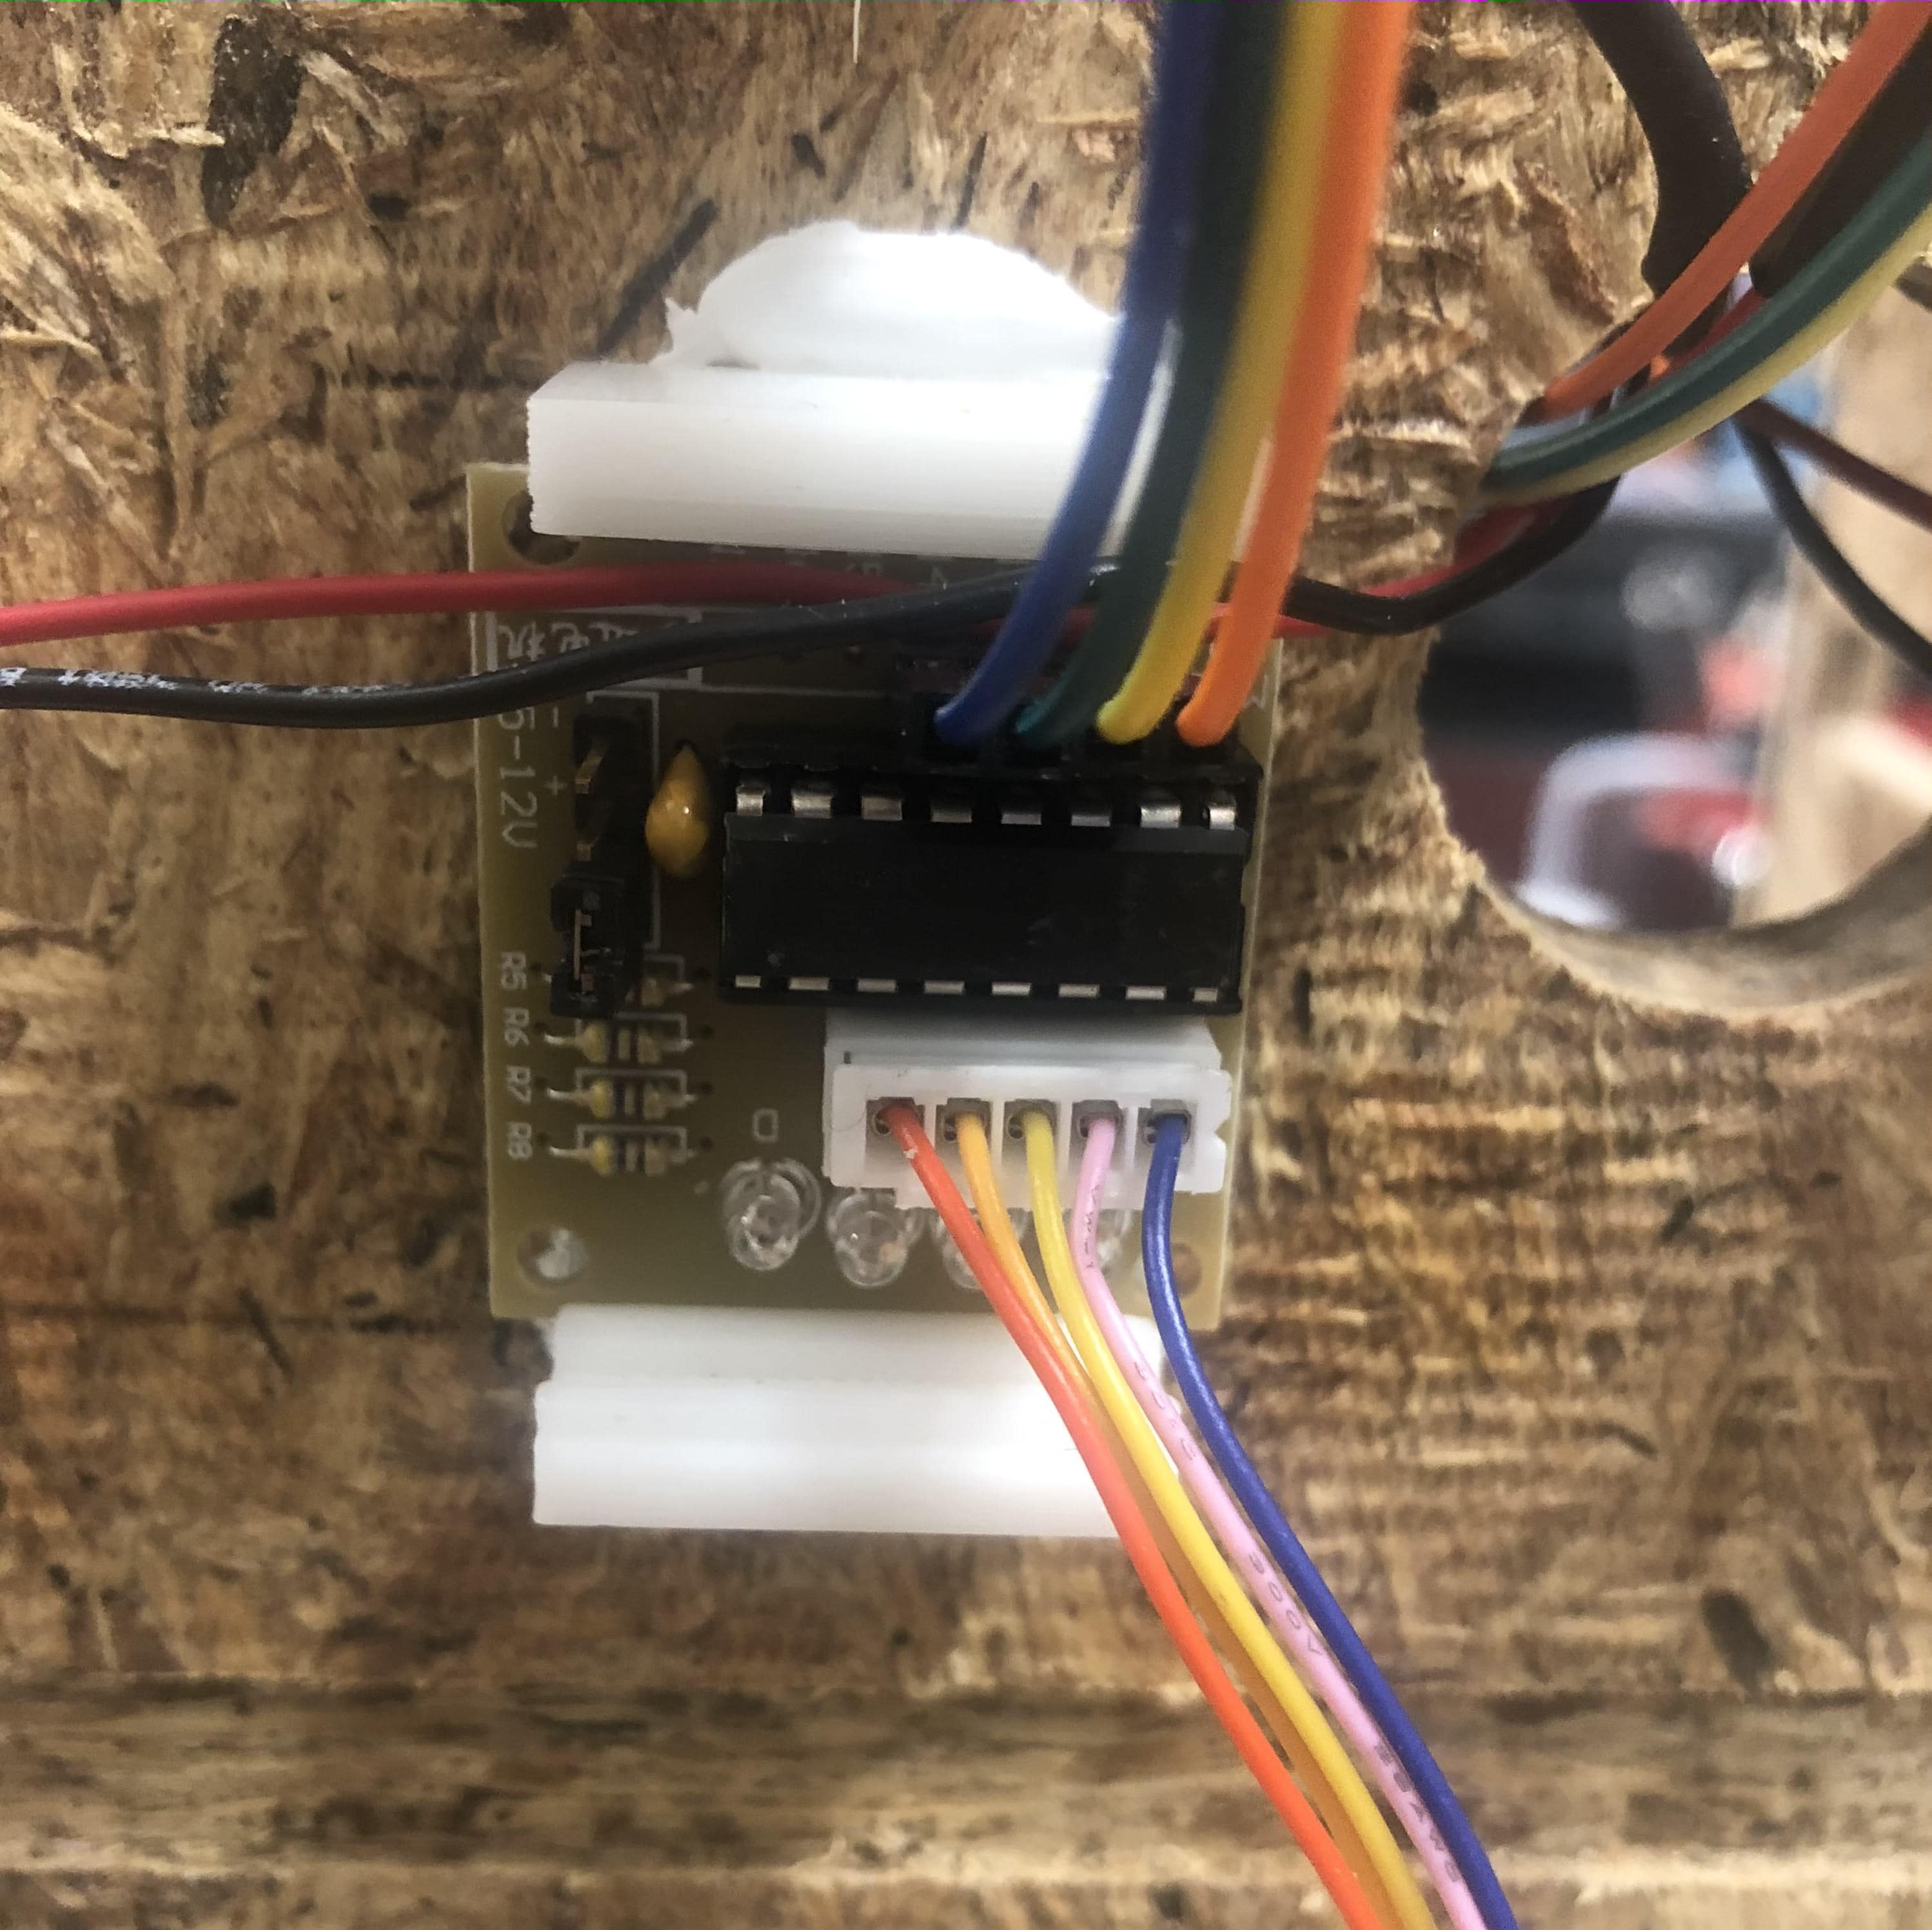
This stepper motor was connected to a driver, which was mounted onto the back of the box, using the same slide-in prongs from the other boards:
Mounted Driver
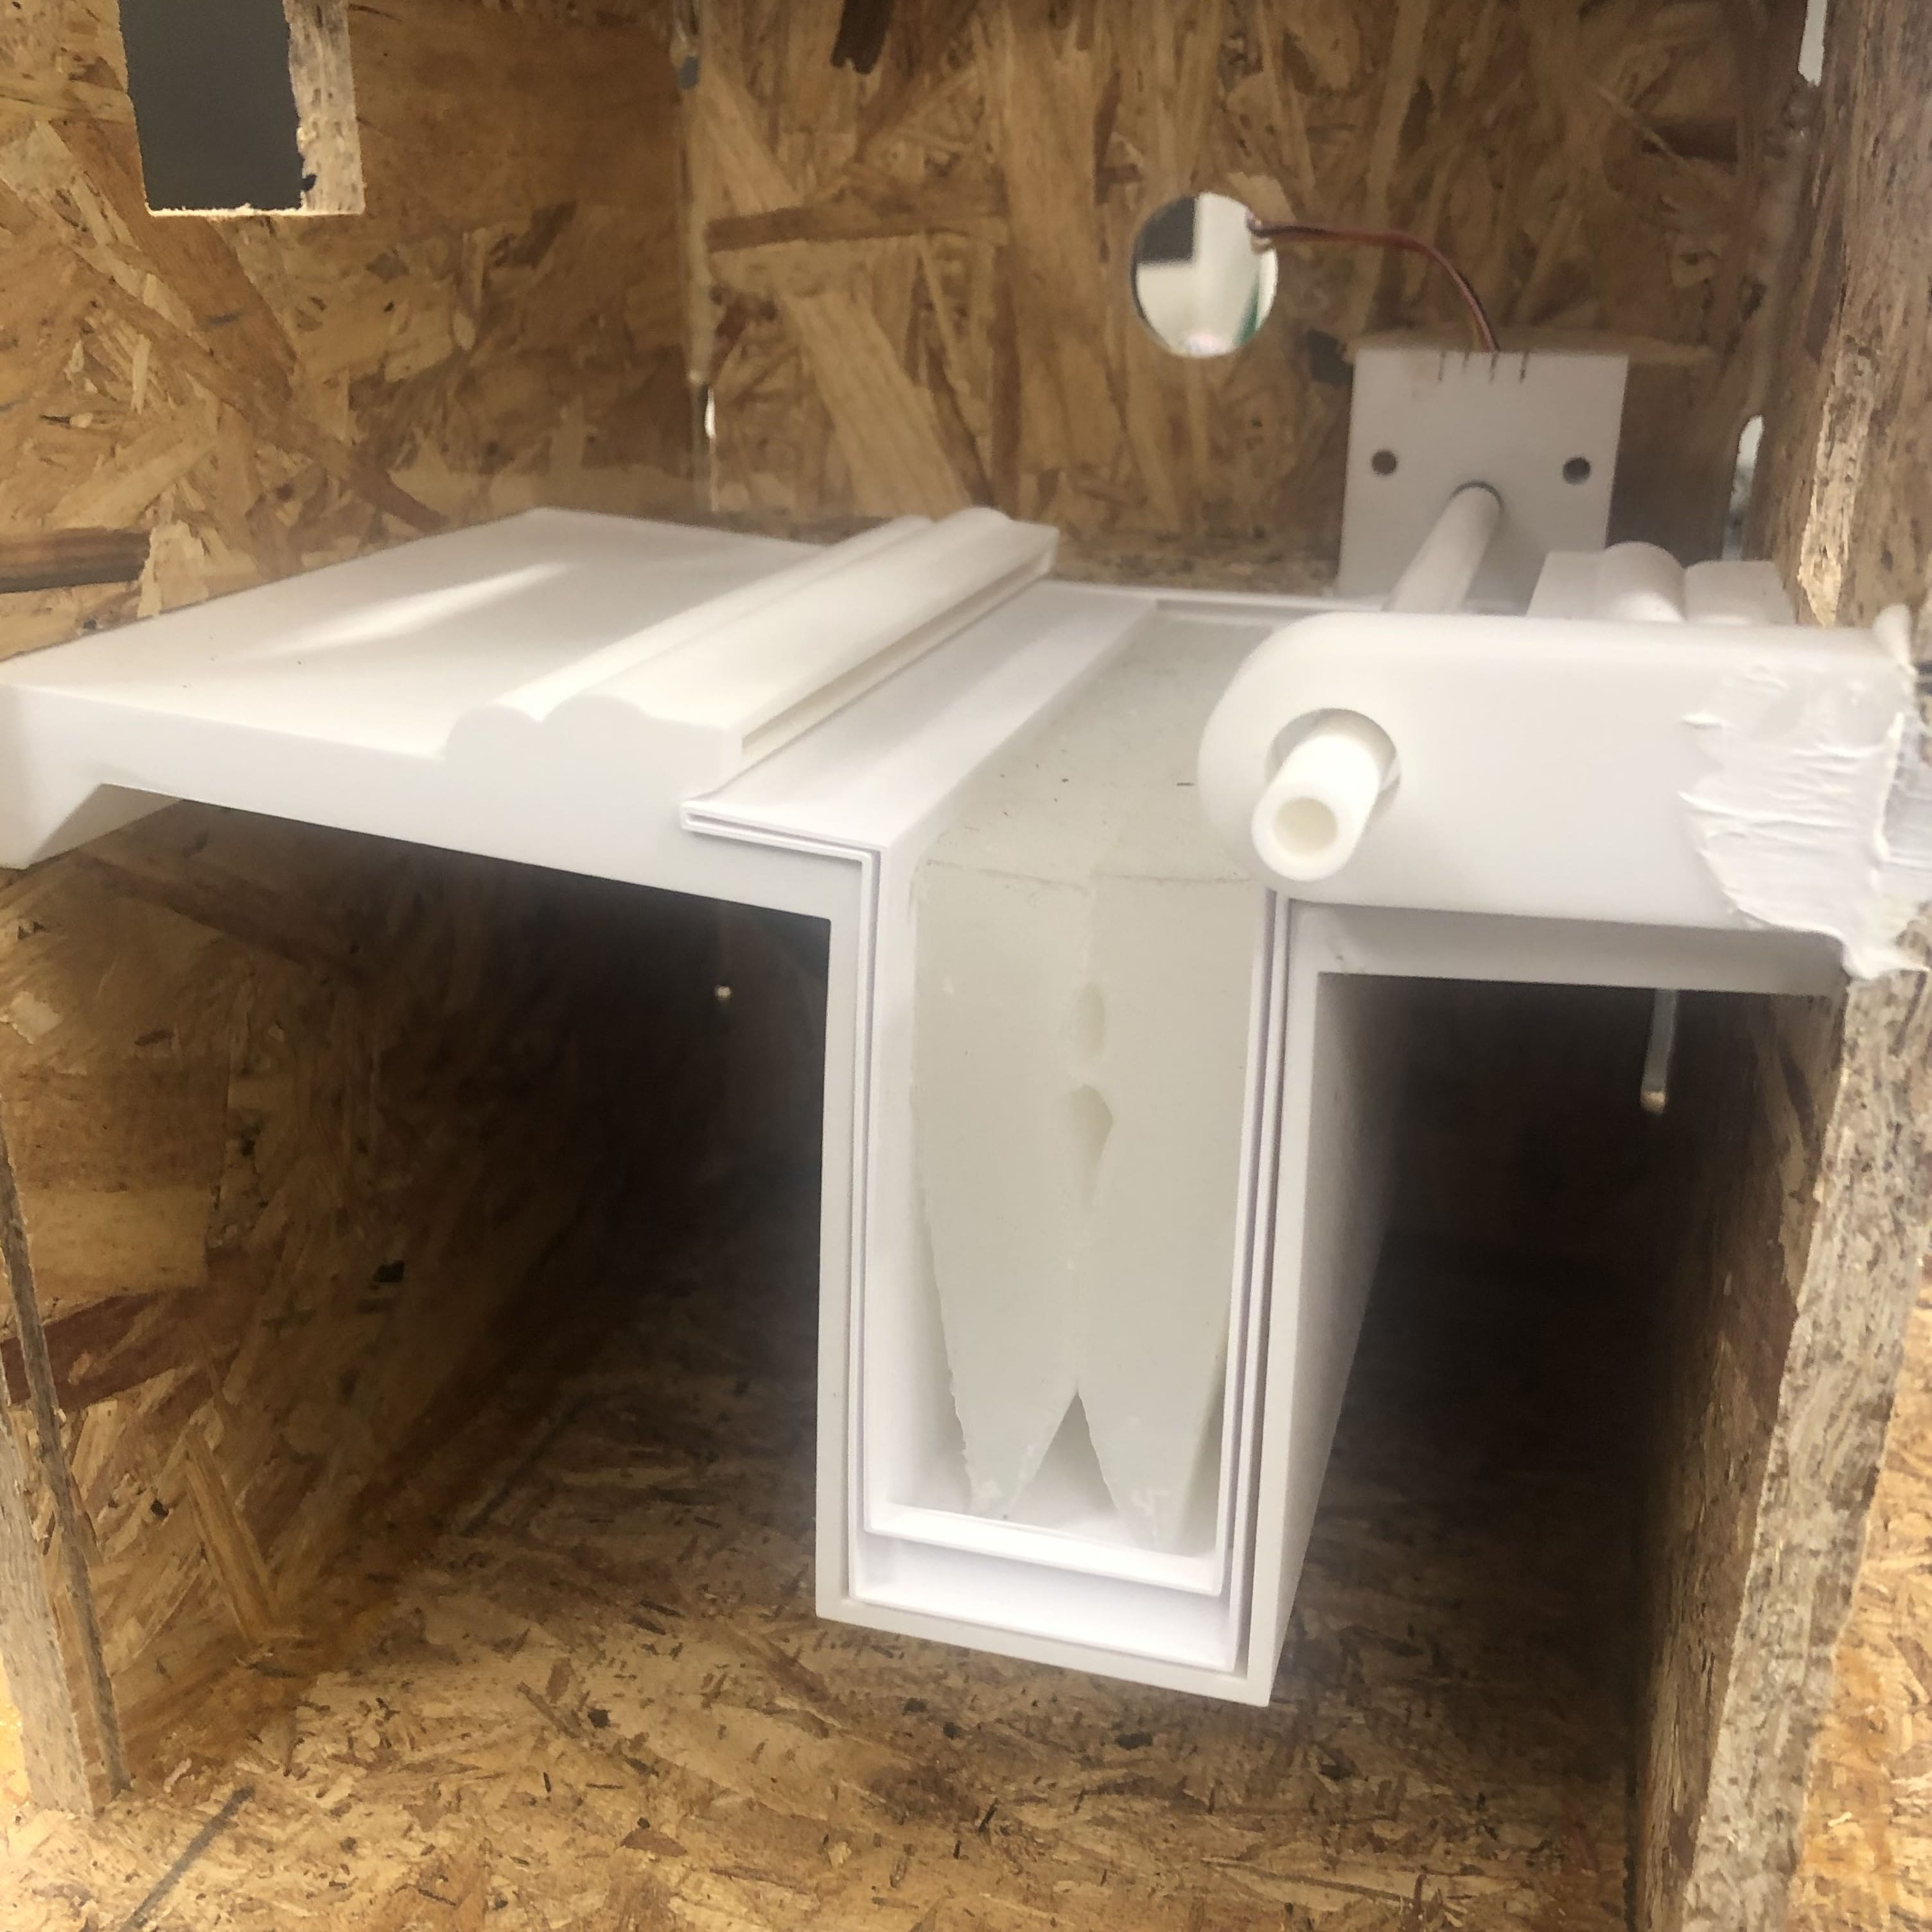
From the front of the box, you can see the stepper motor in place, which had a plastic pipe attached to it. This pipe was connected to the stepper motor with a small 3D piece I designed and fed through a mount on the side of the unit:
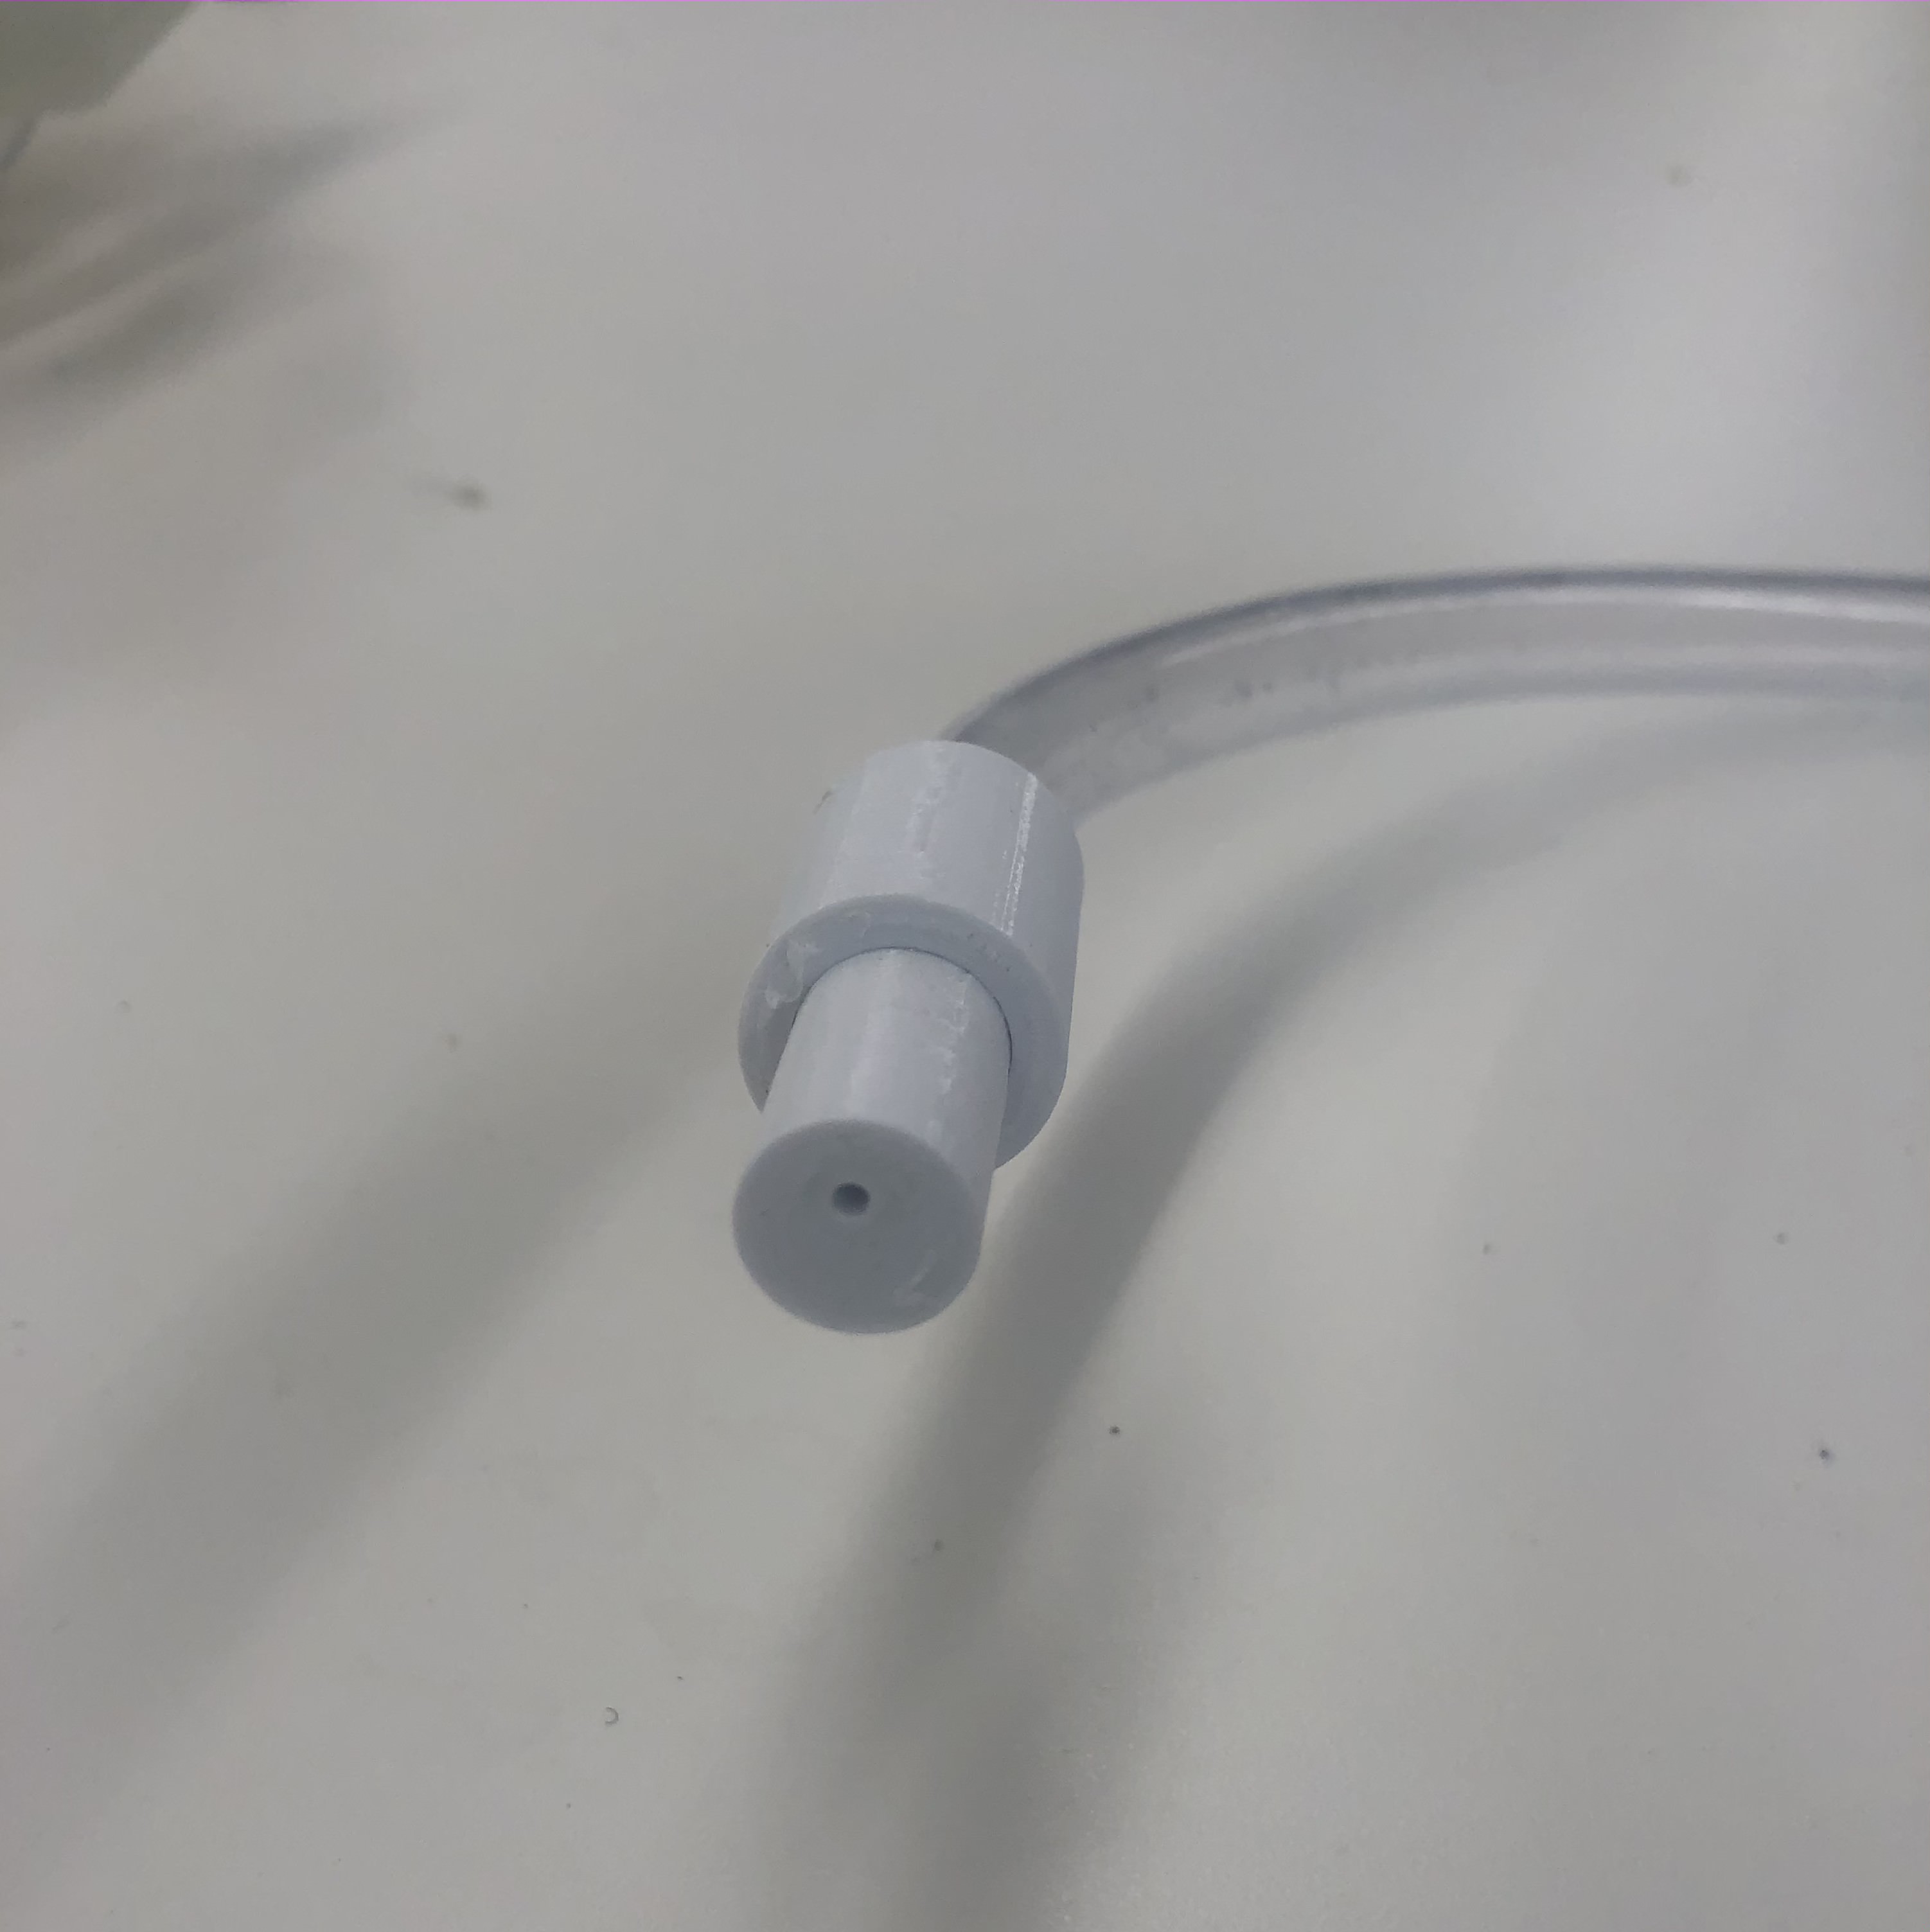
In order to irrigate the silicone bed, I used some plastic tubing, to which I attached a 3-piece nozzle system. The piece connected to the pipe was able to move independently of the other two pieces. When the 2mm holes aligned. This would allow for a small stream of water to feed into the pipe (which had pin prick holes). The stepper motor would turn on when a pin on the board was switched to low using a button on the board.
Nozzle connected to tubing
Irrigation system switching on (sound on)
As you can hear and see, the irrigation process was not perfect. First, the fitting of the components was rough, so there was some leaking in the nozzle (I used modified draft settings on the Prusa due to the number of printed iterations). Second, the motor did not have enough torque, which sometimes led to buckling and sound. Nate helped me find a better power source than the one I was using, but the stepper motor still had some issues turning the pipe at times. There was a design trade-off with the system: a more tightly fitting nozzle would prevent leaks but would require a more powerful motor. I landed somewhere in the middle. Third, the stream of water was too weak, so it took time for water to reach the end of the pipe (as seen in the video).
Fan Operation
I used the heat gun from a distance in order to stimulate hot temperatures.One fan on the unit
Here is the Arduino source file for both the irrigation and fan operation:
What does it do? Vridge is a hydroponic growing unit that allows small plants and vegetables to be grown, from seed to harvest. It has a temperature sensor and can regulate air flow. It also has a built-in drip irrigation system that runs down each row.
Who's done what beforehand? I believe other students have made hydroponic growing systems in the past. I also know that MIT had OpenAg in the past, which had a similar box form. So, my idea was not "original", but the point was to create a scalable object. Many people have DIY hydroponic systems in their homes, but the output is not something that has practical applications for local food economies.
What did you design? I designed the shelves (with the drip irrigation module), the silicone medium and the container for the silicone. I also designed the inner and outer frame of the system, including holes for airflow/wiring components. Finally, I wired the thermal sensing components and the fans.
What materials and components were used? Include cost, origin? The outer shell was insulating foam that was available in the shop. I adhered it to the OSB frame that I designed. There was more than enough OSB in the shop, so this was a cost-effective option. The "shelves" were actually two separate components. There was the shelf itself (which contained the drip irrigation module) and the inner container for the silicone. Each shelf component was 3D printed with PLA available in the shop. The irrigation tubing was 1/2 inch tubing that I cut from the shop's supplies. I did have to purchase an extra container of Ecoflex for the silicone mold, since the shop was running low ($30). That was the biggest cost for the project. The wiring components were all available in the shop, but I did purchase small 5V fans ($5) to be used. I included a plastic screen using sheets I found in the shop.
What parts and systems were made? What processes were used? The shelves were designed in Fusion and 3D printed. The irrigation system allowed me to slip the tubing through the circular duct (with the help of mineral oil). The hinges controlled water flow. The frame was designed in Fusion and cut using the downstairs shopbot. Some pieces didn't fit, so I had to cut additional pieces with the upstairs shopbot. They were held together with joints (and I added some wood glue on the base for stability). The silicone media had to be cast in a mold. Because the mold was too deep to be milled, I had to 3D print the mold. I cut out the insulation with an razor blade, and adhered some plastic sheets together for the screen using the heat gun on a low setting. For the thermal sensing and fans, I wired both legs of a thermistor to the board with a coupled resistor. I programmed the board to read out temperature using analogRead. Once that was done, I wired the two fans in parallel to the board and included a FET. I programmed the board to supply current to the transistor port when the thermal reading was above a certain value, which would open the gate and allow current to flow through the fans.
What questions were answered? The biggest accomplishment was showing that silicone could be used as a potentially resuable medium to replace soil. Granted, I only got through the germination phase by the final project presentation, but that was a breakthrough.
What worked? What didn't? The shelving system and irrigation components worked well. However, the hinges that I had to control water flow were too tight and had to be sanded down. There wasn't enough room in the back of the system to include stepper motors (which I wanted to use to control the flow instead of manual operation). The temperature sensor and fans all worked as expected. I wanted to include LED lights and thermoelectric cooling/heating, but it was a bit too complicated for me to do at this point.
How was it evaluated? The most important qualities for me were: form-factor, plant viability, and scaling. I think the form-factor could be optimized, since there were systems that weren't included (e.g. lighting) that would need to be better integrated into the frame. I also found it would be difficult to replace certain parts, so I think that requires either better modularity or improved system integration (so that things don't need to be replaced). I think plant viability was a success, and that will only improve once I add the lighting and HVAC systems. Scaling is still an open question. The silicone mold worked, but I realized that I would need trim/optimize the medium design. Eco-flex is quite expensive ($30 per container), and if I want to add additional shelves and make the rows longer, I am going to need to stretch out my resources.
What are the implications? On a personal level, I called friends in Detroit recently, and was reminded about ongoing food apartheid. I know that my project in comparison to others does not seem very complex -- after all, I'm not reinventing the wheel by any means, and there is a long way to go before I have the ability to do all that I want with this project. But I couldn't be any prouder for trying to confront structural violence that I have observed throughout my life. Even if this project is not the complete solution, it is a step in the right direction for me.