07 Casting
AI GENERATED TEAPOT
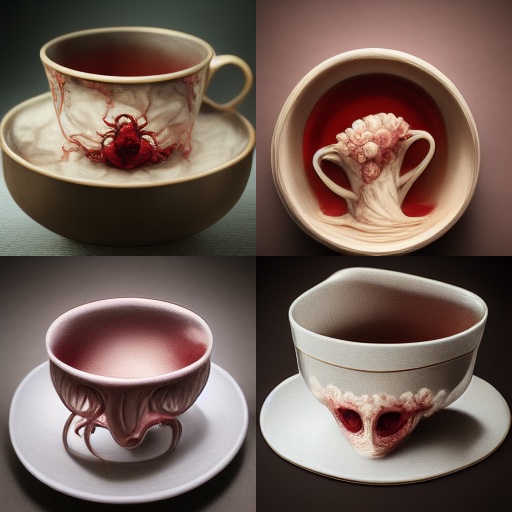
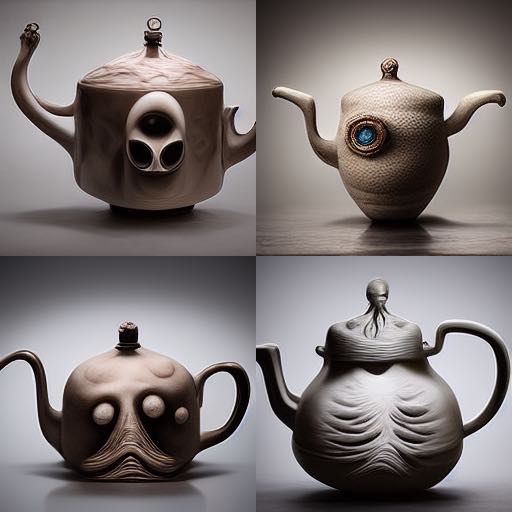
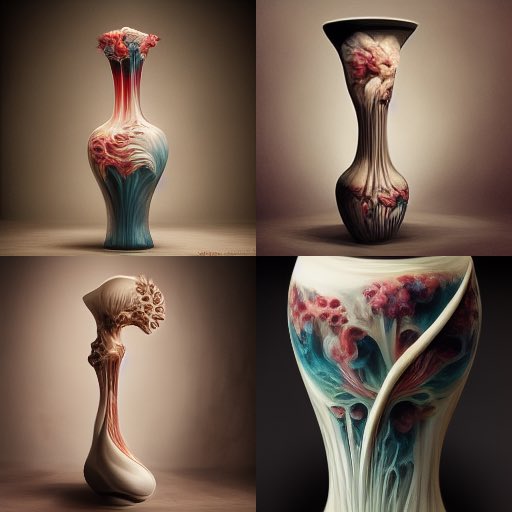
The idea was to generate an everyday object in collaboration with a generative AI system. Using Midjourney with the prompt "A surreal [tea cup, teapot, vase], abject art], I was able to generate some interesting concepts for the objects.
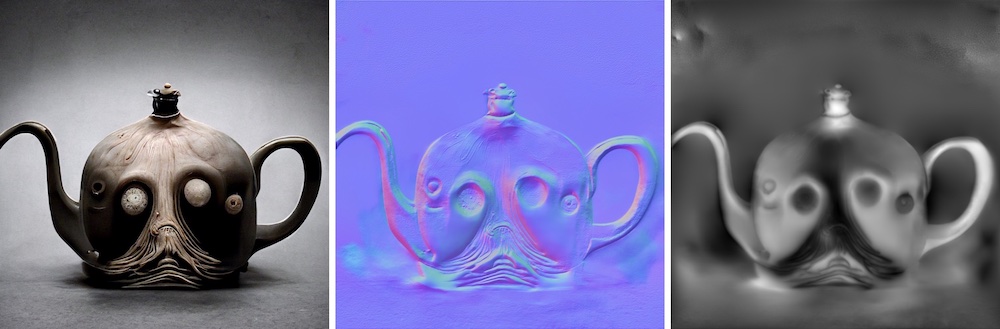
Choosing a vase, I opened up Adobe Substance 3D sampler. Using their automatic image to material textures pipeline, I was able to extract color-map, normal-map and height-map textures.
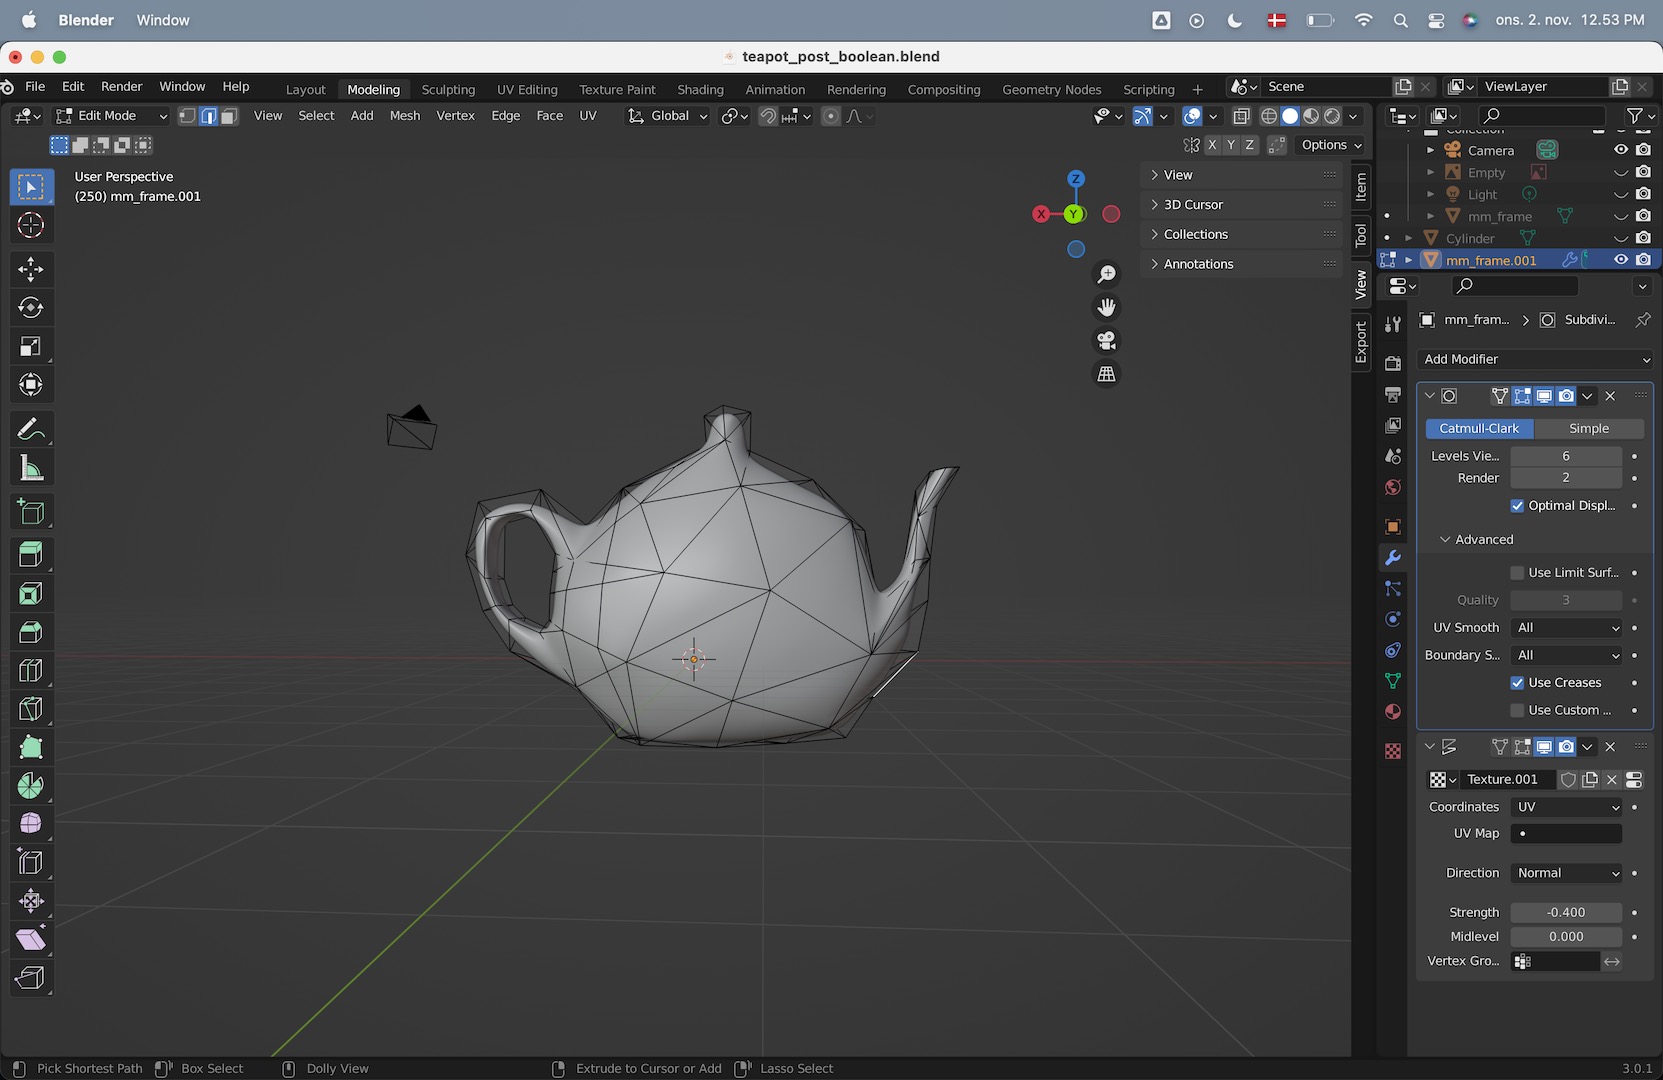
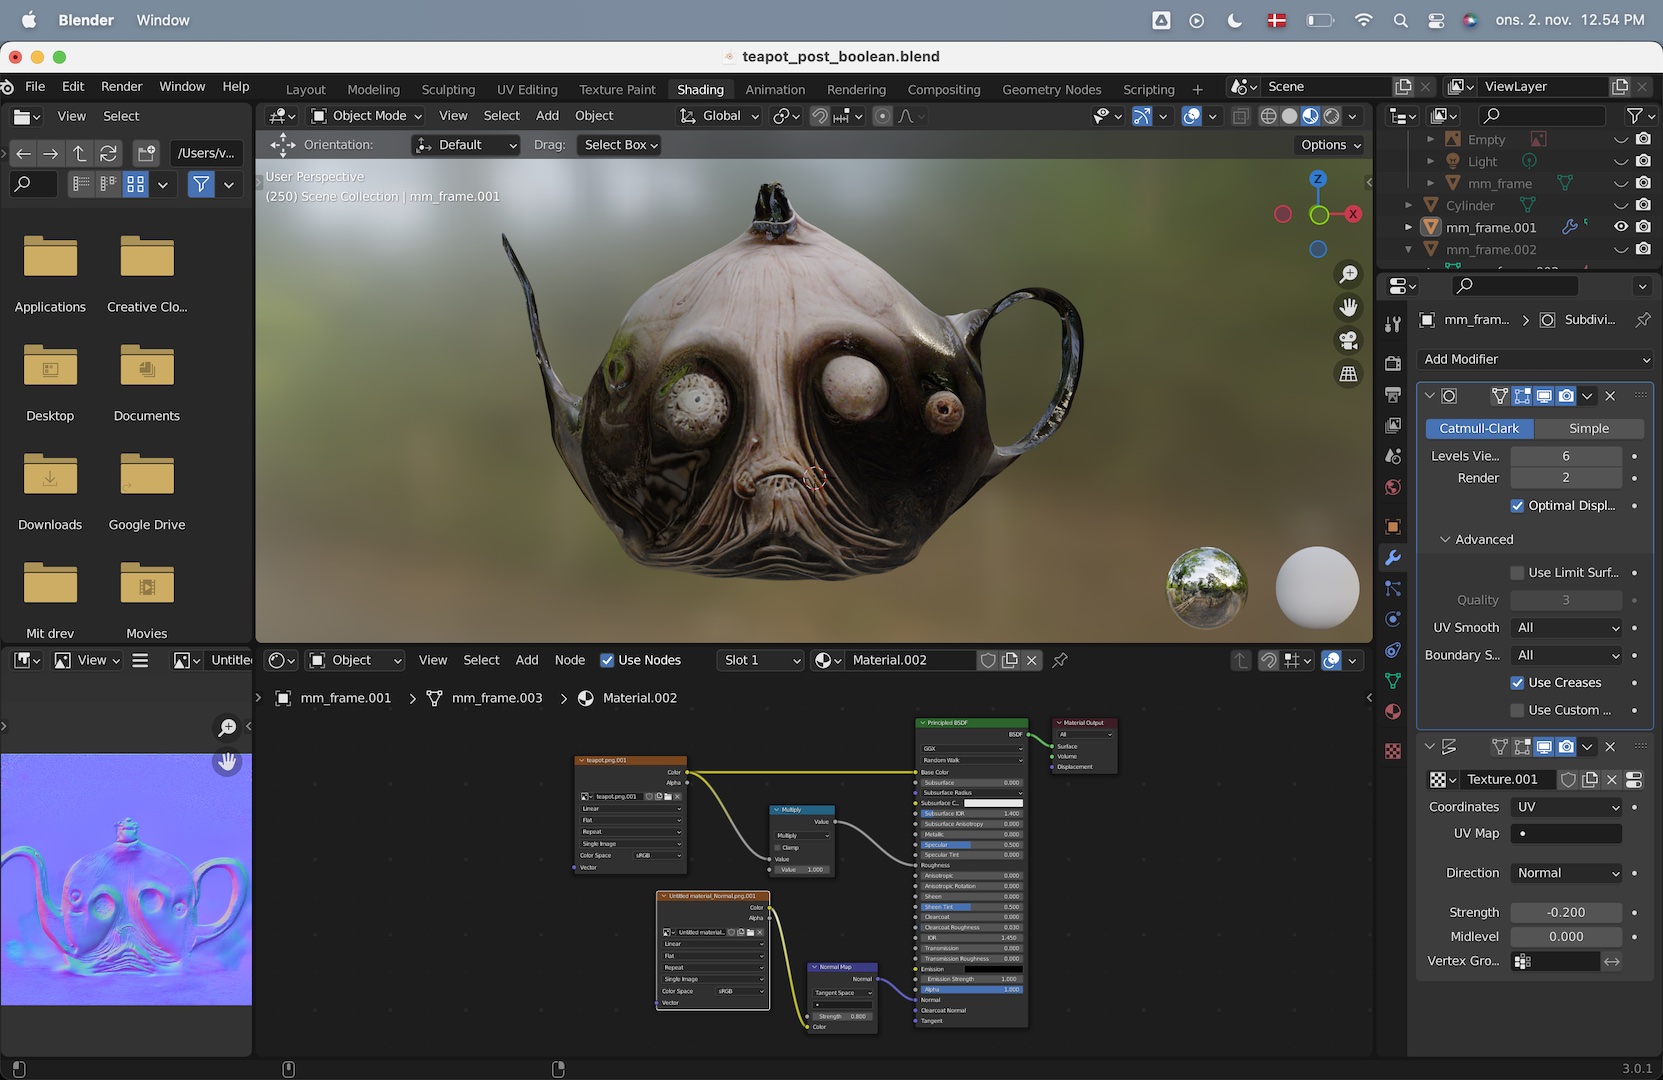
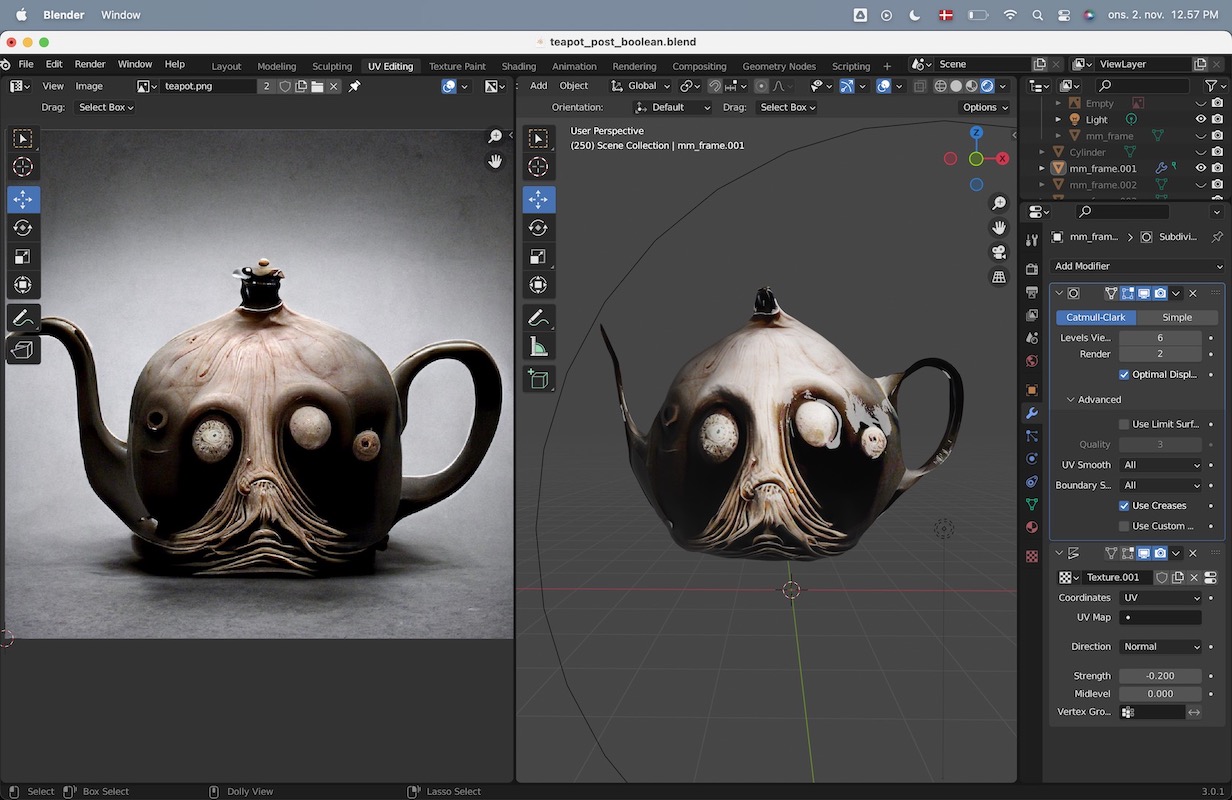
In Blender, I proceeded to model out the shape of the vase from the side and UV map it to wrap nicely with the concept image (this was the most time consuming part). Next, using the shader-graph, I gave the vase its textures and used a depth map modifier.
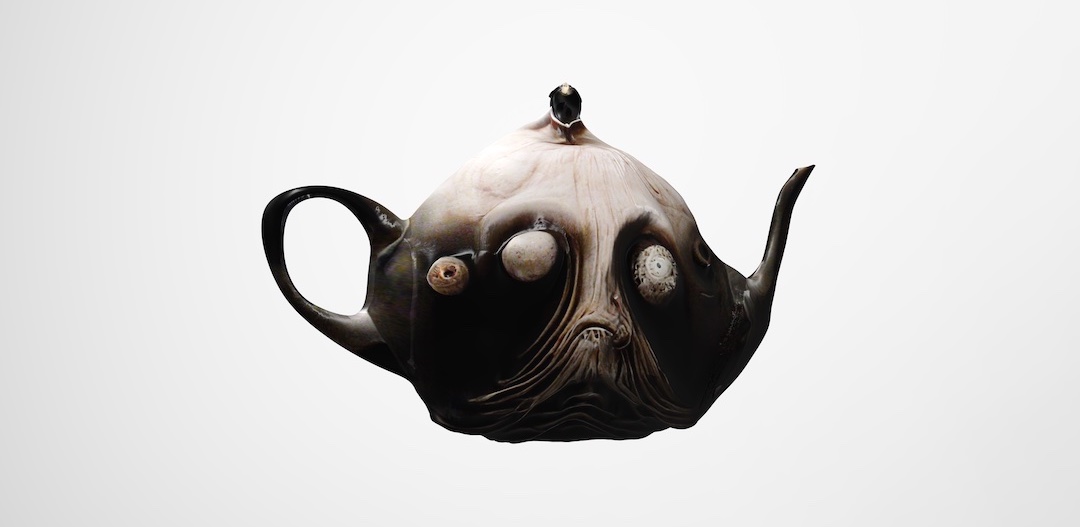
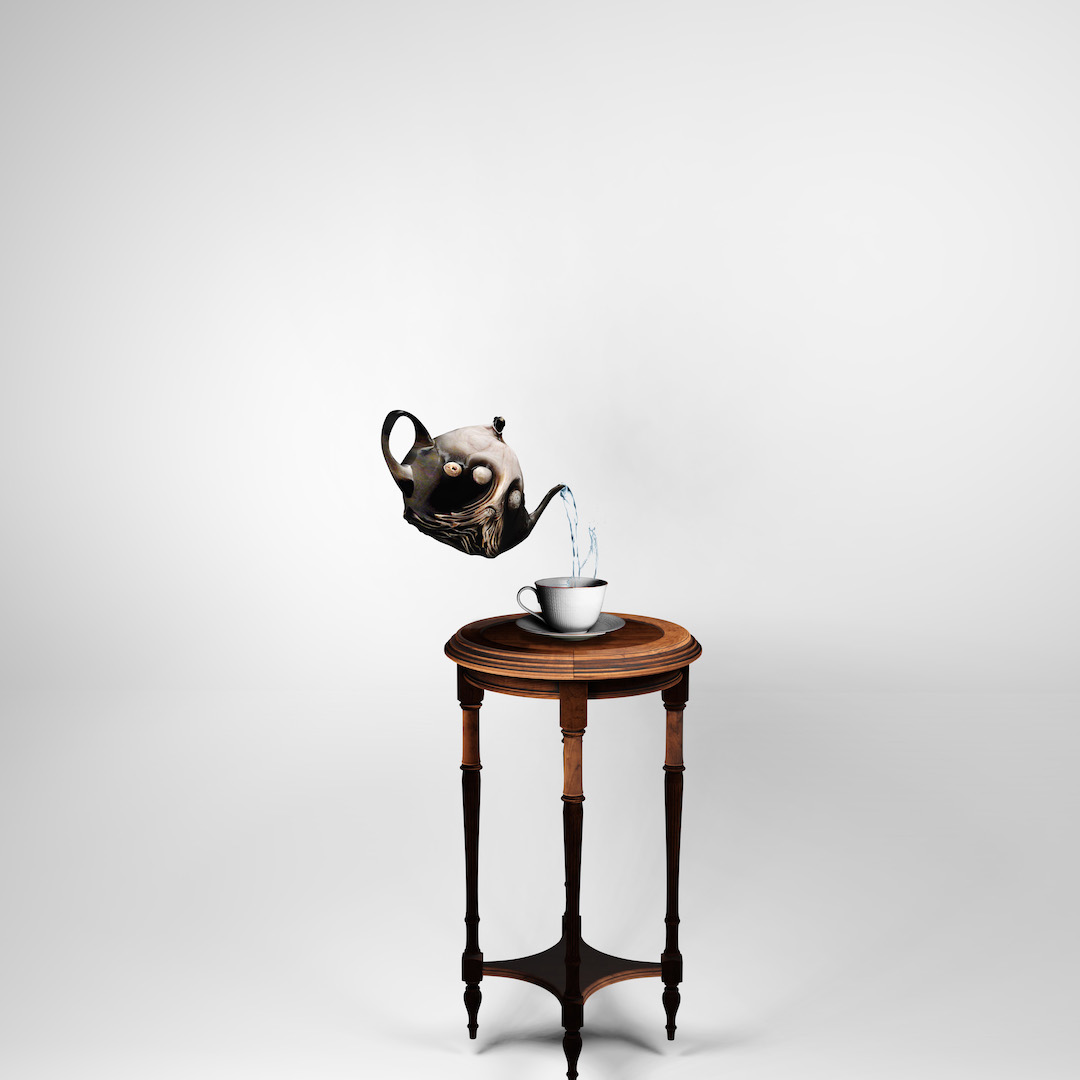
Final close-up render! Now on to the casting.
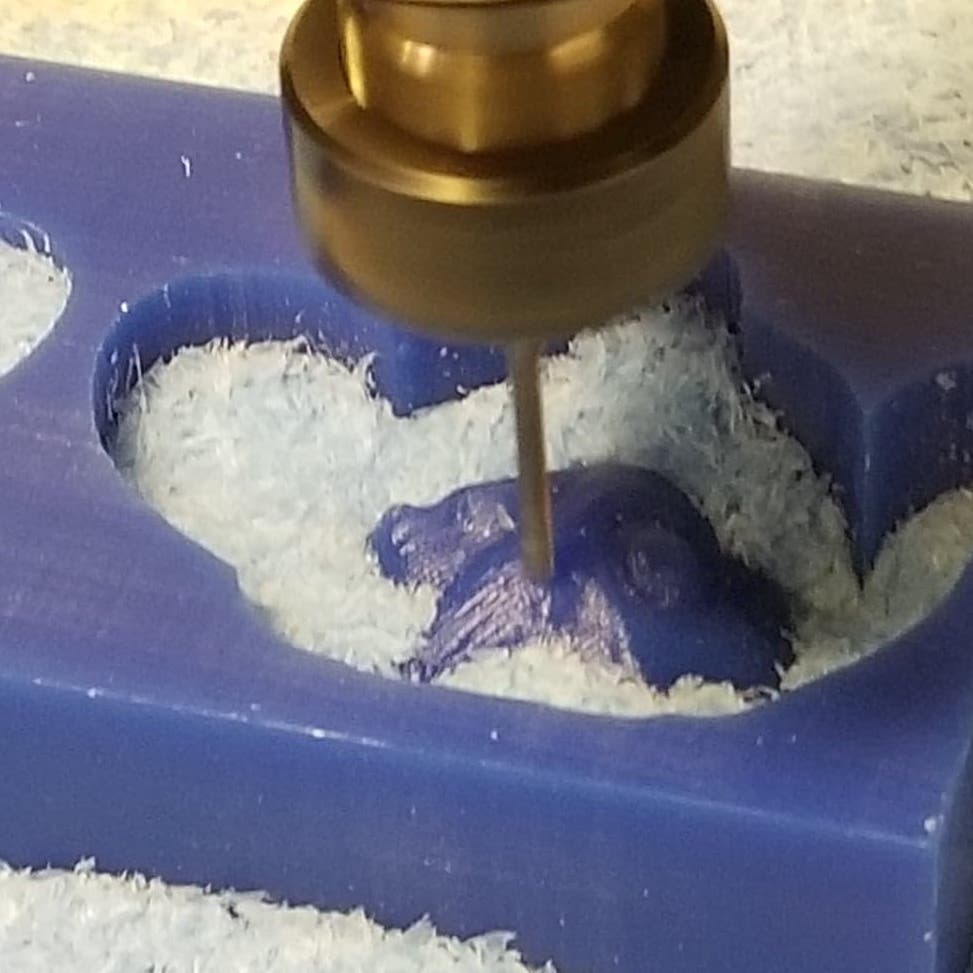
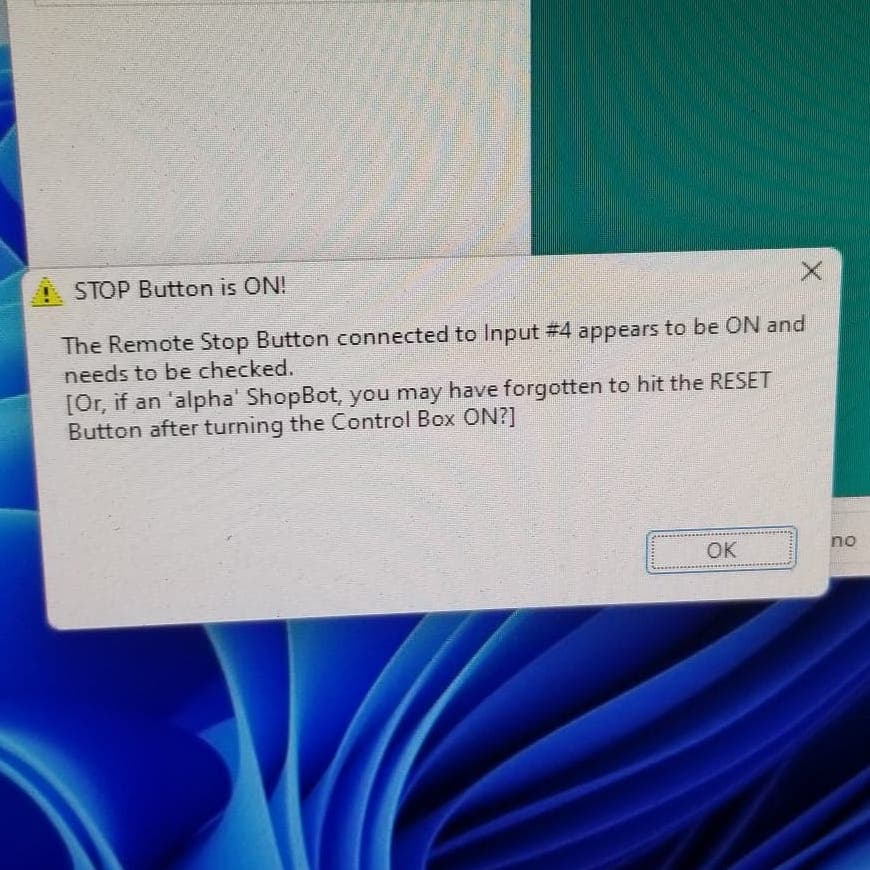
For the casting, I needed a double mold with a negative of the object. To do so I first milled a positive of each side of the teapot model using the small CBA ShopBot using wax as material. The wax block size was 7x3x1.5 inches and so I scaled my two sides to fit within the block. I then generated a tool path for the ShopBot using the software "cut3d". For the rough and fine cut, I used the ball 1/8" endmill. To ensure that the model had sharp enough edges to connect in the double mold, i did an extra fine cut using the flat endmill. Half-way through the process the machine stopped working with the error that a "Remote Stop Button" was on. This set me back quite a bit a we had to resolve this error by the end of the day and as such I had to come back the next day to finish the wax positive.
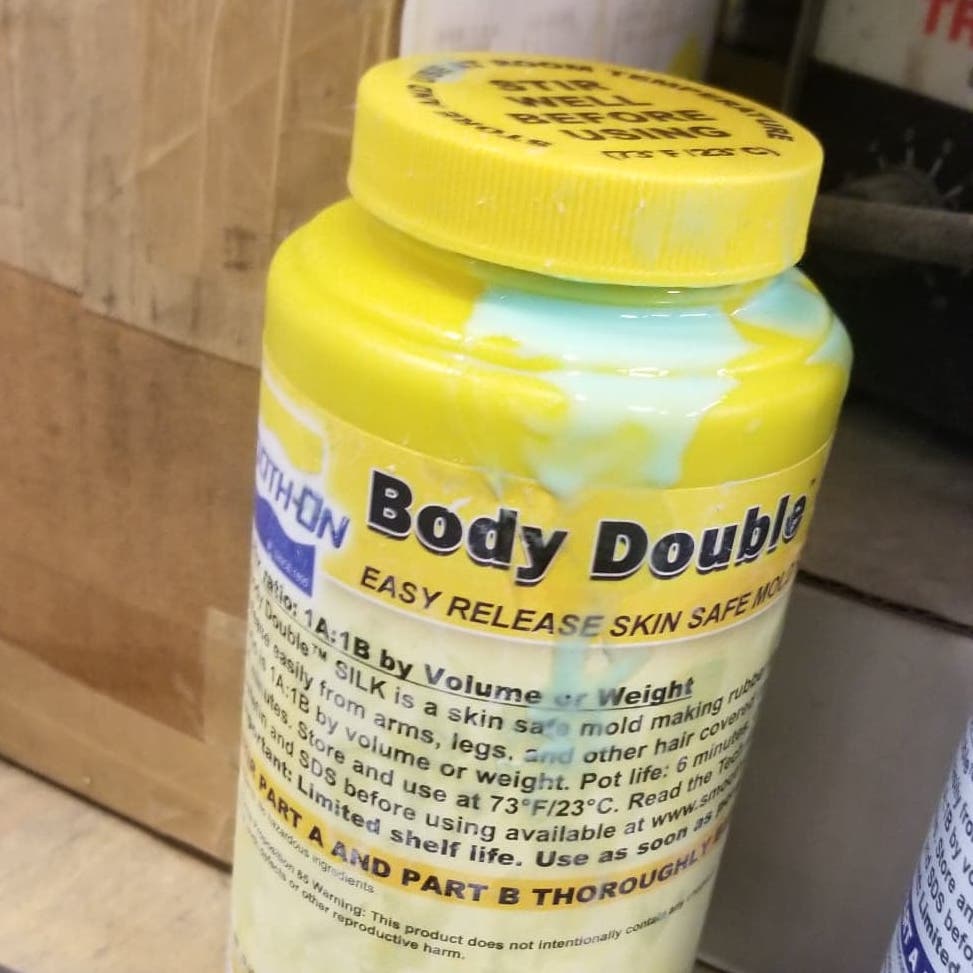
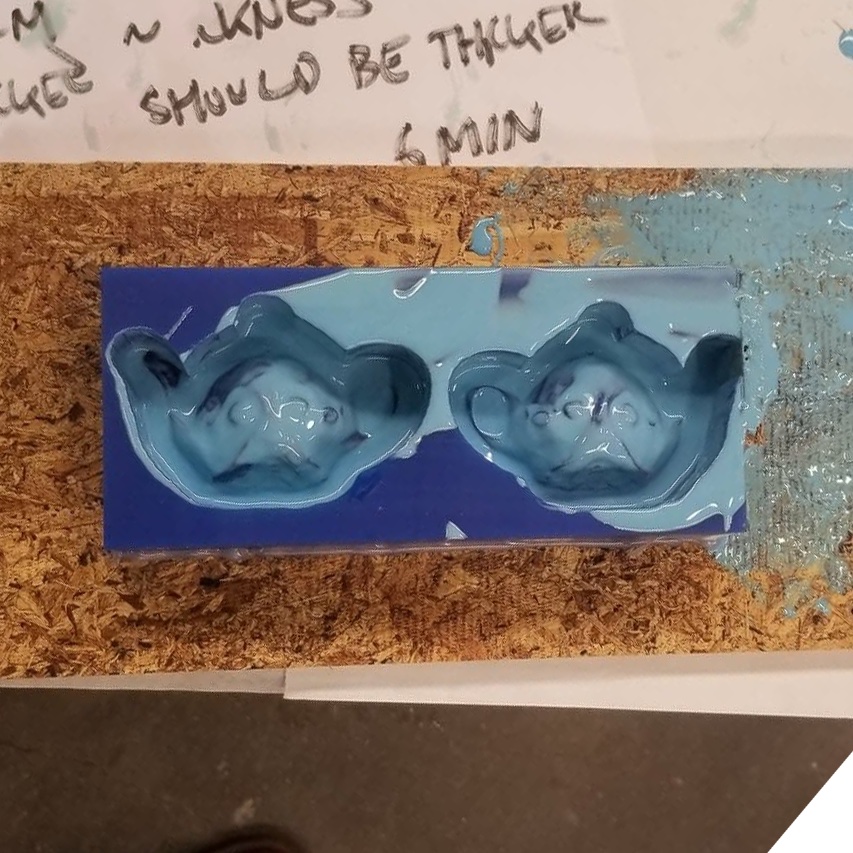

Next, I had to use my negative wax block to create a silicone mold. To do this, I used OOMOO 25. Here, following the instructions, I first gently stirred parts A and B of the OOMOO and that mixed equal volumes of each part. Then, I waited for 3 hours and found that the OOMOO had still yet not cured. After some debugging, I found that someone had placed a different kind of part B (in the exact same color!) on the table that I had accidentally used. I then spent 20 minutes cleaning up my wax block and did a proper mixing of the OOMOO parts. Eventually I had a proper silicone mold.
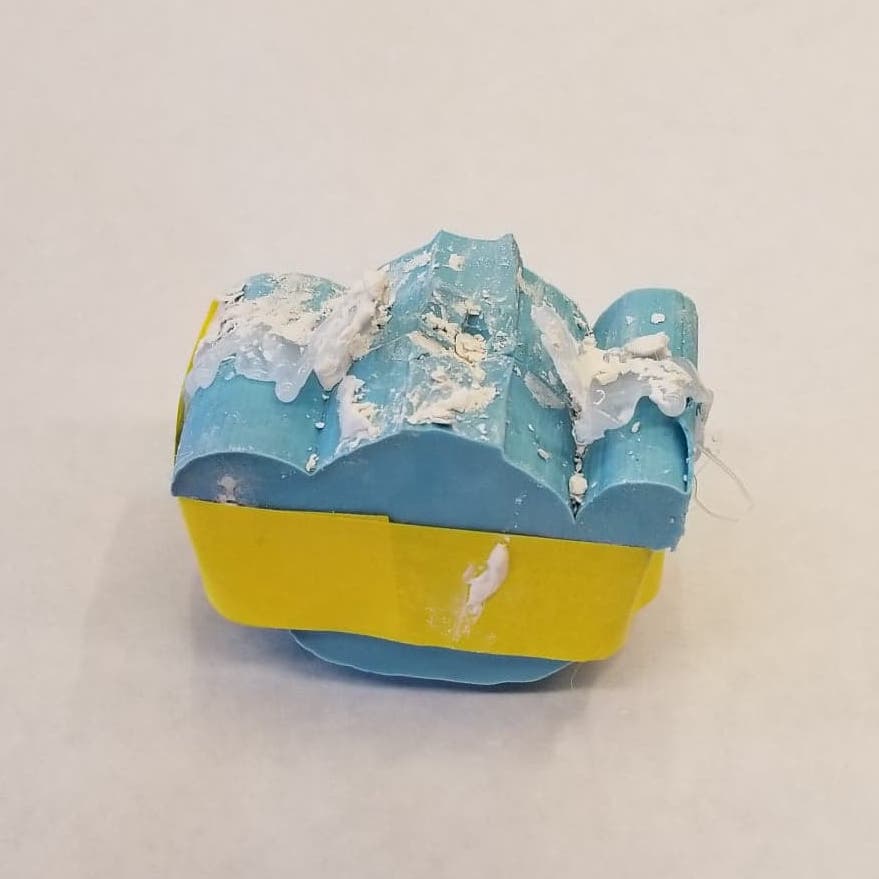
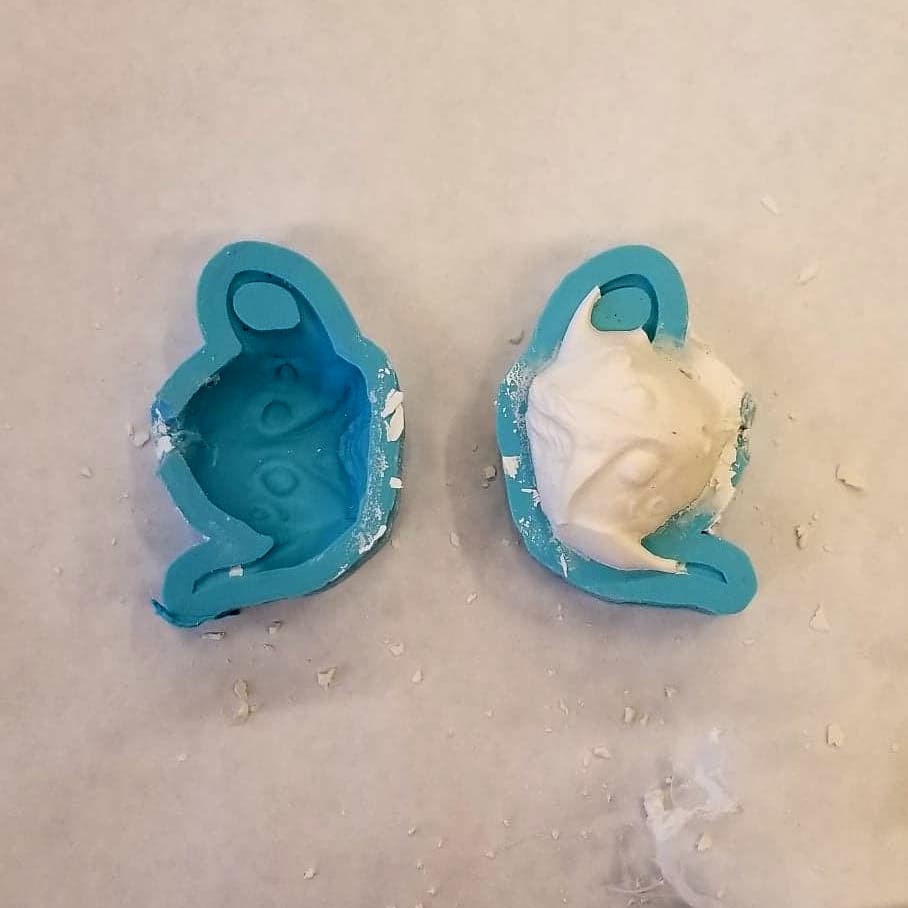
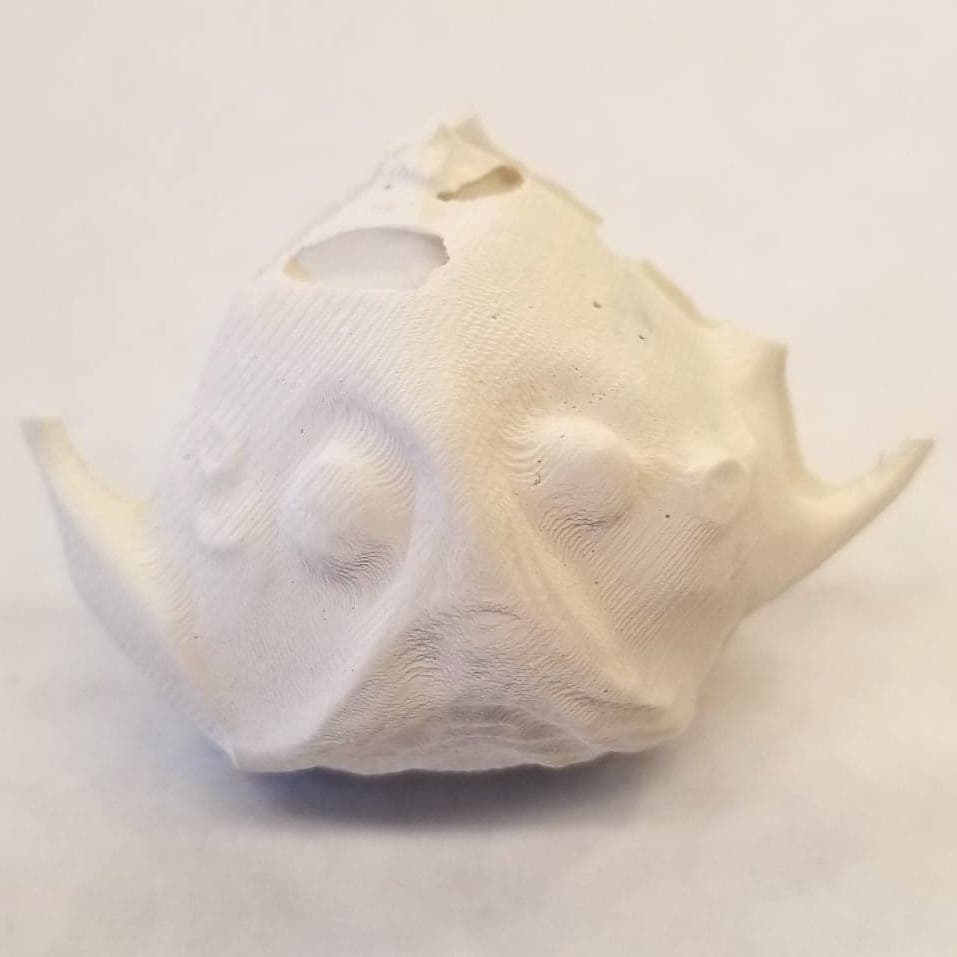
To enable me to fill the negative mold with mixture I cut one hole in the top of both mold parts. With the silicone mold ready, I then the prepared the drystone mix. I found that the best results came from just paying attention to the consistency. The mixture needed to be liquid enough to flow well into the top hole.