
Wildcard Week
Sheet metal, waterjets, and EDM, oh my.
Sheet metal, waterjets, and EDM, oh my.
Design and produce something using a digital fabrication process (incorporating computer-aided design and manufacturing) not covered in another assignment.
This week was an opportunity for us to explore a concept in digital fabrication that we didn’t otherwise have assigned.
I had a hard time choosing , since everything is so cool! Inflatables with Miana sounded fascinating, as did the Zund with Alfonso. (The Zund is a machine that uses different head attachments to cut, fold, and bend almost anything... and it’s huge!)
However, since time was limited with finals, I decided to focus on something more manageable in terms of scheduling: sheet metal design.
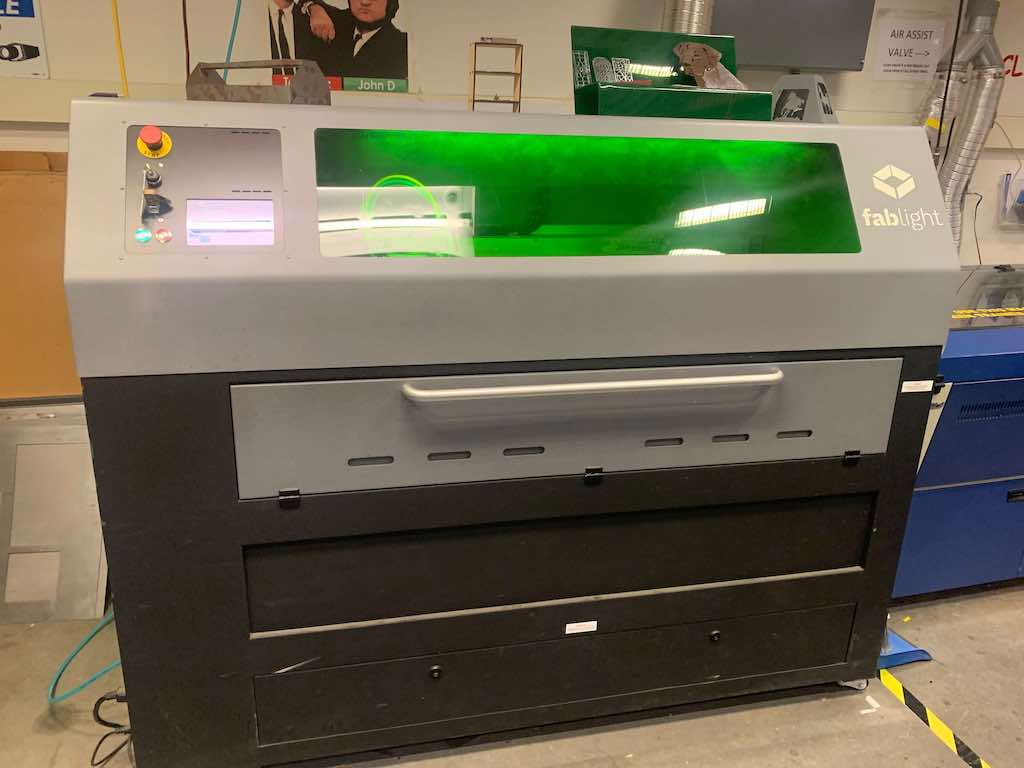
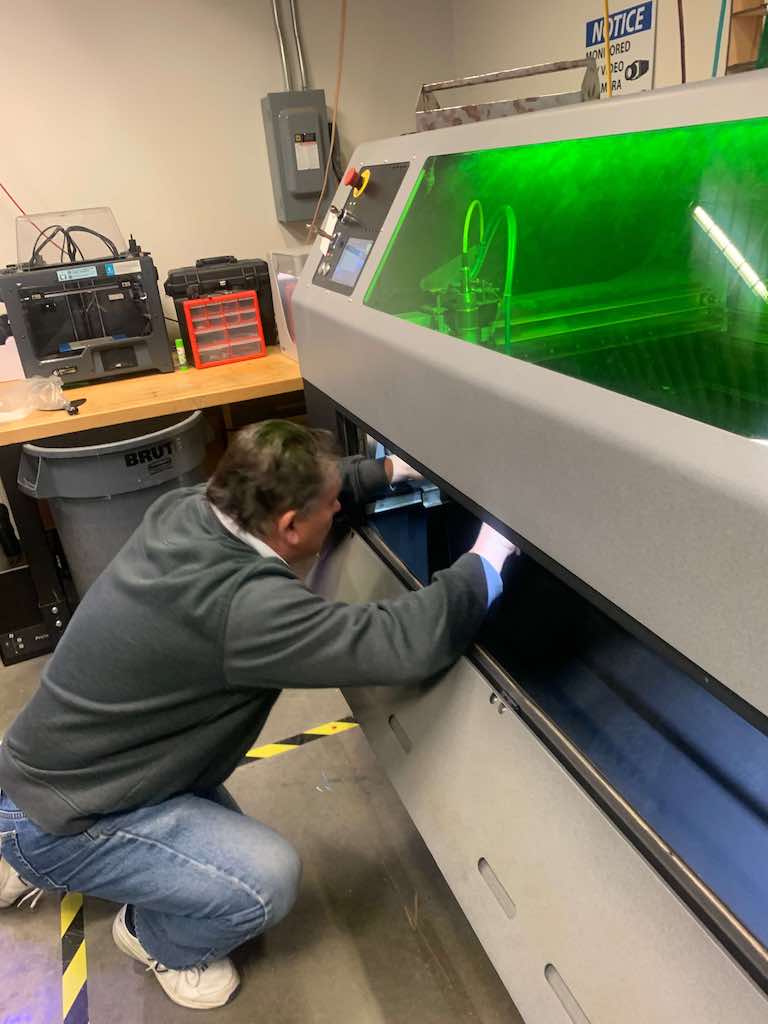
Because the FabLight (a metal-compatible laser cutter) broke down part of the way through cutting my project pieces, I also got an impromptu lesson on the waterjet as well as a special spray-on coating that allows a CO2 laser cutter to raster on metal.
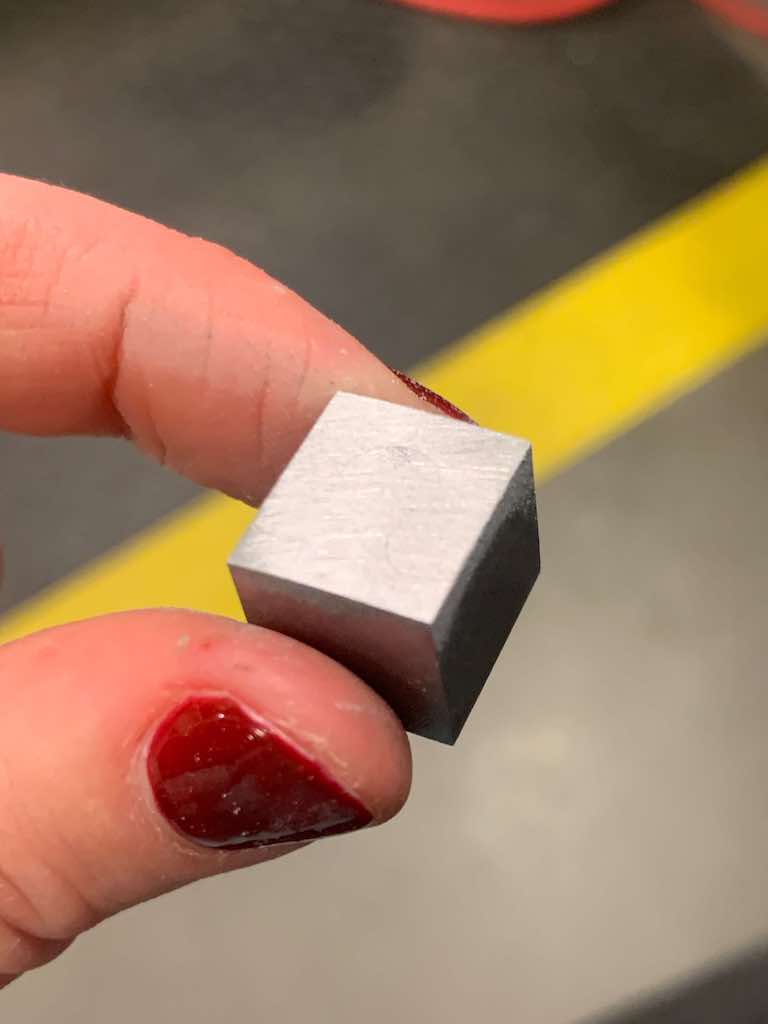
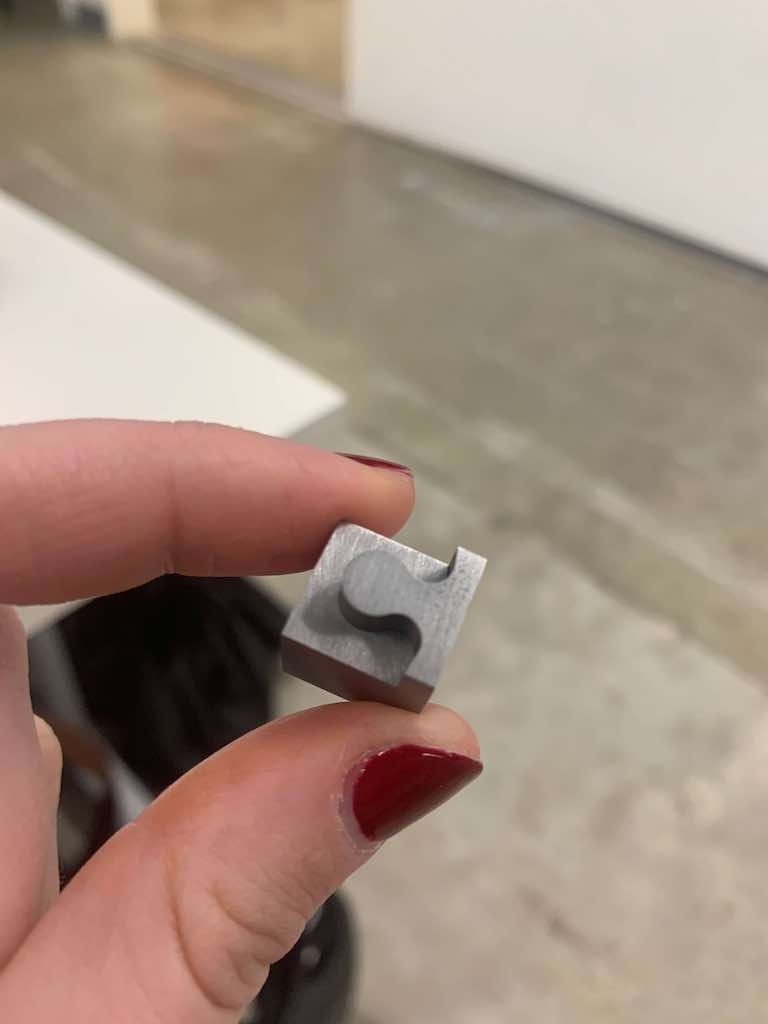
For good measure--and because I think the process is infinitely cool--I also attended EDM training and was able to basically use lightening to cut a near-perfect finish on thick metal stock. Doing this on two separate pieces and allowing for kerf clearance, I was able to create a perfect enough tolerance between two puzzle pieces that they slide together nearly seamlessly.
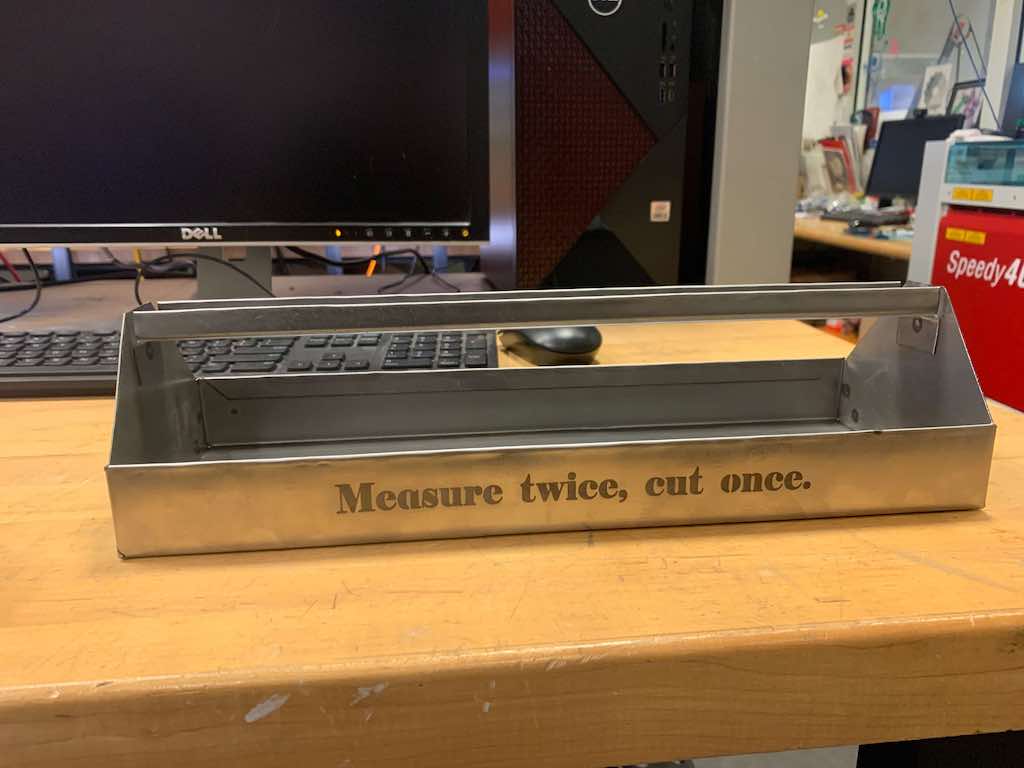
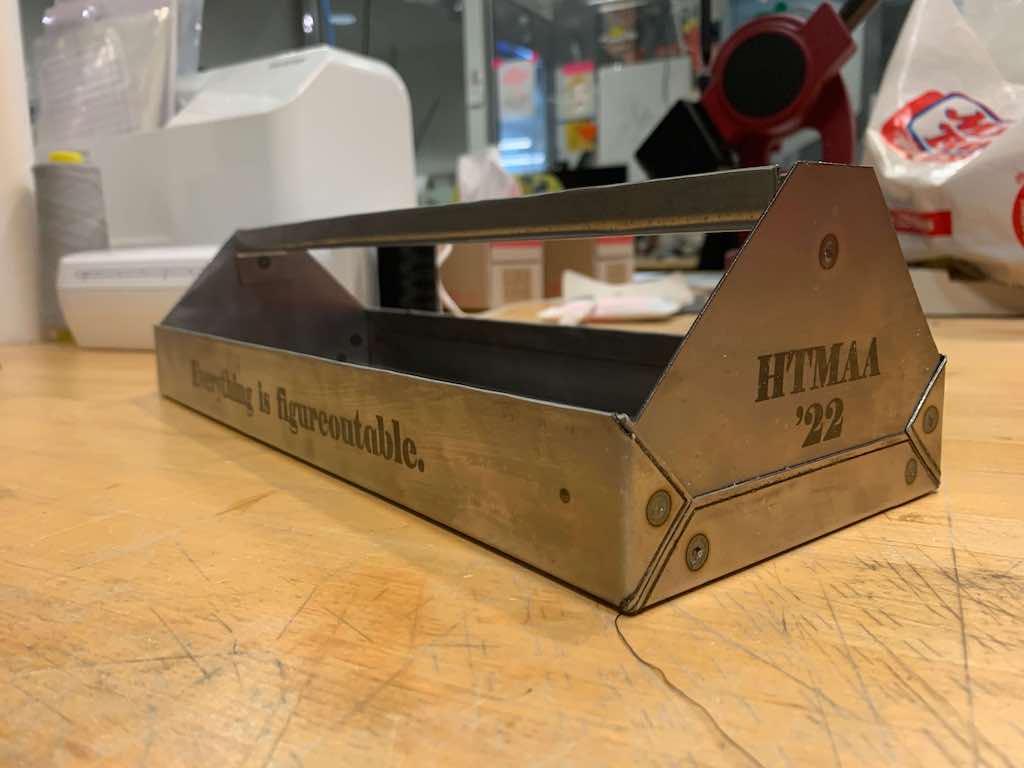
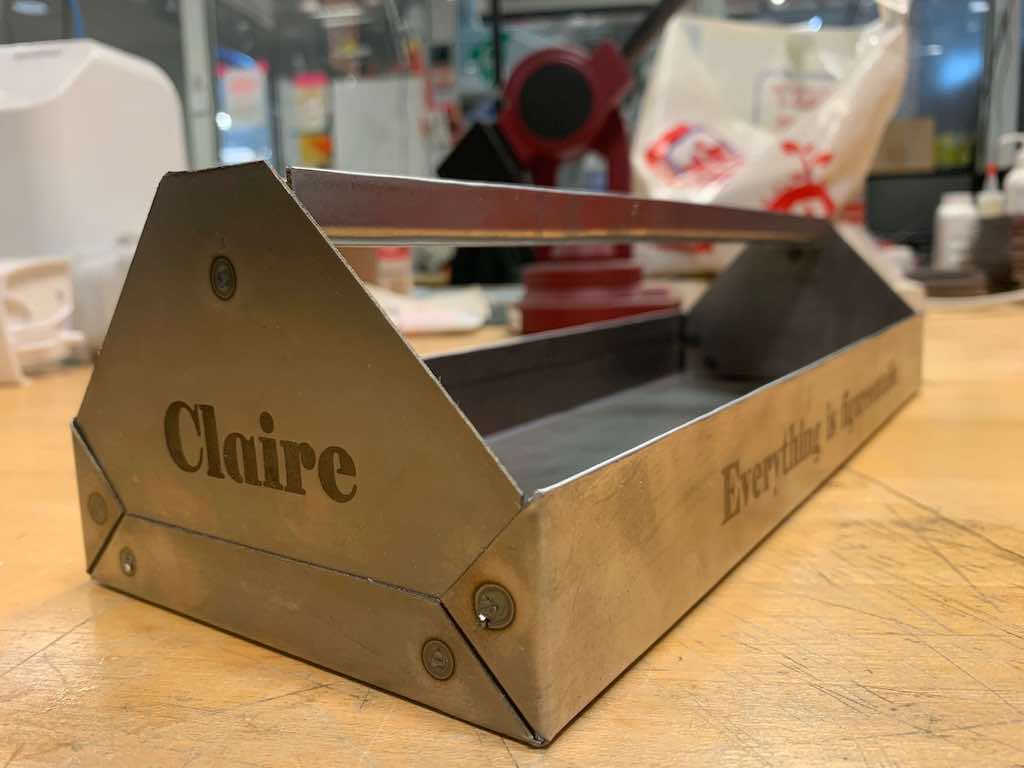
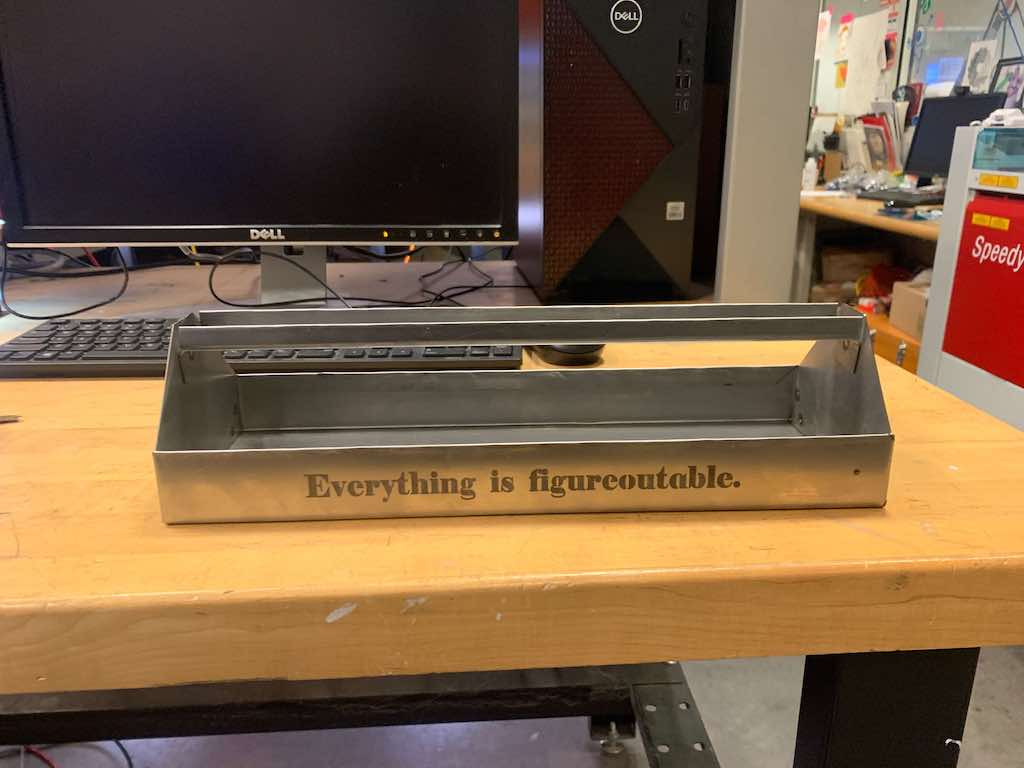
By the end of the week, I'd made a customized steel tool tray and a puzzle piece fidget toy.
TRAINING
On Thursday morning, I made the trek to the CBA metal shop for training. There, John introduced us to the FabLight, a laser cutter capable of cutting, engraving, and restoring metal. (Cutting slices all the way through the material, while engraving carves half-depth outlines, and rastering engraves a series of parallel lines so close together that they appear to fill a shope in.)
DESIGN
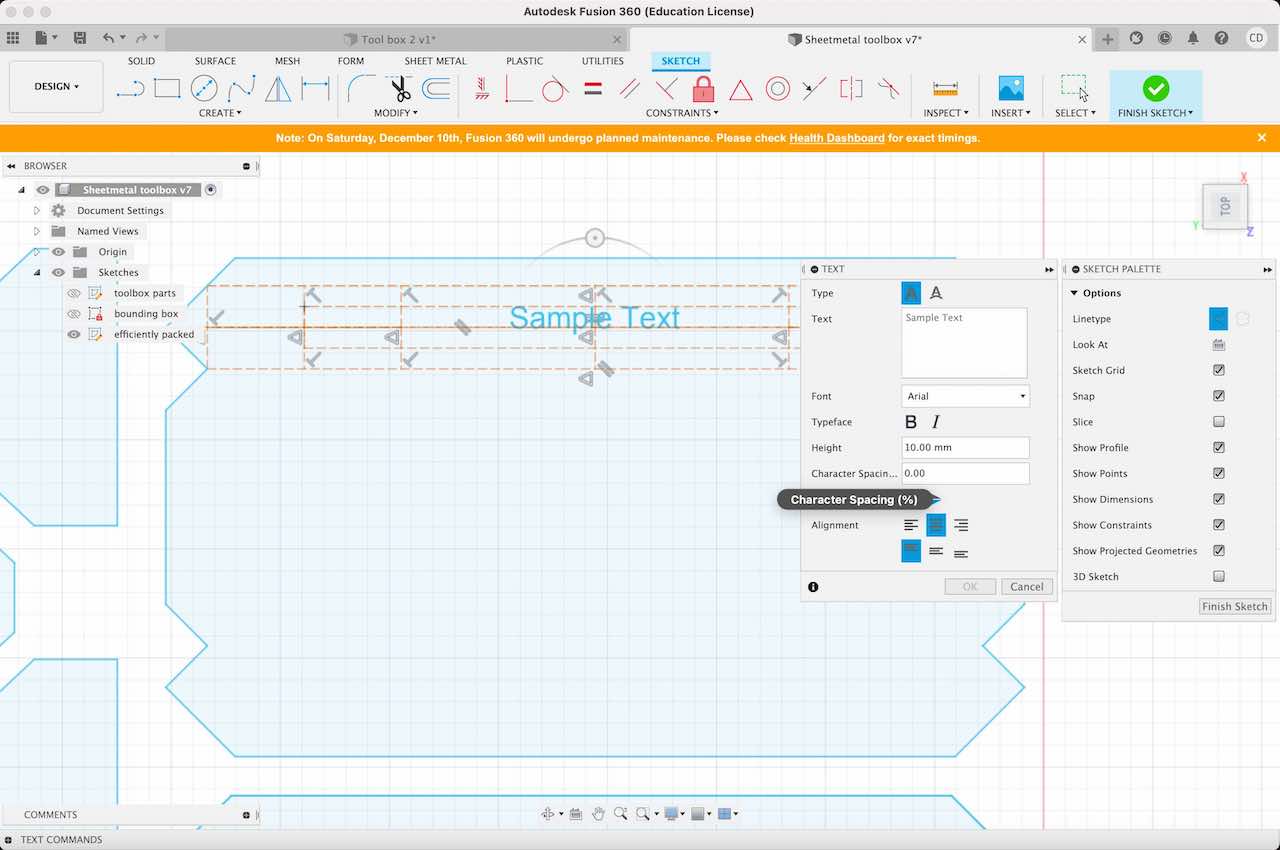
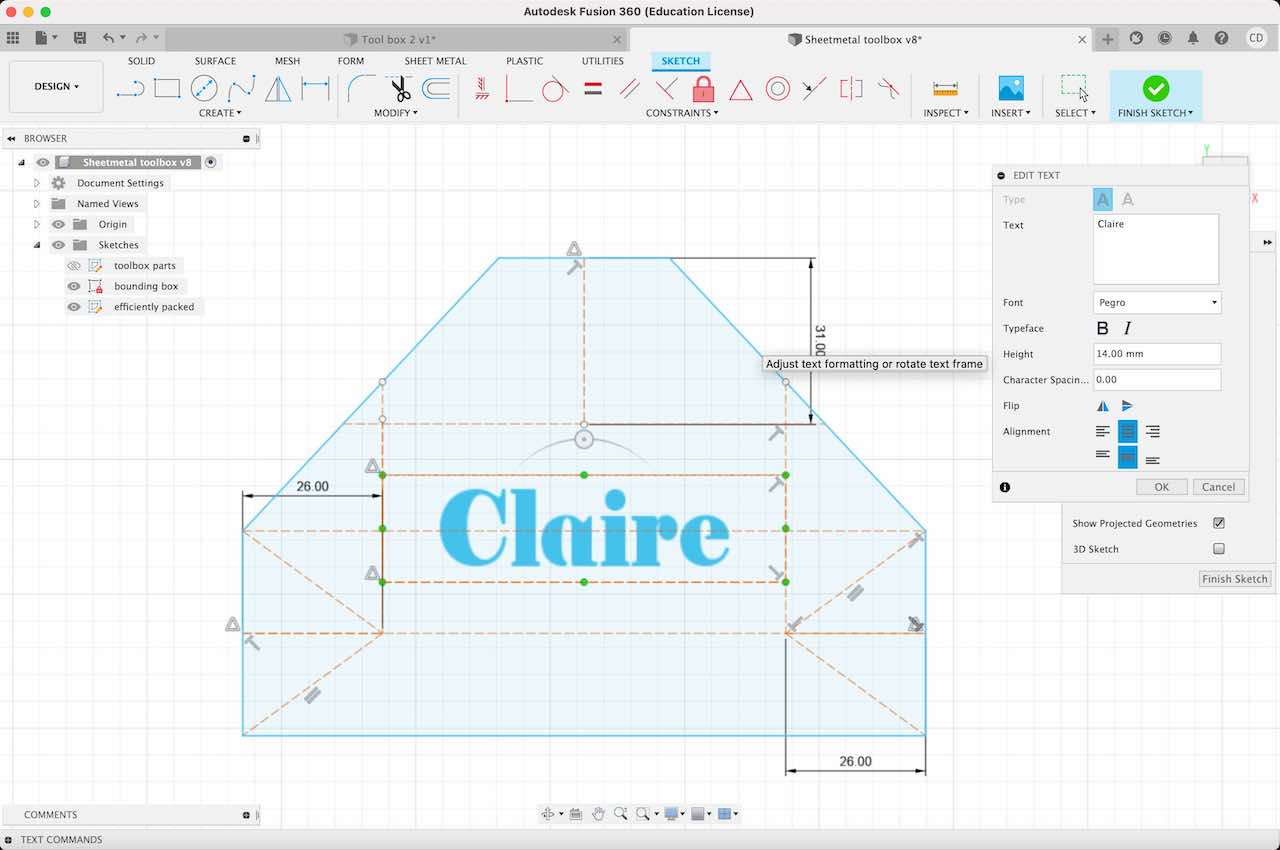
I knew I wanted to change the text on my toolbox and potentially play with text on some other projects as well. I also knew that the machine didn’t recognize inside lines for rastering, meaning I’d need to choose a stencil-style font where there were no entirely trapped holes within letters.
In Fusion, I created a new text box within the toolbox file John had shared, and typed out the whole alphabet for easy reference so I could see what the letters would look like. Then I scrolled through all of the fonts I currently had available in Fusion. Every. Single. One. As it turns out, none of those was compatible with what I was trying to do.
So, I turned to Google. My first search informed me that the style of font I was looking for was called (appropriately enough) a “stencil font.” A second implied I could add fonts to Fusion simply by adding them to my computer system. So I ran a third search for stencil font options, signed up for a free trial of CreativeFabrica (link), and downloaded two I liked: Yosemite and Perga. Once I added these to my system and restarted my computer, I was pleased to see they were indeed available on Fusion.
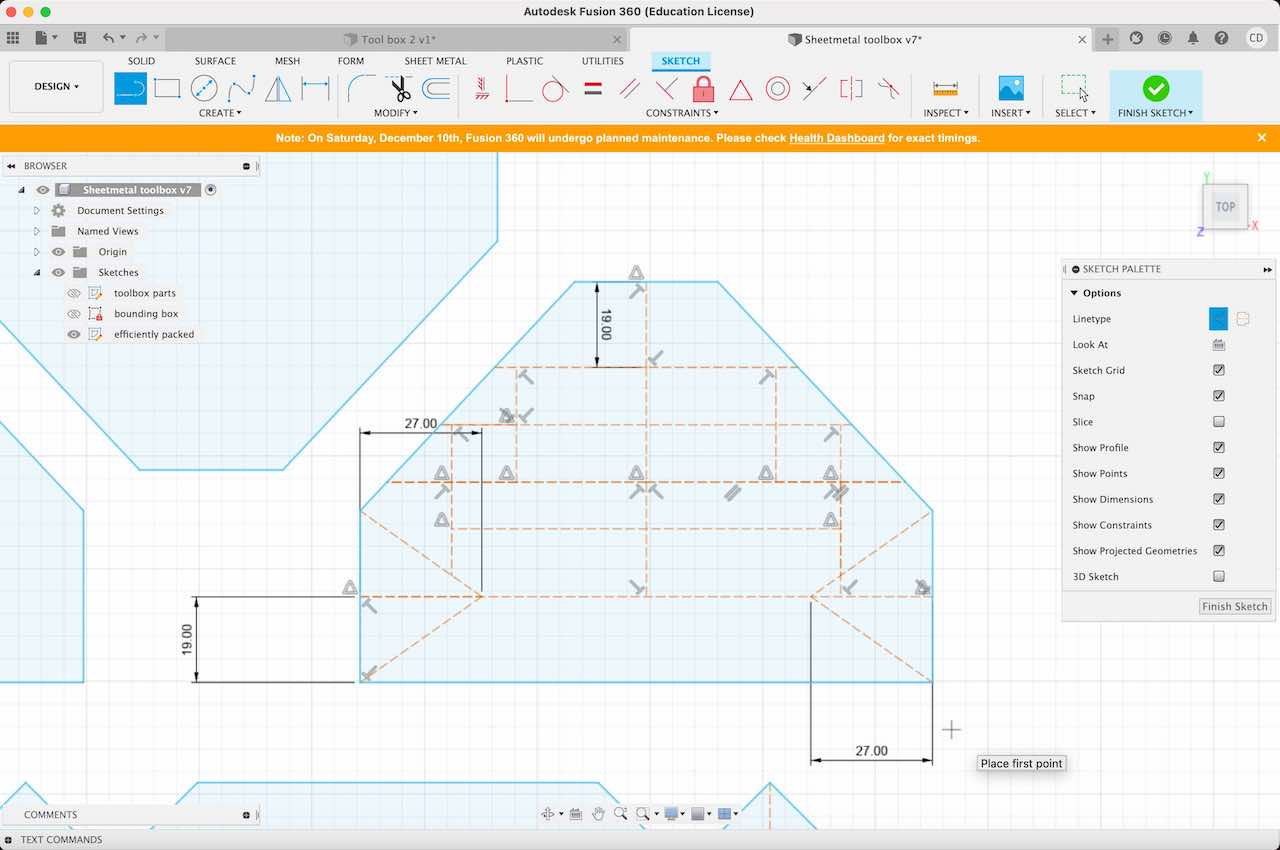
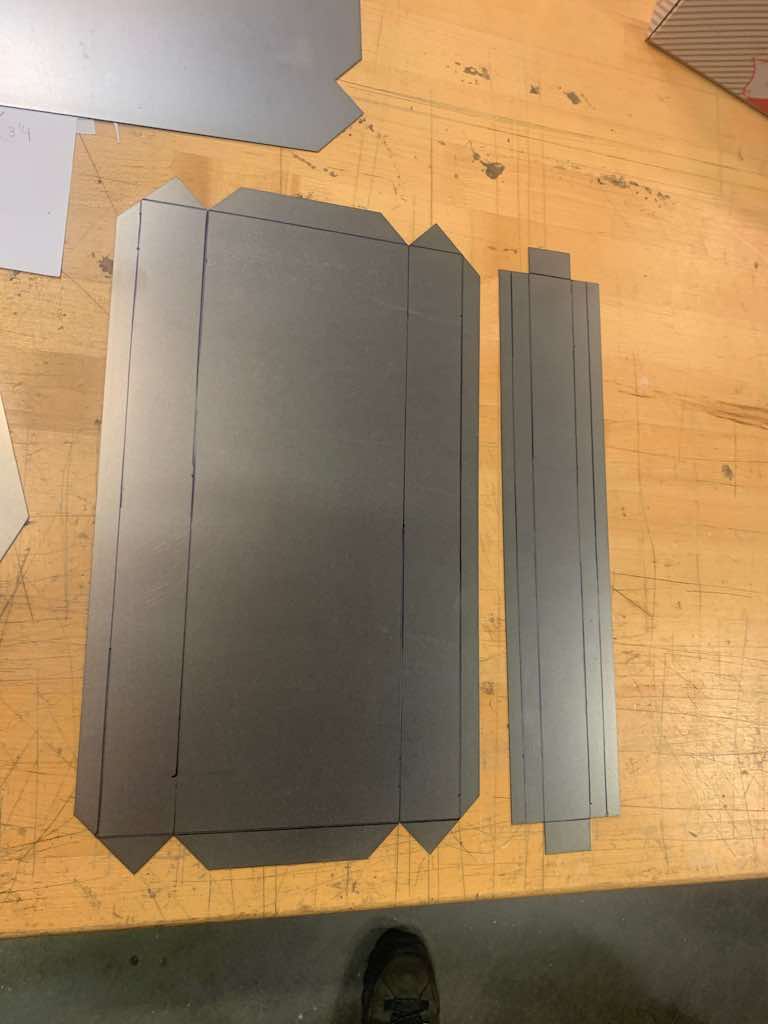
To make sure my text would be centered, I first drew a series of construction lines (though in retrospect, I should have just made my text box the full size of the plane I was aiming for, and then centered the text within that). Then I added my text to the sides.
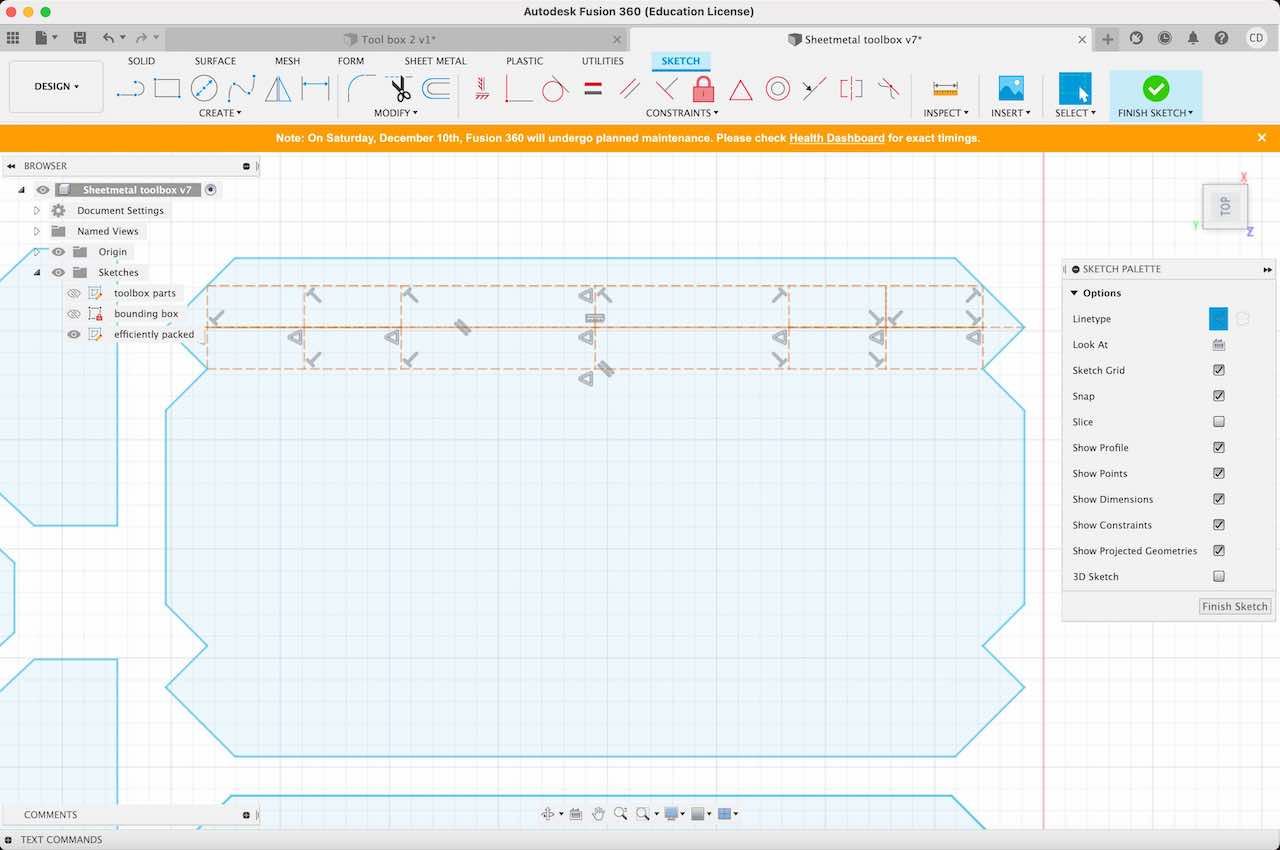

I did the same thing for the text on the ends of the toolbox. Since I knew I'd have bent metal overlapping here for the spot welds and didn't want it to obscure my lettering, I was sure to pull real measurements from the flanges on my main body piece. That way, I could create construction lines that should perfectly match where the bent metal should lie.
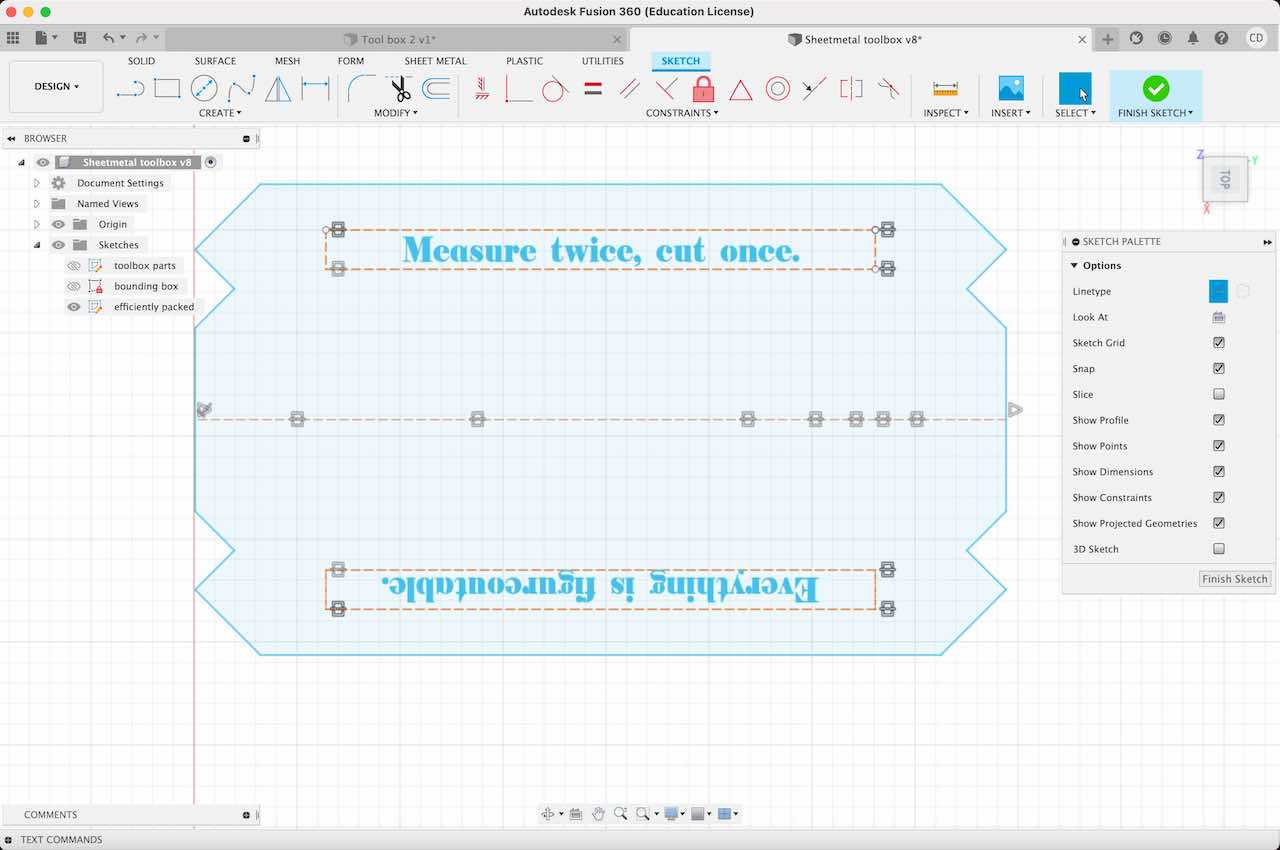
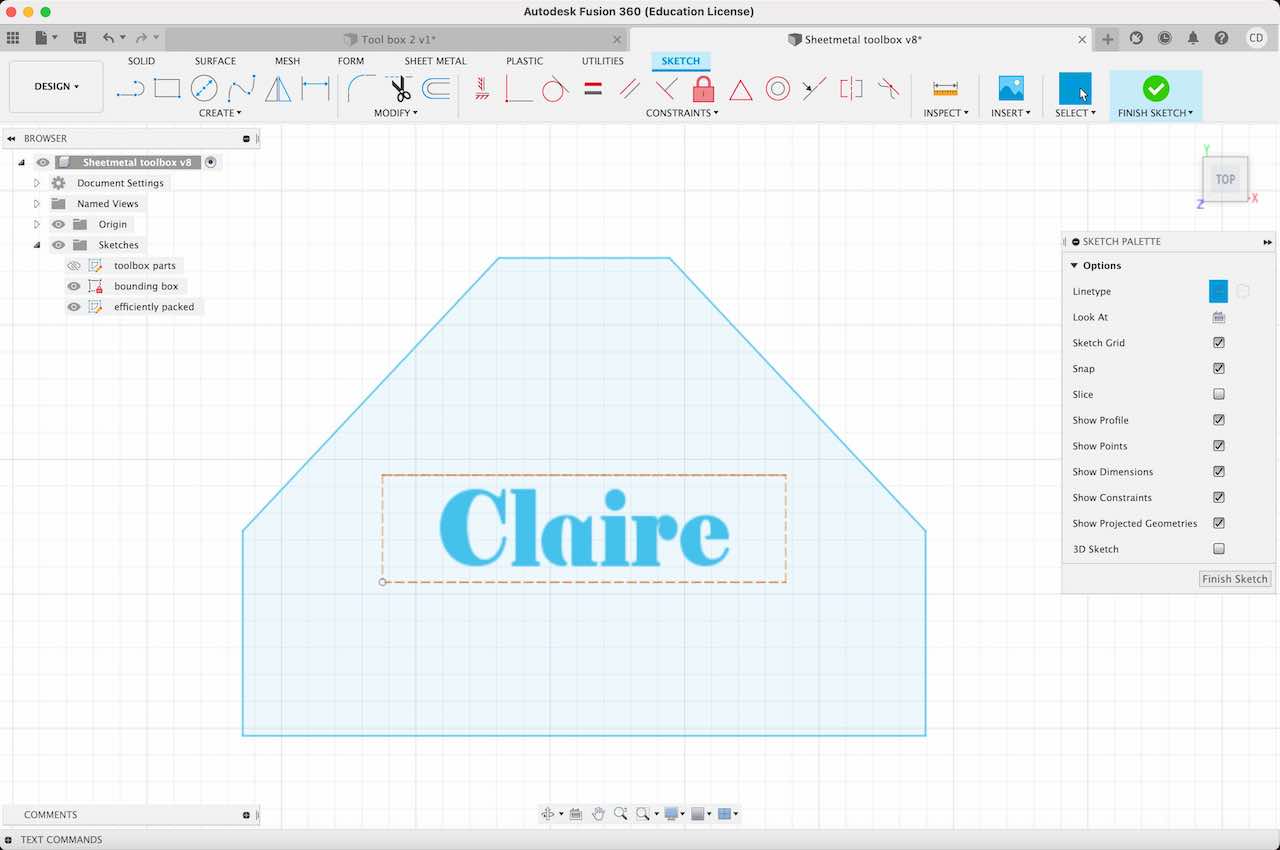
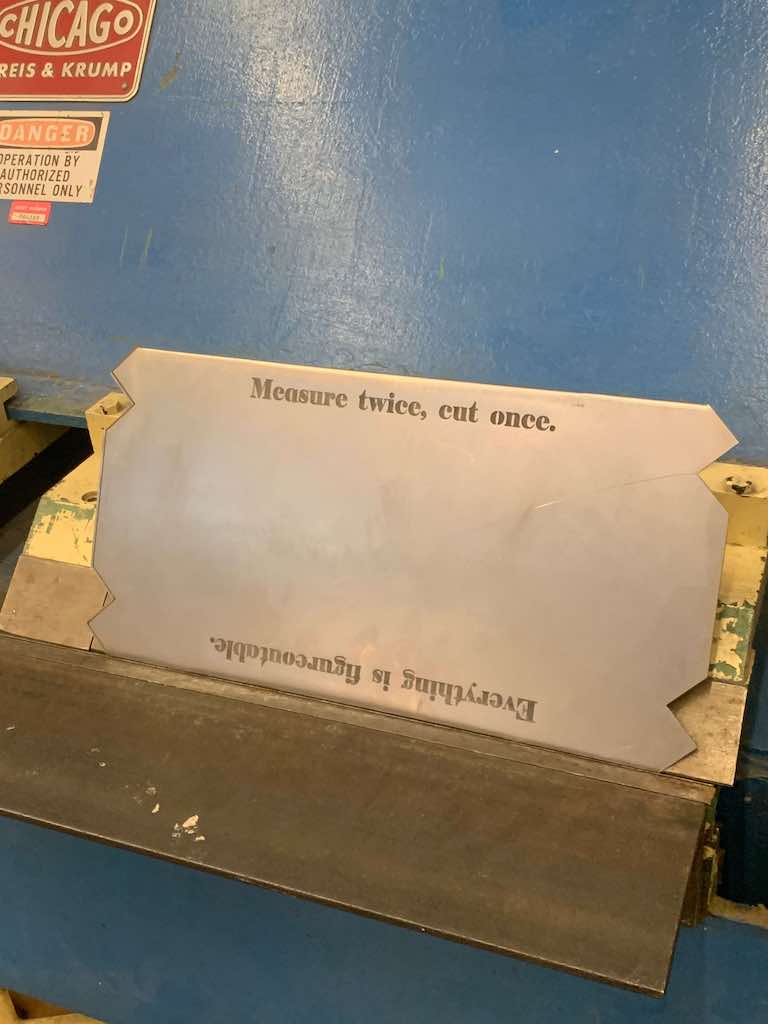
I chose to put my name on one, and "HTMAA '22" on the other, and then deleted all of my construction lines.
Finally, I exported the file from Fusion as a dxf.

I didthe same thing for the text on the ends of the toolbox. I chose to put my name on one, and "HTMAA '22" on the other.
Then I exported the file from Fusion as a dxf.
Note: Because I wanted to be 100% sure that this would cut correctly, I reopened my saved .dxf in Fusion again at this point to make sure it had saved correctly. It hadn’t. The construction-line-boxes around my text had transferred over. Even though I hadn’t been able to delete them in the initial sketch, I was able to do so successfully in this newly opened .dxf—so I did. Interestingly, the text all transferred over as curves (meaning many small connection points) instead of text.
Once I saved the final version of my file as a .dxf again, I put it onto a USB stick and headed to CBA.
USING THE FABLIGHT
At CBA, I loaded my file onto the shop computer and imported it into the “Fab Creator” software. (Note that you have to import a dxf, not open it directly.)
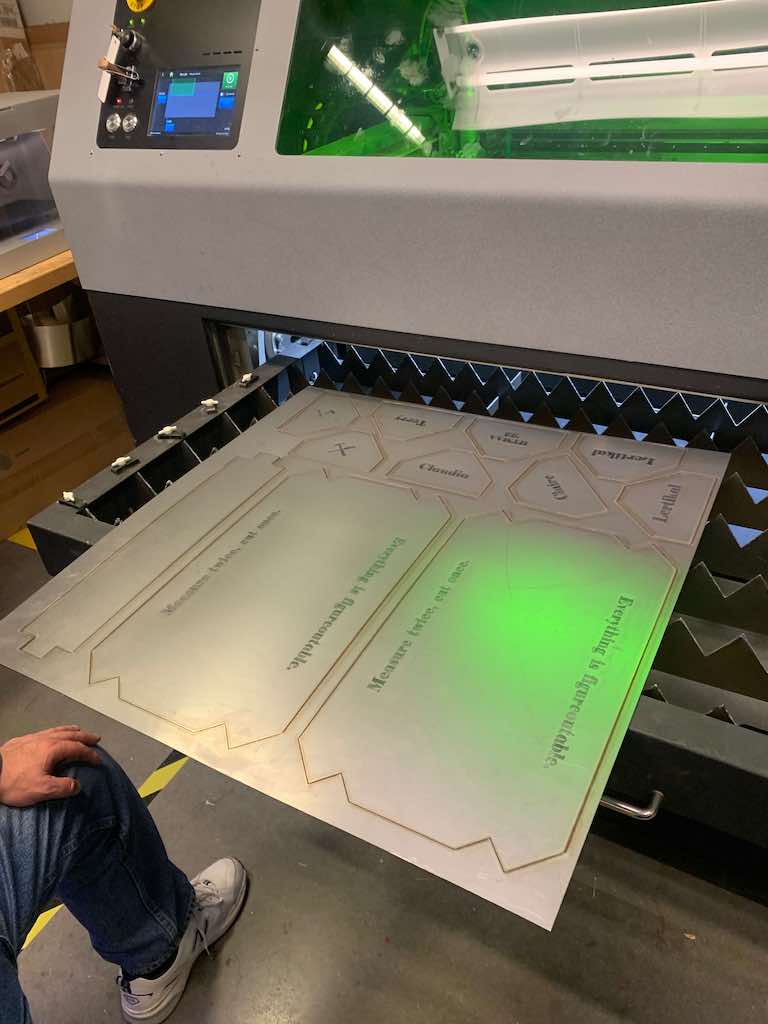
Then I selected all of my cut lines and made sure they were configured for "cut," and all of my raster details to make sure they were configured for "raster," and started the job.
The rastering went slowly by smoothly.

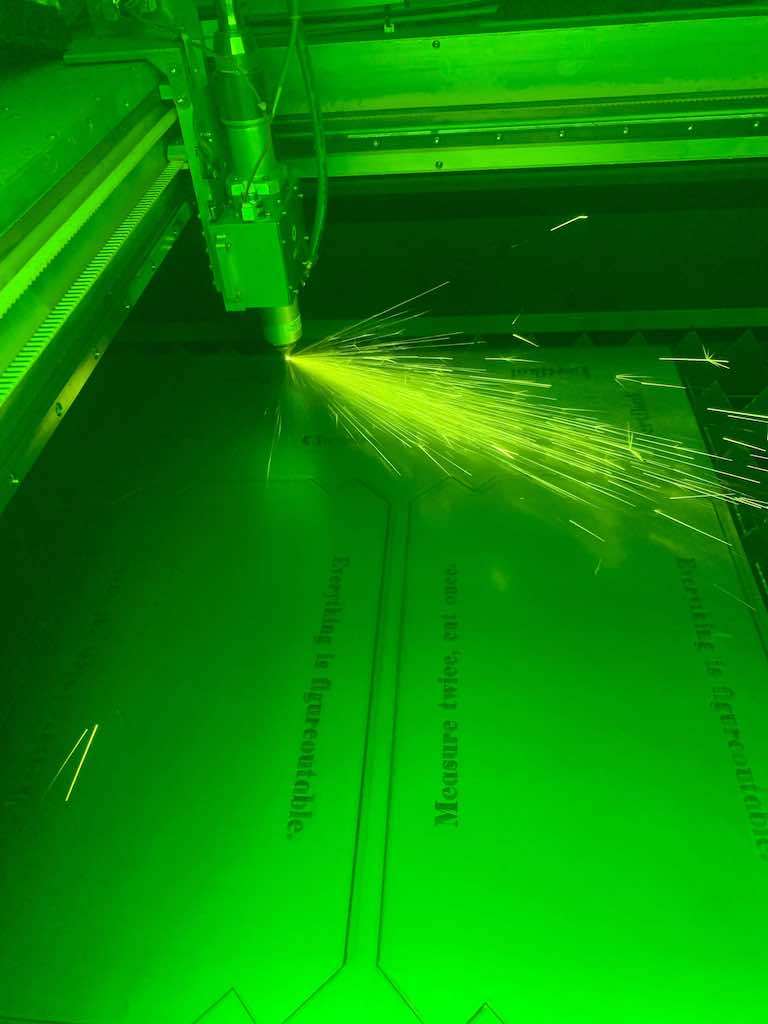
The cutting, however, failed entirely.
It turns out that CBA had been having trouble with the FabLight. No matter its settings, it didn't want to cut deeper than surface-level through material. Shop manager John tried a few different depth and power settings to no avail. We also tried just running the same job (uploading a new file that was identical to the first except that we removed the raster elements since they were already completed).
Shop manager John also tried to clean the laser head, hoping that might help. This had to be done very carefully, in order to avoid disturbing the alignment of the job on the tray.
No luck.
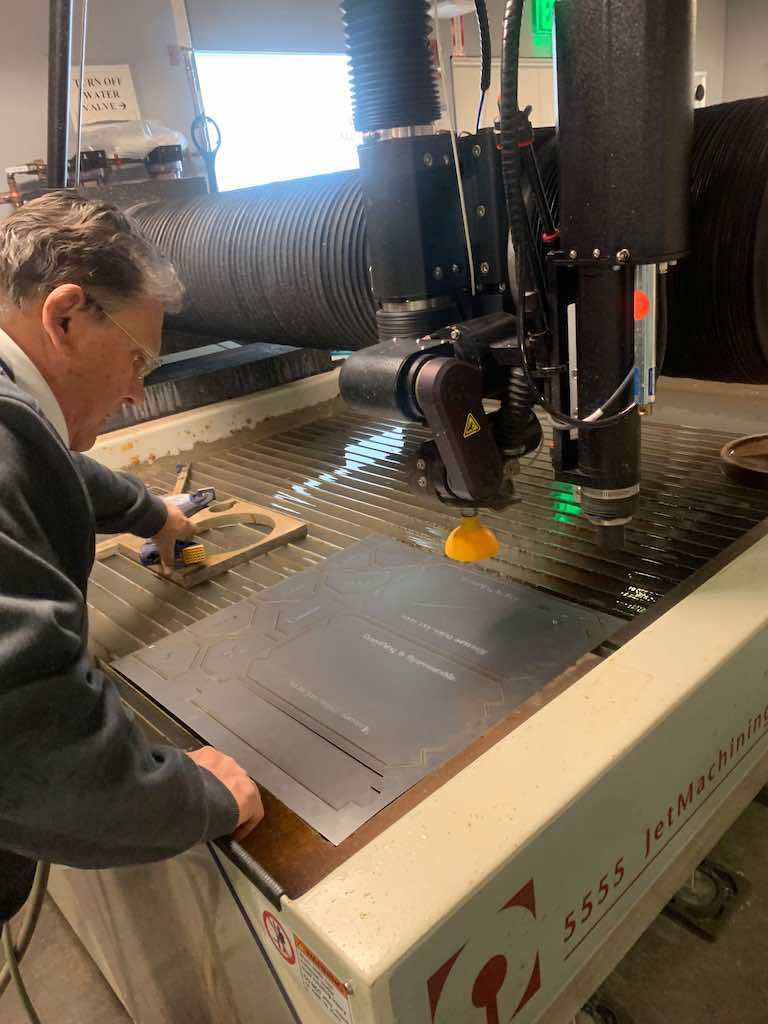
Then John posed a radical idea: shift things to the water jet and try to line things up perfectly. Like, really perfectly. So, we did!
The only waterjet I had any previous experience with was Harvard's, which has a bed size of approximately 2' x 2'. The model in the machine shop was much larger.
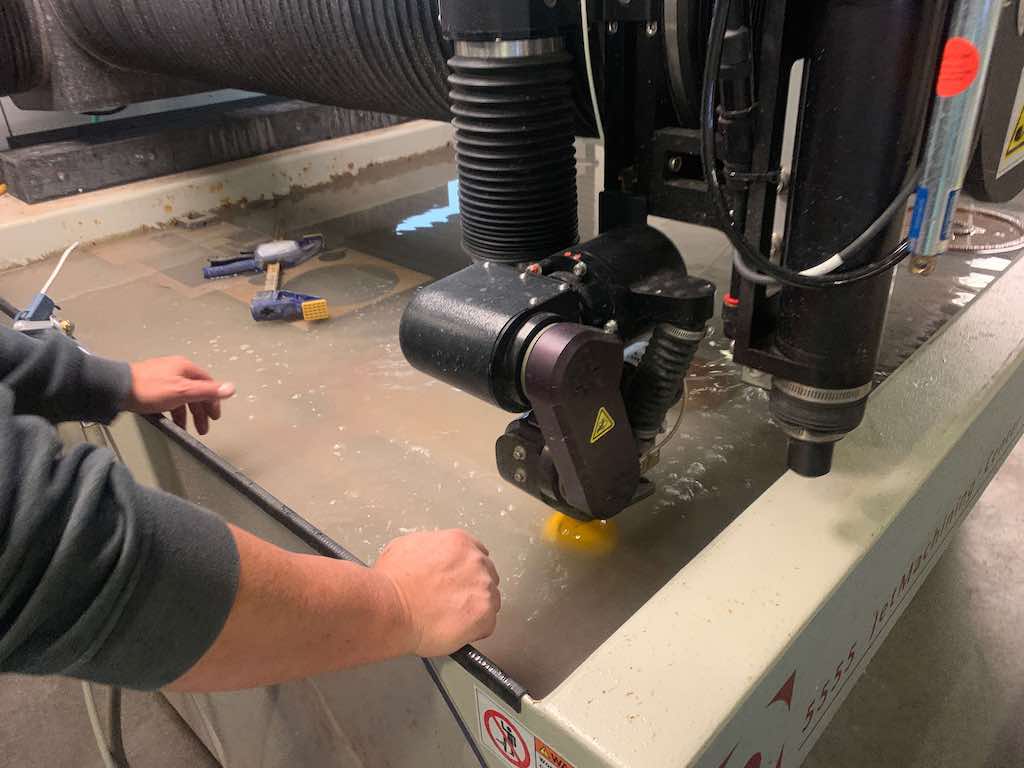
John showed me how to align the material on the bed, which is submerged in a layer of water. There are no clips here like on the FabLight, so we weigh material down by just placing large, loose, flat weights on top of them.
We then opened the toolpath for my cut file on the waterjet computer. Looking at this, we could see where the cutting would begin. The crucial task, then, would be to line the waterjet head exactly--and I really mean exactly--with that point.

We nudged the x- and y- axes this way and that until things were as lined up as possible. Then we held out breath as the project launched.
It truly was beautifully aligned with the starting point. Even impressively so. Unfortunately, the sheet metal itself wasn't perfectly square, which we couldn't accurately account for. So although the machine head started in the right place, it lost the track slightly toward the far side of the material.
This was visible in some artifacts around the edges of my pieces, where you can see the original laser engraved line parallel (or almost parallel) to the waterjet-cut outline.
One note: we did have to do this more than once, since the weights weren't quite optimally positioned the first time and the material shifted, meaning we cut straight into a desirable piece before we could stop the machine. This element was sacrificed out of necessity, and redone. (Thanks for the help, John!).
BENDING
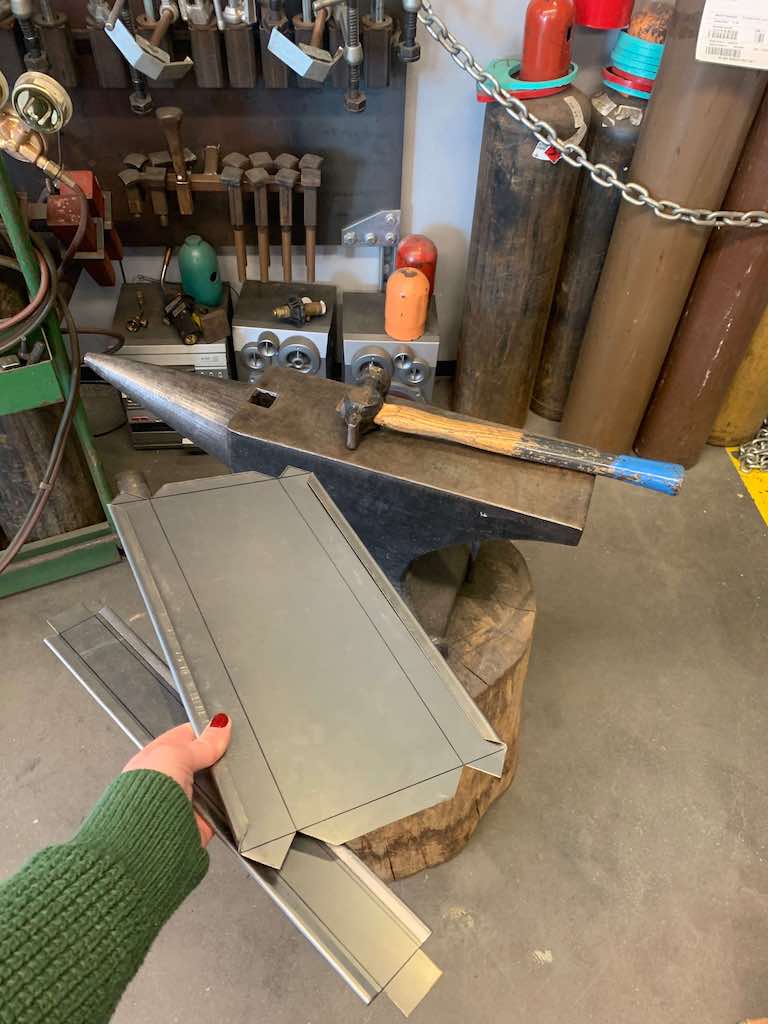
With my pieces finally cut and ready, it was time to get them bent and assembled.
My first step was to use a sharpie and straight edge to draw lines on the back/bottom sides of the cut pieces.
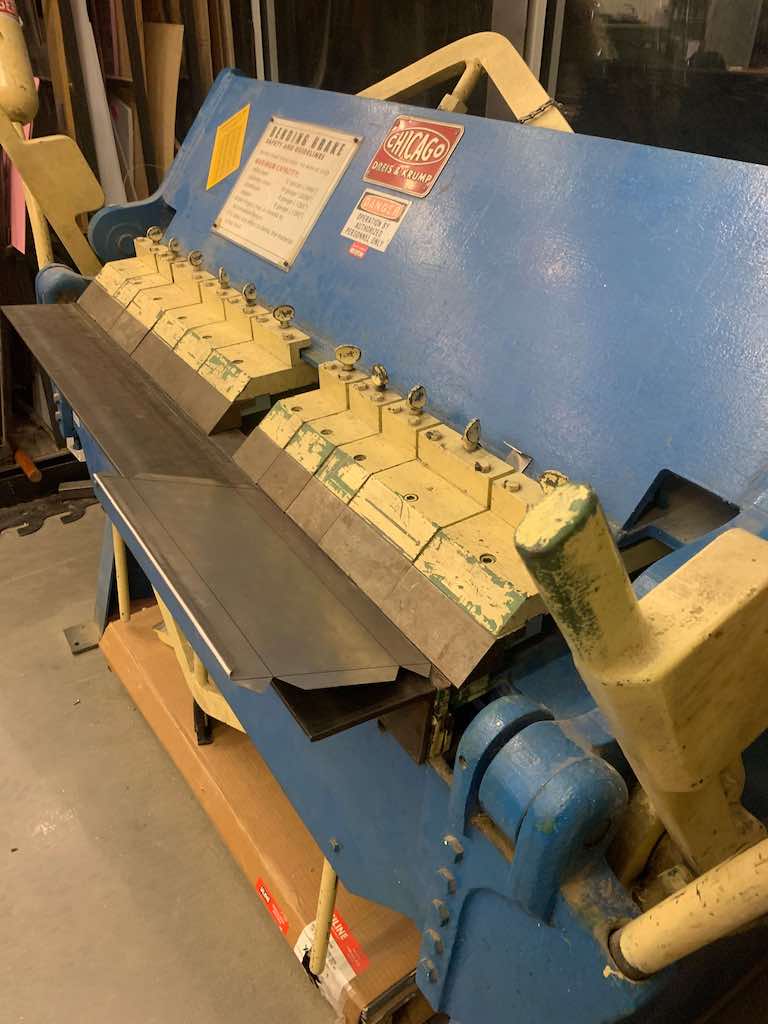
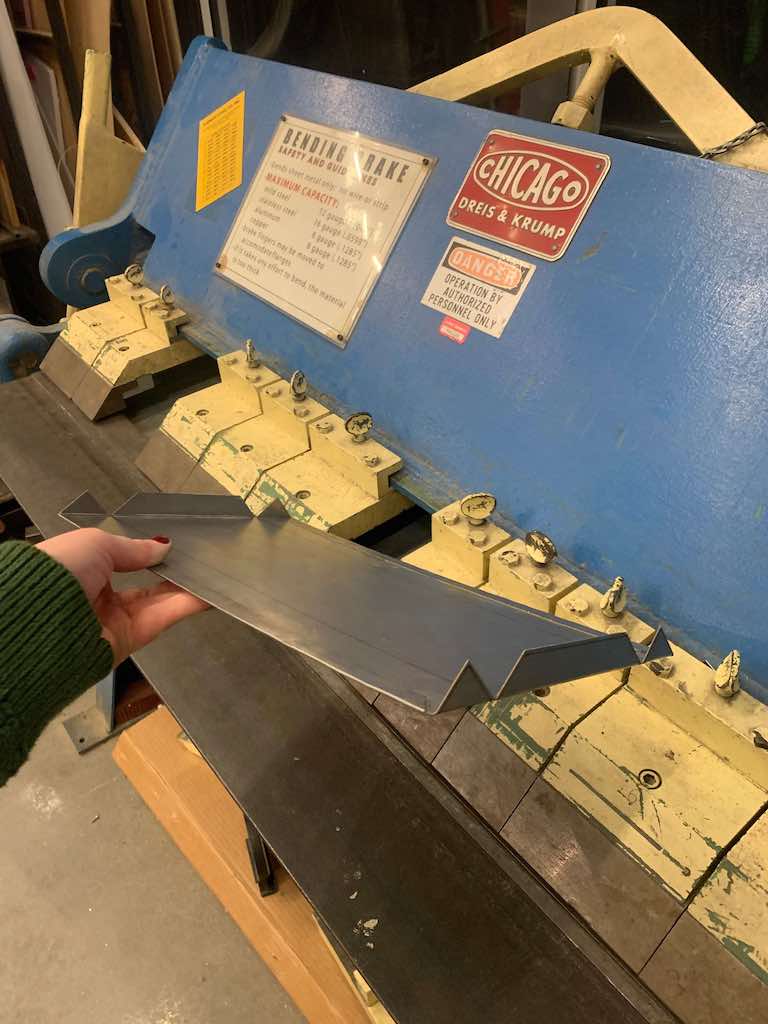
With my sharpie lines in place, I moved over to the finger brake. This is a purely mechanical (no electricity needed) machine that uses weights, levers, and removable wedge-shaped "fingers" to help a user bend metal sheets specific degrees along a straight line.
The first bends I made were along my hems. These were sharp edges that got bent down to produce a softer and more blunt finished edge. Since the finger brake's maximum acute fold is approximately 30 degrees, hems took two steps to fold flat: the first was the maximum ~30 degrees, while the second required putting that whole 30-degree bend beneath the fingers again to flatten it in place.
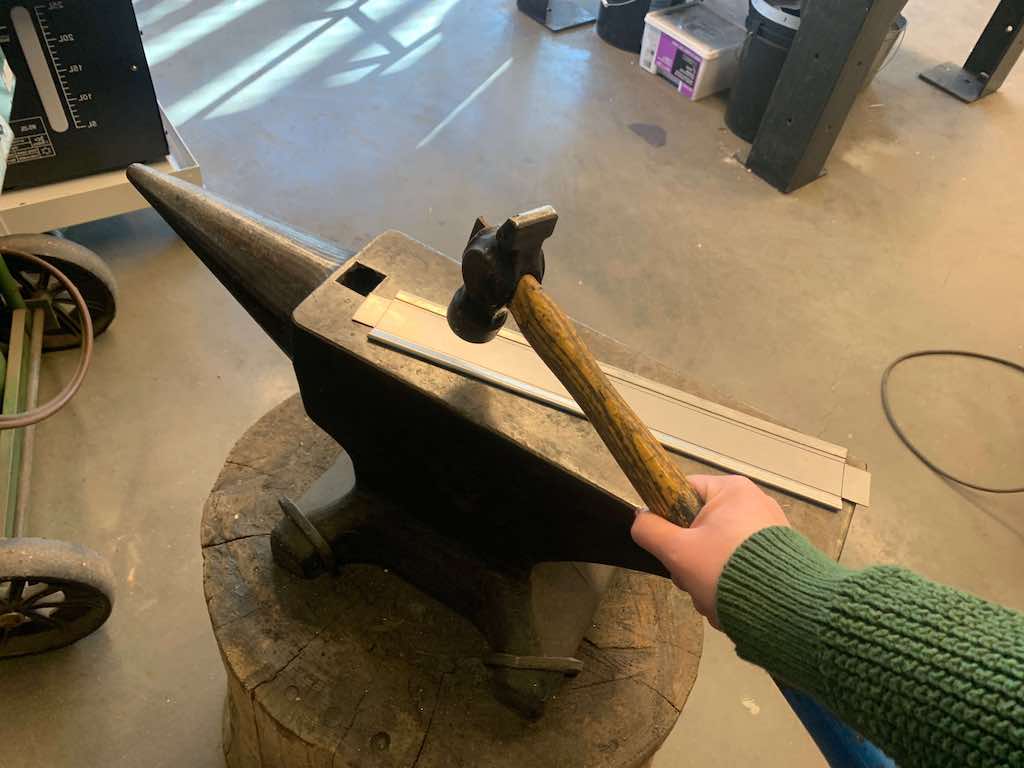
I made hems along both of the long walls of my toolbox, as well as both long handle edges. Since the finger brake doesn't result in a perfectly flat crease, the next step is was move to a hammer and anvil.
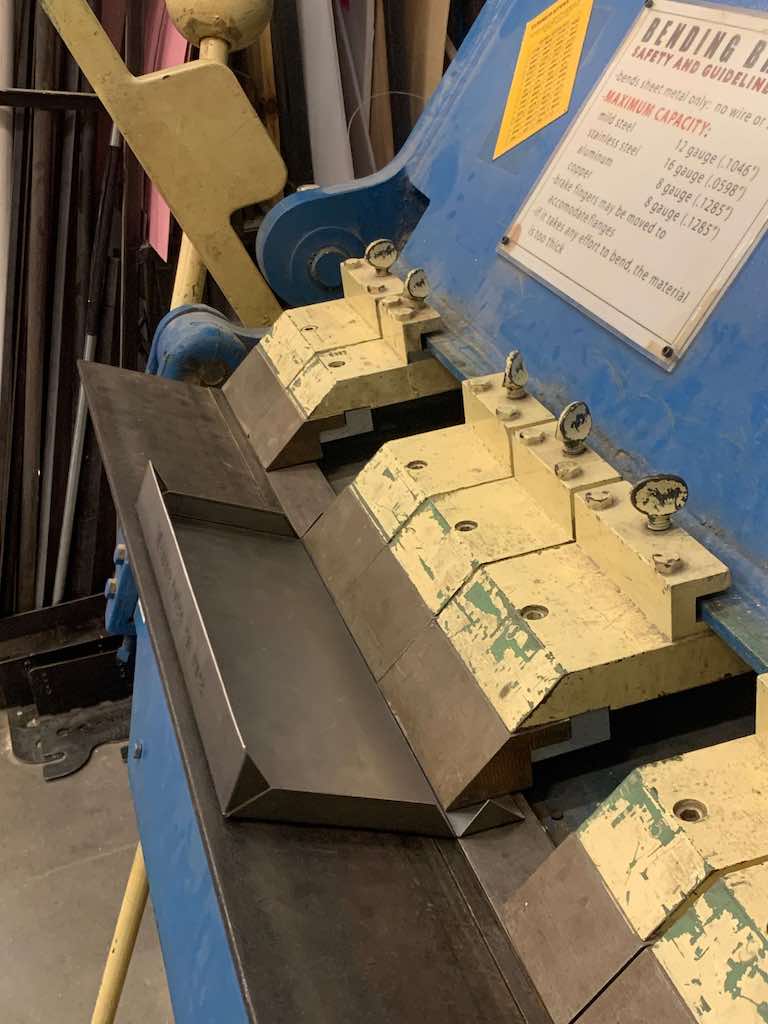
I made hems along both of the long walls of my toolbox, as well as both long handle edges. Since the finger brake doesn't result in a perfectly flat crease, the next step is was move to a hammer and anvil.
Placing the metal sheet flat on the anvil, I used the hammer to pound its rounded hem folds into flat creases. Remember to hold your hammer toward the end of its handle to minimize the work you're doing during this step--but also maintain enough control that you don't whack your fingers. There's a lot of force at work here!
Once my hems were perfectly flat, I moved back to the finger brake to finish the rest of my bends.
I had to fold the shorter ends of the body piece first, aiming for 90 degrees. Then, I had to remove two fingers to give myself enough clearance to avoid squishing these new 90-degree bends along my shorter axes while also bending each longer axis 90 degrees. I also bent the long edges of my handles 90 degrees, in order to create little walls for a nail-and-screw channel once it was connected.
With all of my bends made, it was time for spot welding. I first slotted the ends of my toolbox into place, and then lined up the fingers of the spot welder where I wanted to make my weld. I used a lever to pinch these together over my metal, and a food pedal to actually initiate the weld. It was as easy as that!
I made the rest of my spot welds, taking care to line things up as perfectly as possible, and was quite pleased with my finished product.
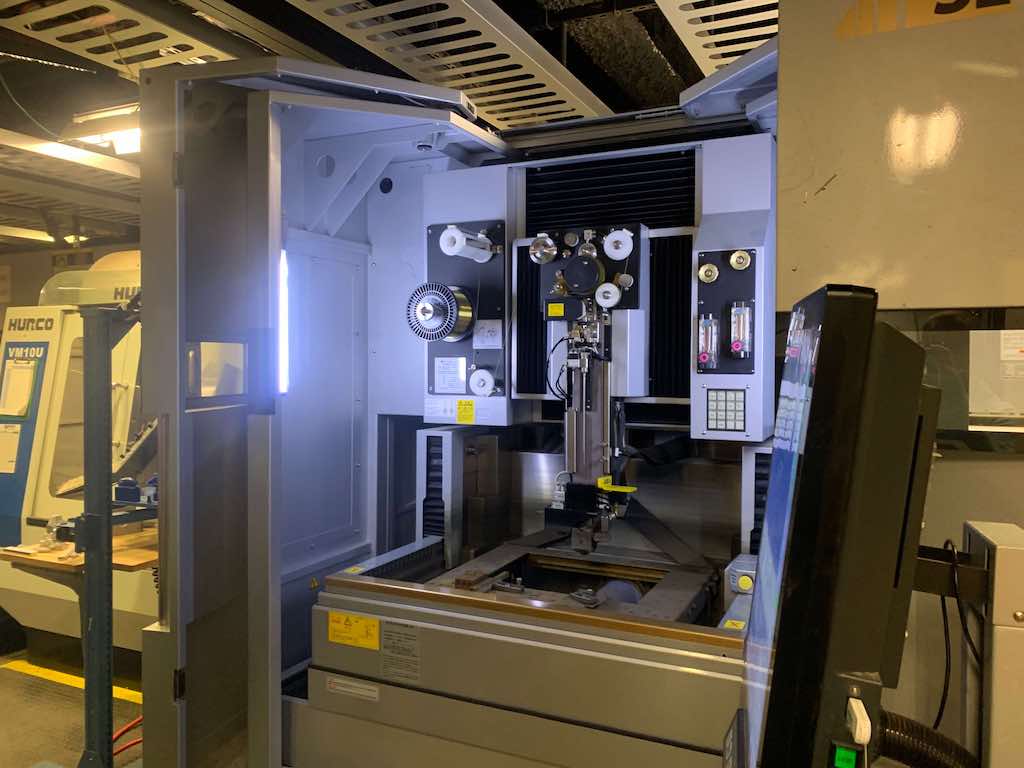
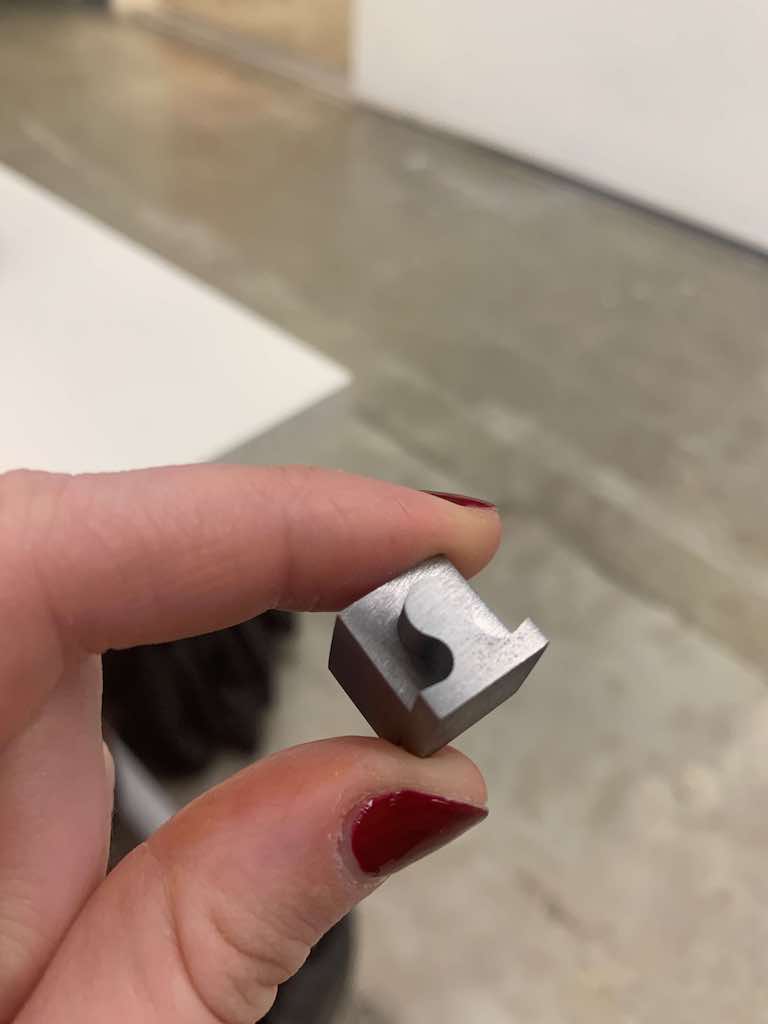
Since I'd chosen metal as my theme for the week, I snuck into another training as well. This one was for EDM: electrical discharge machining. In laymen's terms, this is a machine that cuts material--any material, as long as it's conductive--using electricity. Basically, lightning!
This machine can slice cleanly through incredibly thick material, from metal to marble/granite. It produces an impressive surface finish, and well-crafted designs can account for kerf so that two pieces (cut separately, since there is still some material that gets eliminated) fit together seamlessly.
I've been intrigued by the concept since John Lampros, the head fabricator at my previous job at the Great Lakes Science Center, first told me about it. So I was thrilled to get the chance to use the machine myself!
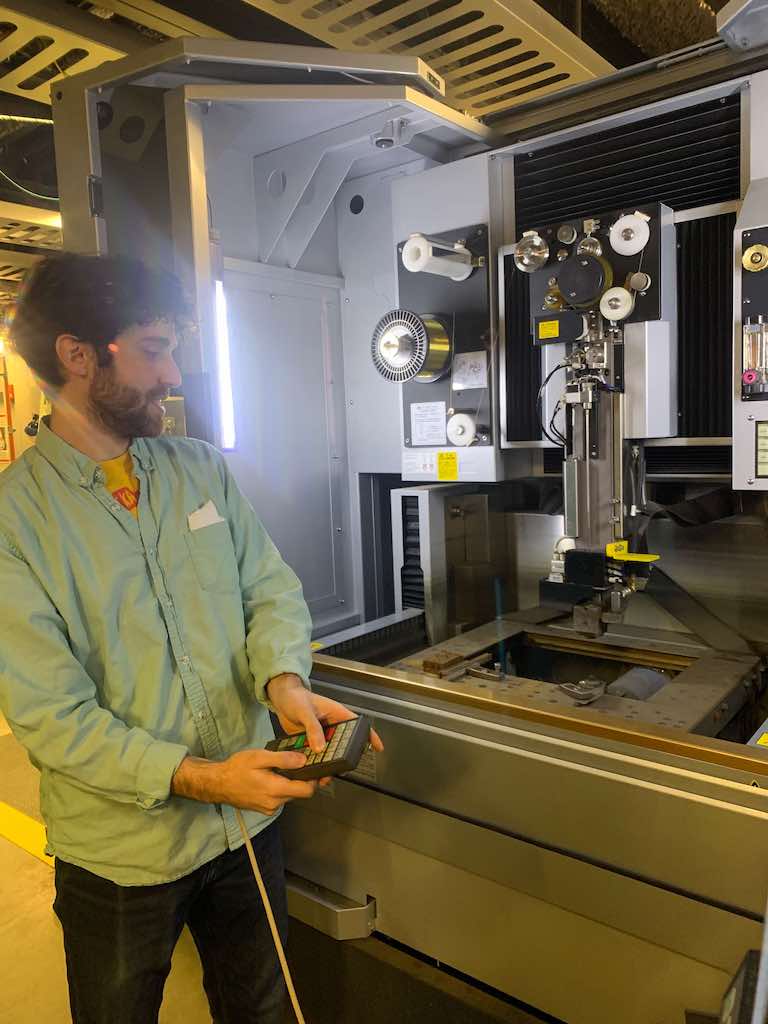
TRAINING
Dave led EDM training. We learned that the machine uses AC power and 150-micron wire to make its cuts, unwinding it off of a large spool. The machine feeds new wire continuously across a job since it erodes and gathers microscopic imperfections as it cuts, which compromise its ability to produce a clean finish. Used wire gets automatically deposited as a tangled mess into a waste bin around the back.
Both the workpiece and tool (wire) must be conductive in order for the process to succeed, since the EDM functions by arcing electricity through the wire to the workpiece. Interestingly, the thing that arc is hitting bears the brunt of the damage as opposed to the emitter. The whole thing gets submerged in a dielectric (water) for the sake of conductivity and to help with constant flushing of detritus. (Interestingly, some other machines work by constantly dripping water down the wire as it cuts, rather than submerging the whole system.)
On this particular machine, the workpiece moves on the x-axis and the machine moves on the y-axis. In order to "load" the thread, the machine ballistically shoots it down from the spool through a hole.
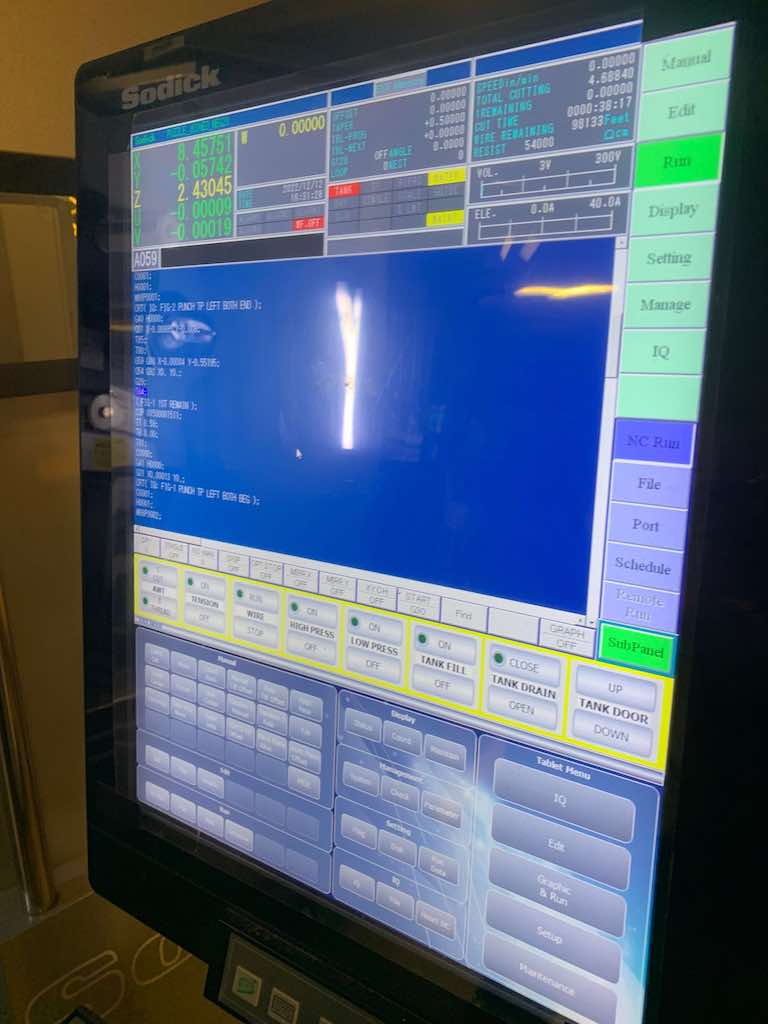
Conveniently, it takes gcode (from .dxf files).
MACHINING
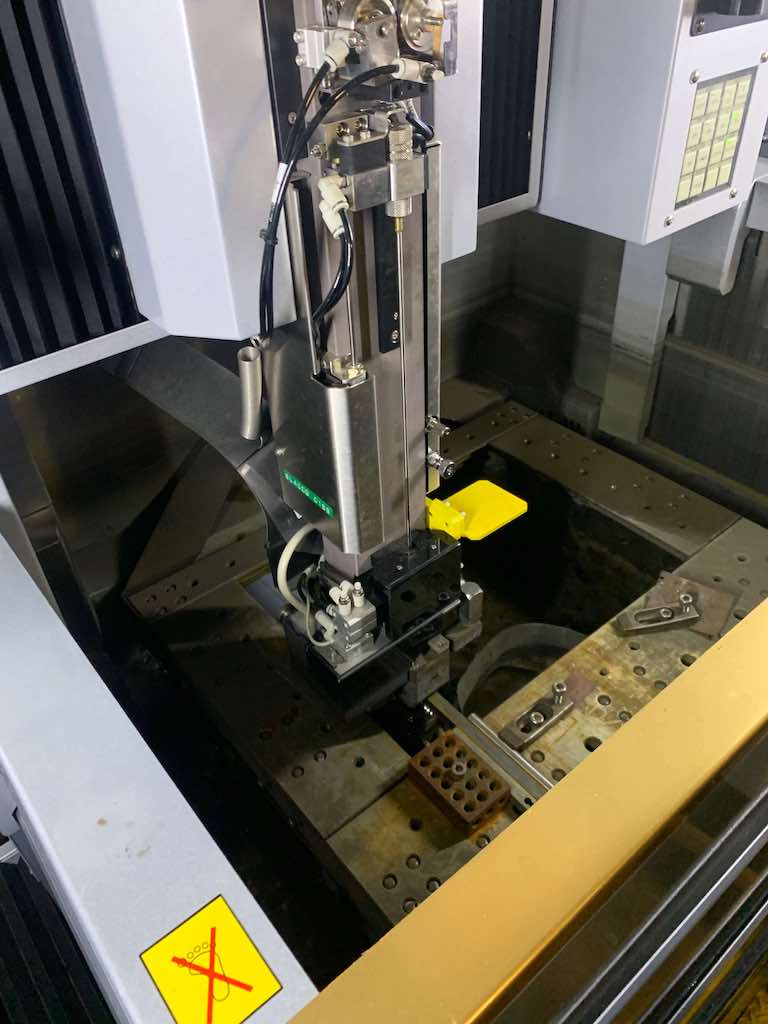
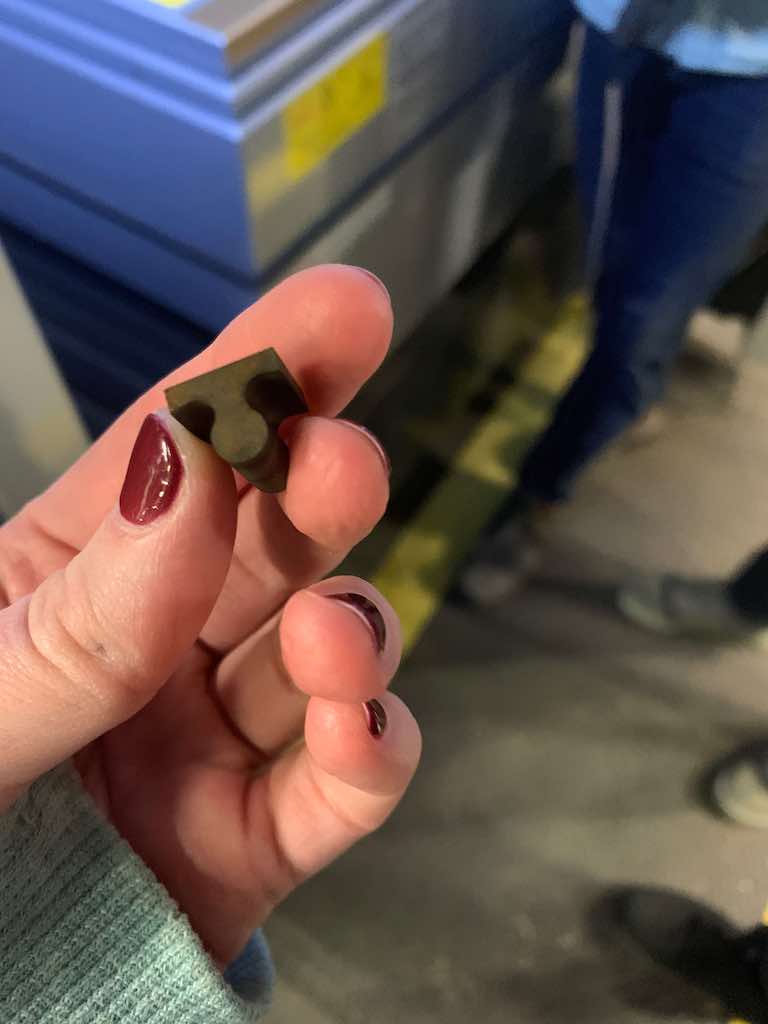
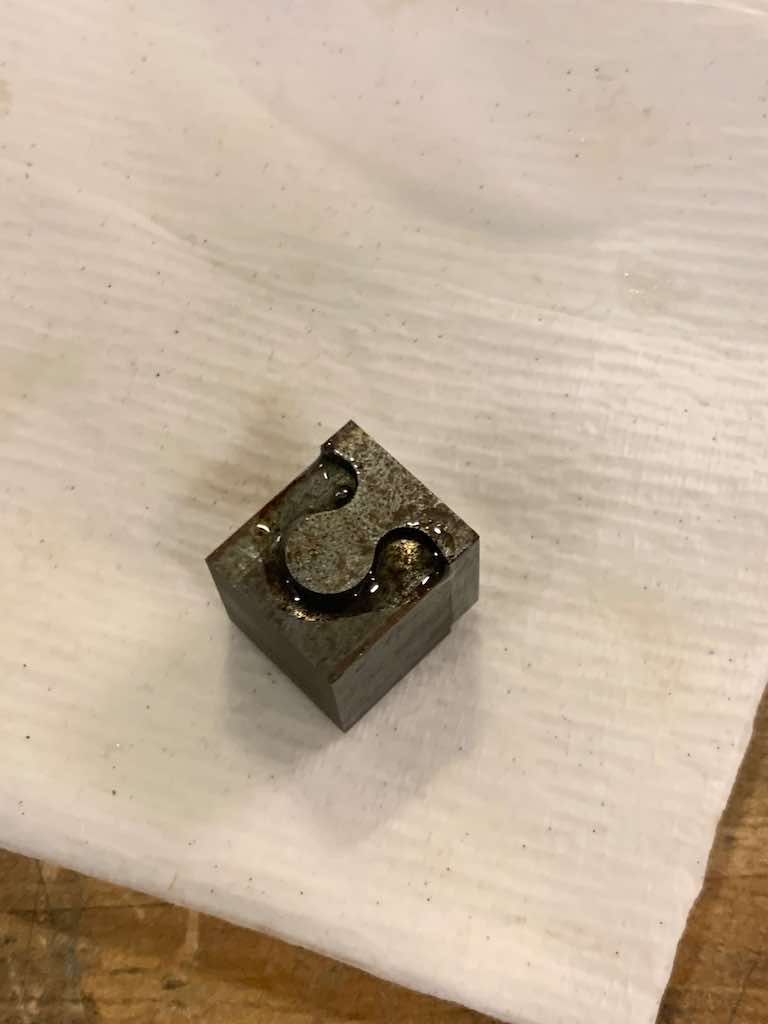
I decided to mill a tiny puzzle piece based on Dave's design and prototyping. As the machine starts, it raises a set of lower containment walls around the workpiece and cutting area. This then fills with water. After a few moments of flushing, plasma is visible as the arcing starts.
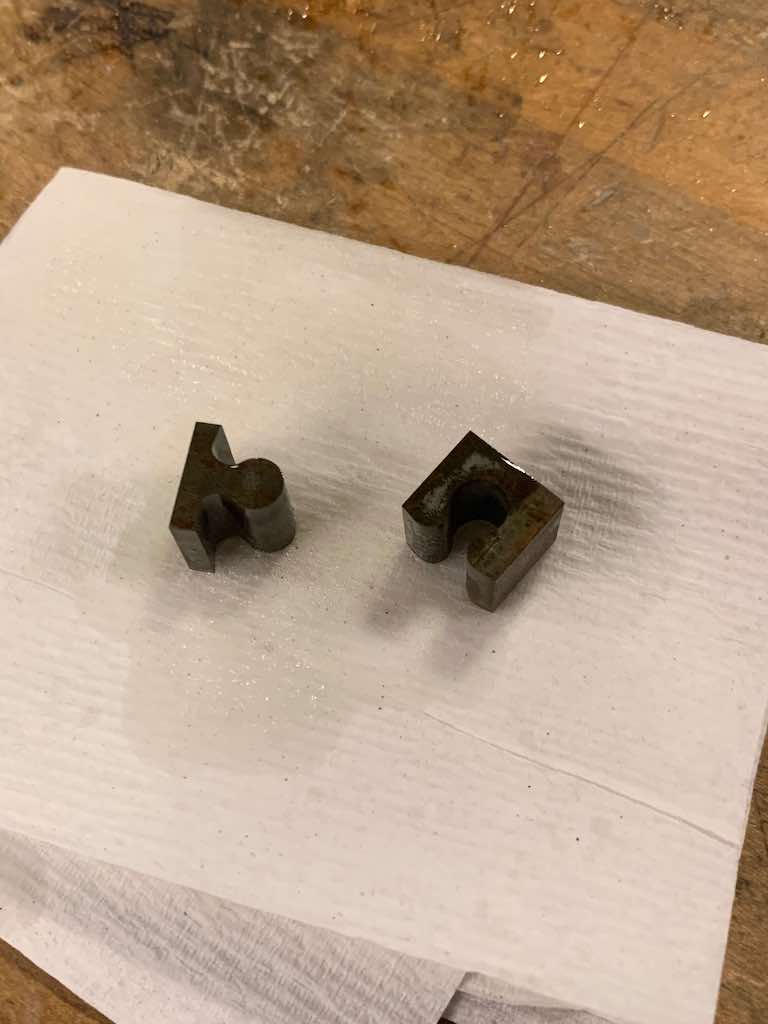
My puzzle pieces took about 45 minutes in total to cut. At the end of the process, the machine's water was flushed away and we had to literally just fish the finished pieces out of the bed. One was easily accessible, but the second was hiding. It had fallen against the edge of the workpiece support, and was nearly invisible from my angle.

F INISHING: SANDING & OILING
The finished pieces had a nearly perfect tolerance, but still didn't quite want to fit together perfectly. This is because of tiny, microscopic burs produced on the interfacing planes during the cutting process.
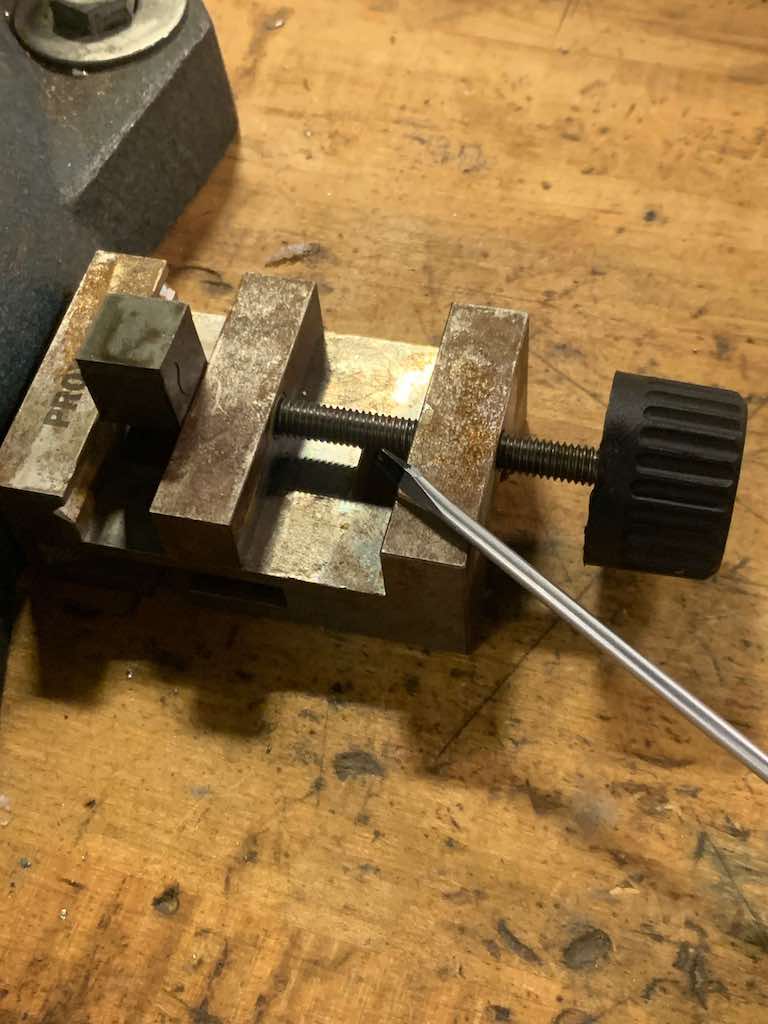
To fix this, Dave showed me how to apply some WD-40 (followed by gear oil, when this didn't do the trick) and force them together. Once they were together, I fixed the bottom of one piece in a tiny bench vice.
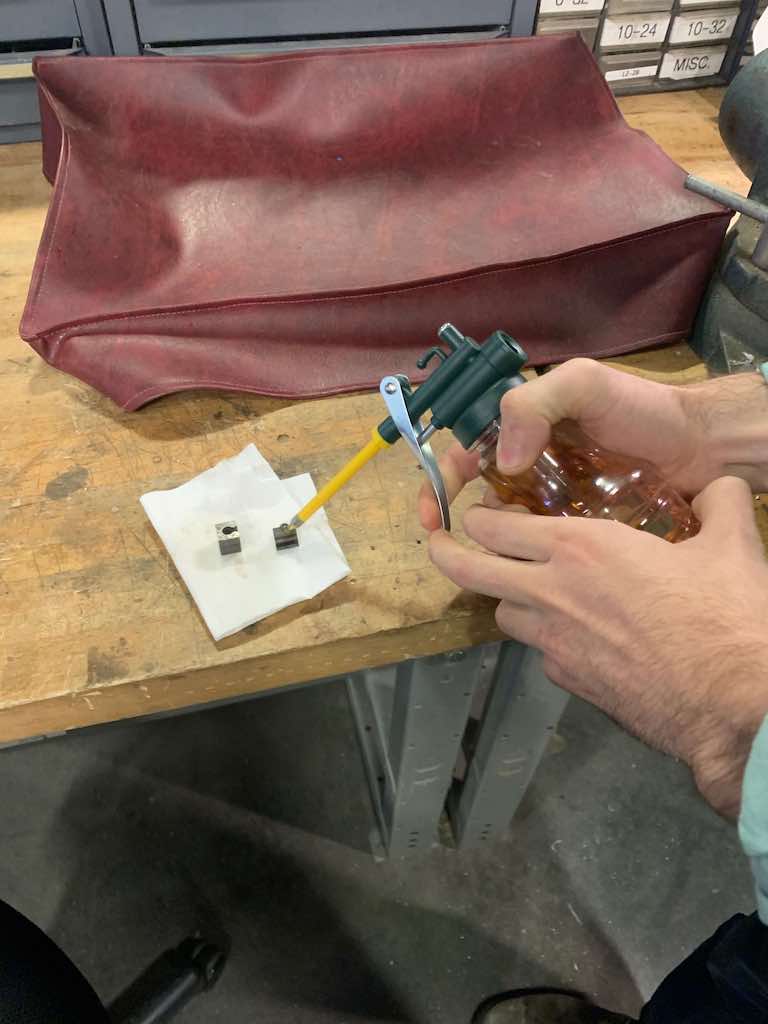
I then used a screwdriver and hammer to tap the top piece out. Then I turned the whole thing 180 degrees and repeated the process. I continued dong this until the top piece was able to move more easily within the track of the lower piece. (Basically, until I could push it with my fingers instead of needing the screwdriver-and-hammer combination.)
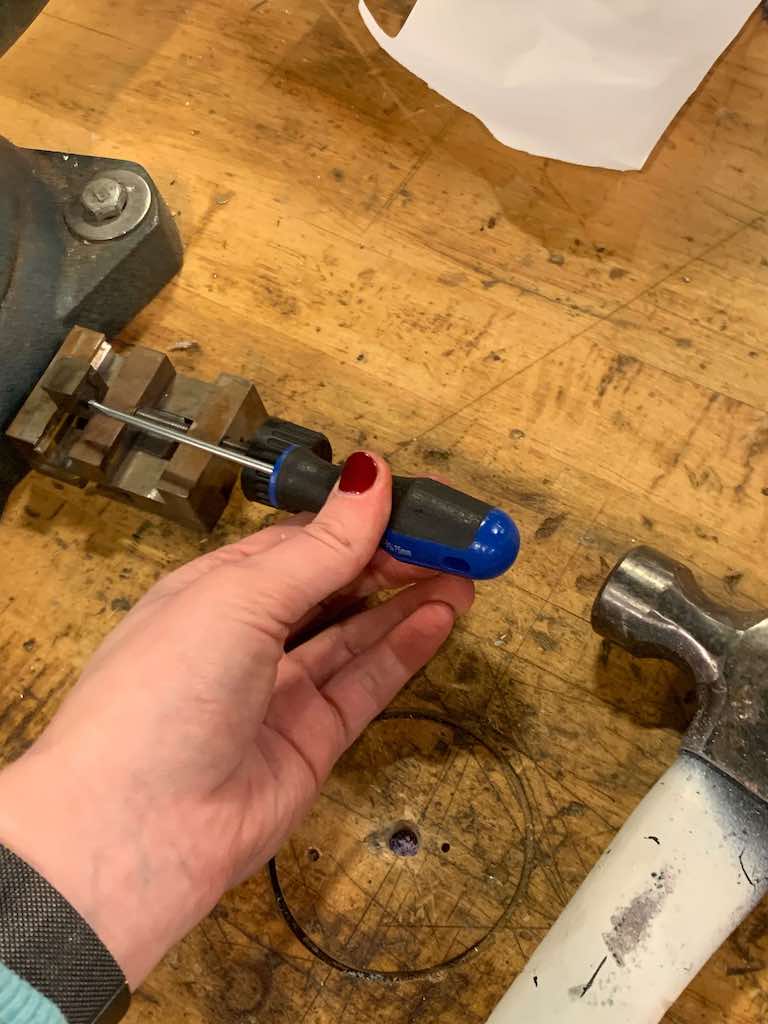
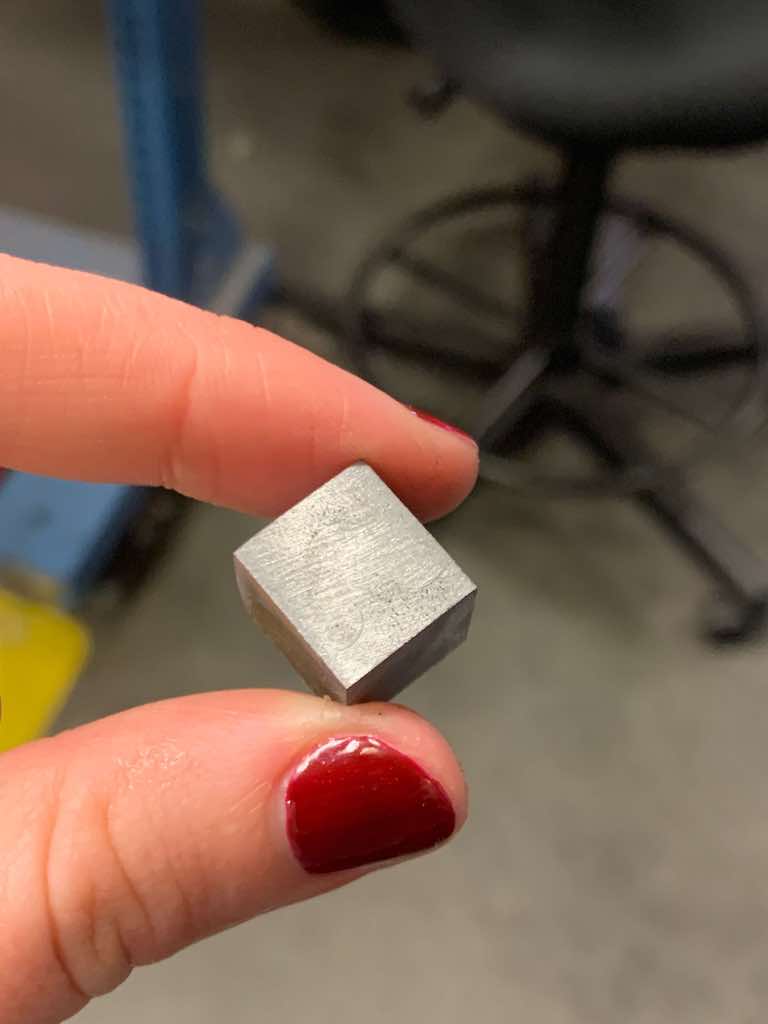
Finally, I pressed the two pieces together and rubbed all six edges of my cube against medium-grain sandpaper for what felt like ages. I made sure I applied even pressure while doing so. This gave the sides a smooth, shiny finish.
I love the finished product. It's addicting!
created with
Website Builder .