
3D Scanning & Printing
Modeling, printing, and scanning in 3D.
Modeling, printing, and scanning in 3D.
Test the design rules for your 3D printer.
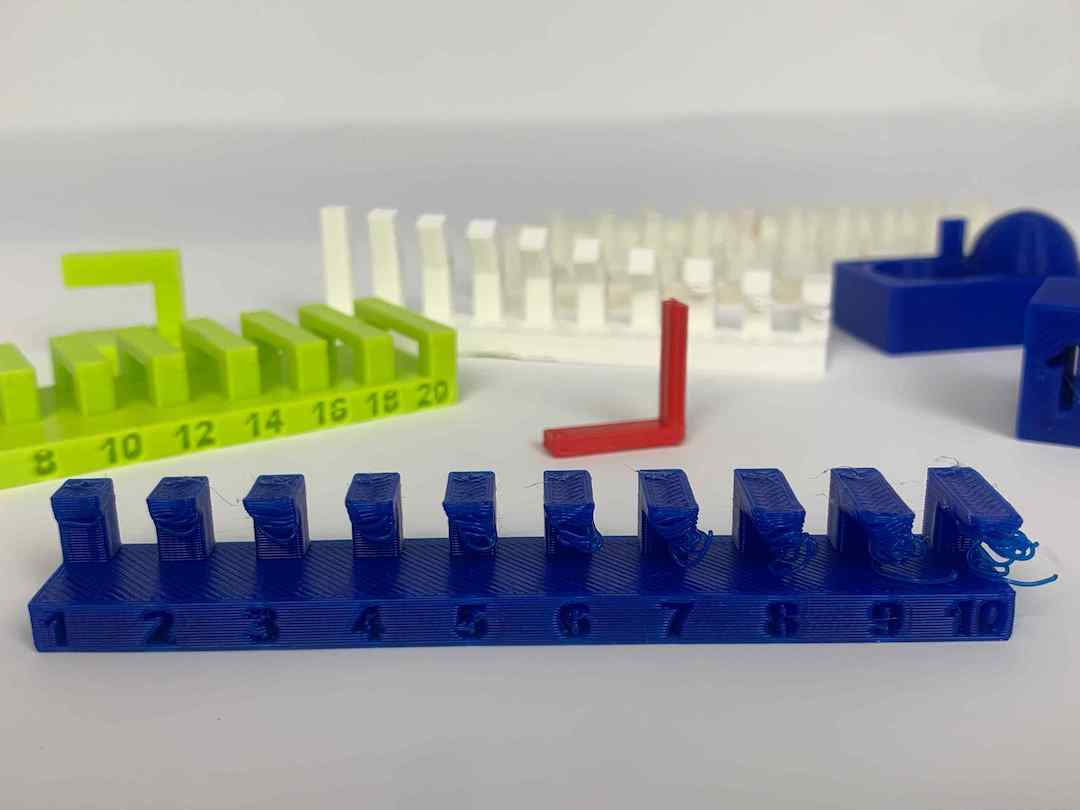
I ran a bunch of the files provided by Neil for this week's group project. When she was next in the lab, Rehana ran a second batch. Then I finished up the final few remainders that evening.
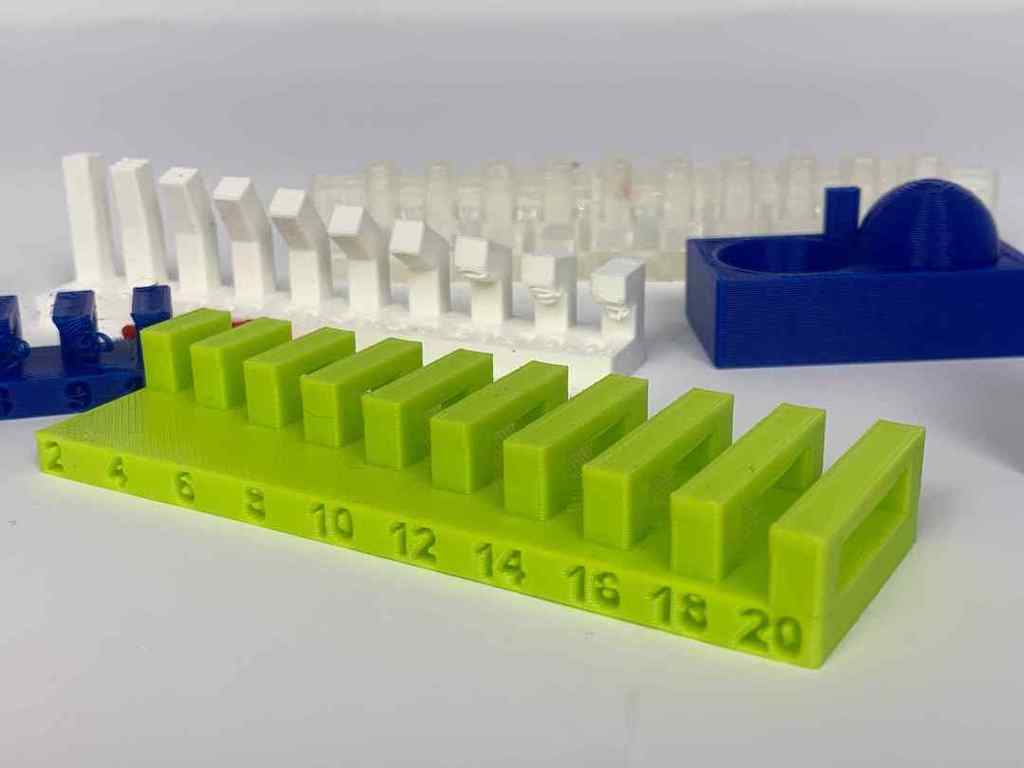
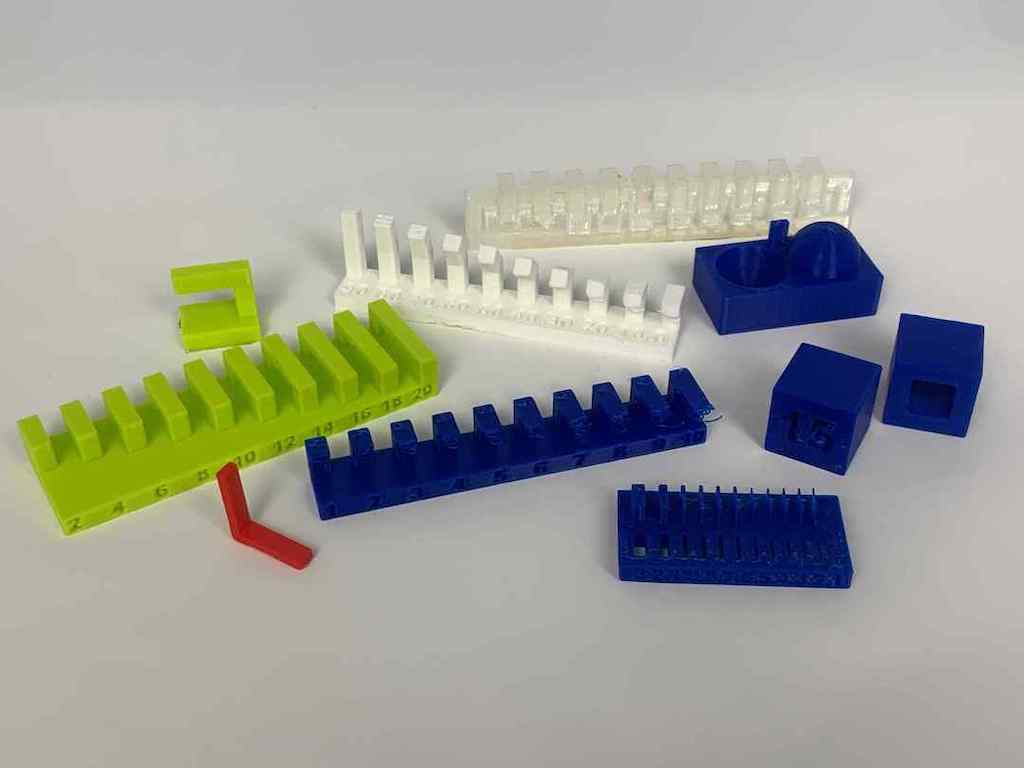
The group project showed us the print tolerances for:
I knew for this week's assignment that I wanted to do something interlocked or captive (sort of an object within an object). Since Fusion 360 is still pretty new to me and I'd never 3D printed anything before, I decided to do a test run.
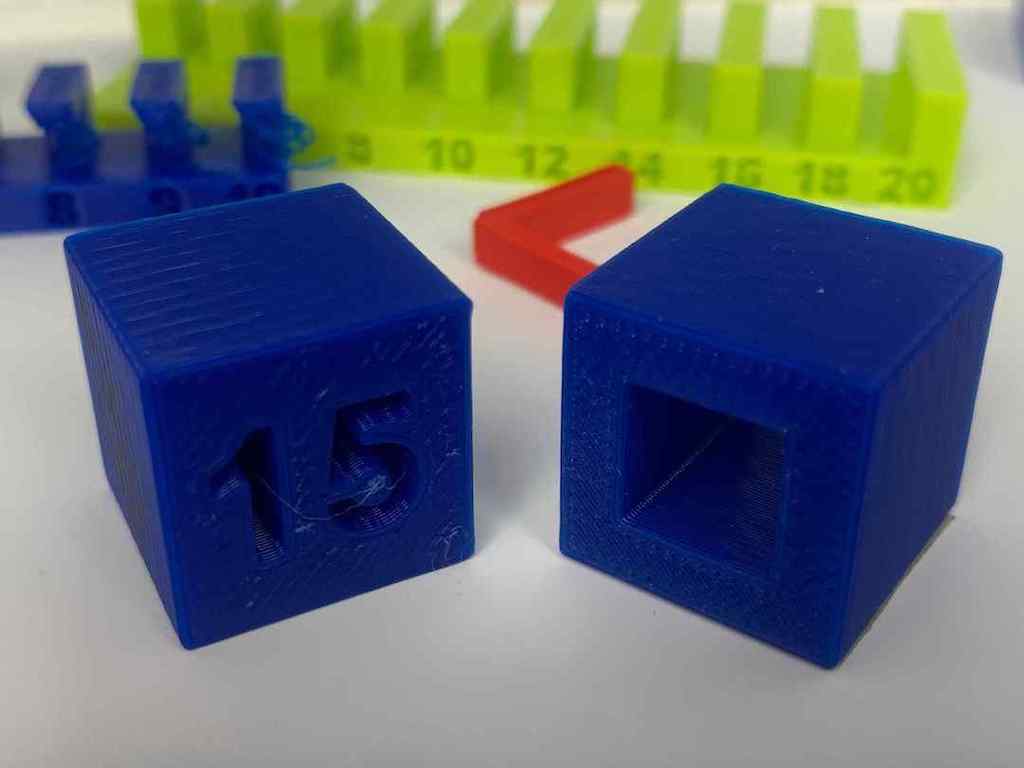
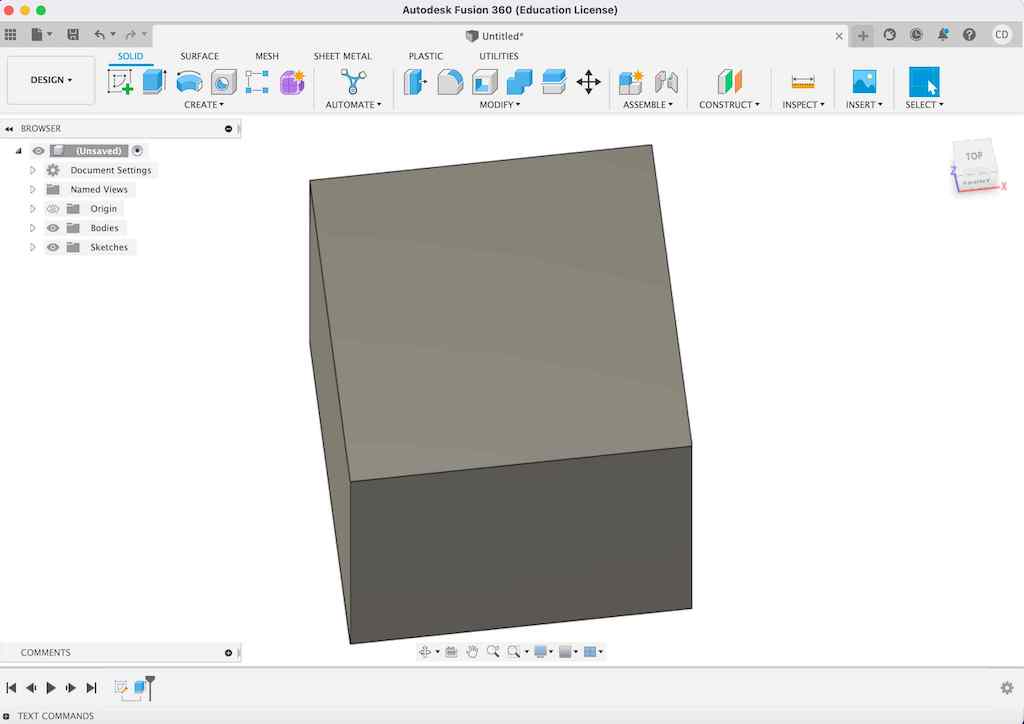
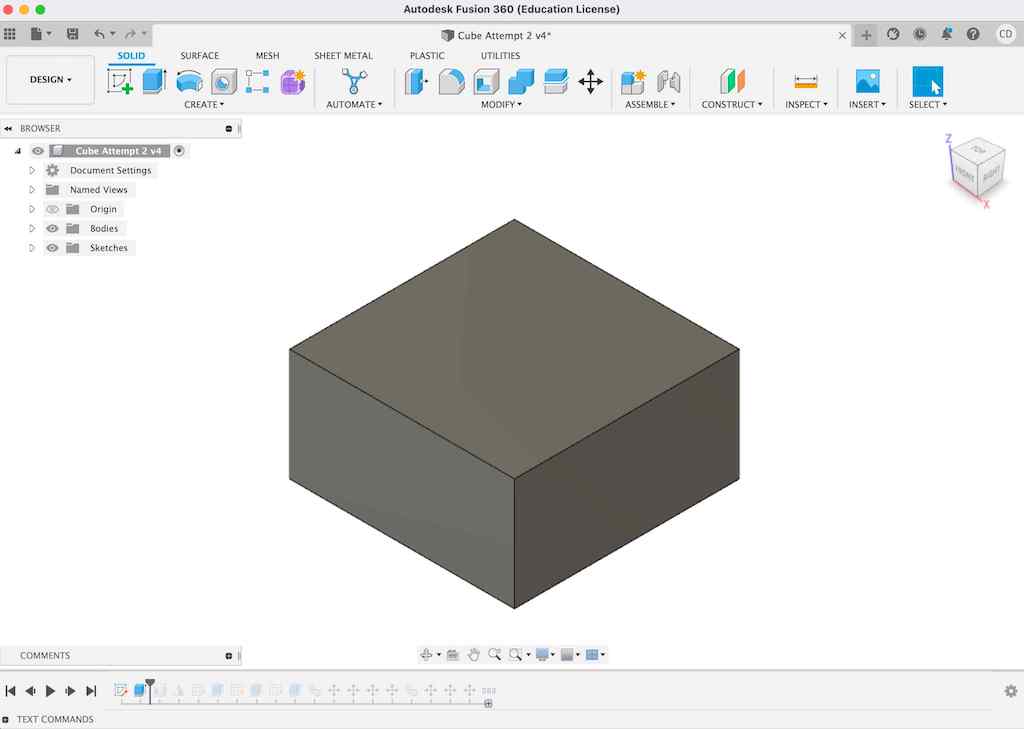
Both of my project ideas involve a hollow object, so I started off by making a solid cube and adding holes through all of its faces to hollow it out.
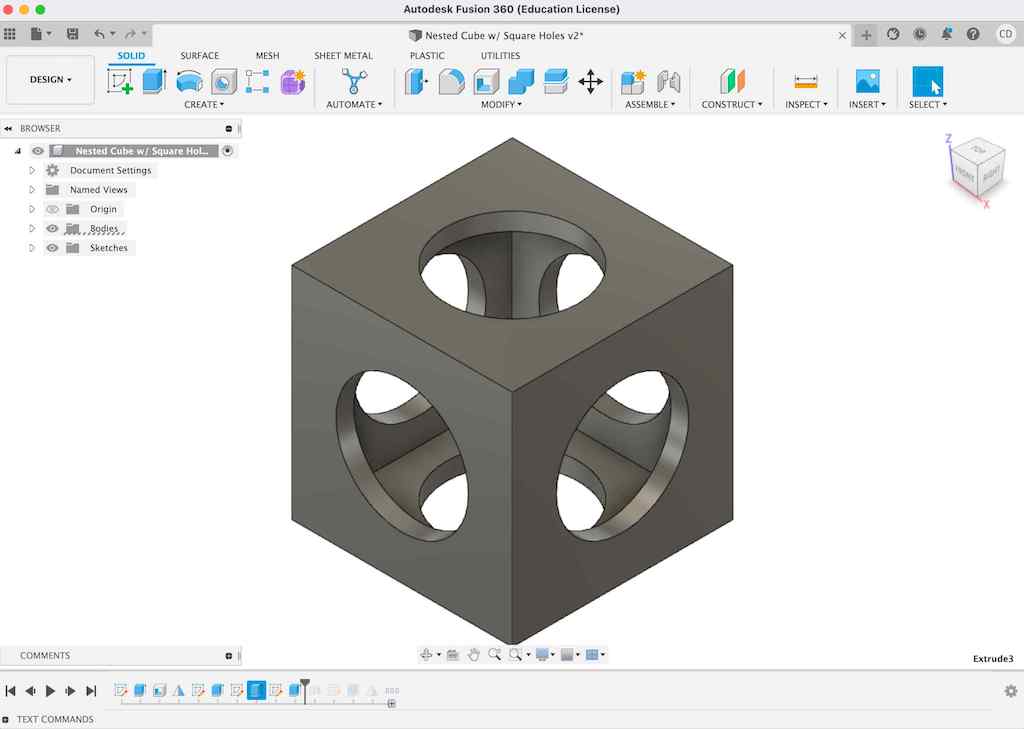
To create a cube like this with circular holes punched through each side:
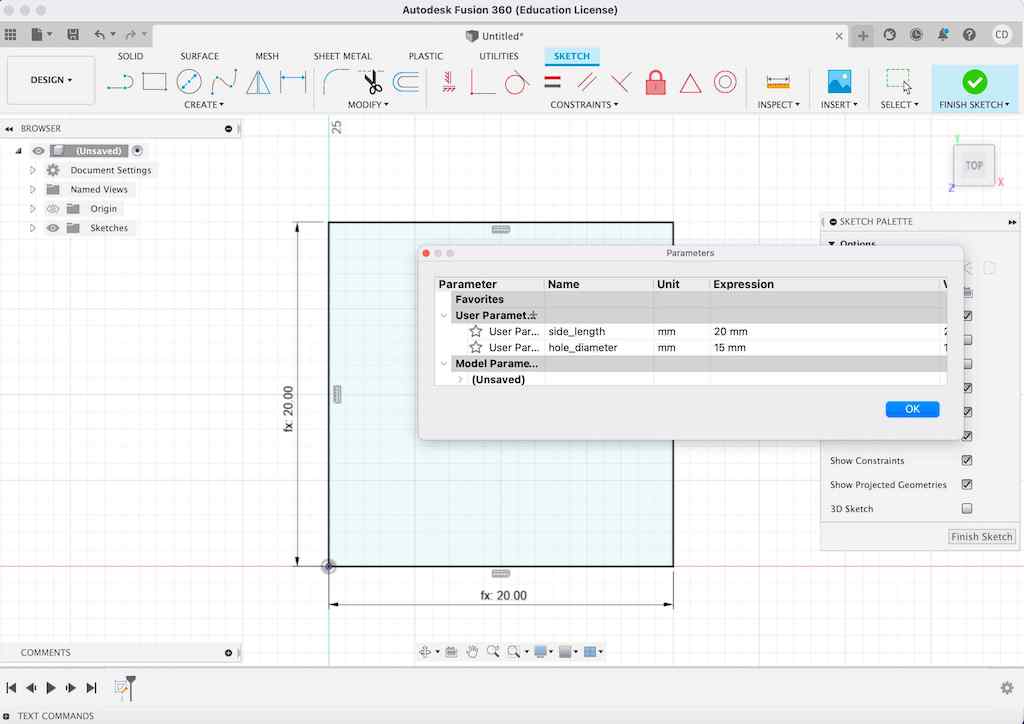
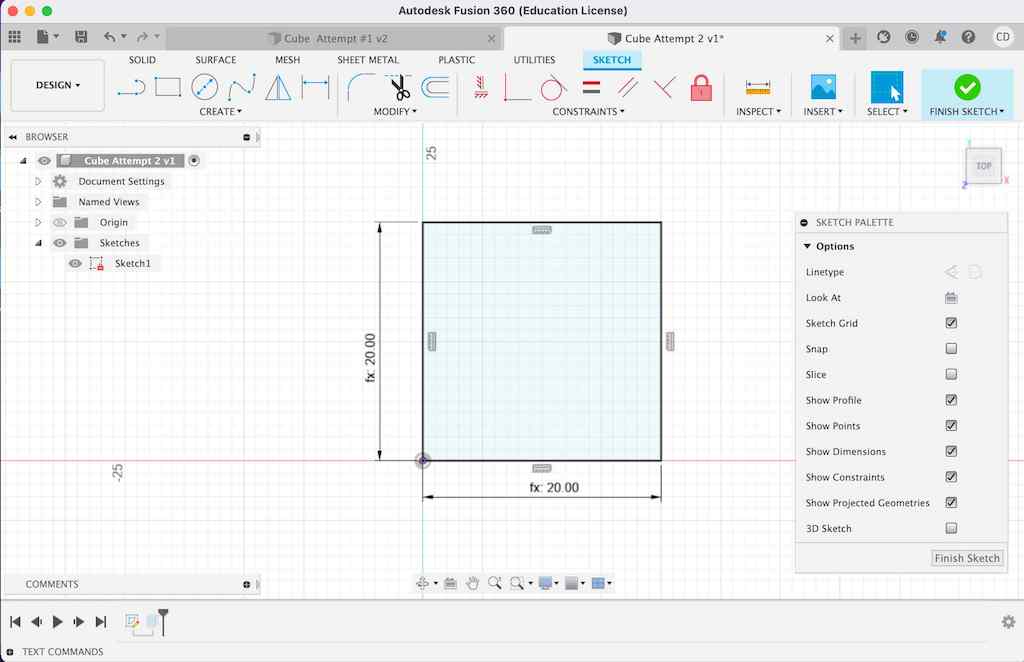
1. Draw a square.
2. Parameterize the side lengths. I chose 20mm since we were asked to do something small and I didn't want my print to take too long. I also created a second parameter at the same time for the diameter of the hole I wanted to make later. I chose 15mm for this, but in retrospect should have parameterized it as a function of the cube's side length. Something like [side_length - 5mm].
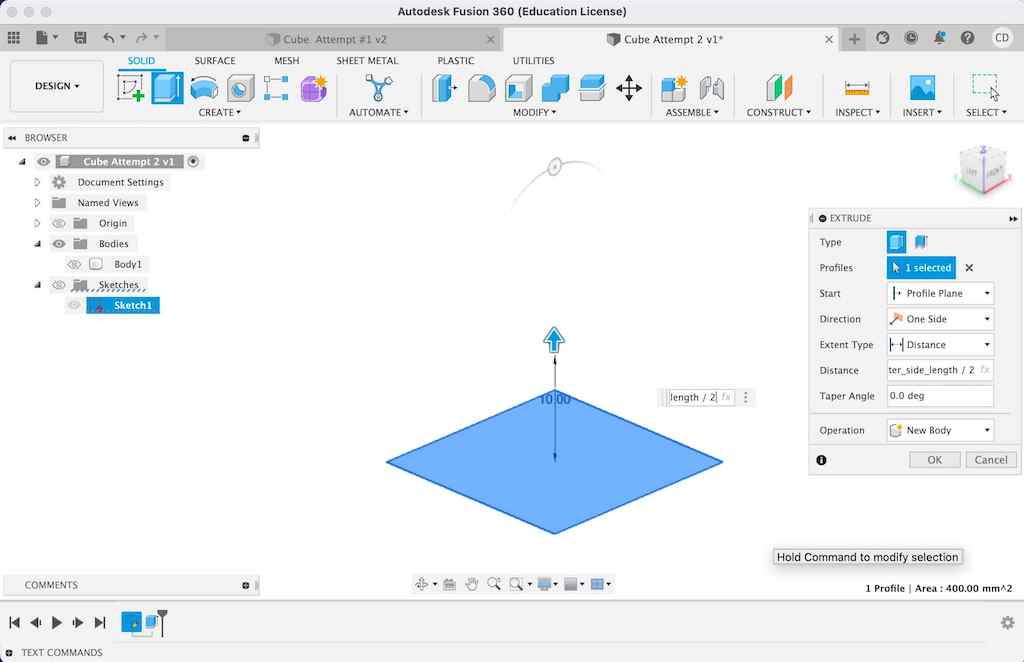
3. Extrude square to the same parameterized side length. Now we have a cube!
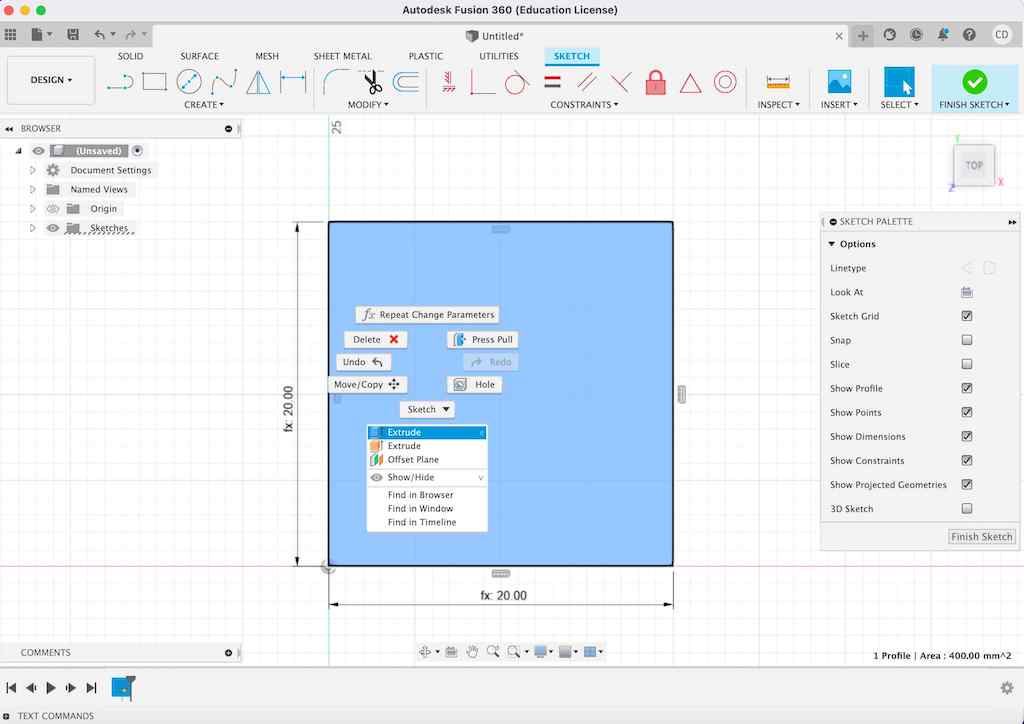
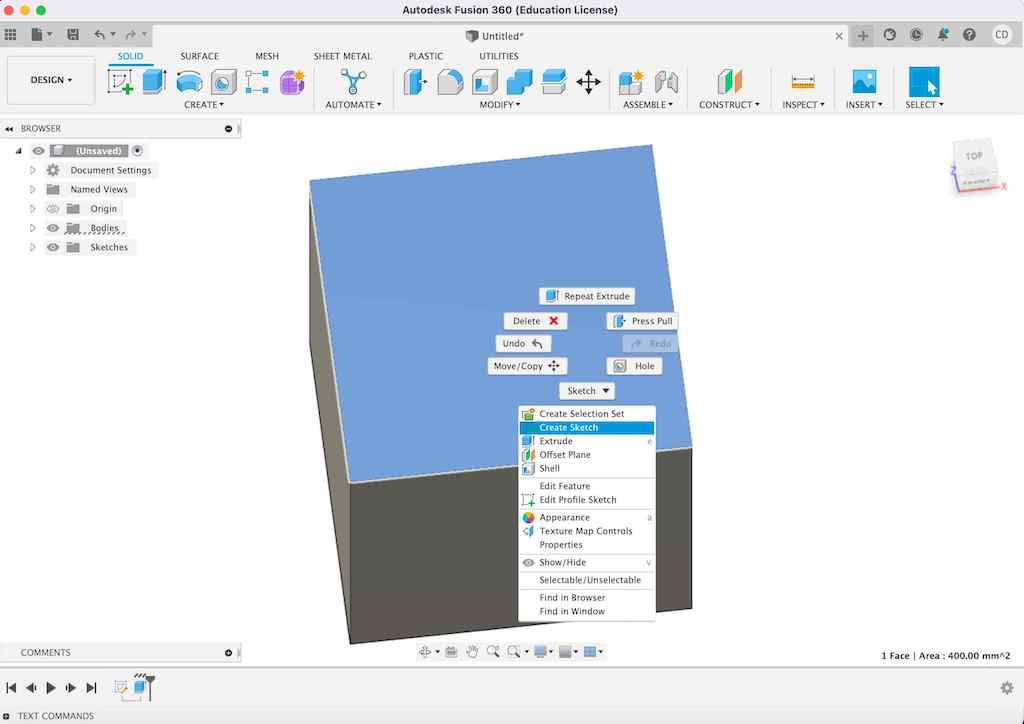
4. Select one face of the cube (any face works). Right click. Choose "create new sketch."
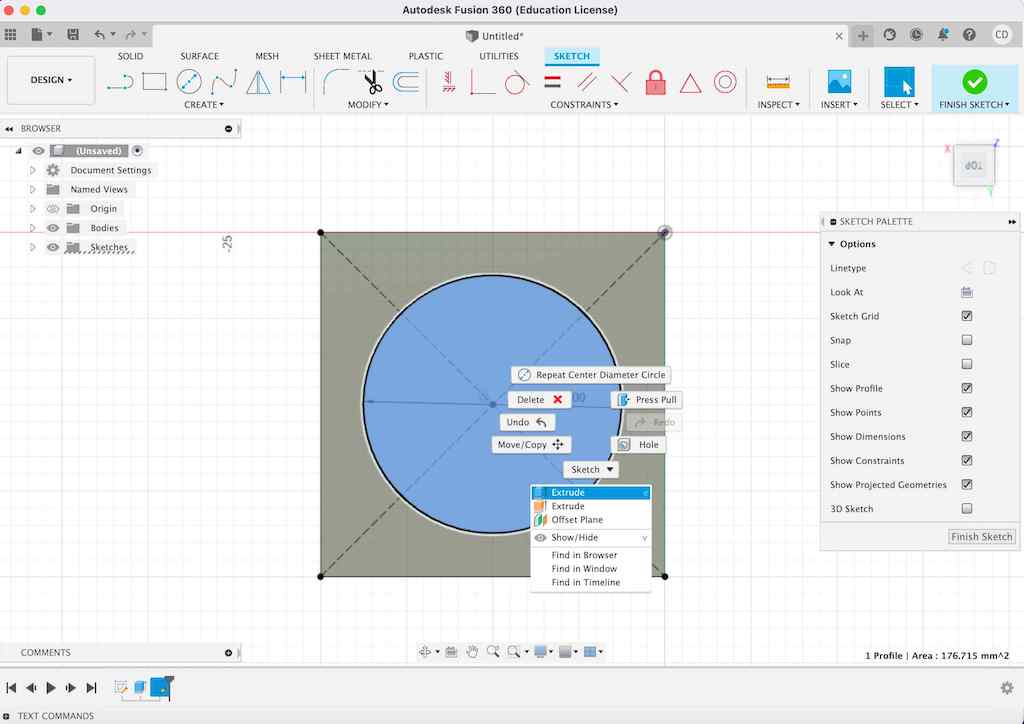
5. Draw construction lines connecting both sets of diagonal corners. This helps identify the center point of the face.
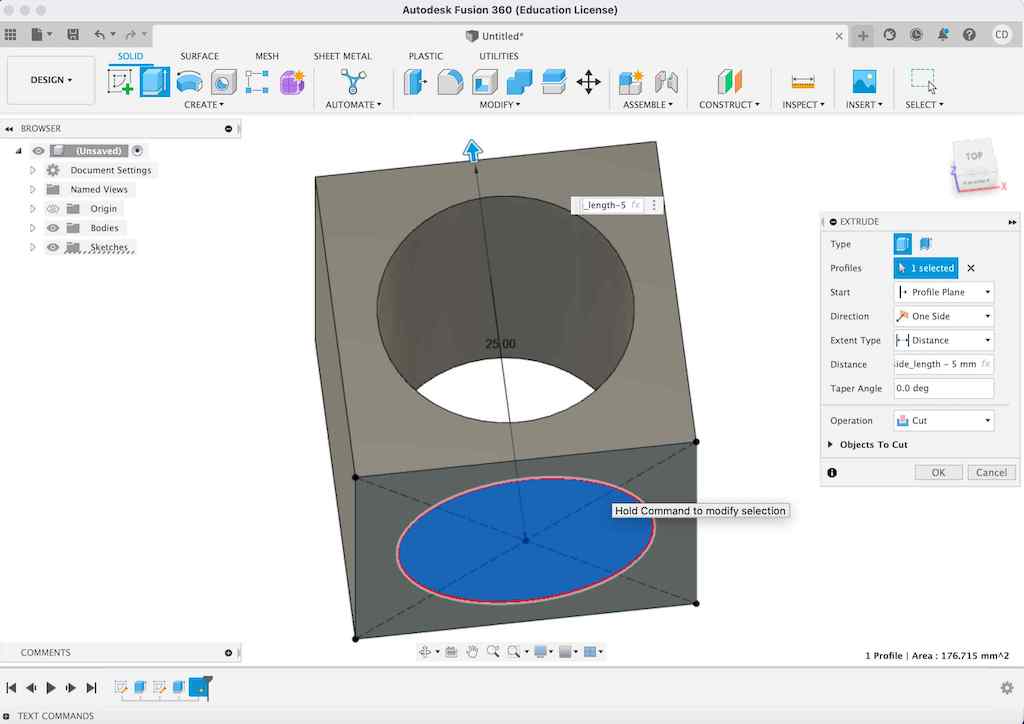
6. Select the circle drawing tool. Remember to turn off construction lines since we want this one to be solid. Select "center diameter circle" option.
7. Starting from the center point of the cube's face—which we just identified by creating our diagonal construction lines—draw a circle. Parameterize circle diameter.
9. Extrude the circle backwards to create a hole. This just means putting a negative sign (-) in front of the distance we want to extrude. Since we want this to go all the way through the cube, I used the negative parameter for my cube's side length and then subtracted another 5mm just for good measure (-side_length - 5mm). Hit enter. We created our first hole!
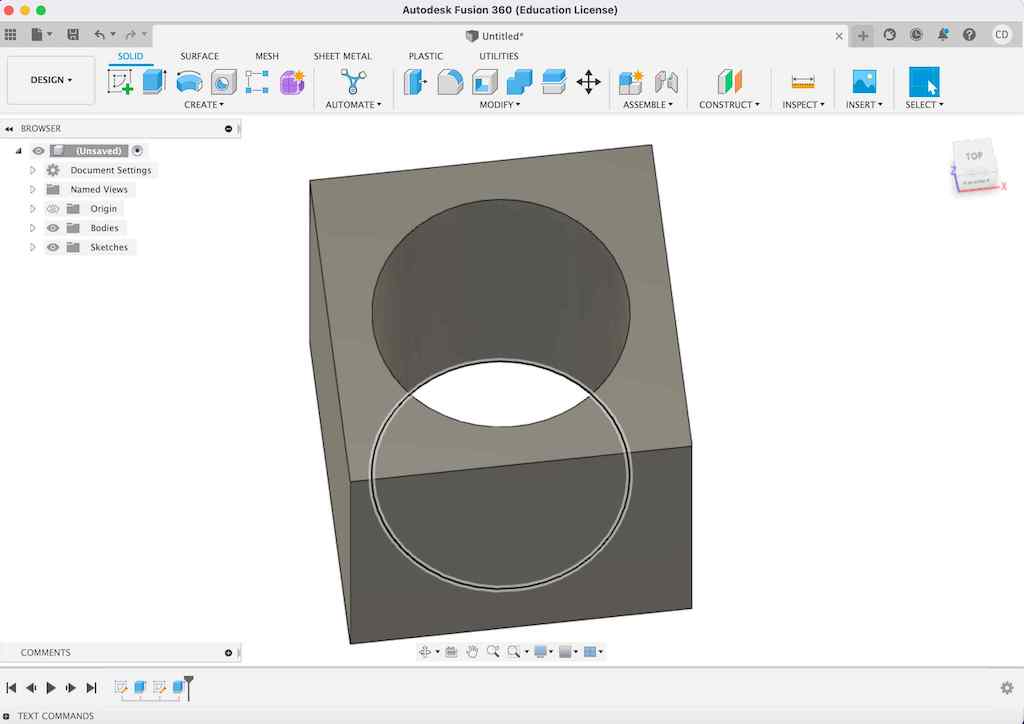
10. Repeat this same process (steps #4-9) for the remaining faces of the cube. Since the hole goes all the way through and therefore tackles two faces at once, we only have to do this twice more.
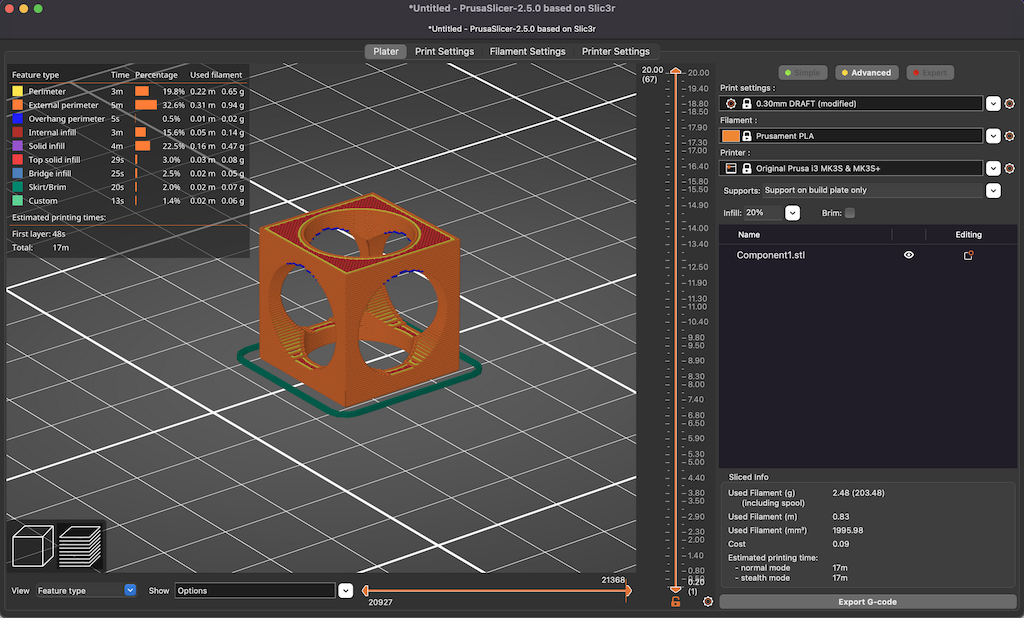
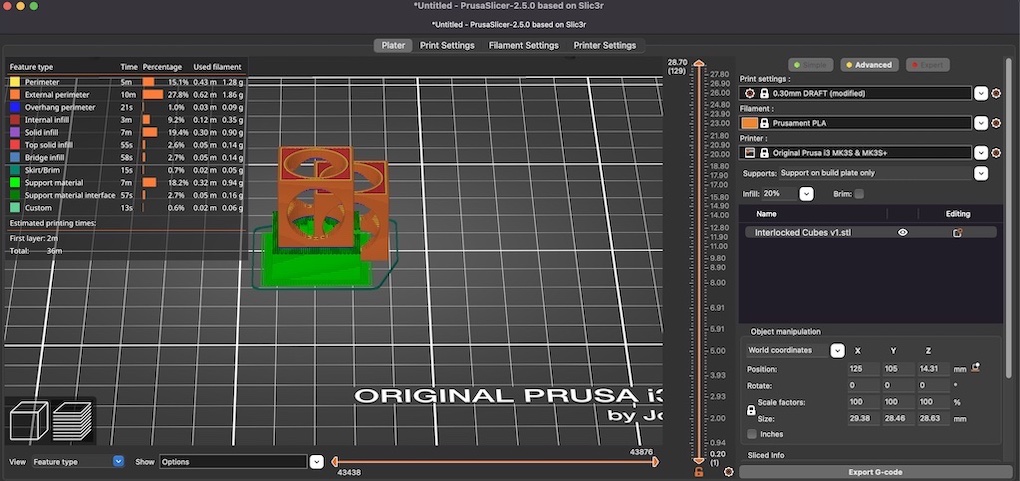
11. Right click on the cube's body just made and choose "save as mesh." We can then send it directly to the Prusa Slicer.
12. I played around with supports for this, and realized there wasn't much middleground unless I painted supports on. It was all or nothing (literally "none" or "everywhere"). Based on the test prints we ran for the group project, I decided to proceed without any supports. Only a tiny bit of the dreaded blue color-coding appeared at the tops of my circular holes, so I wasn't too worried. (Blue indicates something that should really be supported and might fail without supports).
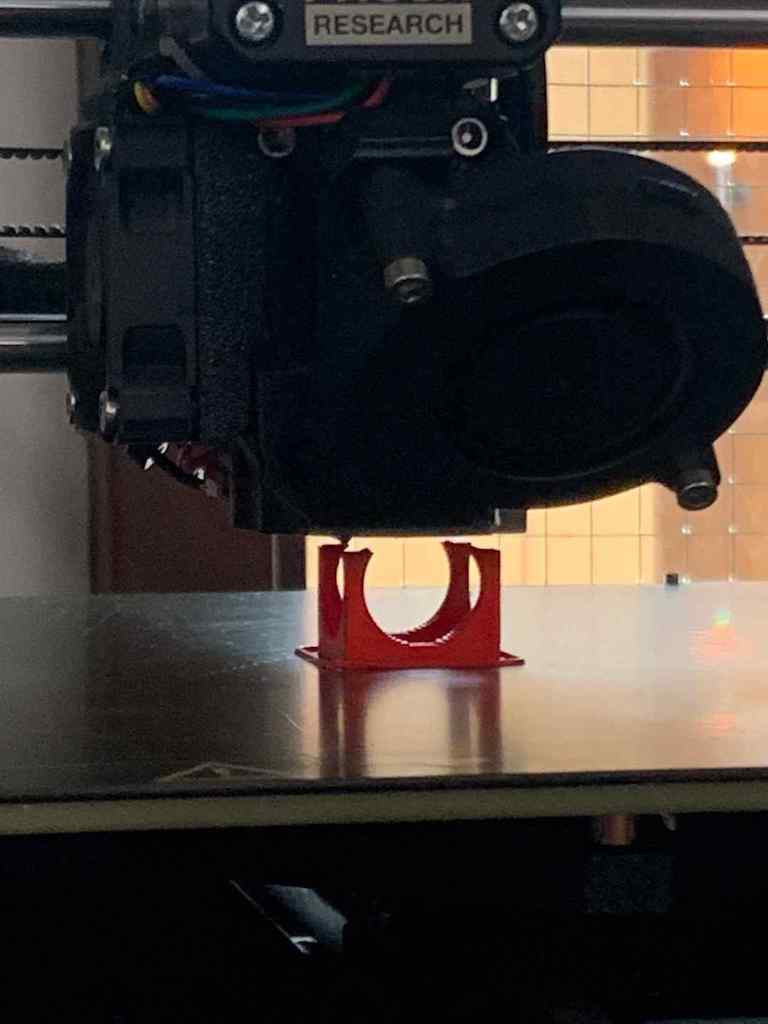
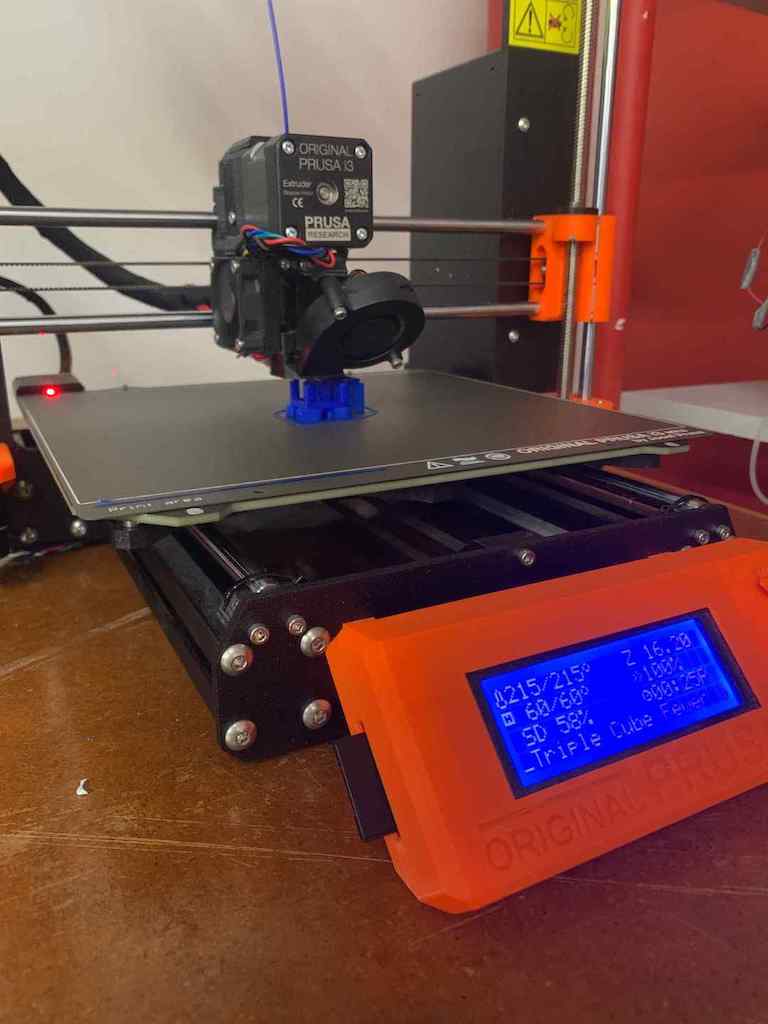
Finally, I saved the gcode for my design to my desktop and then transferred it to an sd card to load it onto the printer. It was a quick print: only 17 minutes. I waited long enough to be sure the first few layers went down well, and then tinkered around in Fusion 360 for a while.
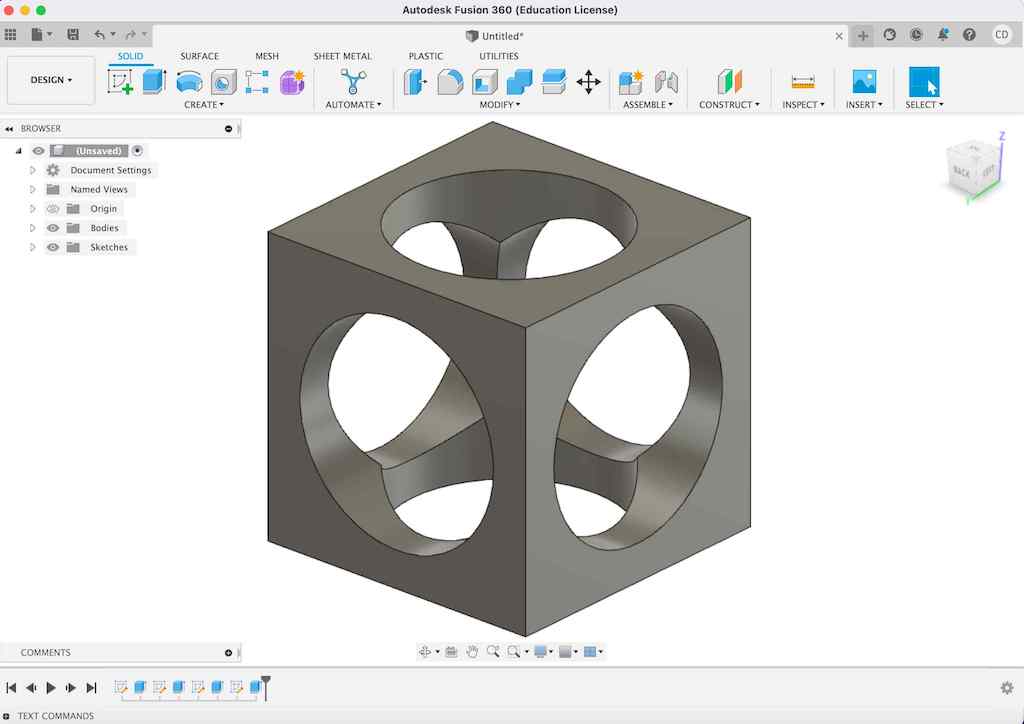
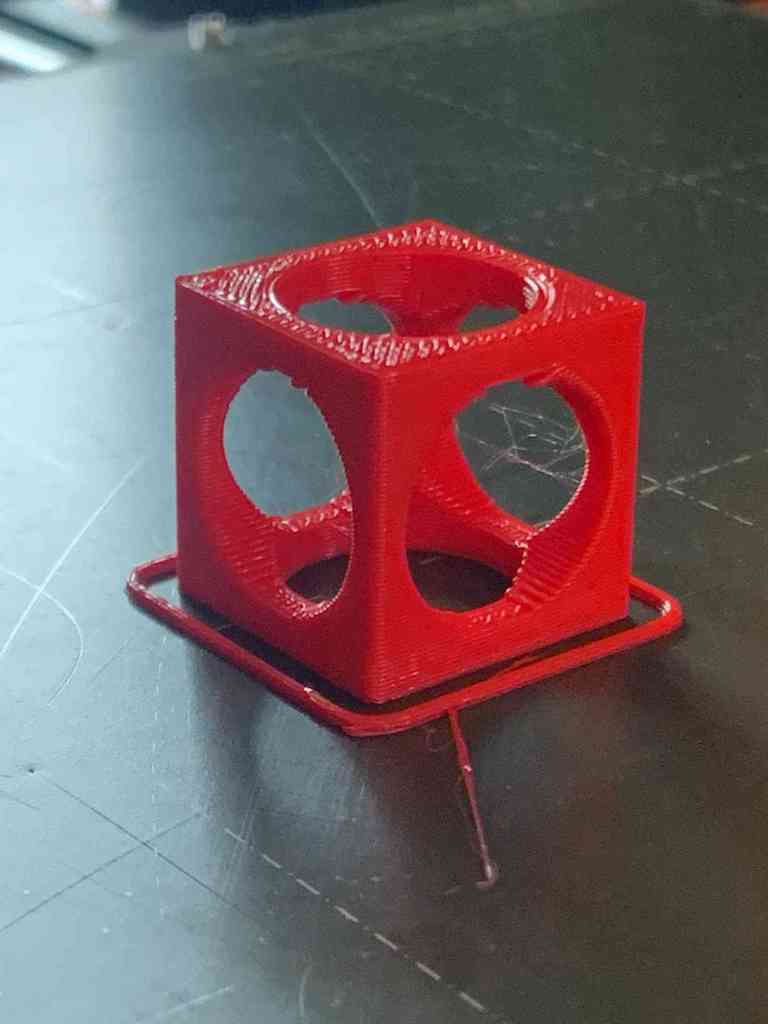
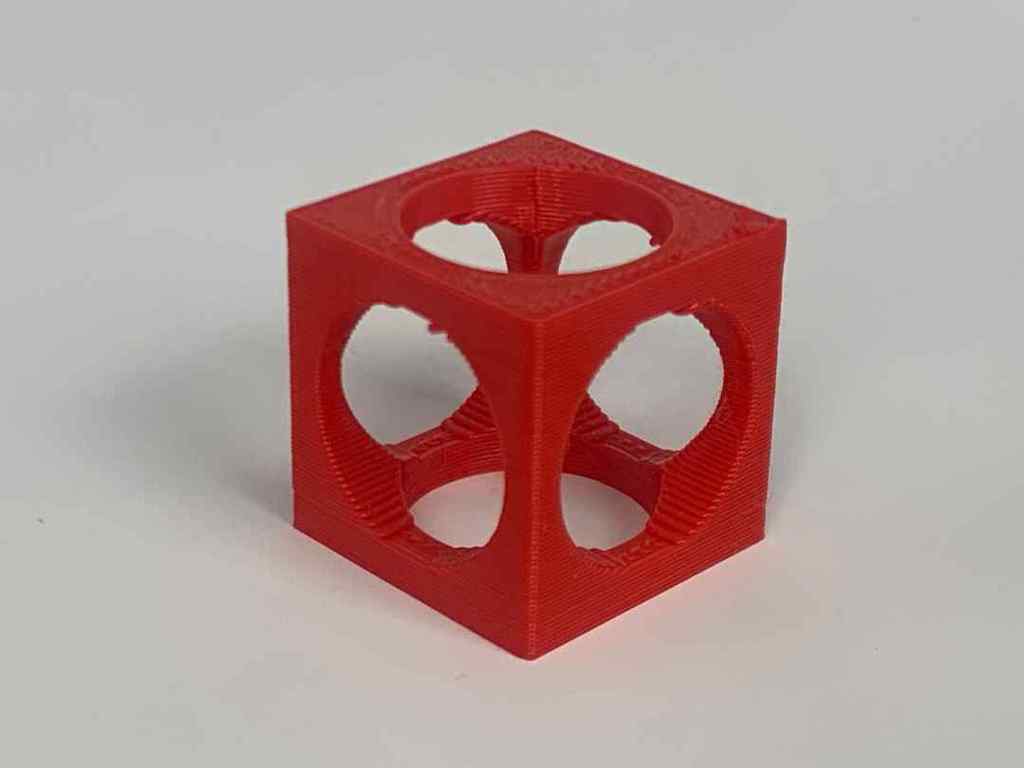
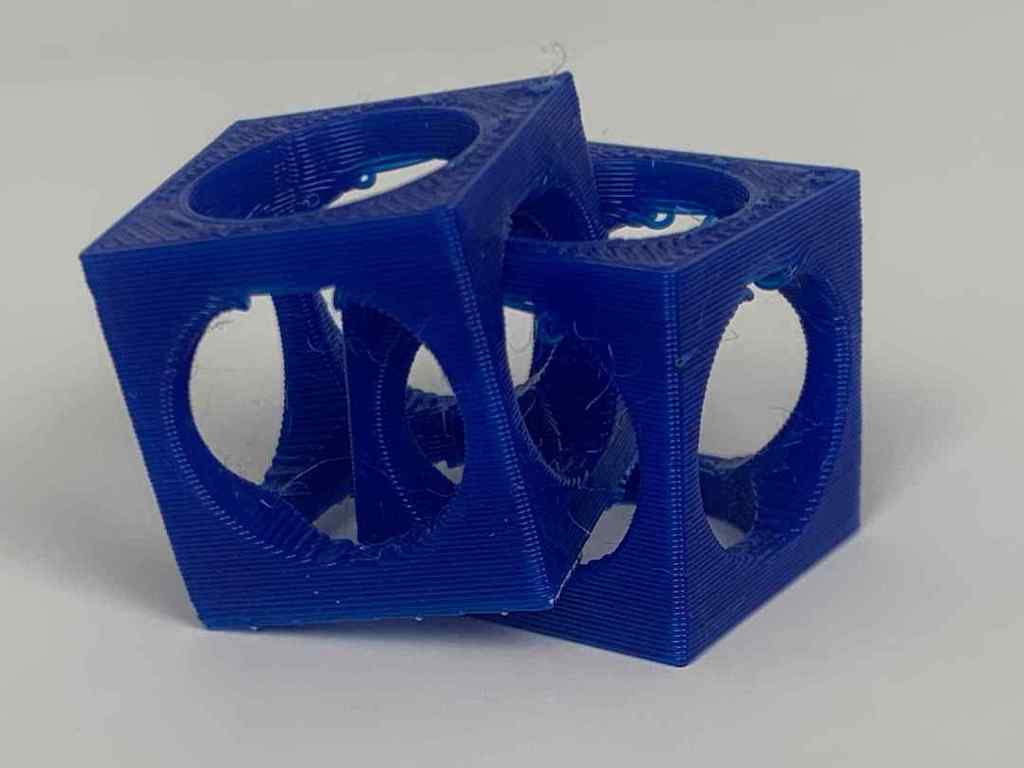
When my print was done, there were a few tiny spaghetti loops drooping down at the very top of my holes, but nothing drastic! This was run on the ".30 DRAFT" setting. I decided that it turned out well enough to try an interlocked version next.
One thing I did notice was that the way I created my circular holes through the cube left little point bits inside, essentially where the cylinders from my holes intersected. I didn't mind this, but it did make me wonder about different ways to create a more truly hollow cube.
Using the same file I created for my test print, I decided to duplicate my existing cube and try to interlock it with its twin.
This took a bit of creative geometry. Although I'm sure there's a better way to approach it (constraining the corner of cube #2 to the center point within cube #1 somehow?), I ended up just dragging my duplicated cube around and looking at the design from all sorts of different angles until I was confident the two didn't intersect.
This design also gave me a chance to play around with supports in the Prusa Slicer software. The first cube could sit flat on the printing bed, but the second would have to essentially be floating in midair. Since gravity is real thing, I created supports to solve this problem.
Steps to duplicate and interlock cubes:
1. Create cube following the steps previously outlined above.
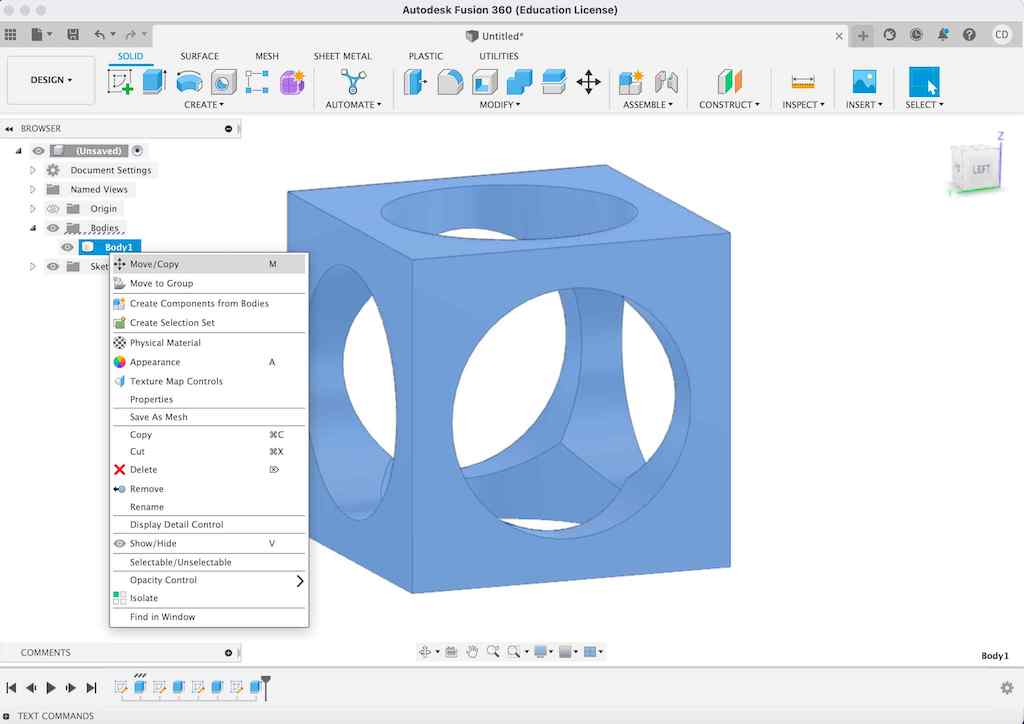
2. Right click on cube and select "move/copy." In the window that pops up, we need to check the little box near the bottom that asks whether you want to make a copy. Yes, we want to do exactly that, so click okay.
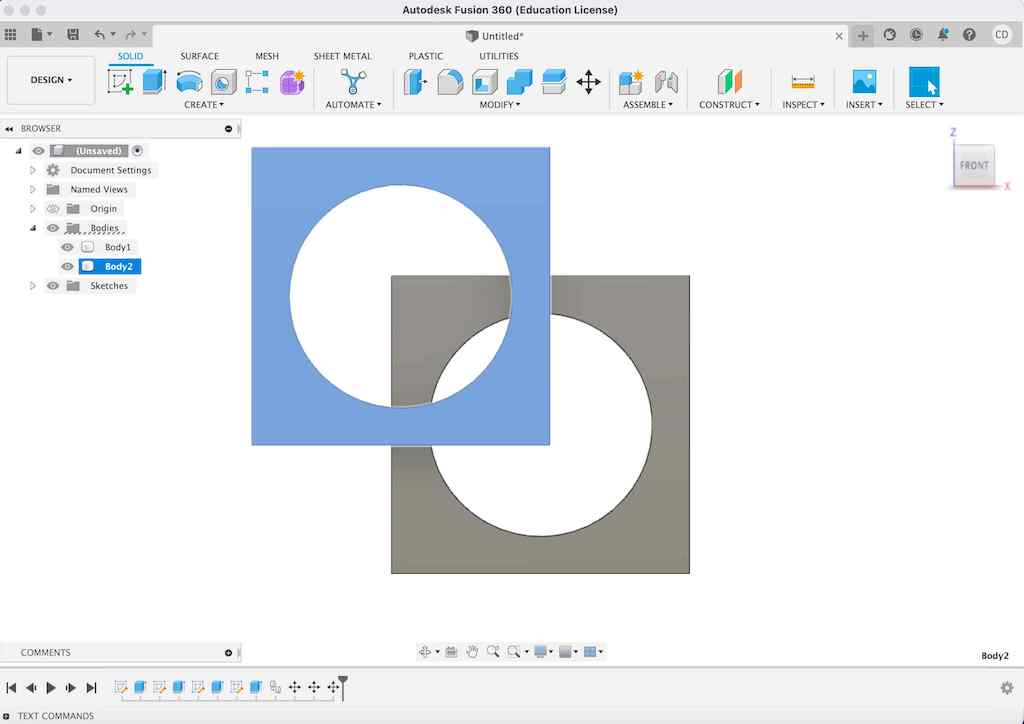
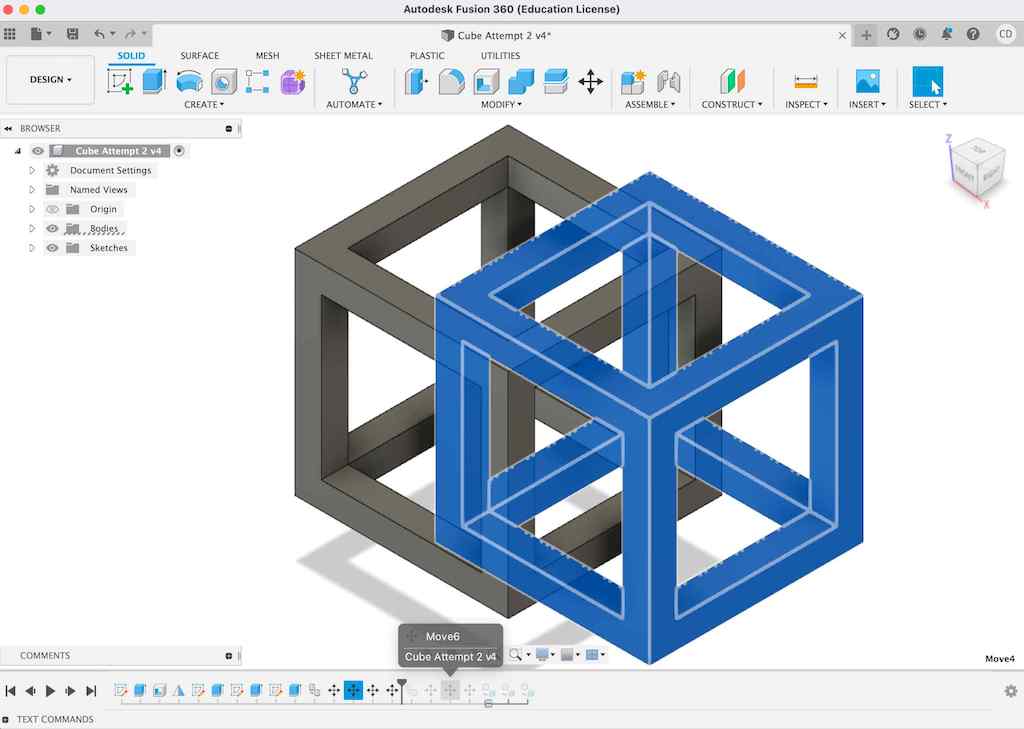
3. We will now have two cubes: the original plus a duplicate. HOWEVER, since the duplicate is directly superimposed over top of the original, it's difficult to know it's there at first. (This led to an interesting issue in one of my prints that I'll discuss shortly...) To separate the two cubes, use the "move" tool to drag the duplicate cube over to one side. Drop it when one of its sides is approximately bisecting the original cube.
4. Now, switch views. If you were previously looking at the design from the front plane, you now want to look at it from the right or left plane. Repeat your drag and drop process. This time, also move the duplicate cube up. The goal is to have the duplicate diagonally offset from the original so that the corners of both cubes will be interlocked when printed, but not intersecting.

5. Save as mesh again (both bodies/components together), and open with Prusa Slicer.
6. Select supports, and slice! I chose to run this print on the "supports on build plate only" setting.
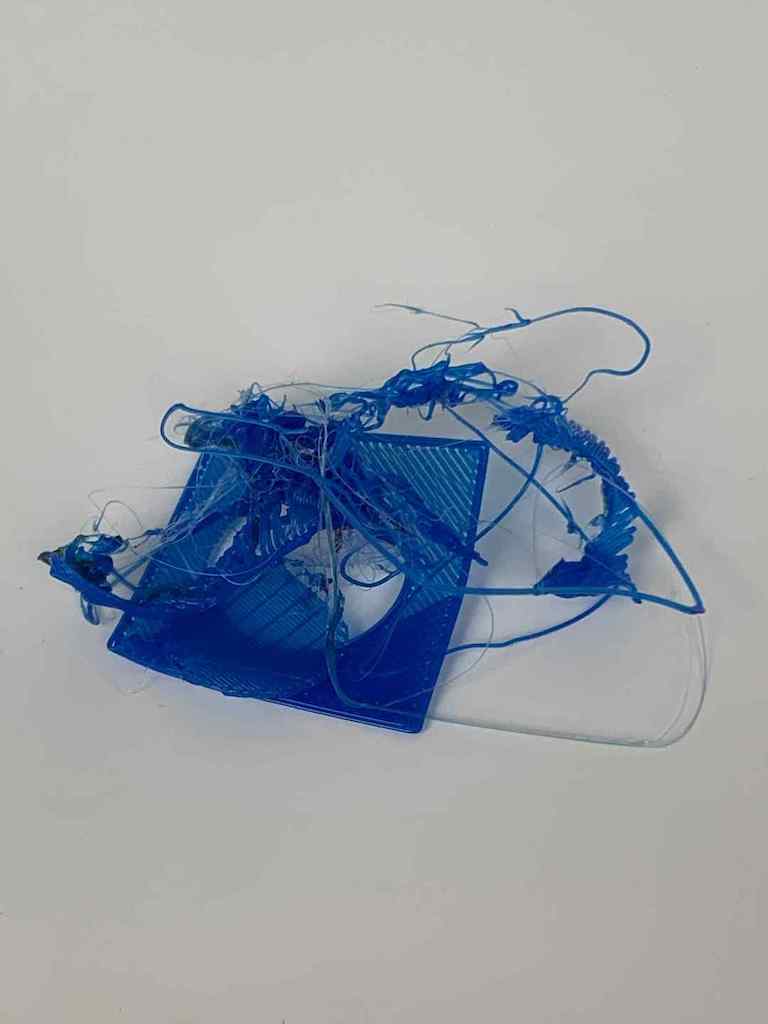
...FAILURE: This print took a little longer, so I went out to grab lunch after making sure the first few layers went down well. When I came back, I was dismayed to see that I had a lumpy looking mess waiting for me. No spaghetti... just a flat block of plastic. Our shop manager, Nathan, was certain that I had the extrusion settings miscalibrated, but we checked them together and I was set up for the appropriate nozzle. I decided to try again on a different printer. No luck there either. Nathan wasn't sure what my issue was an neither was I, so I started the Prusa Slicer process over again from scratch to see if that might make a difference... and it did! My estimated print time also went down by around 50%. Weird... until I realized that I had probably accidentally saved two bodies superimposed over top of one another before transferring to Prusa Slicer. The poor printer was trying to print two designs's worth of material into the same physical space. Oops.
7. Restart and hope for the best!
8. Remove print from bed and remove supports. I realized during this step that I hate supports. They're difficult to remove, and leave ugly scarring behind. I used needlenose pliers to peel them off my creation.
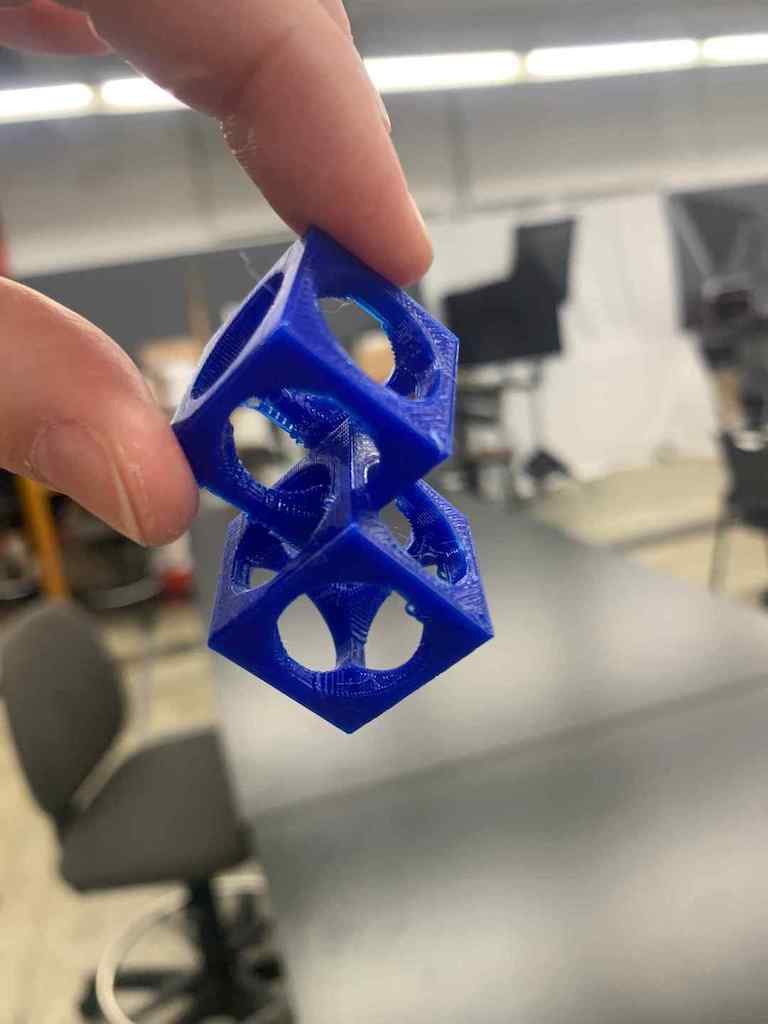
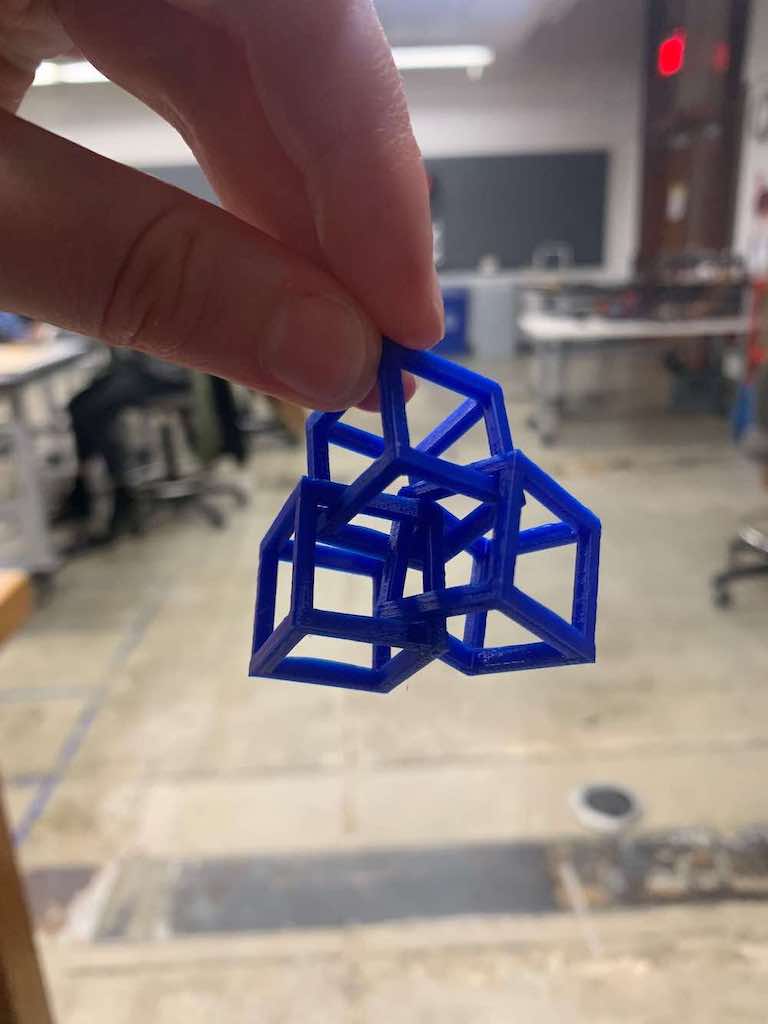
Except for the ugly support wounds, this turned out pretty well! I was pleased with it overall, though I wish I'd done it larger.
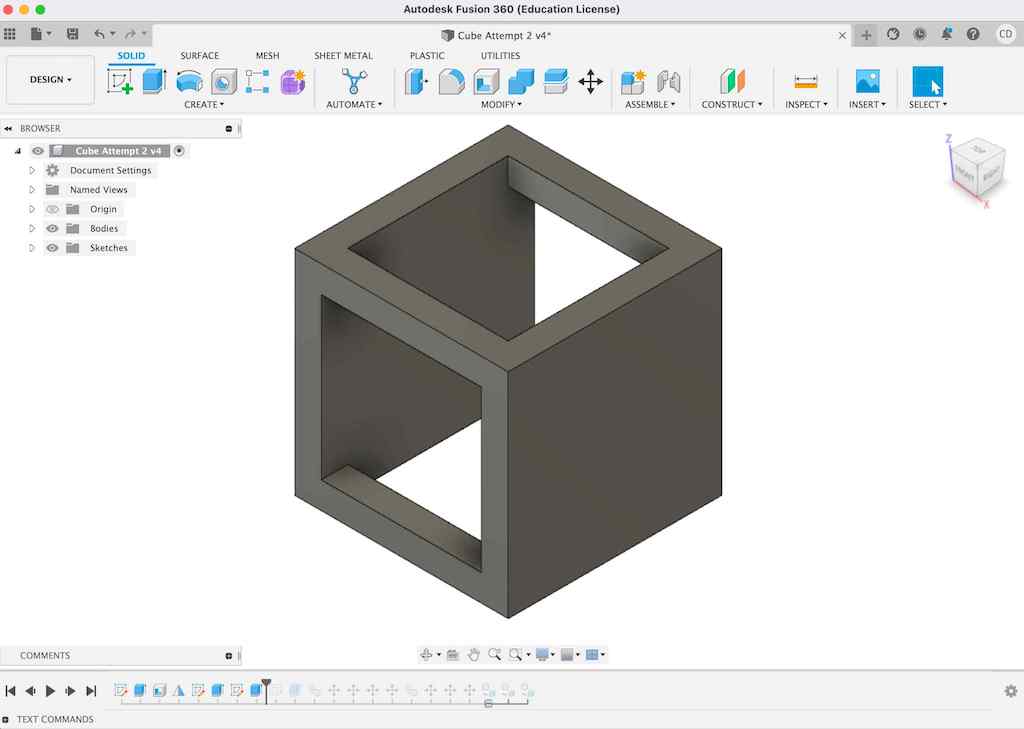
II also didn't love the drooping spagetti loops on the top parts of my circular holes. Thinking about these loops and the odd angles inside my cube, I decided to try another approach. This time, I wanted to try creating a truly hollow cube with square holes.
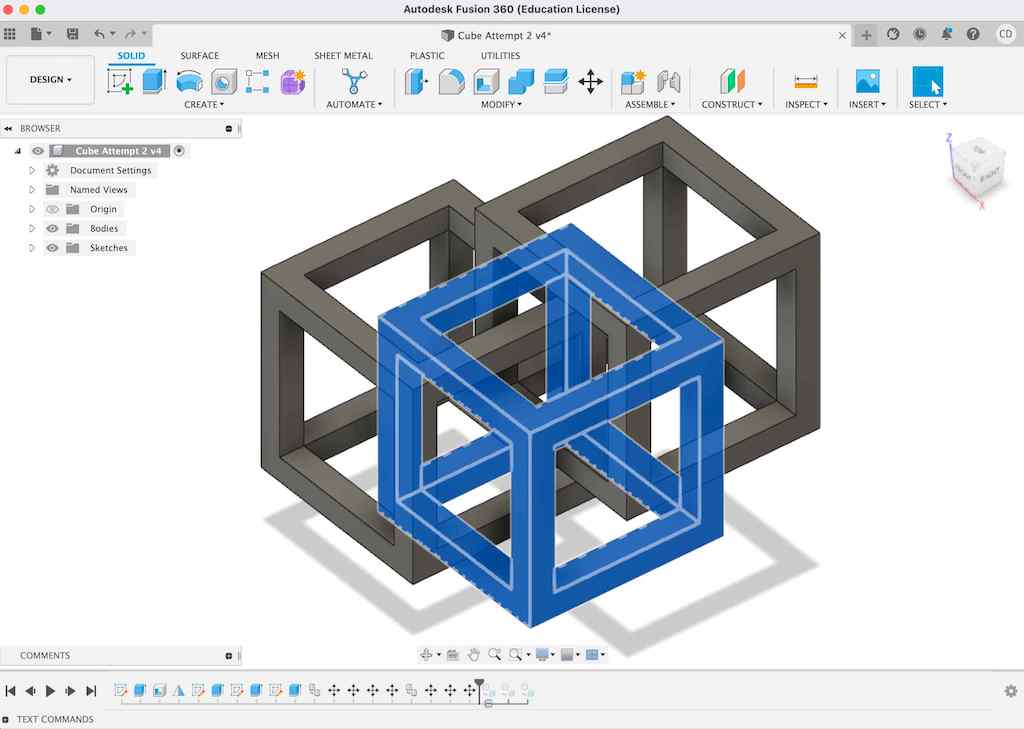
I started over from scratch in Fusion 360 for this round, since I wanted to try a completely different approach to create my cubes.
This time, I wanted to try hollowing out my cubes before adding holes. I also wanted those holes to be squares instead of circles, since I knew from the group project that bridging this distance with a straight line should cause fewer (if any) issues. To add another layer of complexity, I also wanted to interlace three cubes this time.
This introduced me to Fusion's "shell" feature. Pretty cool!
Here are the steps I followed:
1. Draw square.
2. Parameterize sides.
3. Extrude to half height! We're going to do some mirroring here, so don't want a full cube to start with. We want half a cube. I did this by extruding to a function of my side length parameter: [side_length / 2].
4. Select "shell" function. I chose to parameterize my wall thickness here to make things easier if I wanted to make changes. I'm learning to parameterize everything, even if I don't think I'll need it later... and I'm usually glad I did! Hit enter to lock this in.
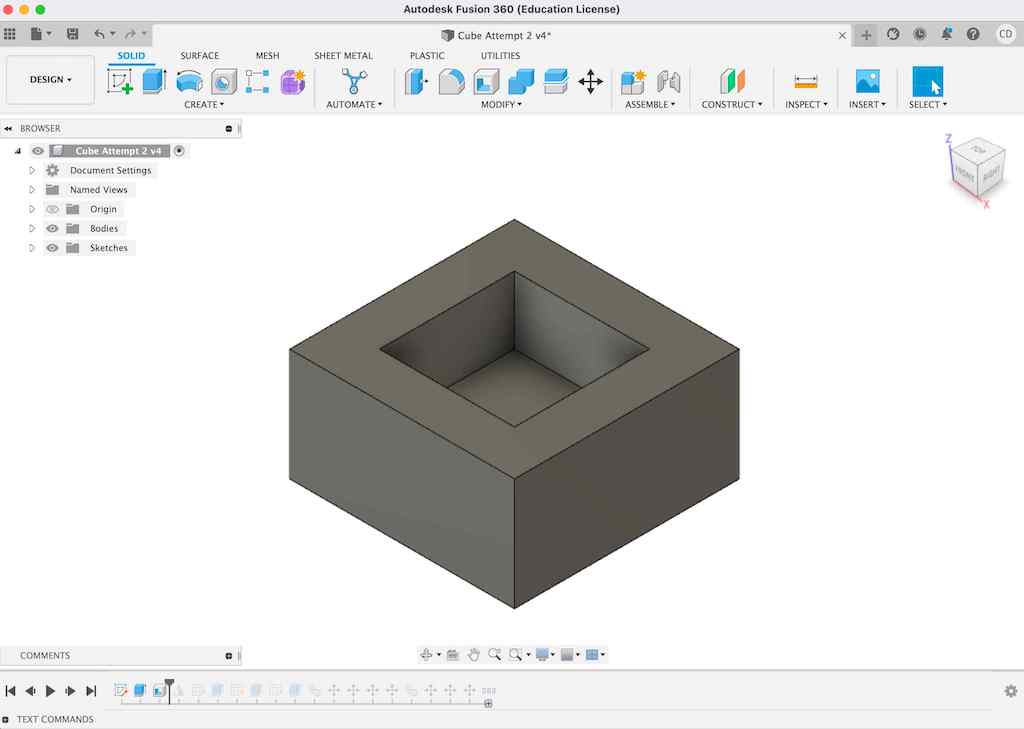
5. Now we have half of an empty cube. To enclose it fully, we want to mirror it across its top plane. Do this by selecting the mirror tool, then selecting the appropriate (only?) body, and then the plane. There's also a setting that automatically joins the original and mirrored object if you check the box at the bottom of the pop-up menu, which conveniently saves us a step. Hit enter. What you have now will look like a solid cube, but it's actually hollow! (Note: I forgot to screenshot that step.)
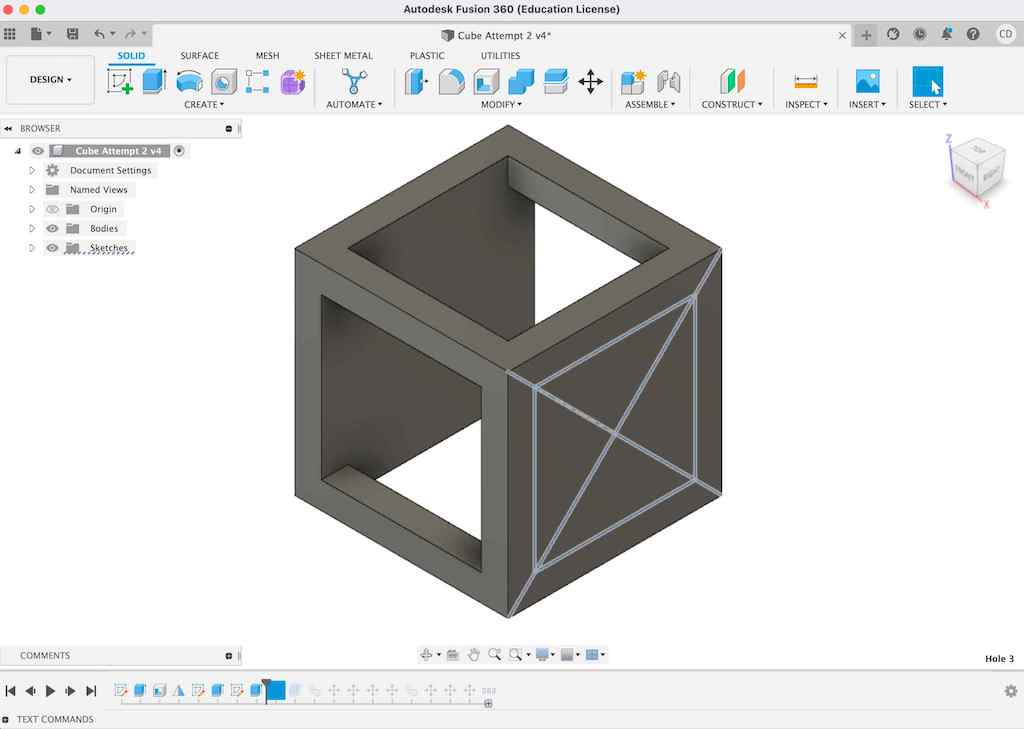
6. Next, I created square holes using the same process I discussed in Round 1: start a new sketch on one of the cube's surfaces, add diagonal construction lines to find the center, add a solid square from the centerpoint (I parameterized the side length for this), and extrude to at least the negative value of the side length. Viola! A square hole!
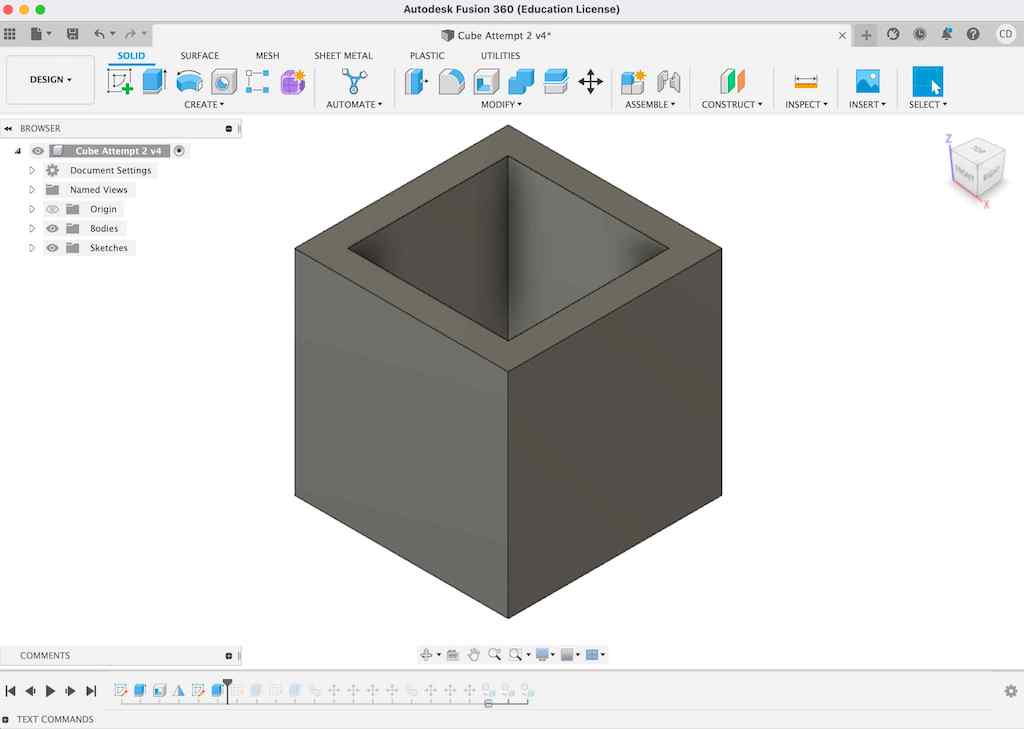
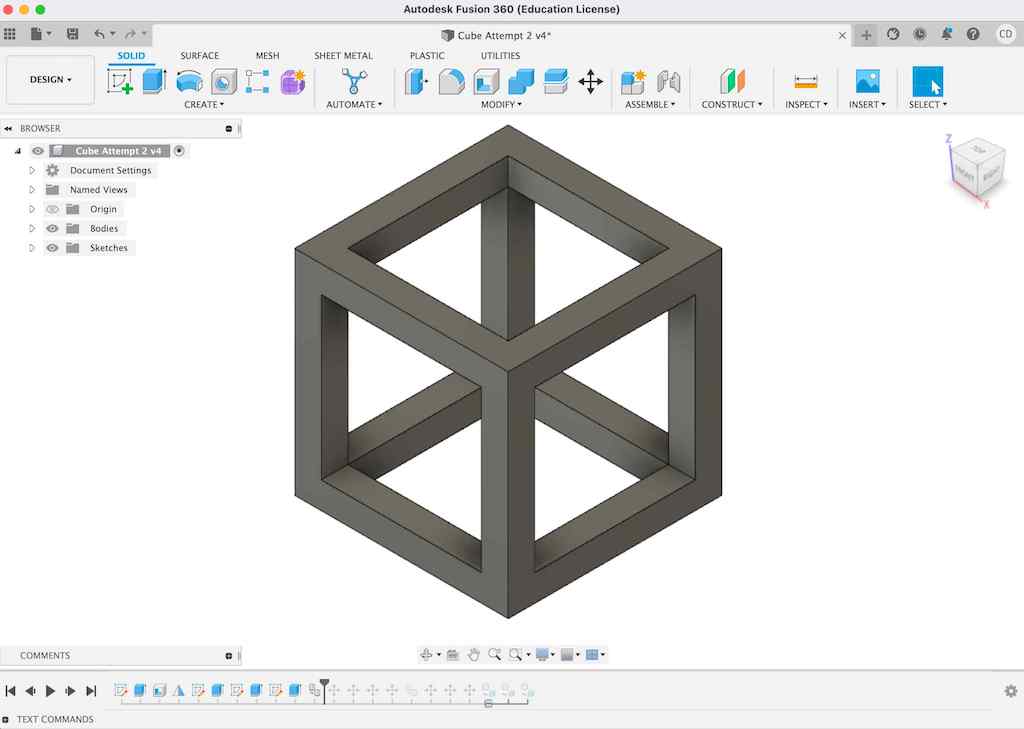
7. Repeat your hole creation process on the remaining faces to create what is essentially the frame of a cube.
8. Duplicate, drag, and drop the cube until you have three cubes that are all effectively interlaced.
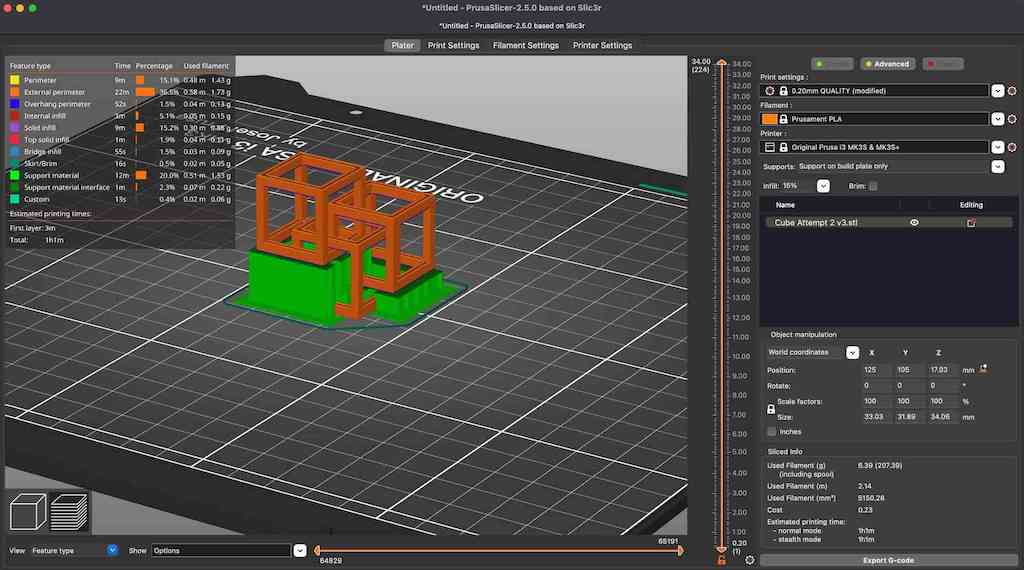
9. Save as mesh via Prusa Slicer. This time, I painted on supports in just a few key areas on the corners of each floating cube to create less scarring.
10. Print, remove supports, celebrate!
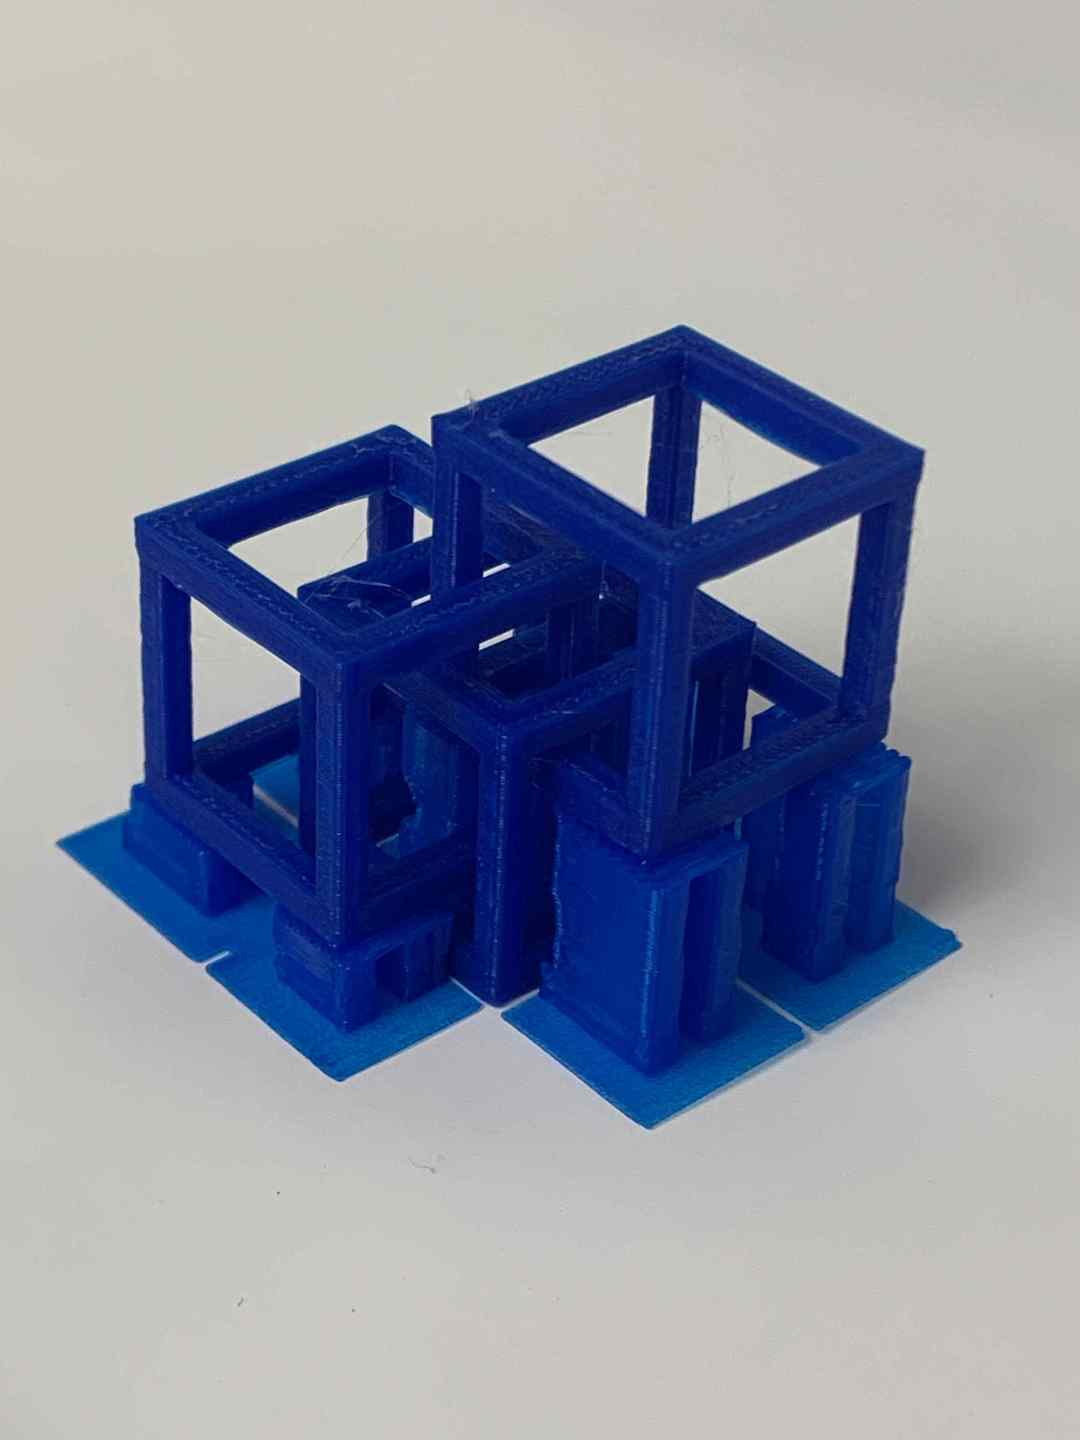
This turned out well!
Again, I wish I'd done it a bit larger, but overall it was a nice end product. It was a bit difficult to get the supports out, though.
Because I was having fun messing around with additive designs and Fusion (did I really just type that...?), I decided to try one more design.
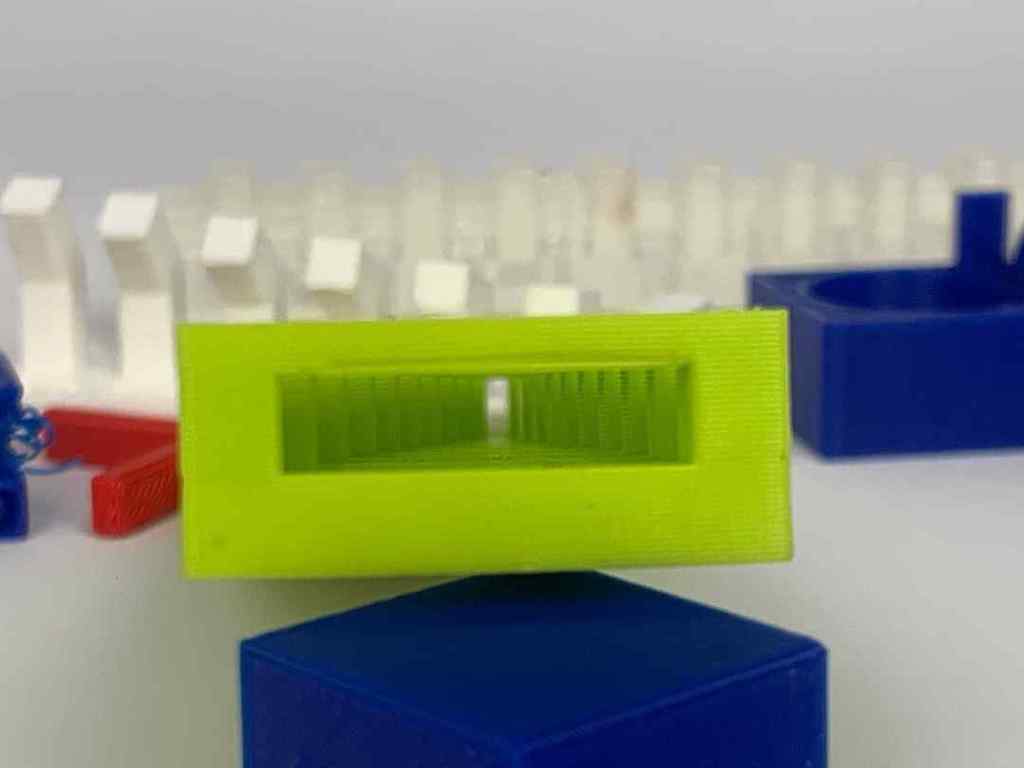
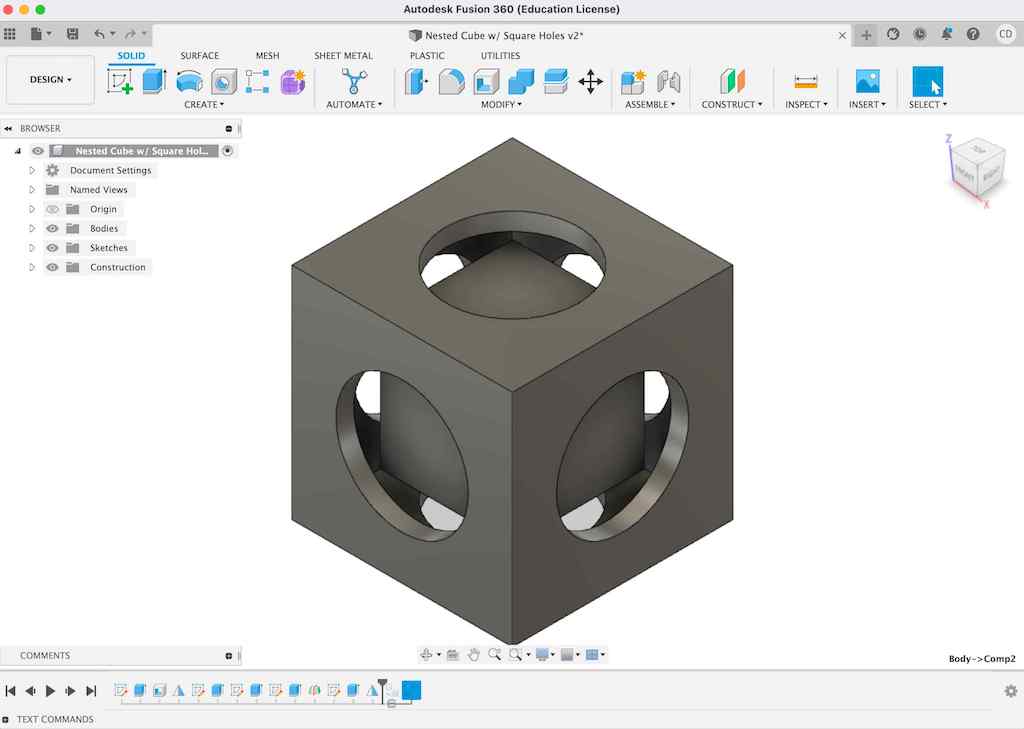
for this one, I decided on circular holes in a hollow square. That meant replicating steps #1-5 from Round 3 above, and then creating circular holes from the centerpoint instead of square ones. (I parameterized my hole diameter as a function of the side length to make it easy to play around with). One note: I specifically started the midpoint of my original square at the origin for this, which made my life bit easier later on.
Then I added a few new steps to create an object within an object:
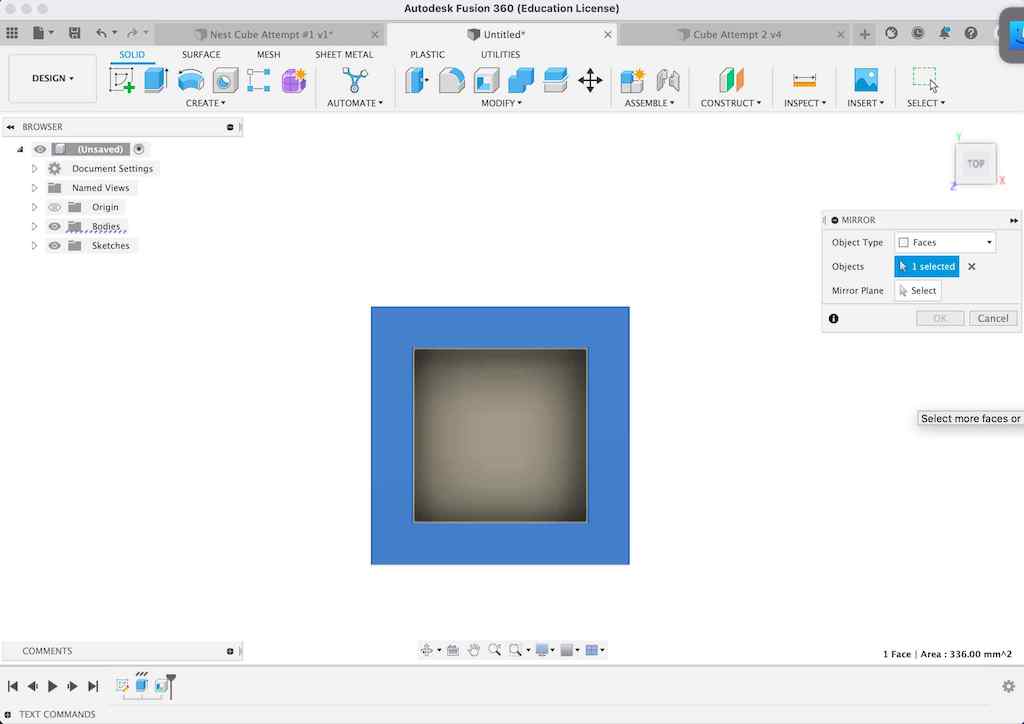
1. Add a new plane. Under the "construct" menu, select "midplane."
2. Select the top and bottom faces of your cube-with-holes and hit enter. This will create a new plane at the midpoint between them.
3. Draw a square on this plane. Make its midpoint at the origin again, just like you did for the original square you created your hollow cube from. I parameterized the side length for this smaller square and did a bit of math to figure out what size I wanted my trapped cube to be. Since I wanted it to be just barely smaller than the diameter of my holes, I went with a function again: [hole_diameter - .5mm]. I'm calling this smaller square my "trapped cube" since that is what it will ultimately become.
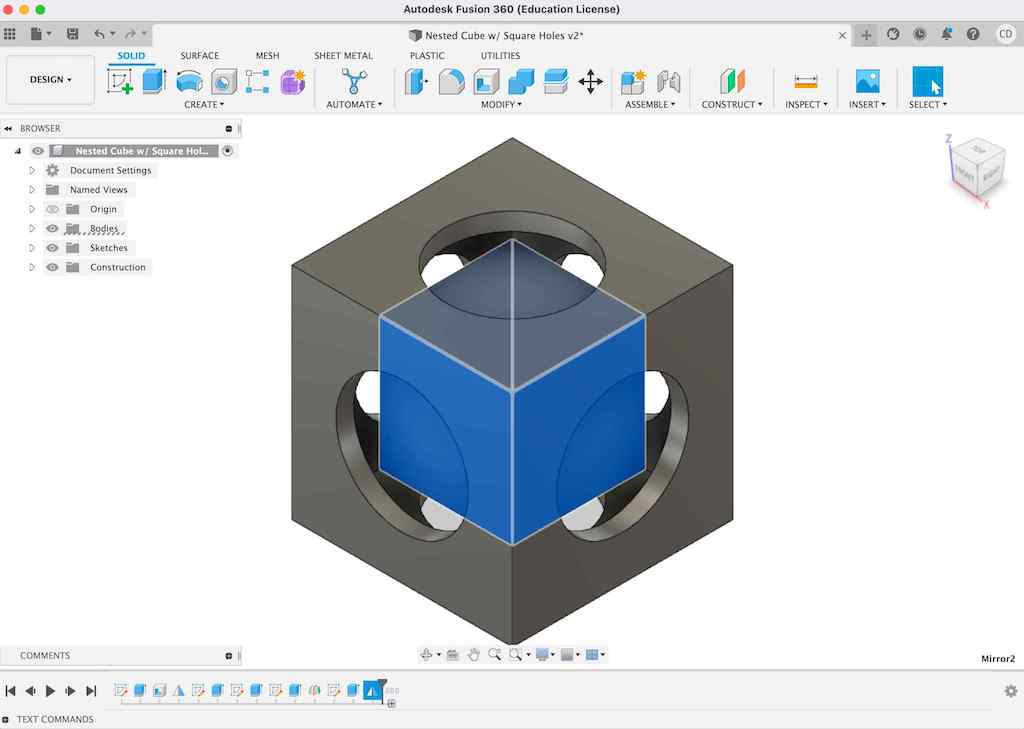
4. Extrude this square to half of the trapped cube's side length. This will set us up so that we can effectively make it float directly in the center of the original cube.

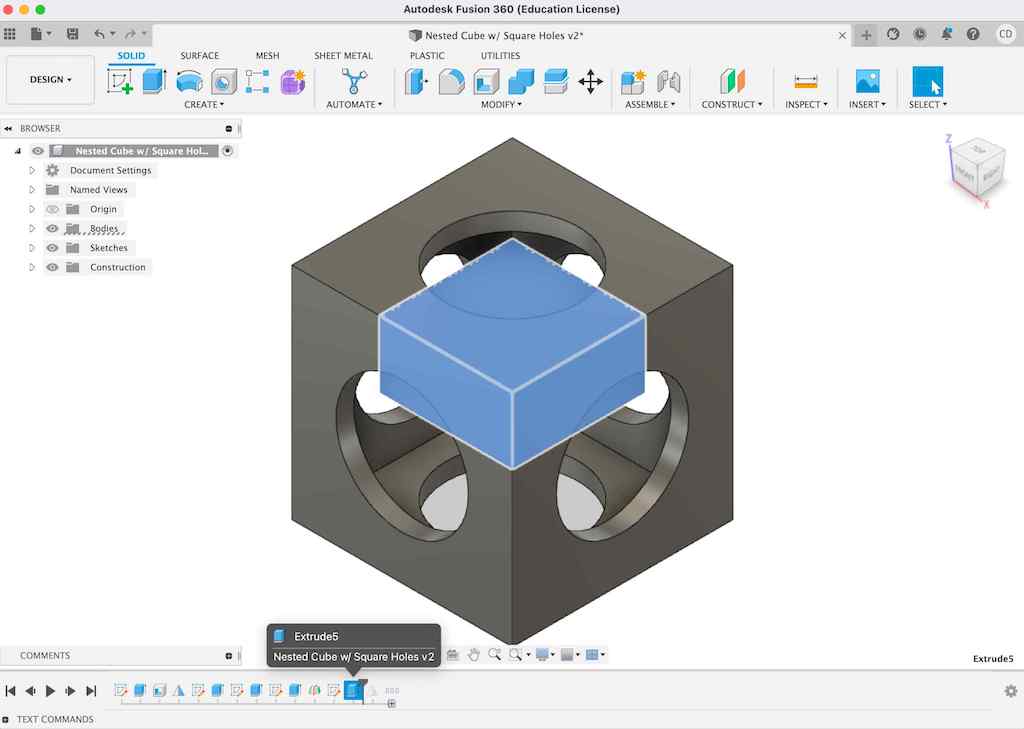
5. Reflect your half-trapped-cube across the second plane you introduced (or across its own bottom face). This should give you a whole cube in the center of your original hole-laden cube.
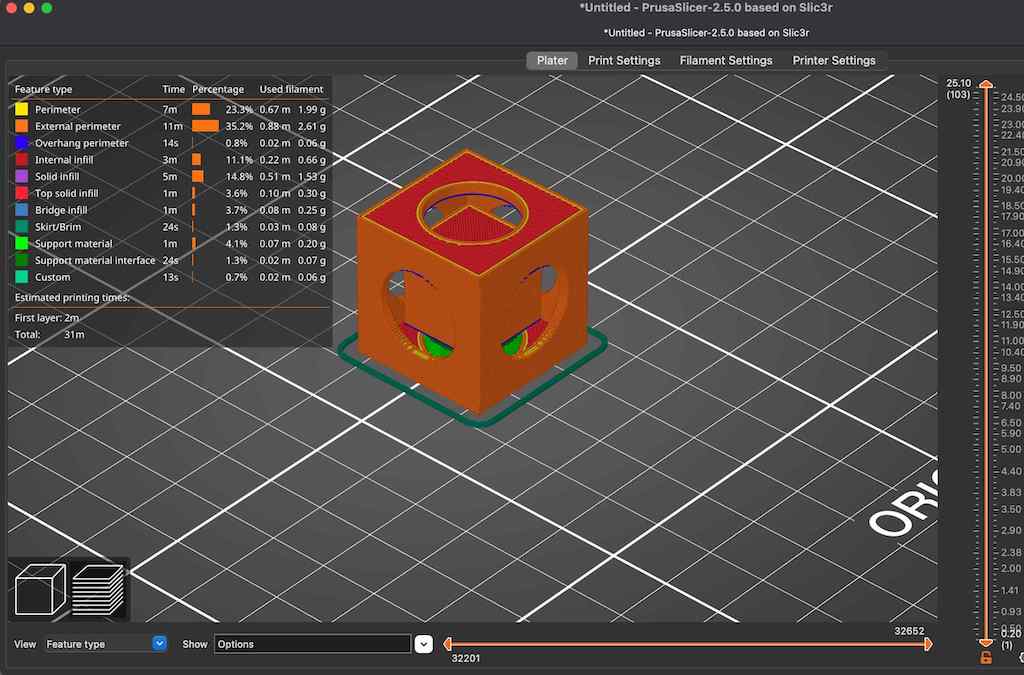
6. Save both bodies as components, save as mesh, transfer to Prusa Slicer, and select "supports on build plate only" to make your life a bit easier when it comes time to remove supports. Transfer to sd card and load onto printer.
7. Print!
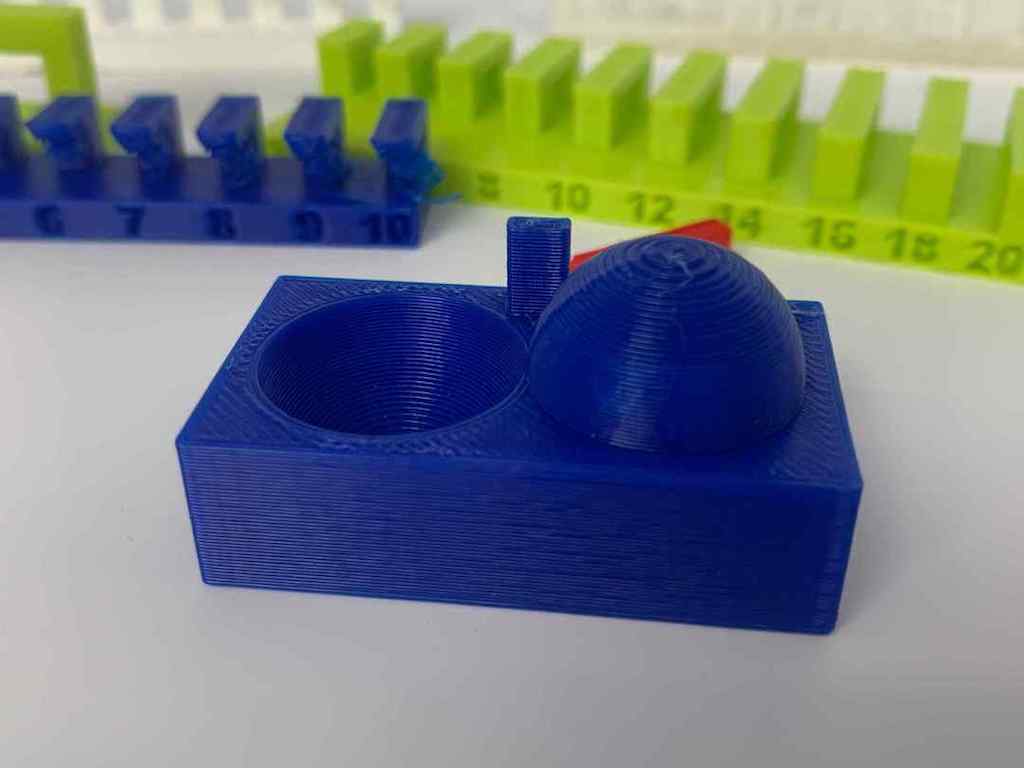
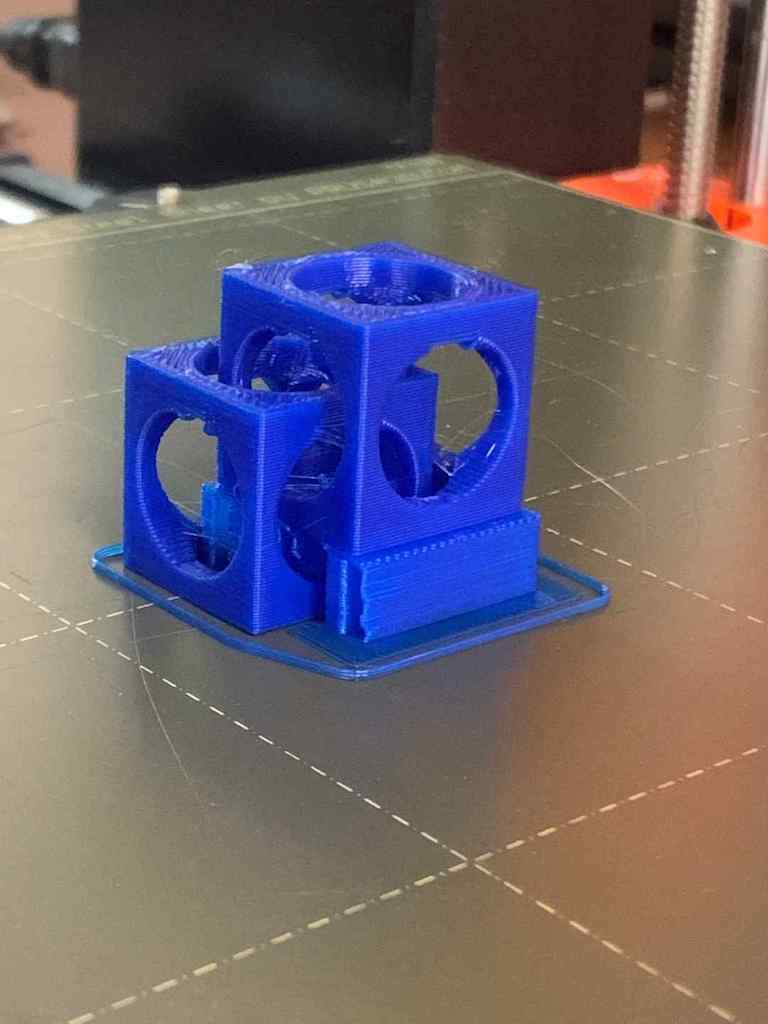
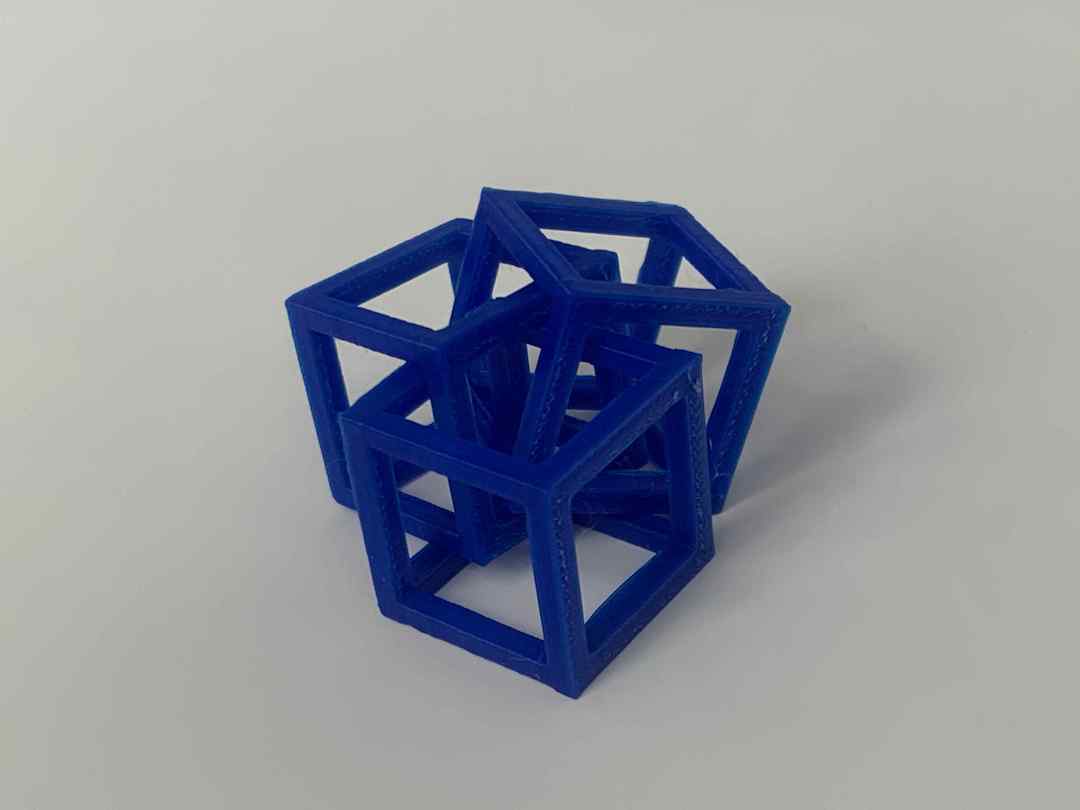
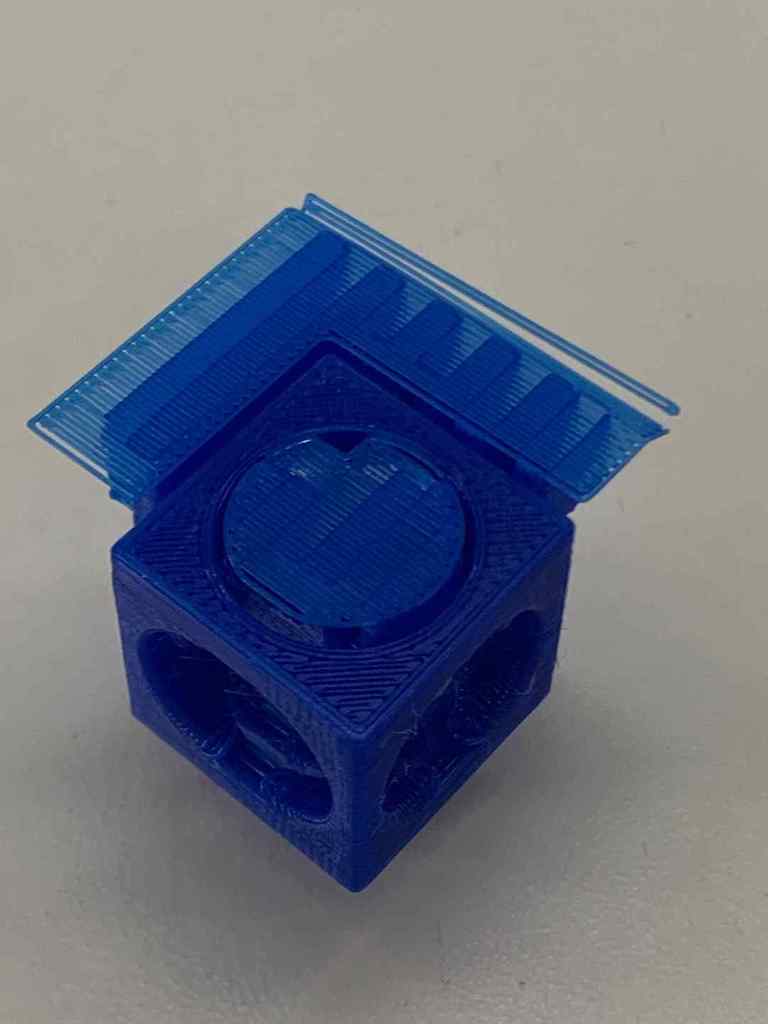
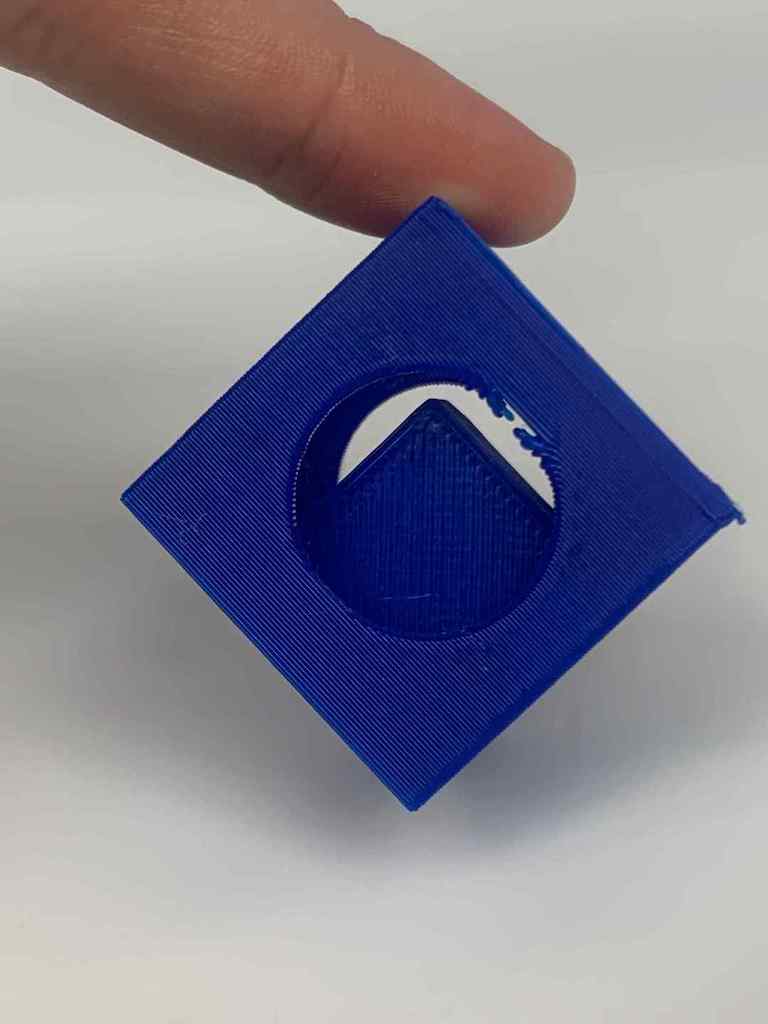
It worked!
I printed this one slightly larger than my previous attempts, and for unknown reasons the first two prints failed. For equally unknown reasons, the third attempt worked! I did them all on the same printer, but swapped filaments between attempts. The blue worked best for me.
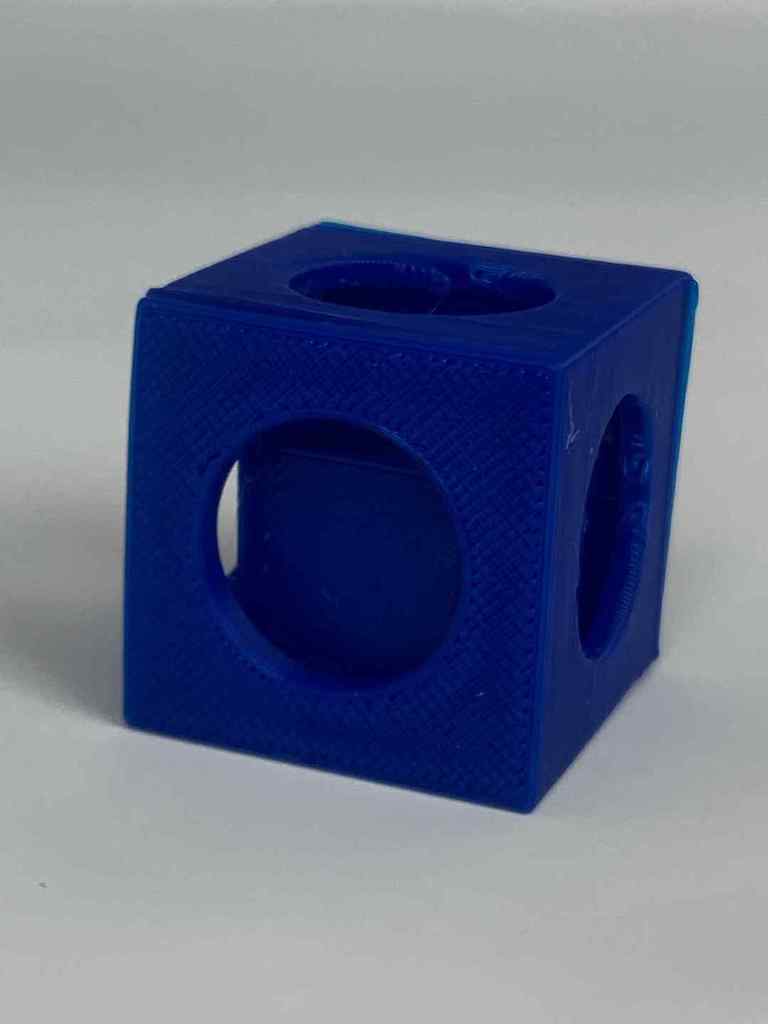
Now i have a little cube that rattles around in a larger cube!
I'd be curious to try more complex versions of this in the futuer, but removing supports from that many nested layers is a real pain. I'm very tempted to try making a fidget spinner using planetary gears, but designing those gears is still a bit beyond me at the moment. Someday!
I'd never done a 3D scan before, but was loosely familiar with the concept from exploring LiDAR in my car-themed "Vroom!" exhibit. (This is how self-driving cars "see" the world around them.)
I first tried to scan my dark brown hair clip, but this was both too dark and too reflective to work well.
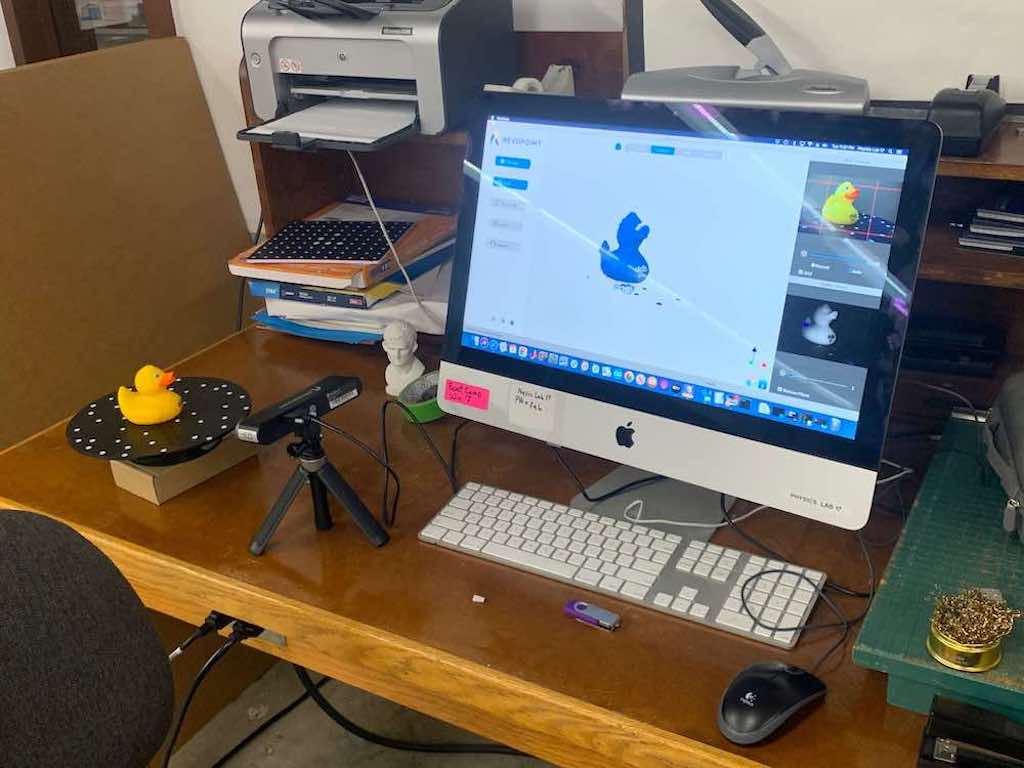
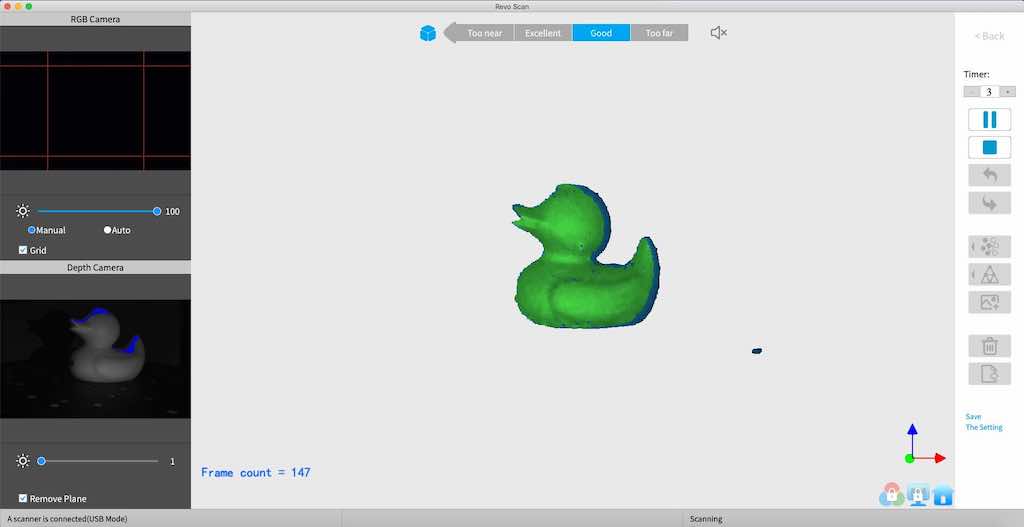
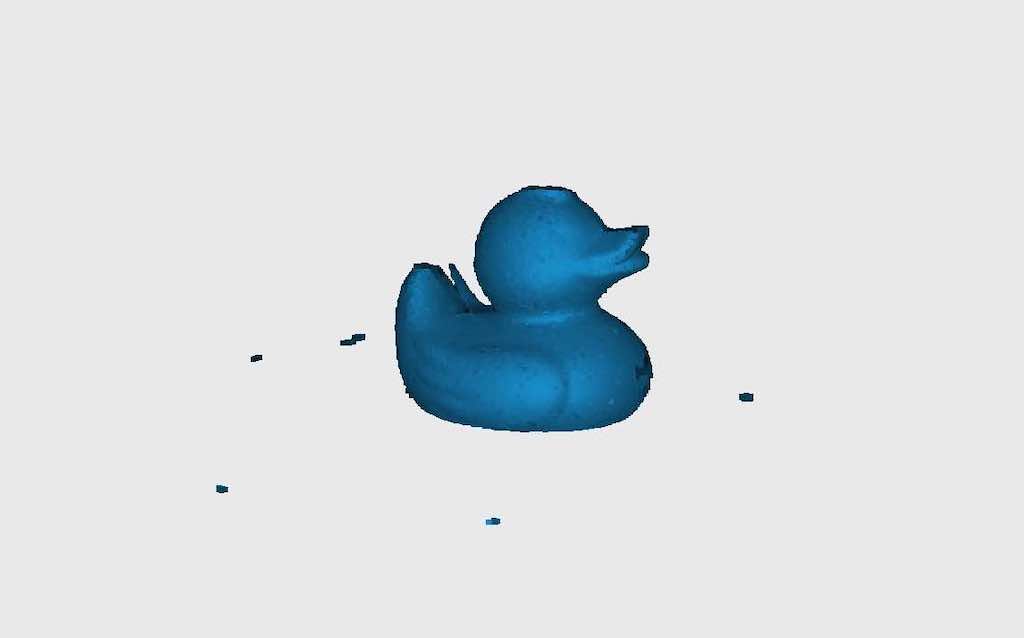
I then transitioned to a rubber duck that was in the lab. This worked much better! I let it revolve twice on its spinning pedestal before laying it on its side. This let me get the top and bottom of the duck as well as its sides, so I had no (or at least fewer) holes.
I did think it was interesting how low-tech the spinning pedestal is! I expected it to be connected to camera or software somehow, but it was just a little electric spinner that worked totally independently from anything else. It seems like they could improve the quality if they linked this to the software?
created with
Website Builder .