
Computer-Controlled Machining
"Make something big."
"Make something big."
Make something BIG!
Design, mill, and assemble something using a 4'x8' sheet of material or equivalent (like two 4'x4' sheets).
Do your lab's safety training. Test runout, alignment, fixturing, speeds, feeds, materials, and toolpaths for your machine.
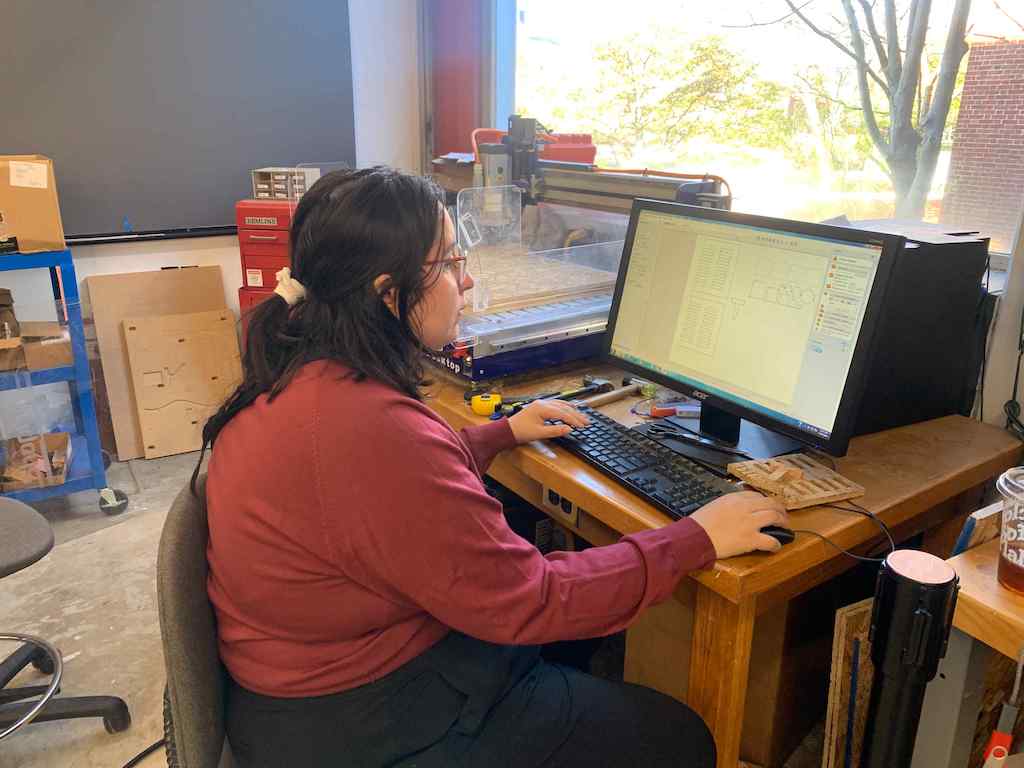
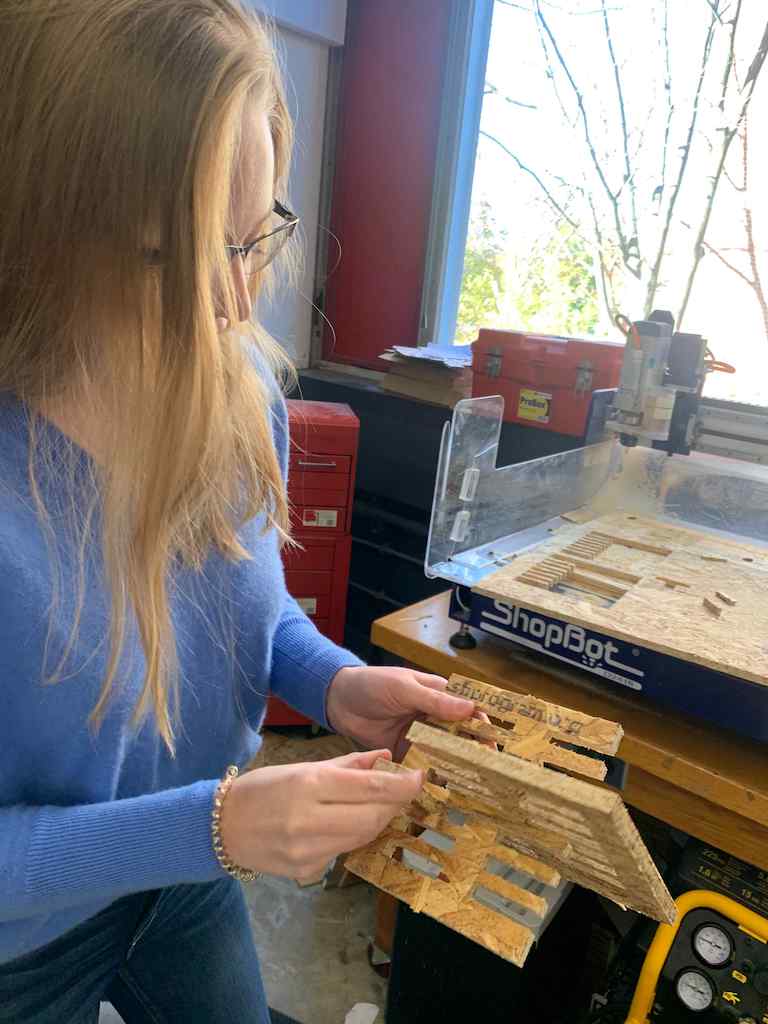
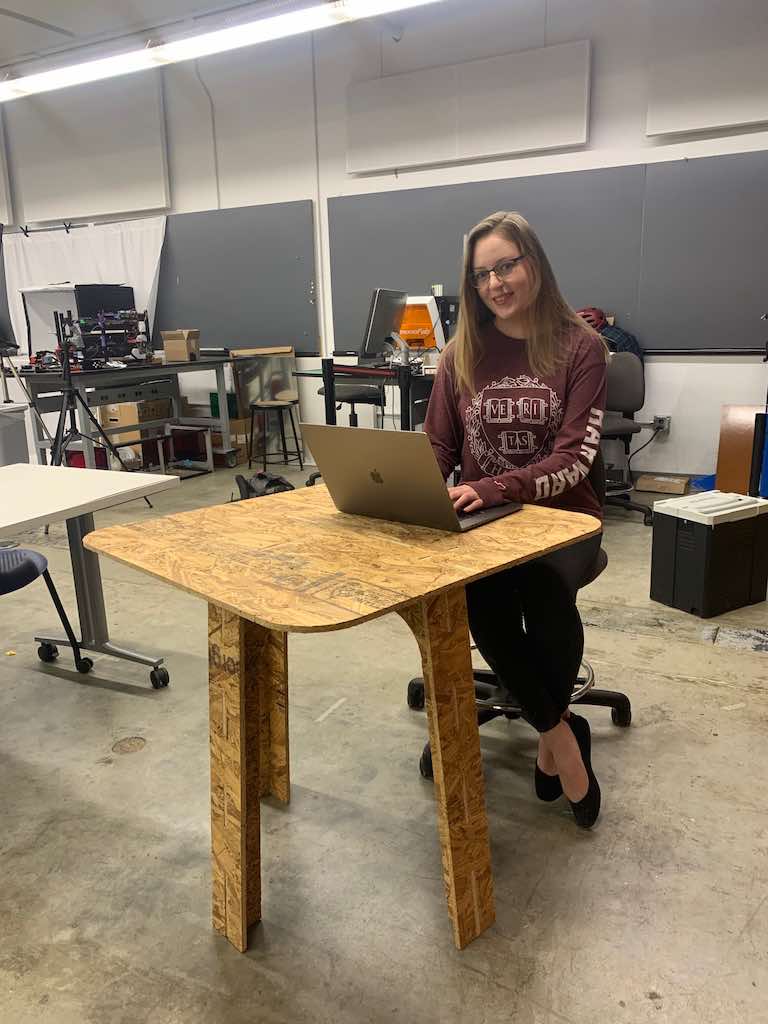
This week, I designed a parameterized press-fit table in Fusion 360, formatted the file in Aspire, and milled it on the shopbot.
Then I sanded and assembled my masterpiece!
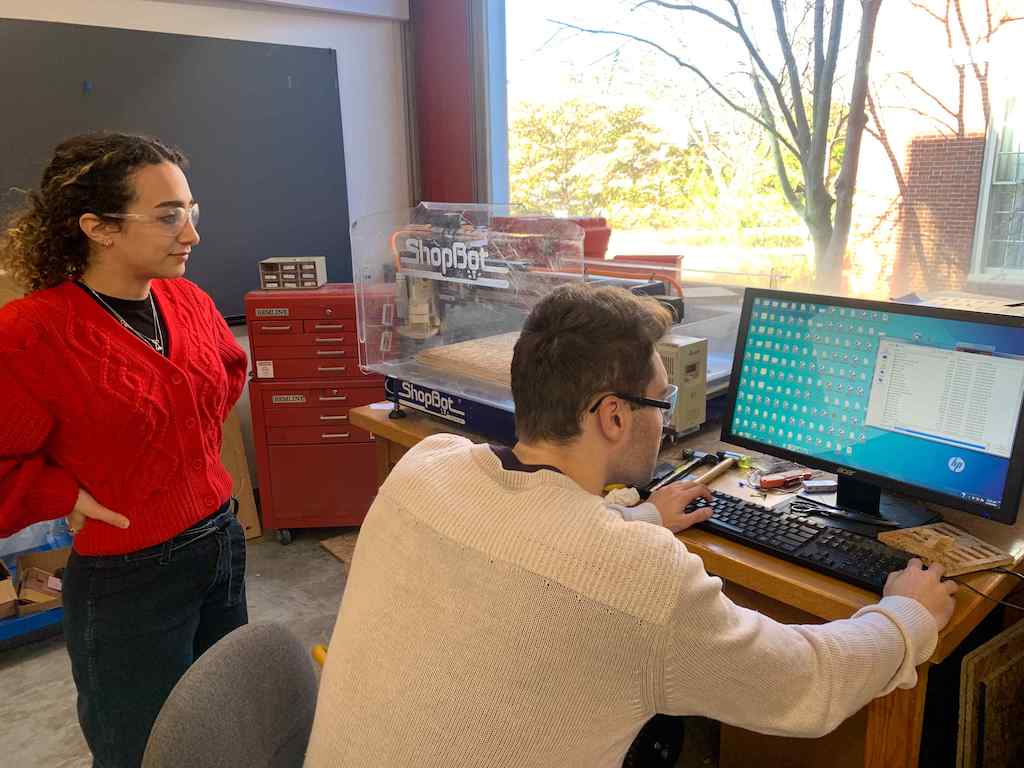
Alexia, Treyden, Noy and I tackled this week's group project together.
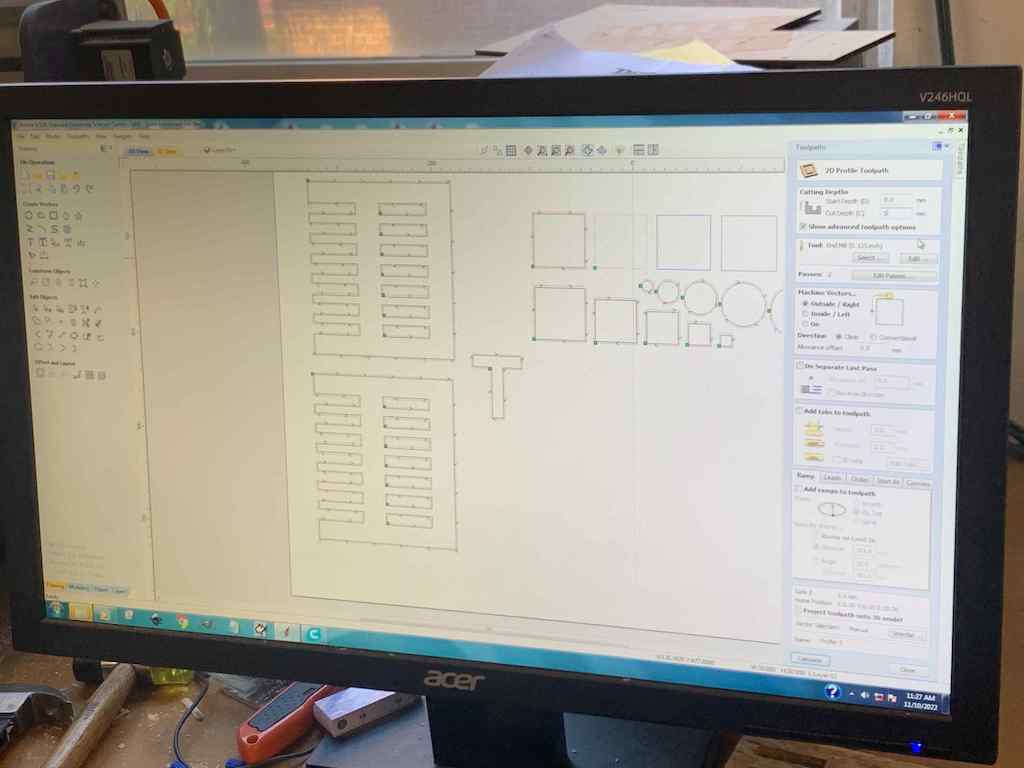
First, Alexia set up a Fusion 360 file with some shapes to test cut. This would show us how the ShopBot handled various sizes of squares and circles and allow us to measure the kerf (width of the sawblade).
Then, Noy, Treyden and I formatted the design file for the ShopBot using Aspire and ran the job. Finally, I did a writeup of our results for the class.
We quickly noticed a few things:
-SPEEDS: Curved lines = cut more slowly than straight ones.
-MATERIALS: OSB produces way more wood chips compared to plywood, and a rougher finish.
-TOOLPATH: It's vital to cut holes first, before outlines, in order to make sure your material doesn't shift enough to misalign your holes.
KERF
Unlike the laser cutter, which cuts on the center of a line, (meaning you have to calculate and allow for kerf, the material removed by the blade/laser), the ShopBot offsets its cuts based on a user's programming selections to account for kerf. That means you need to tell it whether you're making an inside cut or an outside cut, so that it offsets to the appropriate side.
The end effect is that you get a clean cut directly along the desired line, meaning your final result ends up being exactly the size you wanted it to be, with nothing lost to kerf. (The kerf comes entirely from the outside perimeter for an ouside cut, or from the inside scrap for an inside cut like a hole.)
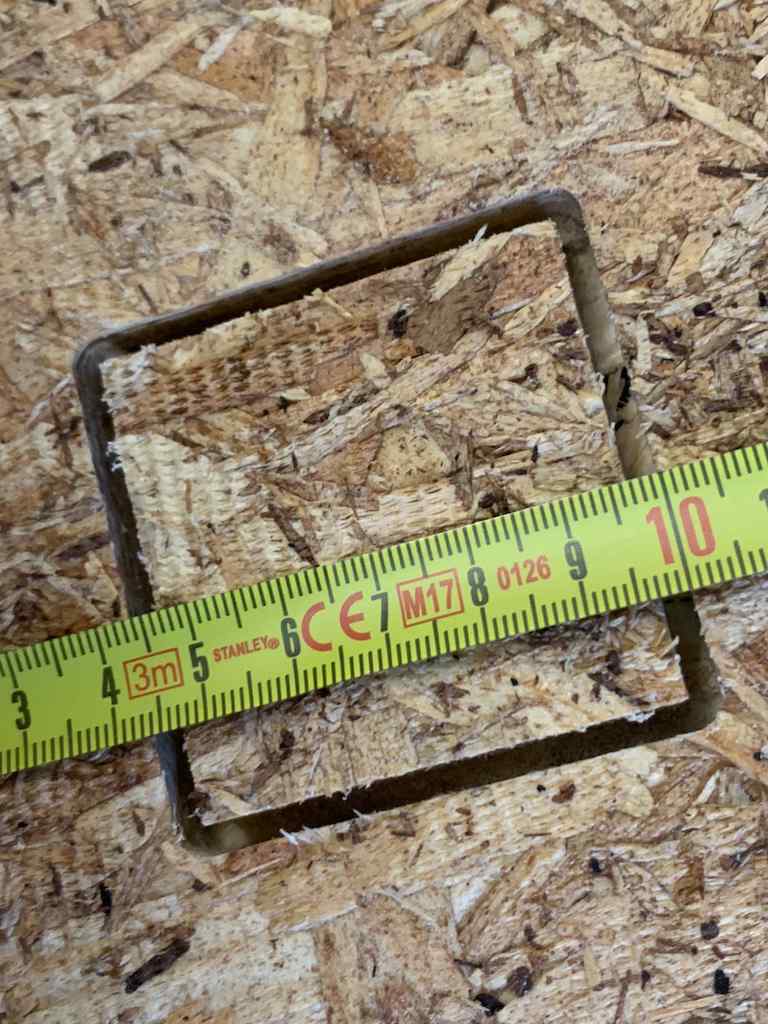
Still, it's interesting to see the kerf width! We determined it to be 3mm.
FRICTION-FIT JOINTS
The test we must needed to run for the purposes of this week's design challege was for press-fit joints.
Most of us were planning to use a slot-and-tab assembly strategy, where some elements would slide together like two interlocking combs (hint, hint).
To determine the optimal slot width for this approach, we designed a few test pieces. These included a series of slots of varying widths (only increasing by 0.1mm at a time) along with a T-shaped plug to insert into them, and two interlocking combs, (go figure!) with the same series of gradually increasing widths between their "teeth."
Once these were cut, we tested them out and determined that an 11.5mm slot offered the best friction fit and did have to be tapped into place with some force. However, a 11.6mm slot actually offered the best comb-fit. (For reference, our piece of OSB measured an average of 11.6mm thick, with some spots closer to 11.4 and some up to 11.7.)
We determined that it would be best to err a bit smaller than average if we didn't want to use glue, knowing that we could always file things down later.
All this being siad, because OSB--the material we're working with this week--is made of compressed wood chips, it's thickness varies (sometimes significantly!) from piece to piece. Therefore, we'll still need to measure our own boards before designing/milling so that we can account for any differences.
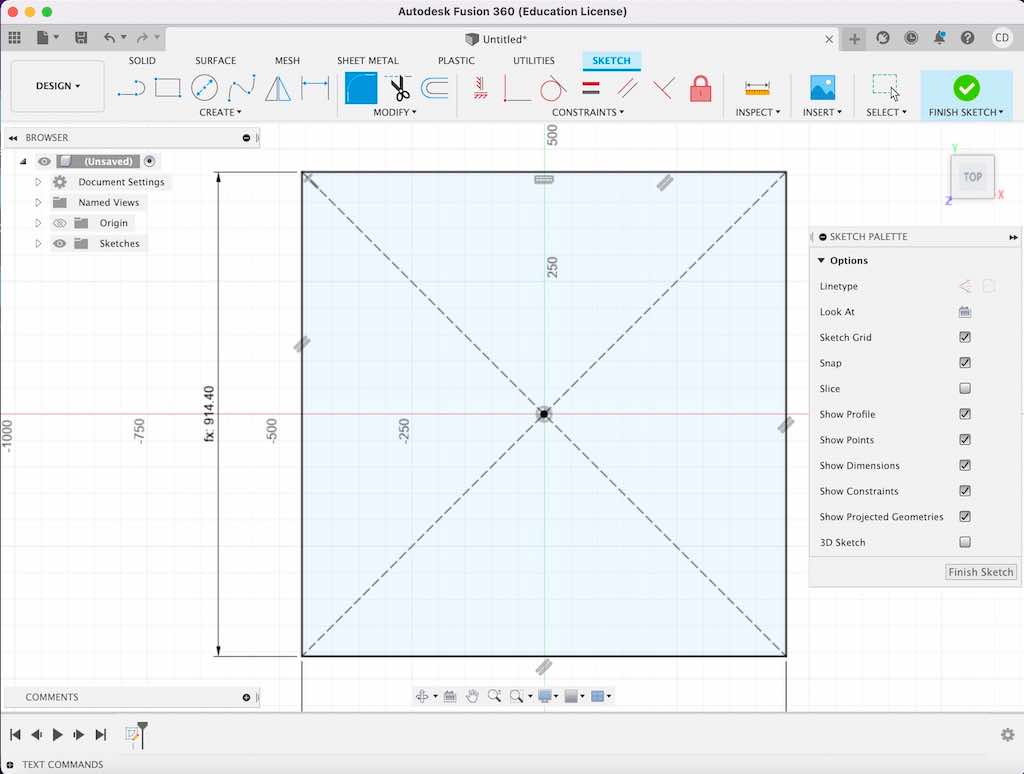
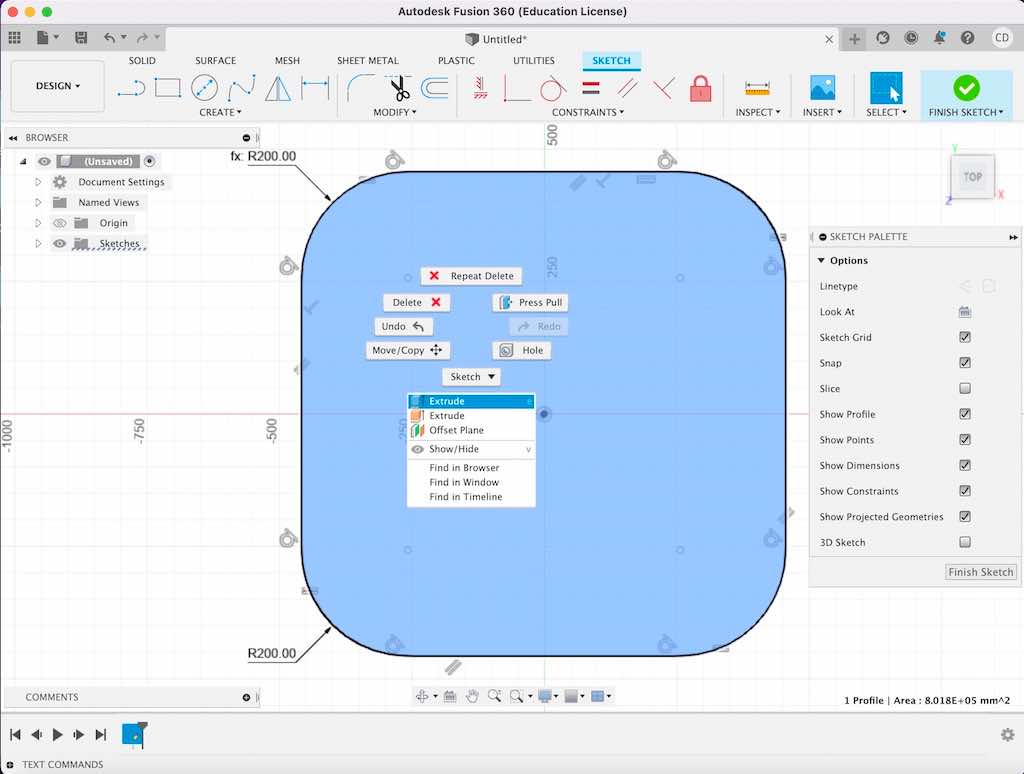
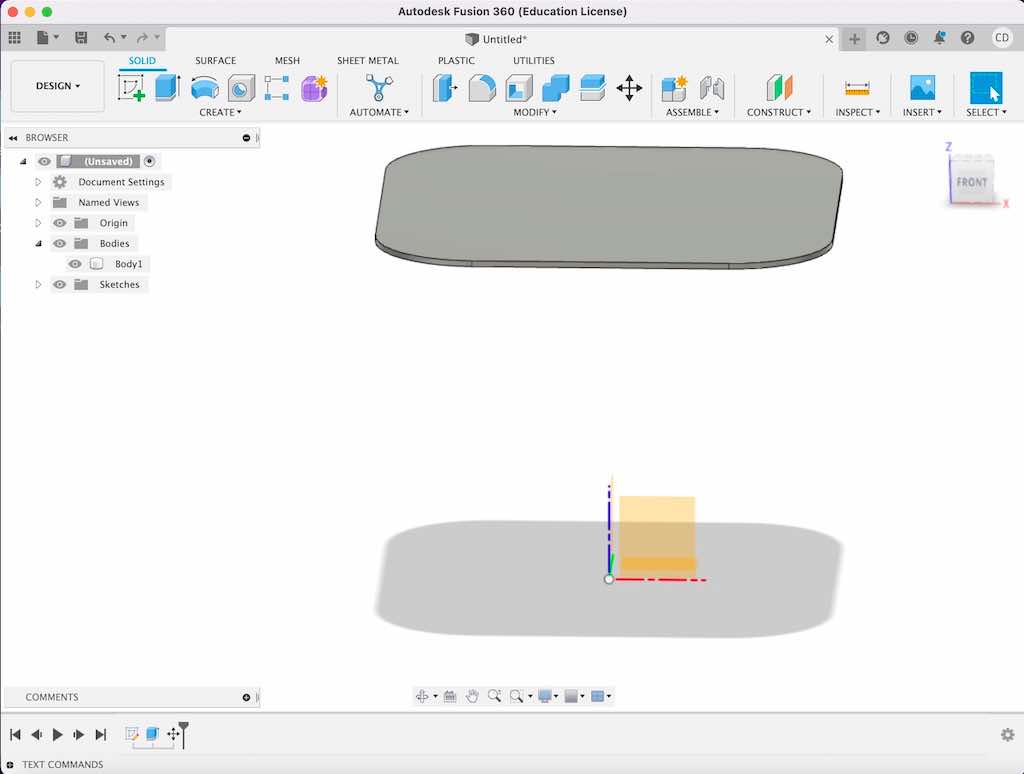
This week's task required CAD again (so many things do!), which meant it was time to revisit Fusion 360.
It's crazy to think it was only a few weeks ago that I was first introduced to Fusion! Although I've come lightyears since then (from not knowing how to enter the dimensions on a basic two-dimensional sketch to designing in 3D), I'm still very much a beginner. That meant that I spent much of this week wrestling, once again, with the design process.
I spent a long time at office hours again (Alfonso, you are a lifesaver!) expanding my Fusion skillset and putting Week #2's lessons about parametric design into practice.
I initially wanted to make a Branca shell chair, inspired by a student's project from last year that has been sitting in the Harvard shop. The chair has a "do not sit" sign on it, but should be functional if made out of a more substantial material than OSB—and it’s beautiful!
Because it’s made of only four unique pieces (many of which are repeated), I thought it might be simple enough to figure out in CAD. Perhaps I could buy plywood and do it properly… but with only a week to work on this project, no vehicle with which to fetch materials, and not much Fusion experience, I soon pivoted toward a table instead.
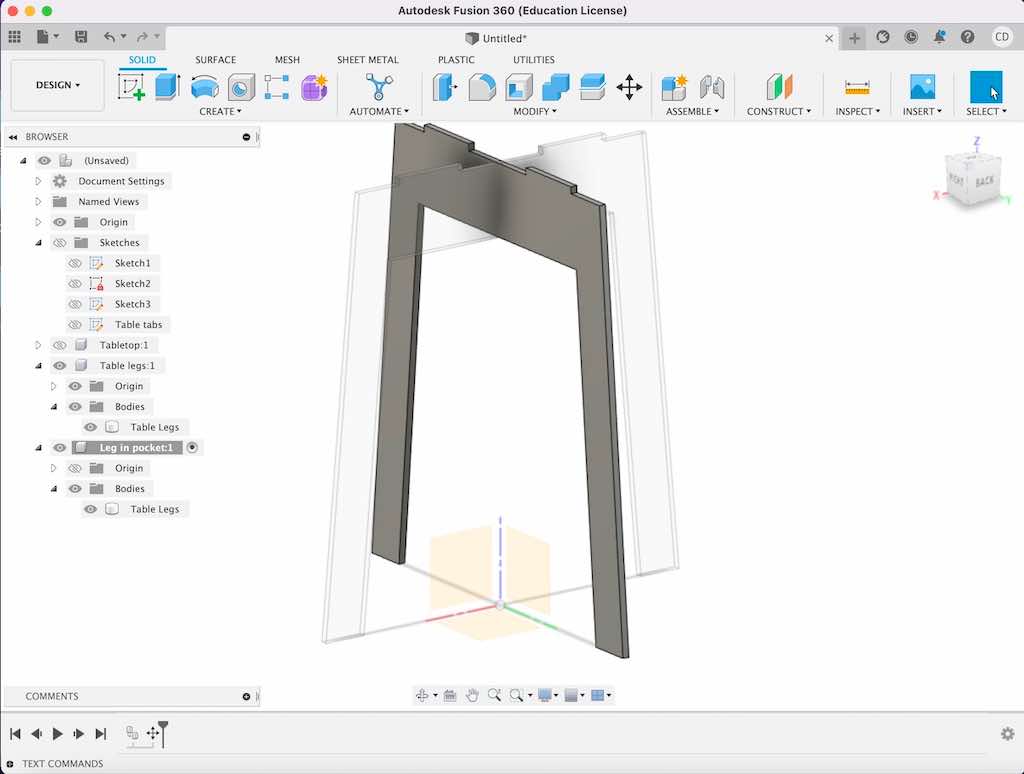
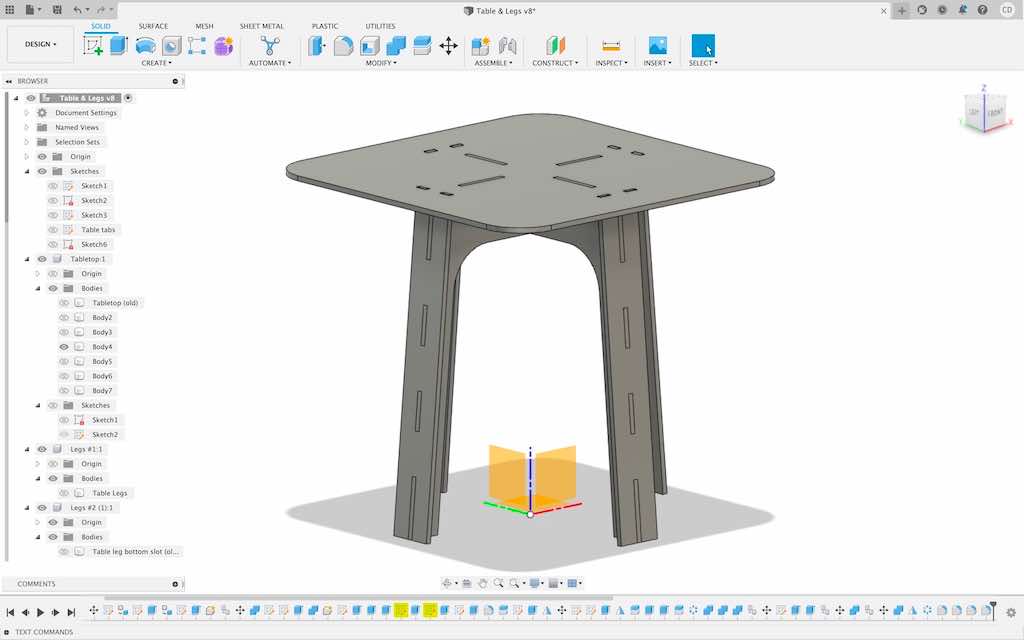
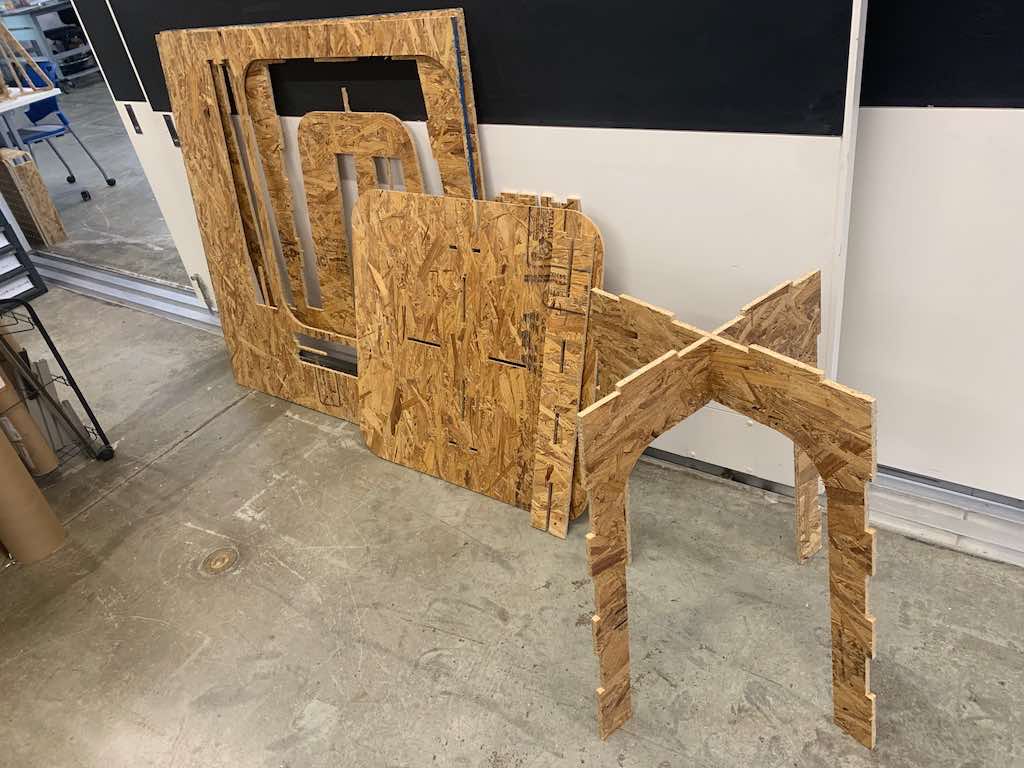
My table’s legs are composed of two flat arches that lock together via friction-fit slots in top center. This means that both leg pieces are identical except for the positioning of their slots (one is on the top and the other is on the bottom).
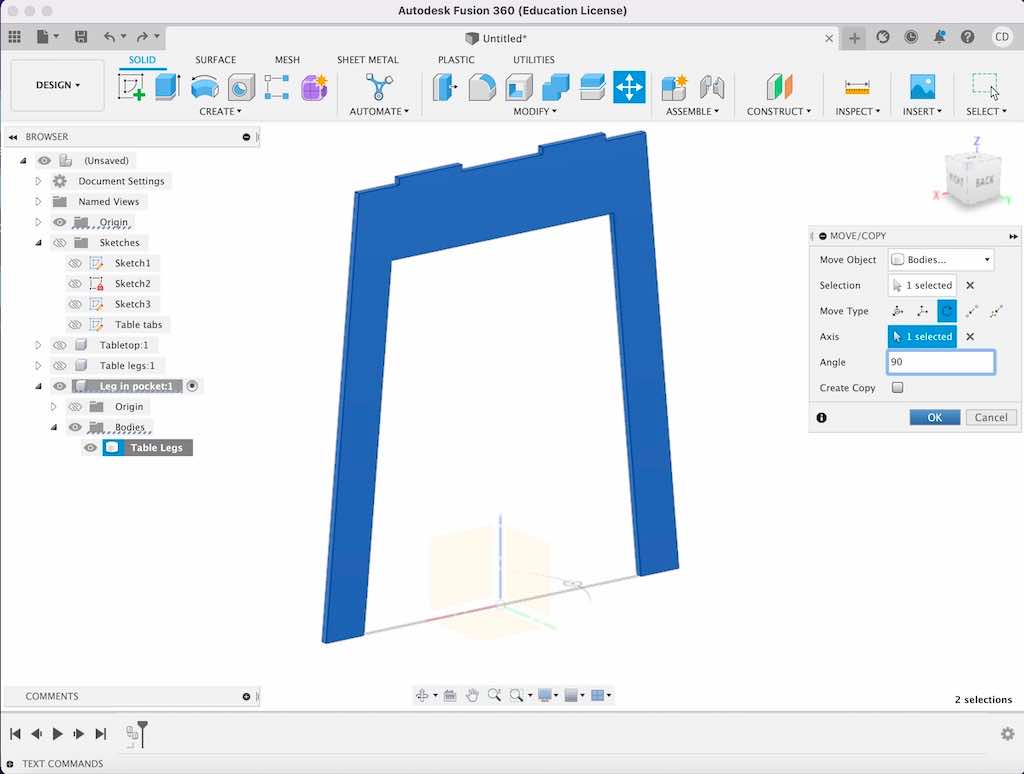
My initial approach was to sketch and extrude one half of one leg arch, mirror that across the center plane, and then join the two halves into one whole. I could then select the “move” function, check the box for “create copy,” and make the necessary selections to create a new body, and rotate the piece 90 degrees around the z axis.
I then set out to create supports for my table legs to help prevent them from wobbling wildly, but soon ran into trouble. I’m still not certain why, but I ended up with a hole somewhere I didn’t want it. When I asked Alfonso for assistance diagnosing what I’d done, he suggested that I take an entirely different approach for the supports. His version would have them run the full leg length and slot into place onto teeth positioned along each leg. He also suggested that I take a different approach to design the table: design one quarter of it and then pattern that in a circle to create a symmetrical whole.
While both approaches get us to the same end goal, he challenged me to try this one. Since I already had to revise my supports anyway, I opted to give his recommendation a try. This meant essentially starting over from scratch—but since I did it in the same Fusion project, I ended up with artifacts (sketches and bodies) from my original design interlaced with those from my new one. I toggled those to invisible, but they were still occasionally confusing. I solved that problem by actually naming the various parts in the browser menu which was (unsurprisingly) hugely helpful, and something I intend to continue doing in future projects.
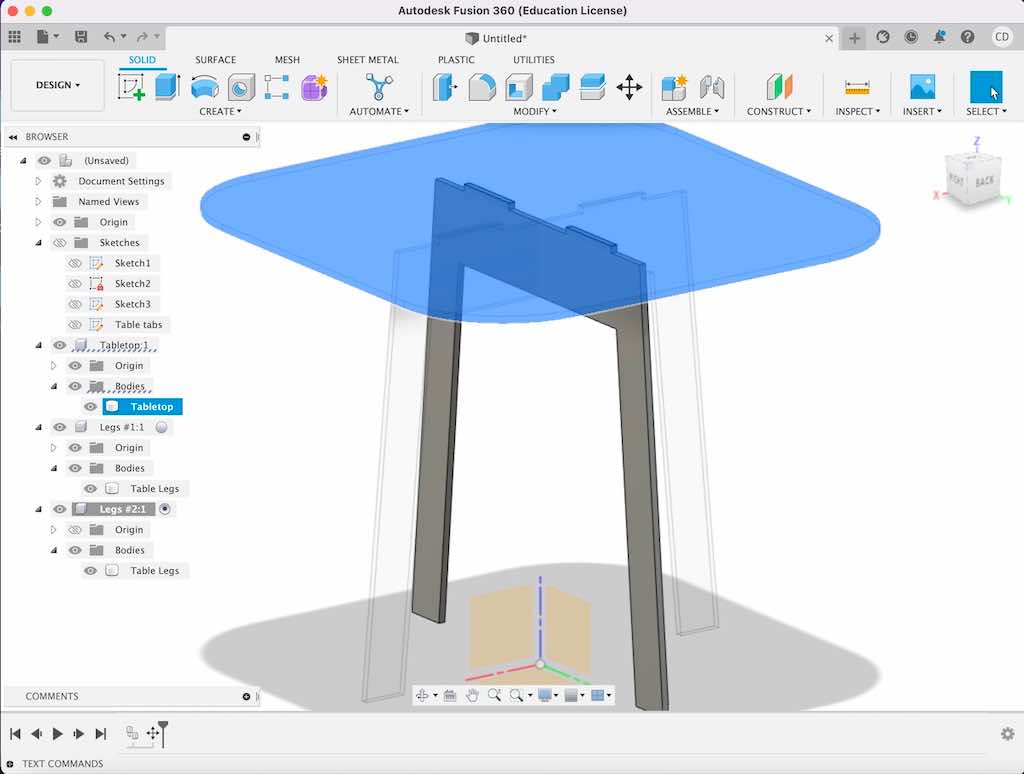
This time, I designed one leg and one quarter of the table. I used the “cut” function again to create slots in my tabletop using teeth I’d added to the top of my leg and support. I also used teeth I created along the length of my leg to cut through the support plank, giving me perfect-fit slots there as well.
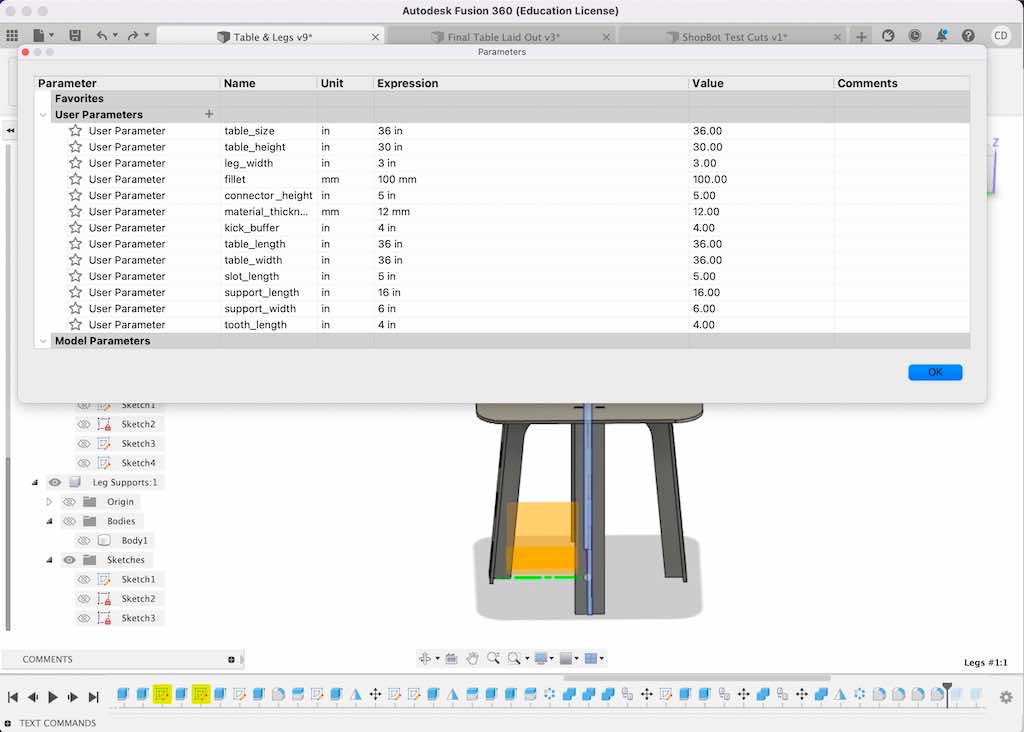
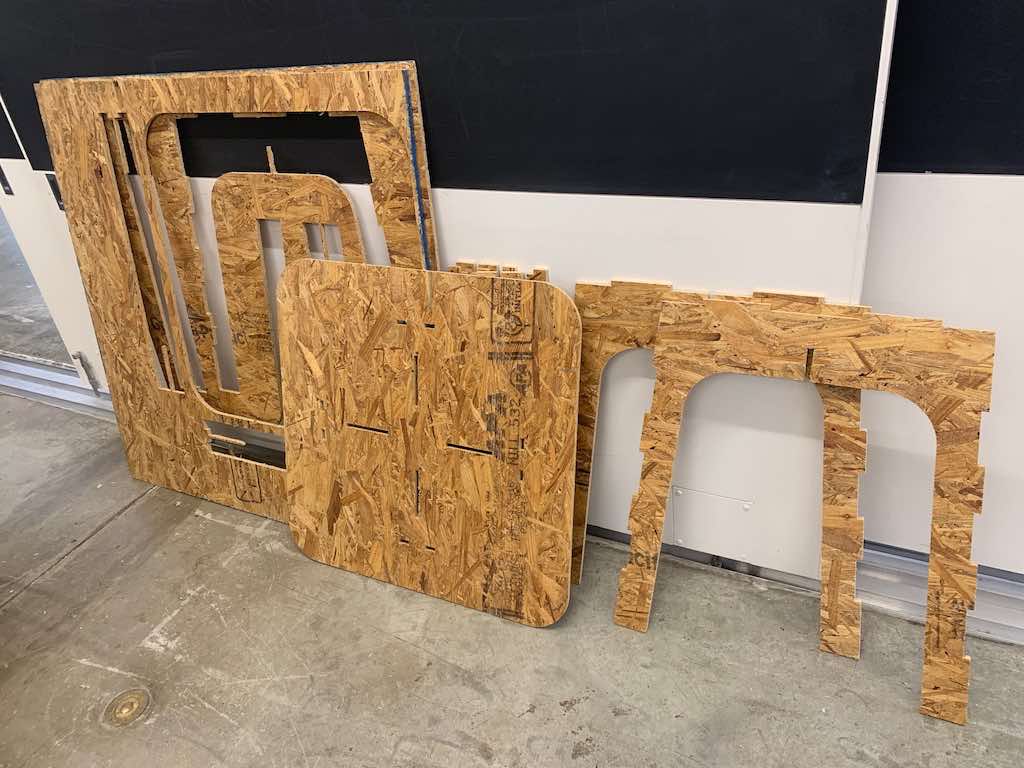
I then created a circular pattern to make my table whole, and combined the relevant parts. I ended up with four unique pieces and seven total pieces: tabletop (x1), supports (x4), top-slot leg arch (x1) and bottom-slot leg arch (x1). Lots of parameters, too!
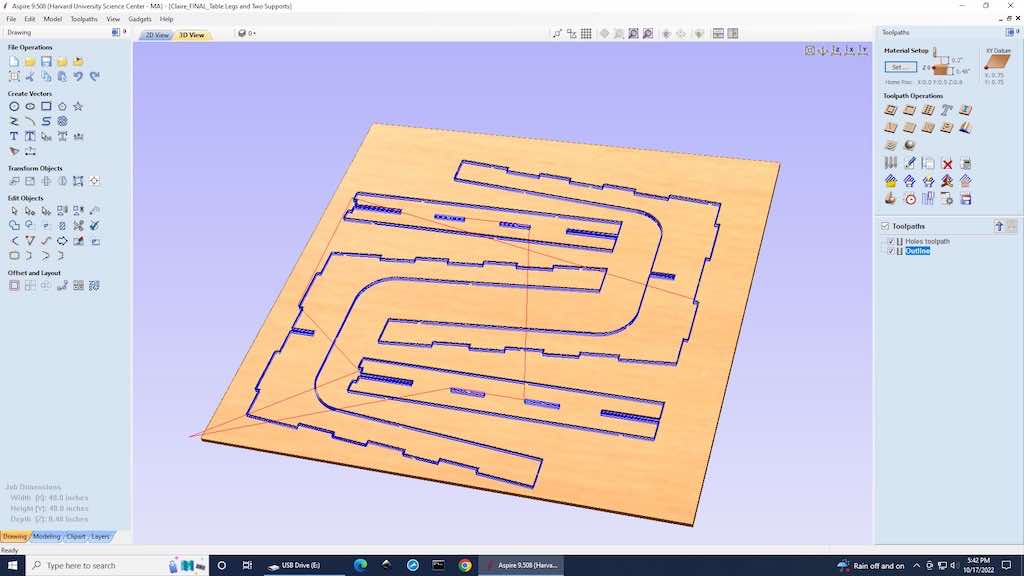
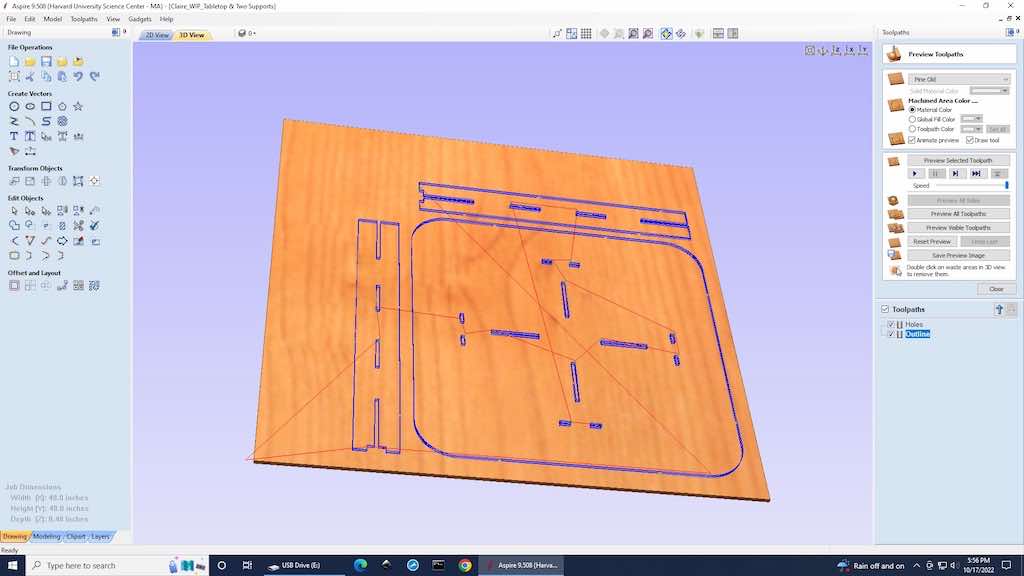
Once my table was designed, the next step was to prepare my file for the ShopBot. This meant using new software called Vectric Aspire, a type of CAM (computer-aided manufacturing) software, to create dogbanes and map tool paths for the mill to follow.
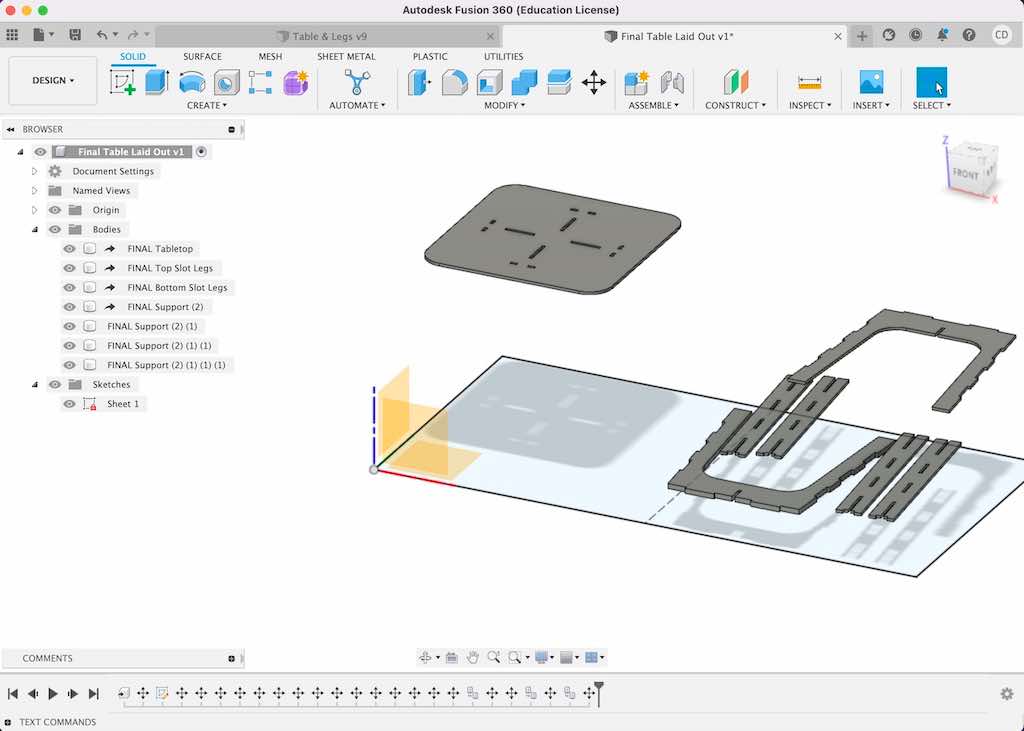
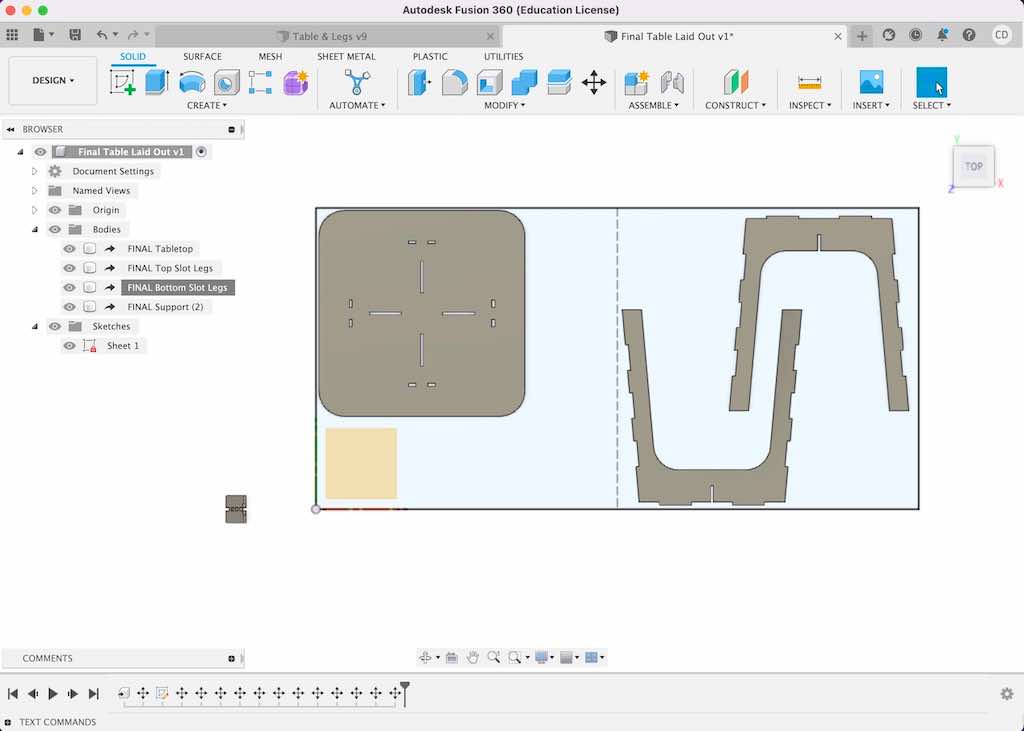
First, I needed to export my designs from Fusion as a .dxf file. Since I had created my table in three dimensions, I first needed to lay all of the pieces flat so that I could project them onto a new sketch to get their outlines all together. I did this by rotating each one appropriately until they were all on the same plane.
Then, to nest the pieces together in a way that would minimize material waste, I sketched a box exactly the size of my sheets (I needed two 4’x4’ half sheets) below them. Viewing the pieces from above, I then positioned them relative to the box before projecting them. Finally, I saved my new projection sketch as a .dxf.
The Aspire software works only on two PCs in the lab, so the next step was to move my files onto one of those and follow Nathan’s very helpful guide to setup: https://nathanmelenbrink.github.io/lab/cnc/Shopbot_Aspire.pdf.
However, when I opened my files in Aspire, they immediately lost their dimensions. They became huge!
Scaling: Since my slots were all parameterized for my exact material thickness, there was no room for error or guesswork with scaling. That meant I couldn’t just click a corner of the design and pull to resize.
Instead, I went back into Fusion and extruded and then projected my material sheet perimeter. Since I knew exactly what the scale was on that, it acted like a bounding box. Back in Aspire, I could select everything all together inside the box—including the box itself—and then set the target dimensions to 48’x48’ to make everything the right size again. Success!
Note: if you do this, make sure to delete the bounding box you created after scaling! Otherwise, it will become a tool path later.lso make sure your vectors in Aspire are closed. If they aren’t closed, you’ll have problems creating dogbanes and tool paths.
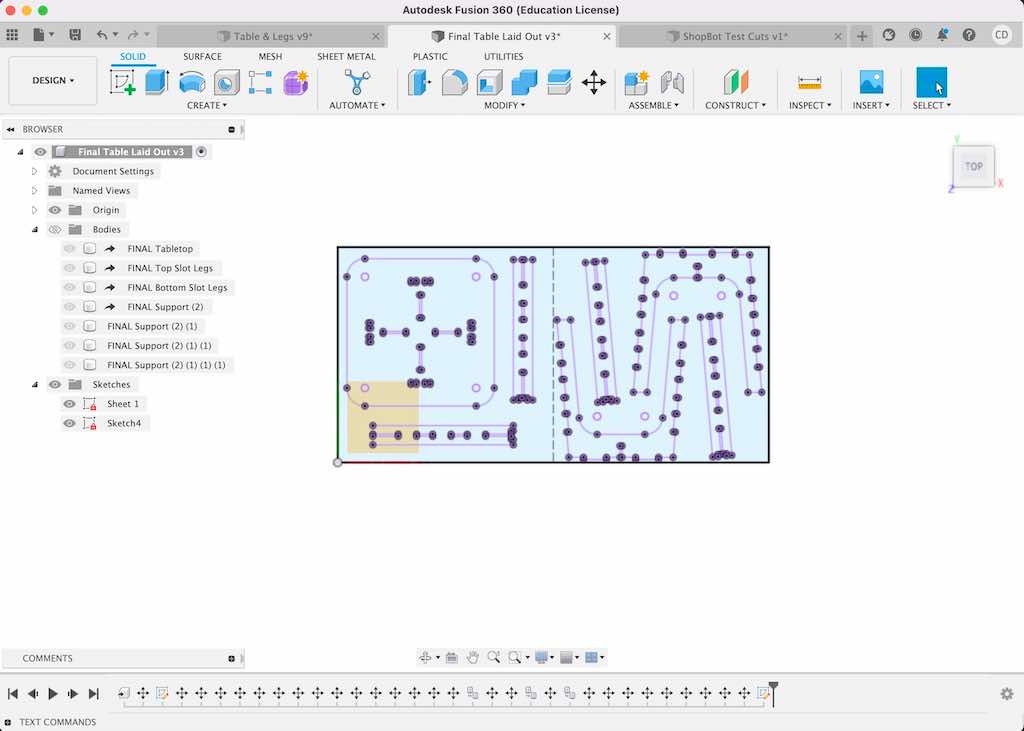
Add dogbones: Next came dogbanes. Dogbanes help ensure that your tabs can actually fit into your slots. Since the endmill is circular, it can’t create a perfect 90-degree angle when cutting inside corners (though it can when cutting outside corners). In order to avoid having to file down the tiny residual curve, we can add dogbones: tiny circles in each corner telling the endmill to cut away enough material to accommodate a 90-degree angle. These are found under the “fillet” command in the design menu. Warning: you will have to click on each inner corner individually to add dogbones one by one.
Create tool paths: Finally it was time for the tooth paths. Navigate to the tool path menu (upper righthand corner) and configure the job. Remember: we want to cut any holes out first, followed by larger outlines. Inside holes also need to be “inside” cuts, meaning the mill is offset in such a way that there is no kerf. We end up with a hole exactly the diameter you designed it, creating a snug fit. The inverse is true for outside cuts: we want to make sure they’re labeled as such so that the mill is appropriately (automatically) offset to cut perfectly along—not beyond—the designed line.
This means we will have two tool paths: one for holes and one for the outline. I labeled mine as such for easy reference, and also asked the software to project the tool path onto a 3D view so I could see what was happening.
Note: my cuts were all “profile cuts,” meaning I wanted to cut all the way through. If you want to mill only partially through the material—essentially creating a groove—you’ll need to select “pocket cuts.”
Add tabs: The mill will make four passes to cut cleanly through the material, each time removing 1/4 of the material thickness. To keep a part that has been completely cut out from flying off the table or shifting while further cuts are made, we need to add tabs—tiny, thin intact bridges that bind the finished piece to the material sheet. After the milling is done, we can break or saw through these to release our piece.
Click “edit tabs” and then manually add tabs every few feet around your object.
Once you’re done, navigate to “toolpaths” and export as a .sbp (ShopBot) file. While you can export each tool path individually, I chose to do them both at once.
With files prepped and ready, it’s time to configure and run the ShopBot. This requires supervision.
My scheduled time slot to cut was at 7pm on Monday. However, Rehana’s piece was still cutting then (3 hours!). She was scheduled for 5pm and was actually able to start at 4:30pm, but had so many pieces that the job took forever. Noy, who had been scheduled for 6pm, was also still waiting to begin her project. That meant we were about 2.5 hours behind schedule.
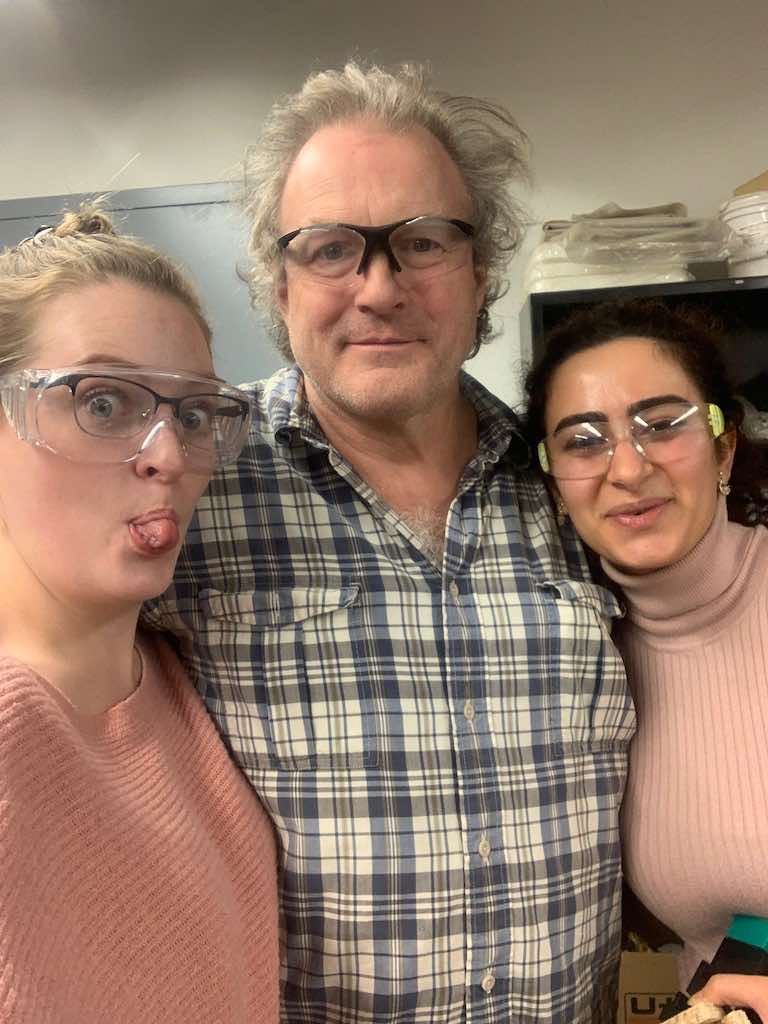
Thankfully, the wonderful Daniel Rosenberg was kind enough to stay well past his scheduled time (we stayed until 11:30pm…) to accommodate us both. It was a blast! He’s a great teacher, and made the learning fun. Thanks, Daniel!
First, I used a nail gun to attach my material to the sacrificial bed using polymer nails. While it’s possible to use screws instead, you’ll break an endmill if you accidentally mill over one. The polymer nails won’t do this. So, instead of trying to anticipate the tool path and avoid planing screws there, we just use the nails. They’re extremely strong straight up and down, but weak enough in sheer that we can pound against the edges of the material when finished to break them off and retrieve the job.
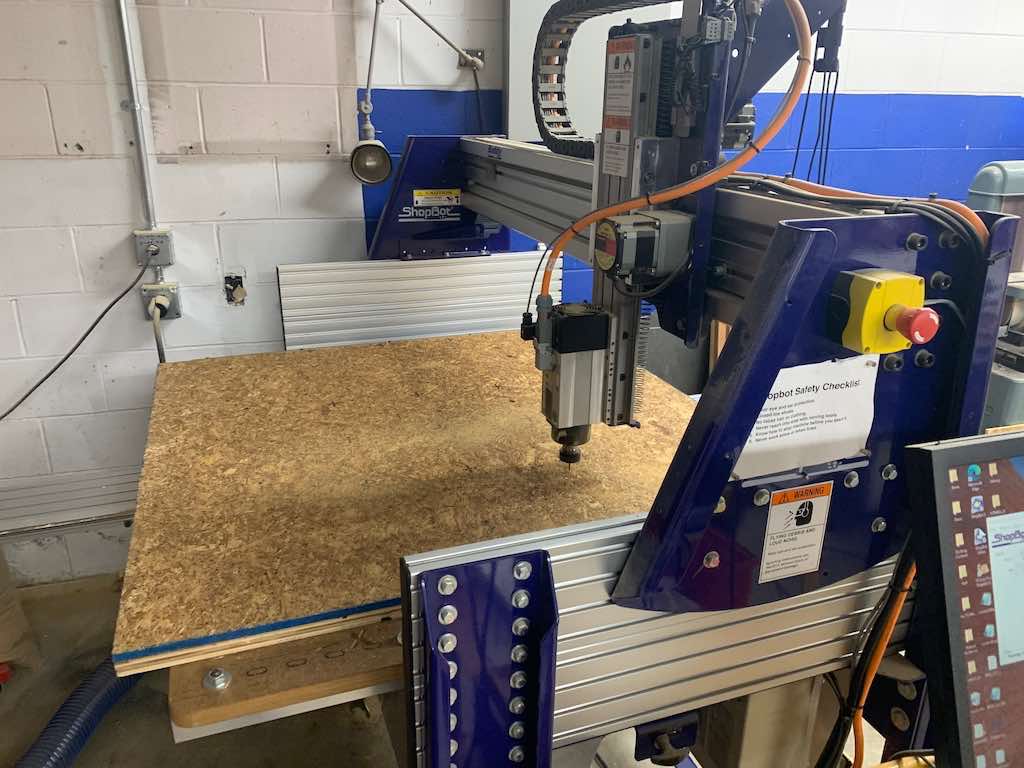
I used a 4 x 4 grid of nails to attach my material
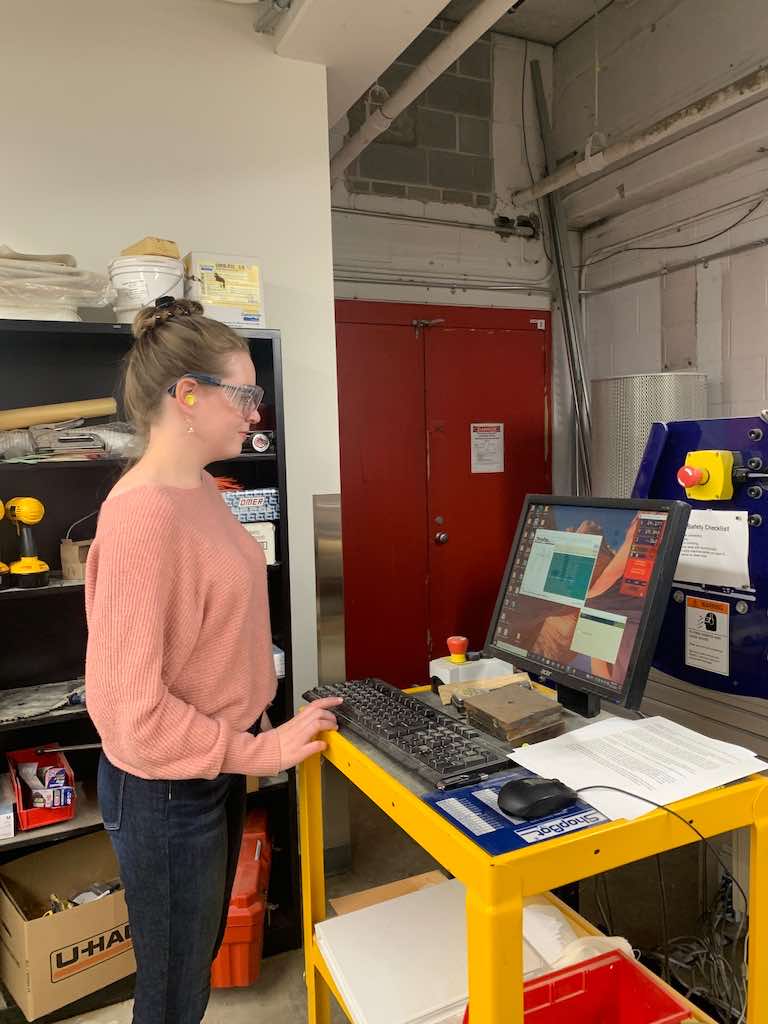
Once my material was attached and my files were loaded to the ShopBot computer, we needed to zero the axes. This involved steering the mill to the exact bottom left corner of the job and locking that in first.
Then, we moved the mill to the center of the material about 2 inches up. We navigated to “cuts” and use a metal plate and clamp to precisely zero the z-axis by dropping the endmill down unit it just barely touched the plate, completing the circuit and registering it as perfect zero. A very cool tool!
We then moved the z-axis to an inch above our newfound “zero” to run an air cut. This is what it sounds like: we run the job in midair to make sure nothing weird happens.
Then it’s time for the actual cutting! A slow but satisfying process.
One of my OSB sheets was just a tiny bit thicker than what I had parameterized for. This resulted in some of my tabs fitting into my slots, while others were too large.
That meant a lot of filing.
Note: I highly suggest that you add chamfers to your tab corners. I wish I had! This helps them slot into place much more easily.
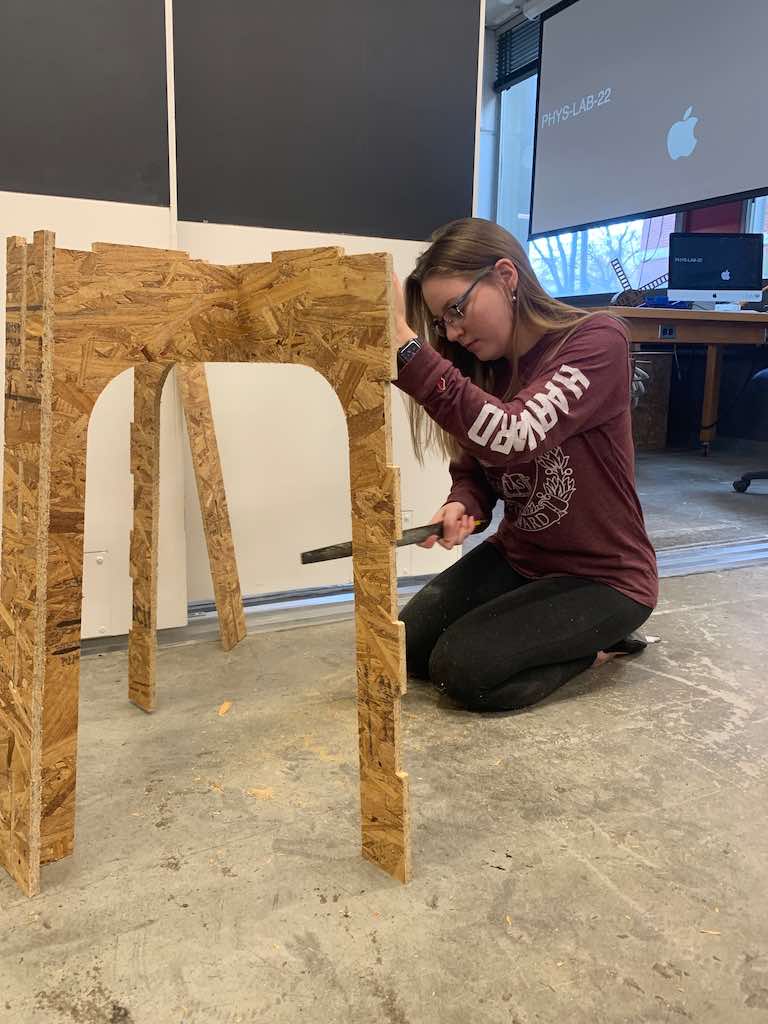
Once I had done a lot of filing, I was able to pound my pieces together. The shop didn’t have a mallet, so to avoid making hammer marks in my wood, I used a small square of extra material to spread out the force. (Essentially, I held the extra square against my table and hammered against that, instead of directly on the table’s surface.)
Success!
I wish I had thought to rotate my tabletop during the design phase so that the legs were positioned at each corner rather than in the middle of each side, but oh well. My table is still perfectly functional and surprisingly sturdy. It measures 36” across and 30” high. It’s not particularly pretty, but I’m still proud of it!
I really hope to revisit this week with nicer material and a more interesting design. (I’m bound and determined to tackle that shell chair now that I have some new Fusion strategies!)
created with
Website Builder .