Week 02 ~ Embedded Programming
RP2040 ~ Xiao vs. Pico?
The RP2040 is a microncontroller developed by Raspberry Pi.
It comes in a range of packages, from Raspberry Pi's own Pico W, to Seeed Studio's more compact Xiao-RP2040.
 The RP2040 surface mount chip (source: Raspberry Pi).
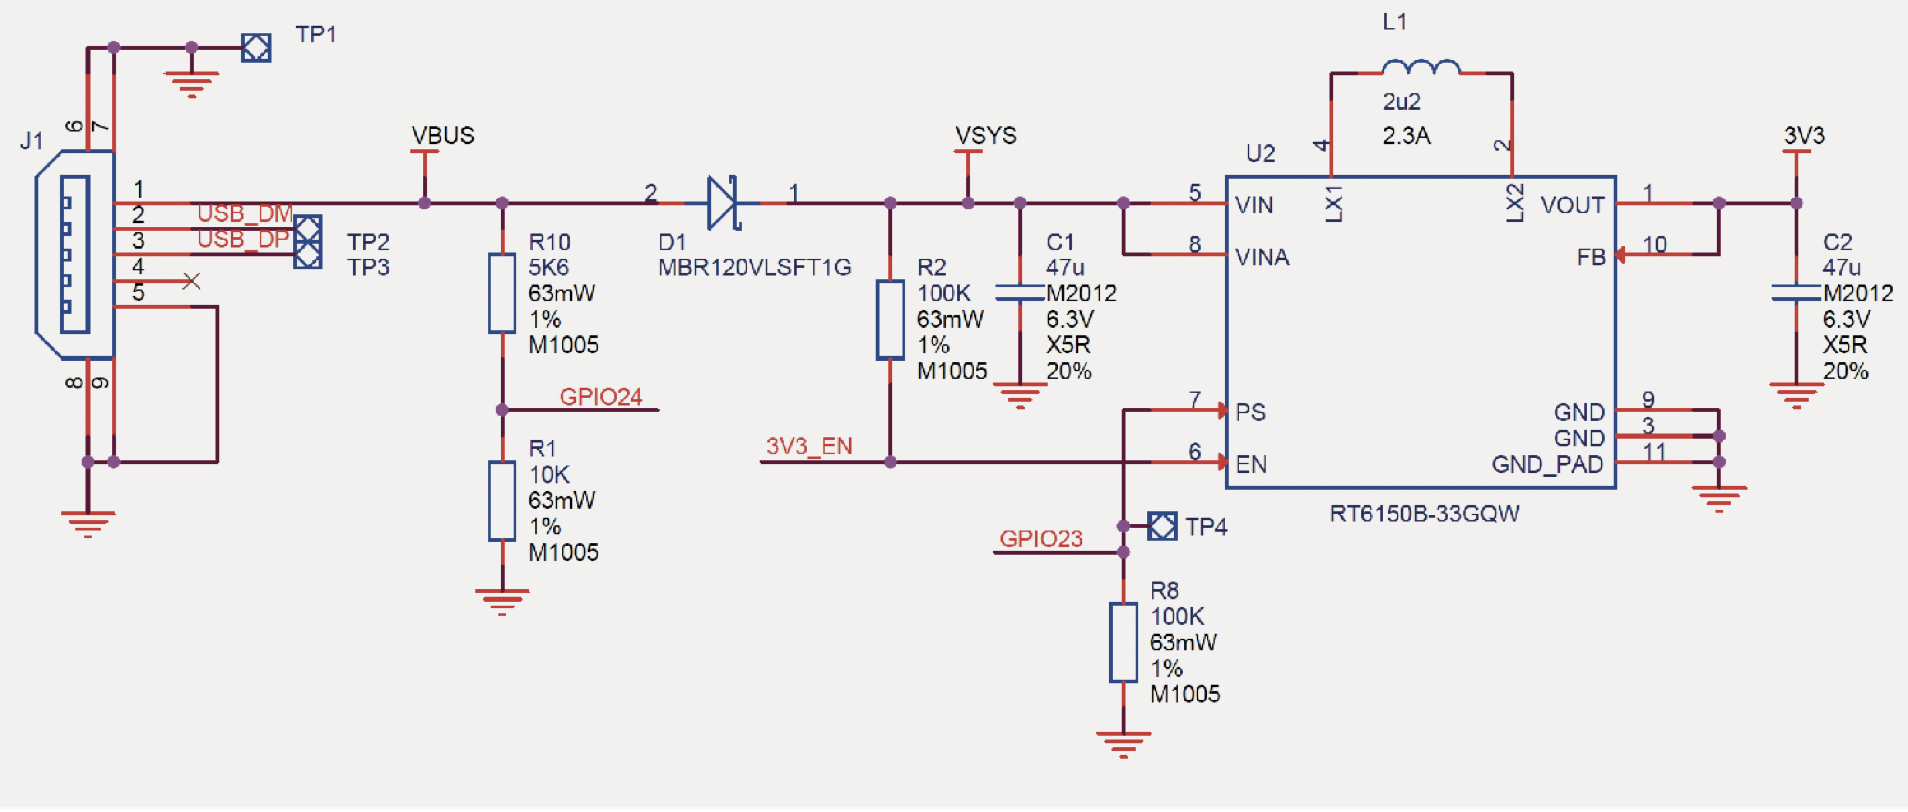 Powerchain circuit detail from p.18 of the
Pico datasheet.
Powerchain circuit detail from p.18 of the
Pico datasheet.
Looking through the datasheet for the Pi Pico, I was surprised by the wide input voltage range that the Pico accepts, ~1.8V to 5.5V (a "buck-boost" switch-mode-power-supply ensures
the chip gets steady 3.3V).
The Seeed website gives a good overview of how to get started
with the Xiao RP2040 using C and Arduino libraries (via the Arduino IDE)
and MicroPython (via Thonny).
To upload Arduino/C code to the Xiao-RP2040 (or other RP2040 board), we need to install the right board "cores"
(a set of instructions and mappings that allow Arduino to compile the standard 'Arduino' code we write for different
microcrontroller hardware, more info here).
Neopixel RGB cycle test on the Xiao RP2040.
The "Raspberry Pi Pico/RP2040" board package by Earle Phil Hower III allows us to compile Arduino code for a wide range
of boards using the RP2040 chip (detailed instructions on the Seeed website).
The Xiao also has an addressable RGB LED (Neopixel), so finding the latest version of the Adafruit_Neopixel library, was also useful.
 Architecture HTMAA coding group (thanks Alex for the picture)
Based off the example code on the Seeed website, I ran the following code to test the Neopixel, adding a small function to check the serial port, to allow for basic communication via USB:
          #include Adafruit_NeoPixel.h
          int Power = 11;
          int PIN  = 12;
          #define NUMPIXELS 1
          Adafruit_NeoPixel pixels(NUMPIXELS, PIN, NEO_GRB + NEO_KHZ800);
          String command;


          void setup() {
            pixels.begin();
            pinMode(Power,OUTPUT);
            digitalWrite(Power, HIGH);
            Serial.begin(9600);
          }

          void loop() {

            checkSerialInput(); // function to check for input from the serial port

            if (command.equals("Hello")) {
              Serial.println("Hello Niklas");
              command = "";
            }
            if (command.equals("Goodbye")) {
              Serial.println("c ya!");
              command = "";
            }

            pixels.clear();
            pixels.setPixelColor(0, pixels.Color(15, 25, 205));
            delay(400);
            pixels.show();
            pixels.clear();
            pixels.setPixelColor(0, pixels.Color(103, 25, 205));
            delay(400);
            pixels.show();
            pixels.clear();
            pixels.setPixelColor(0, pixels.Color(233, 242, 205));
            delay(400);
            pixels.show();
            pixels.clear();
            pixels.setPixelColor(0, pixels.Color(233, 23, 23));
            delay(400);
            pixels.show();
            pixels.clear();
            pixels.setPixelColor(0, pixels.Color(12, 66, 101));
            delay(400);
            pixels.show();
            delay(500);
          }

          void checkSerialInput() {
            if (Serial.available()) {
              command = Serial.readStringUntil('\n'); // read what get's typed into the serial port, until 'return' key is pressed.
            }
          }
I also ran the same sketch with the Pico W board. The sketch compiled and uploaded successfully, though I was initially confused about the lack of visual feedback (no power LED or the usual flickering LED's when uplpading the sketch).
No blinking lights ... but it worked :)
Next up, some quick tests with MicroPython ...
Thonny is easy to install, and sticking to the guide on Seeed,
I was able to quickly install MicroPython on the Xiao and then send a simple script for it to interpret. I am not versed in Python, but it would be interesting to go a bit deeper here, as it sounds like it opens up a lot of possibilities.
Sending a simple MicroPython script that counts for the Xiao to 'interpret' ...
I quickly wanted to test the Xiao ESP32-C3 as well. Again, the Seeed site had all the information to get started. After making sure I had the most uptodate "esp32" boards package installed , I uploaded the the Arduino blink example (making sure to specify pin 10, as LED_BUILTIN is not defined for this board).
Also blinking ...
Next I wanted to see if I could get the ESP32-C3 controlling a servo motor. I had some code I had developed over the summer for a
robot arm end-effector that utilised the Arduino Servo.h library. Unfortunately it looks like the library may be incompatible with
ESP32 boards (see truncated error message below).
WARNING: library Servo claims to run on avr, megaavr, sam, samd, nrf52, stm32f4, mbed, mbed_nano, mbed_portenta, mbed_rp2040 architecture(s) and may be incompatible with your current board which runs on esp32 architecture(s).
...
"This library only supports boards with an AVR, SAM, SAMD, NRF52 or STM32F4 processor."
 #error "This library only supports boards with an AVR, SAM, SAMD, NRF52 or STM32F4 processor."
  ^~~~~
exit status 1
Error compiling for board XIAO_ESP32C3.
I went back to the Xiao RP2040, and for this the code compiled. There were some noises/hints at movement, but
the servo
I'm using requires 5V control signals, which neither the Xiao or Pico W can provide.
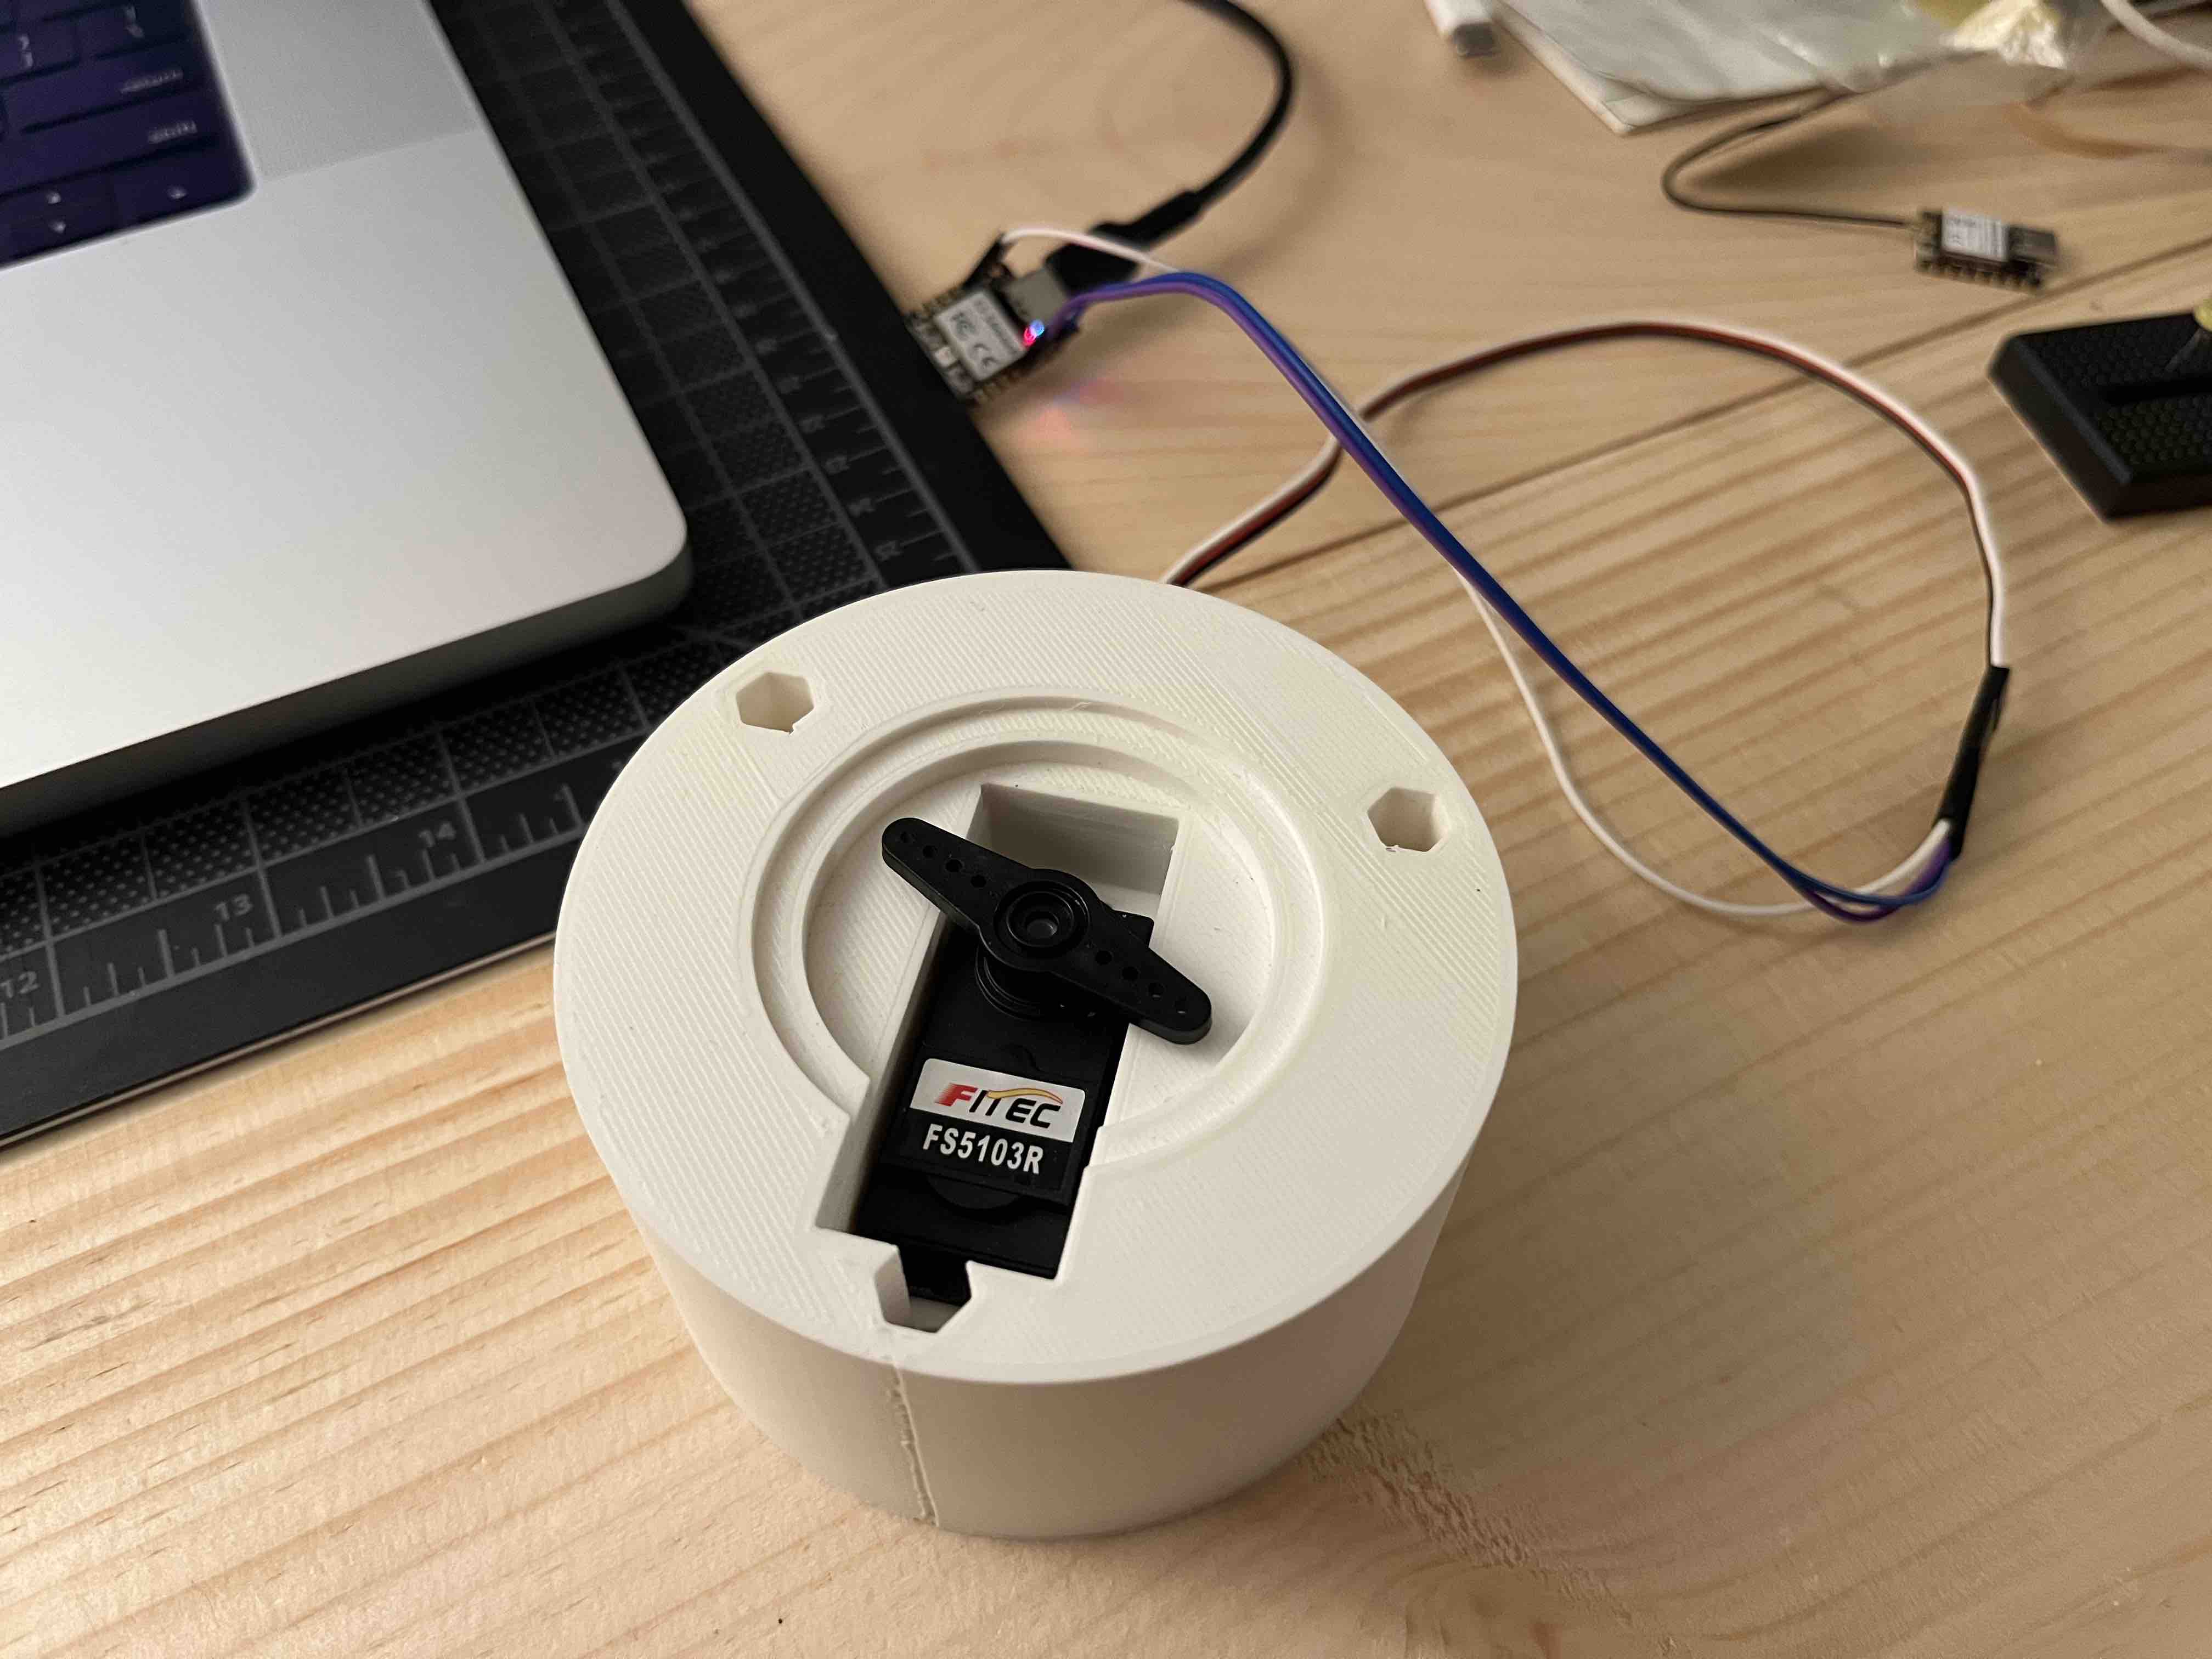 Servo hooked up, but not enough voltage.
 Pin-out diagram of the Pico W (source: Raspberry Pi).