Week 11 ~ interfaces
A p5.js interface to activate the modules
For my final project I would like to have a way to control the individual modules through an interface of some kind. I have used Processing in the past to communicate with Arduinos/prototype simple UIs, but have been meaning to try p5.js.
The process for setting up serial communication via a p5.js sketch is described nicely here.
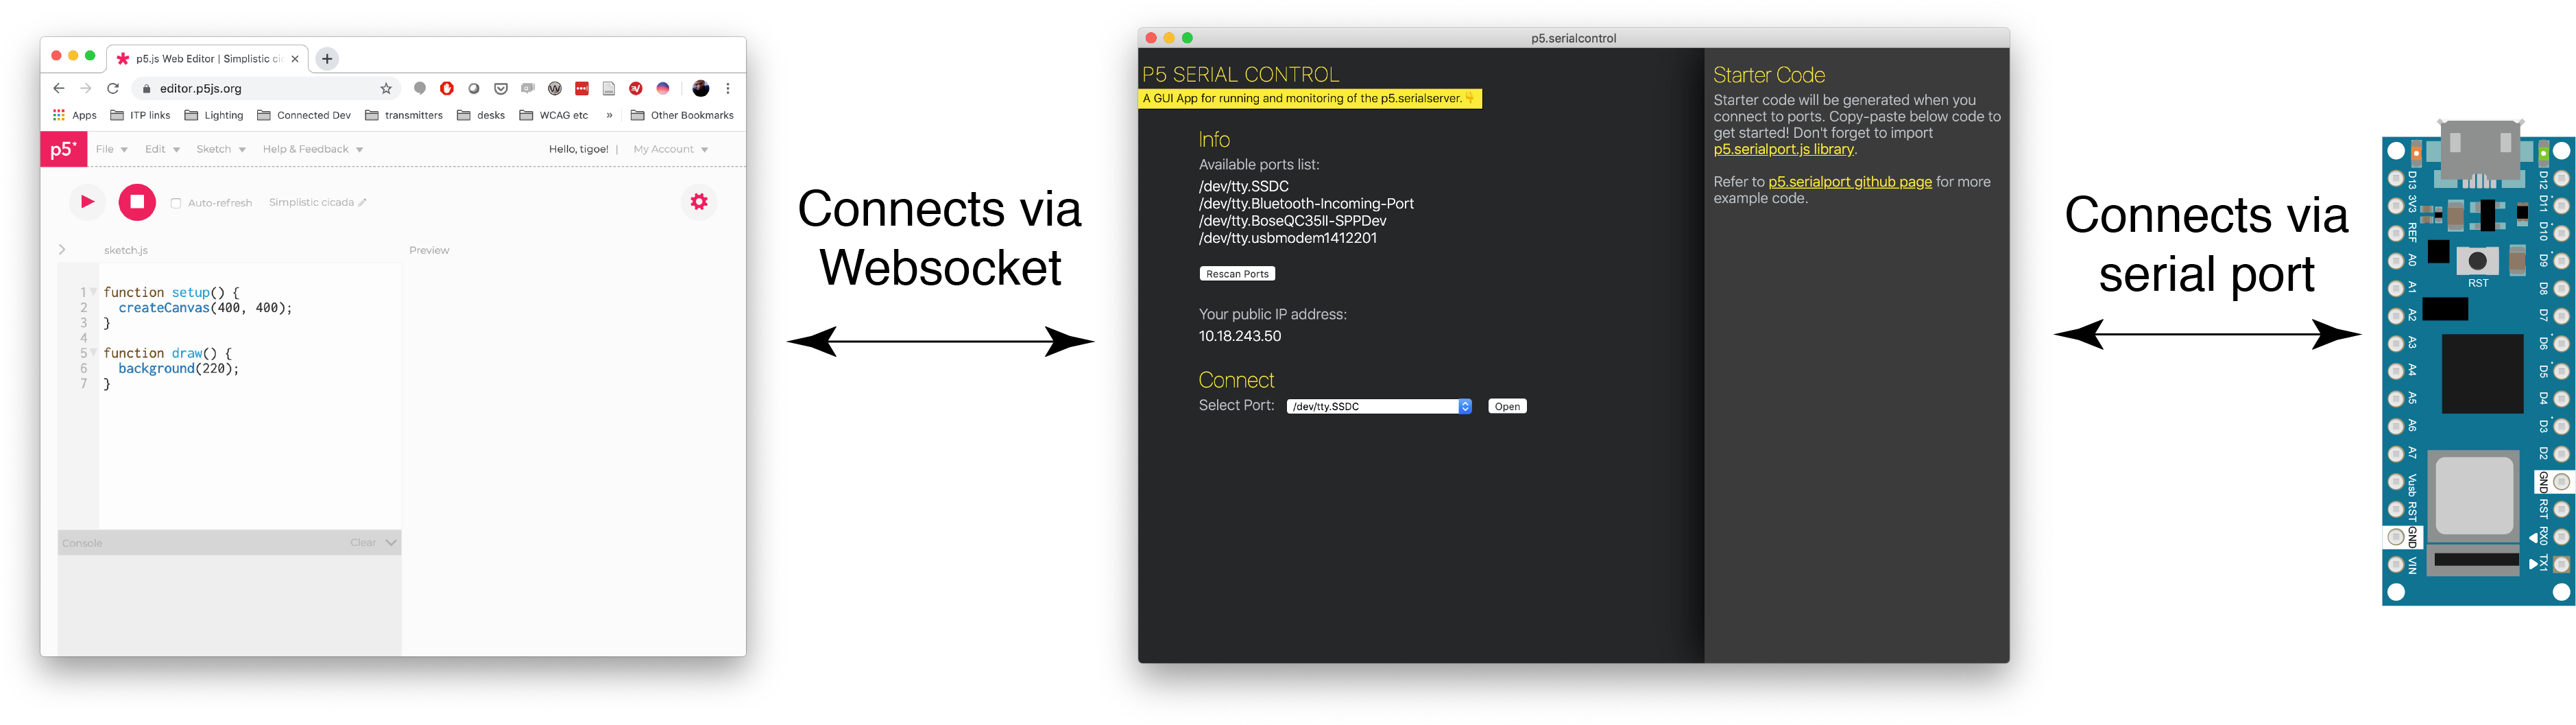 Setting up serial communication between a p5.js sketch running in a browser and a microcontroller (source: NYU ITP.)
const int ledPin = D1;            // the pin that the LED is attached to
int inByte;                       // a variable to read incoming serial data into

void setup() {
  Serial.begin(9600);             // initialize serial communication
  // Serial.setTimeout(10);       // set the timeout for parseInt
  pinMode(ledPin, OUTPUT);        // initialize the LED pin as an output
}

void loop() {
  if (Serial.available() > 0) {         // see if there's incoming serial data
    inByte = Serial.read();
    int integer_val = inByte - '0';     // ASCII to integer conversion ... numbers 0 - 9, are 48-57. Saying "-'0'" = to subtracting 48.
    if (integer_val >= 0) {
      for (int i = 0; i < integer_val; i++) {   // flash LED x times to indicate which module has been selected.
        digitalWrite(ledPin, HIGH);
        delay(100);
        digitalWrite(ledPin, LOW);
        delay(100);
      }
    }
    else {
      digitalWrite(ledPin, LOW);
    }

    // Serial.write("ok!");
    Serial.write(inByte);
  }
}
Test code to flash the LED depending on serial input.
I was able to get the p5 sketch communicating with the Xiao through keyboard input (e.g. pressing 'q' and 'w' to trigger the orange LED on my board), suggesting that the
serial commuication was working fine. However, making it work with the buttons turned out to take longer than expected. Debugging was made more difficult as only one thing
could ever be connected to the serial port (e.g. either the browser application/p5-websocket or the Arduino serial monitor).
I'm new to Javascript so it took me a while to realise that it had to do with keyboard presses being encoded as
hexadecimal characters vs the integer values I was trying to send with the button presses (confusingly, the RP2040 was consistently returning what looked like the correct echos of
what I was sending it ~ but as characters). After a lot of back-and-forth, changing serial.write(outByte); to serial.write(hex(outByte)) did the trick.
Confusion ~ the RP2040 seems to be receiving the data correctly (incoming value = serial.write() feedback from the rp2040).
Working! (with LED flashes corresponding to the buttons and hex values being sent back from the microntroller).
Final project update: interface to control two motor modules (1,2, and both).
Also see networking week.
Final p5.js interface, need to install p5 serial control to use (+have some kind of serial thing connected).