Week 5 - Electronics Design
For this week our individual assignment was to familiarize ourselves with one of the EDA tools and create a custom PCB to interact with an embedded microcontroller. This was my first time ever designing a PCB so bear with me for this challenge.
Custom PCB for XIAO RP2040 using Eagle
I wanted to continue using the Seeed Xiao RP2040, as it is a microcontroller with USB-C connection already, a Reset button and a Voltage regulator that drops the 5V received from the USB to 3.3V.To interact with my microcontroller, I added a press button, 2 LEDs and one magnetic 3D position sensor (the sensor might be helpful in my final project if I create a drawing pen).
My first step was to look at the datasheet for the TLE493D-A2B6 sensor, where I found an application circuit example that helped me guide both the connections to the Xiao RP2040 but also some other necessary elements such as resistors and capacitors. An application circuit example is so helpful to me due to my limited EE knowledge and intuition of which elements to add, and the only difference I introduced was that in my diagram I didn’t use an external power supply.

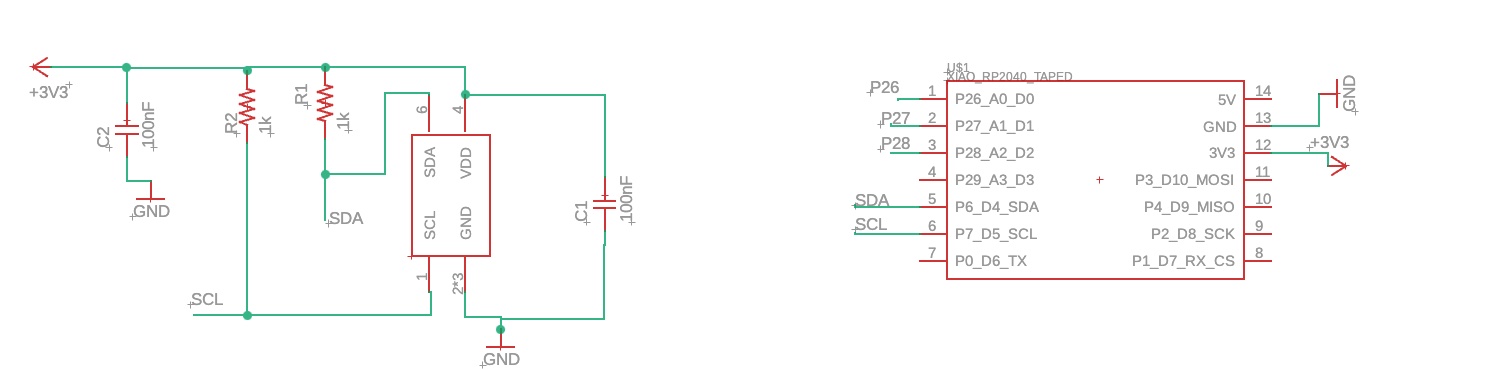
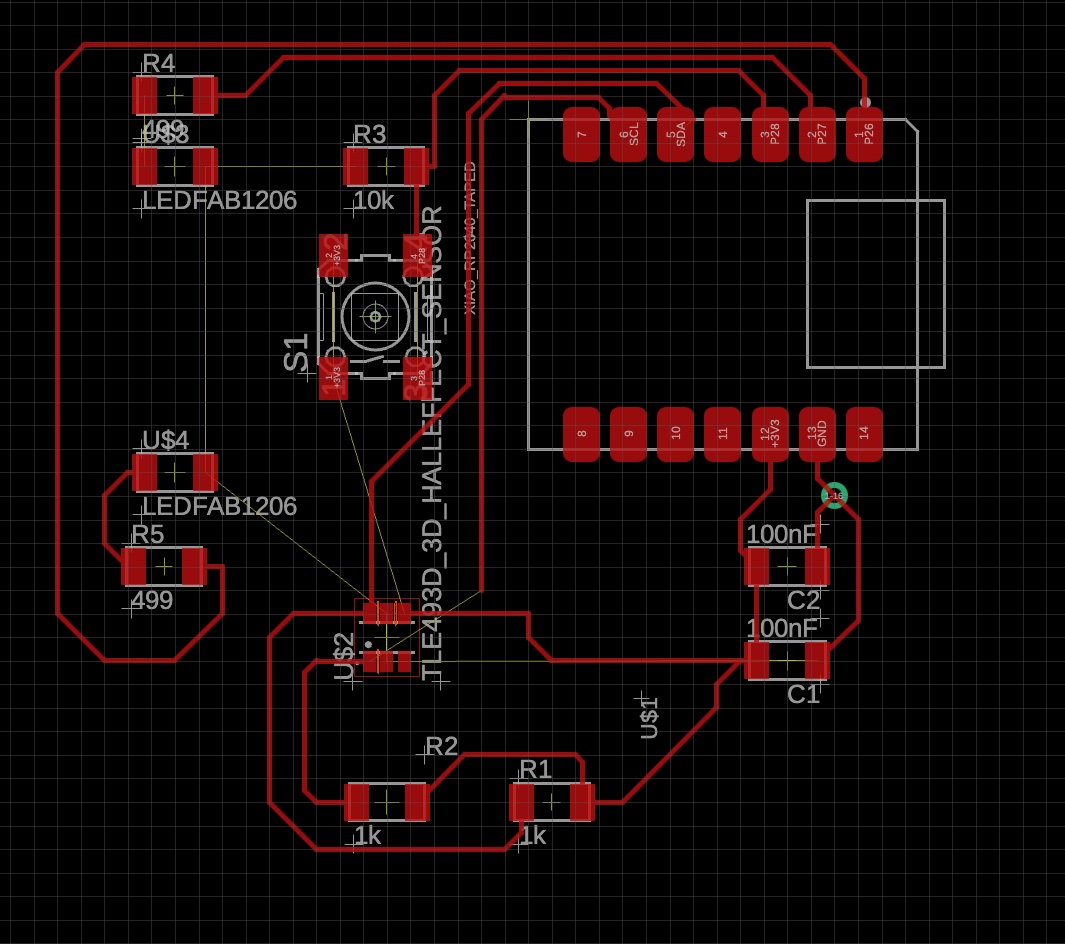
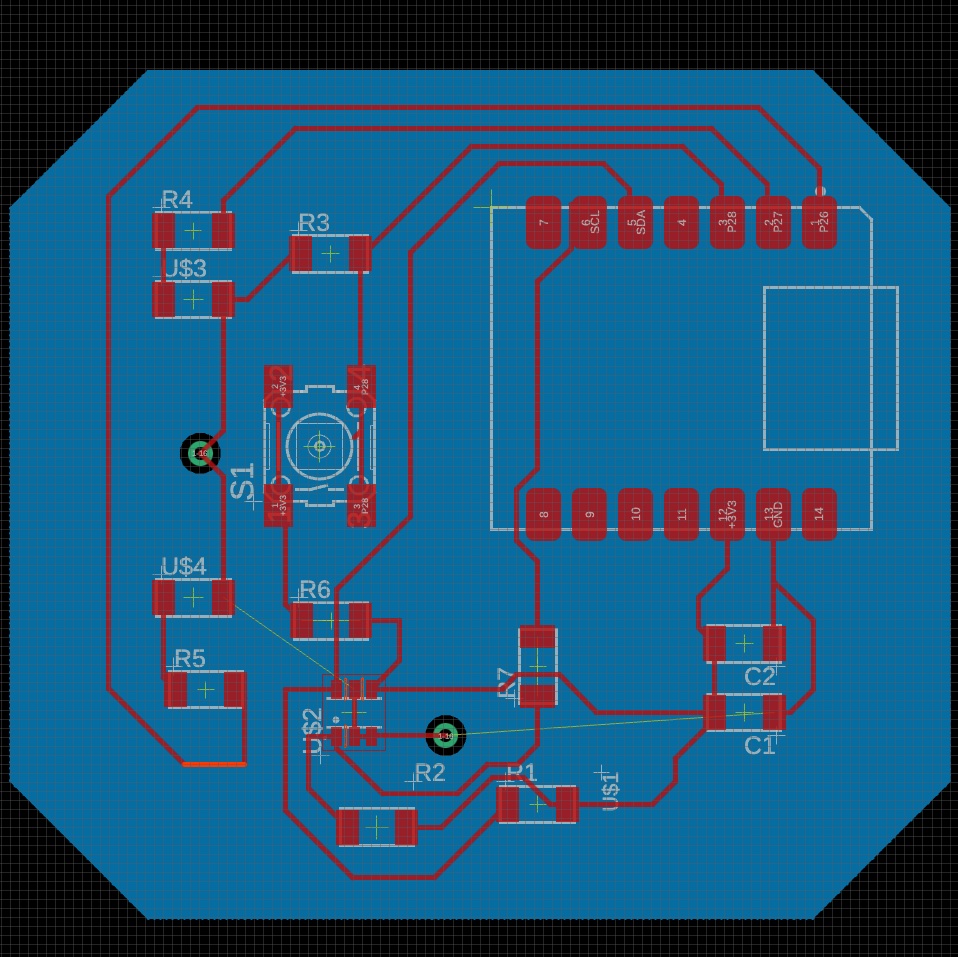
For an EDA tool, I chose to use Eagle due to its integration with Fusion 360, which I currently use for CAD design. The recitation video from the HTMAA Demo Project page was really helpful in describing the most important commands and showing useful tips of how our schematic can affect our circuit design. After introducing the press button switch (with pull-down resistors) and two LEDs (with current limiting resistors) to my schematic, I started experimenting with the routing of the elements and quickly found that I would need some way to “jump” some wires that otherwise would be overlapping. I added some 0 Ohm resistors to overcome those and also used the suggestion in the video to create vias (thru holes) to connect all GND pins to my Bottom layer. After some hours of reorganizing things and creating traces, I used the singleImages ULP that Quentin made to export my pins.


I have no idea if this PCB works but I can feel (a little bit) more familiar with Eagle, and hopefully will learn much more next week when we’re actually fabricating this board.
Files for this week can be found here