HOW TO MAKE (ALMOST) ANYTHING
TIFFANY TSENG - FALL 2011
| 12 // NETWORKING |


|
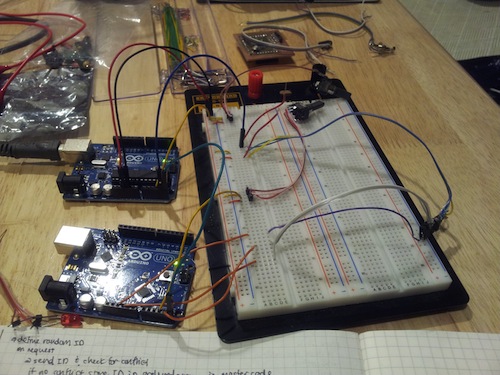
ASSIGNMENT This week, I focused on setting up two pieces of my construction kit over an I2C network. My process involved first breadboarding using two Arduino Uno boards and then making my own custom boards in Eagle. BREADBOARDING + ARDUINO I started off reading about the Wire Arduino library and trying out the sample master and slave code there. After getting it to work succesfully on two Arduinos, I tried implementing it using my Fabduino. For some reason, although my Fabduino seems to work for other things, it didn't want to communicate with the Uno.
I then attempted to write my own code to pass values from a slave board to a master. I wanted the slave to create its own ID dynamically so that the IDs for each piece in my construction kit are not predefined. MANY THANKS to Rob for walking me through his I2C code from a few weeks ago. Thanks to his help, I got my board to work...sort of.
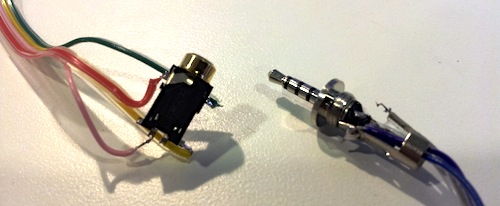
My error is that I need to manually restart the Serial Monitor in the Arduino IDE to have the boards continue to print out their potentiometer values. I went to Brian Mayton for advice, and he suggested fabbing my own Fabduinos because that will bring about an entirely new set of errors, and if I was planning on using Fabduinos in the end, I should debug using them. On a side note... After talking to David and Nadya on advice, I ended up realizing that I needed four connections between my pieces: VCC, GND, SDA, and SCL. As a result, the stereo connectors I was using would not work since they only have 3 pins. I purchased 4 pin audio connectors from Mouser only to find that the connector and jack did not mate! I had to place a next day order from Digikey to purchase mating connectors (and contacted CUI, the manufacturer, in order to ensure that they did).
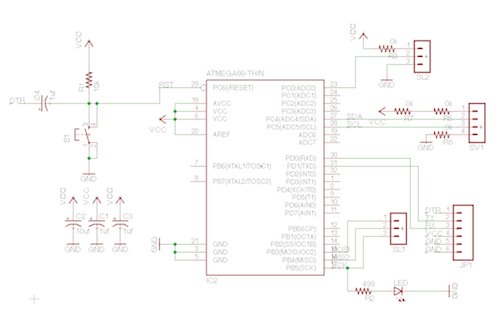
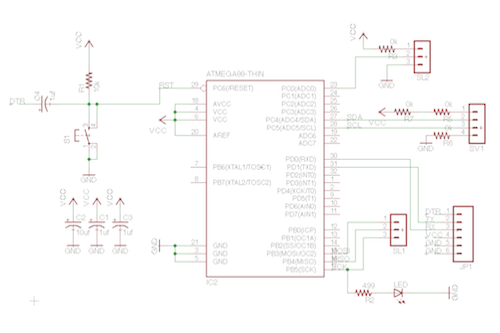
After talking to David and Nadya on advice, I ended up realizing that I needed four connections between my pieces: VCC, GND, SDA, and SCL. As a result, the stereo connectors I was using would not work since they only have 3 pins. I purchased 4 pin audio connectors from Mouser only to find that the connector and jack did not mate! I had to place a next day order from Digikey to purchase mating connectors (and contacted CUI, the manufacturer, in order to ensure that they did). LEARNING EAGLE The day had finally come...for me to learn Eagle. I went through the experience of creating my own custom boards from scratch, which took me many, many hours to complet. I found the toolchain for producing proper pngs for milling to be very frustrating, as it required me to work in Photoshop, which I don't have much experience with.
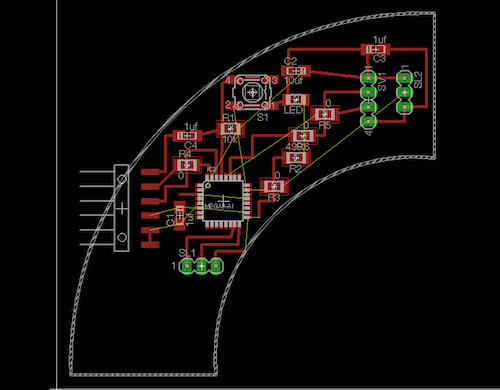
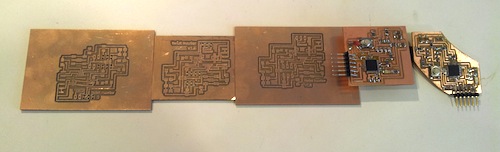
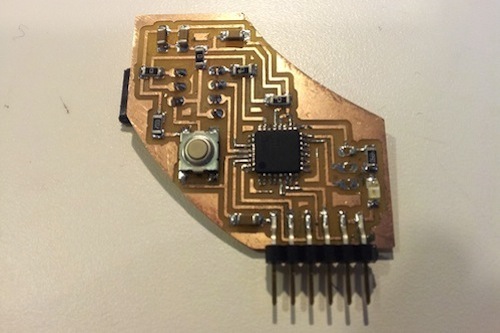
MILLING THE BOARDS There were lots of mistakes, but in the end, I ended up with a board that works!
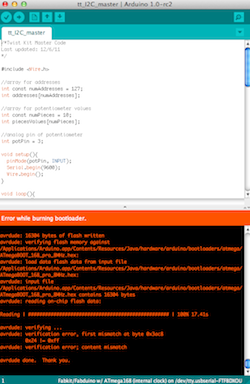
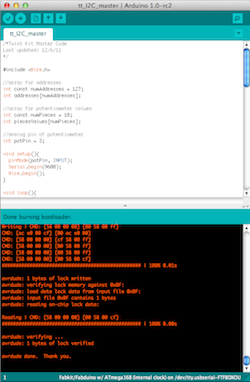
The first time that I tried to program the board, I got the error "verification error; content mismatch." Somehow, though, after I tried again, it programmed fine.
I barely had time to wire up the audio jack and connector that I got from Digikey. I found that my Fabduino is capable of powering an Arduino, so it does seem to be semi-properly wired! It's not passing potentiometer values right now, though, so it needs a little more work.
|