HOW TO MAKE (ALMOST) ANYTHING
TIFFANY TSENG - FALL 2011
| 02 // PRESS-FIT CONSTRUCTION KIT |


|
CONCEPT I had a few different ideas for what to build for my construction kit. I thought about building something kinematic, such as a collection of pieces that could be stretched and compressed to form different shapes using a series of linkages. When I started SolidWork-ing, I ended up with a different design but one that still had movement. Using two different types of pieces, you can create numerous round objects that can roll around. MODELING
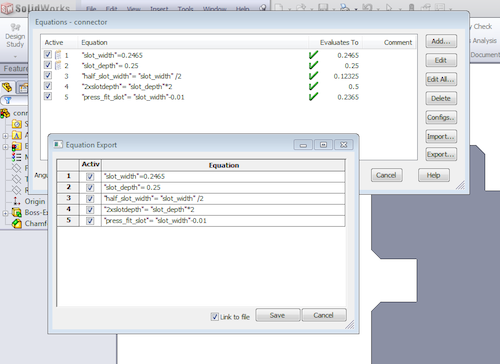
First, I modeled the construction kit in SolidWorks. Although I’ve used SolidWorks many times before, I had never gotten around to teaching myself how to use “global” variables. Since I wasn’t sure what material I would be using, I wanted to ensure that I could easily change the slot width and depth. To do this, I created variables using SolidWorks equations and linked smart dimensions to these variables. I then exported the variables, which exports as a text file. Finally, in my second part file, I imported the equations and linked the slot dimensions to the variables. When I adjust the dimensions in the text file and rebuild the parts in SolidWorks, the new dimensions are reflected in the design.
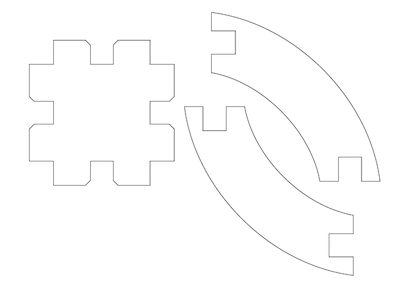
LASER CUTTING I created drawings of the two SolidWork part files and exported DXF files for each drawing. I then imported these DXF files to CorelDraw to send to the laser cutter. Unfortunately, even though I set a global variable in SolidWorks, I had to re-export the drawings each time I made a change, and then I would need to reimport the new drawing into CorelDraw. This was quite a tedious process, but I couldn't find a way to edit the file the way I wanted to in CorelDraw. Dropbox made this process a little easier.
Since I wanted the kit to be able to roll around without coming apart, I chose sturdy ¼”-thick plywood that I found in the scrap pile in the Media Lab shop. I used a speed and power setting of 5 and 100, which I found from the list of speed and power settings that automatically opens up whenever you log into the laser cutter desktop. It took a few tests to get the press fit just right. I ended up undersizing the slot width by 0.01” and setting a slot depth of 1/4".
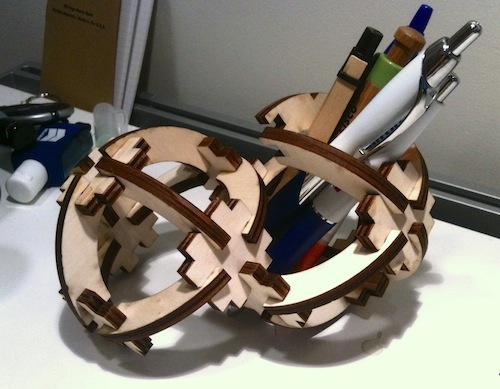
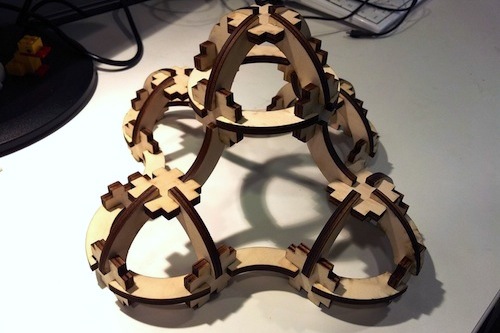
ASSEMBLING After cutting out enough pieces for one ball (6 connectors and 12 circular pieces), I cut out more to see what I could make with more pieces. I found that the kit is capable of forming a variety of round, roll-able designs.
Unfortunately, the wall thickness near the slot of the circular pieces is a bit thin, so the pieces break when handled roughly. If I were to make the kit again, I would increase the wall thickness.
And in case you were wondering, it does roll!
...and I'm currently using the spheres as a pencil holder!
DESIGN FILES
|