Week seven's assignment was to program the boards we made for the electronics design week with the FAB ISP we made a few weeks before
that. I made a pretty straightforward button and LED addition to the board, so this week's assigment was basically to make my button turn on
the LED.
RESULT:After some hardware difficulties, I was finally able to program my board's LED to fade in and out when you push the button:
ISSUES:
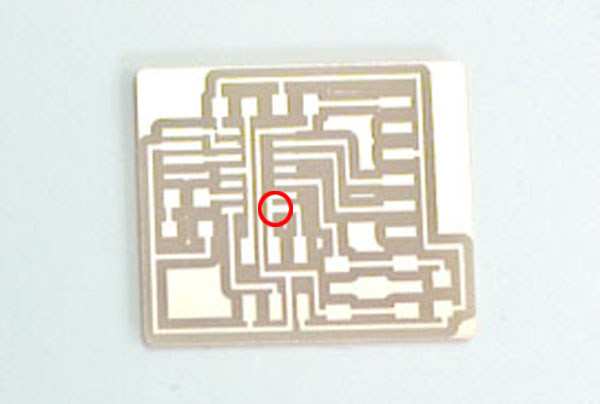
1. My first issue was in the original design of my board. When I initially milled the board, I caught and fixed some errors in the spacing
between the traces, but I missed this one! Before I realized this error, I went through a lot of frustration trying to figure out why the board
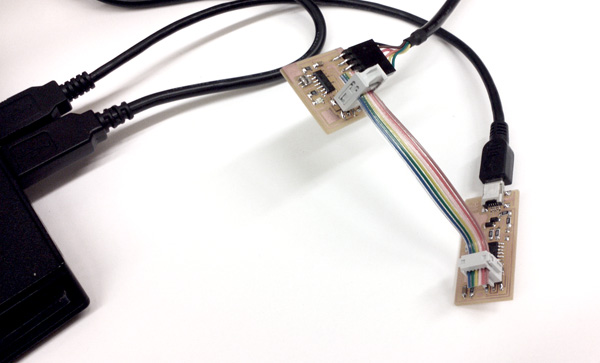
wasn't working. Huge thanks to James for the debugging help! Once that was fixed (I just cut away the copper with an xacto), I was able to power
my board and the FAB ISP and talk to it, but nothing was happening when I tried to upload programs that turned on the LED....
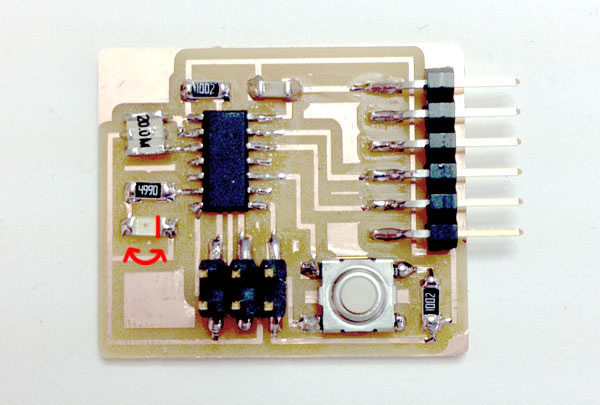
2. I know that diodes have a specific orientation, but I didn't think about it when I soldered my LED and of course it was on
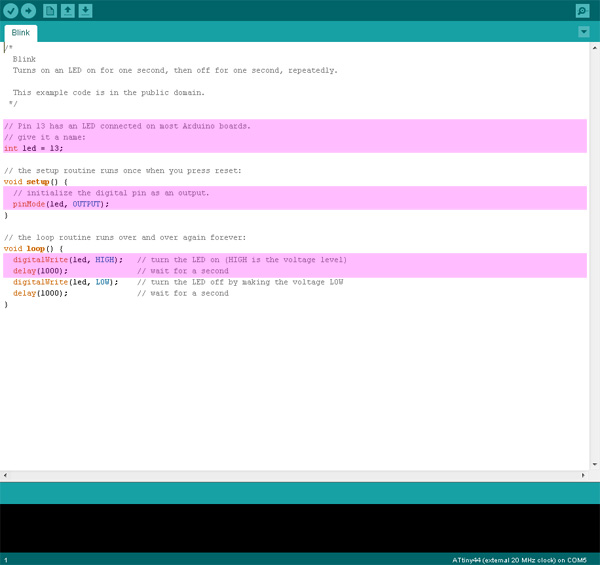
backwards. Once I fixed that, I was finally able to program the board to light up!PROGRAMMING:I have a little experience using Arduino, so I started with that. First, from the pre-loaded examples,
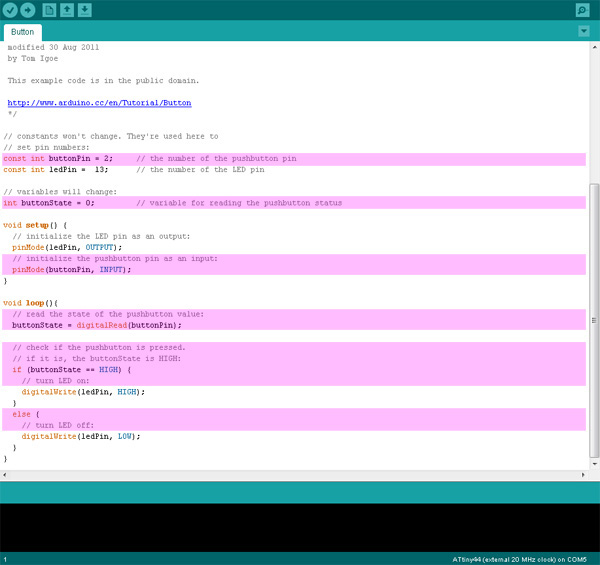
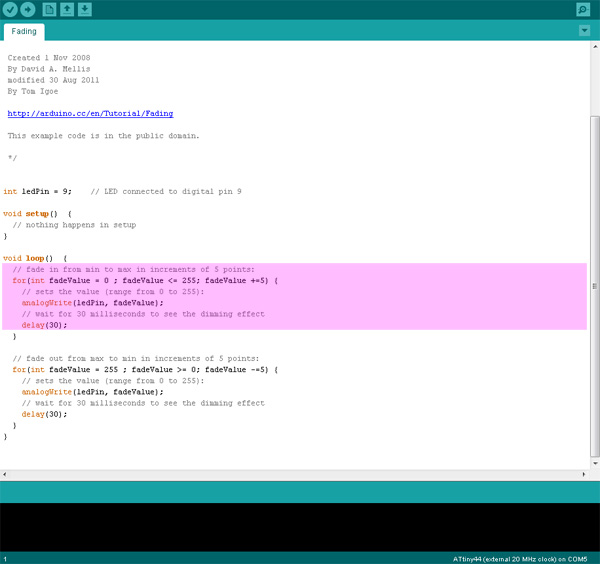
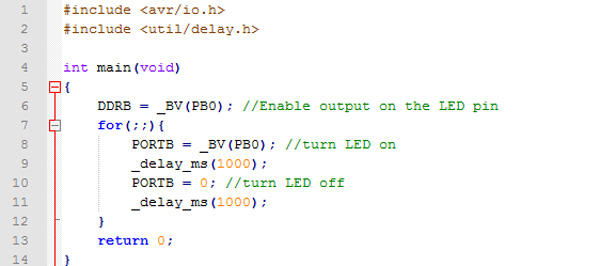
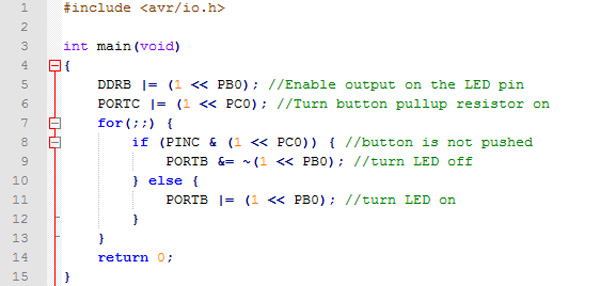
I uploaded the Blink sketch, then the Button sketch, and finally the Fading sketch. Then, by referencing
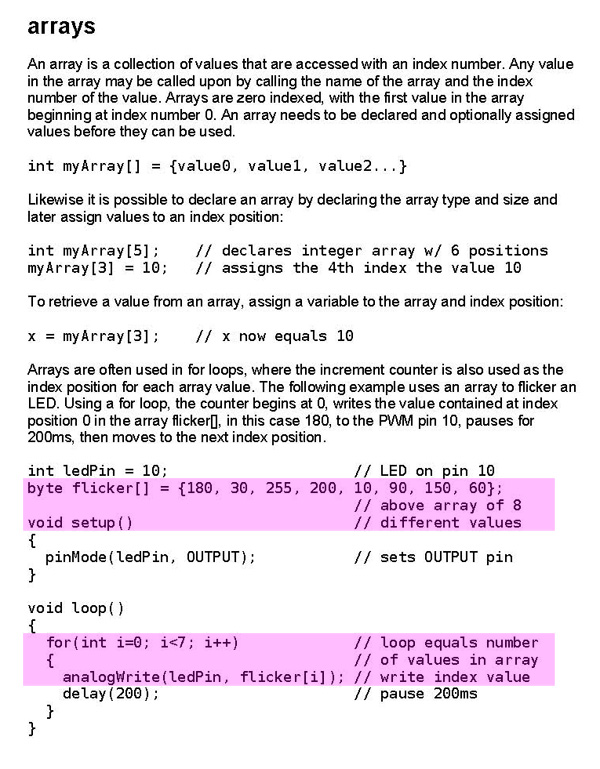
this tutorial ,
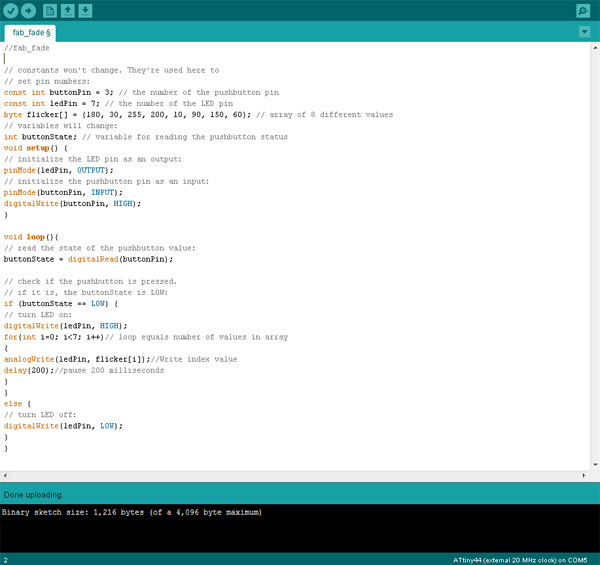
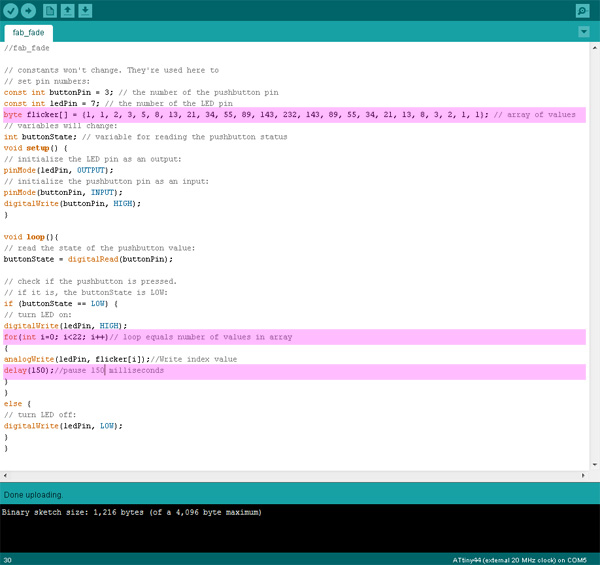
I was able to get the LED to fade in and out using a specific array of numbers.1. TAKE THIS CODE:
2. AND THIS:
3. AND THIS:
4. AND THIS:
5. COMBINE THEM:
6. EDIT IT:
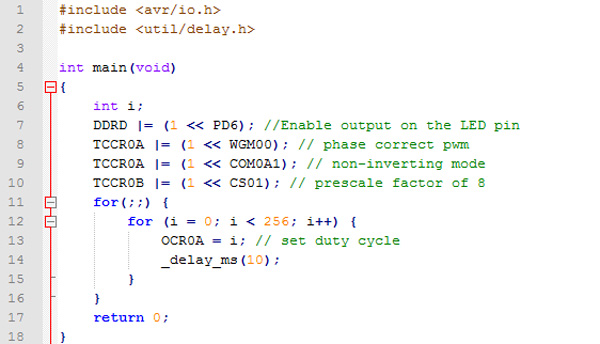
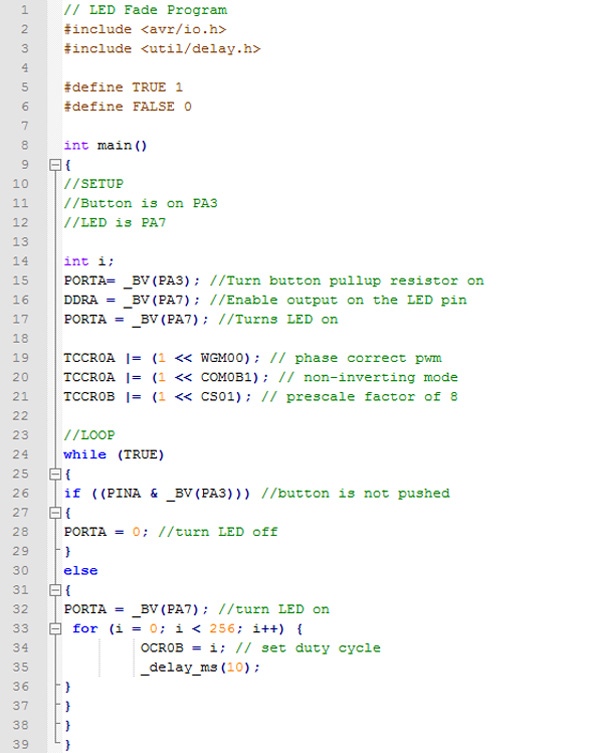
Next, I tried to program in C. Looking at examples
for this was also extremely helpful. I'm still not as confident with the language as
I am in Arduino, but I was at least able to navigate enough code to nearly reproduce my fading program.1. TAKE THIS CODE: