This week we were tasked with measuring something by adding a sensor to a microcontroller and reading it. I chose to make a loading step response board and tested a few ways
of measuring with it.
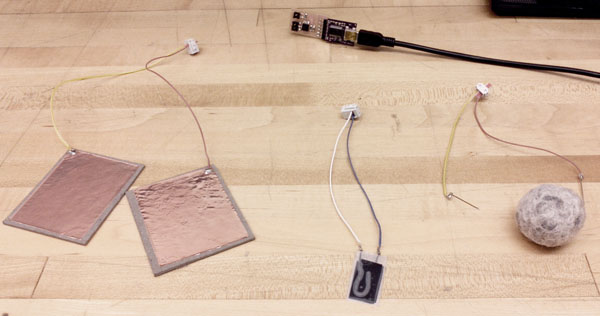
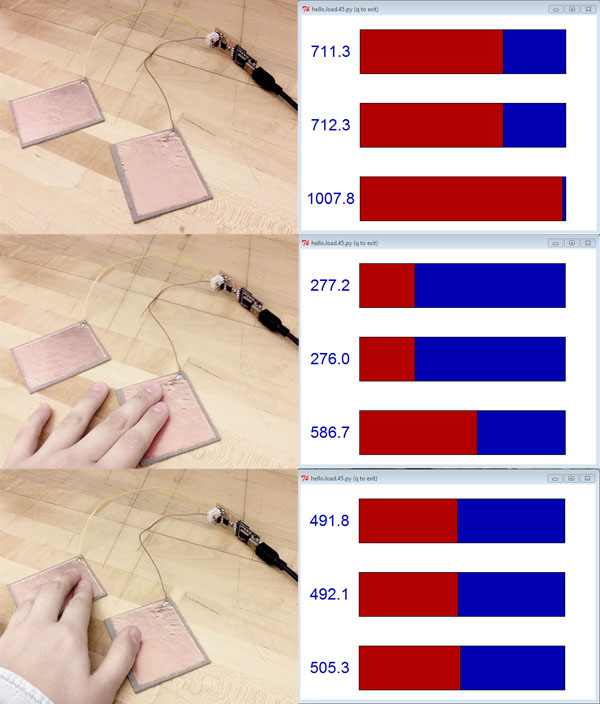
RESULTS:After some hardware difficulties, I was able to program my board to sense through through three methods.COPPER PLATES:
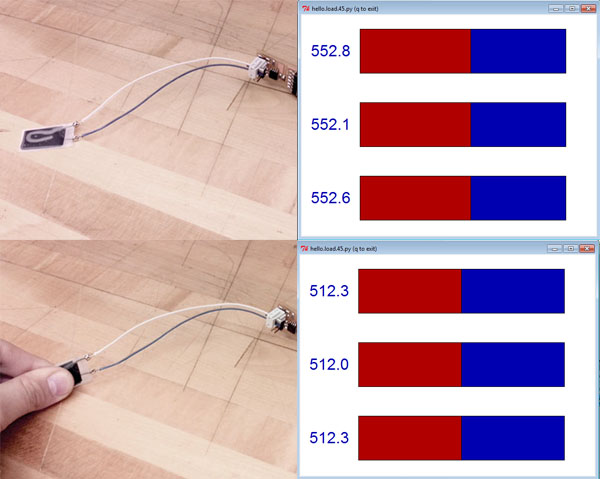
VELOSTAT:
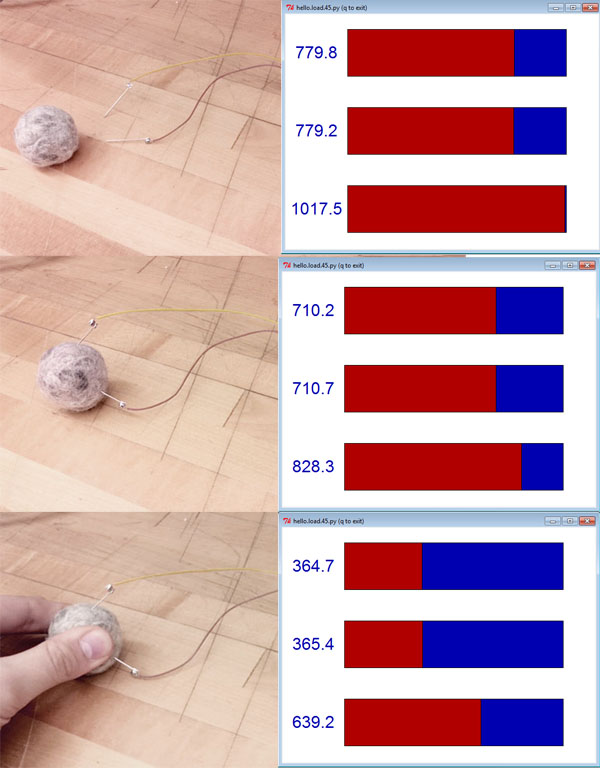
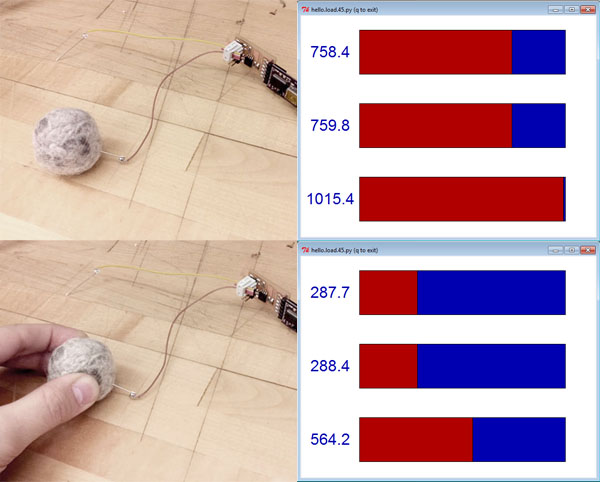
CONDUCTIVE FELT POMPOM:
ISSUES:
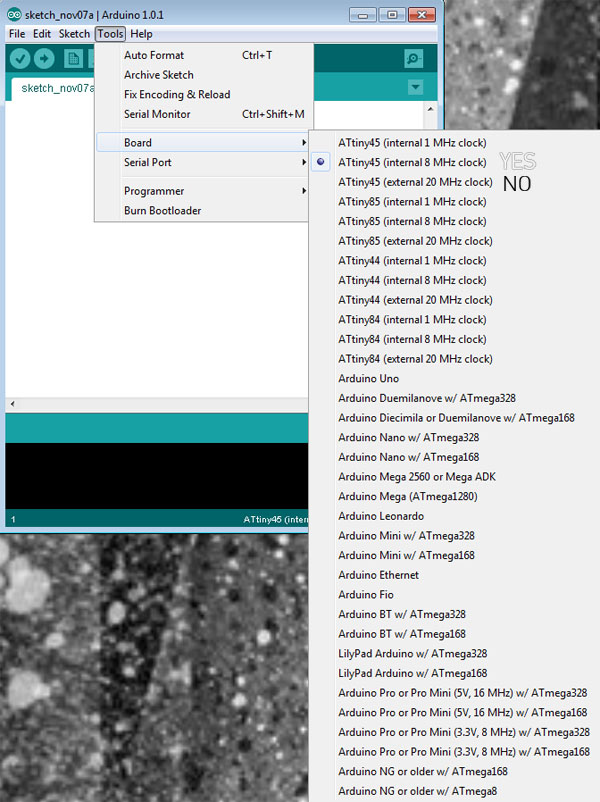
1. My first issue was with the microcontroller. We are stocked with attiny 45v and unlike in many of the examples that use attiny 45, the 45v runs between 0 and 10 mhz (as opposed to 20 mhz).
This means that if you bootload at 20 mhz and try to program the board, you'll get a bad connection error because it won't be able to recognize the microcontroller at that speed. I think you can remedy this
in other ways, but I chose to just replace the component.2. There were some longer pronged FTDI connectors in the architecture lab that I thought were the same as the ones we've been using up until now, but for some reason, I could not get
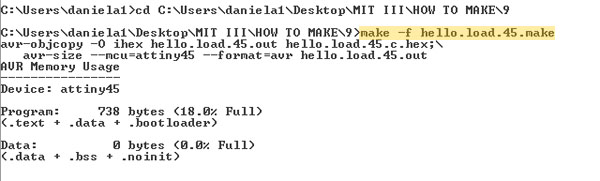
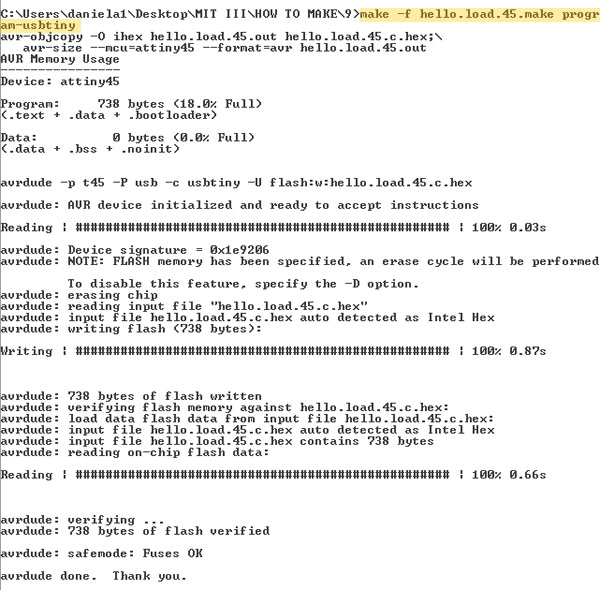
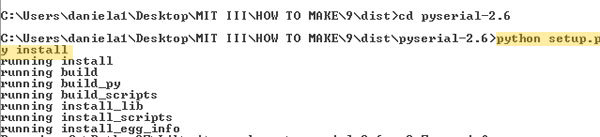
that connector to function. As soon as I switched it out for the shorter pronged version, it worked like a charm.PROGRAMMING:First, I downloaded Neil's c code, make file, and python file for the loading step response board. I then programmed the board using my FabISP as usual (make, make program). Next, I downloaded python and pyserial.
I tried python 3.3 at first and had issues, so I
switched to 2.7 and that worked fine. I referenced this great tutorial
for how to get python and pyserial working from the command prompt in Windows. Then, from the command prompt I ran python. It is critical at this step to note that in Windows the way you call the serial port is
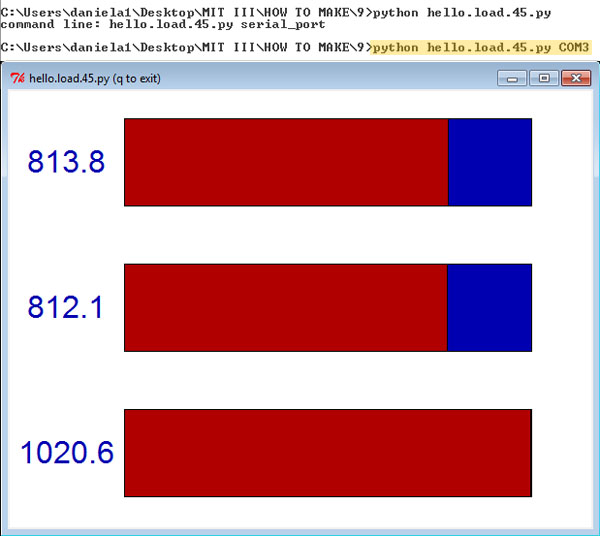
"COM" (just like it shows up in the Arduino IDE) not the various other ways you might call it from a Mac or Linux. You can find out which COM you are using by looking in Device Manager. After that, the visualizer
popped up, but the readings were crazy all over the place and didn't seem right at all. After looking through some pages from previous years, I noticed that crazy readings or freezing could be the result of a
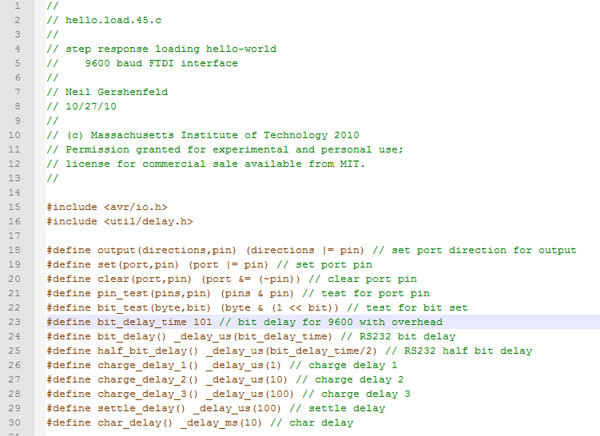
timing error. So, following the adivce given on this page , I changed the bit delay for 9600 from 100 to 101 in the c code.
And although I'm still not entirely sure what that bit of code means precisely, the change immediately made my readings very happy.MAKE:
MAKE PROGRAM:
GET PYTHON:
GET PYSERIAL:
RUN .PY:
CHANGE BIT DELAY:
VISUALIZING MEASUREMENTS:
OTHER SENSORS:From my experience last Spring in New Textiles , I was excited to try making some interesting touch sensors that would work with my board. First,
I made a very simple tape and velostat sensor. Velostat, a piezoresistive
material, reacts to pressure with a decrease in resistance. When between two conductive layers, this change in resistance can be measured (and should be visualized in the python application). The change is subtle, but
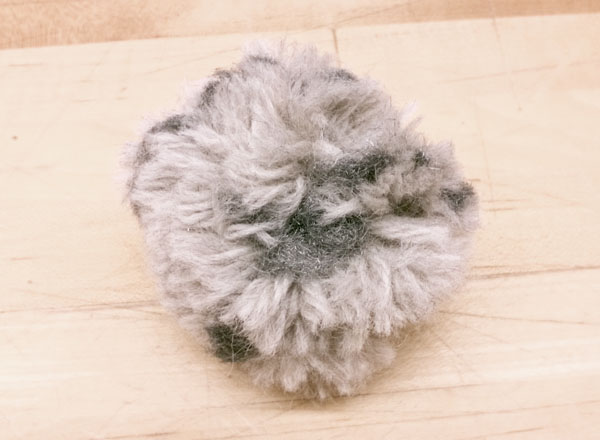
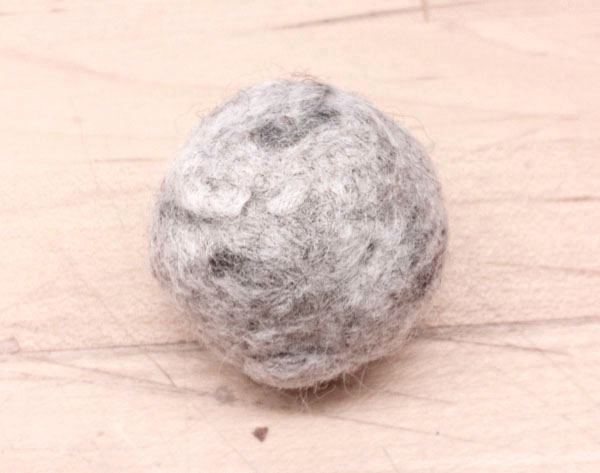
definitely present. Next, I made a felted pompom pressure sensor by following this tutorial . I didn't have any conductive wool on hand, so I decided to try using steel
wool instead (after seeing this). The pompom making and felting went pretty well, but I'm not entirely sure what my readings mean. When both sense and ground are
attached through the ball, it acts much like the velostat sensor, only changing slightly when compressed. But, if I disconnect the ground lead, I get results that fluctuate much more depending on where I touch the
ball (based on if I'm in direct contact with conductive material or not). Squeezing the ball does have an effect, but it is about equal to just lightly touching the most conductive areas.VELOSTAT READINGS:
FELTED POMPOM READINGS A:
FELTED POMPOM READINGS B:
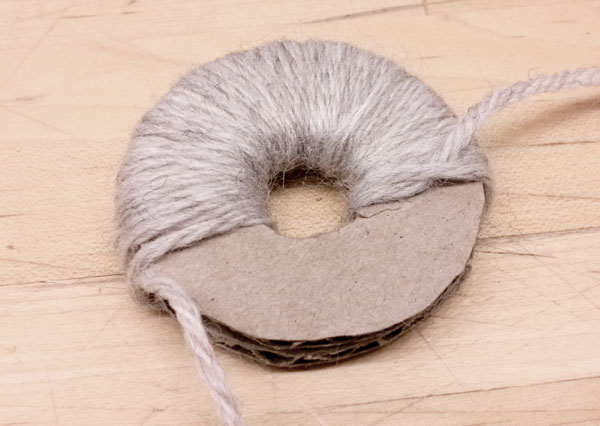
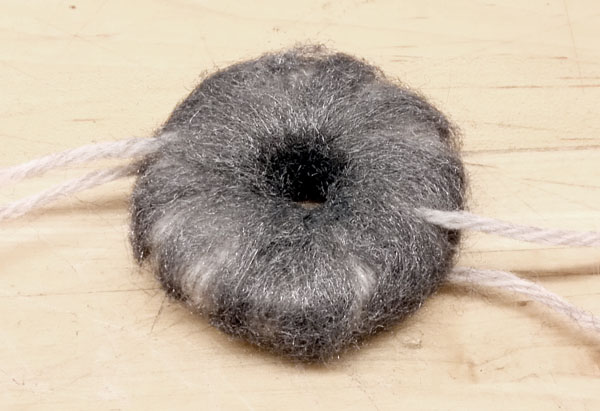
BONUS! HOW TO MAKE A CONDUCTIVE FELTED POMPOM:1. MAKE TWO DONUT TEMPLATES:
2. WRAP WOOL YARN AROUND TEMPLATES:
3. WRAP STEEL WOOL:
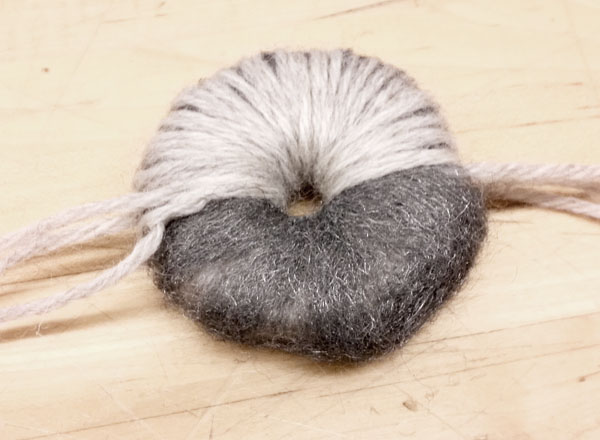
4. WRAP MORE WOOL YARN:
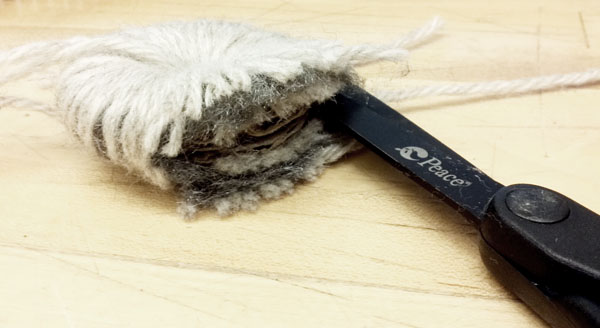
5. CUT BETWEEN THE TWO TEMPLATES:
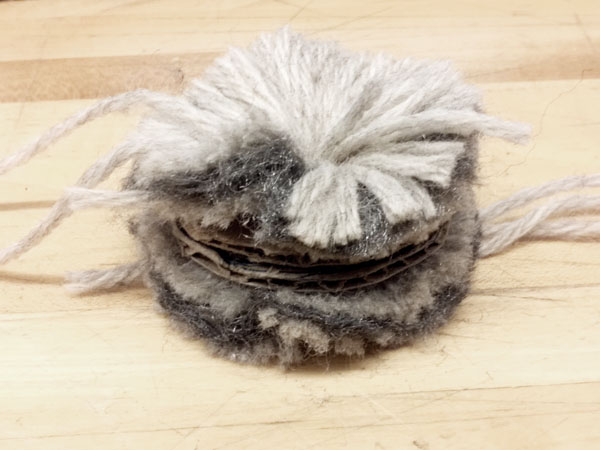
6. SECURELY TIE A LENGTH OF YARN BETWEEN THE TWO TEMPLATES (THEN REMOVE TEMPLATES):
7. POMPOM!:
8. SOAK POMPOM IN WARM SOAPY WATER9. RUB FIBERS TOGETHER UNTIL FELTED: