Version Control and Cutting with Computers
We're doing version control througout the project using gitlab, which turns out to be hard and counterintuitive. With a little guidance from Agnes Cameron, I managed to get it working and wrote a little instruction set for my future confused self (any anyone else who might need it):
Basic Git
- 1) update your local repository by using git pull:
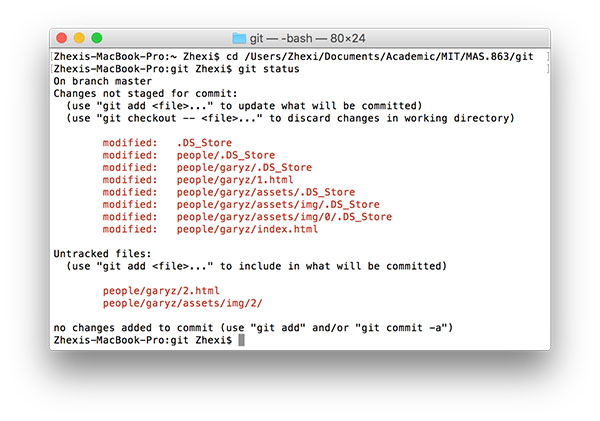
git pull ssh://git@gitlab.cba.mit.edu:846/classes/863.17/Architecture/archsite.git - 2) check the changes that have occurred locally with 'git status', which gives you a list of files in red:
git status - 3) use 'git add' to add the files you want to commit. Once you've done that you can use 'git status' again to see these added files in green.
git add people/garyz/assets/img/0/2fish.jpg - 4) now you commit locally the files you've just added:
git commit - 5) repeat 1) again just in case someone has updated the repository since you last pulled (seems to happen often with our repo)
- 6) now you're ready to push your files, using 'git push', which takes you into the (old + v user unfriendly) vim interface. first you add a comment for your commit, then press 'esc' and the cursor will go to the bottom of the screen, on which you type ':wq' (no quotations) meaning write quit.
- 6) you're basically done. I think you do another 1) git pull to synchronise the local repo.
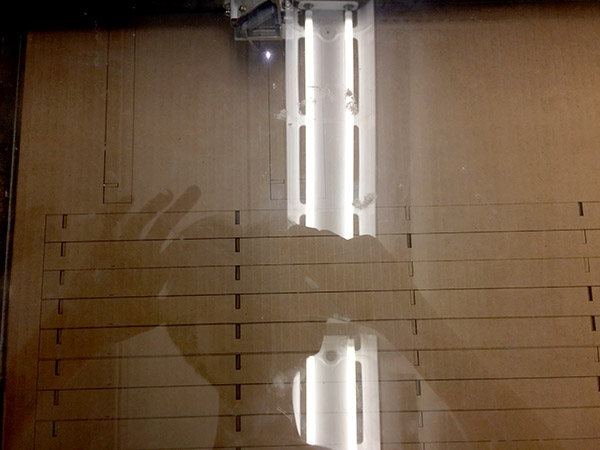
Laser cutting
A few notes on the laser cutter: Fire hazard: keep watching it cut! Don't forget to autofocus. Remember to account for the kerfing (width of the cutting slit, about a third of a millimetre on our Epilog).
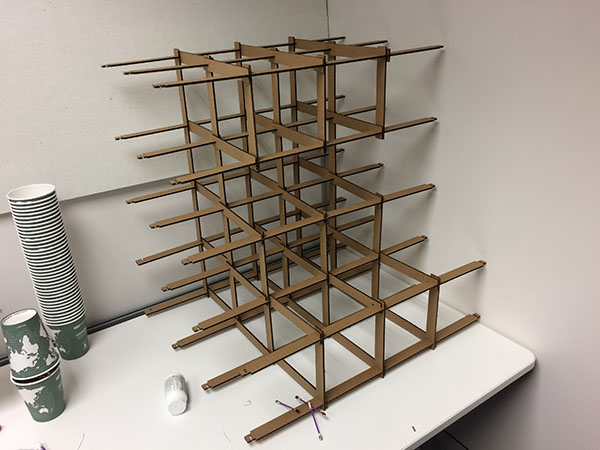
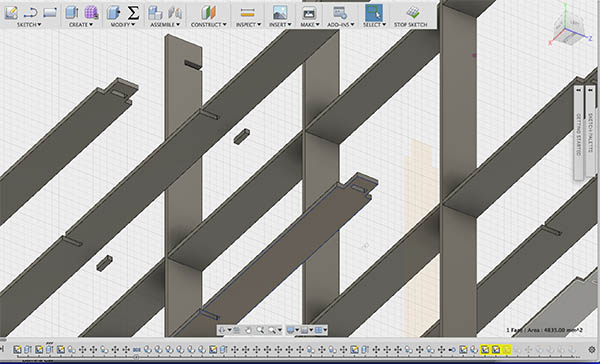
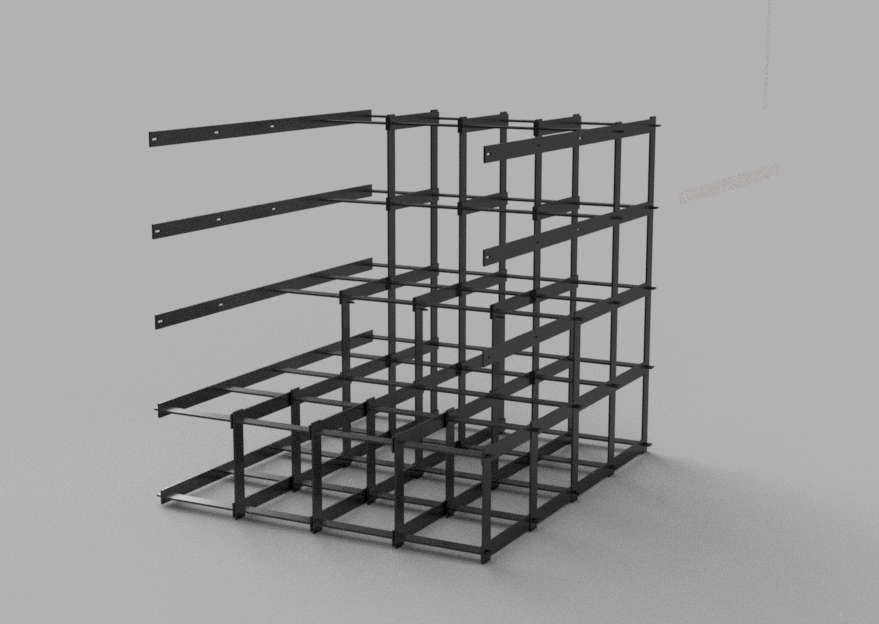
With the laser cutting project I kept things pretty simple, as it was my first time using one. The aim was to make a press-fit construction, and the mechanics of my design was fairly conservative and probably suboptimal: all right angles, for one. In practice, I found it surprisingly hard to manipulate two-dimensional shapes into three-dimensional pieces in order to fit them together in my head. I ended up doing much of the construction in the virtual space of the CAD programme, before moving it back into 2D in order to cut the cardboard. This meant however that I got plenty of practice of Fusion 360, which is great and frustrating in equal measure. Parametrics makes everything so much easier, but the lack of clarity about the order of priority of the constraints (as well as the invisible constraints) can be pretty infuriating.
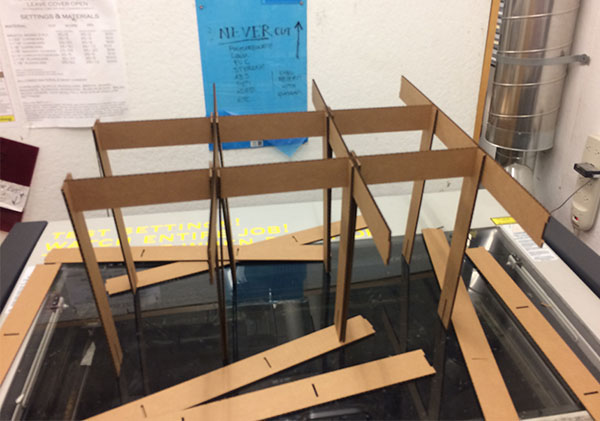
A House that Eats Itself
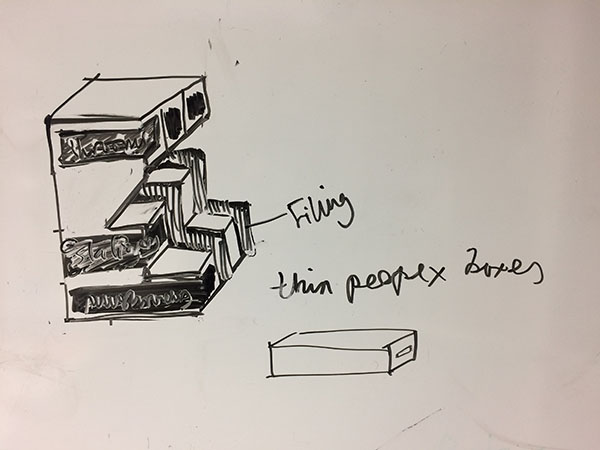
Initially, I was thinking of making some kind of shelf or desktop storage for my currently empty studio, which I kind of need, even though it'd be a pretty boring outcome. Plus I didn't really trust my structural engineering skills to actually build something I could use over the longterm.
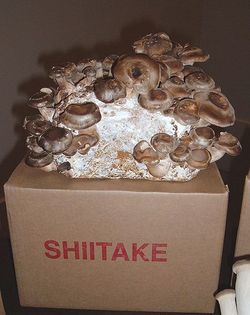
Then I started thinking about what could be done specifically with cardboard, especially within the material and metabolic contexts I'd been thinking about elsewhere. It turns out that oyster mushrooms are particularly easy to spawn in wet, mulched cardboard because their ideal nutrition is a mixture of lignin and cellulose. Plus, I needed some new plants/bio-decoration for the office and oyster mushrooms are also delicious. That's how I ended up designing a very basic storage space for filing and bits for my desk, which doubled as a kind of architectural structure for growing mushrooms. I suppose the tenuous fascination here is with the idea of a house that would eventually eat itself, decomposing and recomposing its materiality into something new. This process will take a few weeks (in time for casting and molding...) but if it works out, it should look pretty dramatic.