3D Printing and Scanning
I anticipated that this week's experiments would be both novel and banal. I've yet to try out 3D printing myself, and I'm excited for the possibilities it presents for distributed, personal manufacture, but I also never really understood all the hype around it as a technology. '3D printing' sounds miraculous, isn't the actuality just extruding a pile of stuff on a plate?
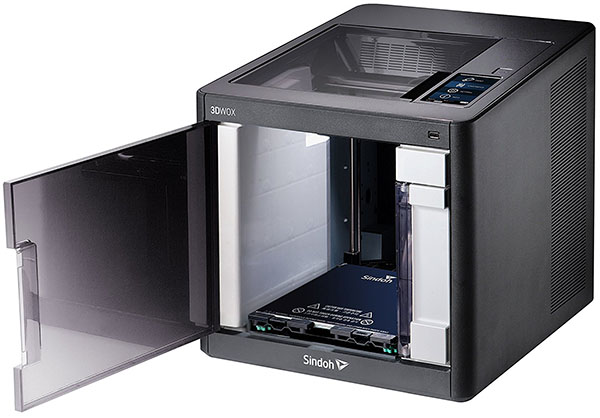
As part of the architecture shop, we had access the the Sindoh 3DWox, a reasonably priced ($1000) Korean printer which houses a closed environment that can control temperature. Neil told us that it was a solid and consistent printer, and it didn't disappoint.
Pulling Some Basic Shapes
Initially, I wasn't sure what to 3D print, but I'm still fairly new to 3D modelling, so I decided to follow some online tutorials and create some abstract shapes.
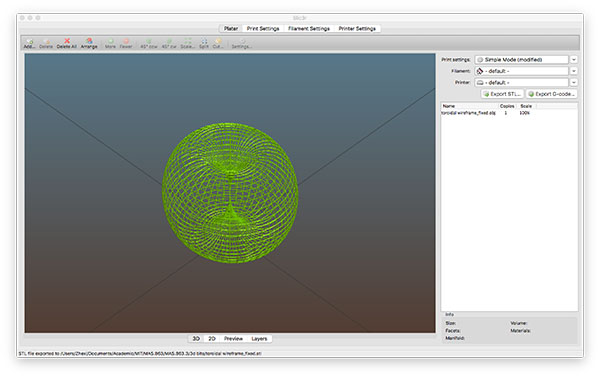
I found that Blender had a nice wireframe modifier, which turned the wireframe mesh of a 3D model into a solid -- turning the edges into solid bars, if you like -- and I played around with the shape of a kind of toroidal vortex. It's just a shape I like, although usually in a more animated form.
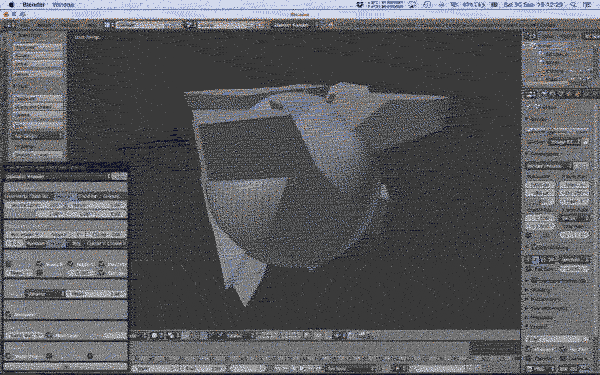
I followed a tutorial using Meshlab and then Blender to create some basic voronoi and other visual effects on solid objects, in this case a simple sphere. The process in Blender involved the use of 'cell fracture' to create the formation, followed by a similar modifier for solidifying the shape. These were pretty boring, to be honest, but it was helpful to learn a few tricks on Blender. Meshlab, on the other hand, I found a bit difficult at first (it's a pretty bare interface with menus that list what seem like every image processing filter and algorithm I've never heard of -- it comes out of a conference, you can tell) but as I got used to it, turned out to be extremely useful. I don't think it's much good for modelling, but many features were great for cleaning up the model for print, more on which later.
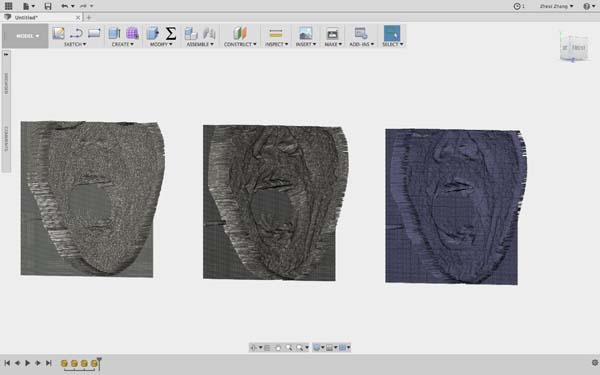
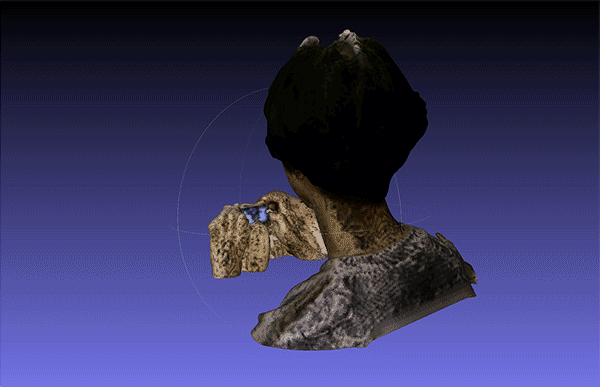
Another test involved a Fusion 360 script I found that turned bitmap tonal values into heightmaps. It was fun to play around with; here you see a 3D relief pulled from a photograph of my gaping maw.
Worm Theory
Eventually, I figured that it might be fun and a bit more interesting to 3D print an object whose shape described a movement through time, such as a sound, a wave-form, or a procedural shape. This was partly inspired by another class with Terry Knight's design and computation group in the department of architecture, where we discussed various philosophies of temporality; in particular, the perdurantists, whose ideas were sometimes known as worm theory (understanding objects extending through time as an earthworm burrows through space). Perdurantists can also be stage theorists, who conceive of time in terms of instantaneous time-slices. It would be nice to be a worm theorist.
Anyway, this got me thinking about slices of time in 3D printing context. The association is quite intuitive if you consider how the printer, using the G-code, generates a cohesive mesh slowly, one layer at a time, effectively slicing it up. This is also the basic mechanism in some forms of 3D scanning, most obviously, "milk scanning", which involves submerging an object incrementally in a plain substance like sugar or milk and taking pictures of its profile, slice by slice, so that they can be put together again later. This is basically how tomography works, too.
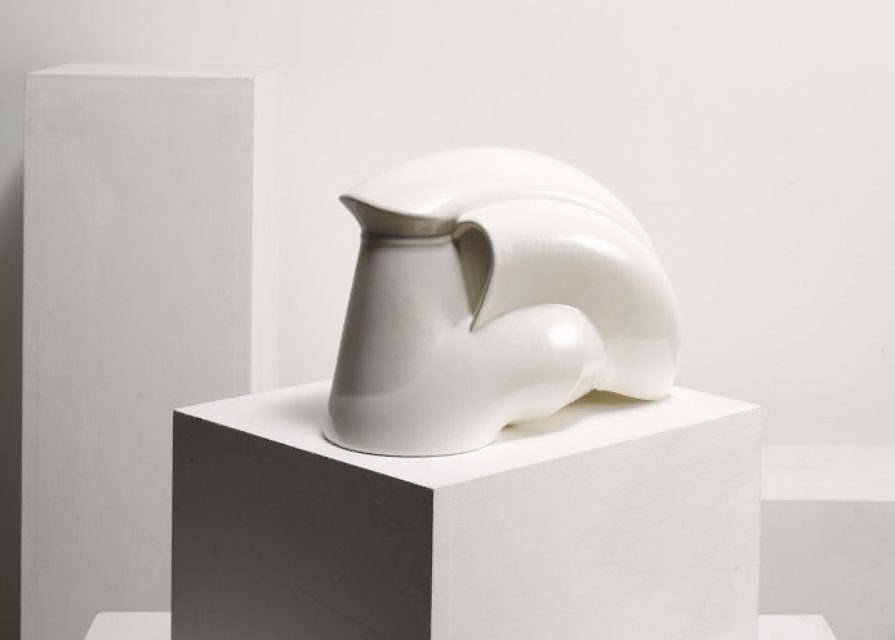
But these methods didn't have to be be limited to static objects - they could also be used to describe temporal changes in a 2-dimensional form, using the 3rd dimension to describe change over time. One quick example of this is this small sculpture by Richard Wilson, in which he creates a simple but elegant form using the movement of a falling jug. Anyway, I had a few possibilities for this. Initially, my plan was create a 3-dimensional sound file, rendering the sound in 2D (like an windows media player visualisation) and stacking them up as a 3D object, possibly with some interpolation between the slices.
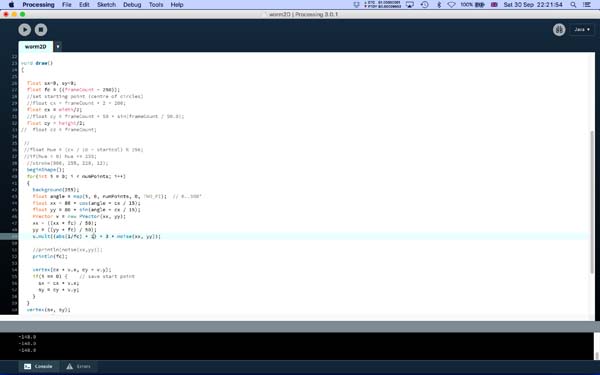
I'm not much of a coder but I have a little familiarity with Processing. (I imagine if I could use Blender with Python this idea might have been better achieved.) I was short on time, inevitably, so I borrowed an existing piece that I liked from the gallery at openprocessing.org: Color smoke" by Gerd Platl, a simple and rather beautiful sketch that draws thin rings, modulated by a little noise, and overlaps them across the screen, creating a fluid, warbling, smoke-like effect. It's just how I imagined a timeworm.
The challenge was how to turn this 2-D visual effect into a set of 3-D co-ordinates that could be turned into an .STL file, either within Processing, or by other means. Secondly, I'd experiment with various audio inputs to replace the noise filter, so that the shape of the ring being generated was responding to a sound.
I tweaked the code so that instead of forming beatiful shapes that floated across the screen to created an illusion of a 3D form, it simply drew the morphing circle in the middle of the sketch, which I knew I could output as individual frames.
Then I tried it with a few excerpts of speech, using the Minim library to add an audio laptop. I tried a bunch of different sounds, including voices, which was what I wanted, but I realised that without a lot of extra work smoothing and slowing the file, the frequency range was too high to create a coherent (and pleasingly fluid) shape. I decided to stick with the noise filter, as it fulfilled both of these categories nicely on its own.
Making Bread
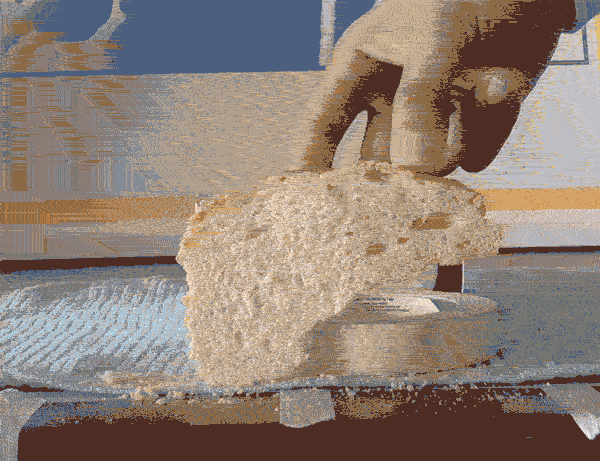
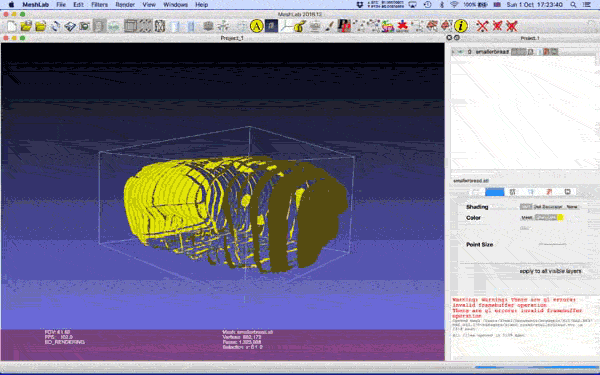
The other assignment for the week was to 3D scan something. My partner, Agnes (who is also in the class) has been making a lot of bread lately, and she realised that it'd be perfect for some destructive scanning. Meanwhile, I was trying to work out how to reconstruct STLs using image slices.
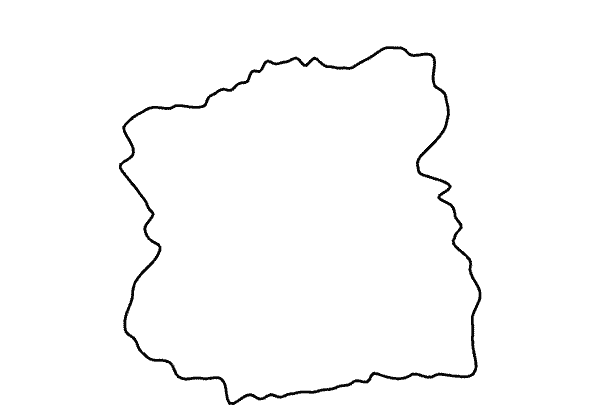
We photographed the loaf each time we cut a slice, keeping it in the same place so we could cut out a series of profiles as a 2D image. We then cleaned up these images using Photoshop.
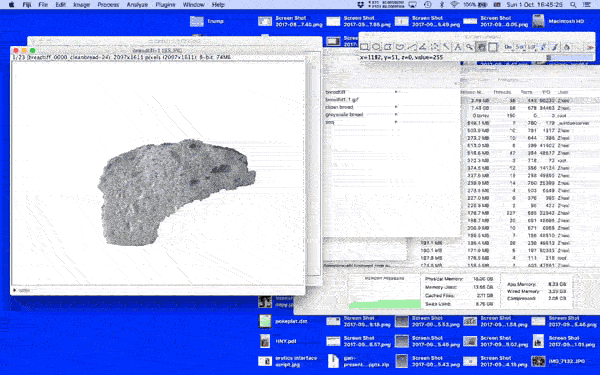
The main challenge was how to reconstruct them. After extensive googling, a number of possibilities emerged. I found a github repository called Got Mesh?, a python programme that uses opencv to do edge detection and reconstruct milk-scanned objects. Thrillingly, the repository comes with a sample scan, of a rock. Unfortunately I wasn't able to get Got Mesh to work, as I had a very messy install of OpenCV had there were some version conflicts.
Many of the options that came up were tools for reconstructing CT scans or similar medical data, which made sense. However, the mainstream standard for this kind of data seemed to be a DICOM file, which was packed with metadata about the medical particularities. I tried out slic3r, a programme for reading such things, but I couldn't get it to behave in the same way with a manually imported bunch of JPEGs.
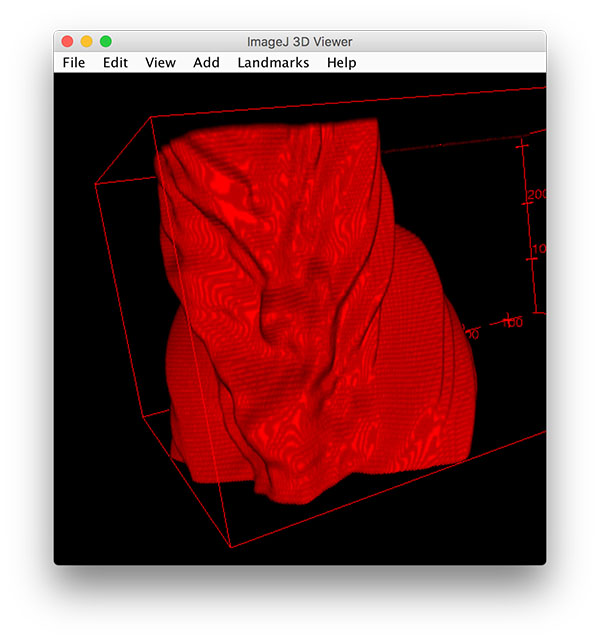
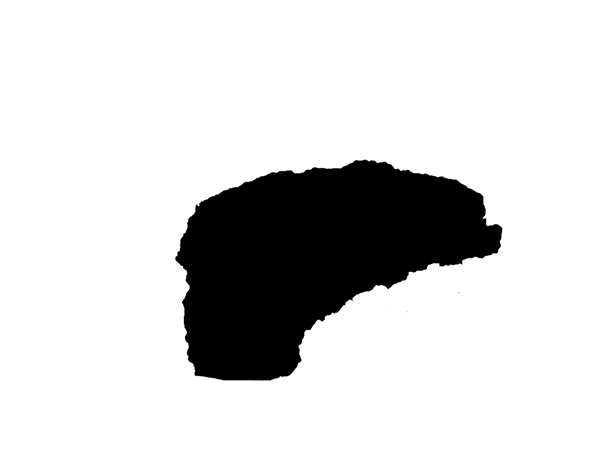
Eventually, I remembered ImageJ, or Fiji, which I had installed from a previous project working with biologists. It's an image processing software primarily used for microscopy formats, as well as CT files (I believe). Aside from crashing a lot, it has a bunch of really useful tools for manipulating stacks of image data. After playing around with it a little, and discovering this tutorial, I learned how to import a TIFF sequence into Fiji as an image stack on which to run an edge detection algorithm. After Fiji had detected edges and separated the object profile from the noise, all we had to do was process it as a binary and export it to the 3D viewer. It took quite a while, but eventually we discovered the voxel depth setting in the properties menu, which allowed us to give a bit of depth to our slices of bread, rather than having each slice only a pixel thick. There was a problem, however, in that the relatively high resolution of the edge meant that the space between slices in the resulting model was made up of incredibly dense, almost parallel-looking edges.
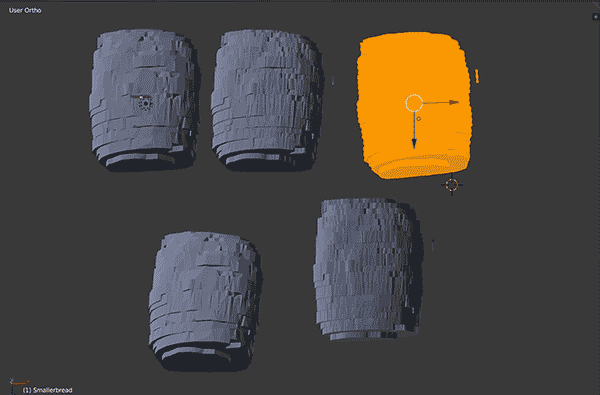
I exported the STL from Fiji and into Meshlab, as well as Blender, in order to play around with the cleaning options. Meshlab turned out to be the most useful, with a great quadric decimation tool which could remove the vast majority of useless edges, as well as a "close holes" tool, which did the self-explanatory thing.
Finally, the STL was loaded into Sindoh's proprietary 3D printing software, with which I added supports to the model. The only hitch was the support material, in the end -- the bread model was uneven on all sides, which gave it character but meant that the support material on the base is almost impossible to get off cleanly. But still, the loaf was printed, and will long outlive its referent, of which a few slices remains in the freezer.