Interface Programming
This week was over the Thanksgiving break so our task was software only. There are a number of things I have been meaning to learn in terms of using javascript for more interesting web interfaces, as well as sockets/websockets-based communication which is just really useful for all kinds of networking projects, especially involving hardware.
I decided to start relatively simple. Looking ahead to the temperature sensor I will need later to make a thermostat, in order to regulate the temperature in my sous-vide machine, I wanted to take the thermistor temperature sensor I made last week and get it to talk to a web interface via websockets. To begin, I had the example of Neil's hello.temp.45.py, which contained the python code for getting serial data out of the ATTiny45. Because the hello.temp.45 board did not have a clock onboard, it might also be necessary to regulate the timing of the bits as they are going to be sent through in quite an unstable fashion. Neil's python code also includes a buffer which arranges the bytes as they come through, and an operation that reads the input when all the preceding bits are in the right place. The task was to translate the python code into javascript for my temperature sensor programme, and then to send it via websockets to a web client. As my guide I had Neil's magnetic sensor code doing the same thing in both javascript and python, so in theory I only had to do the same for the temperature python code.
I found a useful guide to setting up websockets in javascript via some documentation from the ITP programme at NYU.
Installing the libraries
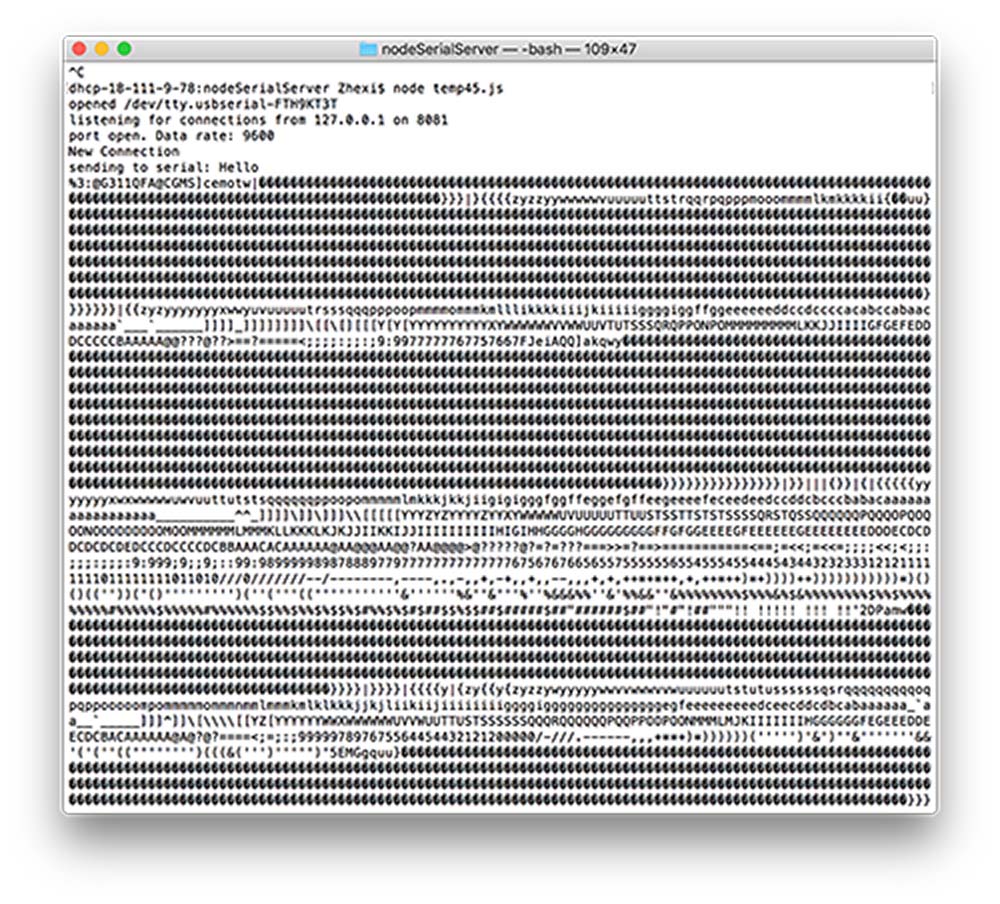
Node.js is the best way to talk to devices through javascript so that the serial data can be broadcast. To begin I had to install a bunch of libraries, along with Node.js, using npm (node package manager). This is all covered in the tutorial linked above, the most important being npm install serialport. I initially had a lot of trouble configuring the serial port to open a new port and actually recognise the /dev/tty.usb-etc device.
The second difficulty was render the serial readings legible as temperature through javascript. There is much about Neil's mathematical operations that I don't understand. However, using console.log(data[0]) and console.log(data), I could see what was coming through as either bad characters or a series of numerical outputs, ranging 1-4 or a value from 0-255. I gather that this has to do with different bytes coming out of the buffer in an asynchronous mess. However I didn't find a good way to re-sort the bits from the buffer in order to filter the 8-bit/0-255 value, which seemed to correspond to voltage/temperature changes, though not at the right scale. In the end I decided to simply use an if statement to only show incoming values that were over 5, which sorted things out a bit but was still far short of a reliable sensor. In the second video, you can see the way in which the buffer pipes the bytes though the buffer, including the 8-bit value, but it's clear that they are far from consistent.
Websockets
Now that I at least had a datastream which was determined by the sensor and was numerically legible, it was necessary to build the sockets. I did this using the ITP guide linked above. The major blocks of code which made up the sockets begins by establishing the component variables of the websocket, including WebSocketServer, which uses nodejs require to load the module 'ws'.
var client_address = '127.0.0.1' // localhost

var serial_port = '/dev/tty.usbserial-FTH9KT3T'

var baud = 9600 // sampling rate for serial

var WebSocketServer = require('ws').Server;

var sp = new SerialPort(serial_port,{baudRate:baud})
Following the data being sent over the serial bus, the following function iterates over an array called 'connections' and broadcasts the stream to each connection:
function broadcast(data) {

 for (myConnection in connections) {

  connections[myConnection].send(data);}}
And the main part of the socket javascript code listens for new connections; identifies new clients and pushes them to the connections array; listens for messages from the client to send back into the serial (in the case of Arduino communication); listens out for when a client closes the connection; and cleans up the connections array by finding the client's position and deleting it from the array.
wss.on('connection', handleConnection);

function handleConnection(client) {
console.log("New Connection"); // you have a new clientconnections.push(client); // add this client to the connections arrayclient.on('message', sendToSerial); // when a client sends a message,client.on('close', function() { // when a client closes its connectionconsole.log("connection closed"); // print it outvar position = connections.indexOf(client); // get the client's position in the arrayconnections.splice(position, 1); // and delete it from the array});}
Client End
With this, I was able to get a rather unstable datastream showing up in the javascript/html.
var text; // variable for the text div you'll create
var socket = new WebSocket("ws://localhost:8081");
// The socket connection needs two event listeners:
function setup() {
  socket.onopen = openSocket;

     socket.onmessage = showData;


     function openSocket() {

      text.html("Socket open");

      socket.send("Hello world");

    }
function showData(result) {
// when the server returns, show the result in the div:
text.html("Sensor reading:" + result.data);
xPos = int(result.data); // convert result to an integer
text.position(xPos, 10); // position the text
}