Make Something Big
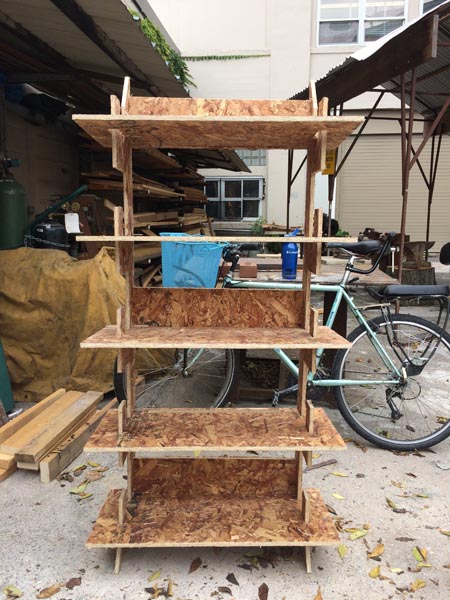
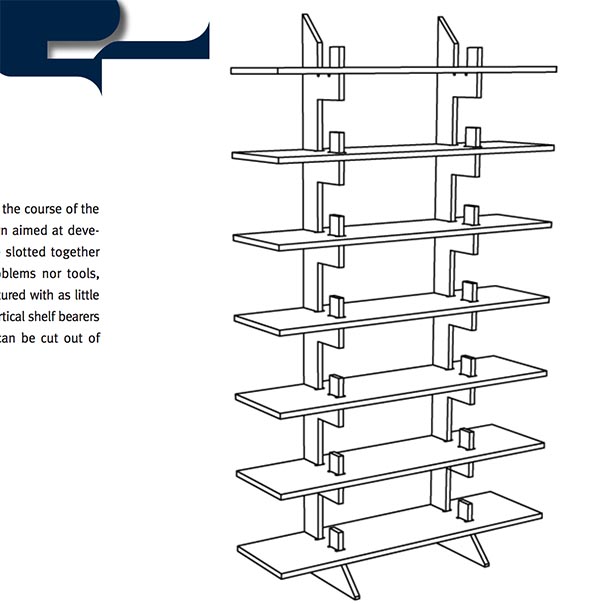
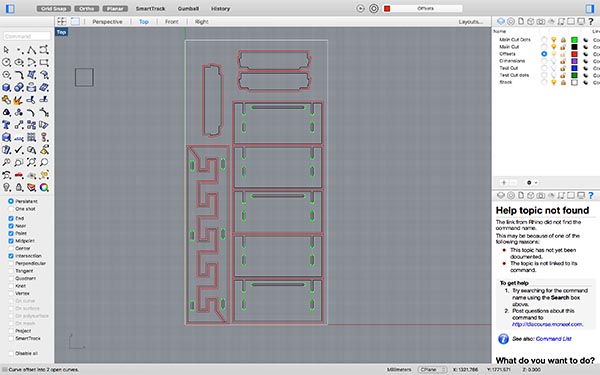
This week I made a shelf. Specifically a shelf inspired by the Meander shelf by C...Lab, a design studio at the design school at Offenbach. They made an incredible amount of research on CNC-friendly wood joints freely available. Since we were using some pretty nasty OSB this week, which is bad for most applications but especially bad at taking load (e.g. as part of a dogbone), I had to forgo the most interesting joints and went for simplicity and consistency with the CNC approach by using press-fit.
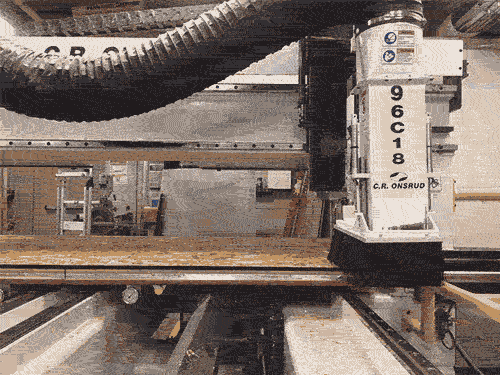
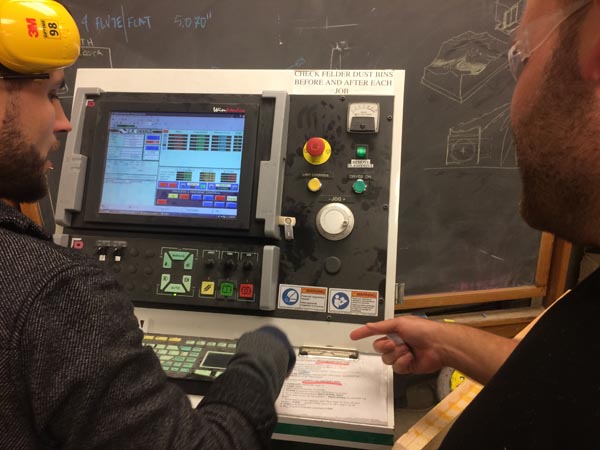
The Meander shelf meant that I could cut the 2 vertical parts from a single piece of wood, and get the most out of the 4' by 8' board and make a shelf that stood about 1.5m (5') tall. CNC'ing was the main challenege this week. As we were in the architects' shop, everyone was instructed to use Mastercam (architects seems fond) to run either the shopbot or the Onsrud at N51. To do this, you make a 2D design, clean it up fastidiously, and use Mastercam to register all the router and tool settings. Then Mastercam simulates a toolpath for you which you can export as a G-code to plug into the router.
Some notes on CNC routering:
Endmills spin like drill bits but they don't drill. They chew away wood in a rotary action, either up or down, or in our case, pull wood into the centre of the endmill.
You need to account for the endmill: its thickness (we used 3/8ths and 1/8th) makes a difference to the design (is it cutting on the inside or the outside of the line, or right in the middle of it?).
Smaller pieces of wood can get flung across the room by the endmill if they get loose, either from the vacuum suction of the bed, or from a larger piece of wood from which it was cut. As such, always make the small and interior cuts first, before moving out to the outlines.
Using Mastercam
First of all, I have learned to love Rhino for its speed and precision, especially in comparison to the stodginess of Fusion. In preparing files for Mastercam it's necessary to make sure there are no duplicate lines sitting on top of one another, and that all the "curves" are closed where necessary (remember, we're turning them into toolpaths). Additionally, it's a good idea to keep your stock, cuts and drill dots (for corners) on different layers.
In Mastercam, you begin by setting up a machine (router) and a tool library of drills and endmills. After this initial setup, you need to set up each set of toolpaths in detail (whether to leave an onion skin, whether compensation sits on the right or the left of the path, etc), and select the paths in your CAD drawing.
 Tool: use No. 1 (3/8ths inch compression bit)
Feed Rate 140
Speed spindle 16000
Plunge is half of fed speed 70
Then you can preview the whole job, which lets you confirm the correct path is being taken with no apprent collisions. You export to a .NC G-code, and voila.
After loading the G-code onto the onsrud (part programme) you need to run the job at a Z-height of 1 inch, so that you can see it going roughly into the right places. If so, hit stop and start again without the Z-shift.
Completion
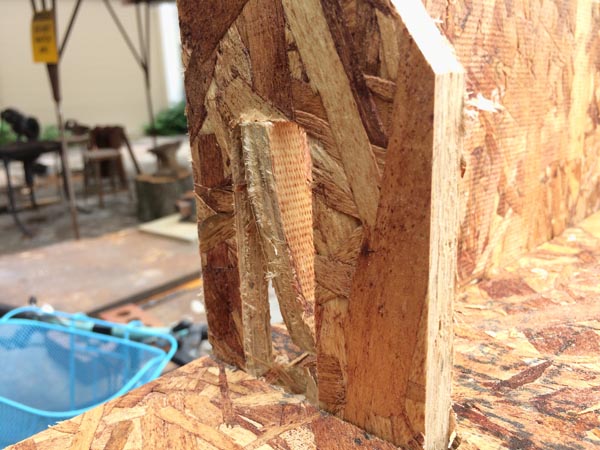
What took a little while was the precise matching of the slots, slats and thicknesses in Rhino, so that the whole thing would fit together. In the end it turned out that my 2mm tolerance for the width of the OSB was actually a little too much, giving it a slight wobble. Another big mistake I made (though thankfully non-critical) is that during my first run I didn't notice that Mastercam had set some of my cuts on the wrong side of the cutting line, thus giving me a much wider cutout than I'd wanted, rendering the slots in question useless for pressfit. Other than that, I'm pretty pleased with how it turned out, though maybe next week will be less utilitarian.