Conception
In the first week, as the syllabus was introduced, it was suggested that we conceive an initial idea for a final project which might utilise the full scope of the techniques covered in the course. This seemed a little daunting, as some of the processes we'd cover in the later weeks were completely new to me.
Given how much time HTMaA was going to take up, I wanted to come up with something that would cohere with my research in the studio. It would also need to be a construction, ideally involving digital and moving mechanical elements. In my current project, I've been exploring ideas around parasitism: systems which attach themselves to others, or appropriate elements of other bodies or environments for their own proliferation. Parasites are structurally interesting because they are often quite simple things; without their hosts, they are incomplete. I've been interested in questions of metabolism: how does the parasitic relation figure as a social and energetic interaction? After all, feeding is a social interface, especially if it's off of one another.
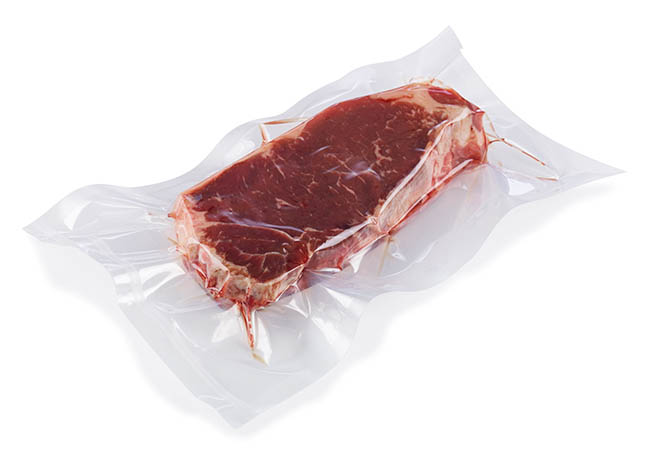
Proof of Steak
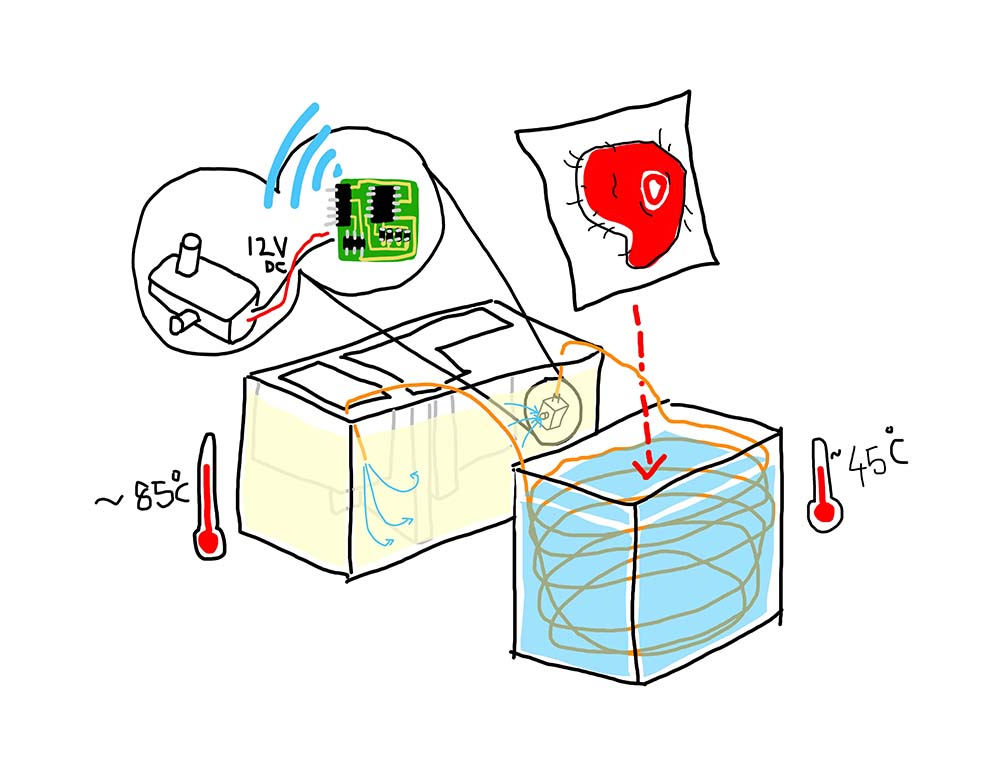
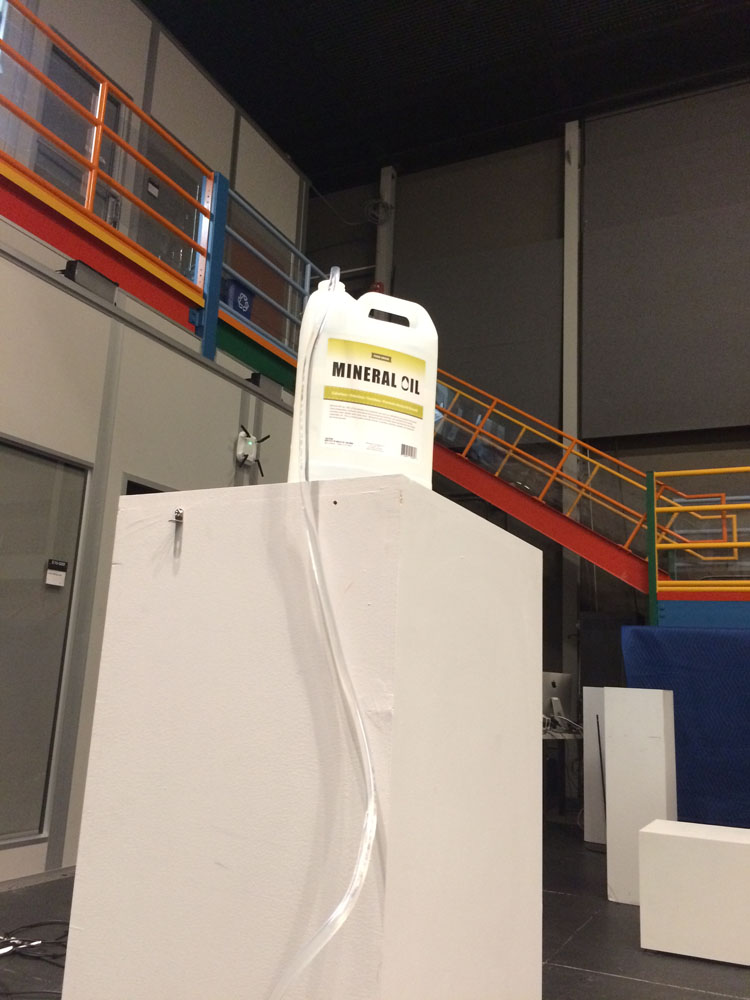
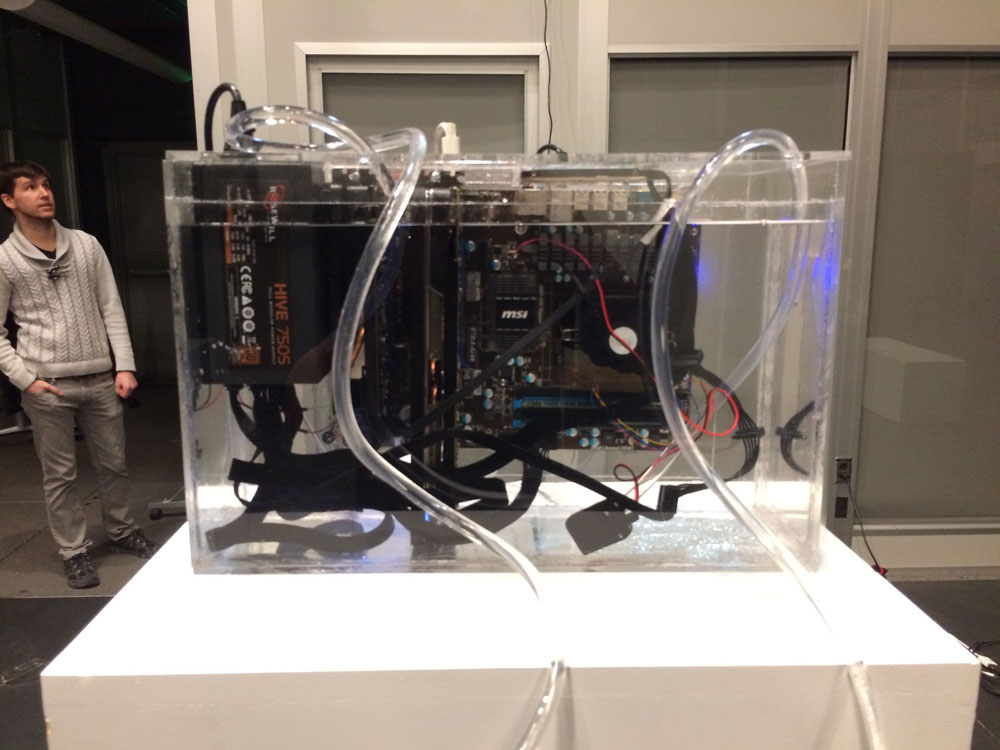
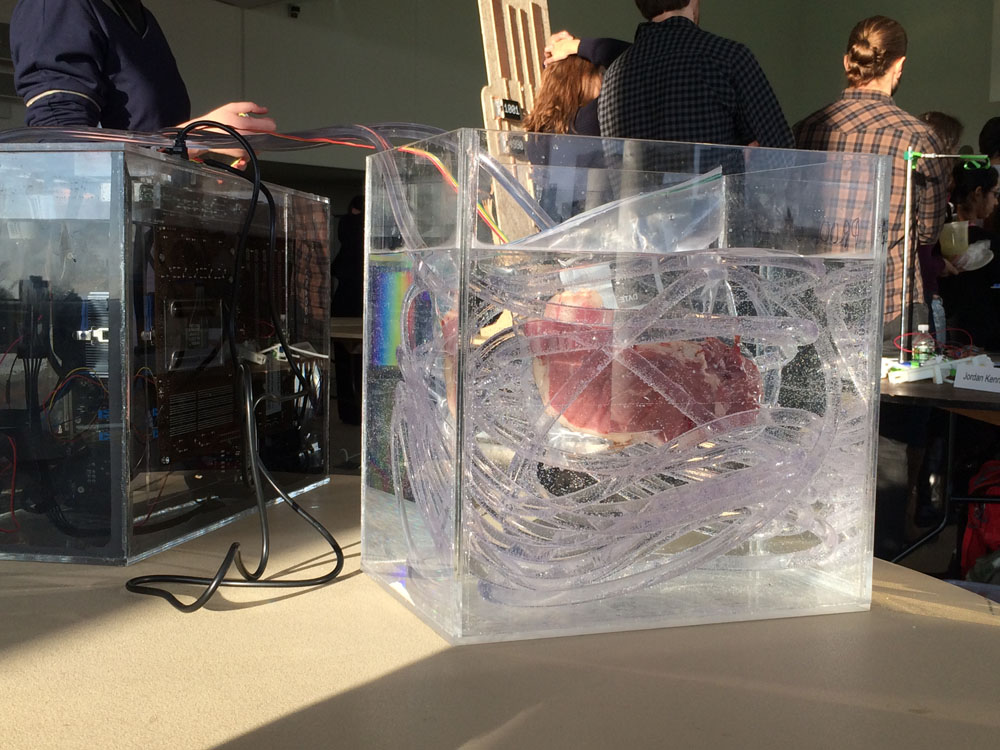
I arrived at a possible project, more of a one-liner than a piece of work: a tank containing a bitcoin mining rig (essentially a couple of GPUs running intensive calculations) submerged within an oil-based cooling system, which gets warm enough (around 60C) to cook meat in the manner of a sous-vide, titled 'proof of steak'. for some time now I've been interested in blockchain protocols and the amount of energy they consume. bitcoin, for example, is projected to use as much energy as a small nation by the end of this decade, because it runs on a 'proof of work' algorithm which essentially involved brute-forcing a very difficult calculation. it takes a lot of energy to run a decentralised system; perhaps trust is a byproduct of heat. 'proof of stake', meanwhile, is a possible (though yet untested) alternative.
3D Drawing
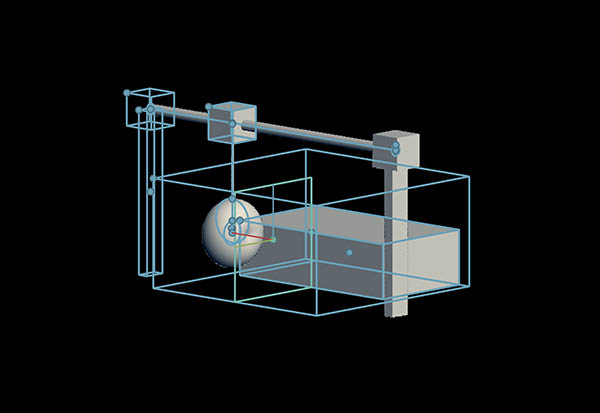
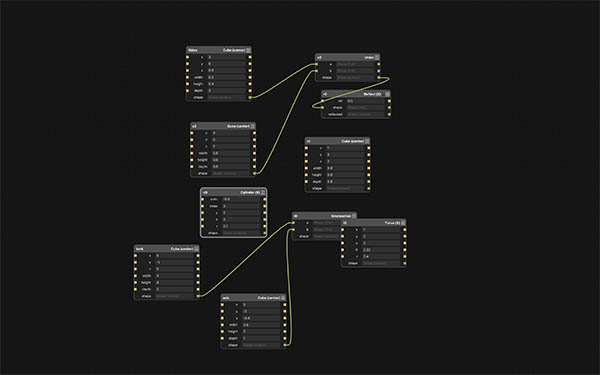
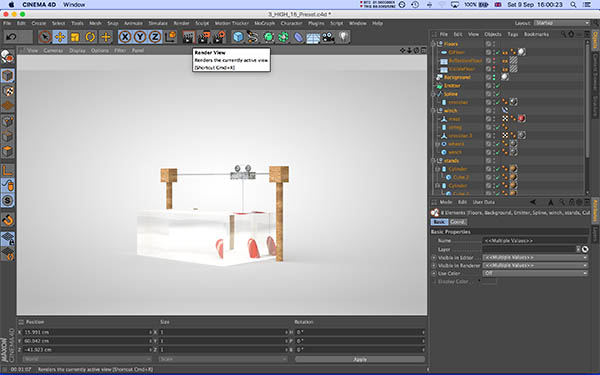
Whether or not I actually end up making this particular project as the weeks wear on, I proceeded with this week's assignment of modelling the thing in a few different kinds of 3D software. The first I tried was Antimony, a simple but quite powerful node-based programme which Neil described using some technical terms I can no longer recall but I am assured that it uses a rather different kind of mathematics to conventional modelling tools. My current design is as simple as can be: the GPU shared the tank with the beef, which is hooked on a small winch which can raise or lower it out of the bath, perhaps according to a timer. In an ideal world, there would be an automated mechanism for vacuum packing and un-packing the meat before and after the cooking process. One for the weeks to come, perhaps.
I also modelled the project in cinema 4D, with which I'm a little familiar. It renders very nicely with but is really more geared towards making animations. My favourite software to use was probably Autodesk's Fusion 360, which seems like a pretty good all round package for CAD work. It's clunky and quite frustrating at times, but it is at least intuitive to learn; plus, apparently the industry is moving towards packages like Fusion. I admit I tried freeCAD but found the interface quite challenging - it might be worth learning if I have more time in future.
Spiral Development
Planning the tank
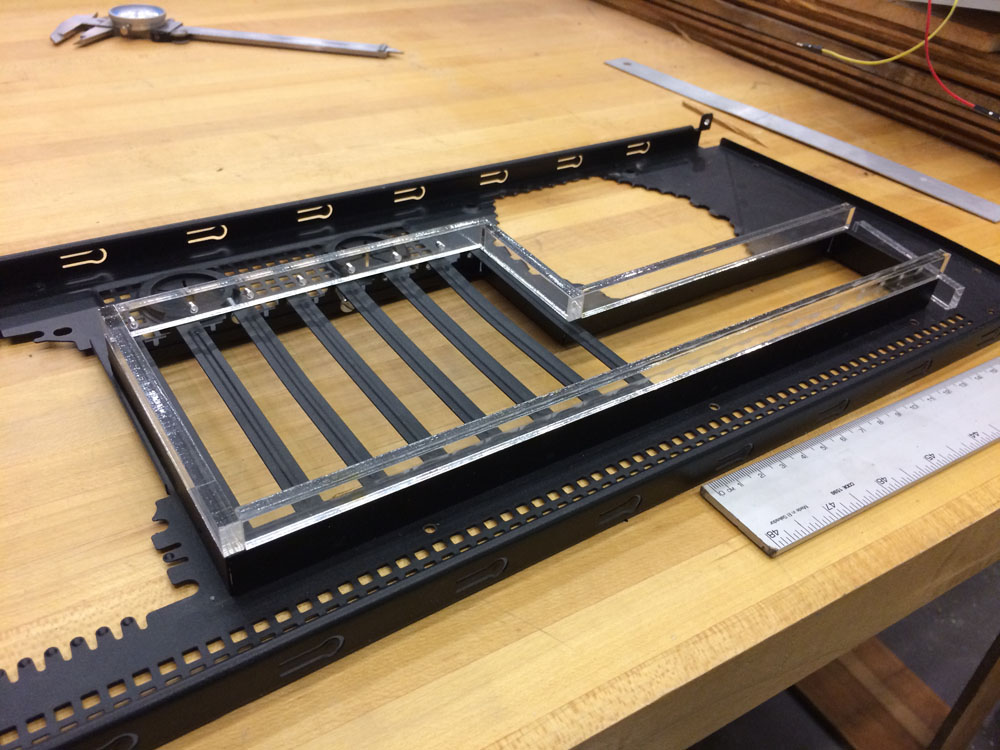
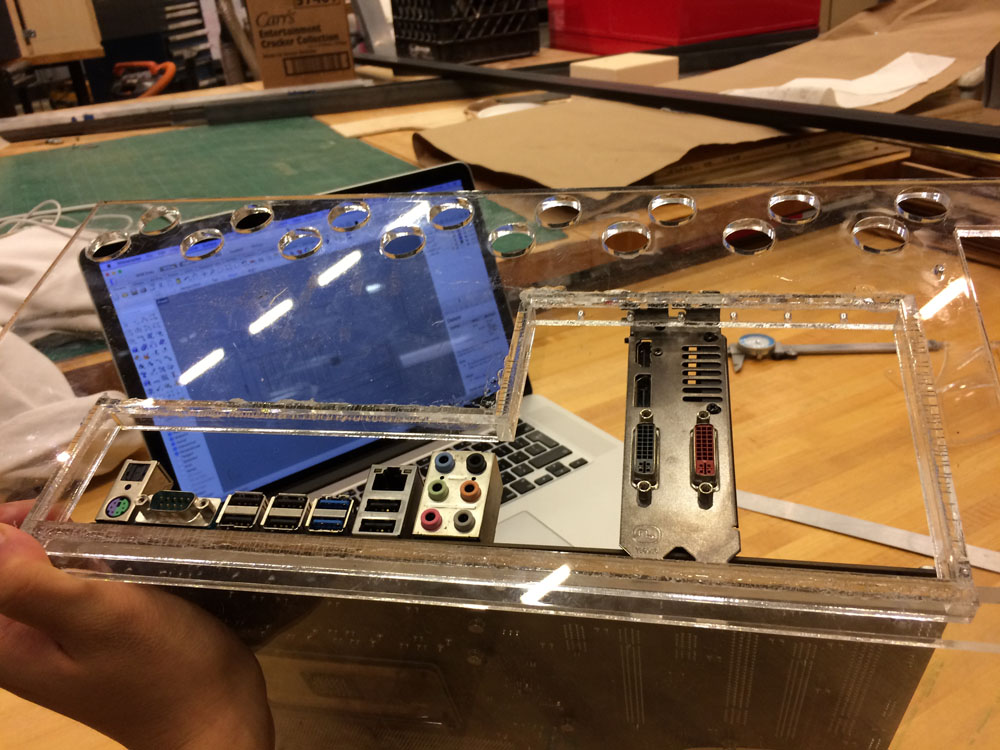
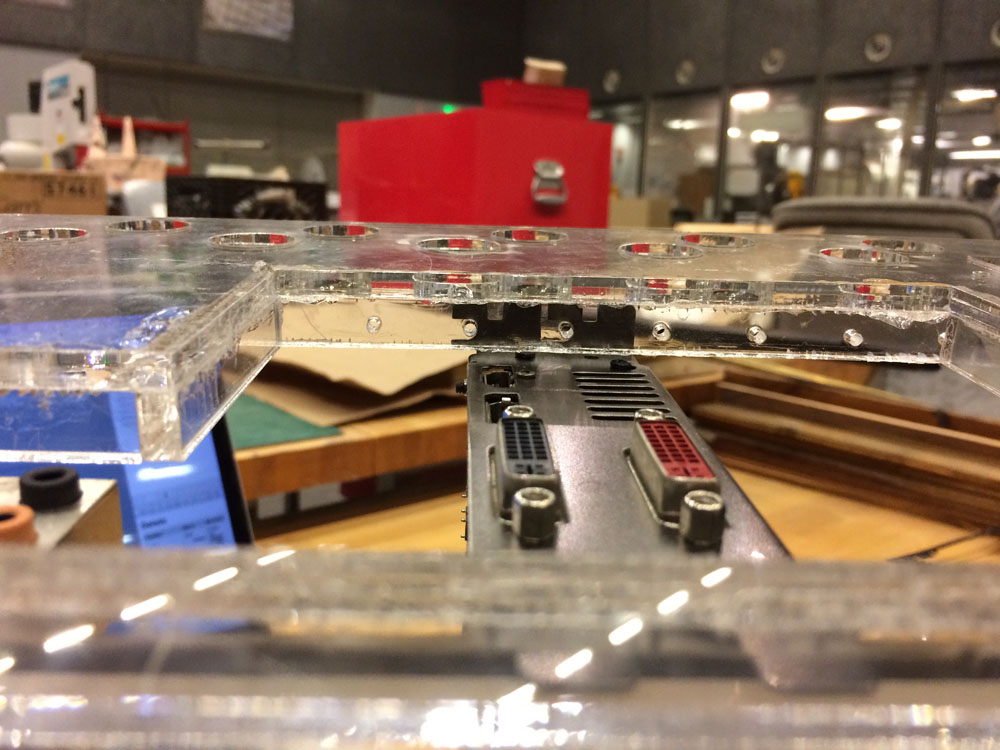
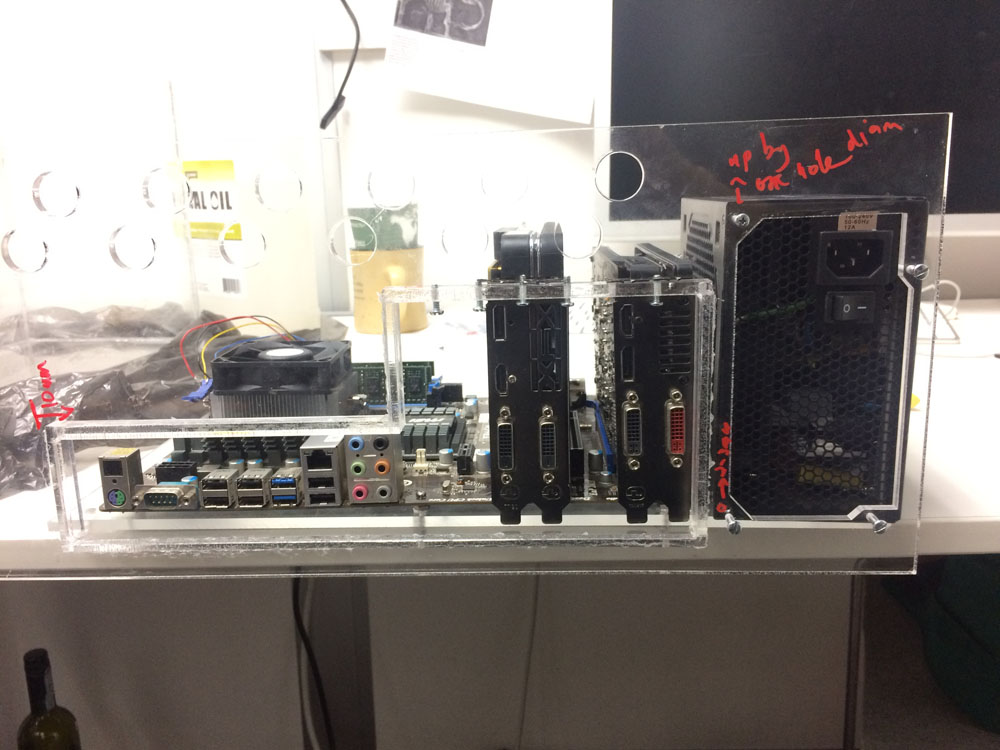
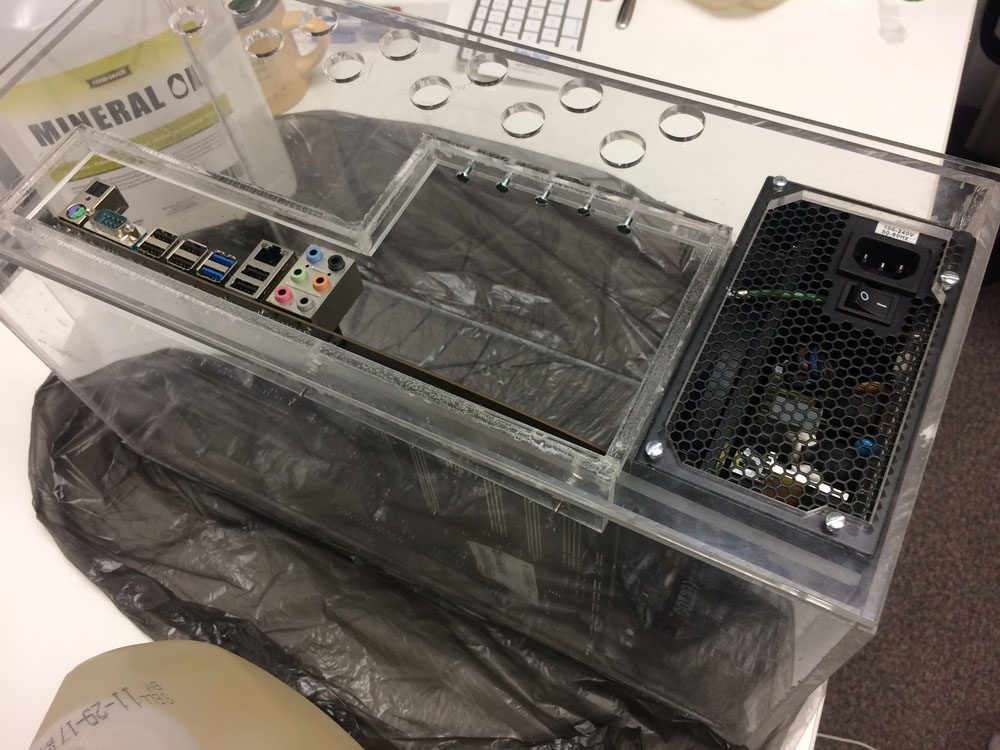
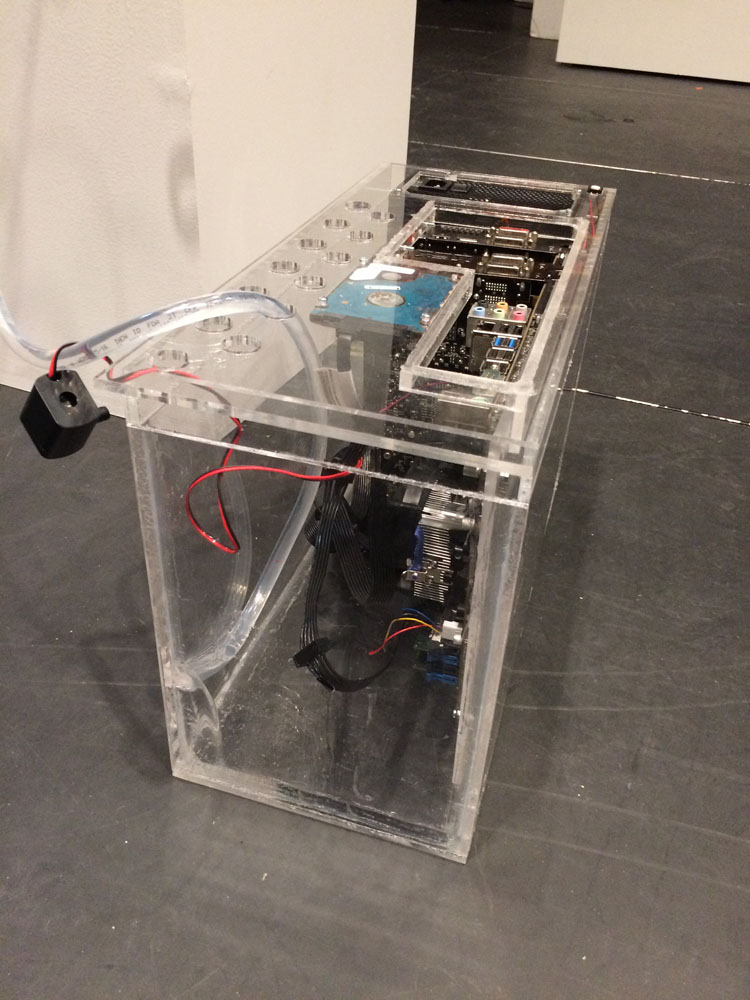
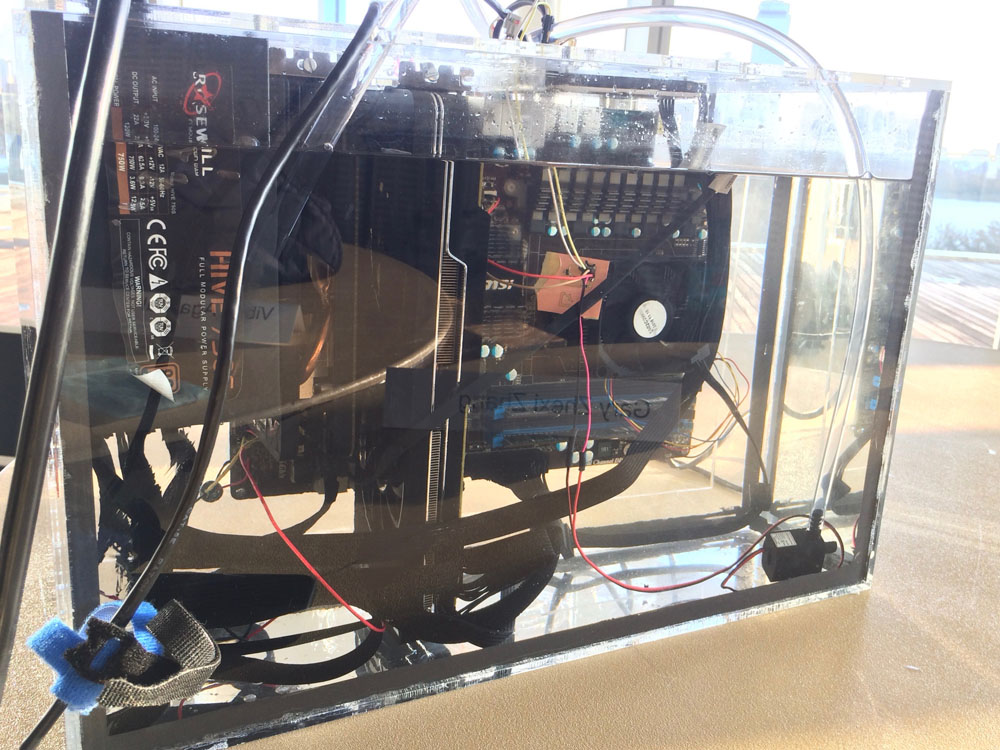
The main tank would need to house a conventional computer with a standard ATX motherboard, which meant that the I/O side of the computer case would have to remodelled in such a way that it could support the weight of a computer hanging vertically from the lid of the tank. Although all the of sizes were standard, making this out of 5.6m acrylic instead of thin sheet metal meant that all of the measurements would need to be altered to accommodate the thickness, which was especially tricky in the elevated parts of the ATX geometry. I was able to draw on various CAD models for some of dimensions but much had to be modelled by hand.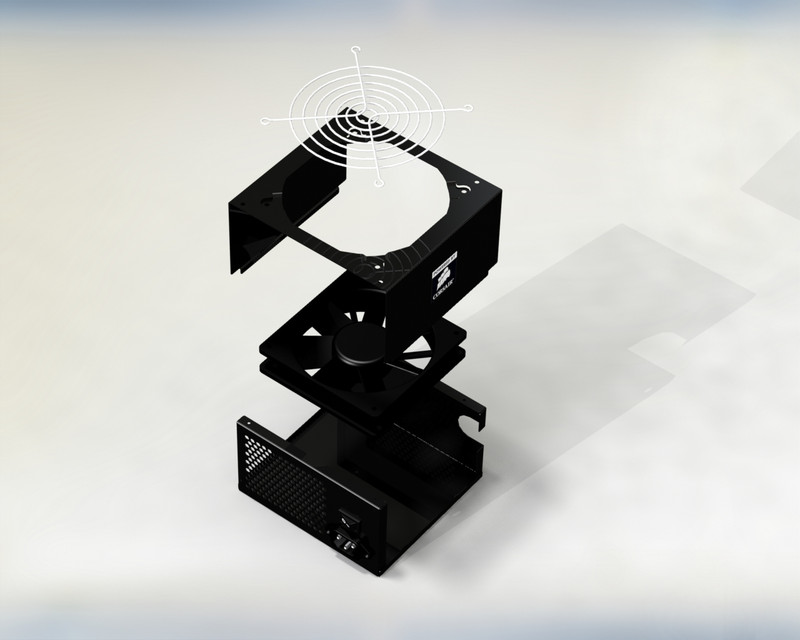
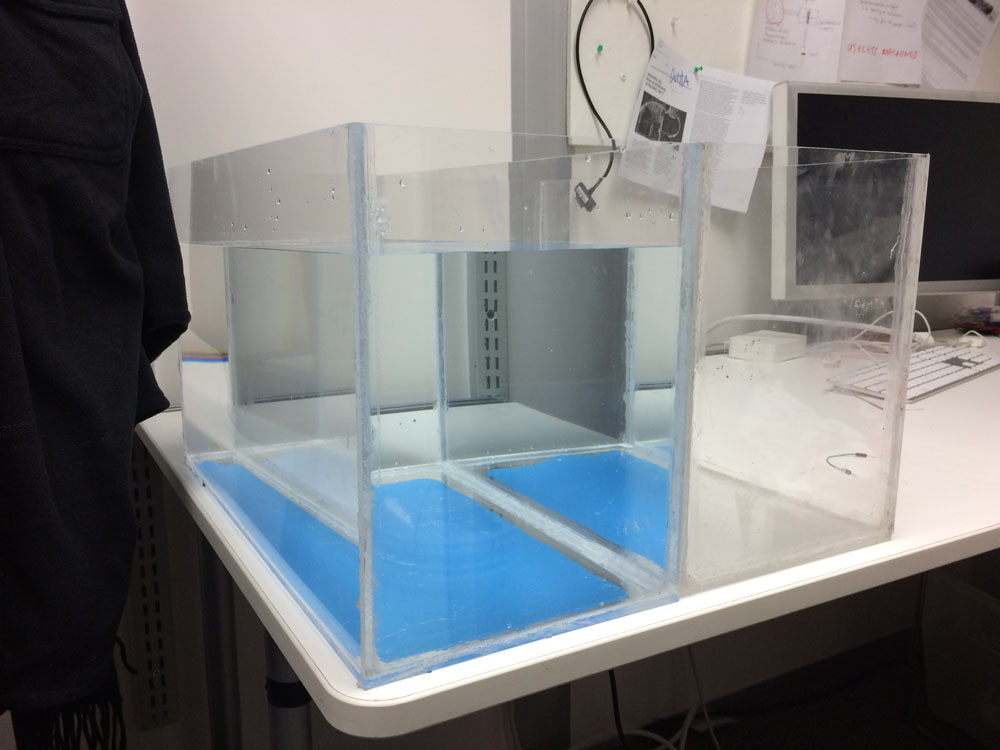
Building the tank
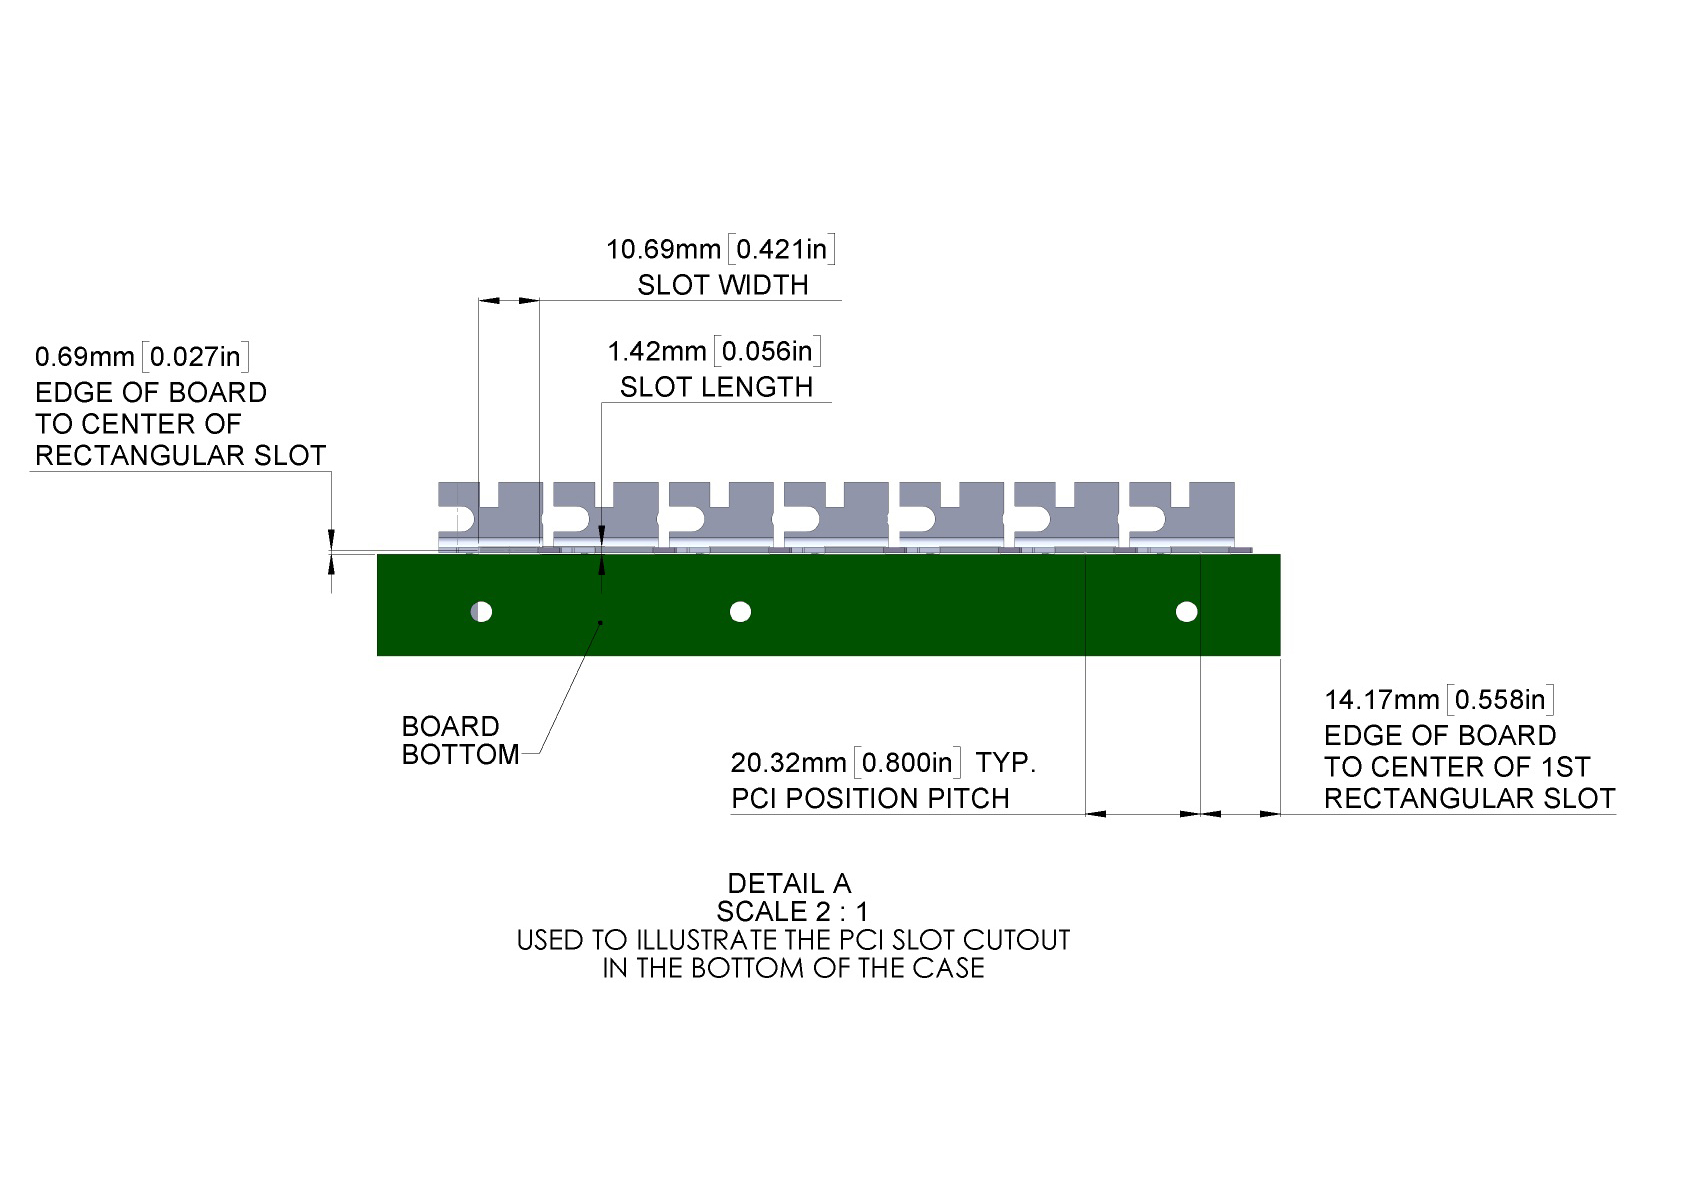 Detailed dimensions for the PCI ports.
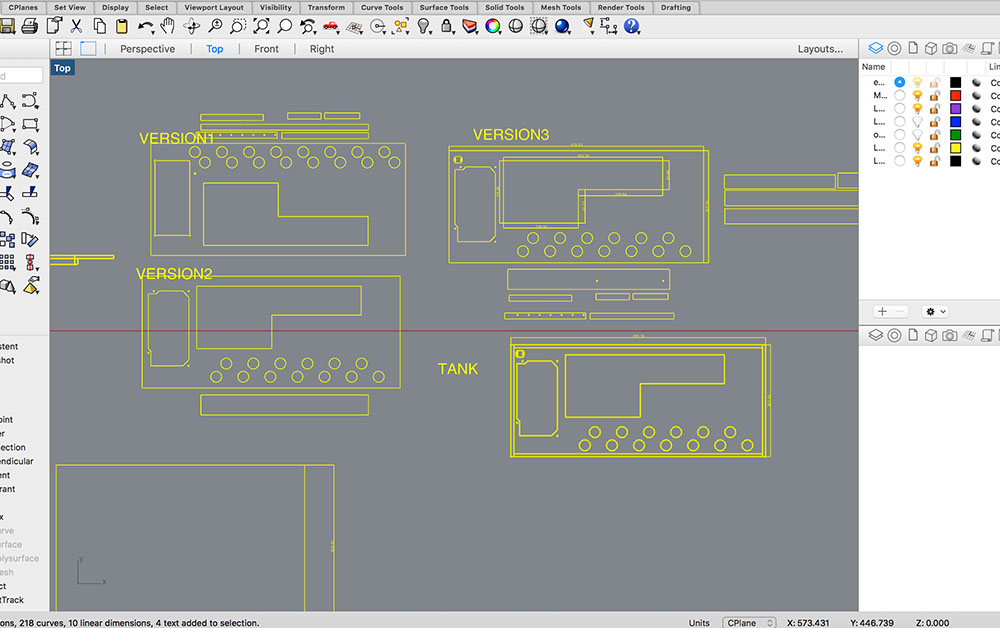
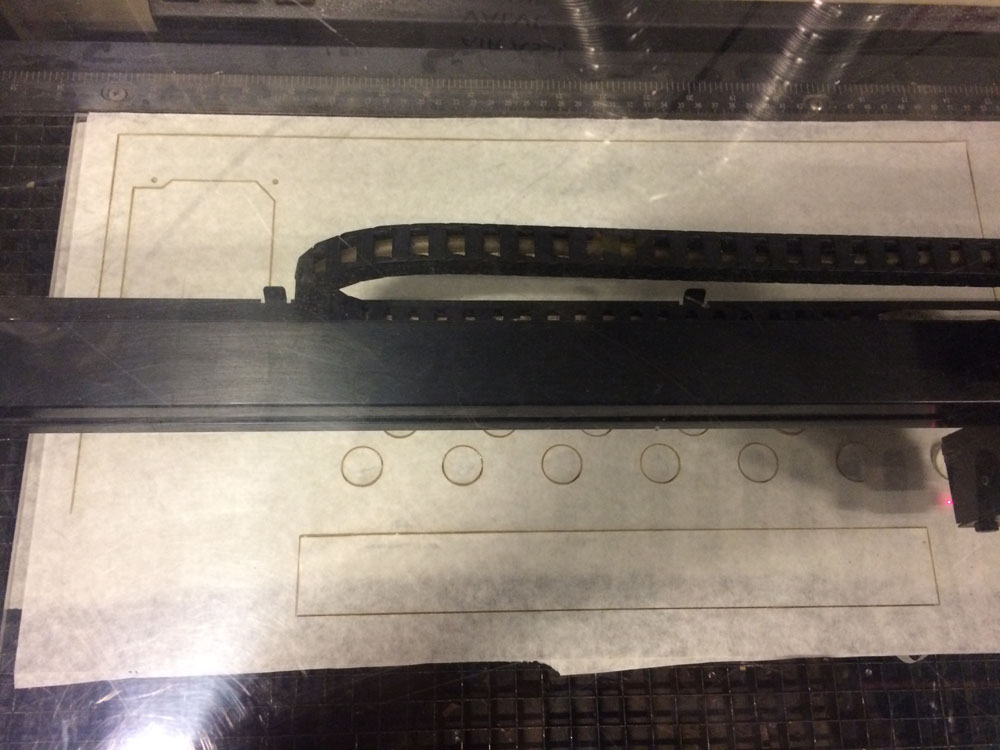
Various iterations
Simplified geometry
Modelling with a standard power supply
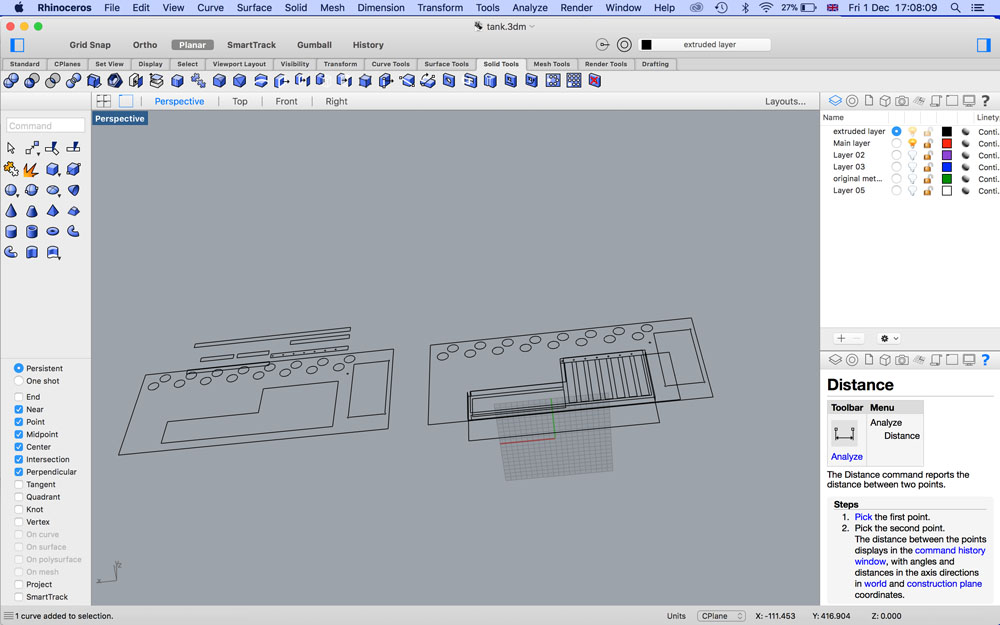
layout for CAD
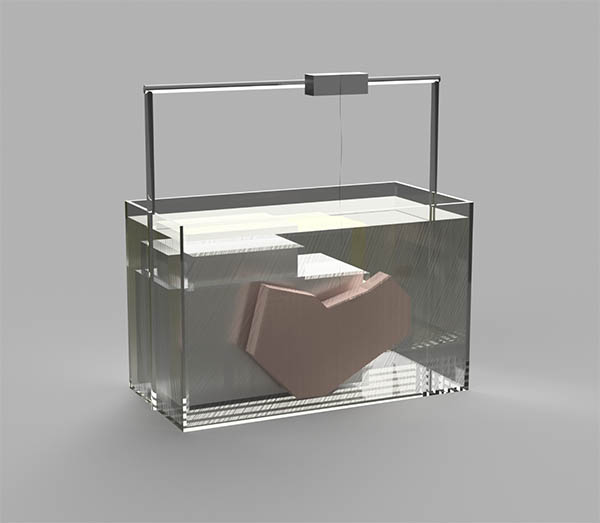
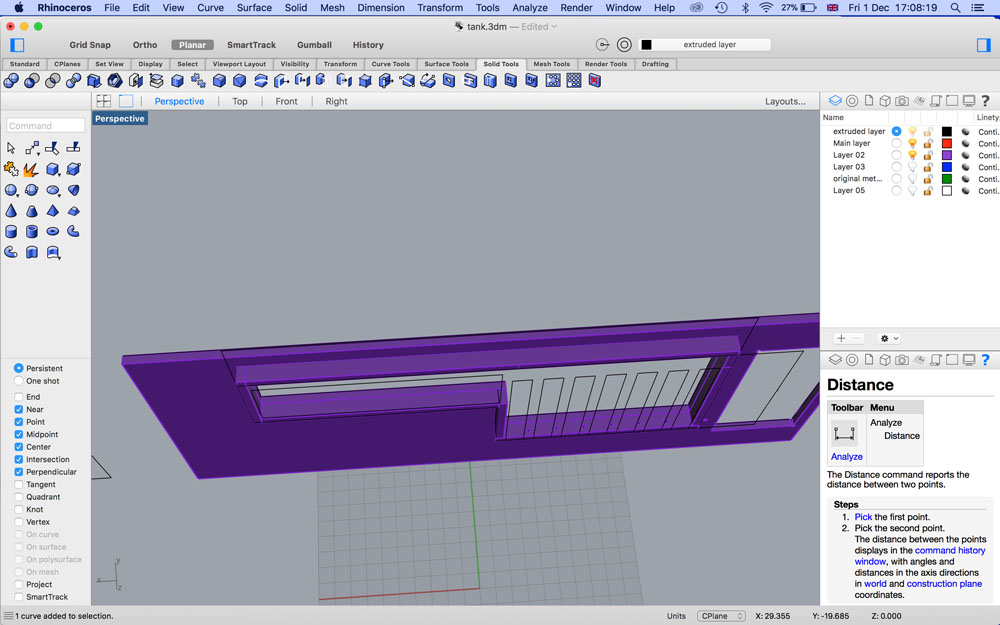
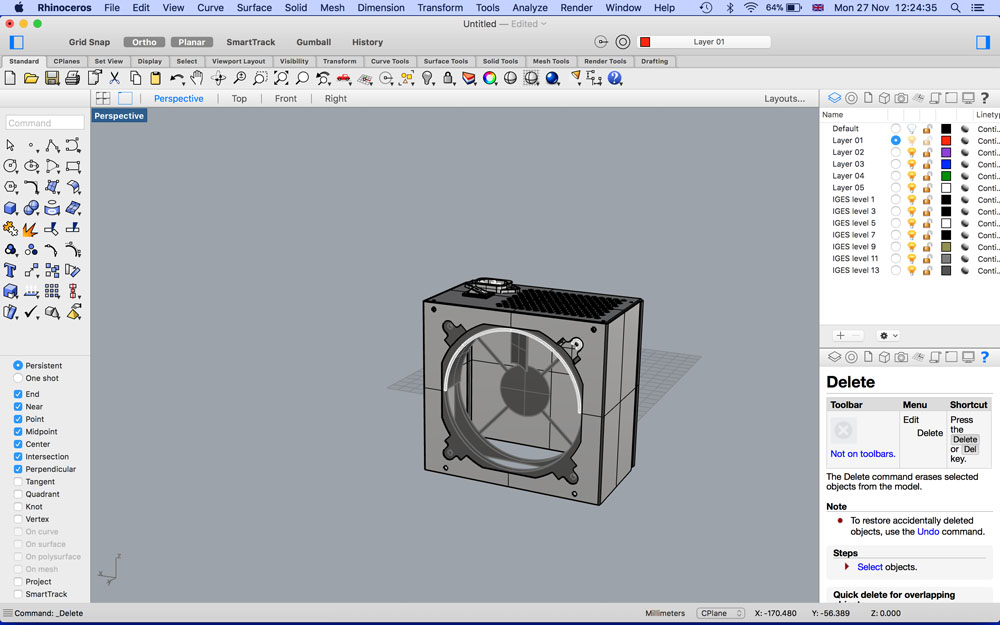
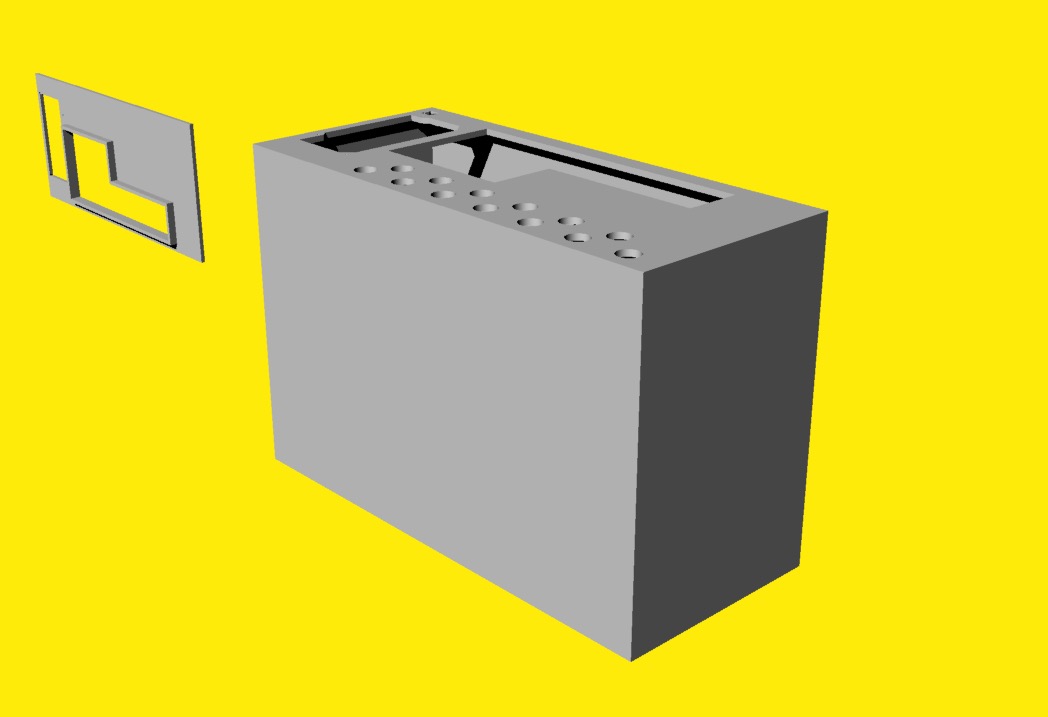 Rendered model
Assembly
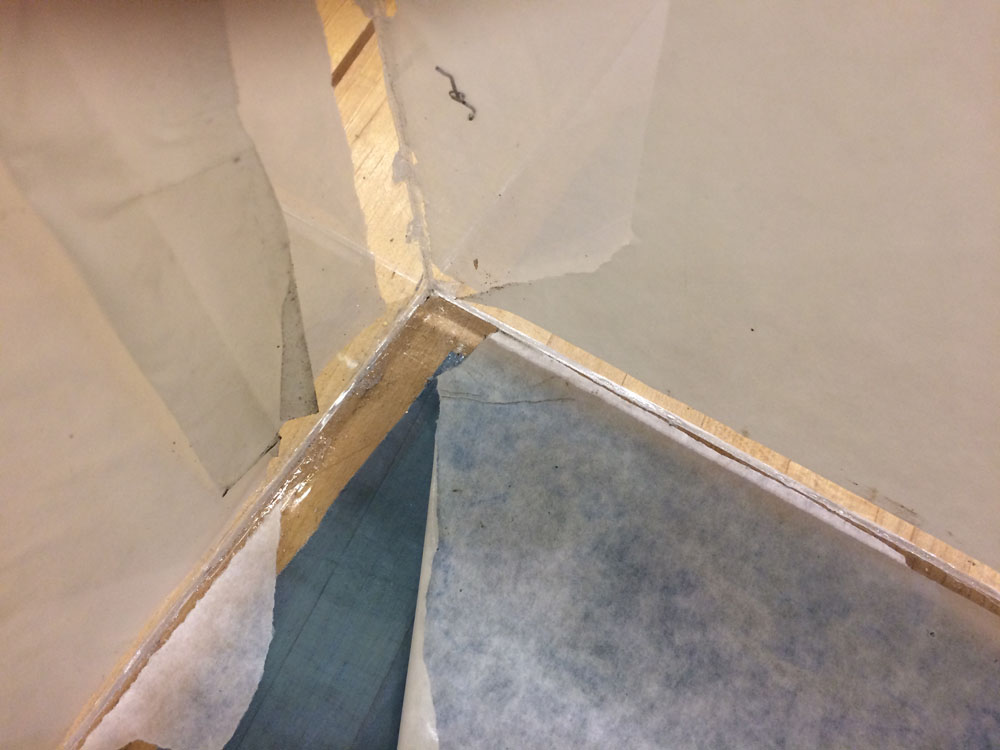
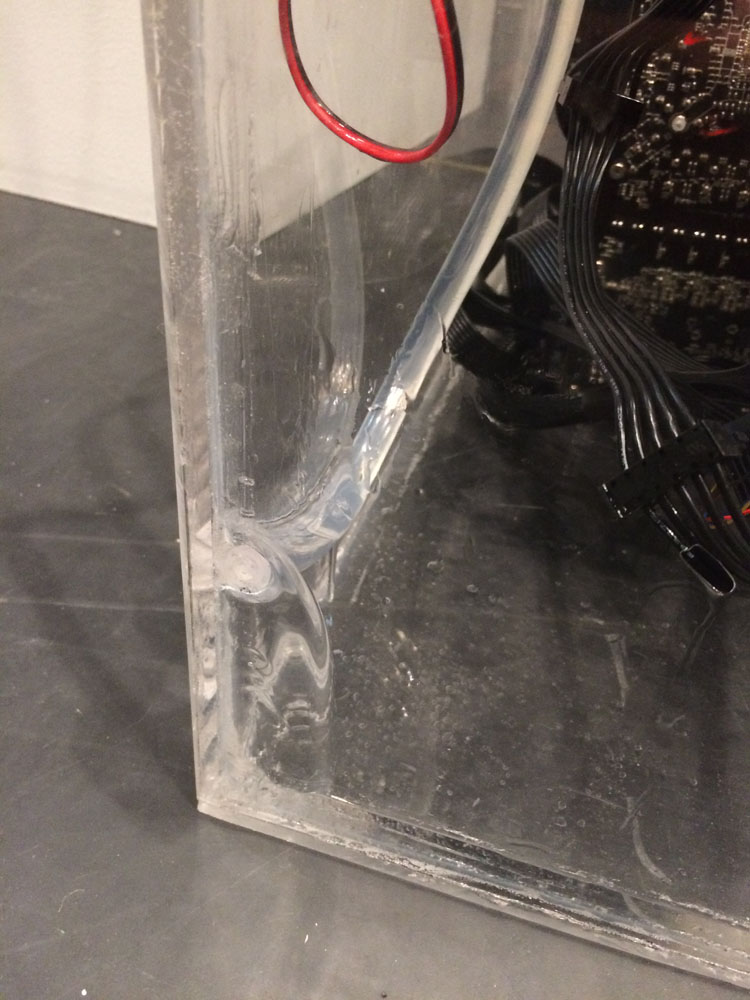
The tank was assembled with acrylic cement, and sealed with silicon sealant (Dow Industrial Grade Corning), although at this point I already had a mild concern about the effects of mineral oil (relatively inert as it is) on this kind of silicon, which it might gradually dissolve.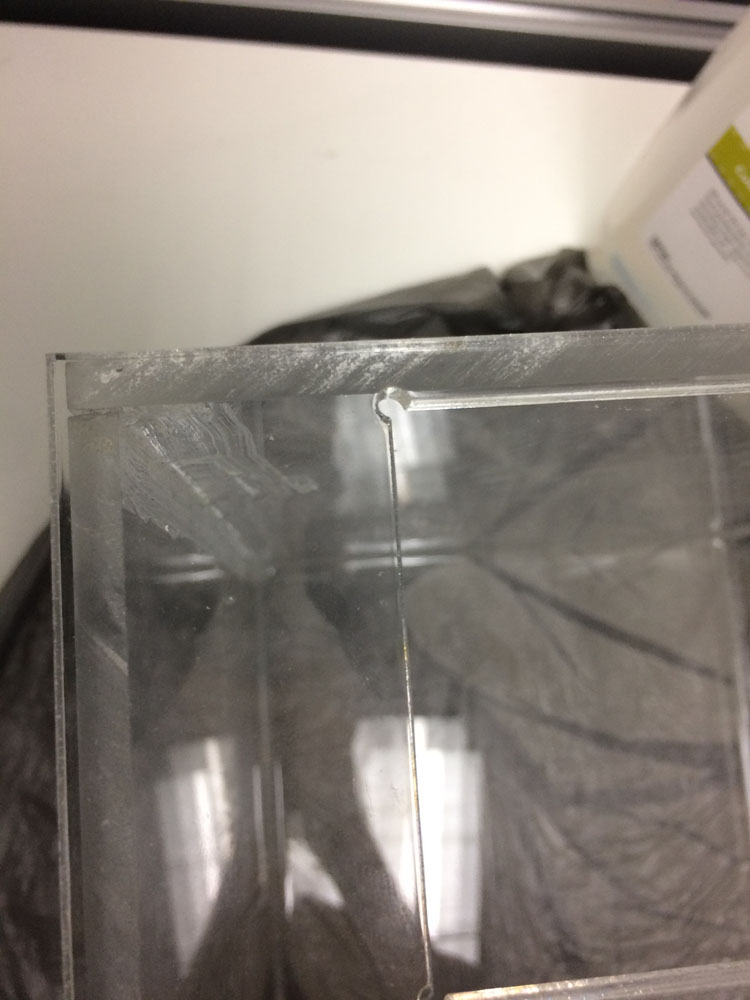
Details and Iterations
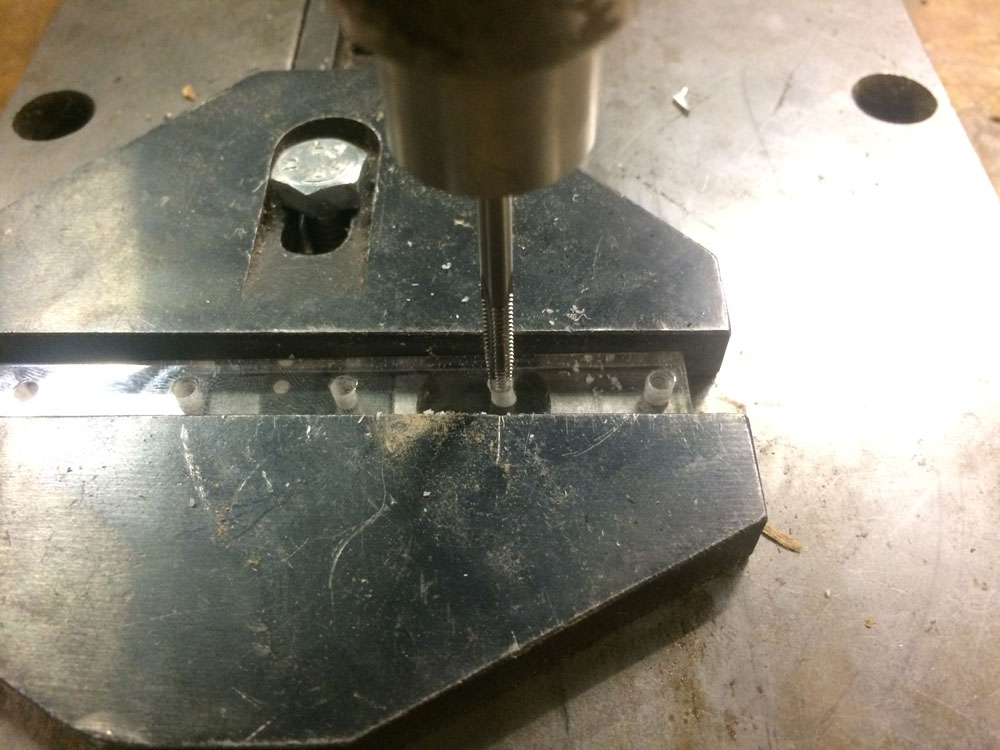
Tapping the 6-32 threads.
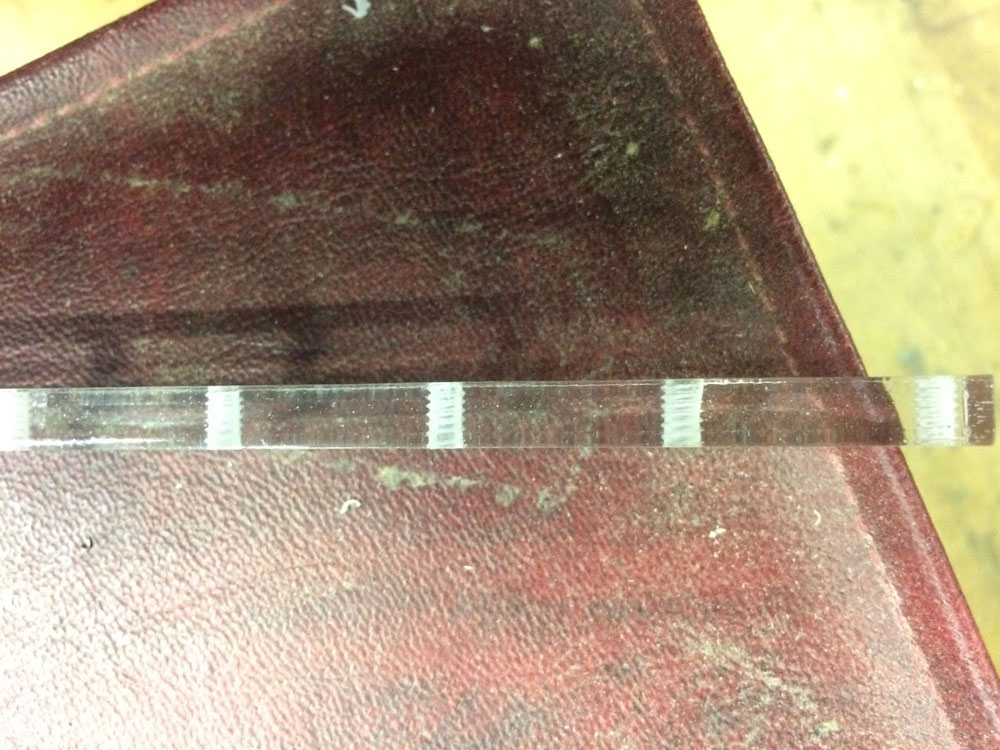
Thread details.
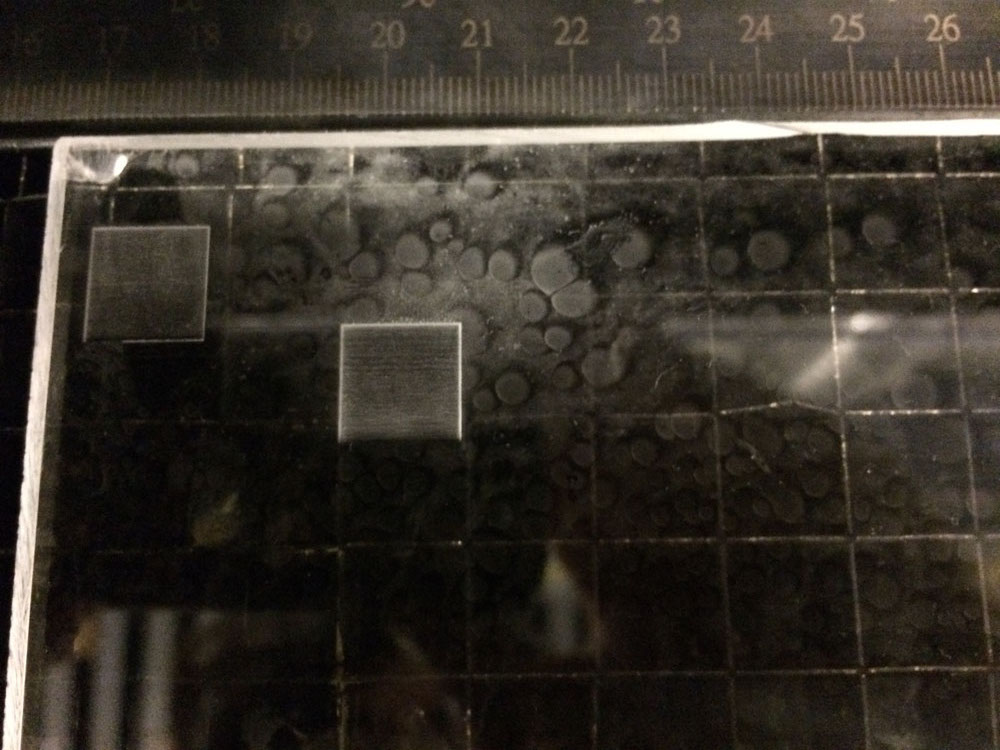
Lasercut raster inset for the switch.
Laser settings (GCC): 0.5 speed, max power, 800DPI.
The threads finally match up well!
Marked for changes.
Power supply screws on, just about.
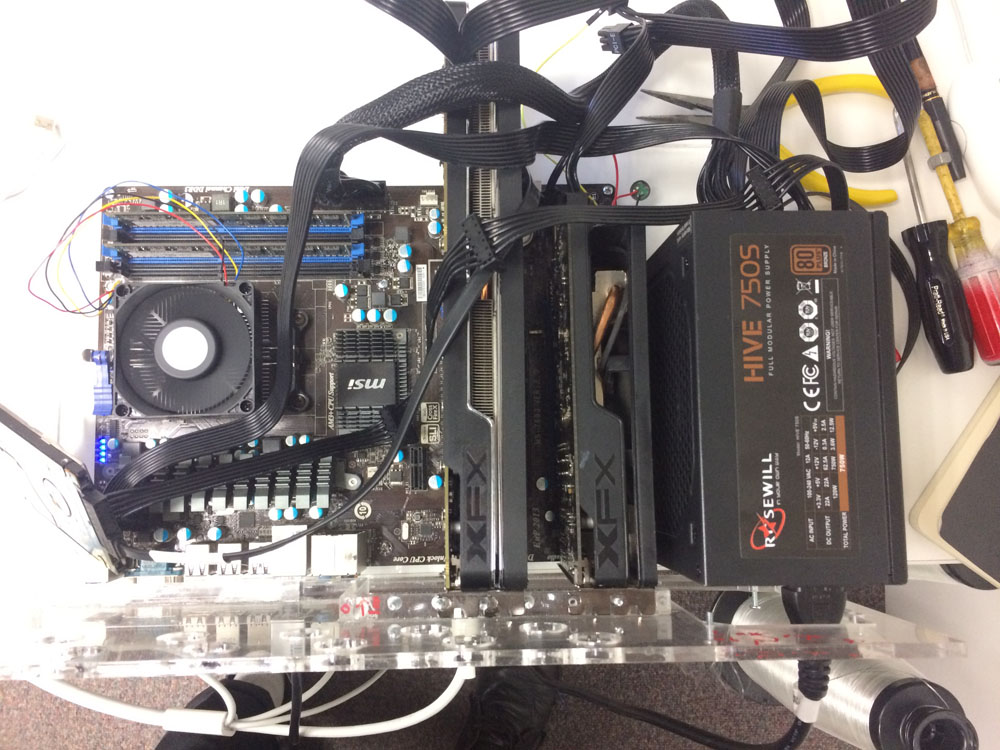
New 2nd hand GPU (R9 290) finally arrived.
Submergence
Starting to fill it up with oil.
It still turns on!
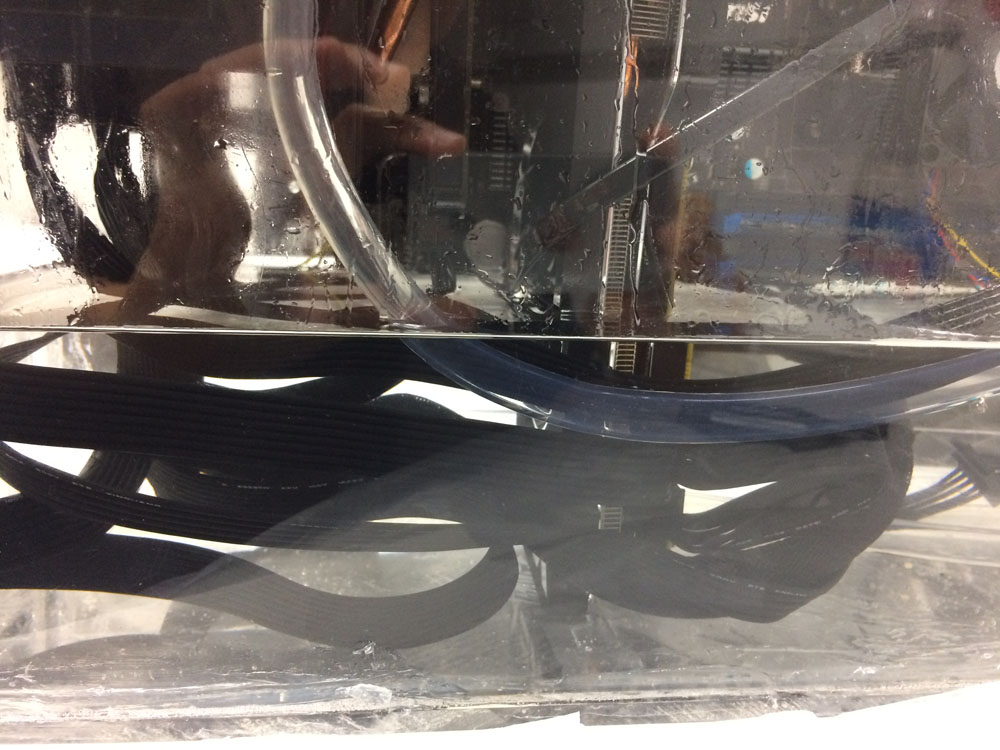 Half full..
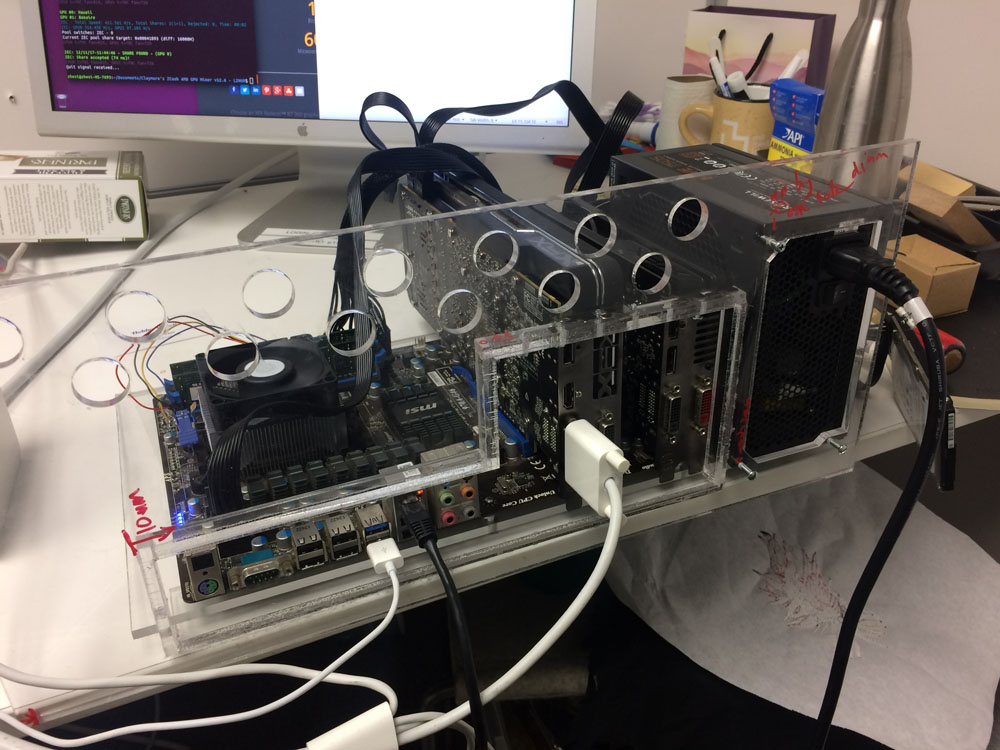
 Mining away!
Remaining Tank issues
After an initial test run demonstrating that the tank was now quite well-fitted, and heated up nicely, there were still a number of issues to be addressed. I wanted to clean up the fitting for a better finish, add an on/off switch to the motherboard jumper cables, and fix a very minor leak, from which a couple of millilitres of oil seeemd to seep from the tank every hour or so. Since I'd applied three layers of silicon sealant already, I could only conclude that the mineral oil was eating away at and penetrating the seams of the sealant, meaning I'd have to find another sealing solution. After a little searcing around a I got hold of some gasket maker/adhesive/sealant which claimed to be oil resistant as well as capable of withstanding very high temperatures.
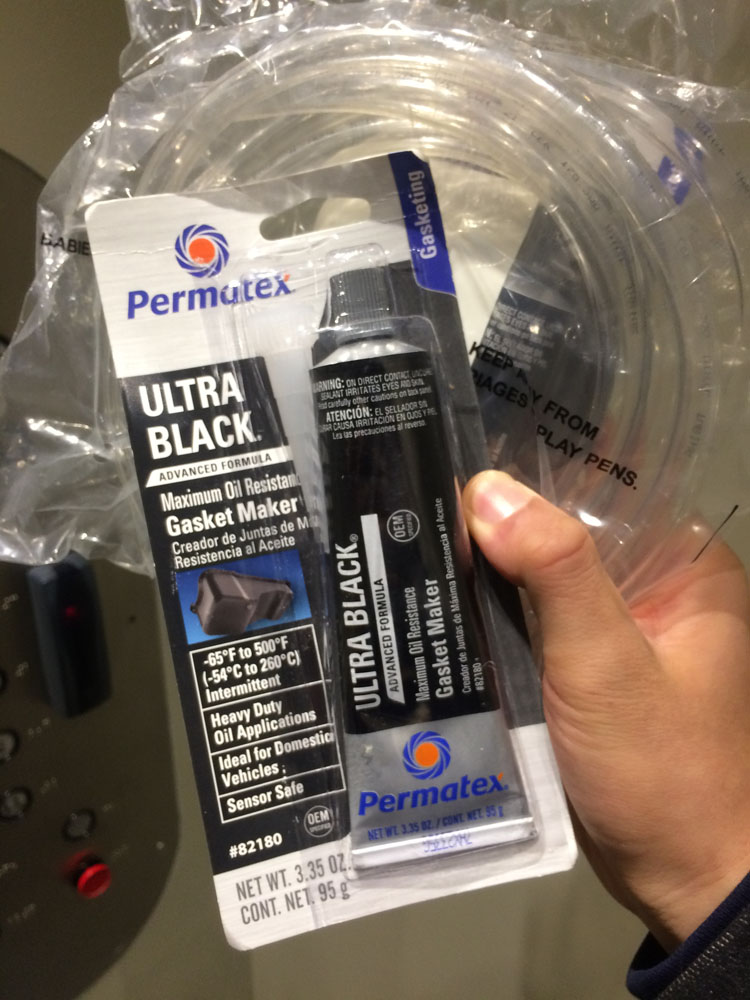 Sealant, oil proof.
A leak!
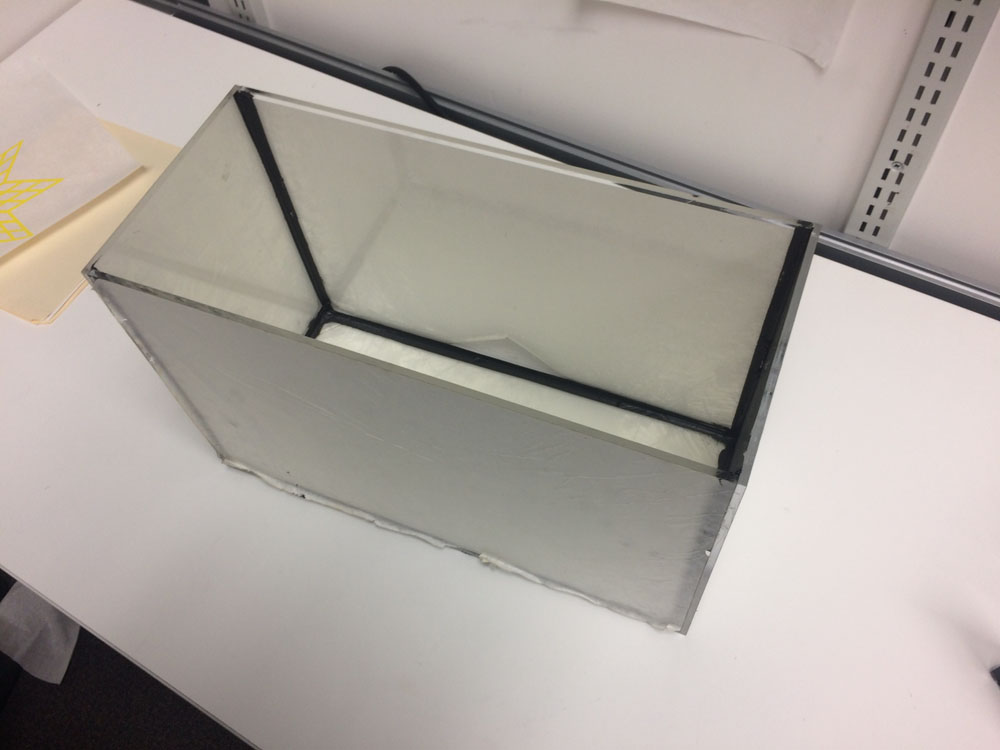
The gasket-sealed tank.
Electronics
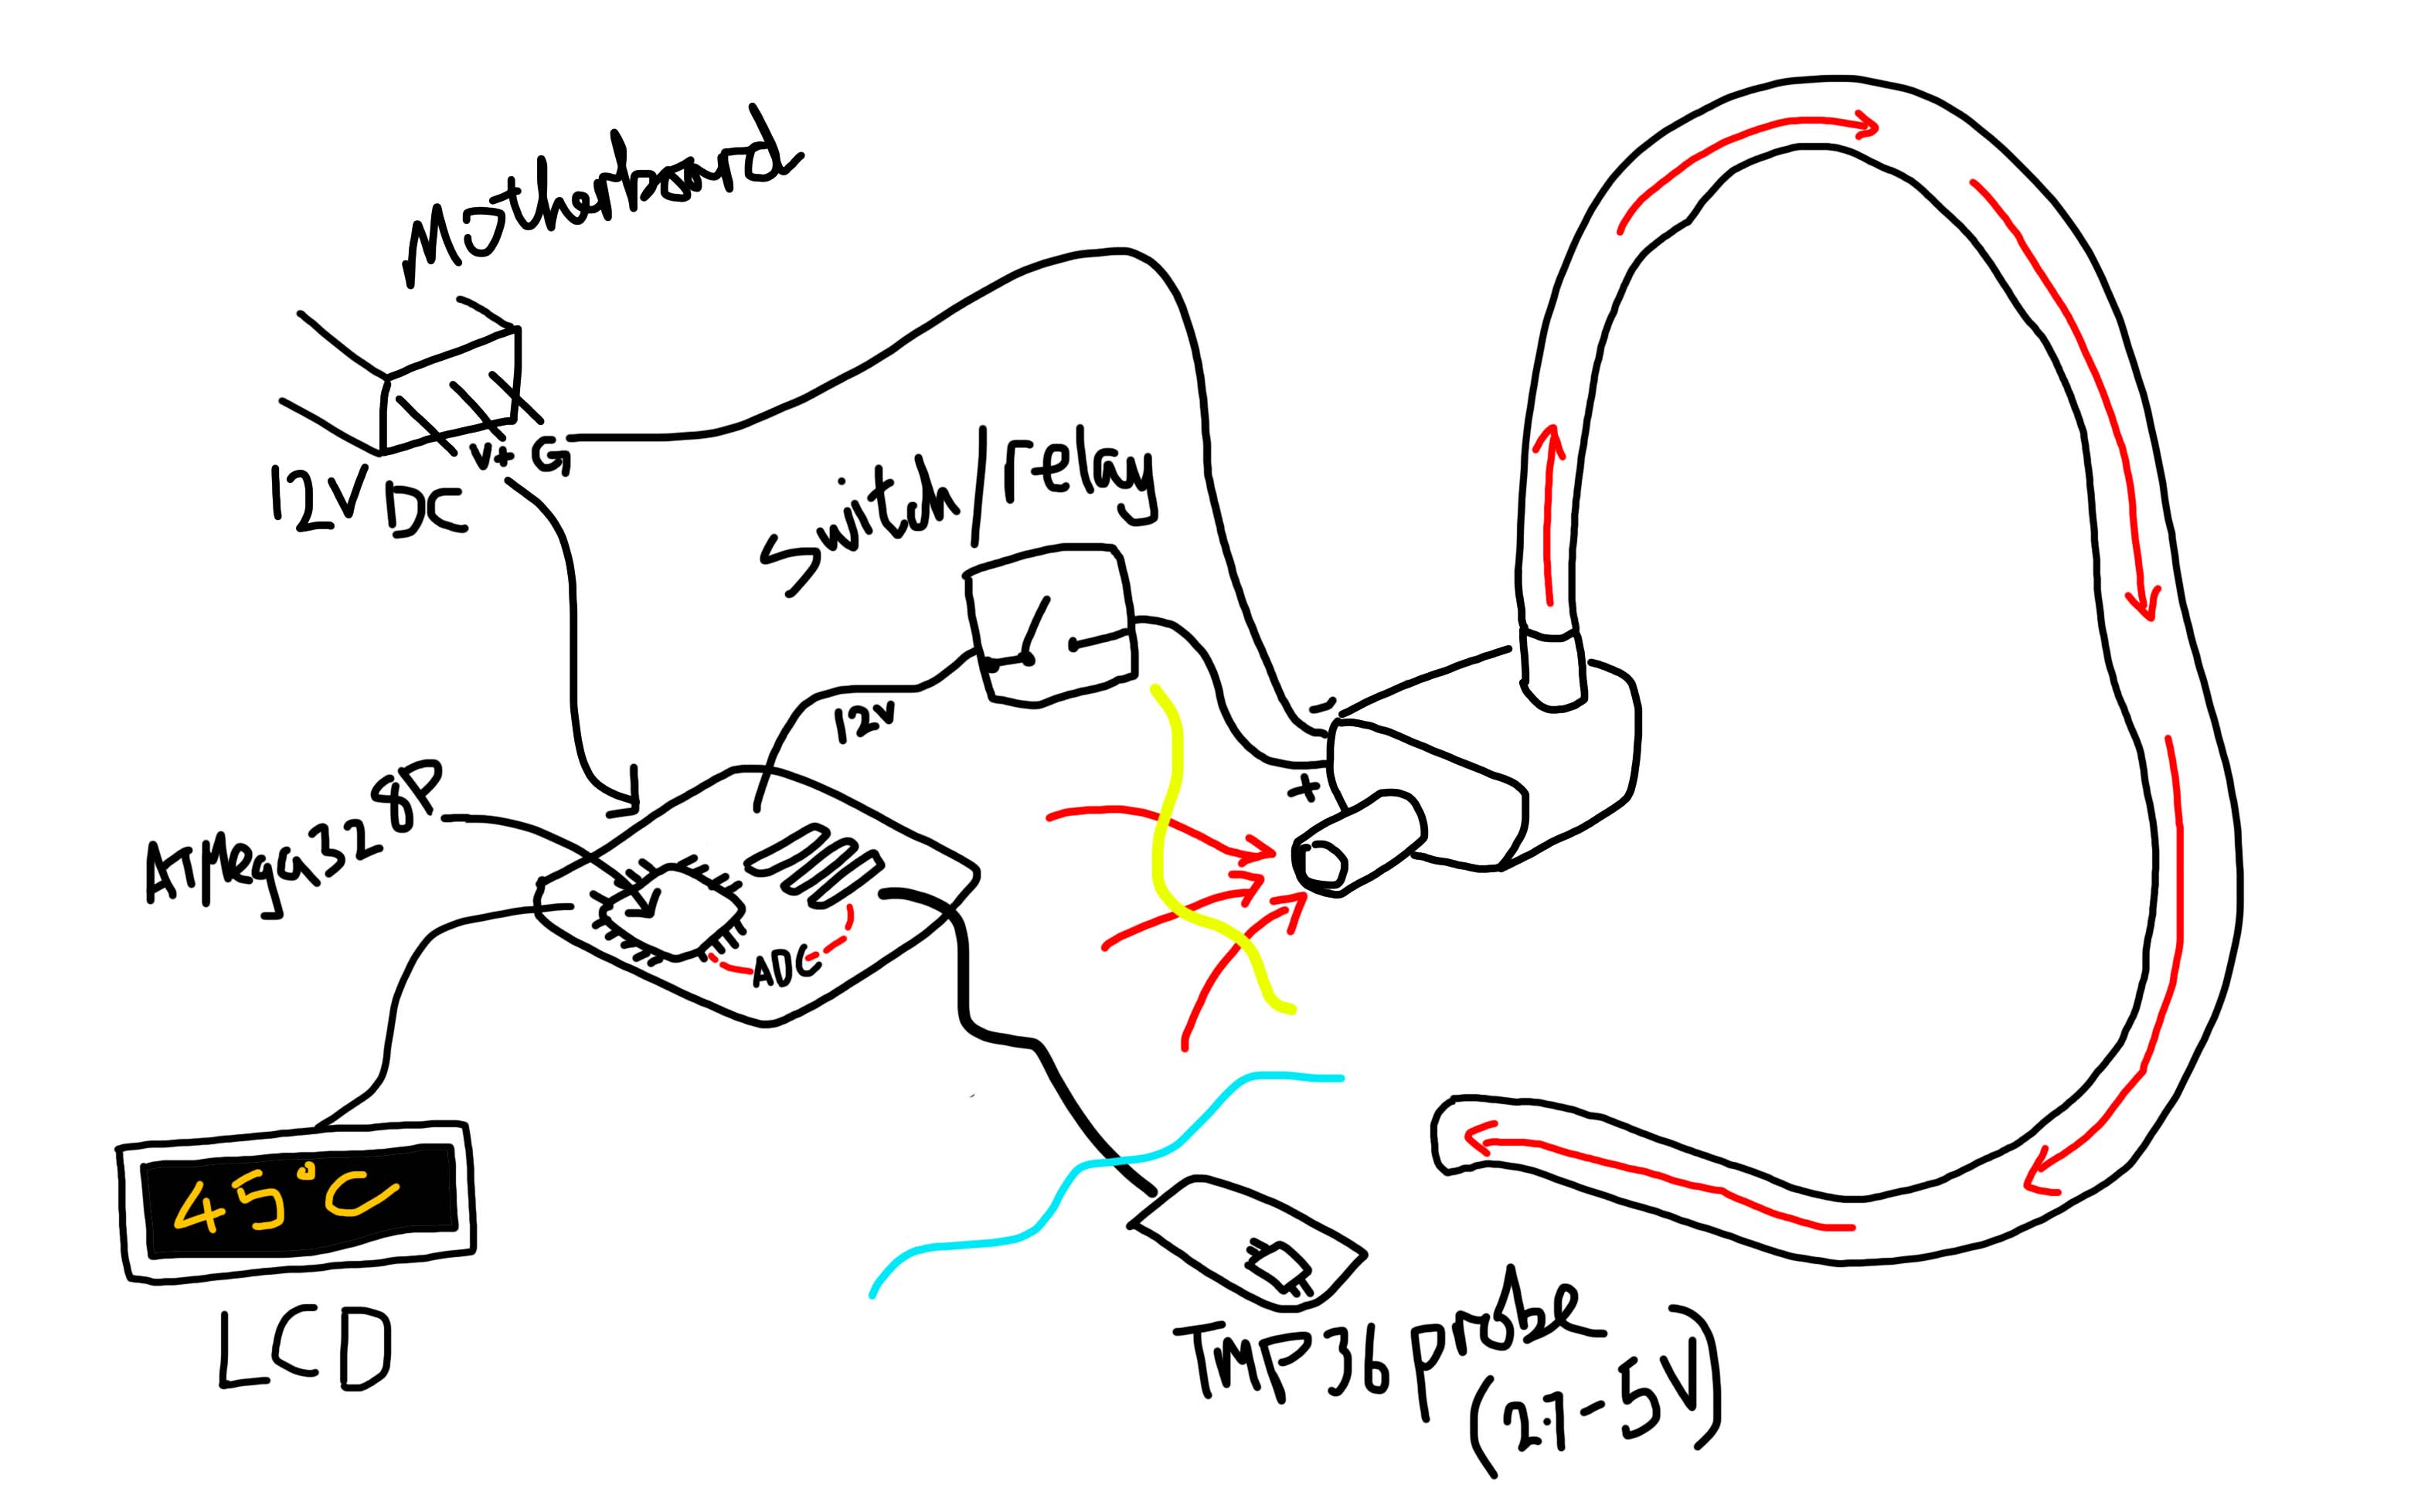
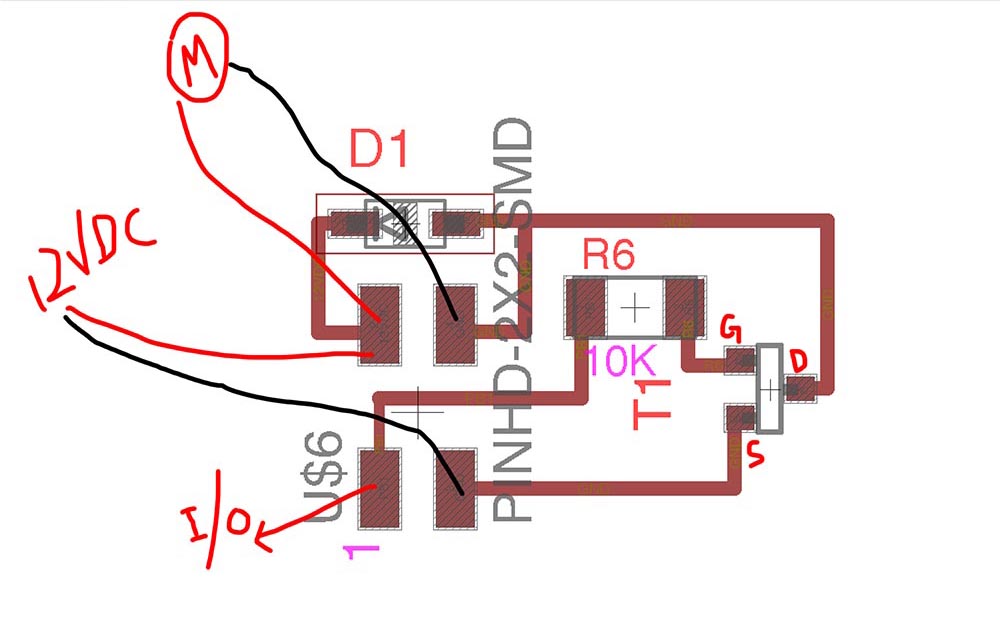
With spiral development in mind, I chose to use an ATMega328P for the board, so that I would be able to drive the water 12V pump motor using a digital signal to a MOSFET; read the temperature in from my TMP36 chip using analog readings from ADC; and perhaps output using I2C to a small LCD screen I've got. I based the design fundamentally on the hello.arduino board, which I had working a few weeks ago. The new design of the board is basically the hello.arduino with several more specific headers for pinouts (to ADC, digital etc) onto which smaller, modular boards could be connected. The smaller boards would be the TMP36 and the MOSFET.
Design, Milling and Stuffing
The board for the MOSFET wasn't much more complex, but from other people's motor problems I learned that I needed a flyback diode in parallel with the motor pointing towards 12V to avoid voltage spikes.
 MOSFET daughter board
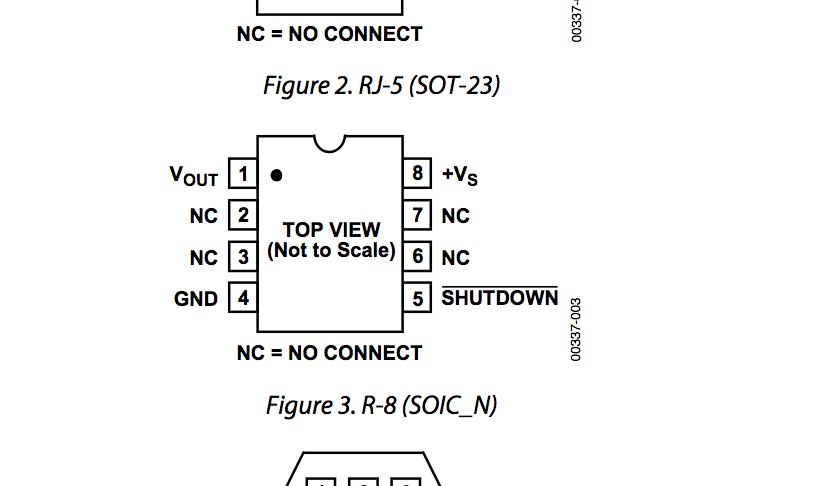
TMP36 Datasheet
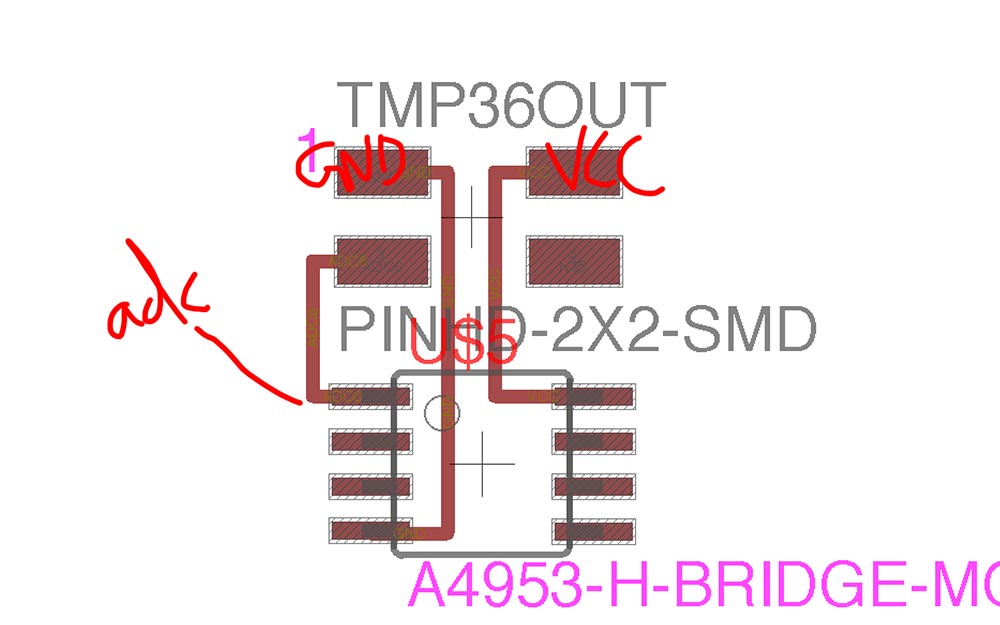
TMP36 Daughter Board
The main board, however, would give me no end of trouble. I had been able to quite happily programme a modified version of the hello arduino board back in the embedded programming, so I figured that it would not be too problematic to redesign a similar arduino-ish board based on the ATMega328P with outlets for serial, ADC, digital I/O to the MOSFET and some SDA/SCL connections for I2C to a potential LCD display.
As such, I decide to base it on my old board design and added the additional parts. Suffice to say it did not work -- I was getting the same rc-1 error that was usually down to a hardware fault, but I was using all the same traces as last time. I checked it over a couple of times, using the multimeter to check for shorts. I even drew on the trace diagram to make sure all the lines went to the right places and nothing was getting confused, as far as I could tell. I could not work out what was wrong at all. It wasn't in the software -- arduino IDE's boards.txt, platforms.txt and avrdude.conf could be causing issues but I was struggling to even get the IDE to acknowledge the board. I am pretty certain I wasn't frying the board in the soldering process -- I went through about 4-5 iterations of the first version, gradually simplifying bits I didn't need like extra digital I/O pins that had been left on there. By this point I'd become pretty good at soldering the little ATMega328p chip.
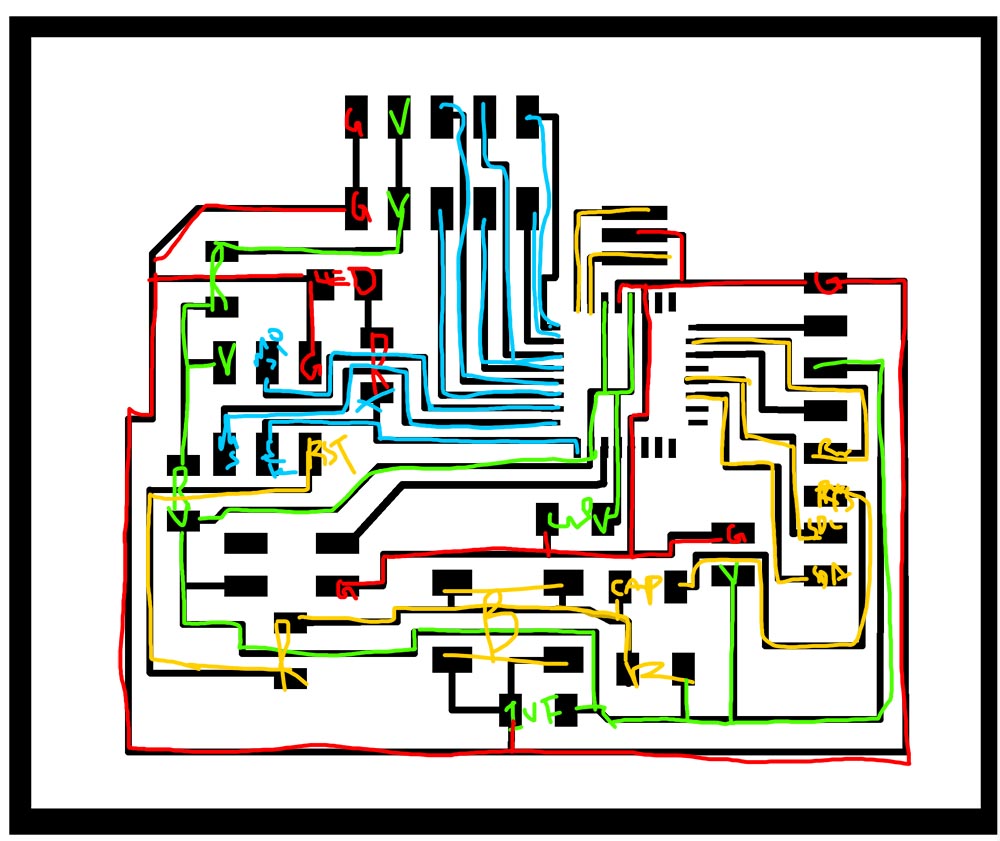
doodling over the failed board to make sure all the traces were going home.
Rip it up and start again
By this point I was close to giving up or starting over, so I did. I decided to do the board over with a fresh trace design, making some extra room so the headers weren't quite so close together nad generally trying to ensure a safe board.
Below you can see all the iterations I went through, annotated as I progressed increasingly late into the night.
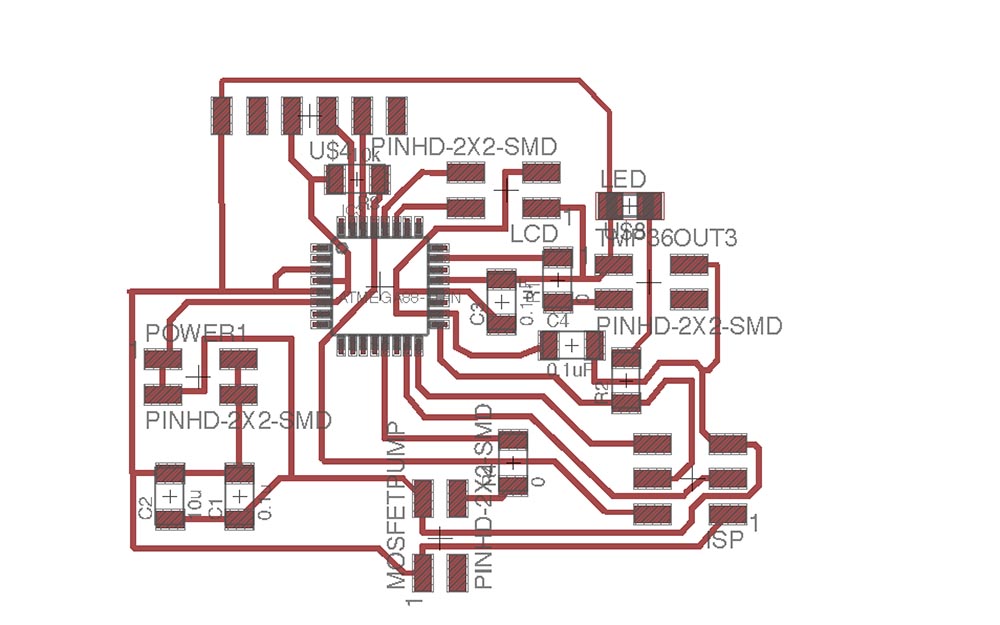 The new design!

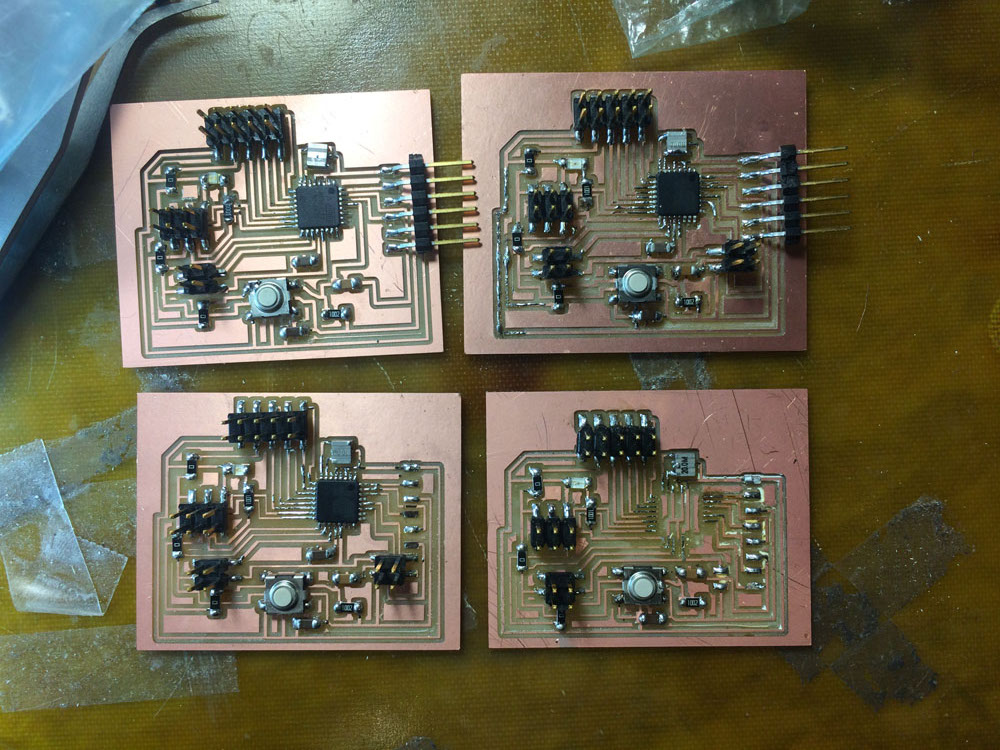
Many boards, much solder, so wow
It works!
At last my board was working: it was reading ADC and outputting to the arduino IDE, which had a very simple programme telling the MOSFET to switch the motor on if it went over a certain temperature.
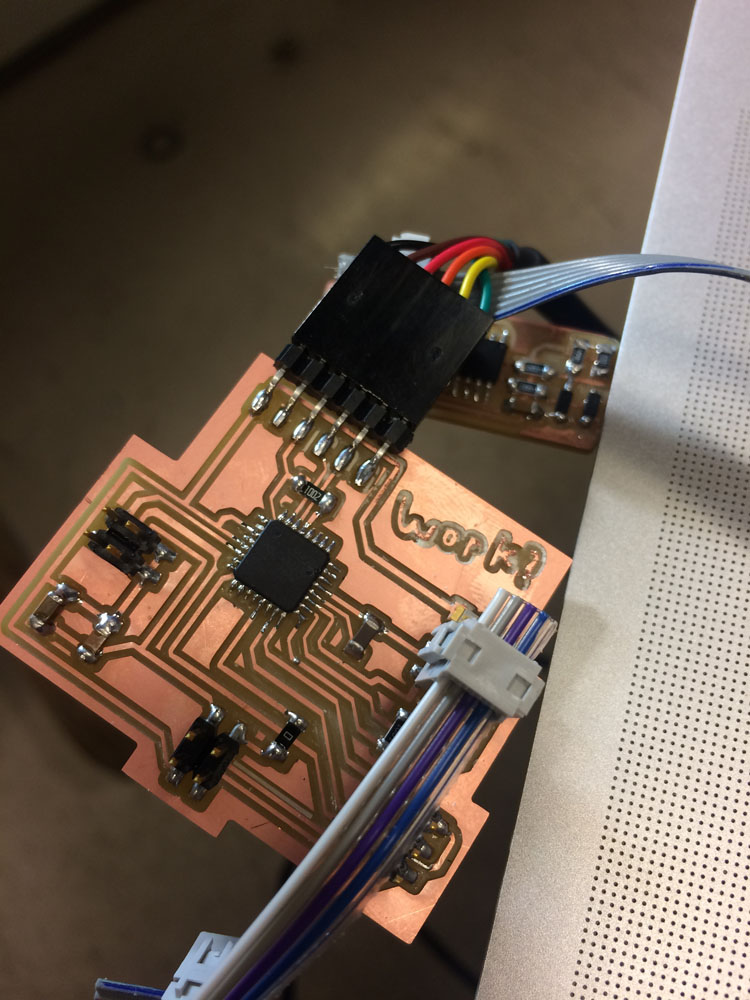
Final touches and assembly
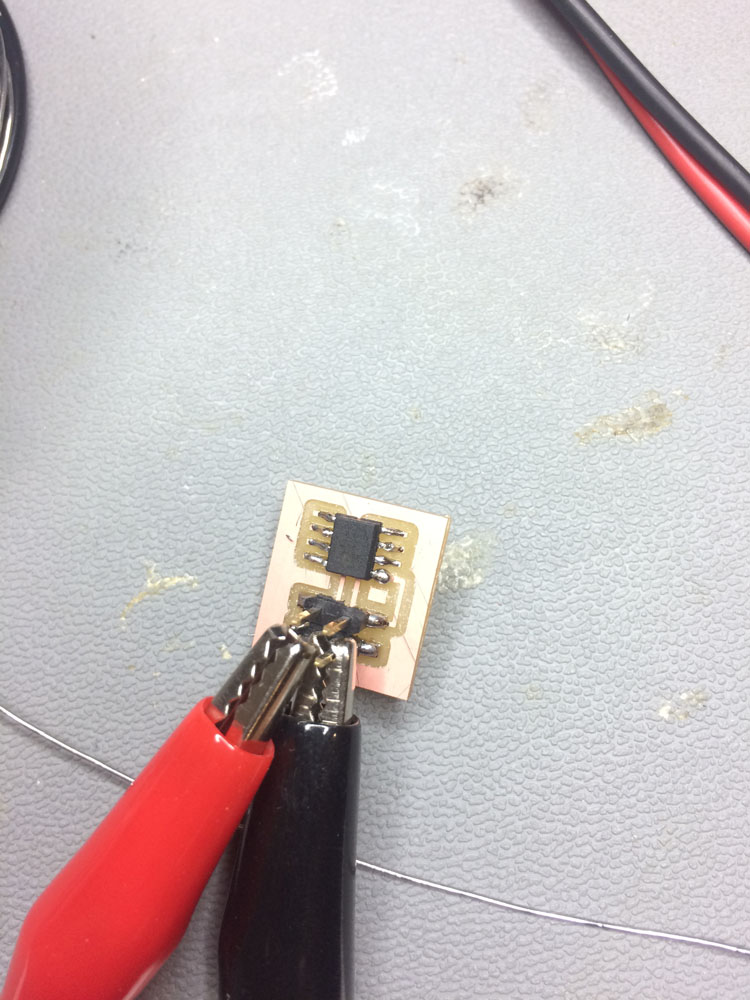
The last few things to do were to waterproof the TMP36 daughter board, which was now mounted on a much longer wire. I simple smothered it in silicone sealant since time was getting a little tight by now, but given less rush I'd have liked to make a little probe mould for it.
By now it was time to actually put it all together, as the exam was approaching. Regretfully I didn't have time to factor in the main board as part of the design for the oil-tank-motherboard-enclosure, which would have made things a lot neater and a little less precarious, but I somehow managed to lose a couple of days to the PCB design, so things got a little rushed by the end.
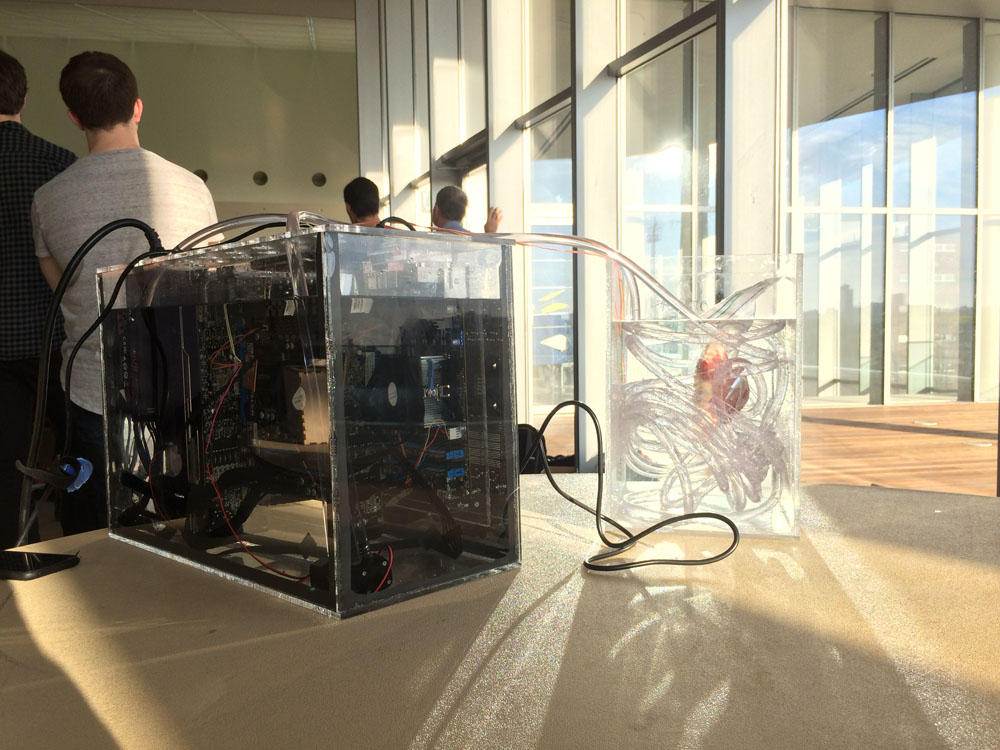
I gathered my vinyl tubes, the second sous-vide tank, 24 litres of oil, about 10 litres of water, the computer tank and chips and headed up to the 6th floor.
In the end, it worked pretty well! The water got up to temperature within about 2 hours, with the long coil of oil-filled tubing transferring the heat. With great regret we had to take down the piece after a 2.5 hours because we had to catch a flight later in the day, and therefore couldn't make it to the open house :/
There was time for a final test, however. As we hurried home to pack out travelling bags, Agnes and I had time to fry up a quick steak for lunch. It was genuinely very tasty, even without being in the sous-vide for as long as it should have been, the meat was noticeably firmer but also tender, meaning it was perfect after just a quick sear.
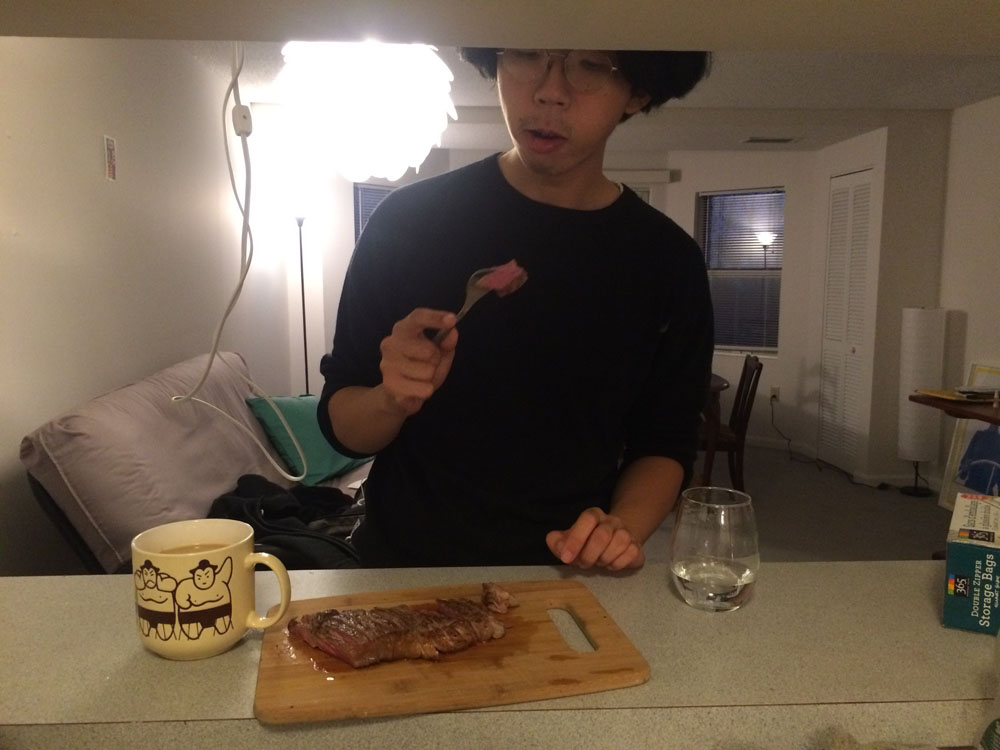
Proof of steak!
Assessing the project
- what does it do? Cooks food in a sous-vide using heat generated by a bitcoin mining rig.
- who's done what beforehand? There have been a number of sous-vide projects in Fab Academy and HtMAA but as far as I can tell, never using heat generated by a computer. I wonder why?
- what did you design? An custom oil-proof acrylic ATX enclosure tank for the computer, and a thermostat circuit for the controlling the heating element using hot oil and a small water pump.
- what materials and components were used? Acrylic, computer, GPUs, 5 gal. mineral oil, water pump, silicon sealant, ATMega328P and PCB materials, vinyl tubing, meat.
- where did they come from? Computer and GPUs - craigslist; mineral oil, sealant, tubing and pump -- amazon; PCBs from the class; meat from wholefoods.
- how much did they cost? Around $250 (elements of this project were funded via CAMIT and the ACT department as part of a wider art project proposal) for the PC parts and $120 for the rest, including the $10 waterproof pump and $90 for the considerable amount of oil. The Atmega and TMP36 is less than $10 combined, while the 3 sheets of acrylic came at $18/sheet. So in total, about $416
- what parts and systems were made? The tanks, the thermostat, pump control (motor driver), integrated into an ATMega board using 2 daughter boards.
- what processes were used? CAD (Rhino, mostly), lasercutting, embedded design and electronics production, embedded programming (ATMega328p using Arduino IDE), input (TMP36) and output devices (water pump). Networking and interface were on the outer fringes of the spiral of development, which I would still like to implement but ended up being not quite feasible in the time I had.
- what questions were answered? Does mining bitcoin give off enough heat to cook meat (while also cooling the system)? Yes.
- how was it evaluated? I ultimately evaluated it by eating the end result, which I admit was very good. The machine heats up the water to the desired temperature within an hour and a half, and the control loop of the thermostat keeps it there, resulting in an effective sous-vide and a somewhat effective utilisation of wasted heat.
- what are the implications? There are some wider implications I would consider in terms of the amount of energy that is expended by forms of computational labour, especially as technologies like blockchain (which artificially leverages the difficulty/energy expense to control inflation) begin to look like possibilities for undergirding all manner of existing systems. If, say, these technologies become infrastructurally important for how we communicate and transact, perhaps it is worth considering how we might direct the entropy of these systems more productively.