Week 7 Molding and casting

Molding and casting week had 4 things to be thought out:
1) Designing the parts to be cast;
2) Machining the positive block from which the mold will be made;
3) Casting the silicone mold;
4) Casting the final part;
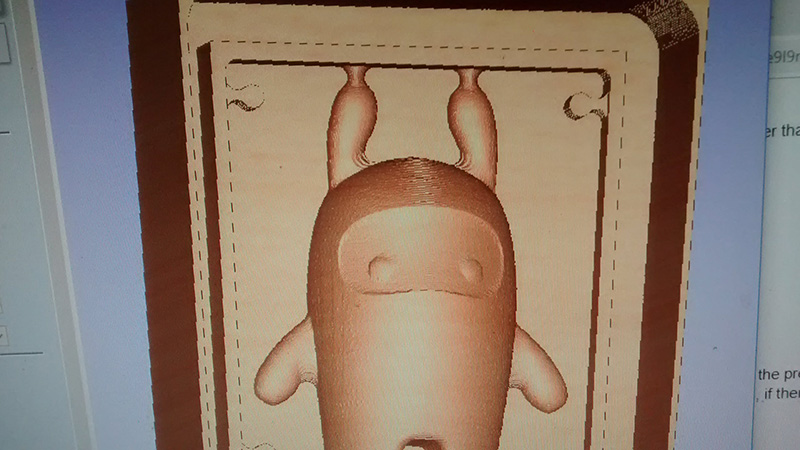
Because I like to play with sculpture of pop culture characters, I decided to design a 3D model of a simple character. So I started by drawing the character from front and side view, and modeling on Rhino:

After I finished the model, I had some problems to save it as STL. That can happen especially on Rhino, even if you part is a solid - depending on how you created the part, boolean operations, etc. there can be a few open parts that are almost invisible. If this happens to you, you can select Analysis → Show Edges → Naked Edges to show where these tiny holes are and join them or fill them with surfaces.
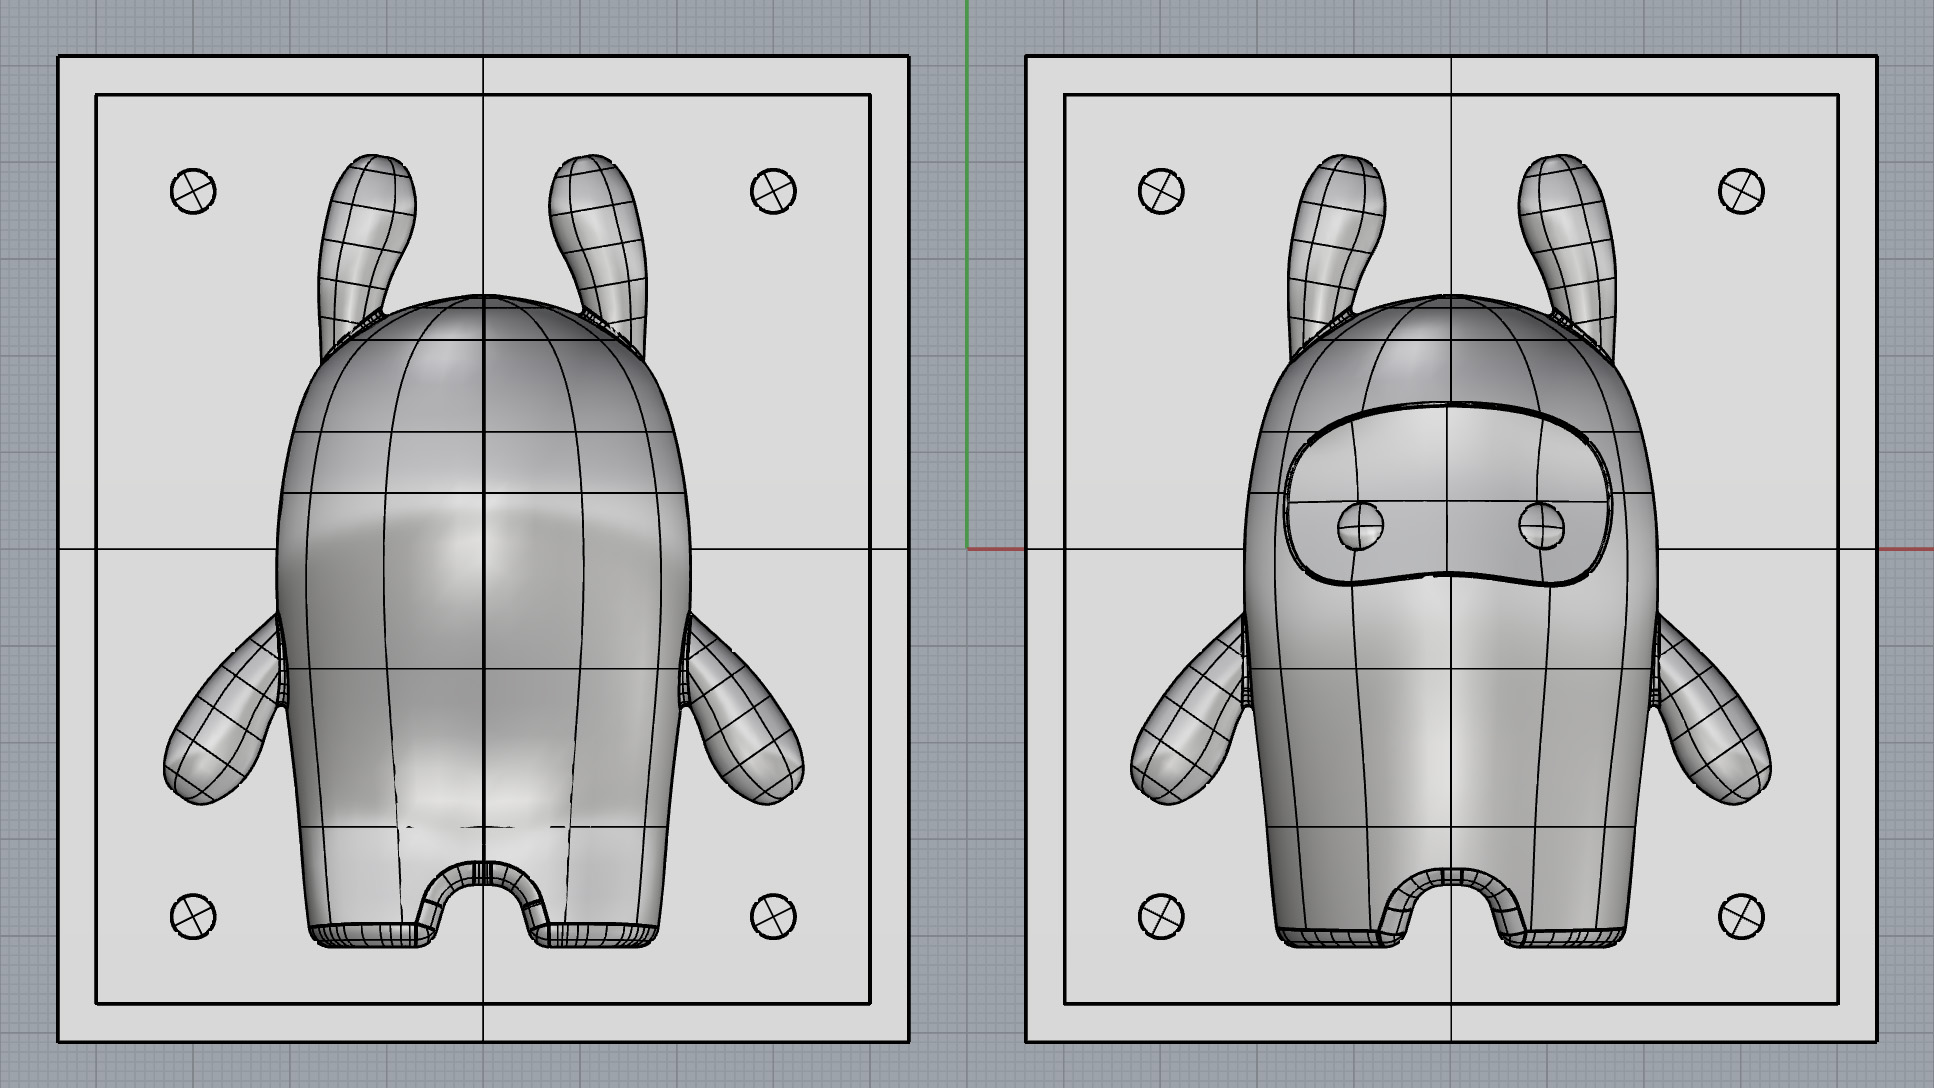
After this, I cut the model in two parts and decided to put them into a box that would enclose the mold material and prevent leakage. It was relatively good, but there were a few problems with this:
- I added four cilindrical registration points to inside of the box, that would help keep the two parts aligned. After importing the parts to the CNC software, I noticed I did not account for the space between this cilinder and the edge, where the tool would not be able to go (see image below).
- Even after correcting this spacing, I did not account for the diameter of the tool being larger than the diameter of the cilinder itself. For that reason, I ended up the registration points in only one of the two parts.
- The final two parts fit together fine, but to make them less probable to move while curing I believe I should have made the edges thicker or taller.
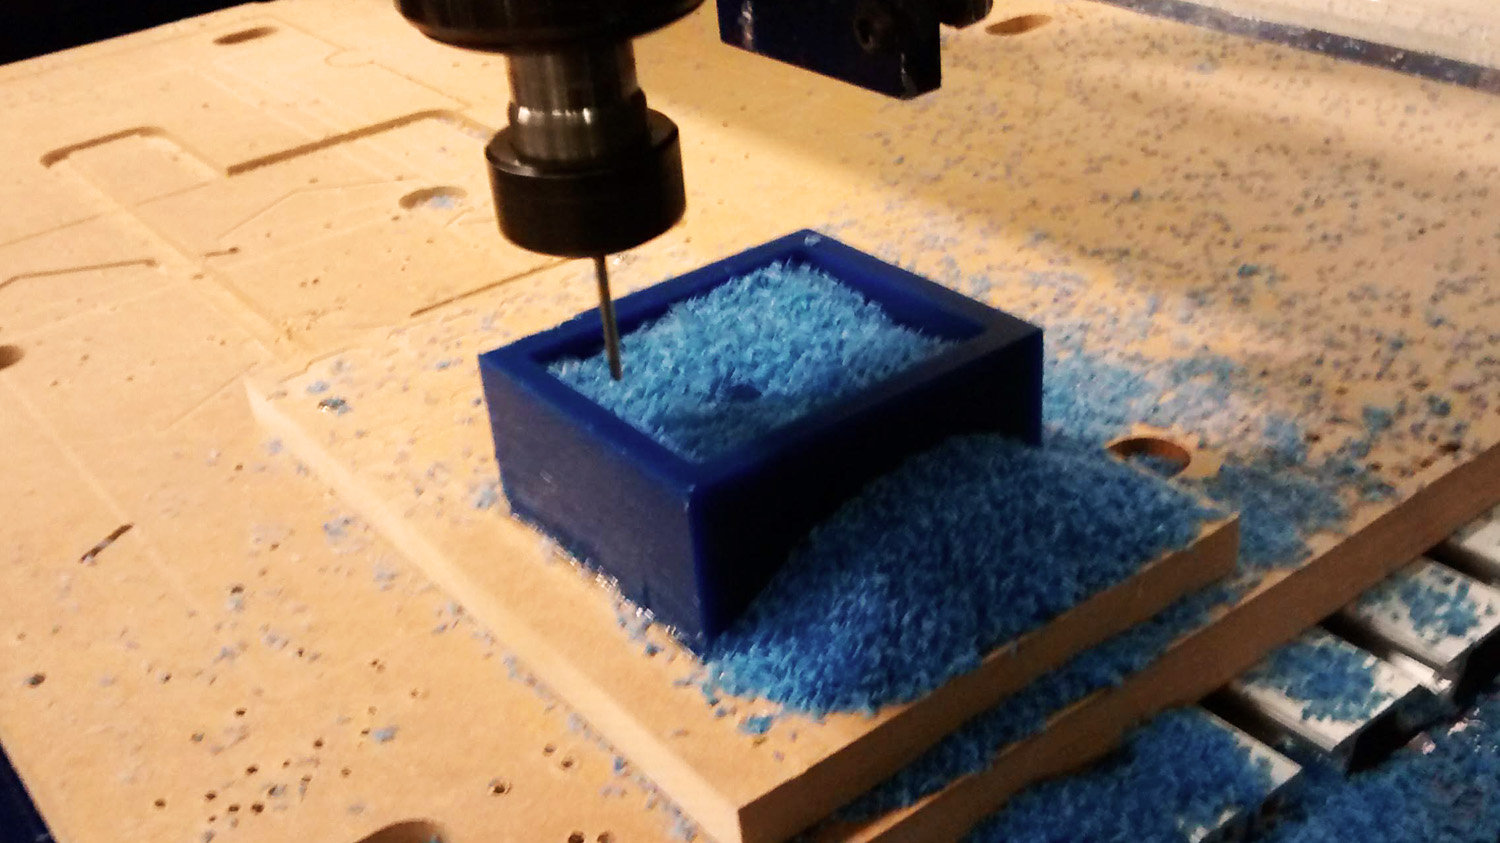
I sent the files to be cut on the CNC, and because we had worked with CNC machining last week, this part did not have many secrets.
Then it was time to mix OOMOO silicone for mold casting. Mixing instructions for OOMOO 25 are quite straightforward, with equal volumes for both parts. I would just add one word of advice from my experience: if you are mixing a volume that is larger than half your container, divide the mix in two containers before vaccuuming to remove bubbles. When you do that, the contents will most probably overflow with this kind of silicone.
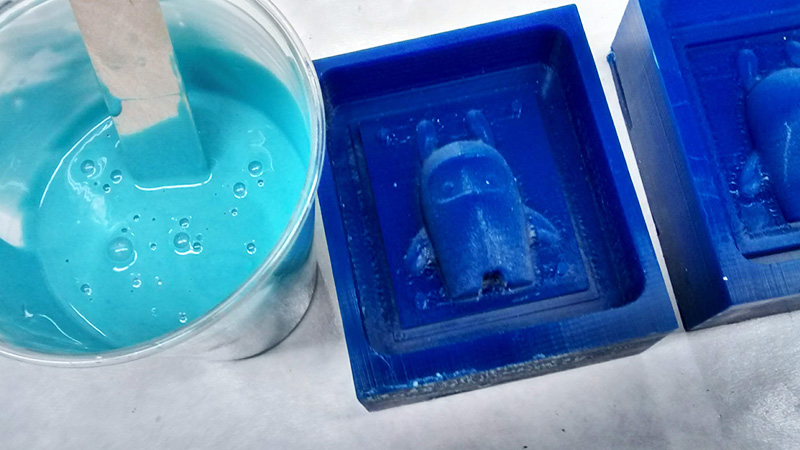
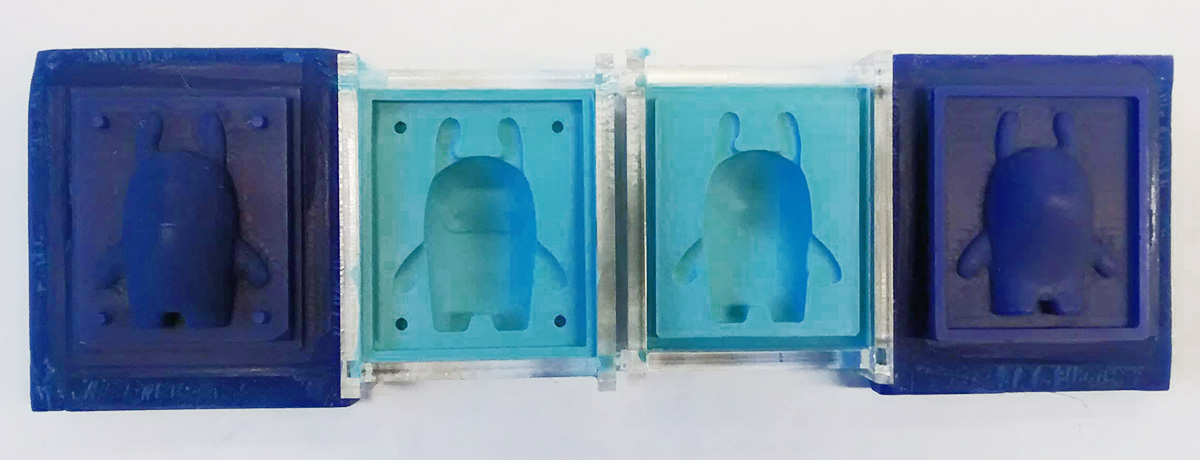
After curing the mold, I realized a few more mistakes. First, there were a couple bubbles trapped. Second, I realized I should have accounted for the extra walls around the parts, wich prevented them from fitting together. Just to make sure the two parts would fit well without the borders, I butchered the sides before I made a new mold.
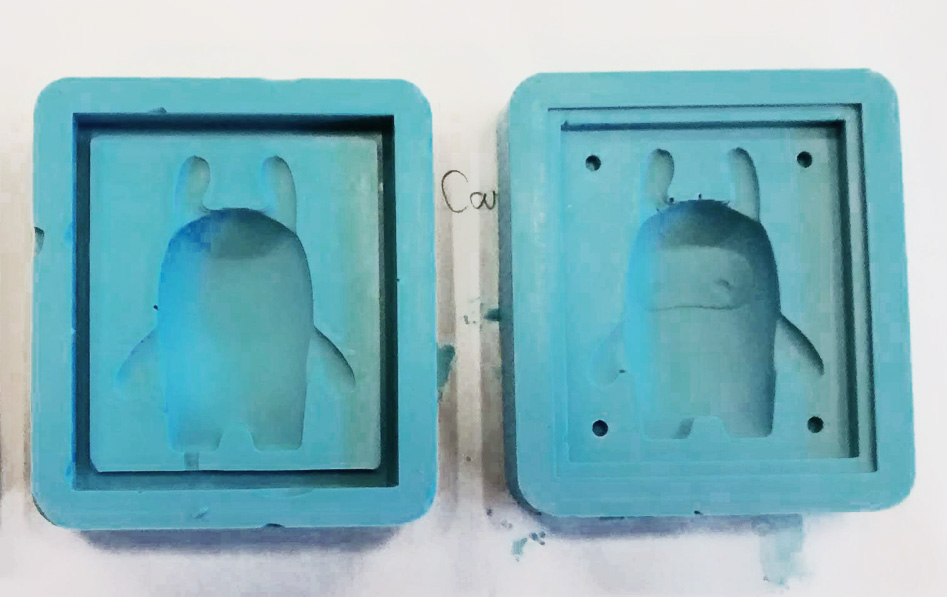
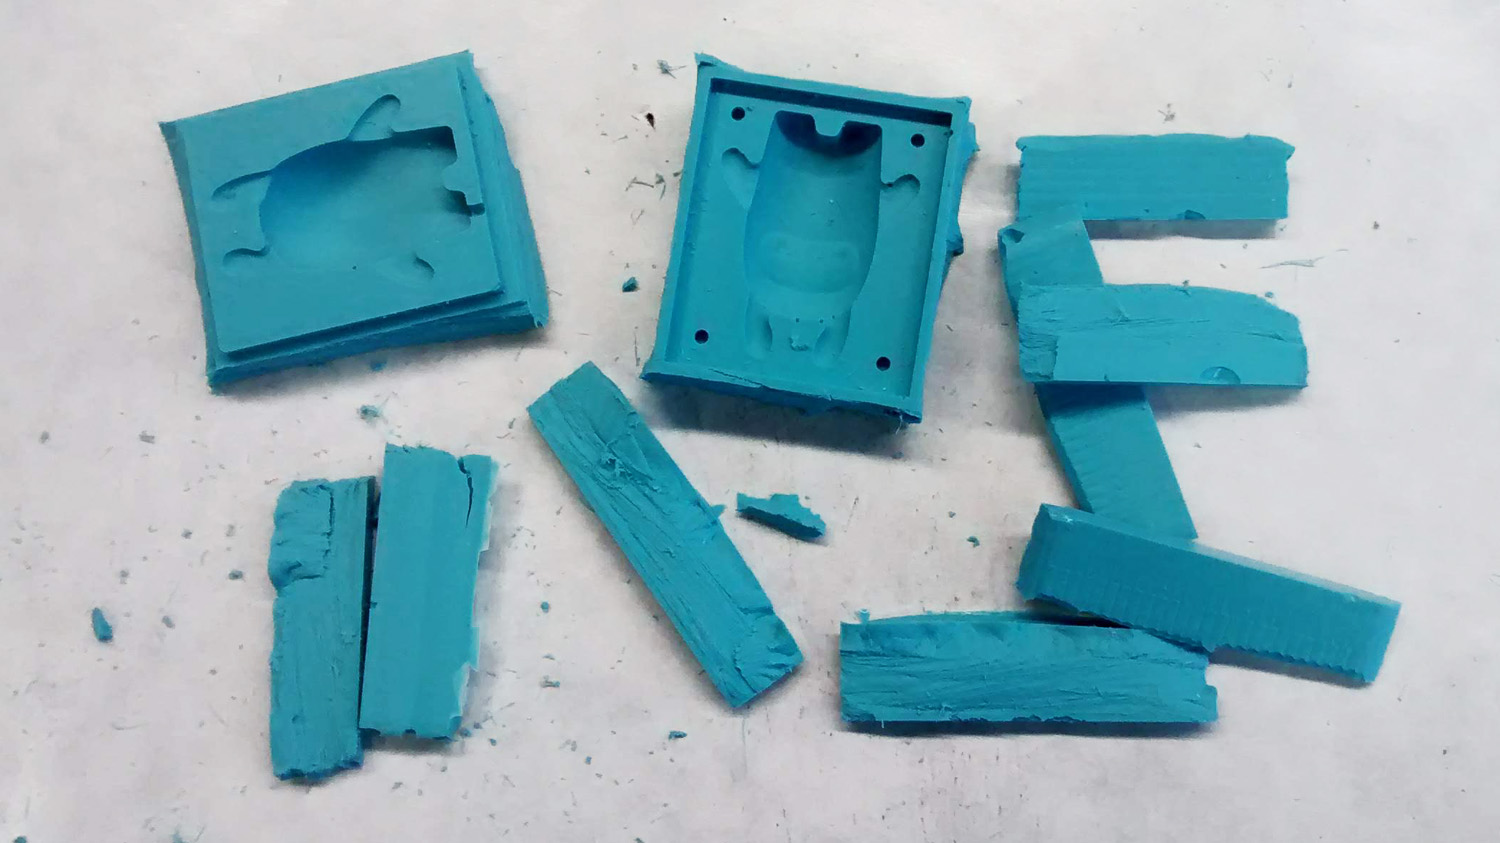
After cutting the sides I realized there was no need to machine the wax block again. So I cut the sides of the "box" and used scraps of acryllic to laser-cut edges that would fit tightly to correct the mold. I also was extra careful when pouring the OOMOO silicone to avoid bubbles, and I got a much better result.
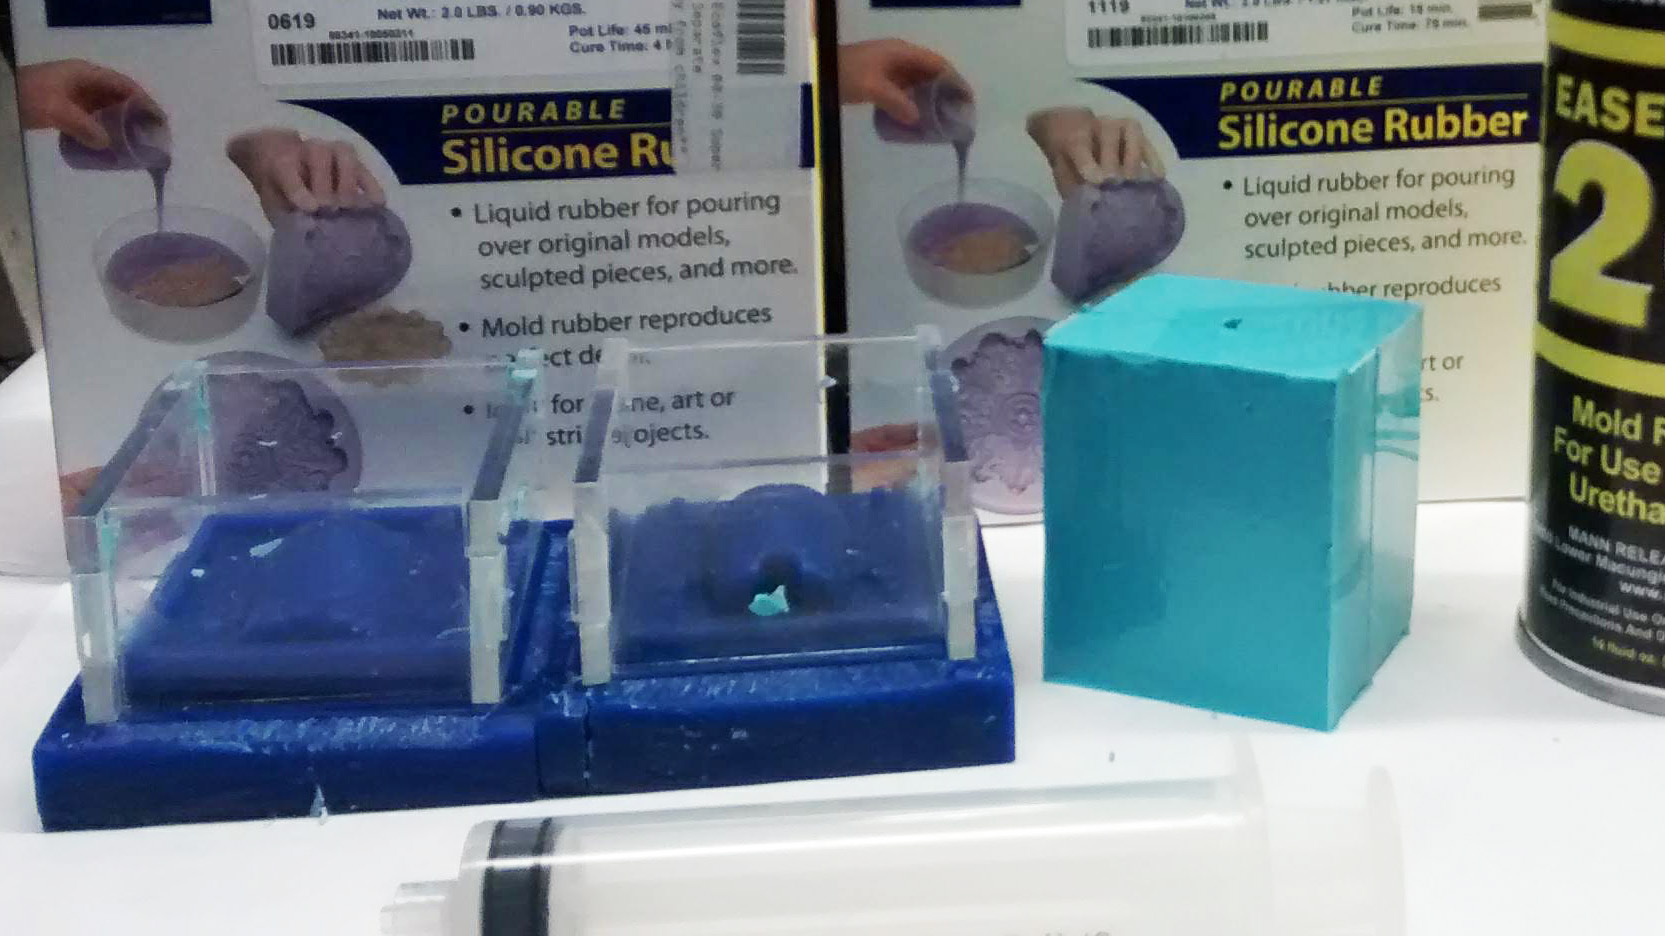
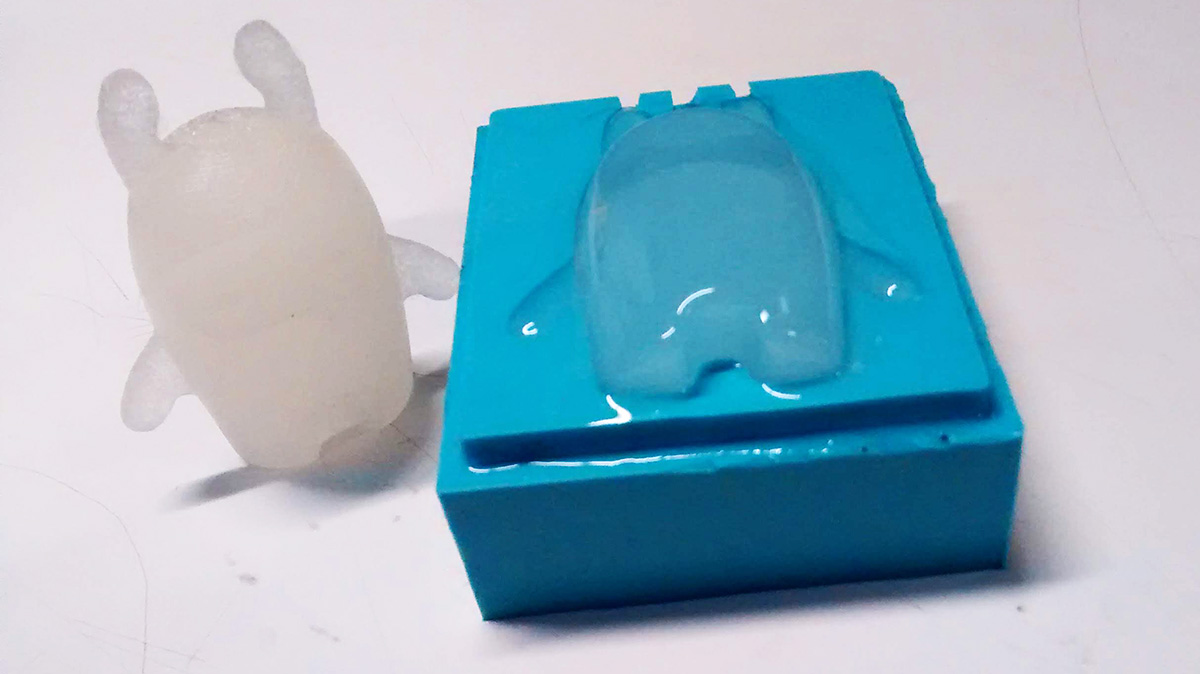
For the final casting, I tried different materials. Liquid plastic cured well but had many tiny bubbles inside, despite the vaccuum process. I decided to try casting the toy on silicone (ECOFLEX 00-30), and in that attempt the result was not successful at all. I tried multiple times, with different mold release agents, but the silicone never fully cured, leaving a liquid layer on the outside of the piece, as shown in the picture below.