SCROLL
finalProject 0000 0001 CAD 0010 cutting 0011 programmer 0100 3Dprinting 0101 elecDesign 0110 makeBig 0111 embedProg 1000 moldCast 1001 inputs 1010 outputs 1011 networks 1100 machine 1101 interface 1110 wildcard 1111 notesfinalProject notes
0110
Make Something Big
Perfect week to make a prototype of my chair.
Decided that a circular stool with a vacuum formed seat providing the "back" of the chair will work better than a square seat. A square seat would look off when it is rotated by less than 90 degrees.
I'm am going to try to draw with Fusion360 again... why? I don't know. I really should just continue learning Blender... but that would make too much sense.
Characterization
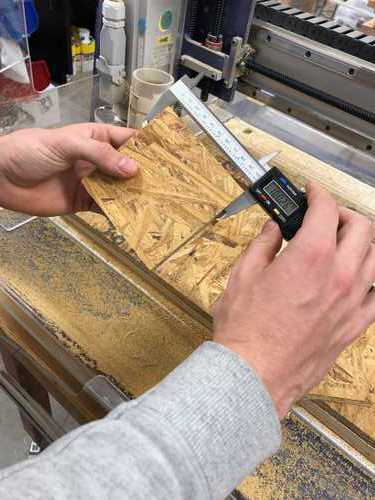
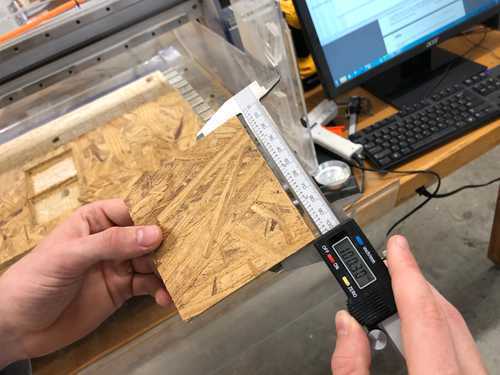
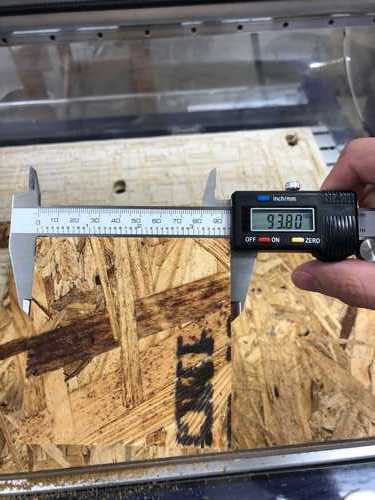
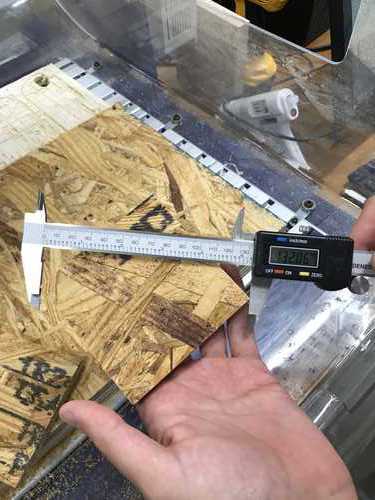
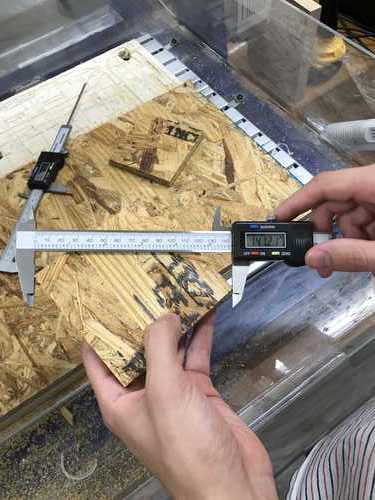
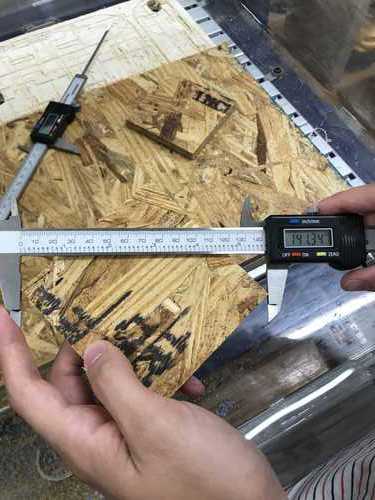
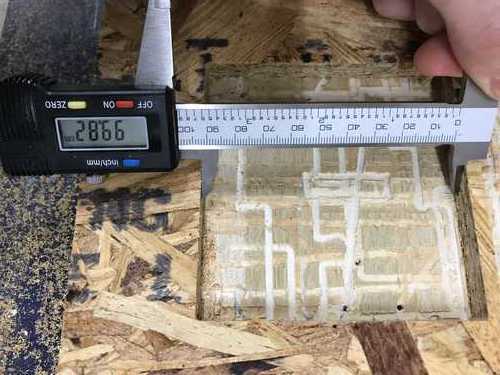
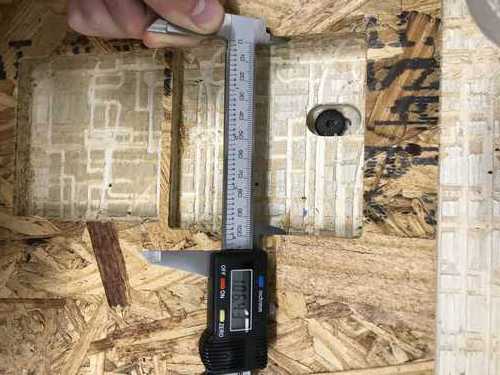
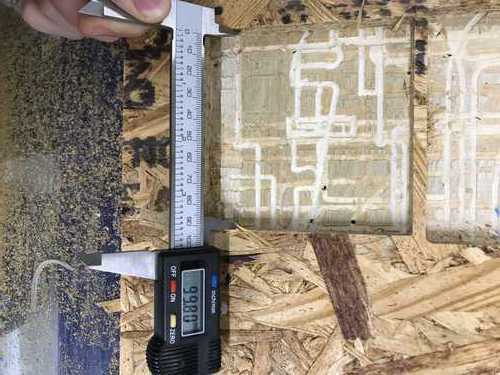
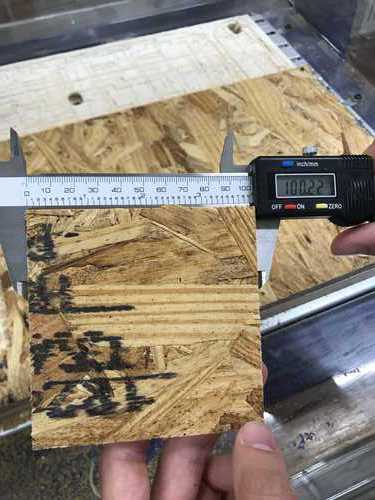
Cutting out 100x100mm squares. One was cut with "outside cut" selected and another with "inside cut" selected. The inner and outer cut dimensions can be seen on the vernier calipers below.


Paper Sketch
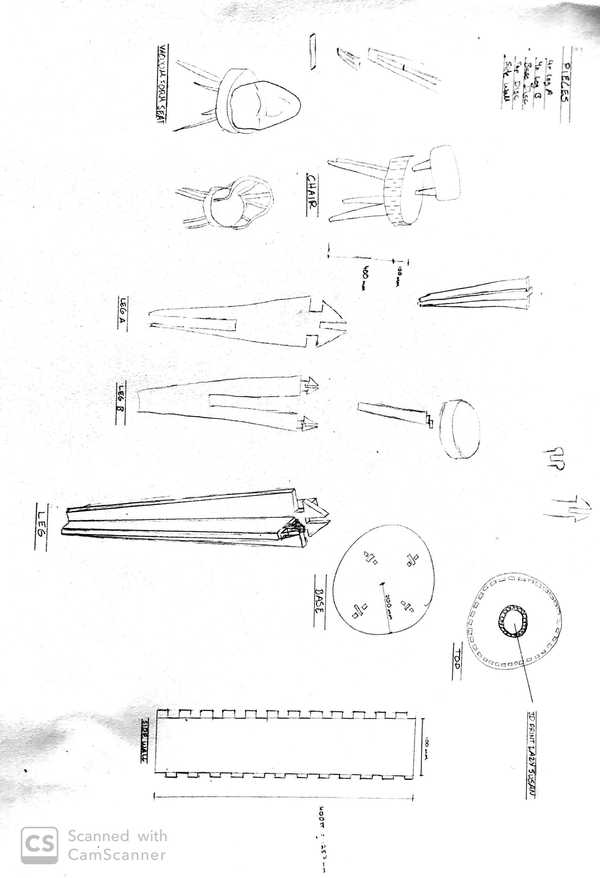
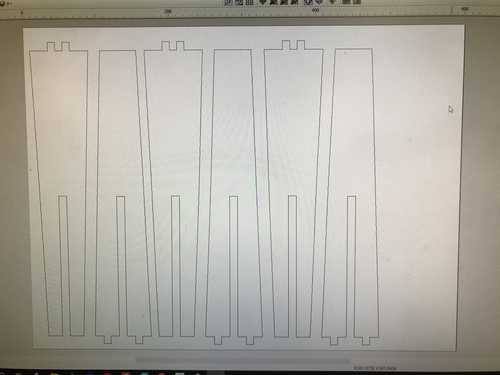
Pieces:
- 4 x leg A
- 4 x leg B
- Base Disc
- Top Disc
- Side wall
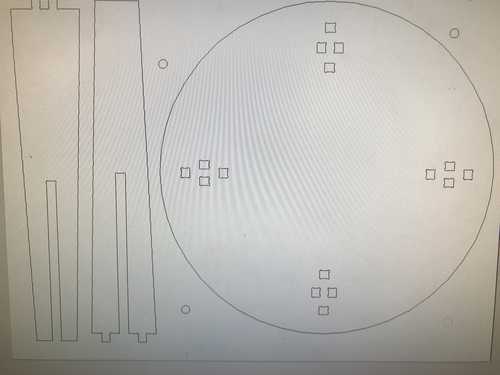
CAD
Drawing a loose mock-up before I measure the thickness of my wood and dial in the dimensions.
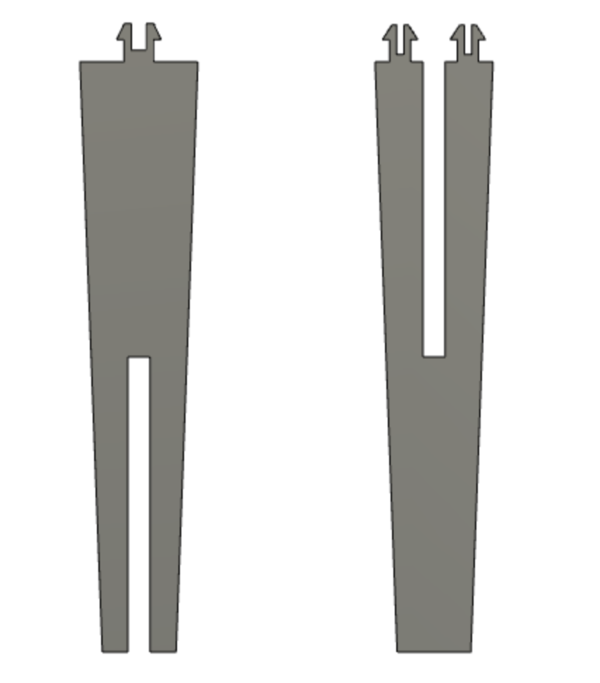
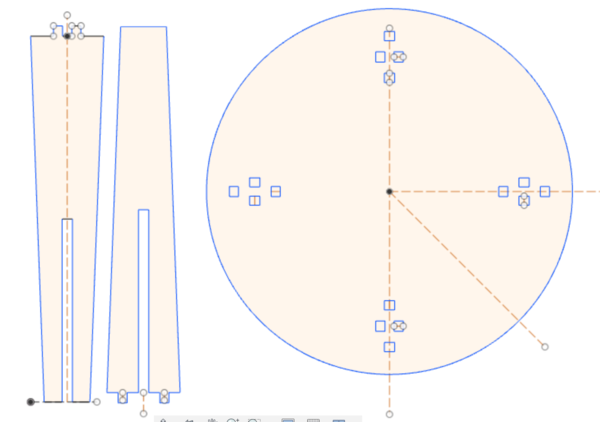
Leg A and B
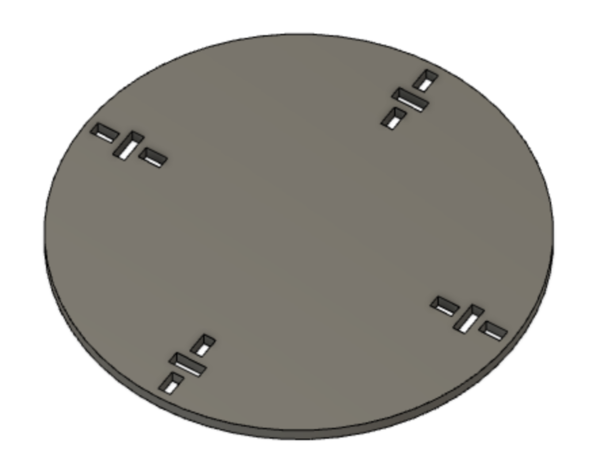
Base Disc
So far, I am hating fusion. Many of the actions that should be the easiest to perform require tedious work around. Not much can be figured out completely by playing around. The online resources aren't great either. I should have stuck with Blender.
I am also concerned that my snap joints won't work as the plywood is too stiff.
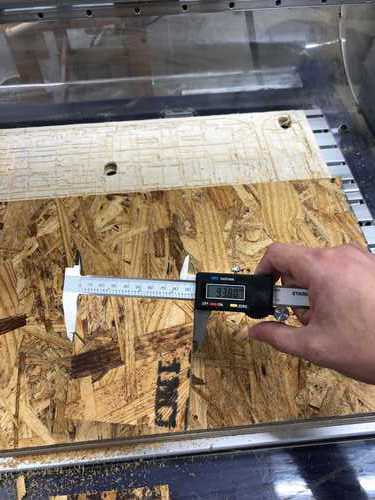
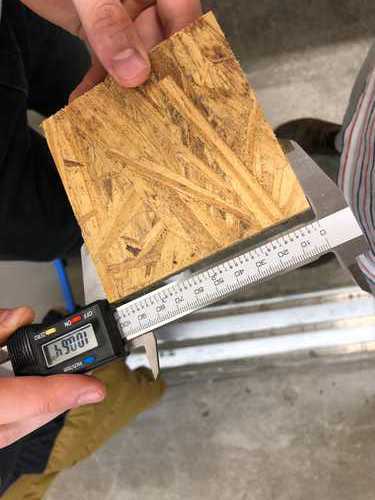
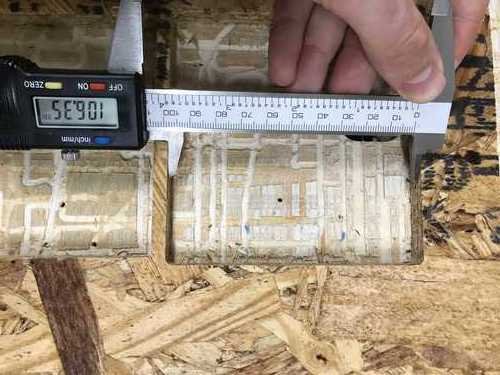
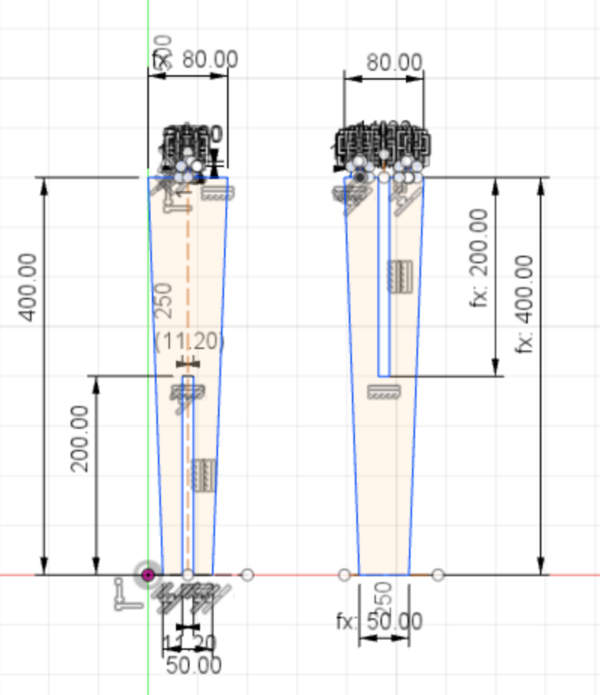
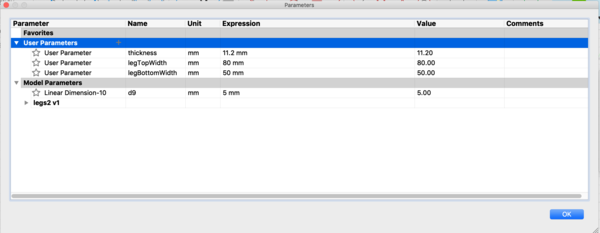
I have measured the thickness of the wood. It comes in at and average of 11.2 mm thick. I'm going to add this dimension into my drawings.
This is great reference for sketching in Fusion360.
My earlier drawings were deleted.
RIP
Re-drew legs. Luckily I have learned quite a bit from the first attempt so it was much more efficient this time.
Here they are.
Just realized that the mill bit is 3mm, hence too large to successfully cut out my snap joints. Time for a redesign.
Something frustrating me is that I have tried linking some dimensions together, like the width of my tabs and the width of my slots. For some reason when I go to work on one part and then zoom back out something has gone seriously awry with another part of my drawing. I imagine this has to do with the linking.
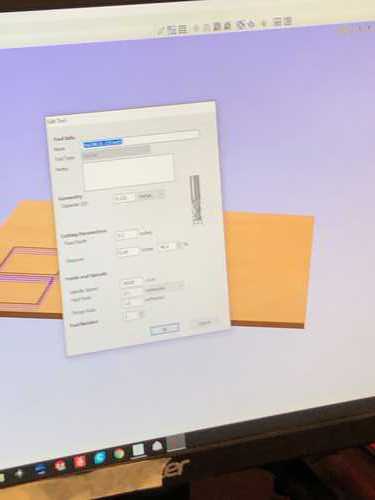
I have just discovered how to add labeled parameters to drawings. It is in the 'modify' menu under tools. Hopefully this will make the drawing process easier.
I drew a second iteration of the leg parts and base disc.
I kept trying to export the file (as a dxf) but all that would export was a broken circle and some miscellaneous lines. I eventually figured out, with the help of Rob, that you must click 'Finish Sketch' in the top right corner of Fusion360 before exporting.
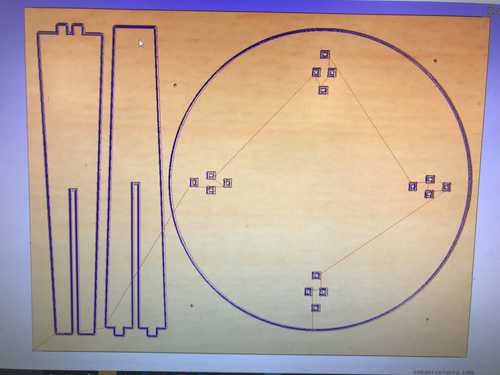
Aspire
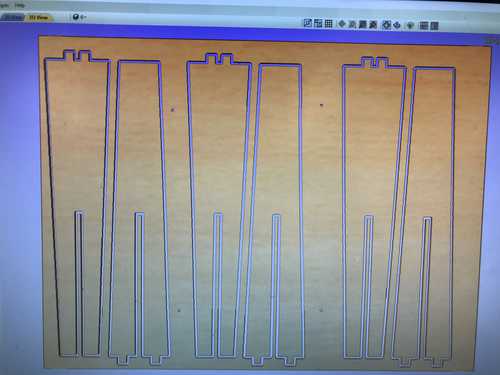
I imported the file into Aspire, the software out ShopBot works with.
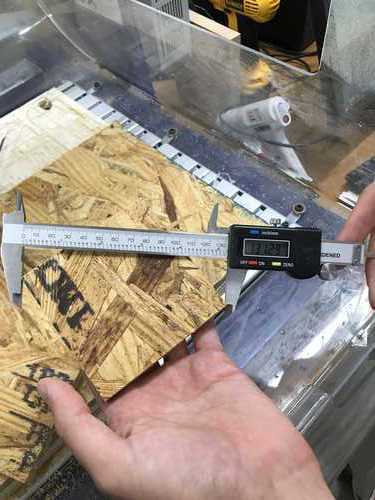
- Set the job size to 600 mm x 460 mm x 11.4 mm
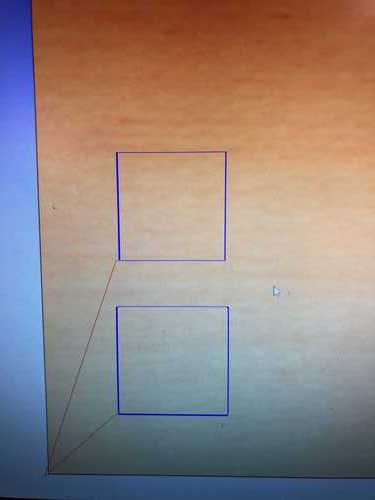
- In 'fillet' there is a 'dog - bone' tool. I used this to 'dog bone' all the internal corners of the job like so:
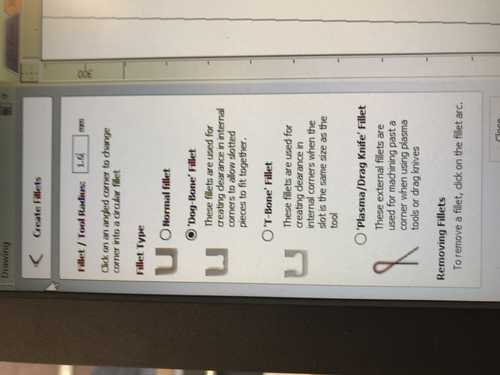
It is hard to see here, but notice the inset rounding of internal corners. Without doing this the material would not be cut away all the way into the corner as the machine knows its mill bit is too wide to fit into the groove without removing material it is not 'supposed' to. Dog-boning make sure the machine cuts all the way in, which is important for the snug fitting of joints.
I then added four holes where I will put screws in to hold down the board as the mill cuts.
Setting the tool path:
- I selected the screw holes (these will be a different job than the one for my main pieces). In the tool path menu, I selected
Drilling Toolpath. I set the cut depth to 11.4 (the average thickness of the board, plus a millimeter) - I selected my main job and set the tool path for it as well.
- I selected the screw holes (these will be a different job than the one for my main pieces). In the tool path menu, I selected
I clicked preview to see if the cuts and tool paths looked correct.
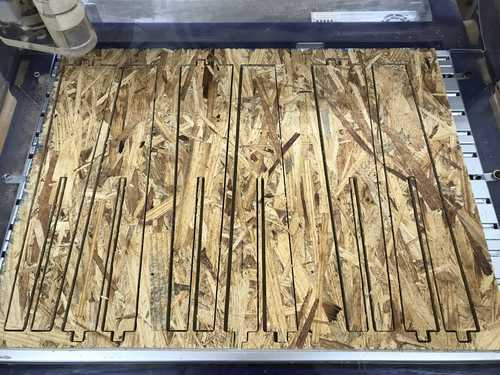
- I added tabs to all of the pieces. There is a button for this in Aspire in the tool path tab > profile cut. Tabs are small pieces of connecting wood between the main board and the piece being cut out that help to keep the material steady as the milling is being done. I even added tabs to the small pieces I don't care about because if they came loose they could fly off and hurt someone.
I saved the shopBot file to a thumb drive and plugged it into the computer running the shopBot.
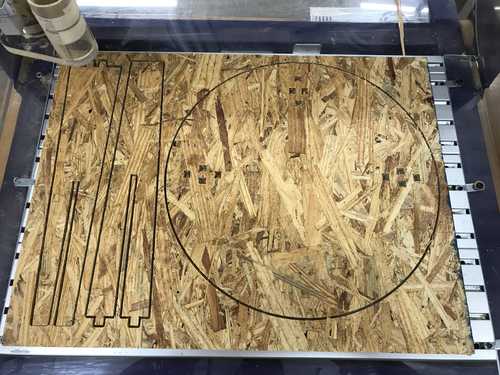
Cutting
- I secured a piece of 18 x 24 in wood to the wooden bed of the shopBot using two screws in the top left and bottom right corners-- places where I knew no tool paths crossed.
- Launched the shopBot 3 app
- Clicked the yellow button
- Used the big arrows to bring the mill to the bottom left corner (my origin from Aspire)
- Used the smaller up and down arrow to lower the mill bit until it was resting on the piece of wood. The
fixedbutton allows you to input finer increments for the moving of the bit. - I clicked
zero axisand selected thexandyaxis and clickedzero. - I then raised the mill bit pretty far above the wood to run an "air cut." To do this you must raise the bit further above the wood than the "cut depth" of the job.
- I then zero'd the z axis at that height (using the same zeroing process as the x and y axis)
- I closed the yellow window for moving the bit.
- I clicked the green
Startbutton - Selected my
screwsshopBot file on the thumb dive and ran the job. - The tool path was nowhere near the screw I had in the wood so I zeroed the z axis resting on the wood in the middle of the board (it will be slightly higher here as it is further from the screws).
- I ran the job at this height and it drilled my screw holes.
- I put screws in the board, holding it down on the wooden bed in the shopBot
- I removed my original two screws.
- I then ran my actual cut file.
- When it was finished, I vacuumed up all the dust and removed the screws.
Assembly
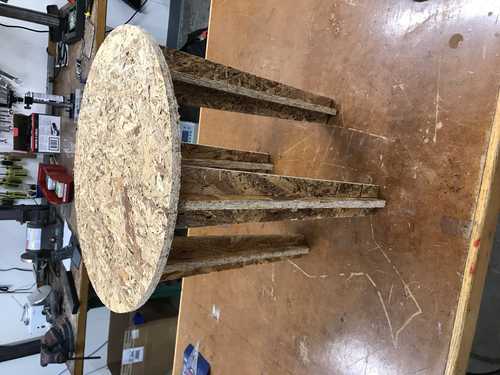
Time to see if these pieces fit together.
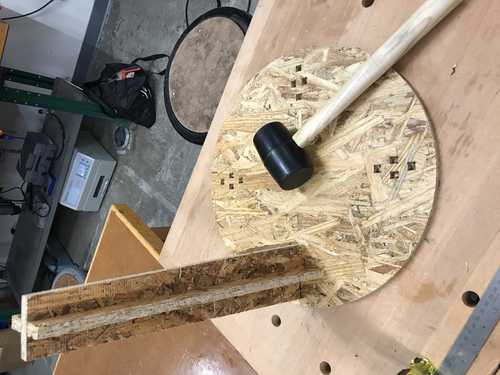
They fit perfectly! I had to use a mallet to get everything into its slot, but this is good as I don't want any loose pieces.
Now that I know they fit I am going to cut out three more legs to finish this part of the chair prototype.
The following was done using the process as above:
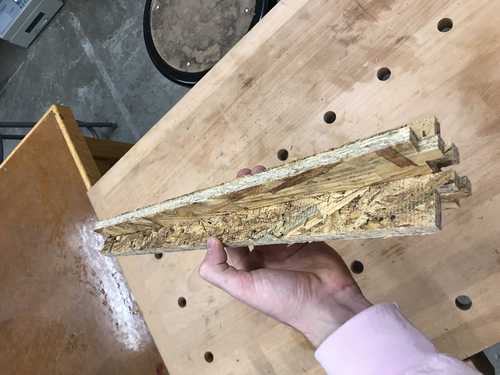
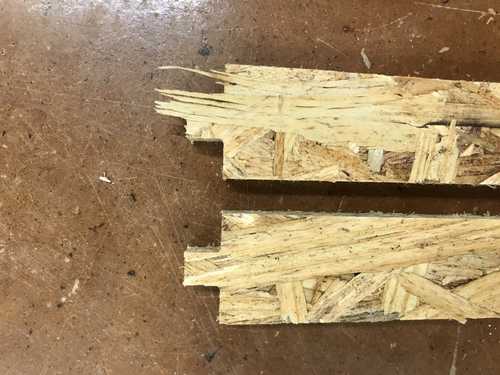
I will definitely not be using this OSB wood for my final project as the way it splinters when it is cut is less than ideal:
Final Assembly
Reflections
OSB is not a good material for my project. I would like to use a wood that requires less work to have a nice finish.
- But it is good for prototyping
The top surface is too low
The legs need to crossed braced - they are wobbly
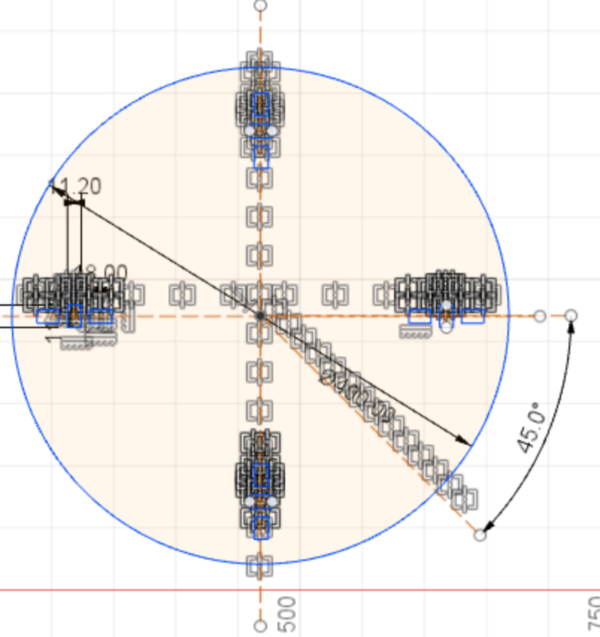
Square drawn by the four legs should be wider at the bottom than the top to make it harder to topple over.
Next Steps
I need to figure out how the top disc will be supported enough to hold the weight of a person
- Even though I don't want someone to get to the point of sitting in this chair, I would like the chair to be perfectly capable of holding someone
I also need to figure out how the side wall will be joined to the top and bottom discs
How will the back of the chair be able to turn?
FIN