Vinyl Cutter
For the vinyl cutter assignment there wasn't any particular idea I wanted to realize, so I decided to just cut some interesting-looking graphics. I knew I want it to be something intricate, or something mathematical, something that would require too much skill/labour/accuracy to be cut by hand, so to justify the usage of the vinyl cutter.
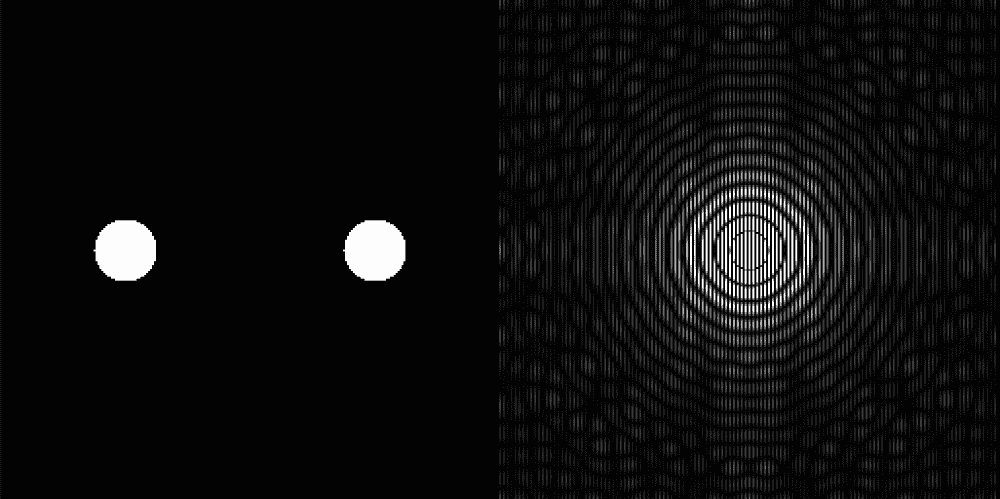
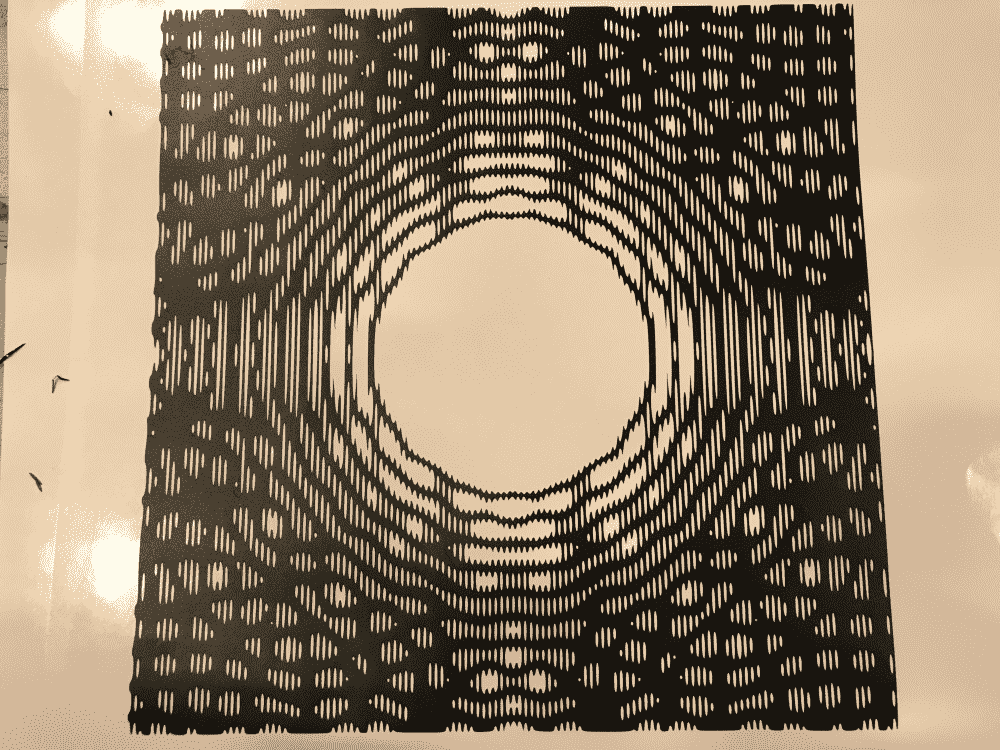
I was looking through my old code for inspiration and found that the discrete Fourier transform (DFT) of an image of two circles was pretty interesting. It exhibits vague resemblance to interference pattern but not quite the same. Wispy shadows of circles and stripes interleave with each other. Zooming in and out the impression changes, occasionally forming Moire patterns.
The code to generate it can be found here.
So I binarized the image, and traced it to SVG using potrace. (Of course now the image becomes “useless” since it's too mutilated for the original image to be reconstructed with backward FFT). But for my purpose, I quite like the look of it.

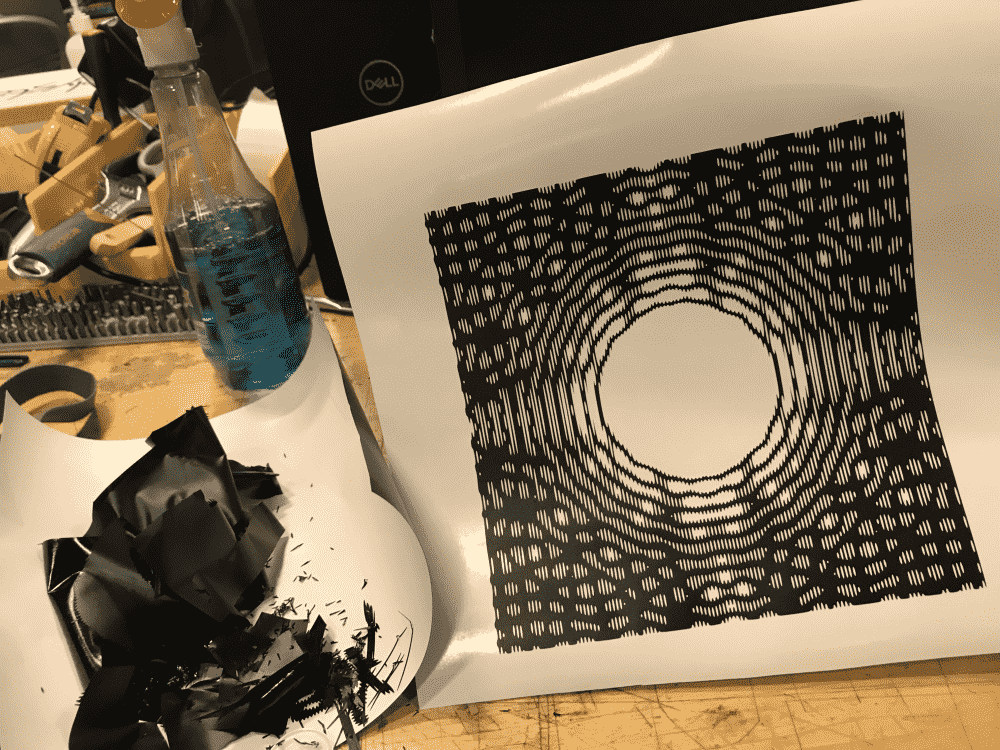
I went to the CBA shop and loaded the image up in CorelDraw, the software used there to control the vinyl cutter.
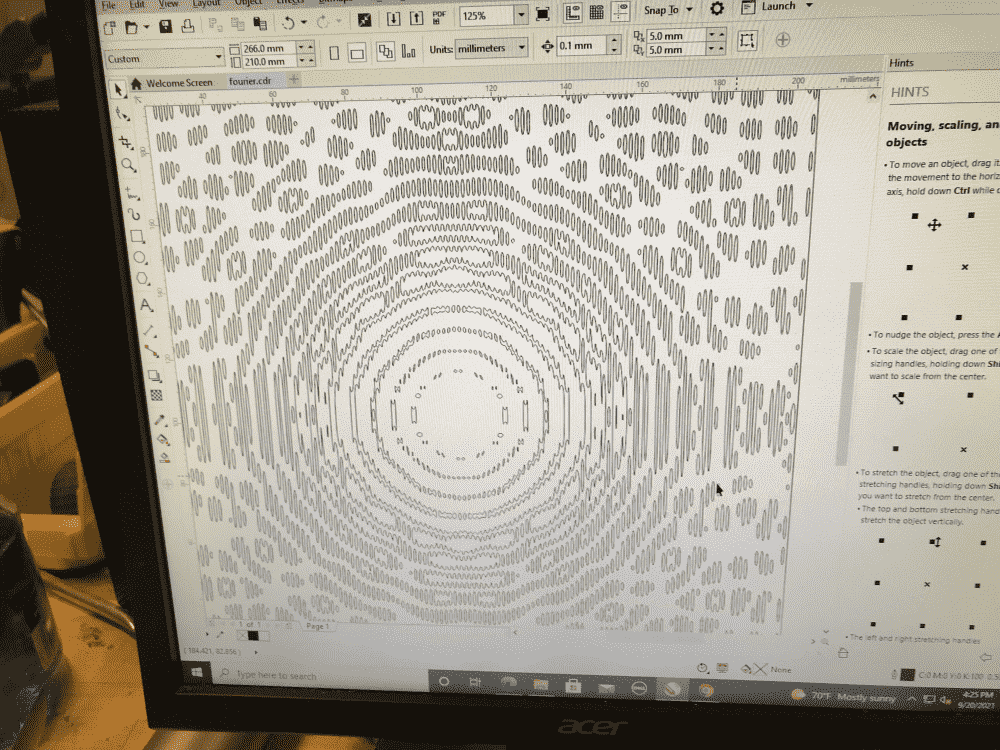
I suddenly had an ominous feeling that this is going to take a really long time. In black and white mode, the image didn't seem that complex, but now that it was converted to outlines for cutting, I realized how deeply I'm in trouble.
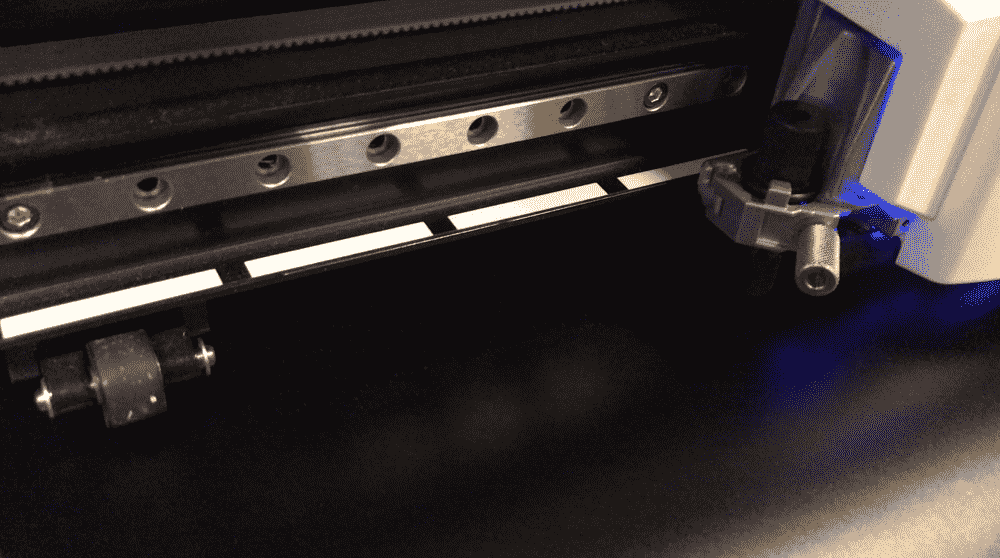
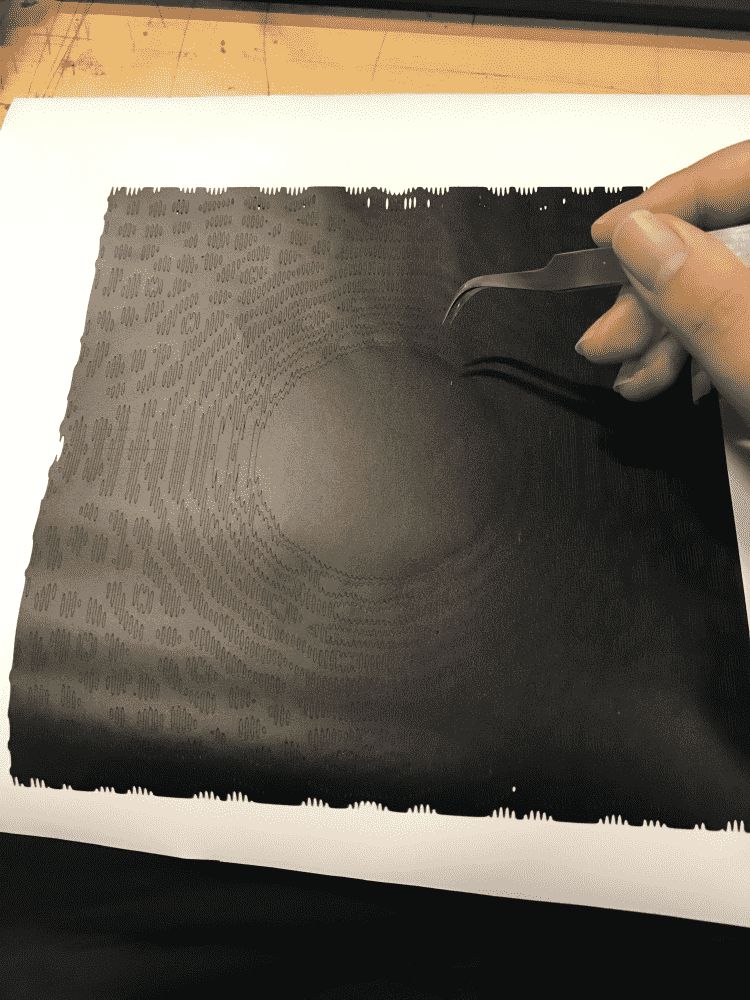
Still, I let the machine measure the material (a black matte piece of vinyl I picked) and start cutting. I can barely see the cuts with my bare eyes, much less capture it with camera:
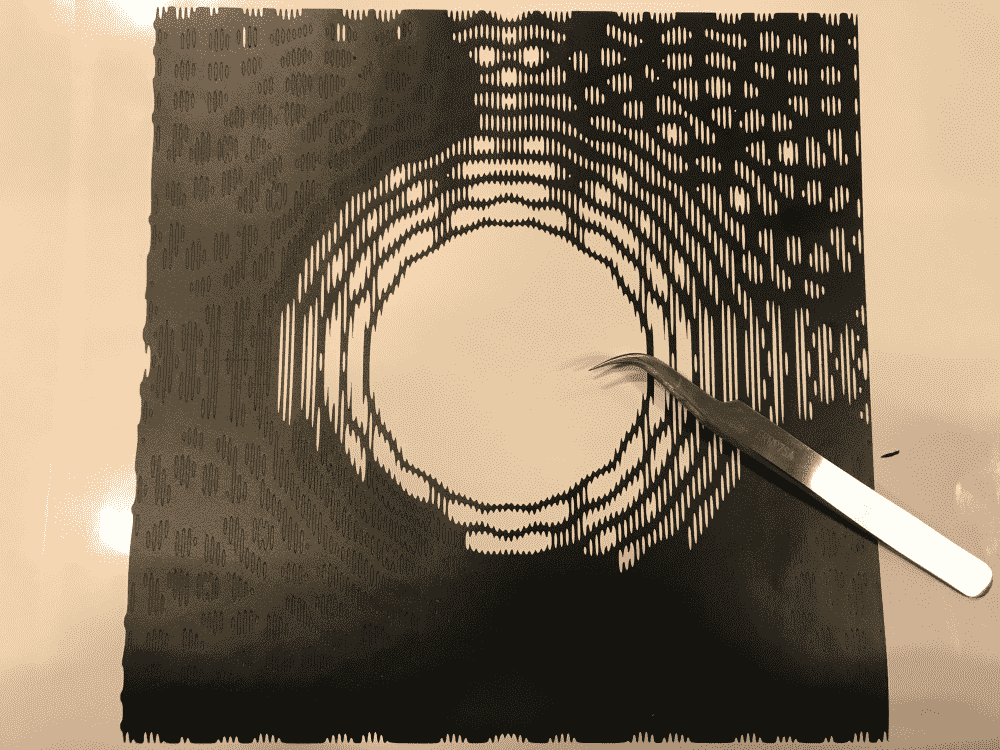
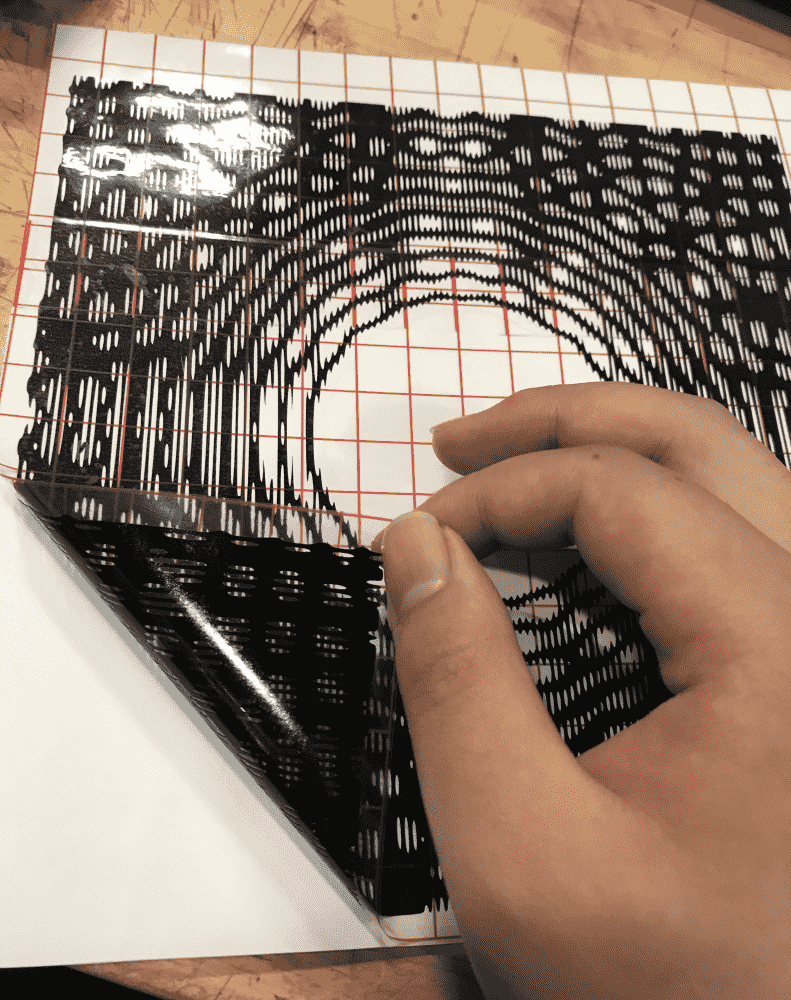
After around half an hour it seemed to have finished the design. However, to my horror, it didn't stop there, and continued to redo all the cuts from the very beginning. Luckily, the machine managed to trace the exact same path so far (how accurate!), so my design was not ruined yet. I asked admin Tom what might be wrong. He said that there must have been duplicate lines in my design, and the machine is just doing what it's told to. He helped me stop the machine immediately. When I took a closer look, it turned out that in the first pass my design wasn't completely finished. The central part is missing. Something must be messed up, me, or potrace, or CorelDraw, or the Vinyl cutter. I thought it's not a big deal (the tiny pieces in the middle might be too hard to preserve anyways), so I started the weeding process.
At first I was very clumsy and it took some twenty seconds to pick up each tiny chip. Gradually I became better and better at it. The trick is to stab the chip right in the middle with both tip of the tweezers, and smudge it toward one direction. Then chip will rear up its head and at this moment grab it there and pull it out. It's also important to completely remove the tweezed chips from the vicinity of the design, otherwise they get stuck again and become even more annoying to detach.
After an hour I only tweezed a quarter of the design. I was exhausted and wondered why I signed up for this masochistic journey. Then a brilliant idea came to my mind, to use sticky tape to pull out large areas of tiny pieces at once.
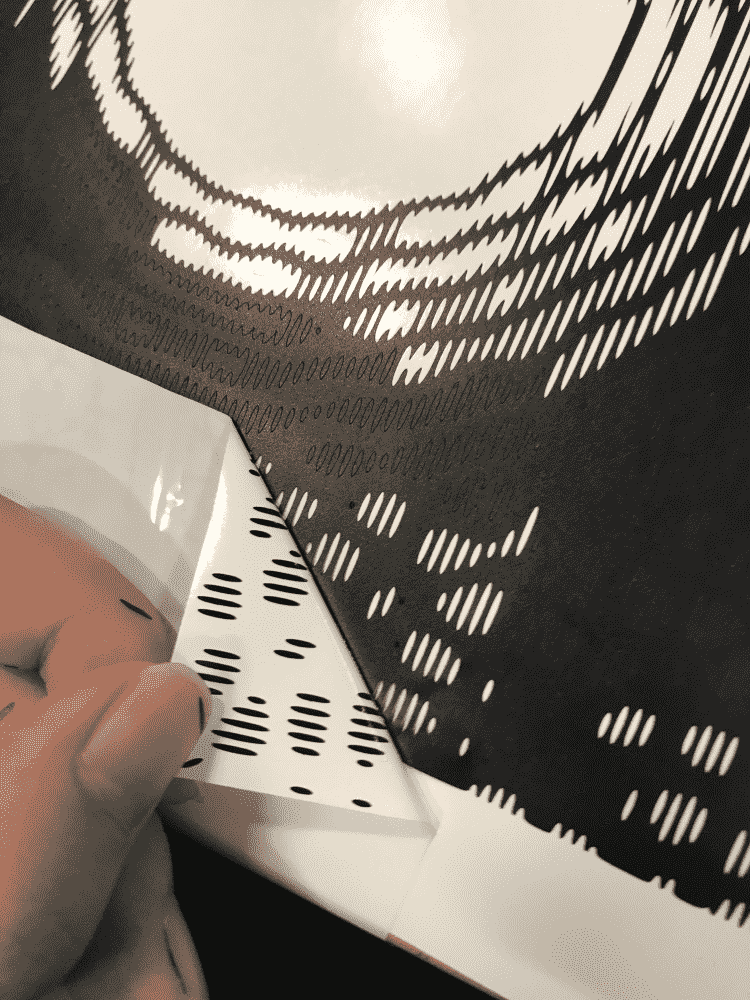
The trick sometimes didn't work with larger chips, and I had a fear that with one careless movement I'll destroy my design. However it is very useful as the first pass, to be supplemented by a second pass of manual tweezing. This expedited the process greatly, and saved me from spending the rest of my life tweezing.
Almost done:
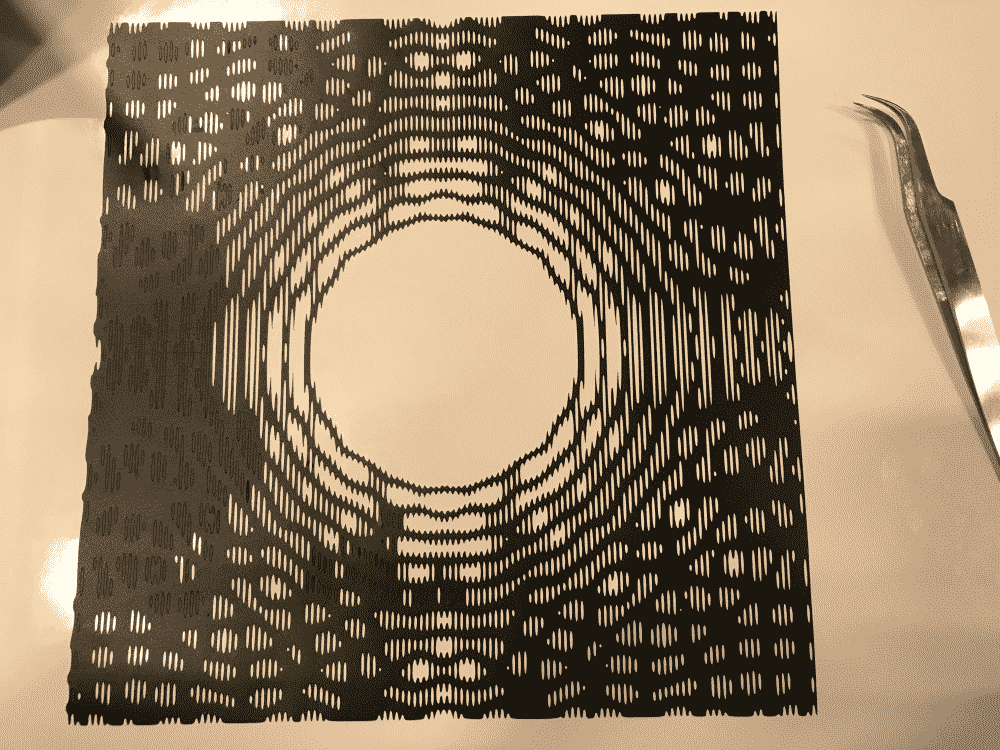
And finally done! The weeding took me around two hours in total. Not that bad actually!
I've got tiny sticky chips everywhere, on my hand, on the desk, probably on my face. I took the time to clean them up, lest they interfere with the next step of transferring the design.
I realized that the transfer tape was too small. I figured that two strips, one for each half of the image, should do the trick.
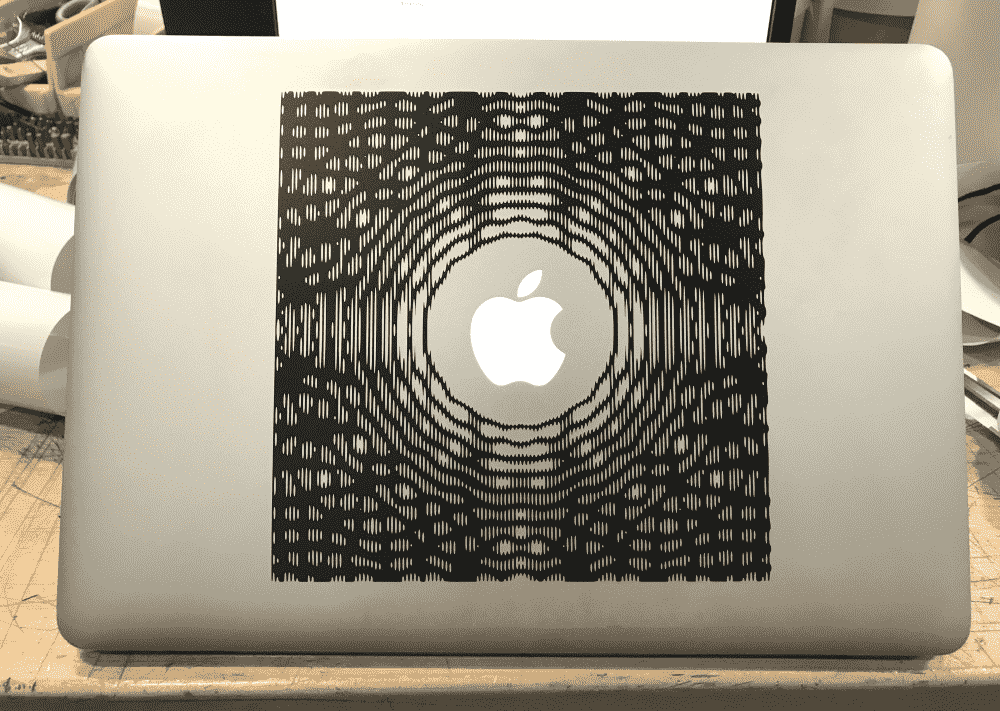
Until this point I wasn't sure where I want to stick the sticker. I'm not a huge fan of laptop stickers since I manhandle my laptop all the time, and stickers tend to come off, lose color, or otherwise look gross on my laptop. However, since I don't have any better place for it, I decided to award my trusty laptop with this new tattoo.
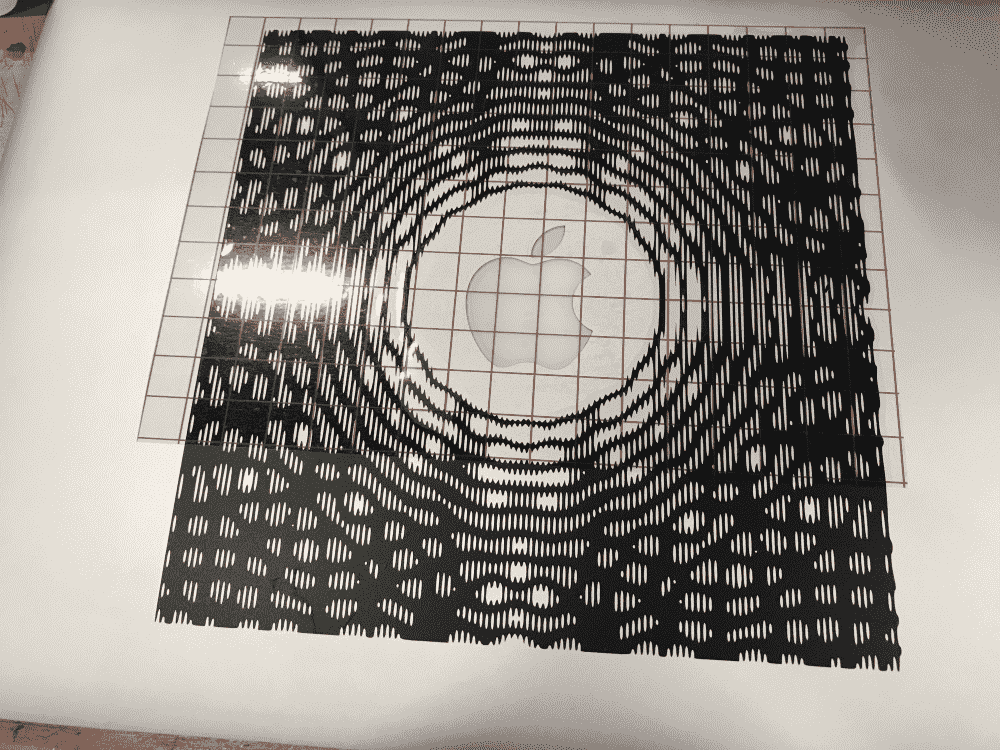
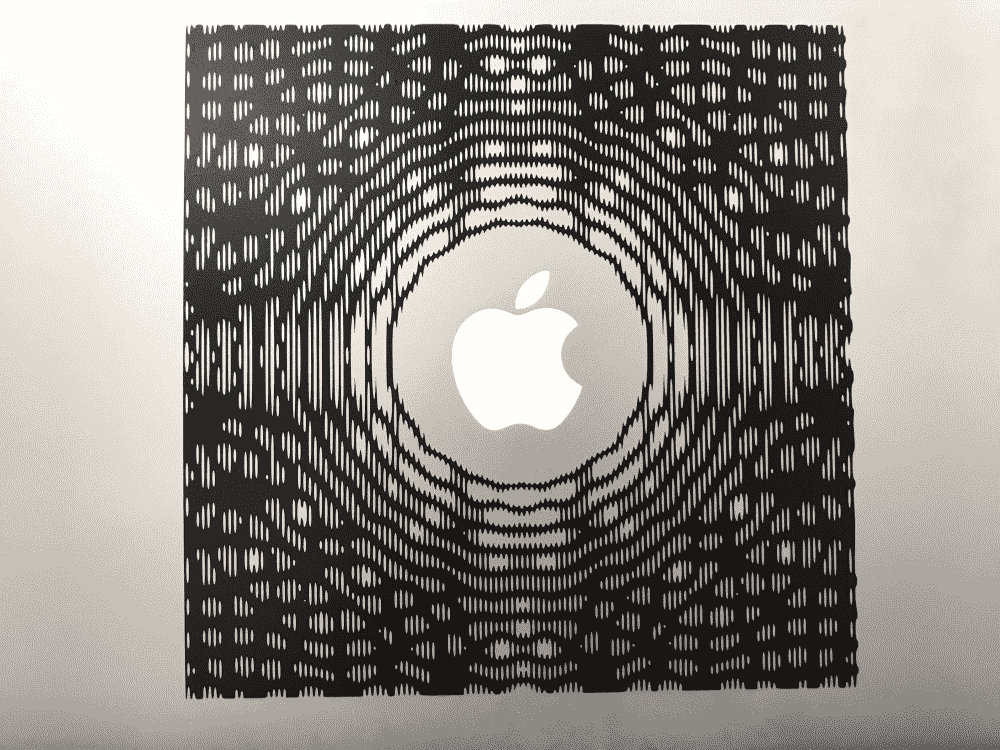
Interestingly, the central hole fits perfectly around the apple logo. This was a total coincidence, since if the vinyl cutter hadn't been faulty, there would have been small patterns where the hole is now.
I redid the alignment a couple of times until it looked perfect to the eye.
Wow! It was quite mesmerizing to look at. Especially when the logo is lit up, it looks as if the patterns are beams of light radiated from it. Again, this was a total coincidence.
I'm quite happy with the effect. My only complaint is that it might look even better if the pattern covers the entire lid of the laptop.
Overall the project went very smoothly. I had bad experiences with sticky things in the past, but this time, nothing went wrong at all: I didn't peal off anything I shouldn't be when tweezing; I didn't accidentally tear the whole thing in half when transferring; I didn't paste it at a crooked angle; I didn't end up with a huge bubble impossible to suppress. I was very prepared to see at least one of those disasters, knowing myself to be a clumsy person, but it was surreal that none of these happened.

Nice!