Week 0
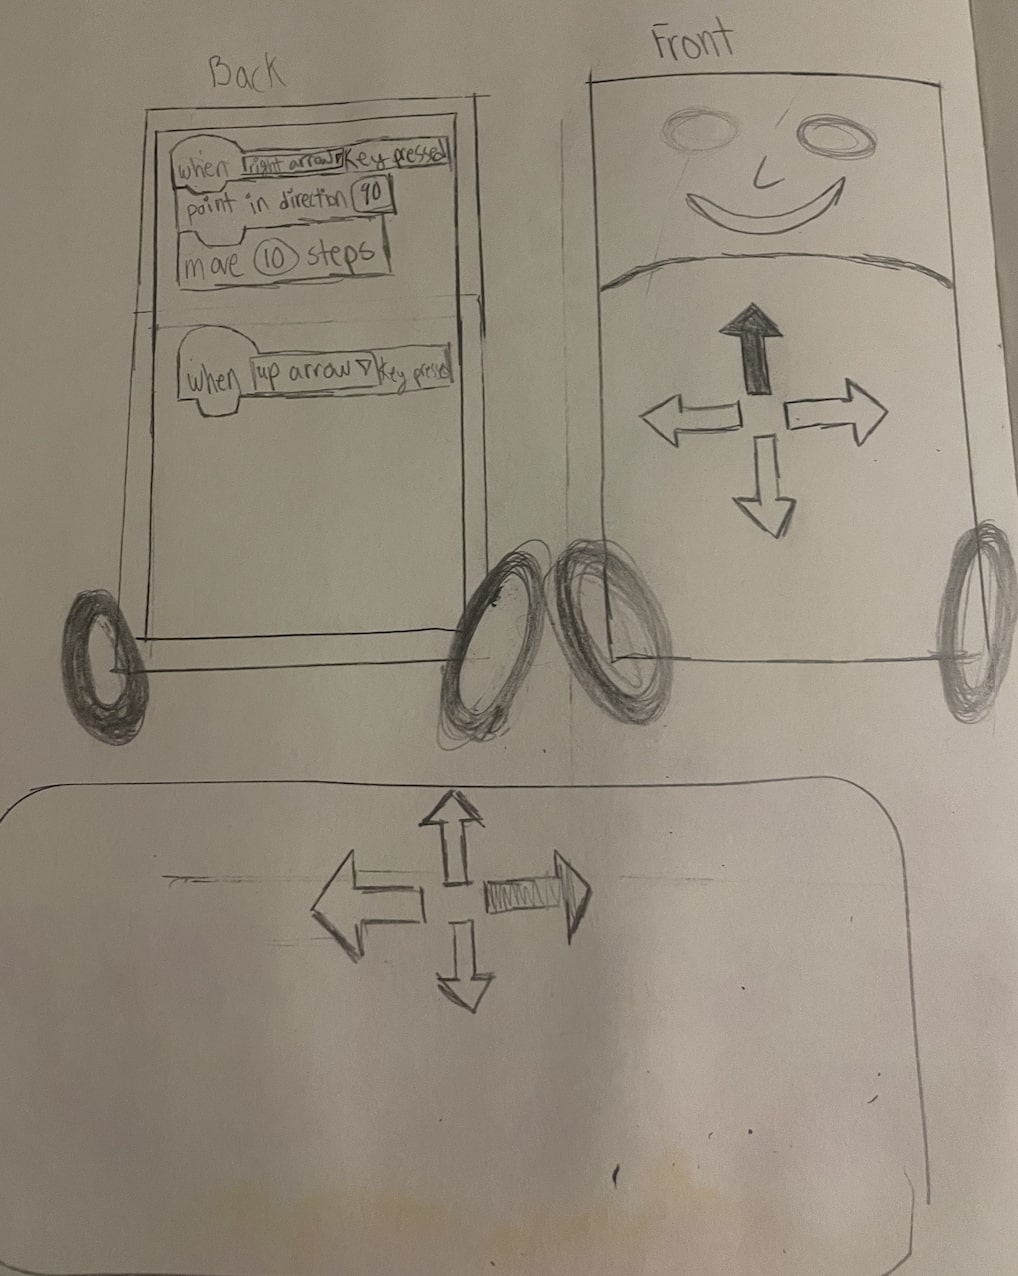
This week is about planning and sketching a potential final project. I hope to 3D print this robot, so I incorporated holes and a place for screws. Moreover, I hope to 3D print tires. There were a bunch of tutorials online that helped me design the shape for the robot body, the tire, and the maze. Moreover, I wanted students to be able to program the robot by pressing certain buttons. Students can use Scratch to train a model that will help the robot turn different directions. Scratch is a great language for those who are starting to learn code. As a result, when the student programs the robot, they can see the corresponding Scratch code for each of their commands. I plan on using a Raspberry pie throughout this project because I would like to display the code blocks and create a live camera feed on the robot. I decided to use Fusion 360 to prototype my final project.
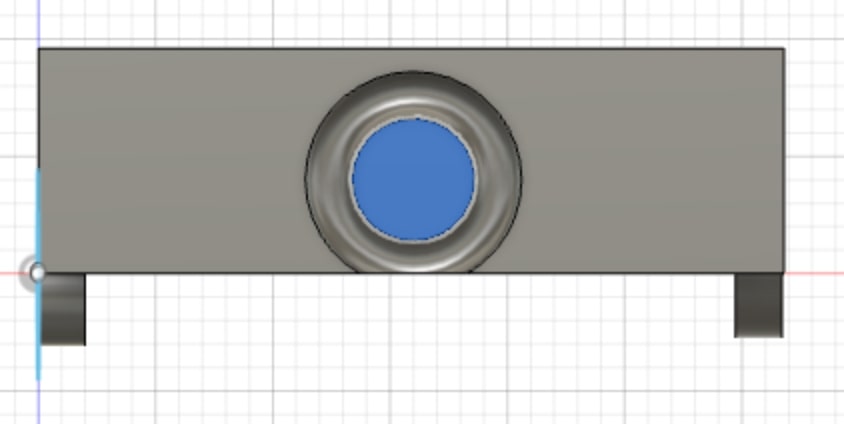
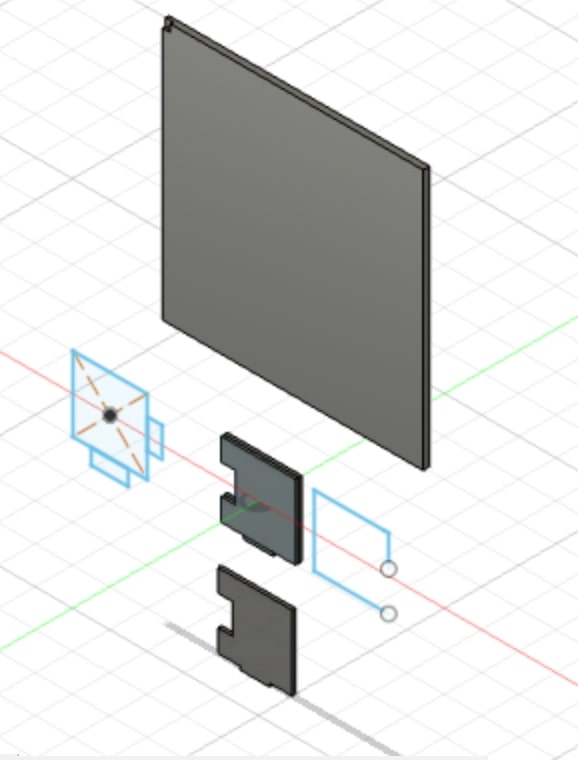
Challenges: I used Fusion 360 to design the walls for the maze and the robot. It took me a couple of days to get used to using Fusion 360 because it wasn’t similar to any of the prior softwares that I used. One aspect of Fusion 360 that I enjoyed is that you can add different components to all sides of an object by clicking the side that you’re interested in. Moreover, it took me a while to realize that I had to right click on a object if I wanted to change it. I enjoyed learning how to insert screws and holes into an object as well. Overall, I still have a lot to learn about Fusion 360, but I’m beginning to understand the logic that I need to have to start creating more complex structures on Fusion 360.
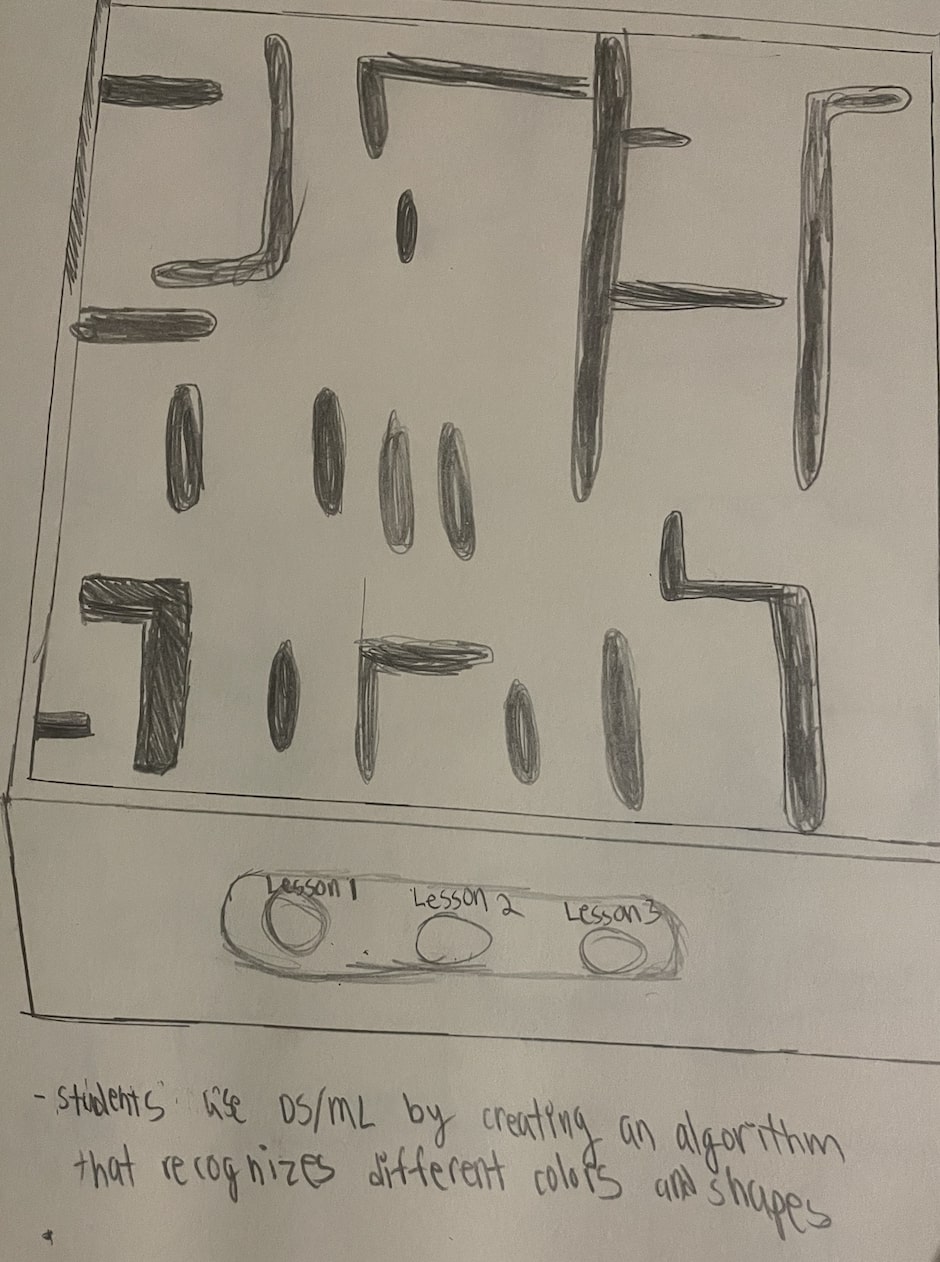
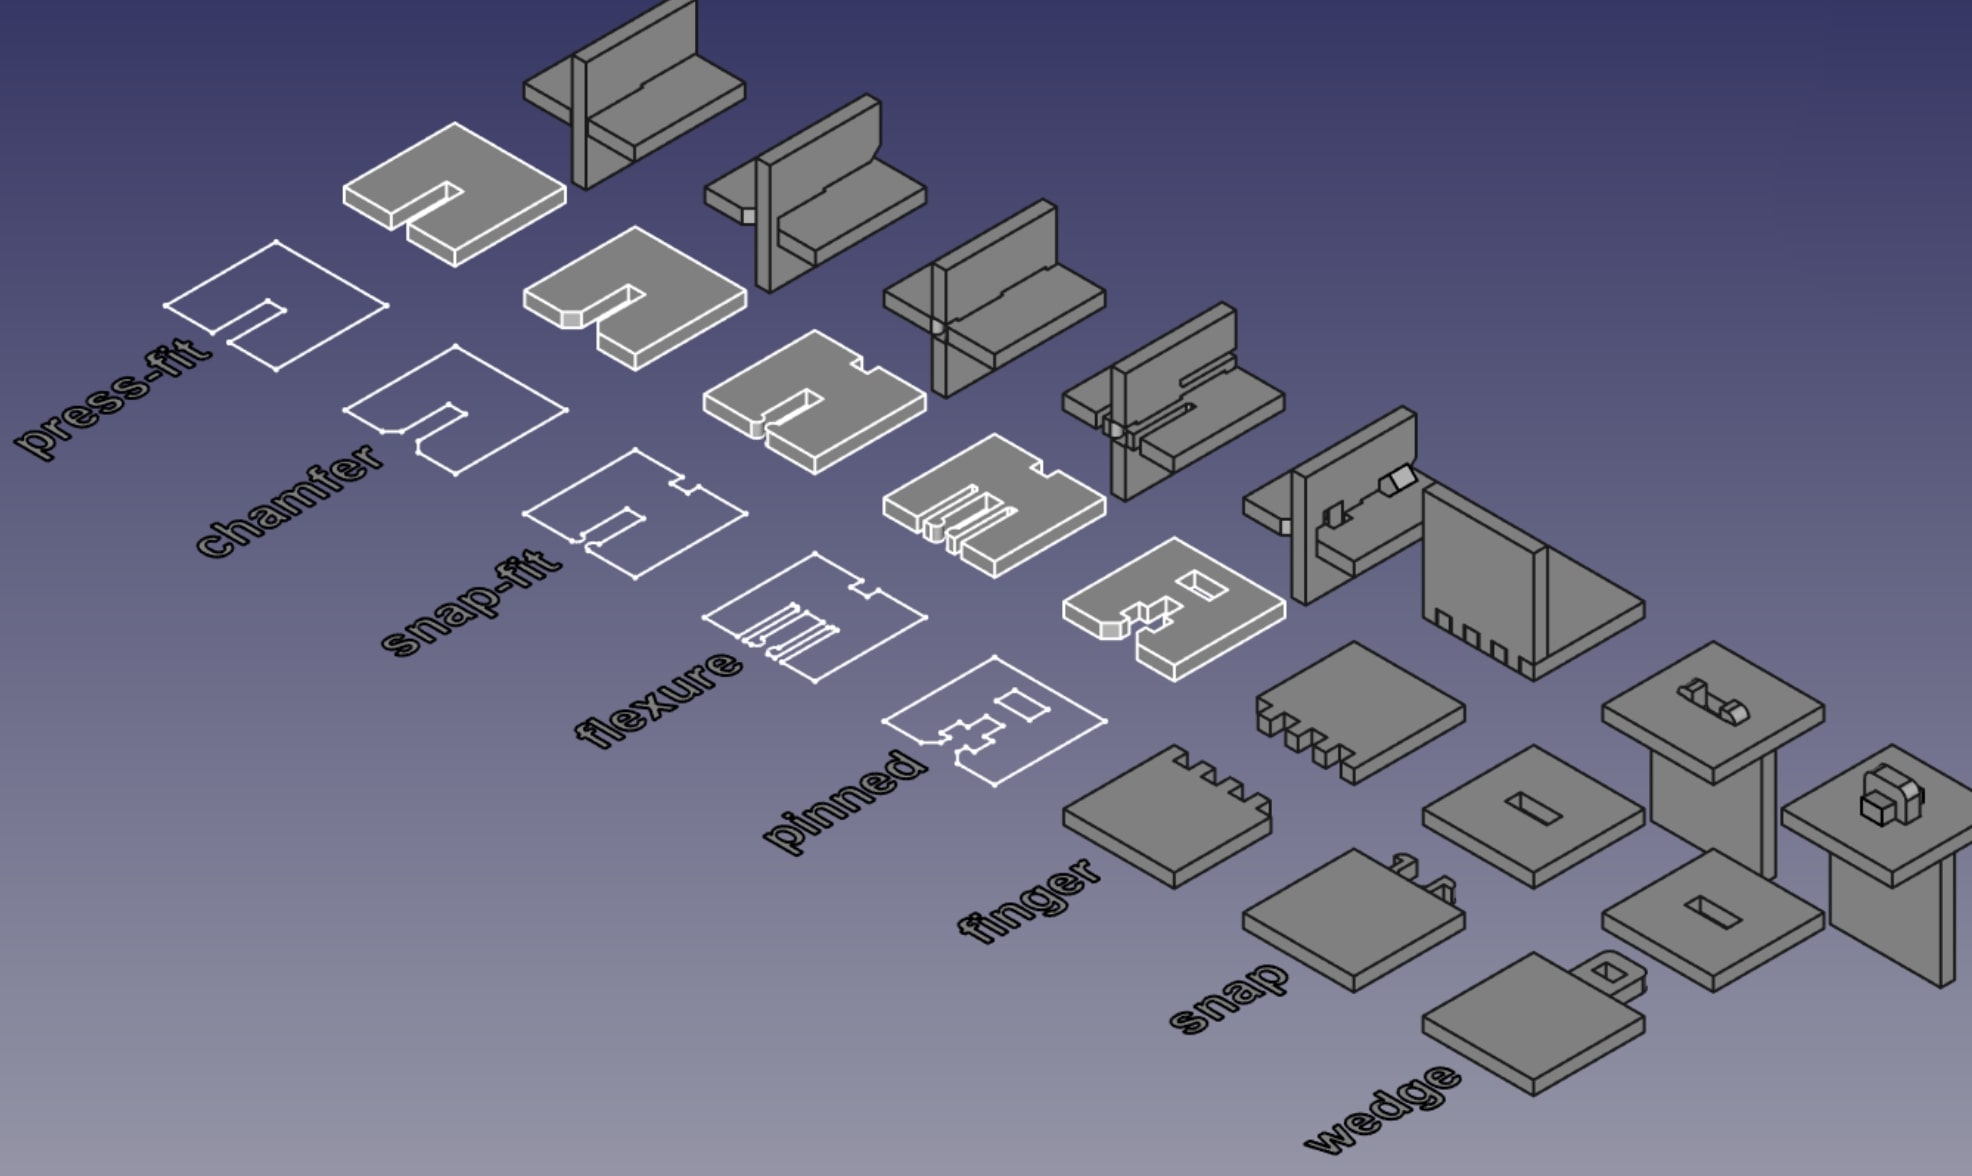
Also, I experimented with drawing the walls for the maze on Fusion 360. Moreover, I used a "press-fit" joint structure and a joint called “finger” to insert the walls into the maze.
Lazer cutting file
Maze file
Vinyl cutting files
Robot body dxf file