Week 03 — 3D Scanning and Printing
Additive adventures, organic rings-turned-bangles, and a crash course in handheld scanning.
Assignment
Group Assignment:
- test the design rules for your 3D printer(s)
Individual Assignment:
- design, document, and 3D print an object that could not be made subtractively (small, few cm3, limited by printer time)
- 3D scan an object (and optionally print it)
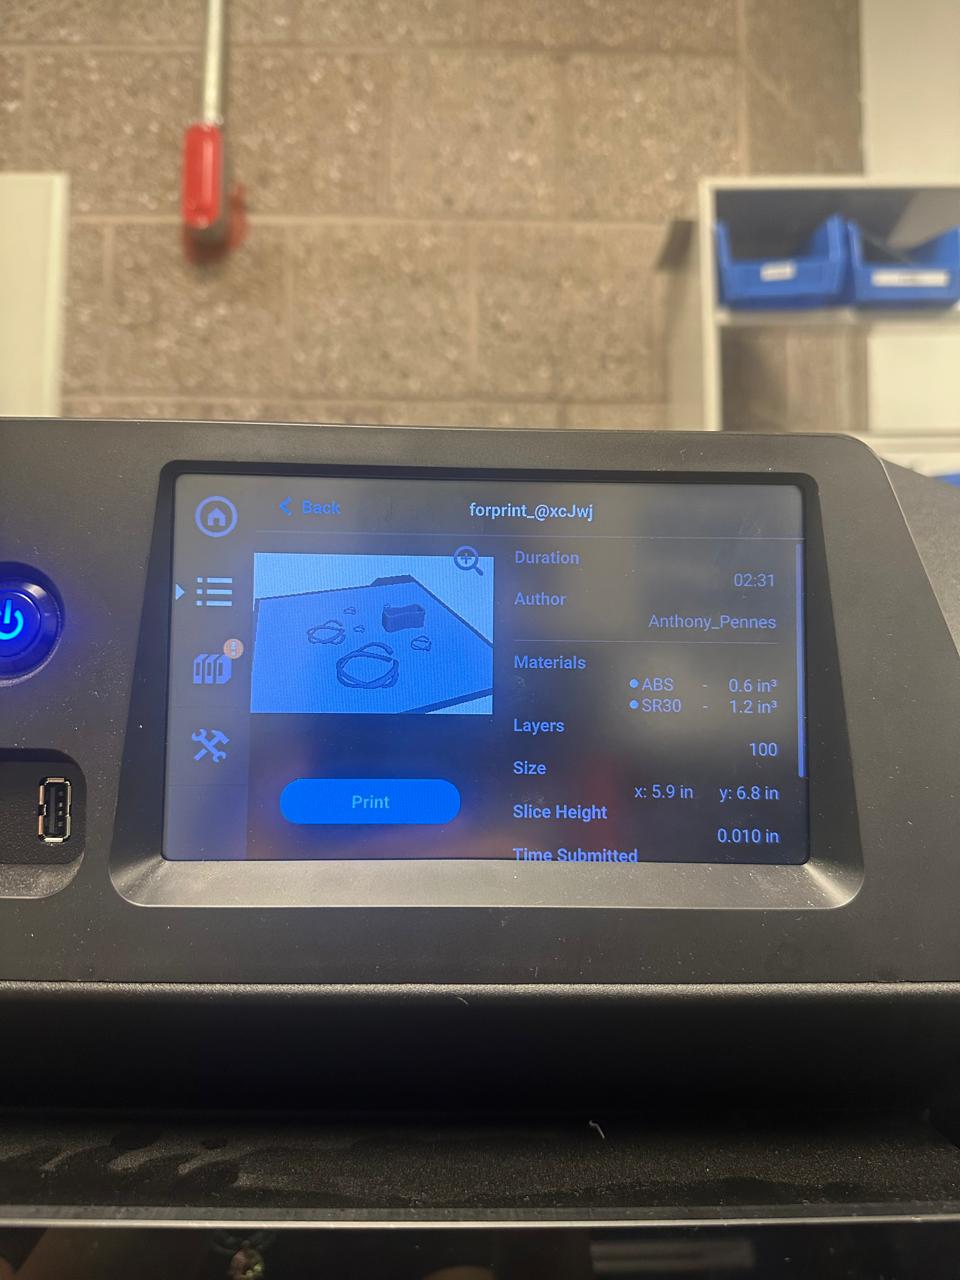
- Printer: Prusa Core One (HF 0.4 mm nozzle)
- Slicer: PrusaSlicer (Expert mode to unlock Organic supports)
- Filaments: Generic PLA (white); OVV3D PLA+WOOD (wood-filled, hygroscopic)
- Layer height: 0.20 mm; Infill: 15% Gyroid; Perimeters: 3
- Supports: Everywhere + Organic; Bed adhesion: Brim
- Temps (PLA): 200 °C nozzle / 60 °C bed
- Temps (PLA+WOOD): 190 °C nozzle / 60 °C bed
- Print speed: Default profile values
- Scanner: Creality CR-Scan Ferret Pro — Turntable, geometry-only, STL export
1) Additive vs. Subtractive
- Subtractive: start with a solid block and carve away (mills, routers, laser cutters) until the form emerges.
- Additive: build up from nothing, stacking layers of material (3D printers, resin curing, powder-bed fusion).
- Constraint reminder: design something impossible to machine subtractively—think captive voids, continuous internal channels, or severe undercuts.
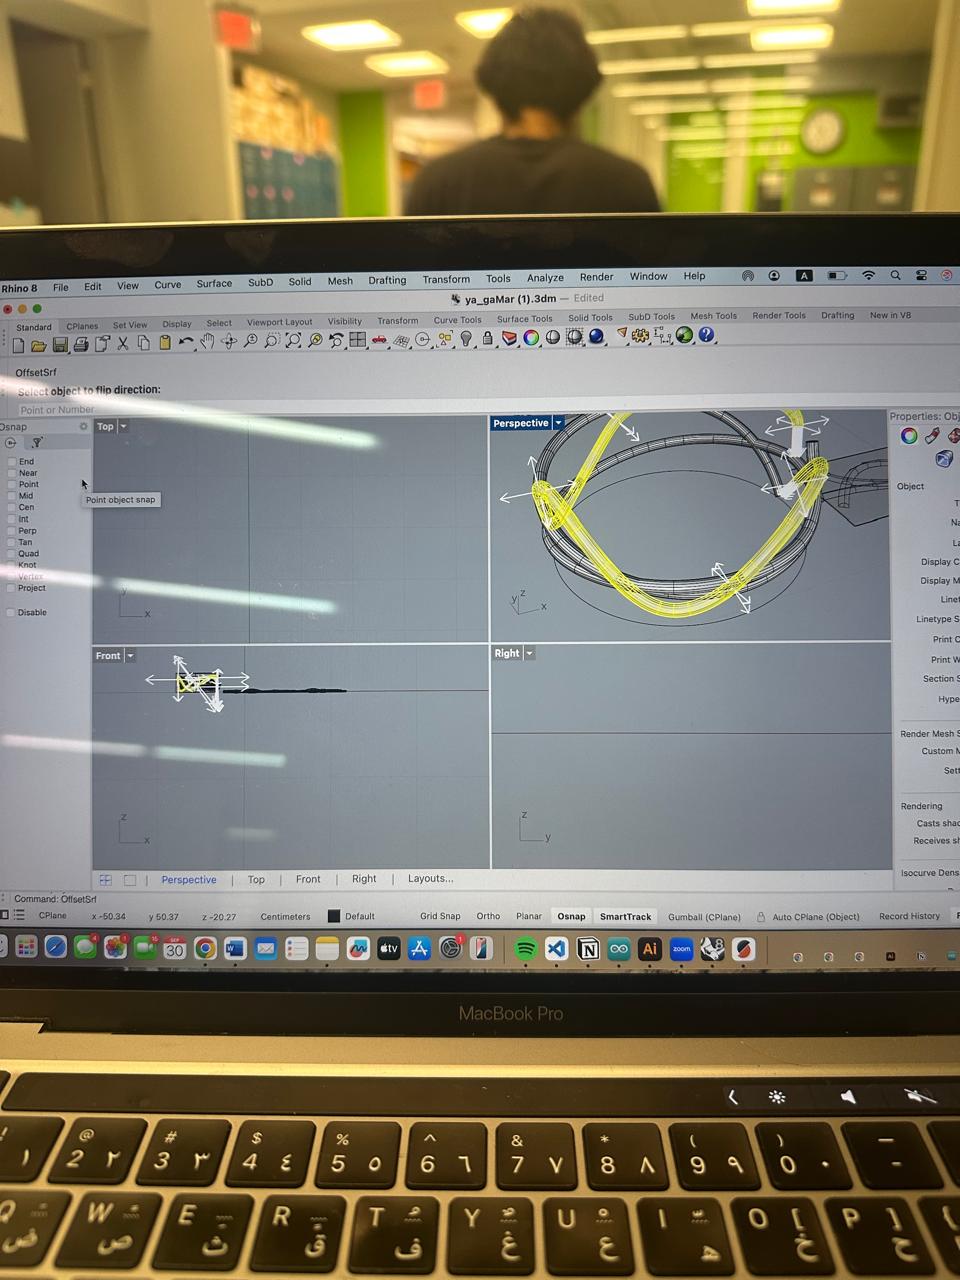
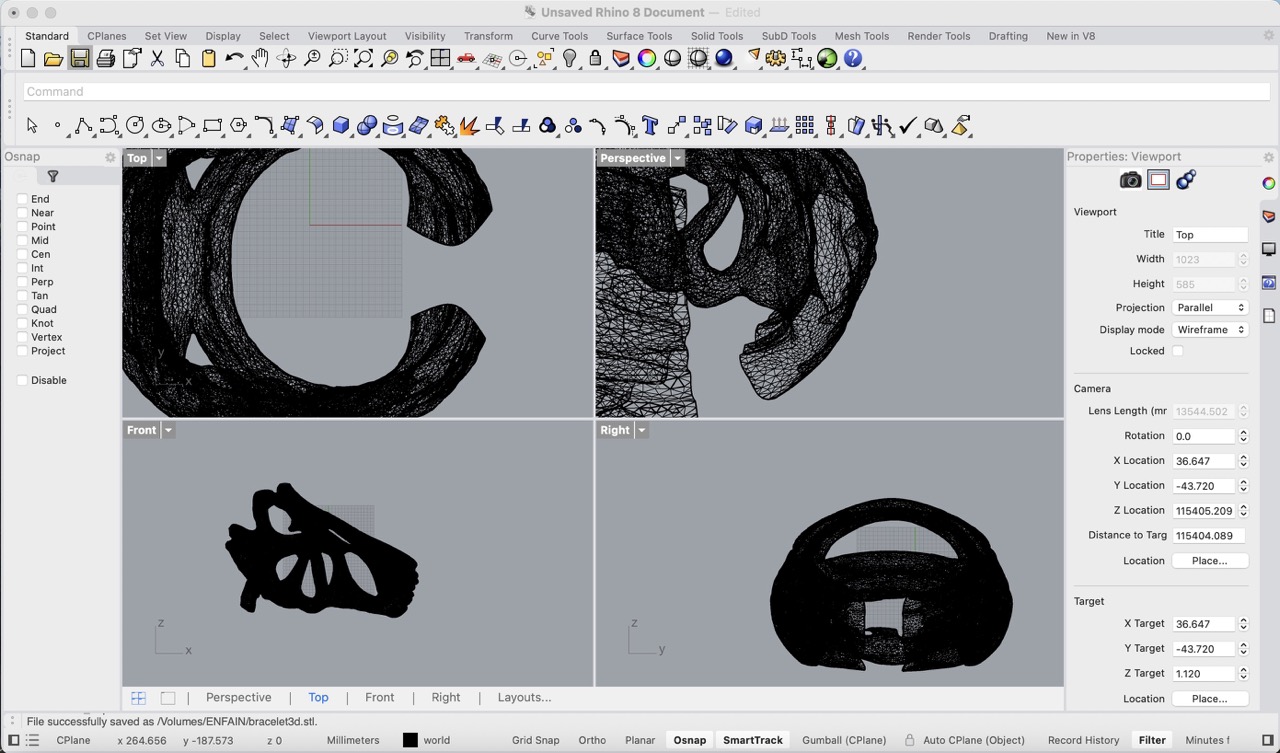
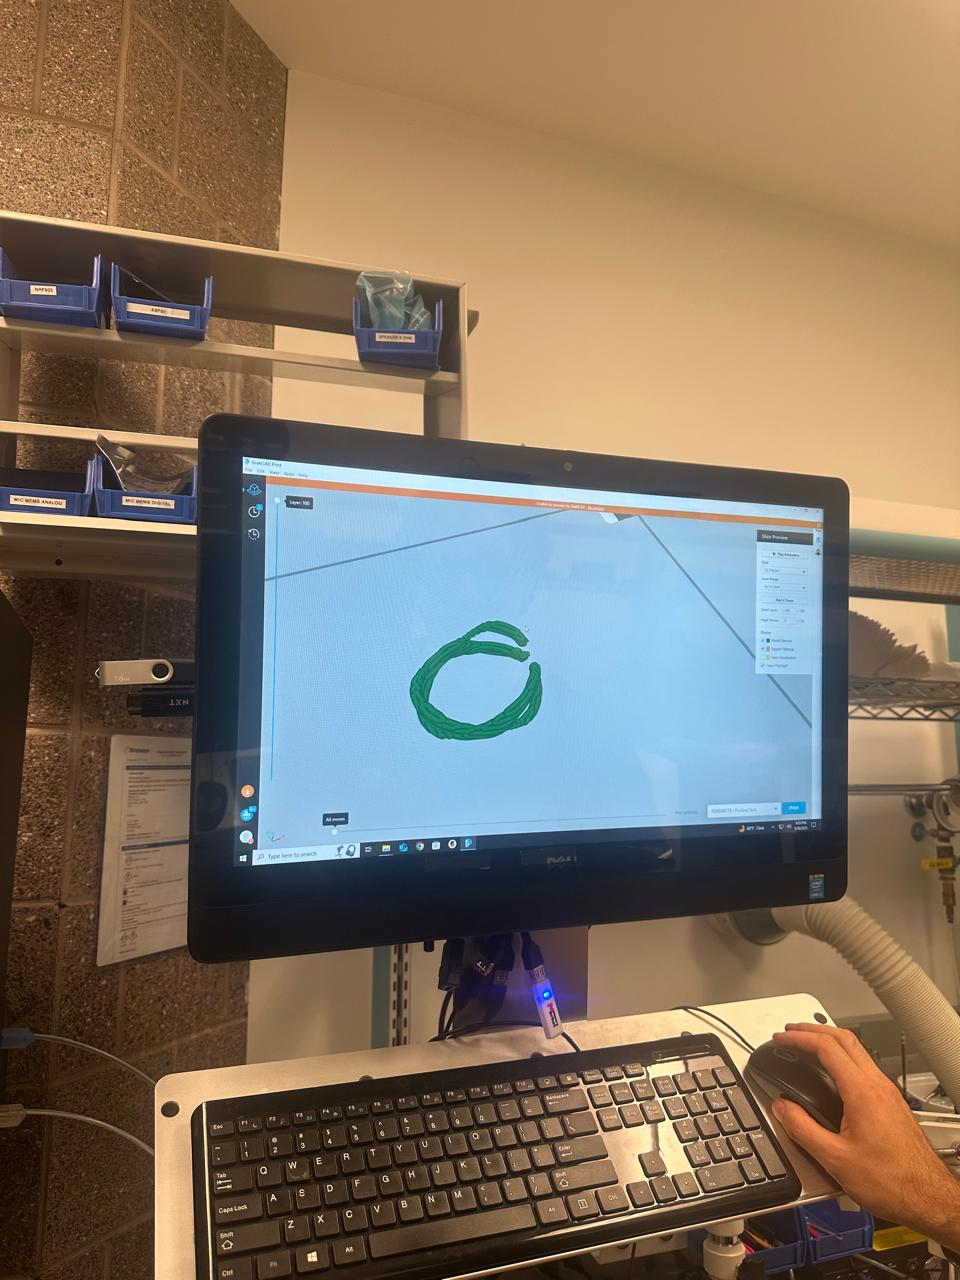
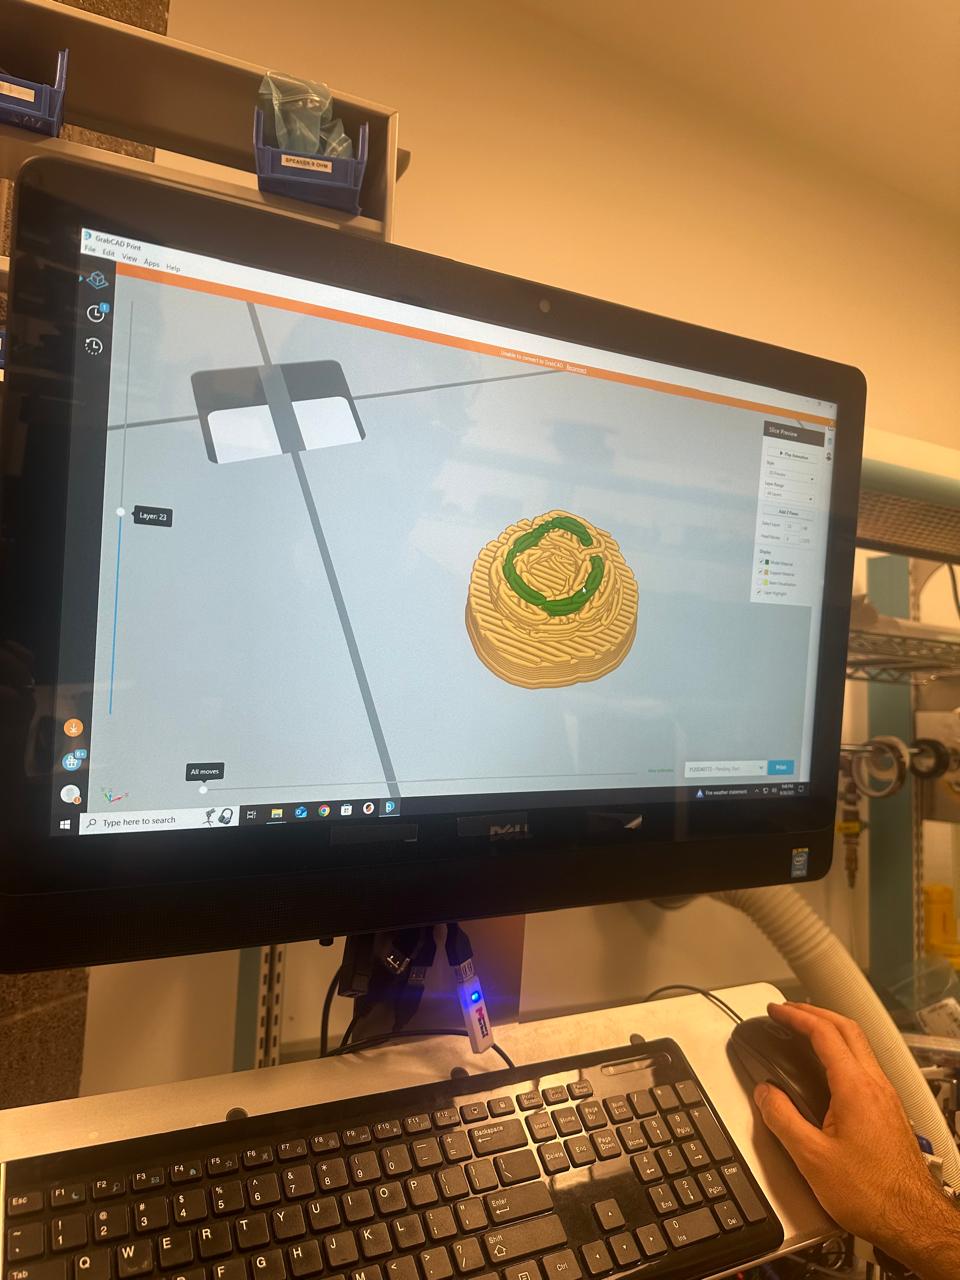
2) CAD — Organic ring → bangle (Rhino)
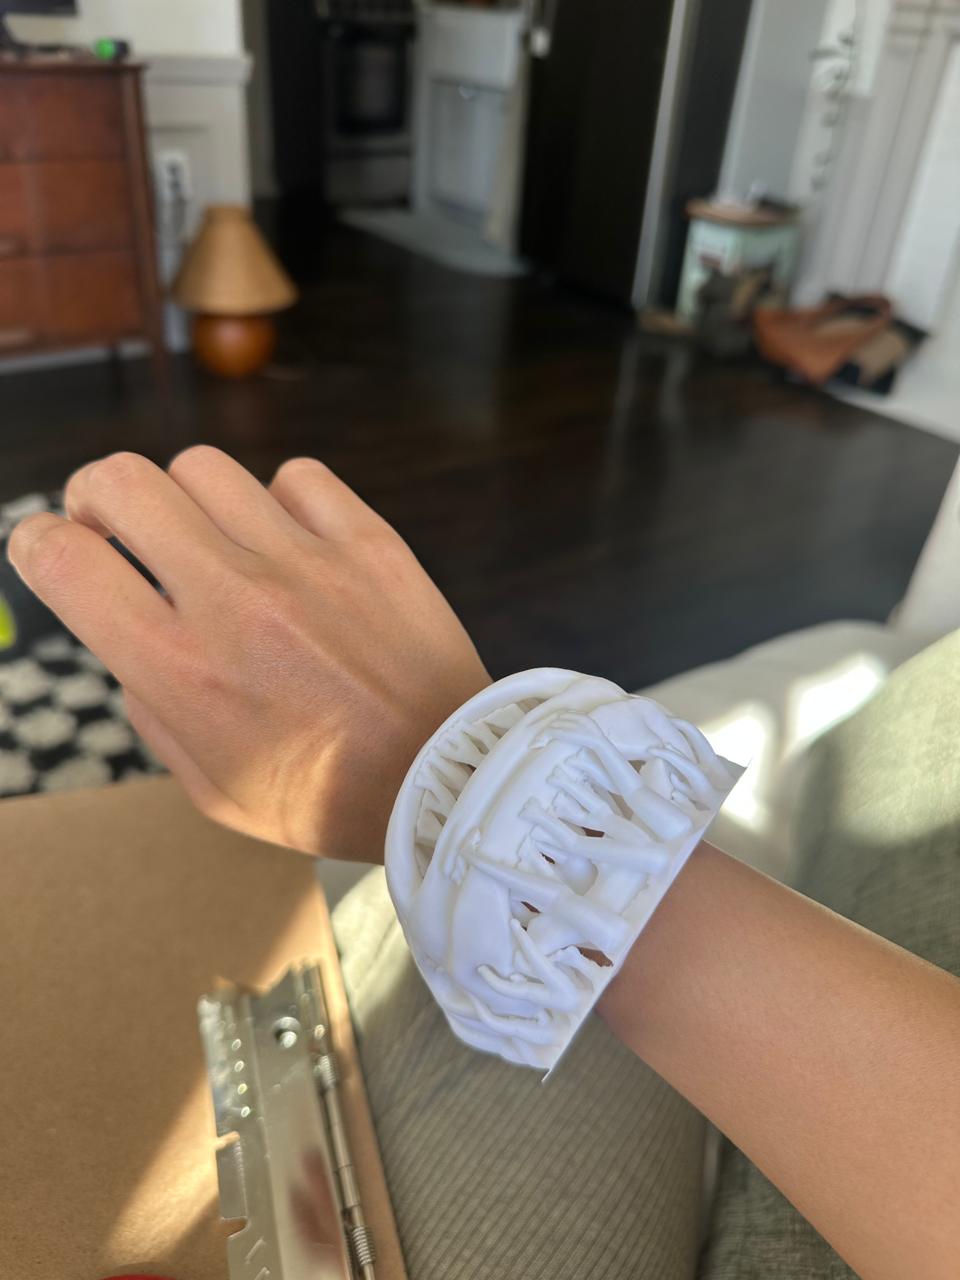
I wanted to remake an organic ring I wear but quickly discovered how thin jewelry fights FDM rules. Scaling the idea into a bangle saved the print and preserved the vibe.
- Set Rhino document units to millimeters.
- Sketch freeform curves inside a guide rectangle to capture the organic profile.
- Use
Pipeto give each curve printable thickness. - Connect forms with
LoftorSweep2to get a continuous shell. - Add
FilletEdgeeverywhere for wearable comfort. - Cap surfaces to confirm a watertight solid.
- Run
CheckMeshto verify it exports cleanly. - Measure ring and wrist with calipers/string and scale accordingly.
- Export STL for slicing.
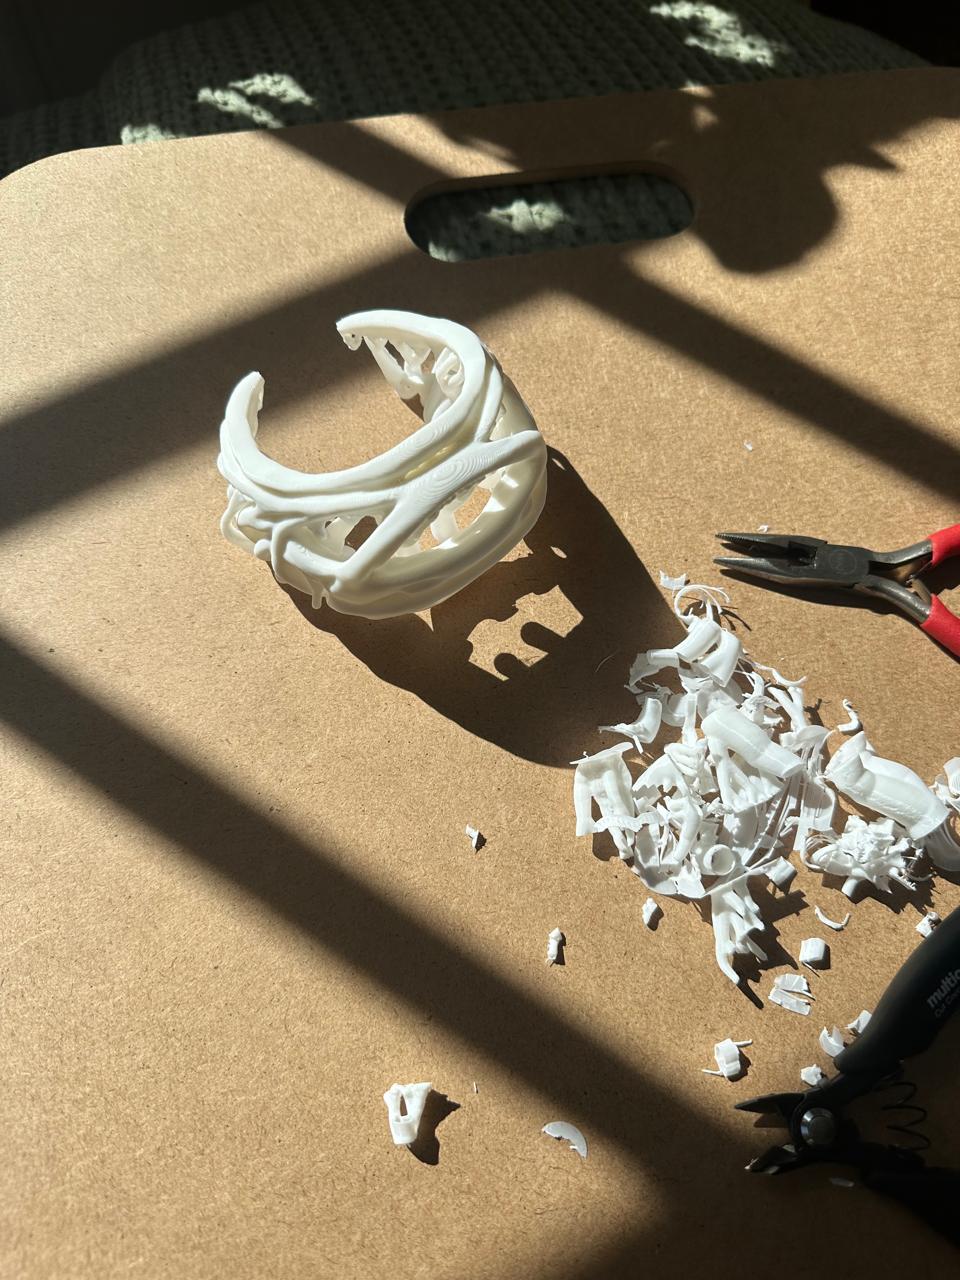
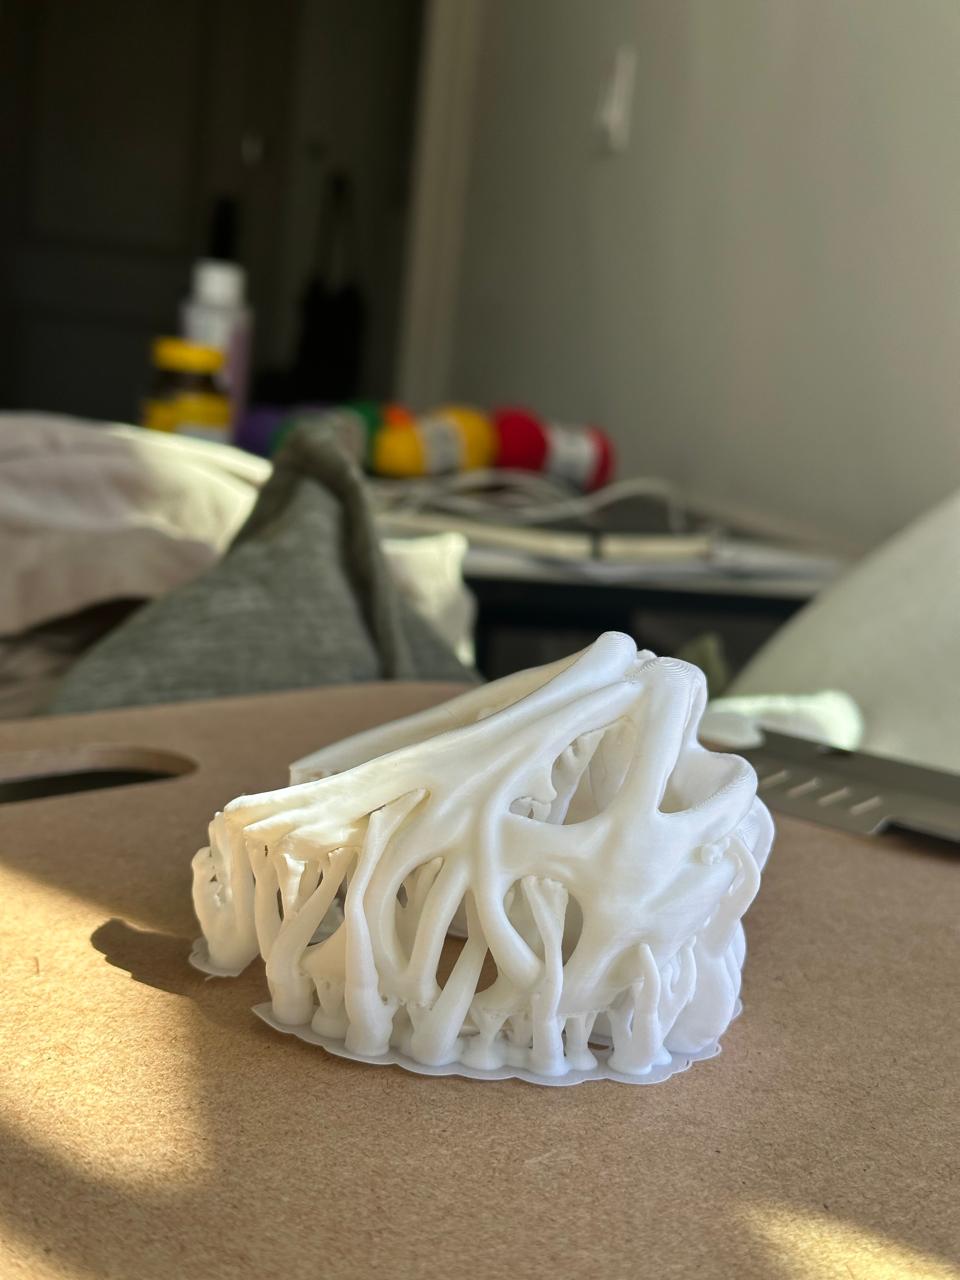
Thin ring walls kept collapsing during slicing tests; scaling up into a bangle gave the geometry enough body for 0.4 mm extrusion.

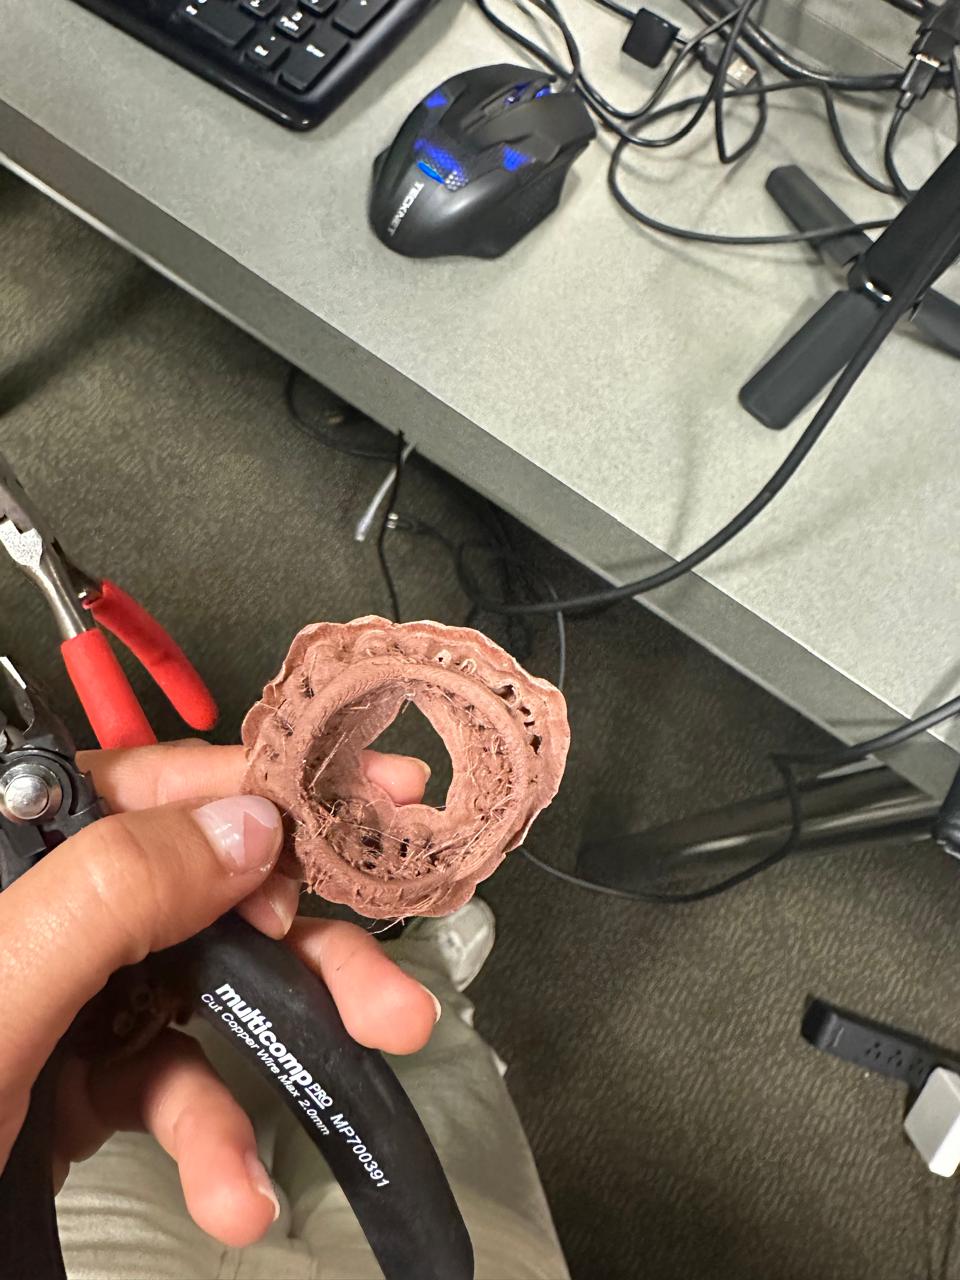
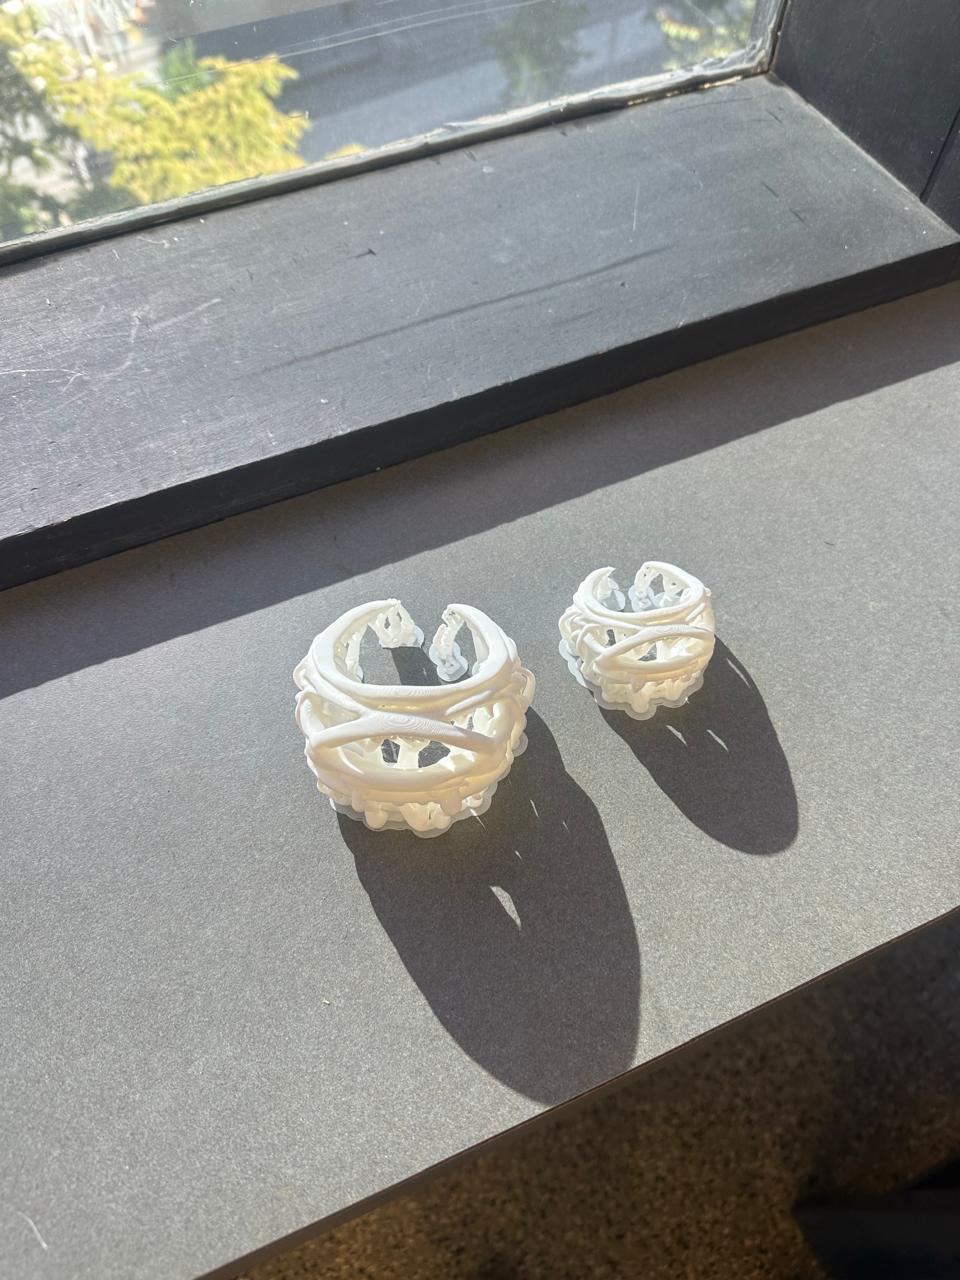
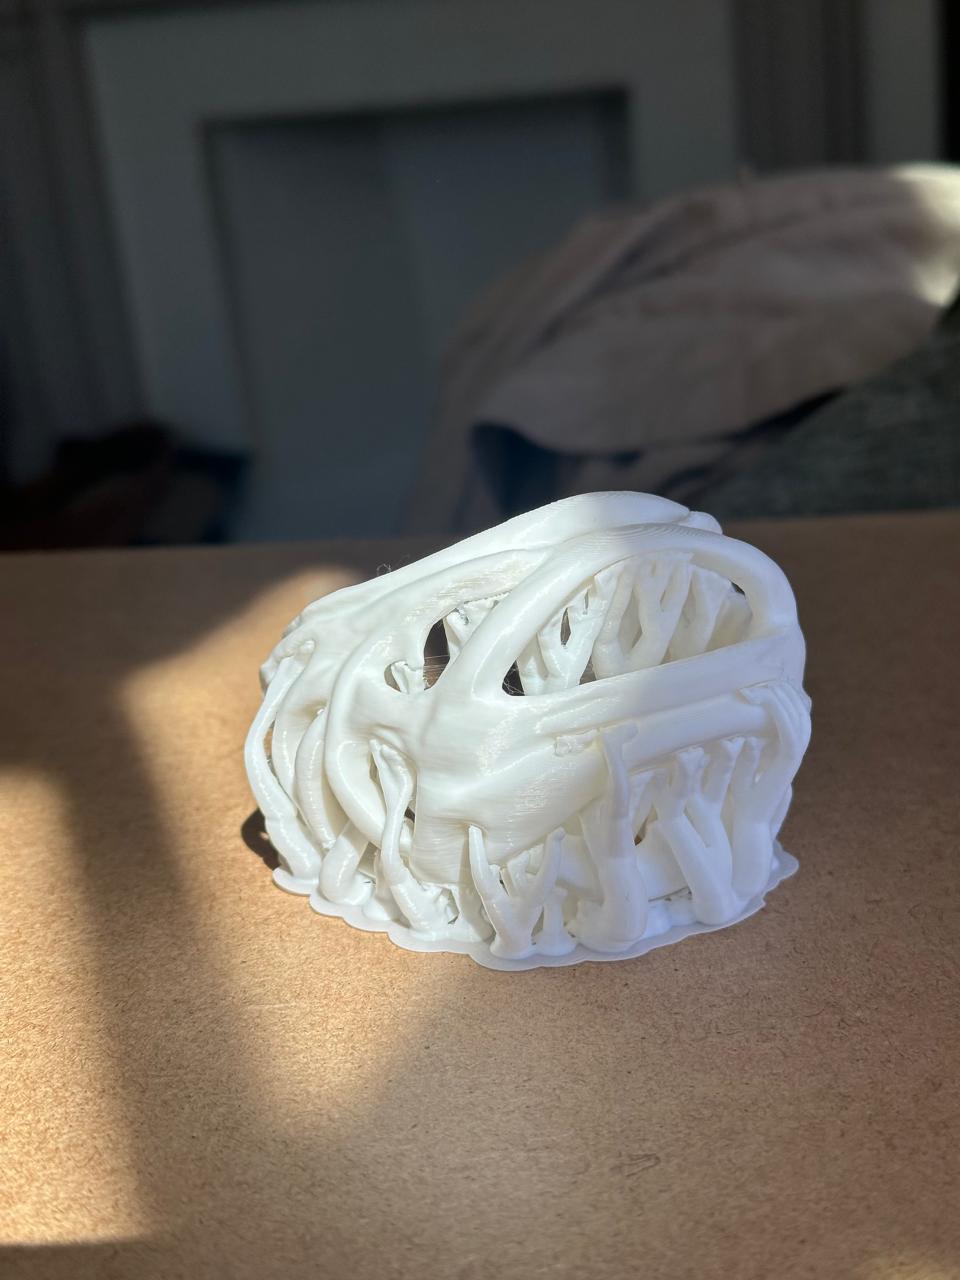
Ring attempt using PLA Wood
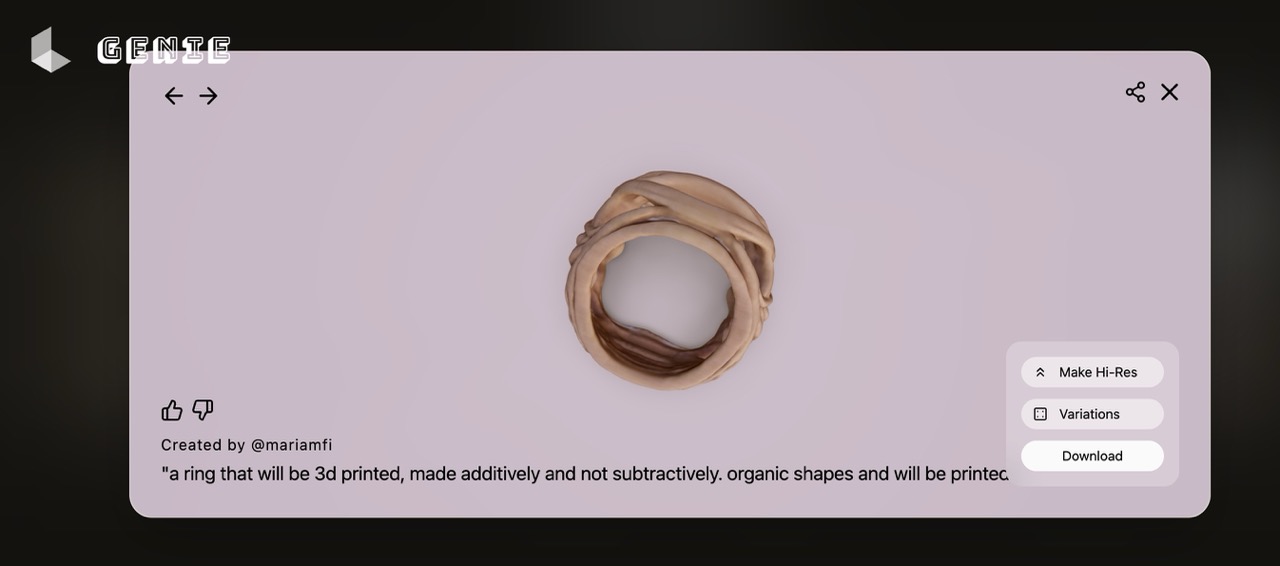
3) AI → CAD experiment (Meshy → Genie → Rhino)
- Tested Meshy for AI-generated rings, but STL export sits behind a paywall.
- Swapped to AI Genie (free STL export) with the prompt "organically inspired ring."
- Imported the STL into Rhino—scale arrived at giant statue size.
- Scaled down, then pivoted to making it a bangle to avoid thin sections.
- Cut a wrist opening and tweaked edges in Rhino for comfort.

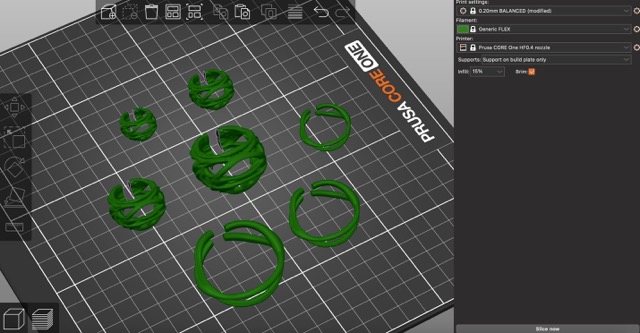
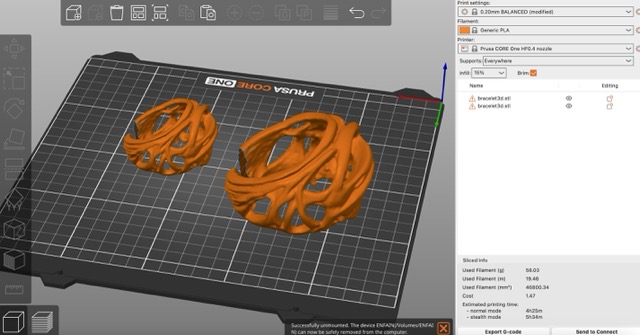
4) Slicing (PrusaSlicer — Expert mode)
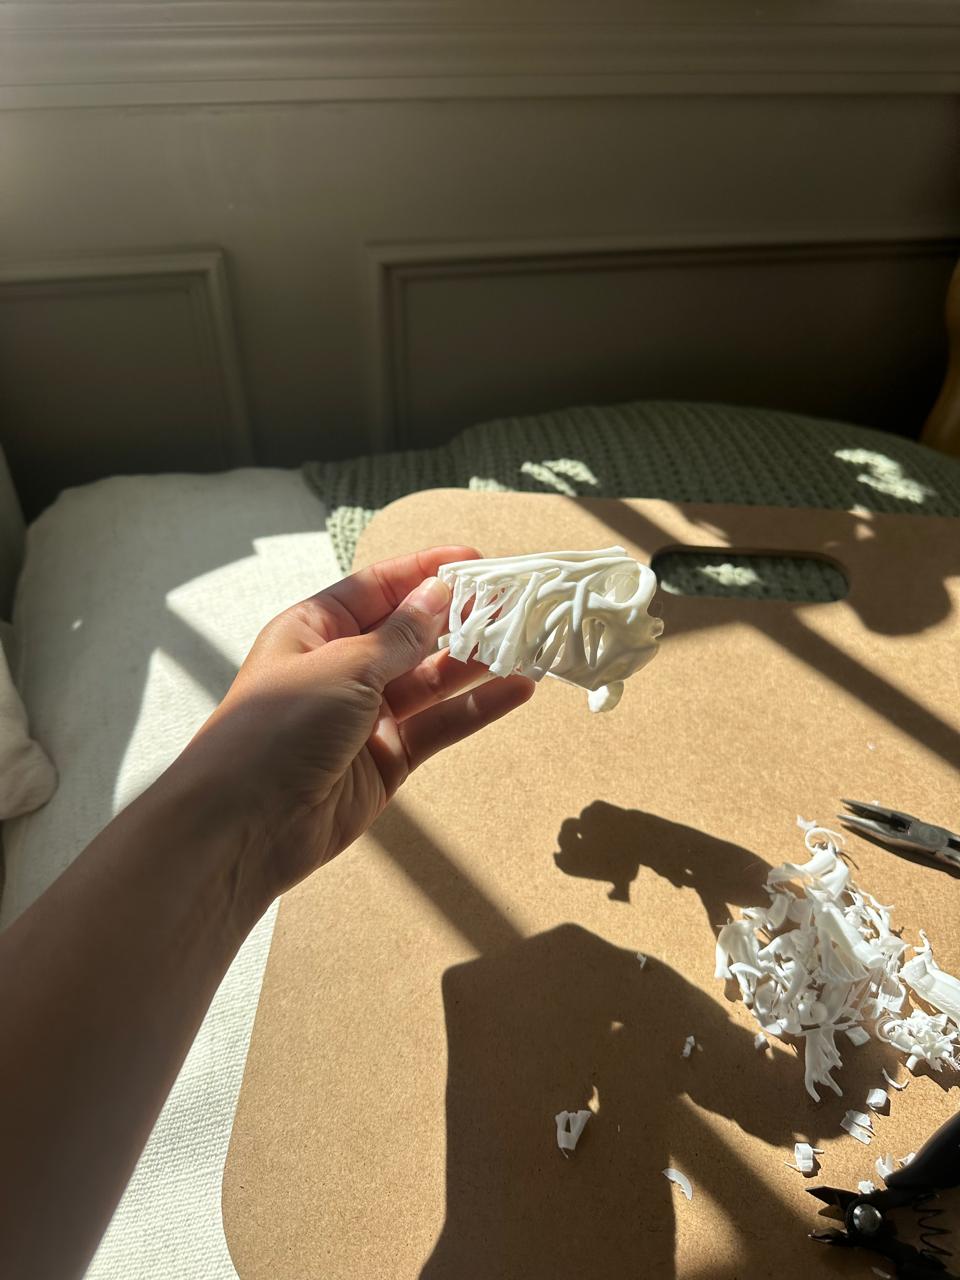
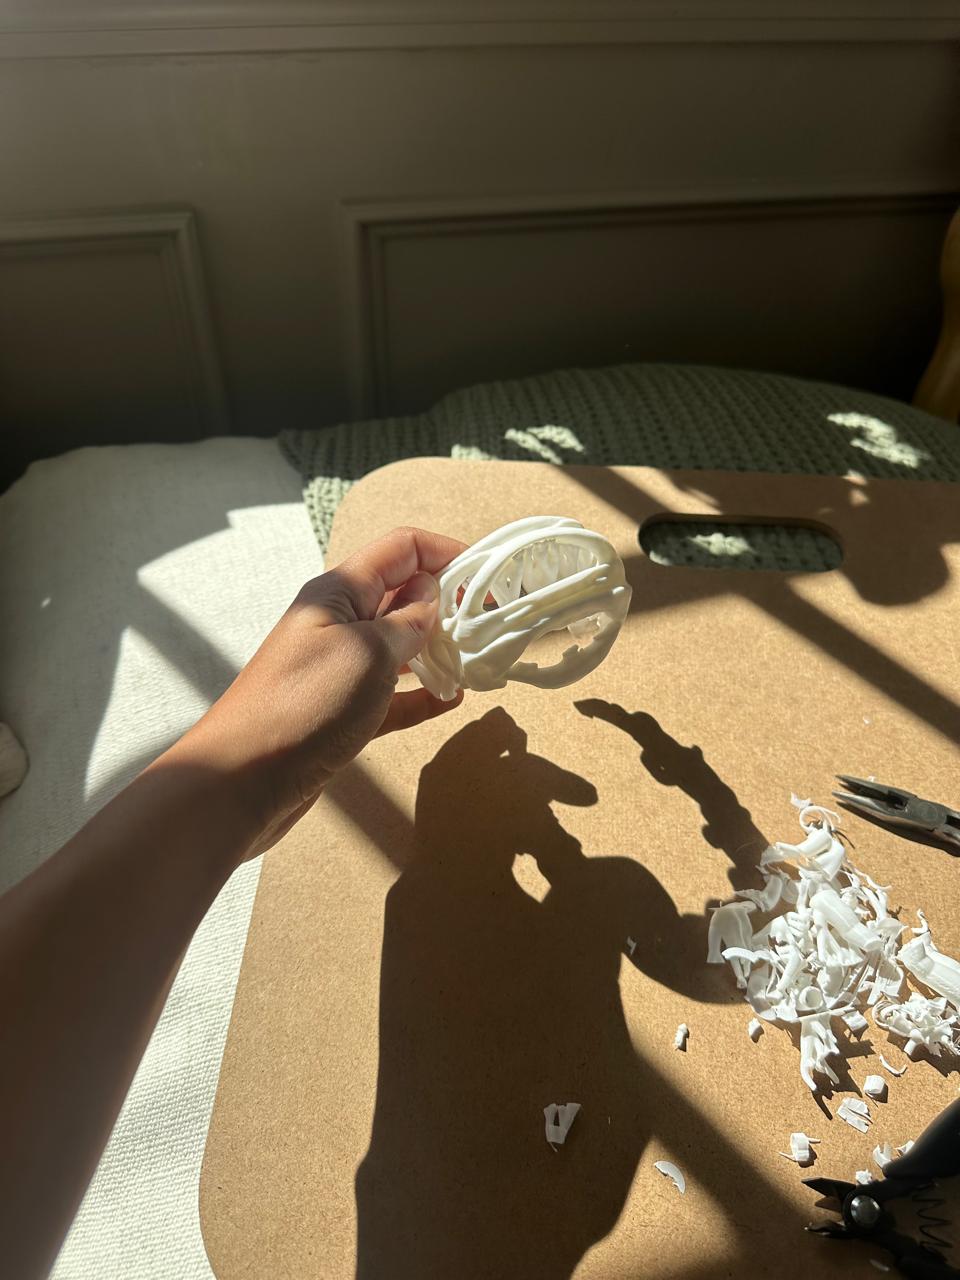
Organic supports felt poetic for an organic bangle, and Expert mode unlocks them. Wood-filled filament needed a cooler nozzle to avoid scorching.
- Profile: Generic PLA, Expert mode.
- Layer height: 0.20 mm; Perimeters: 3; Infill: 15% Gyroid.
- Supports: Everywhere + Organic; Bed adhesion: Brim.
- Temps: PLA 200/60 °C; PLA+WOOD 190/60 °C.
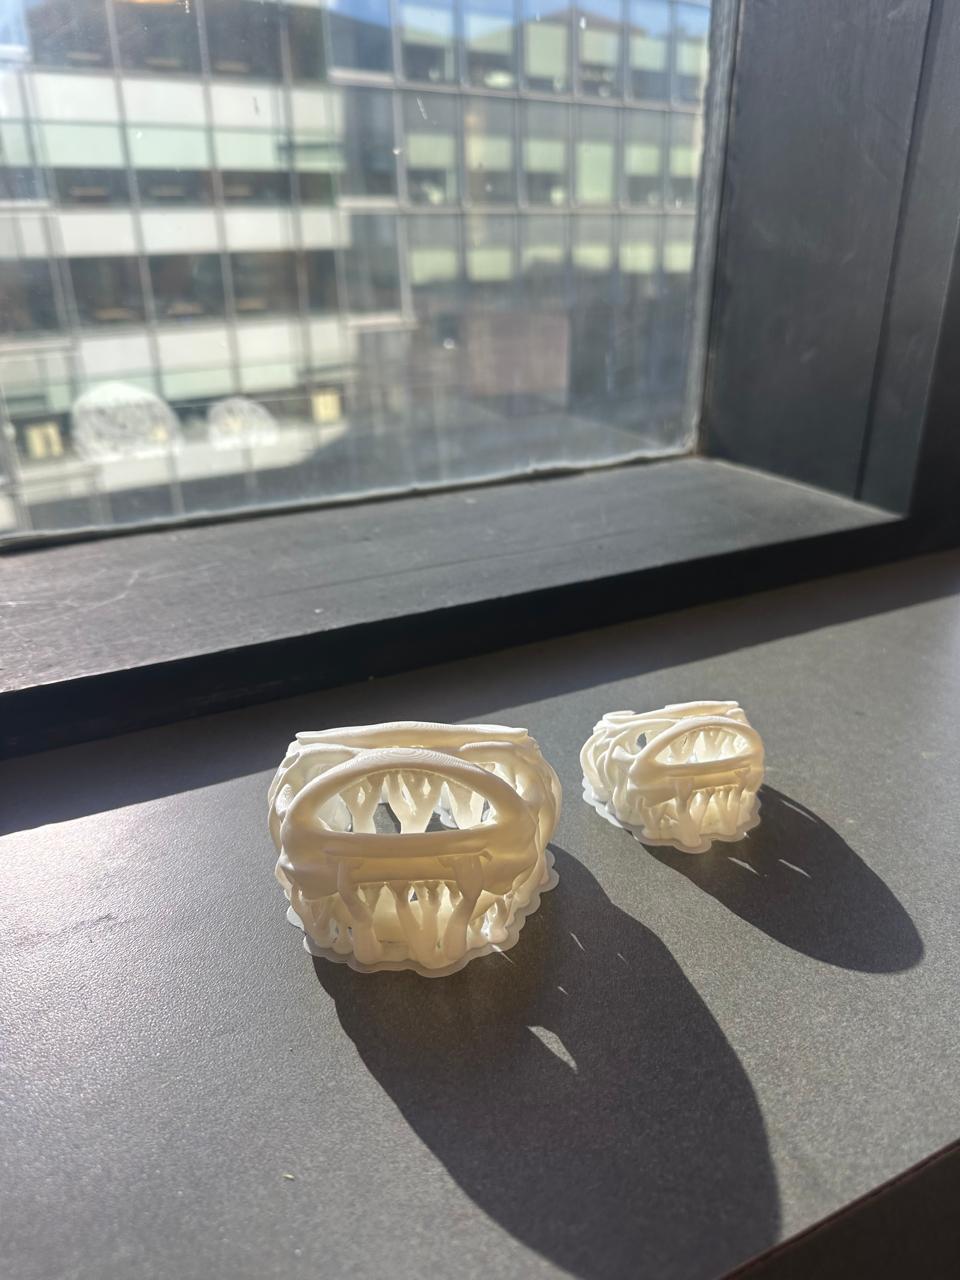
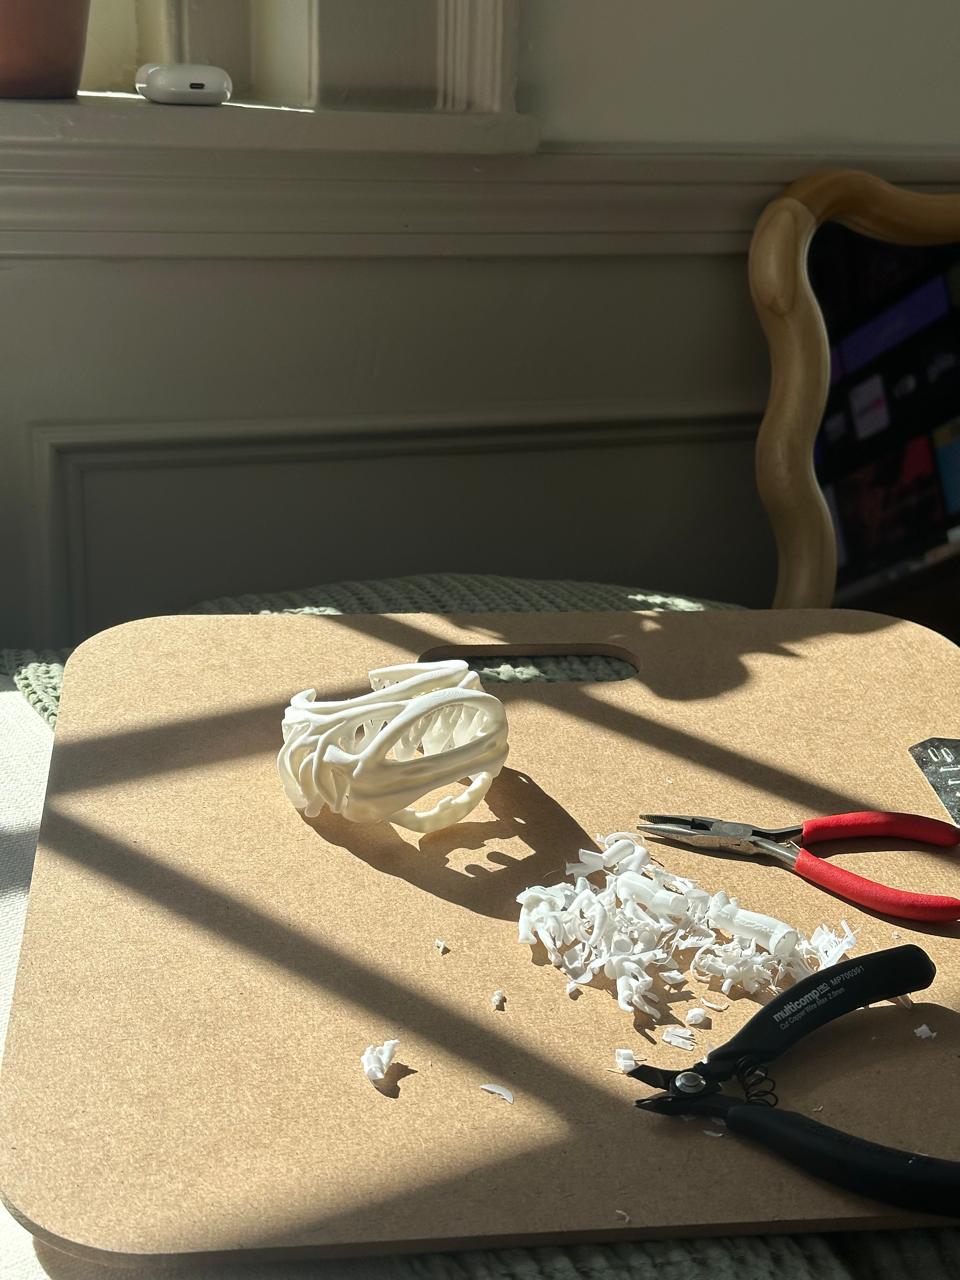
- Observations: thin rings fused to supports; the bangle released cleanly.

5) Printing workflow (Prusa Core One, HF 0.4 mm)
- Cleaned the build plate with isopropyl or water and soap.
- Loaded filament and purged the filament to extract what was previously in the nozzle - do so until loaded filament colour visaible.
- Started the print and nudged Z-offset as needed.
- Let organic supports do the heavy lifting.
- After cooling, flexed the plate for part removal.
Wood PLA clung to supports—likely humidity in the filament—while plain PLA detached effortlessly.
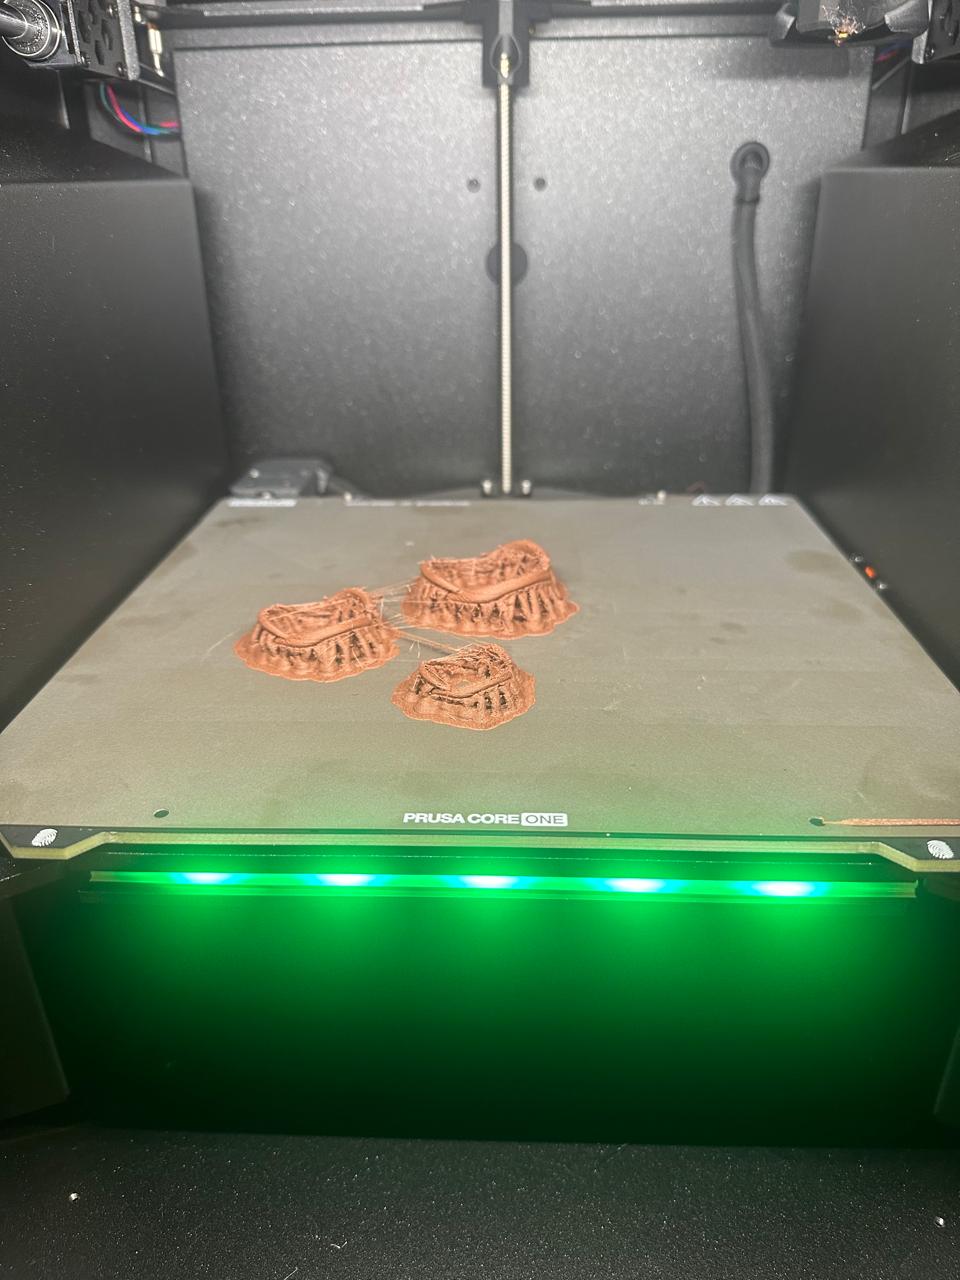
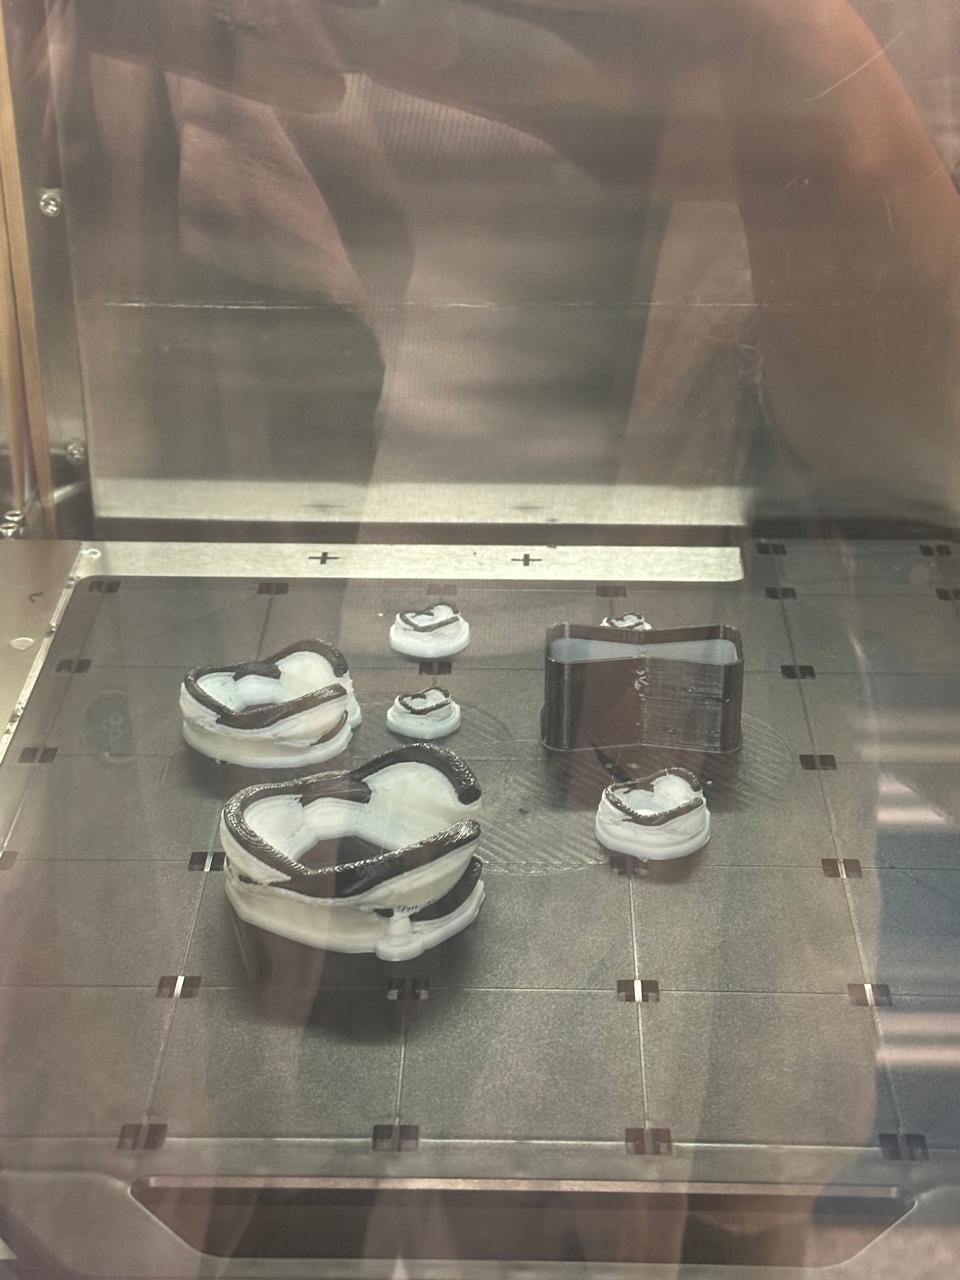
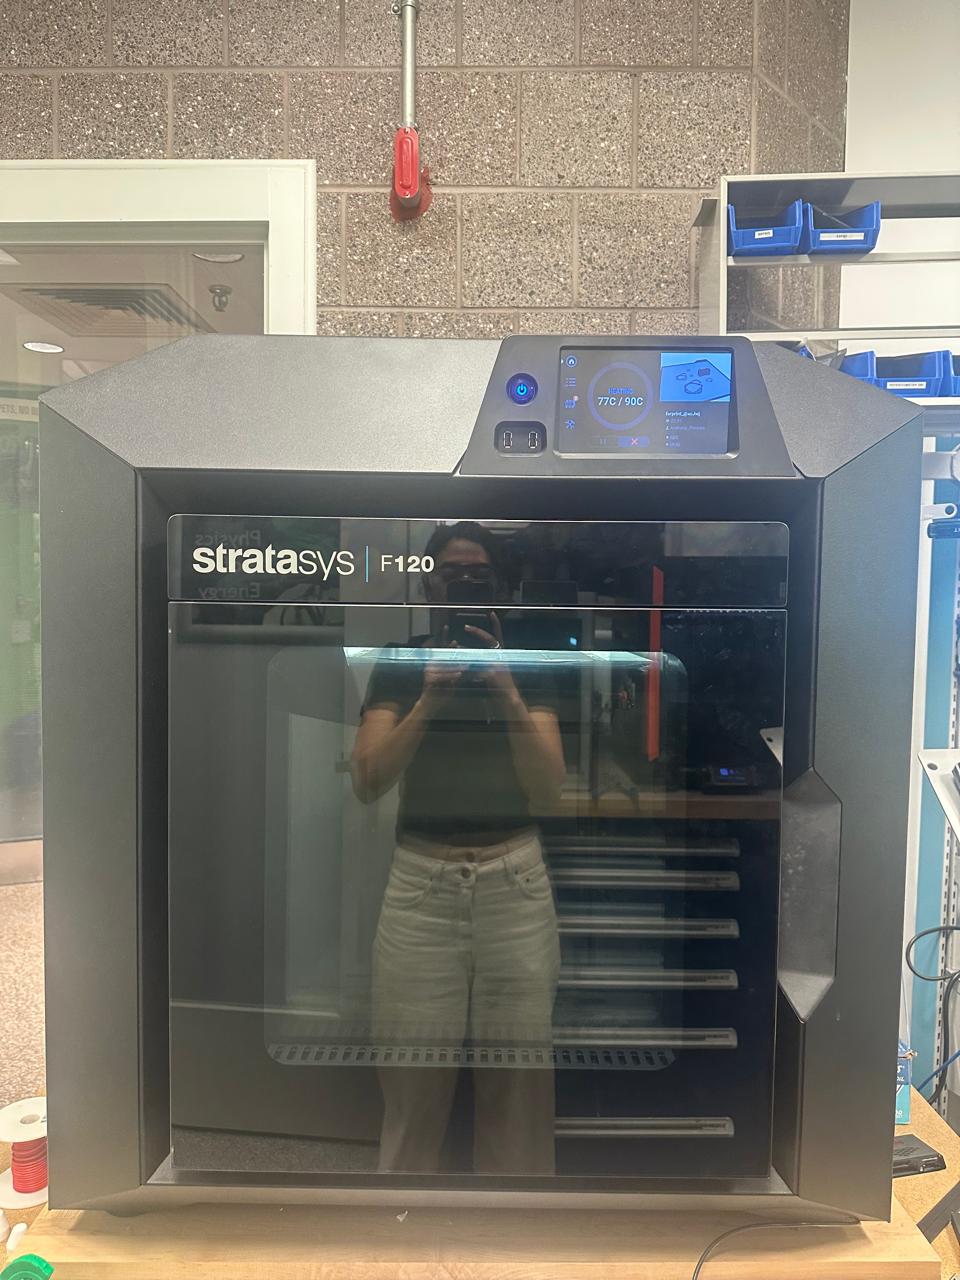
5.5) Dissolvable Supports Solution — Stratasys Machine
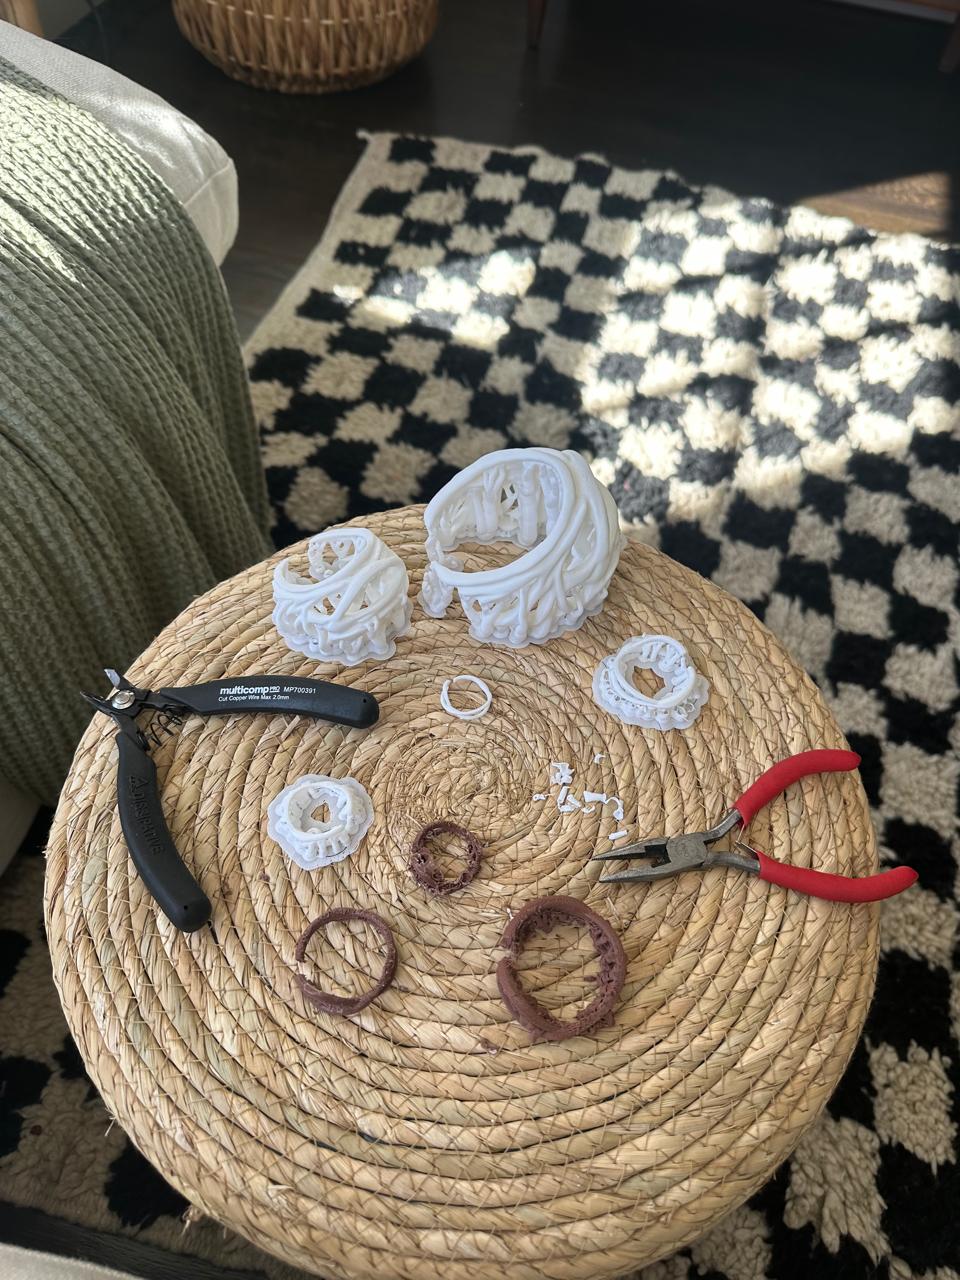
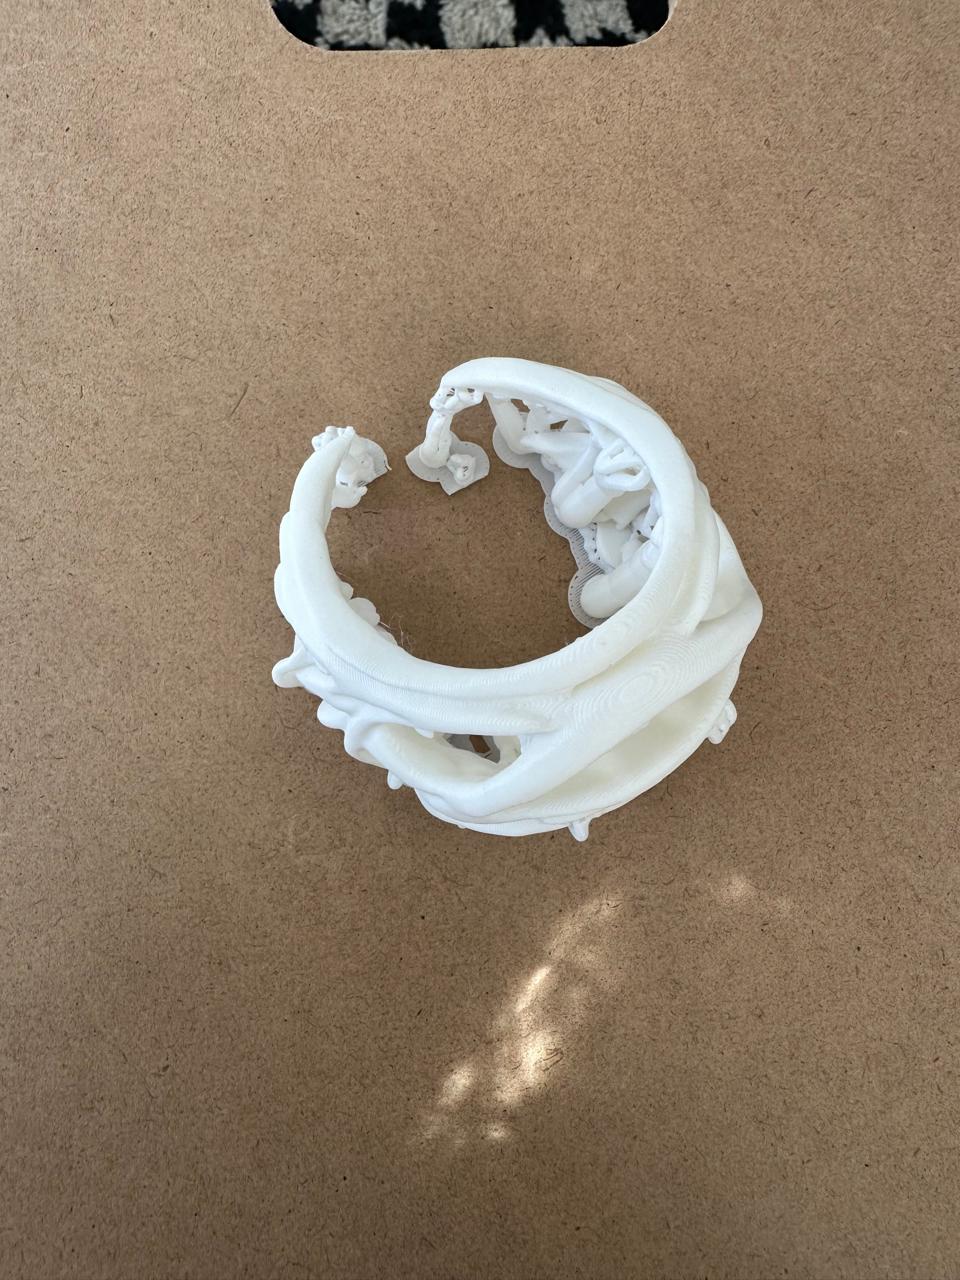
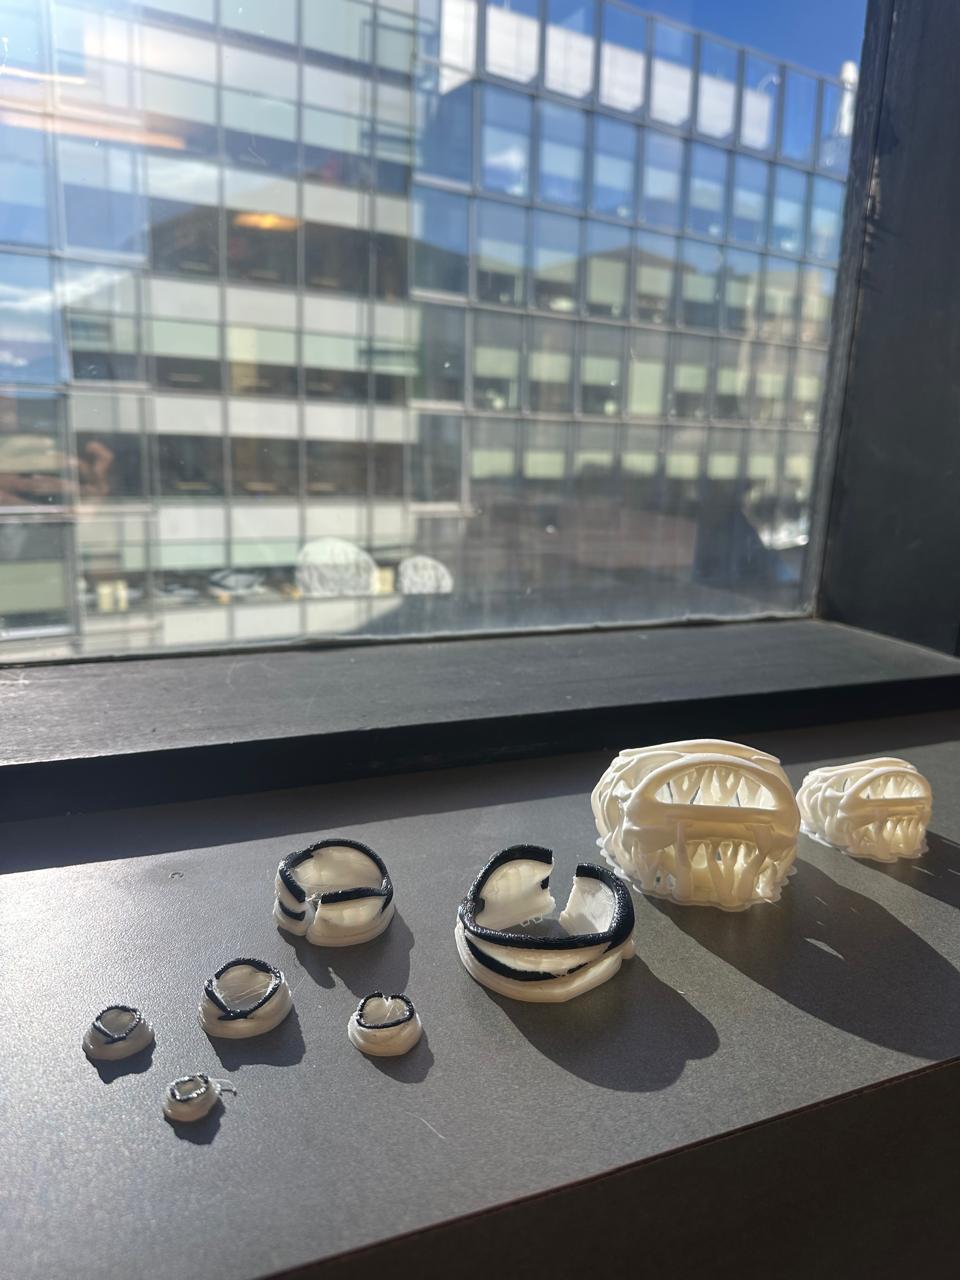
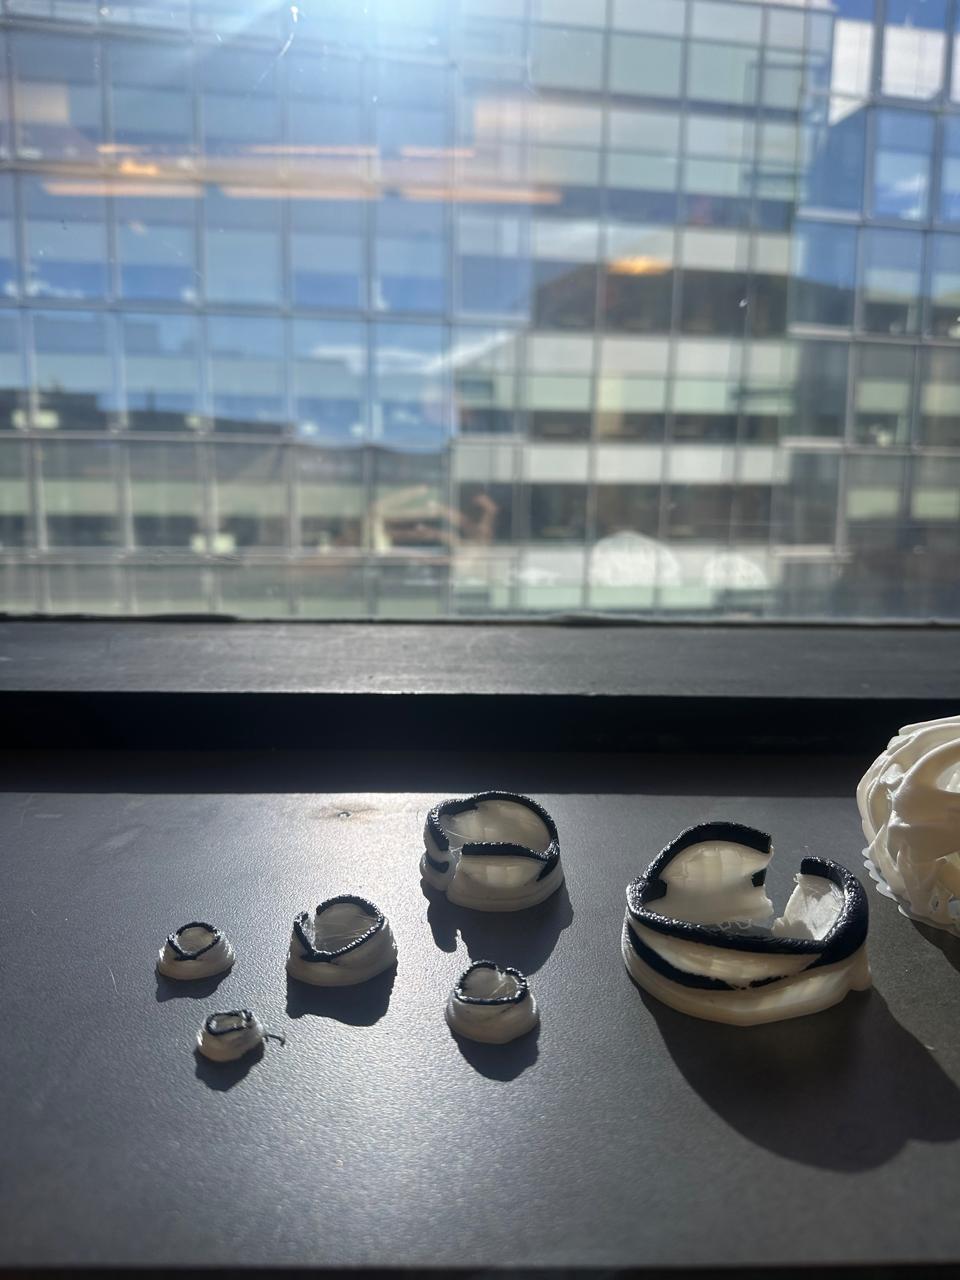
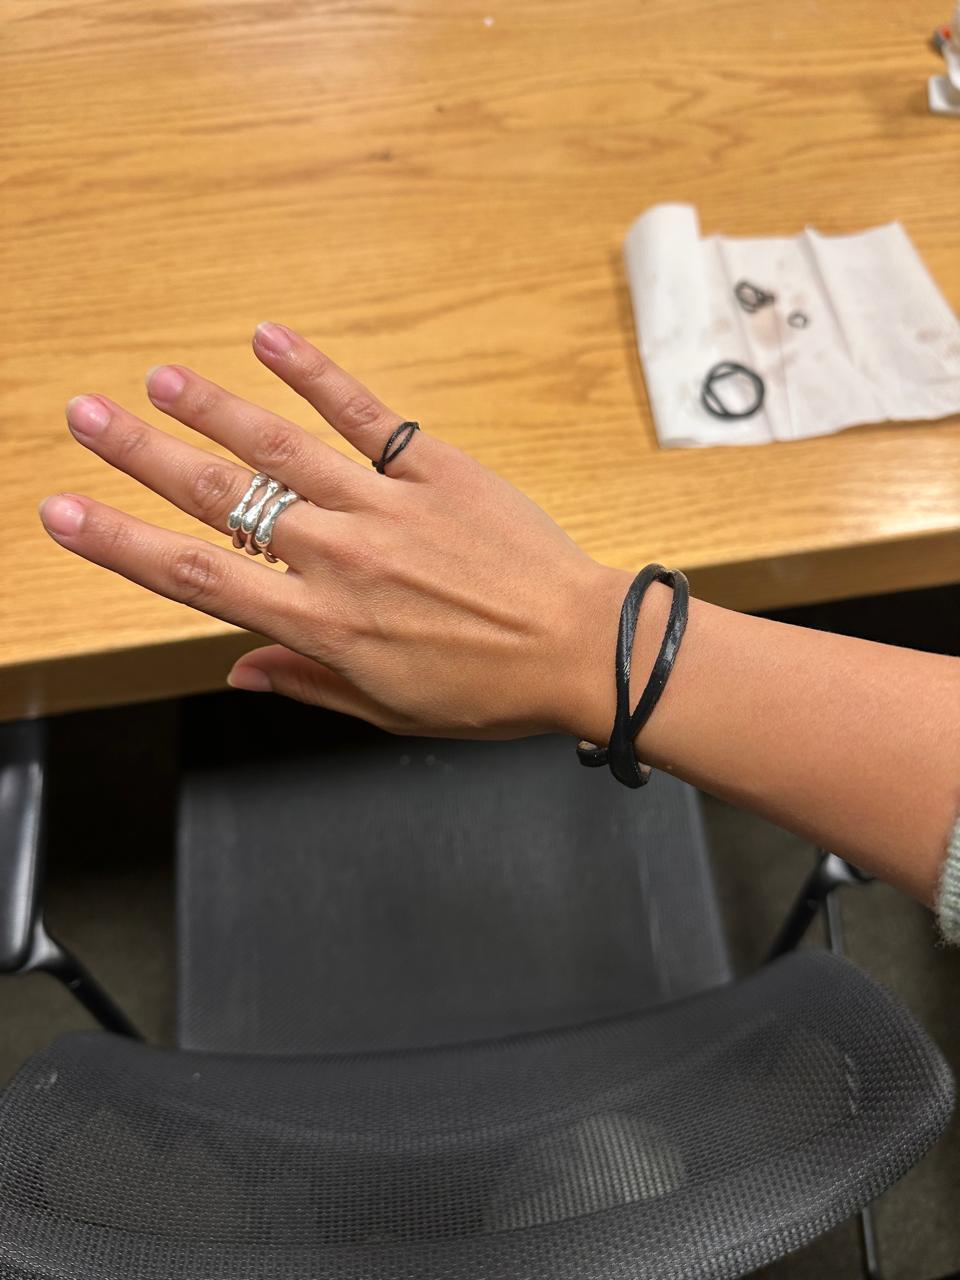
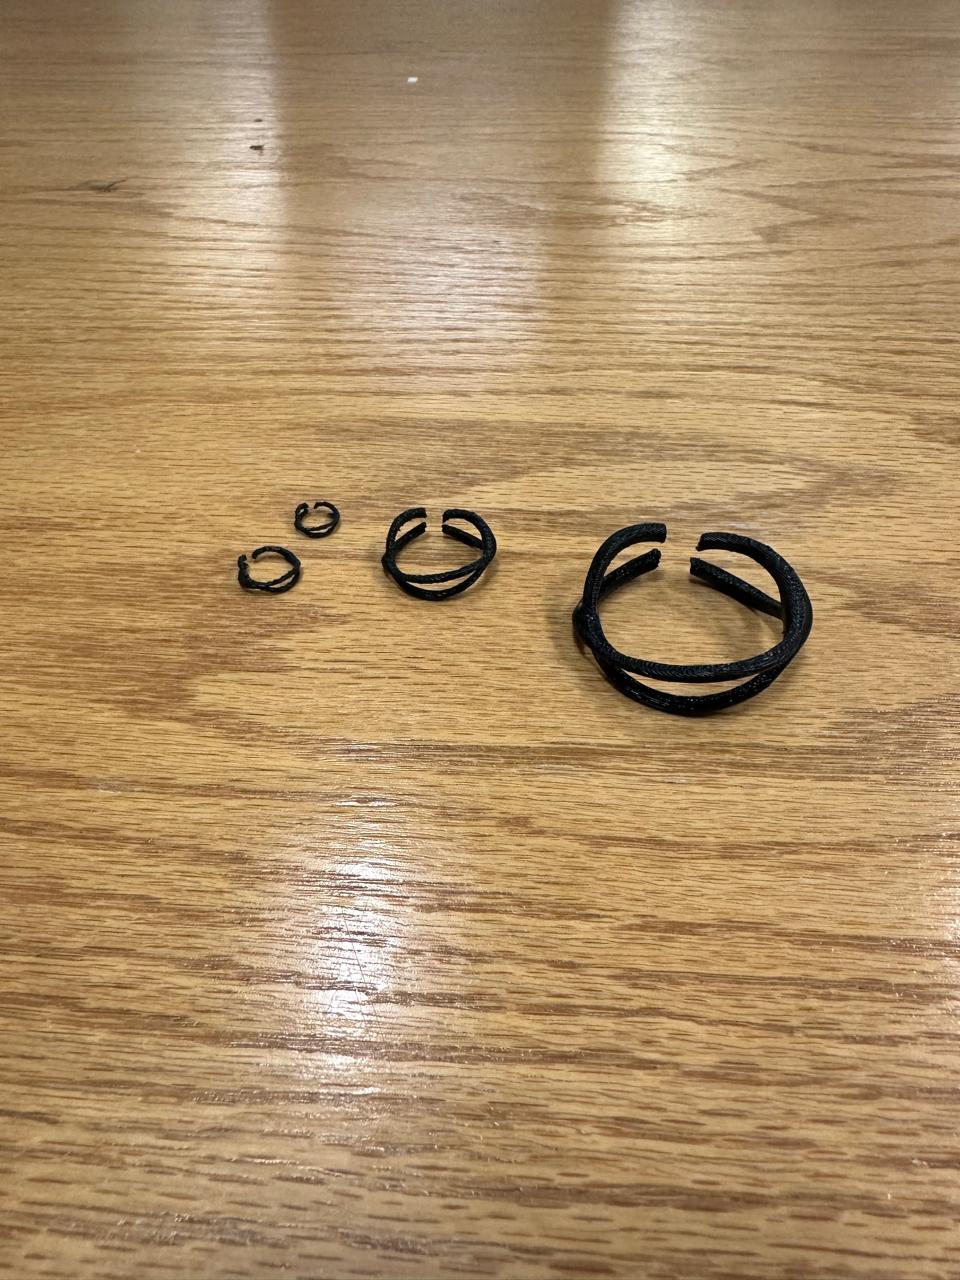
The organic supports failed because my object lines were quite thin. I then used the Stratasys machine with dissolvable supports and that was successful — printed in different scales and ended up with different ring sizes as well as a bracelet/bangle. (thanks to Jesse's suggestion)
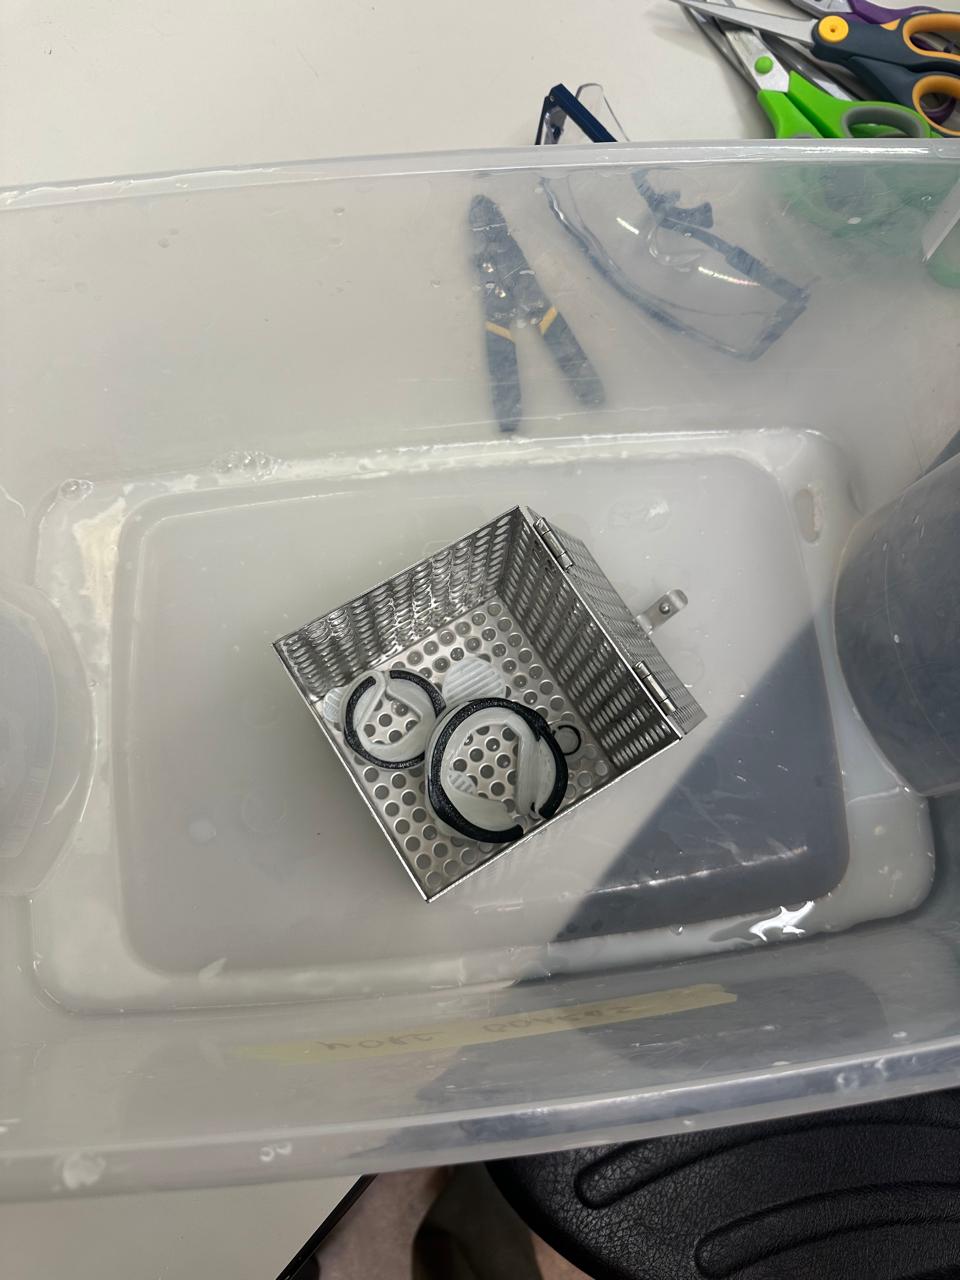

Settings & Process
- Machine: Stratasys with dissolvable supports
- Materials: Build material: ABS-M30 (Black) Support material: SR-30 (dissolvable, tan-white filament)
- Support type: Dissolvable
Results & Lessons
- Different ring sizes achieved through scaling
- Bracelet/bangle version worked well
- Dissolvable supports handled thin lines better
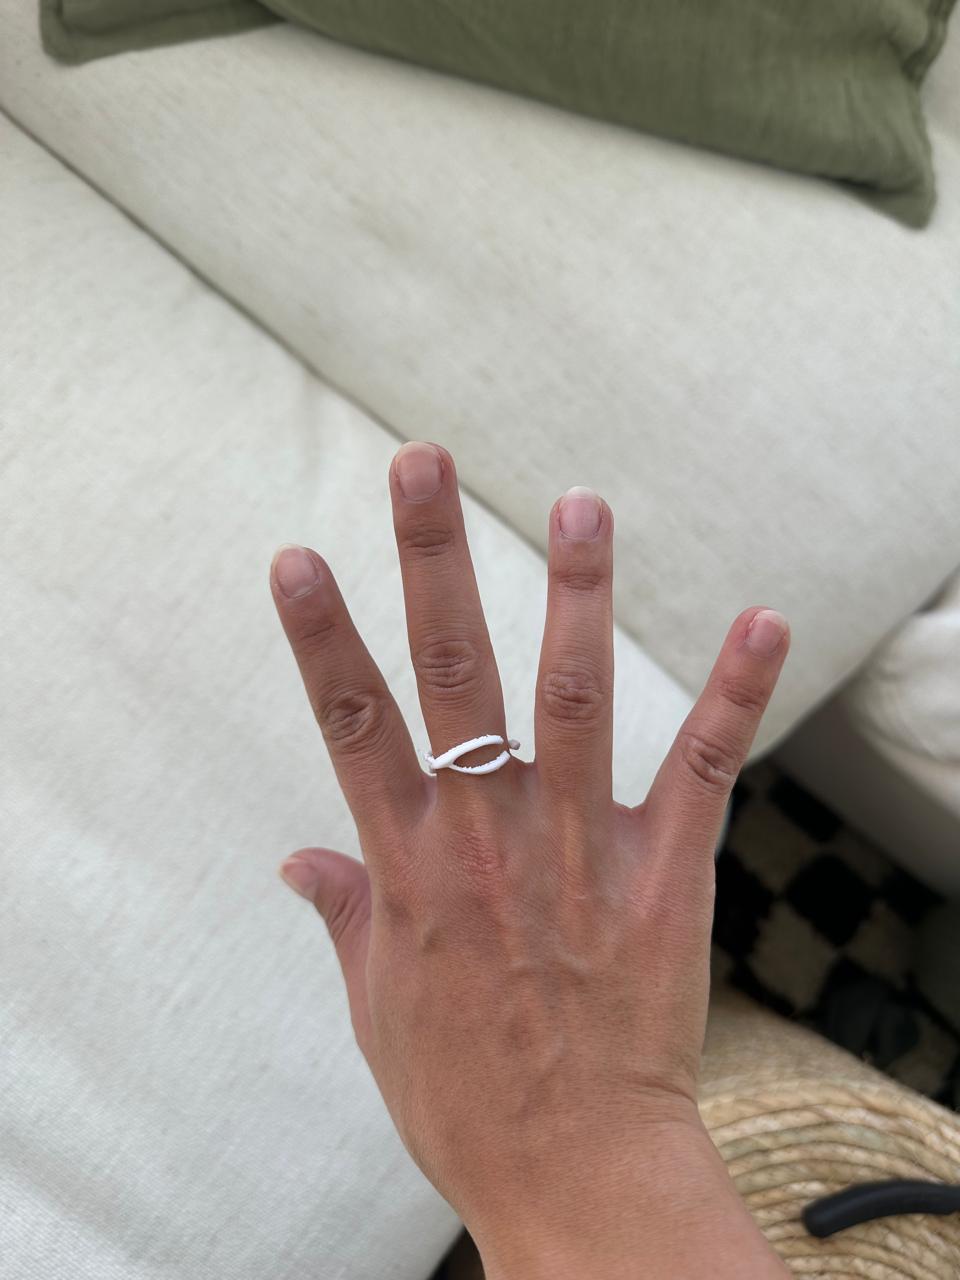
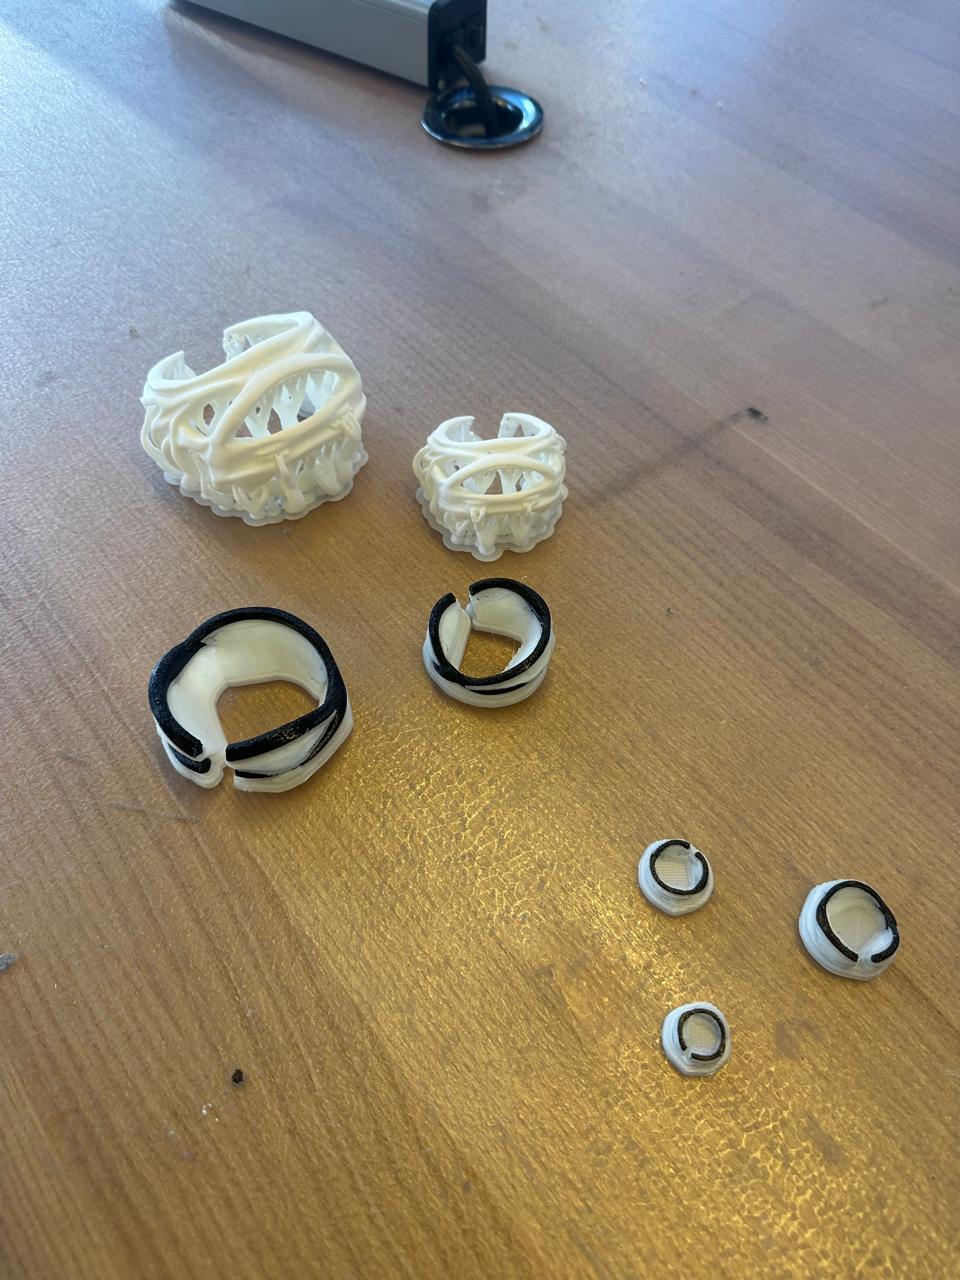
- This 3D printing process was successful and I was able to print different ring sizes and a bracelet/bangle. Recommended printing method for more fragile/thin objects.
Final Jewelry Results
Successfully created wearable jewelry pieces using the Stratasys printer with dissolvable supports, resulting in clean, delicate prints perfect for jewelry applications.
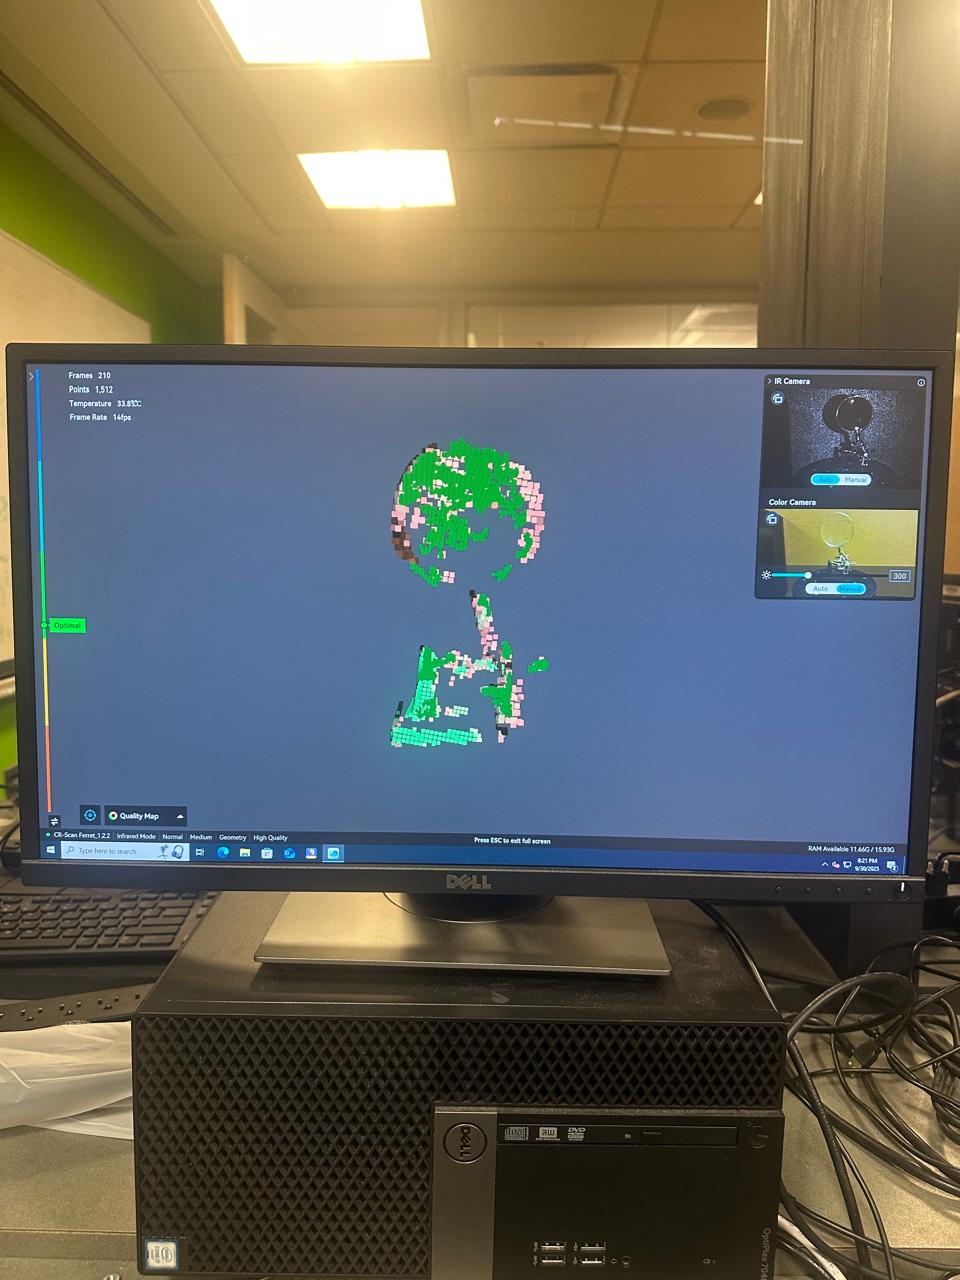
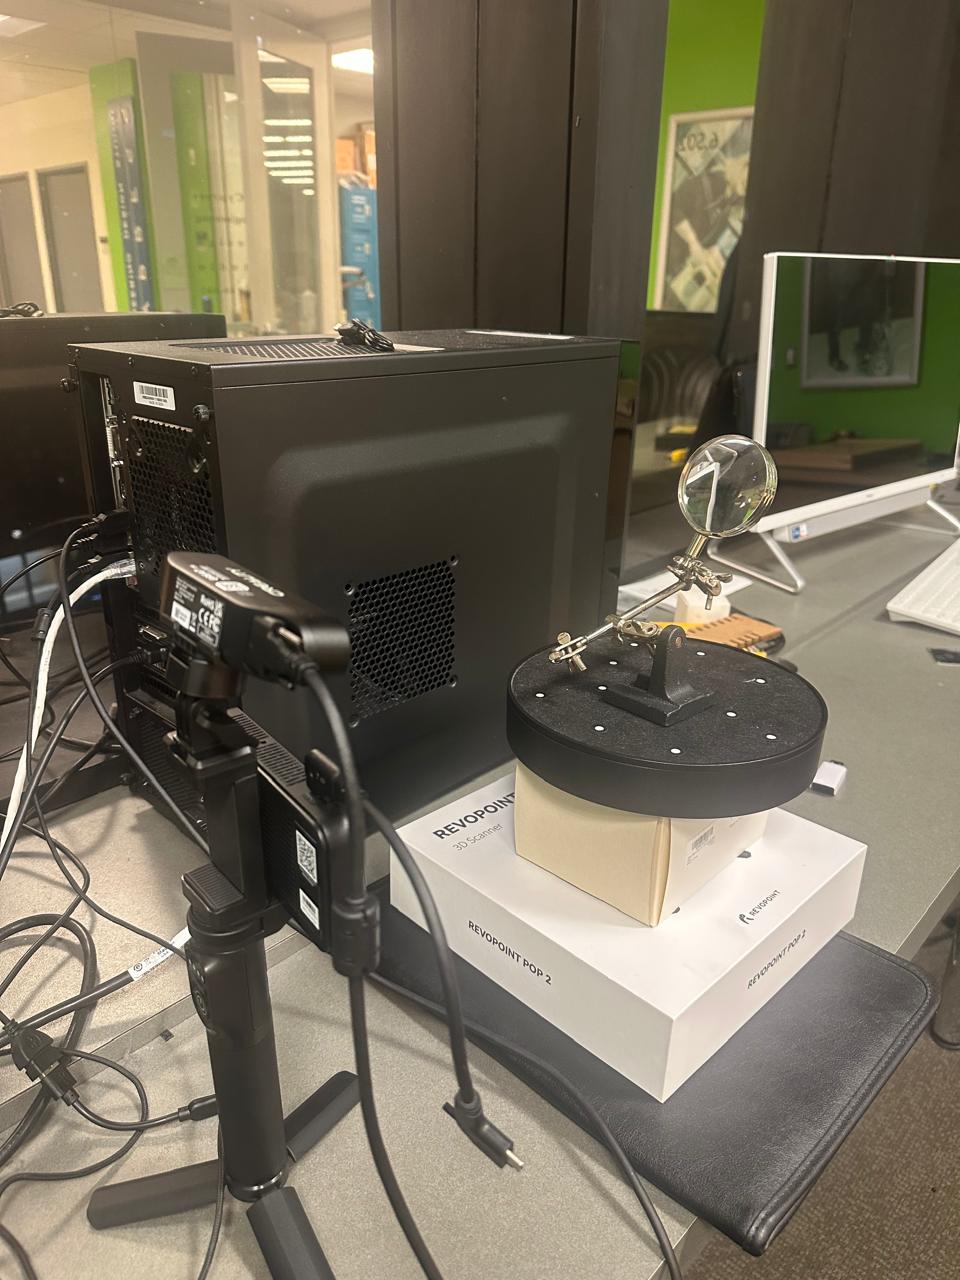
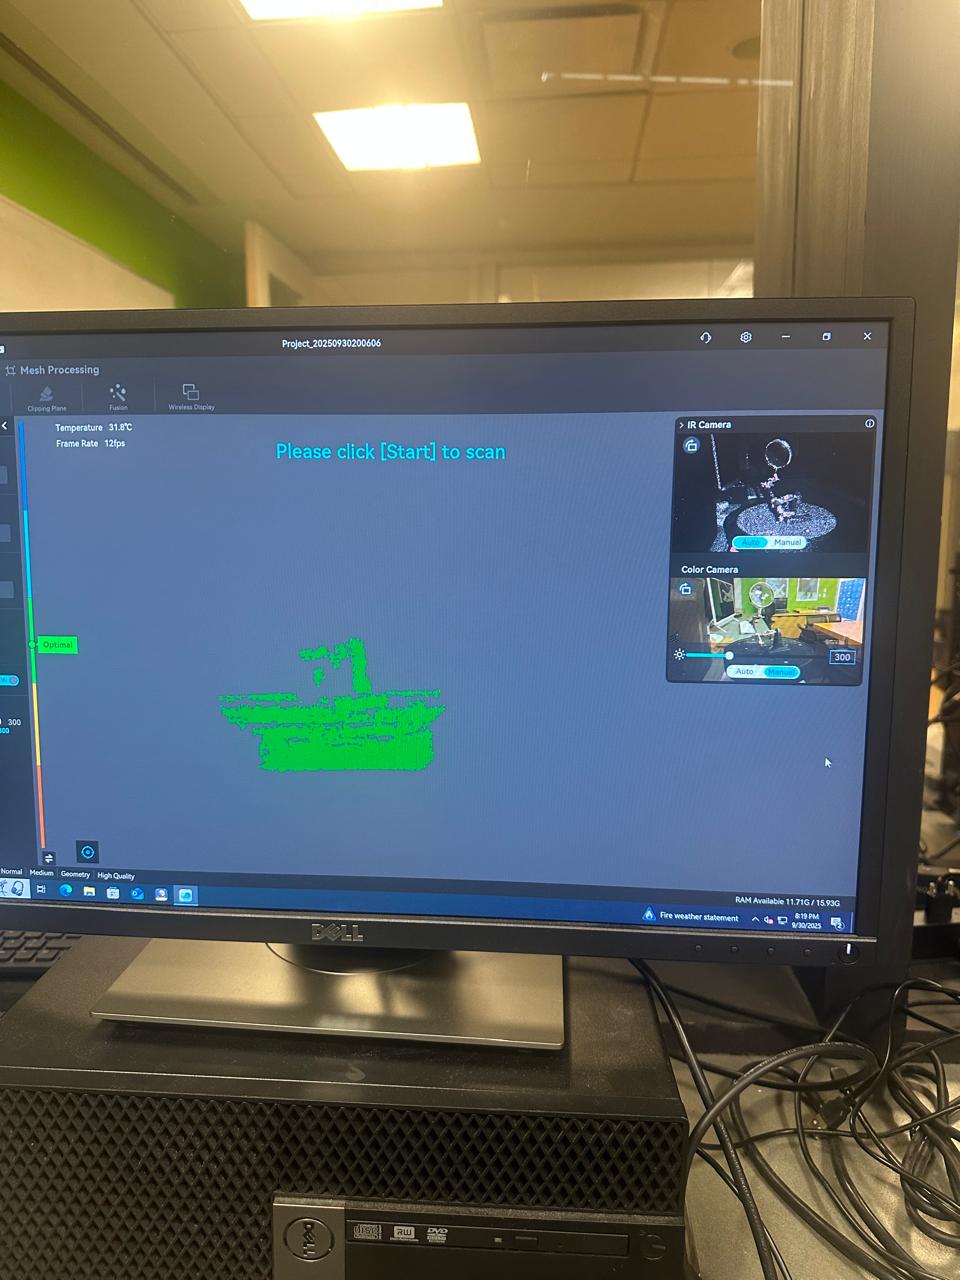
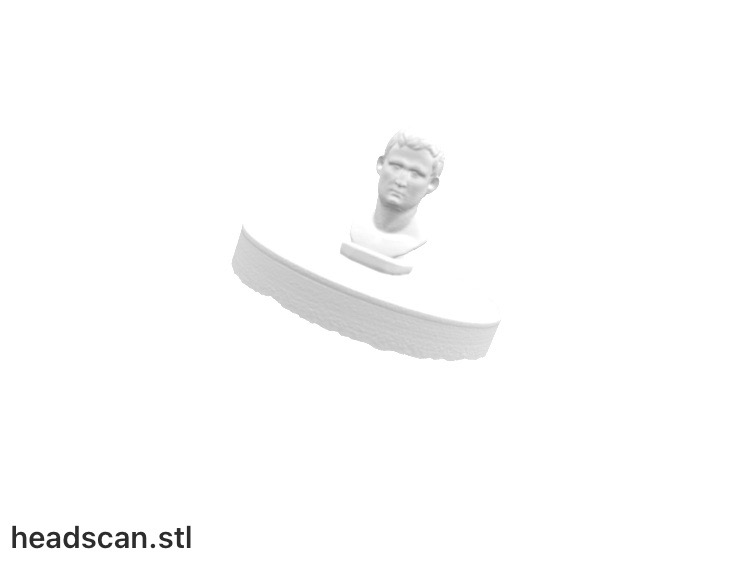
6) 3D Scanning (Creality CR-Scan Ferret Pro)
- Turntable mode, geometry-only capture, exported as STL for cleanup.
- Scissors scanned cleanly thanks to matte surfaces.
- Magnifying glass and stapler were too reflective—noise and holes everywhere.
- Short 1–2 minute scans plus manual cleanup beat long noisy sweeps.
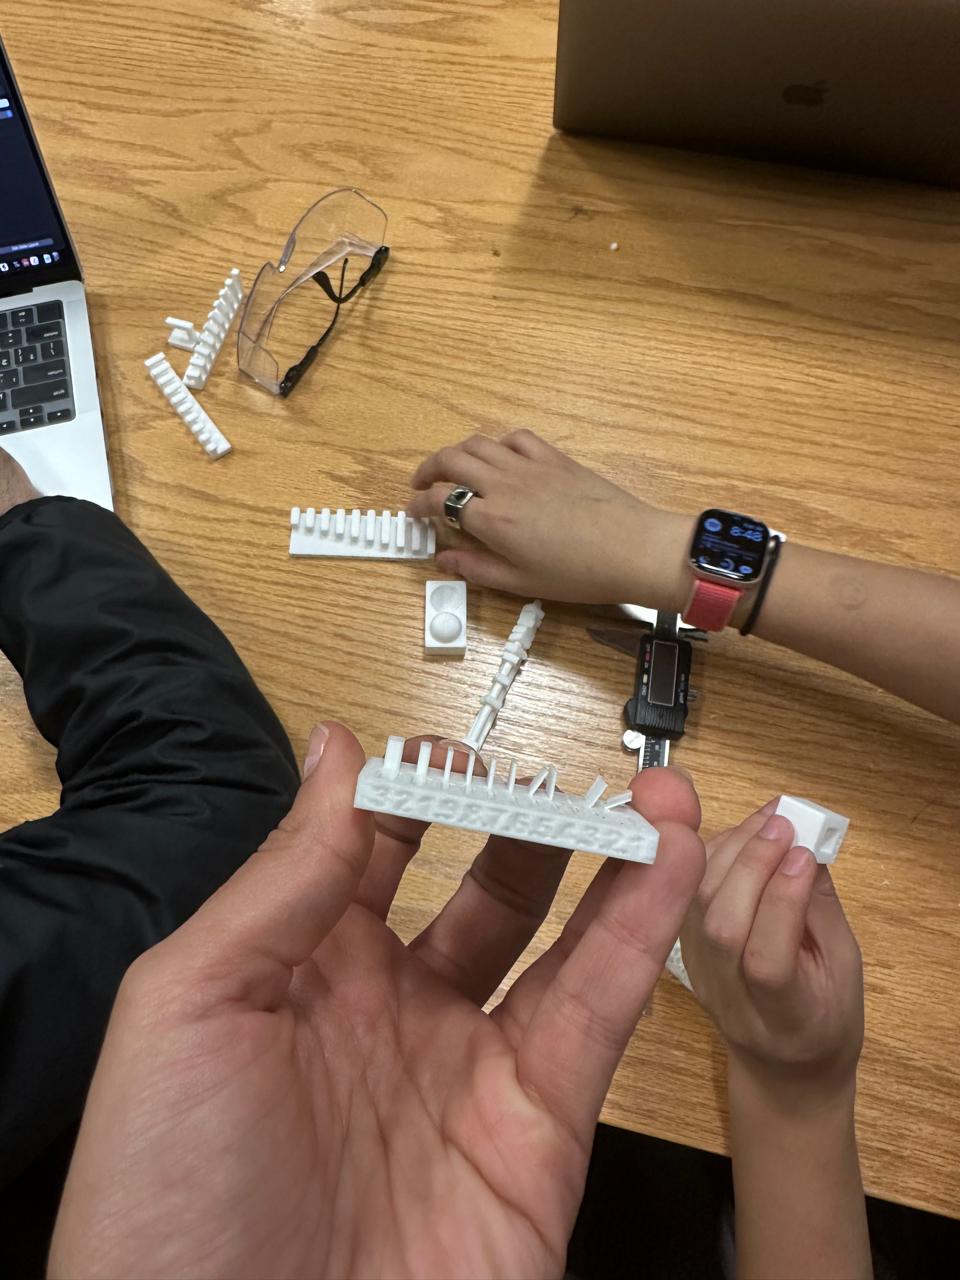
7) Group Assignment — Design Rules (Prusa Core One)
- Overhangs: crisp up to ~30°; sagging appears near 20°.
- Bridges: reliable to 18 mm; 20 mm pushes it.
- Clearance: 0.2 mm separates with friction; ≥0.3 mm is smooth.
- Wall thickness: ≥0.6 mm; anything thinner delaminated.
- Infill: 15% Gyroid gave strength while staying fast.
- Dimensional accuracy: within ±0.05 mm near the base, drift grows with height.
8) Lessons Learned
- Design for ≥0.8–1.2 mm walls when printing jewelry with a 0.4 mm nozzle.
- Fillets and chamfers matter for wearables and reduce stress risers.
- Organic supports are lovely but demand patient post-processing.
- Wood-filled filament needs dry storage and gentle temps.
- Scanning reflective objects benefits from matte spray or alternative targets.
Sources
- Prusa Core One documentation and organic support overview.
- Rhino command reference (Pipe, Sweep2, FilletEdge).
- AI Genie — STL export.
- Creality CR-Scan Ferret Pro user manual.
- HTMAA recitations and group testing logs.
- ChatGPT (GPT-5) — brainstorming and documentation support.