04.29 Update
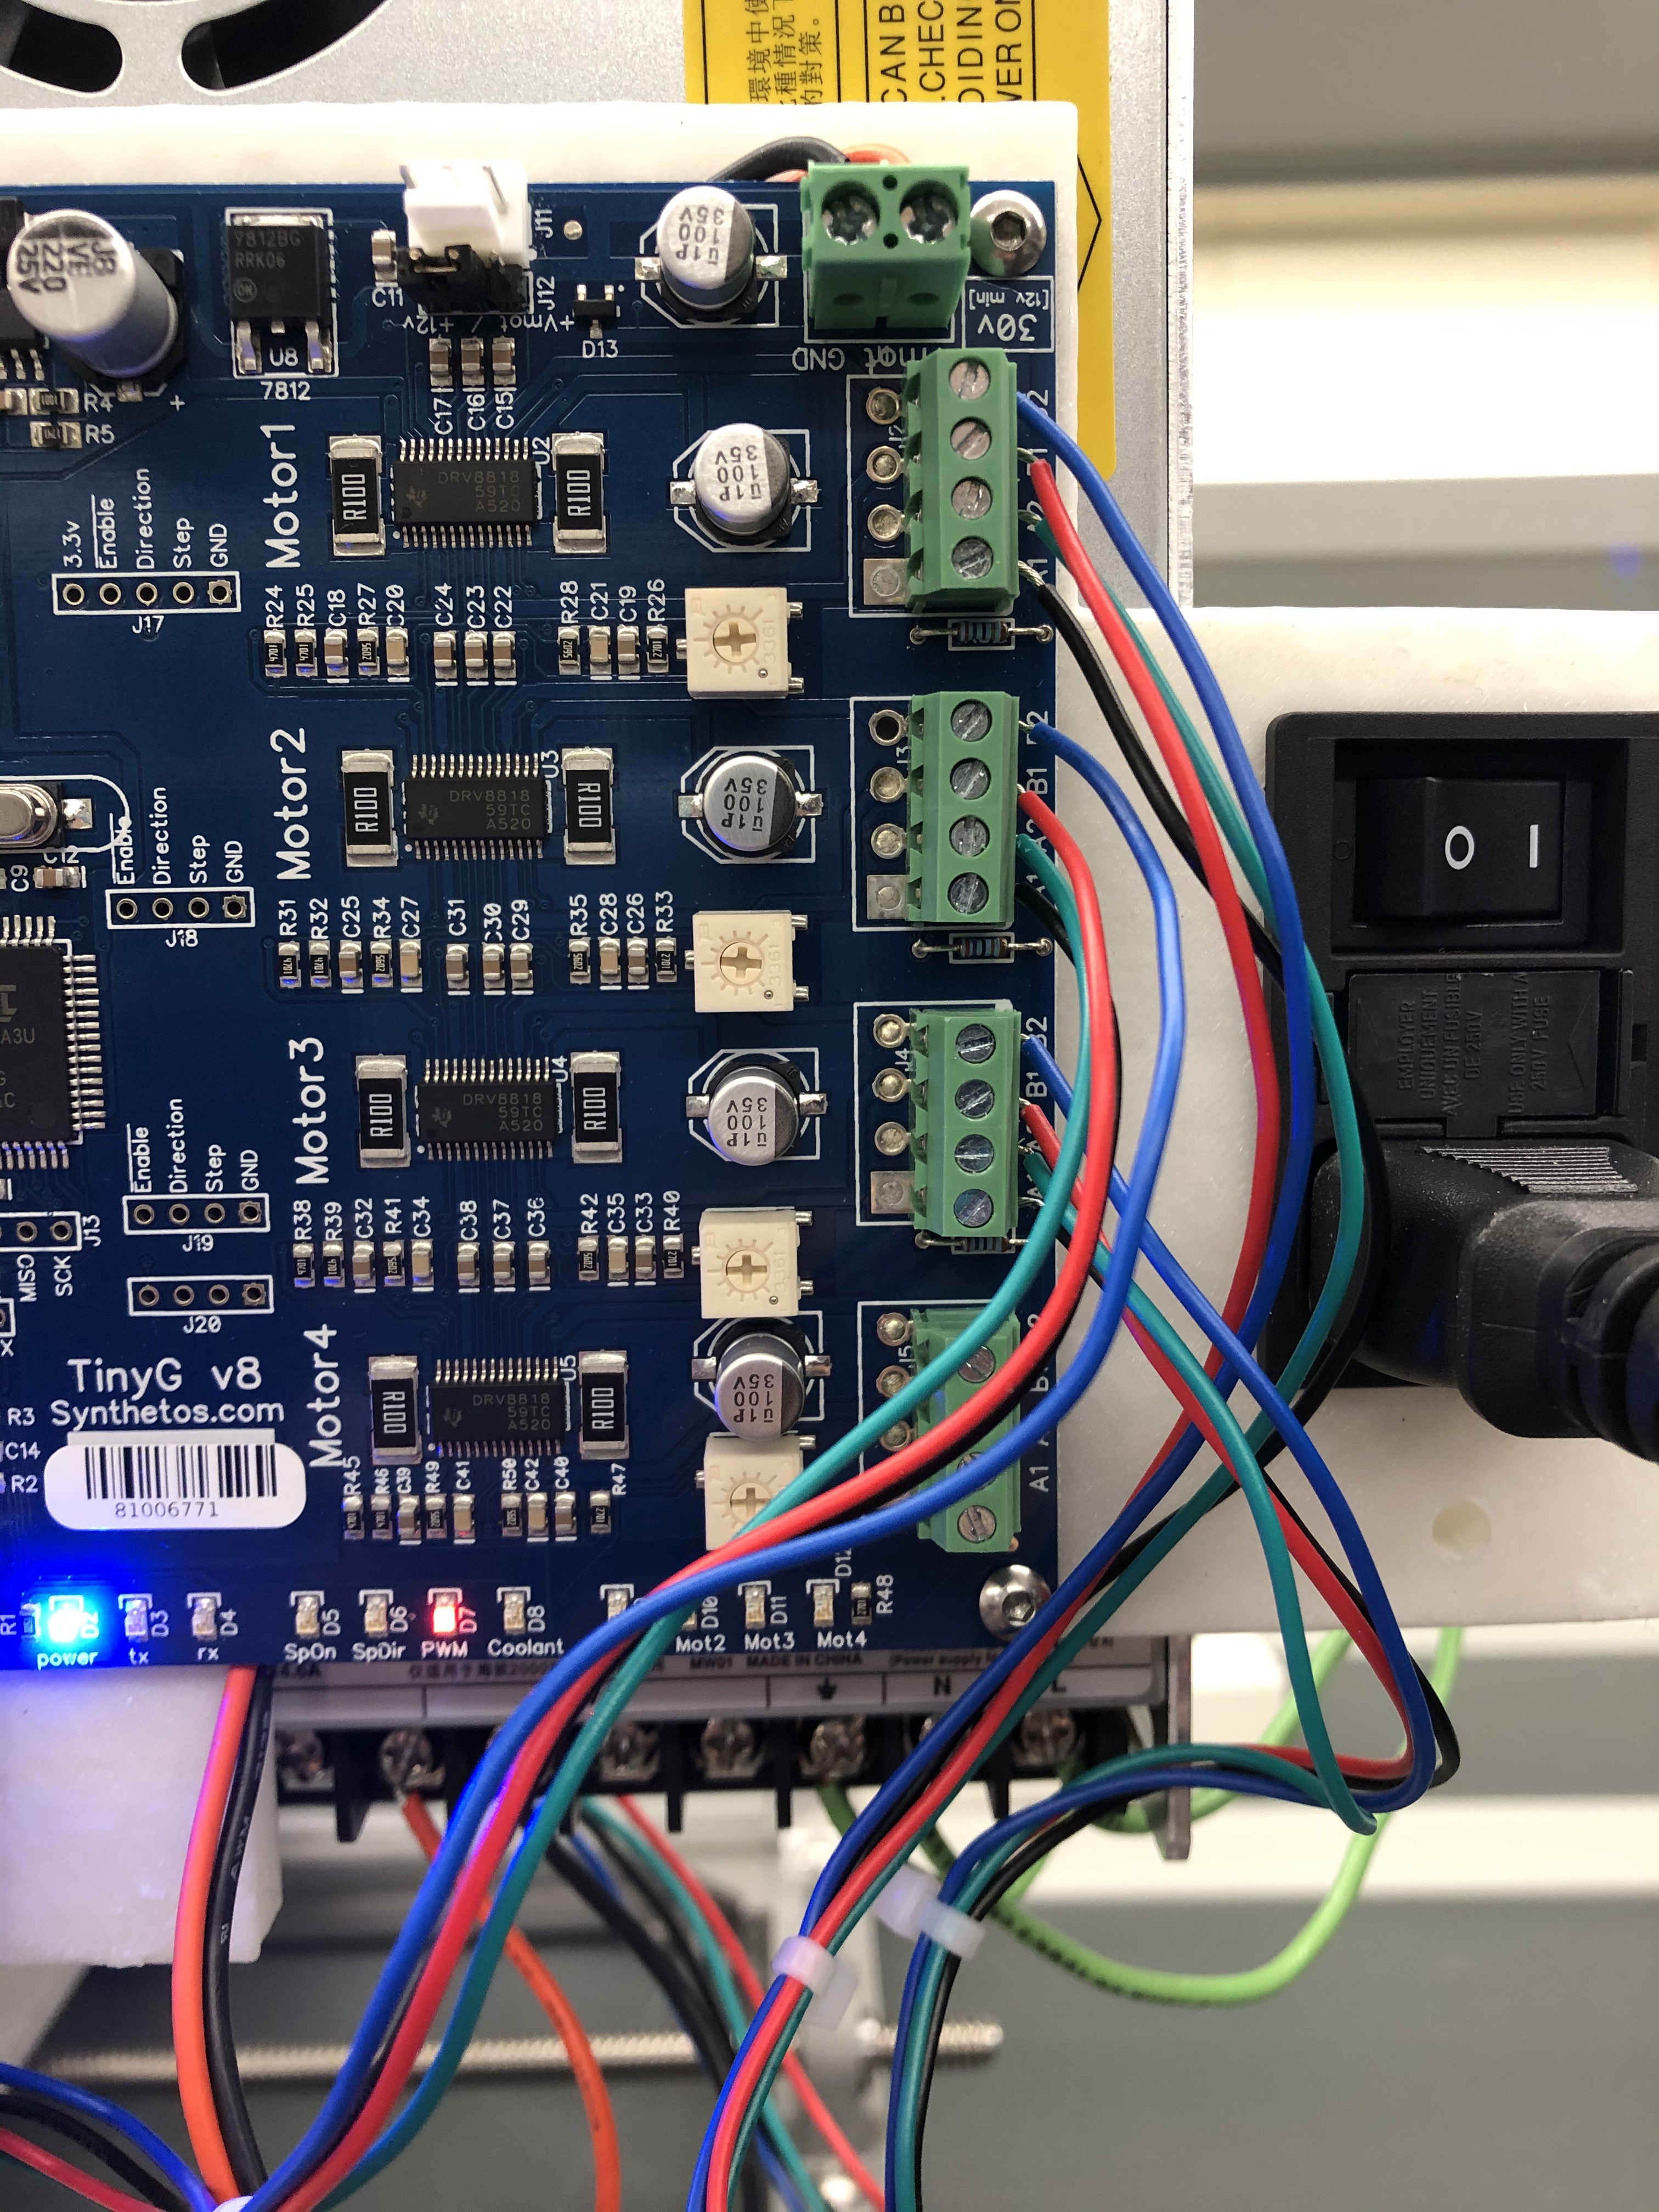
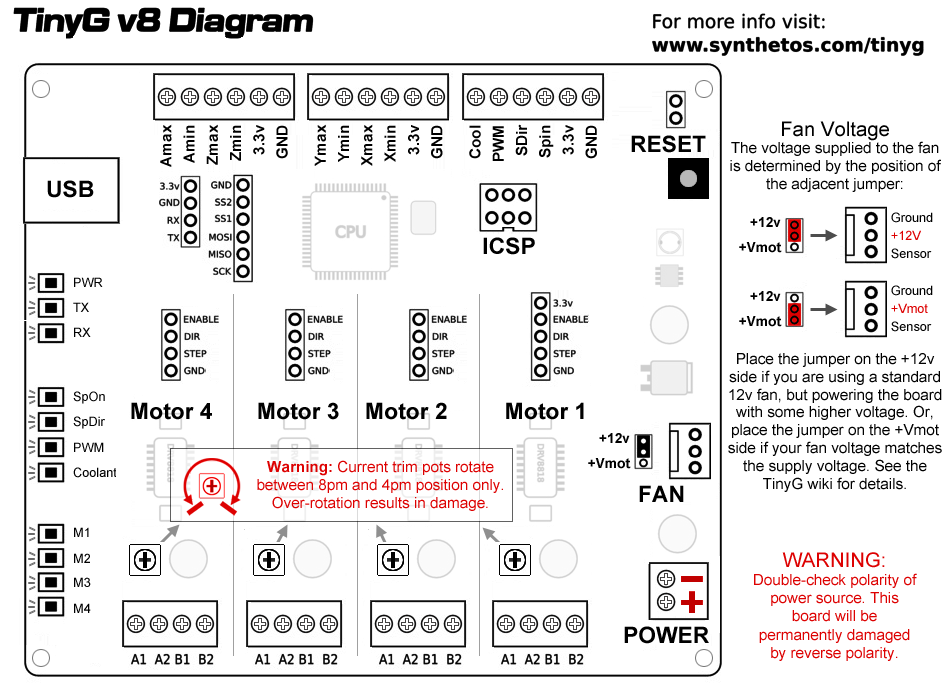
This week we completed the wiring for TinyG - we looked into finding the coil pairs and wiring them accordingly to their A1/A2 + B1/B2 windings.
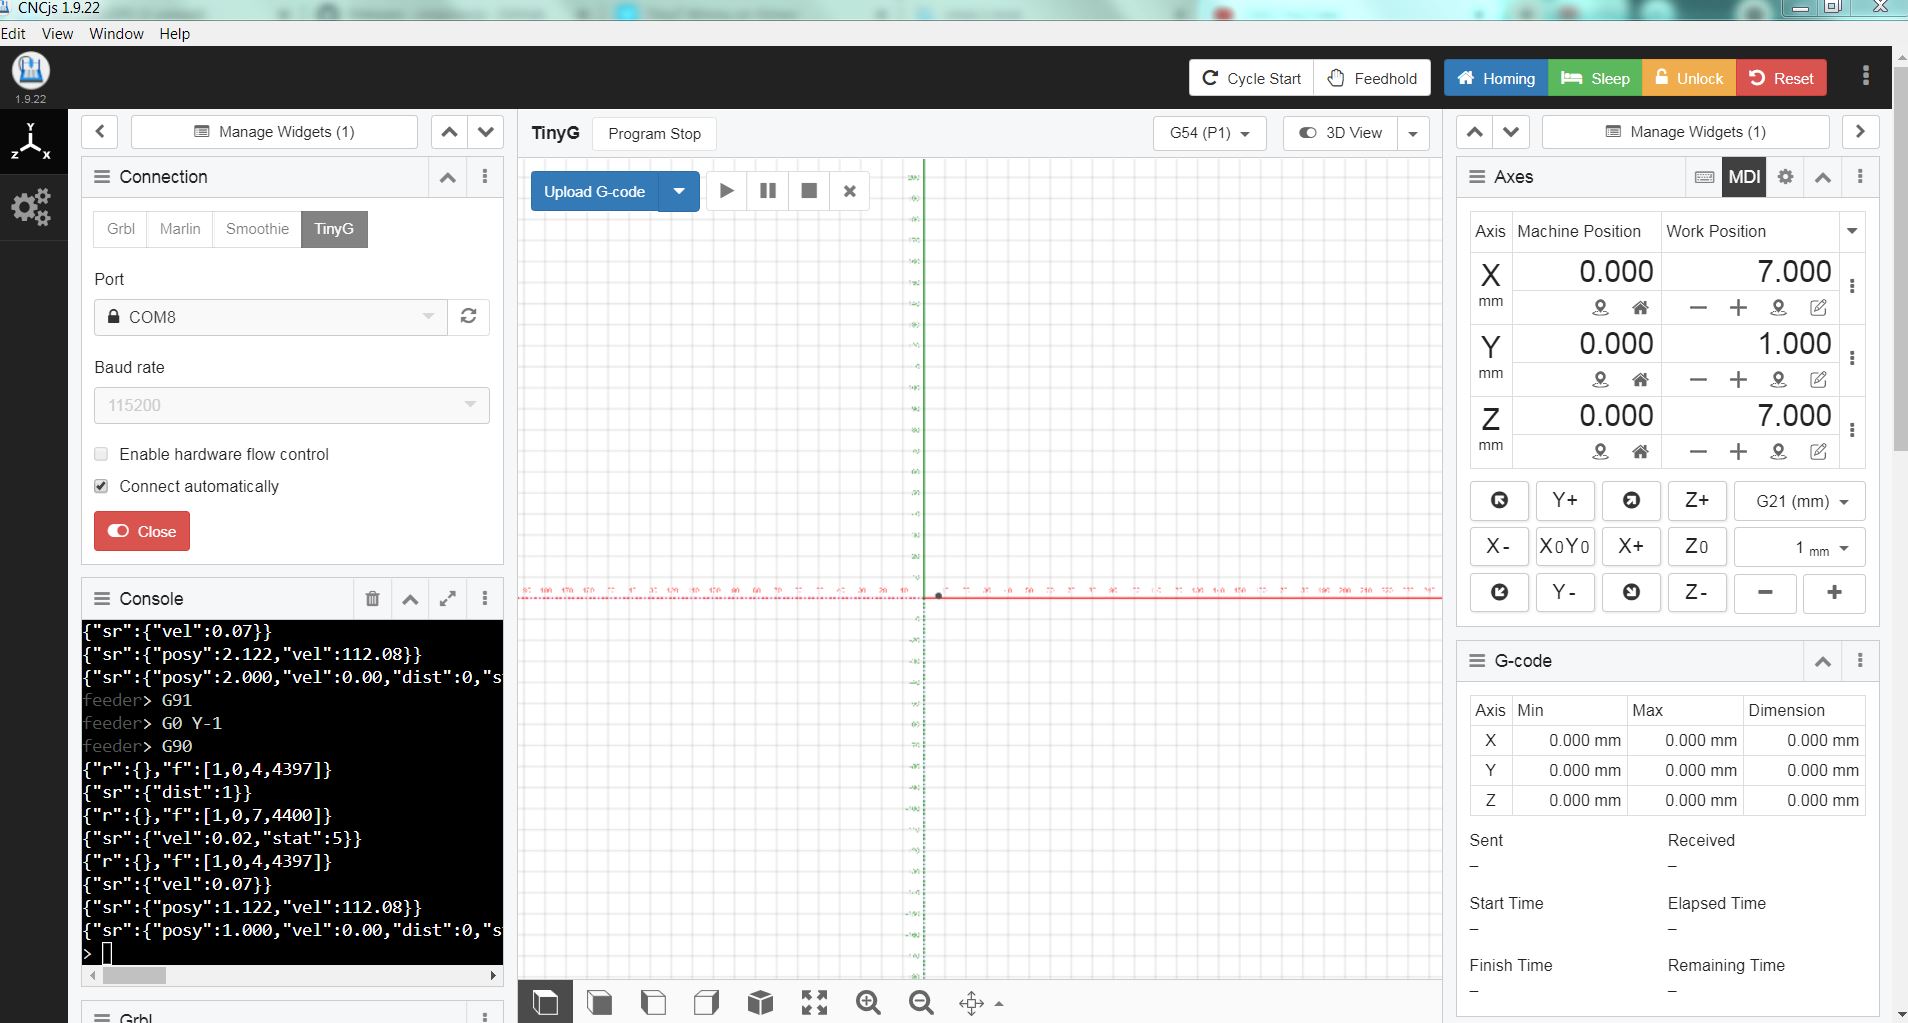
After establishing a connection to tinyG next steps was to configure it. In order to do so I used CNCJs although it can be done through Chilippepr, Universal Gcode Sender, or Coolterm. This is a cheat-sheet for the CNCjs settings. Below are the settings we adjusted within the CNCjs console.
A small little trick I came across to figure out the winding pairing is as follows:
Spin your stepper motor with your fingers. Depending on the size / holding torque this could be easy or pretty hard. All you really want from this is to get a feel how the motor spins without any of the wires connected to each other. Now that you know how hard it is to spin with your fingers, connect 2 wires together. Just pick any two. Try to spin the motor again. If it feels the same then more than likely these are NOT connected to the same coil. Disconnect these wires. Connect one of the other wires to one of the first wire pairs you tried. Try to spin the motors again. This should be much harder. If so, you have found your wire pairs.
After establishing a connection to tinyG next steps was to configure it. In order to do so I used CNCJs although it can be done through Chilippepr, Universal Gcode Sender, or Coolterm. This is a cheat-sheet for the CNCjs settings. Below are the settings we adjusted within the CNCjs console.