/ / / / / / / / / / / / / / / / / / / / / / / / / / / / / / / / / / / / / / / / / / / / / / / / / / / / / / / / / / / / / / / / / / / / / / / / / / / / / / / / / / / / / / / / / / / / / / / / / / / /
week 05 / computer-controlled machining
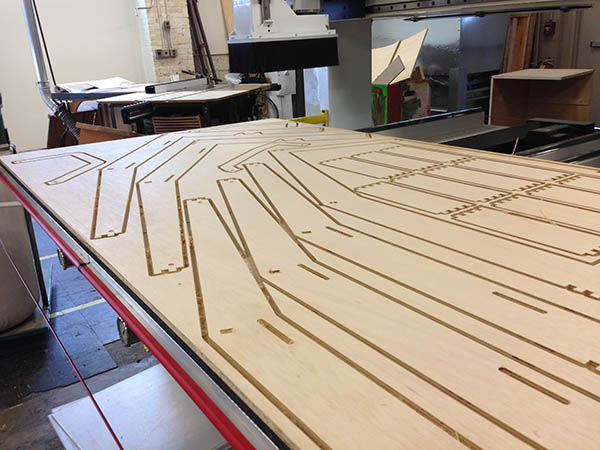
This week's assignment: Make something big using the CNC router. I decided to make something I really need-- a shelter for my bike. I designed and fabricated the structure for the shelter this week, and plan on finishing it in the coming weeks leading up to the Composites lesson, where I will design and fabricate custom roofing panels. When it's done, I'll put it in my back yard!
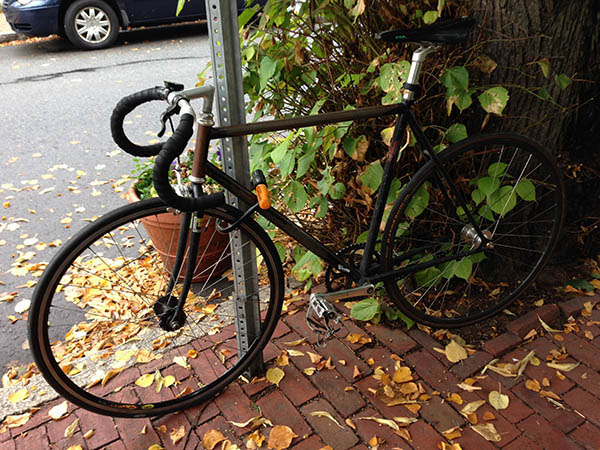
Here's a photo of my bike on a typical rainy morning in Cambridge:/ Back in New York I would always carry my bike up to my apartment, but I can't do that at my new place because our common stairwell is just too tight to maneuver without scraping up the walls. So I've just been keeping it locked by the sidewalk under a tree, which doesn't keep my bike very dry.
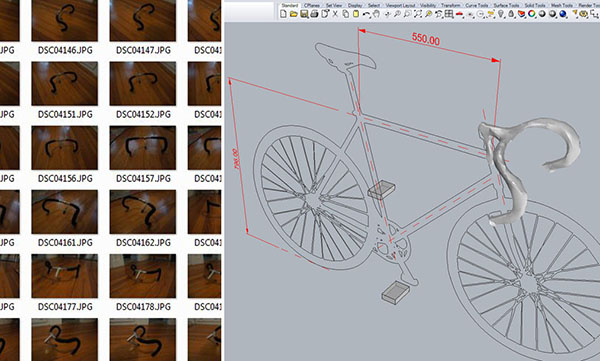
To begin, I wanted to scale the structure appropriately for my track bike, so I created a 3d stick model from actual measurements, a scaled photo of a Bianchi Pista, and a 3d-scan I made of the handlebars using 123d Catch.
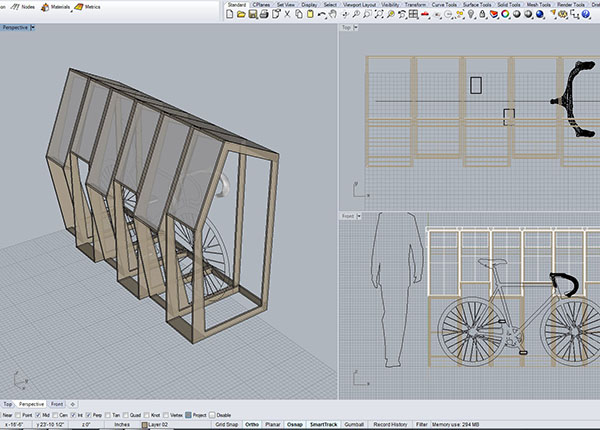
I quikcly sketched through some ideas, and jumped straight to Rhino to model a scheme that comes together in 12" wide sections with a roof profile that I could cover with a material during Composites week.
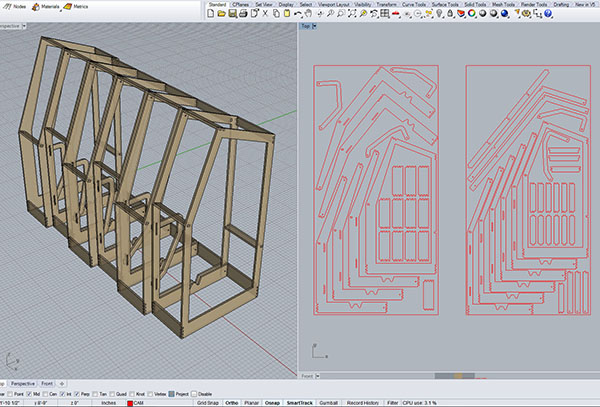
I made some adjustments to the geometry and layout, incorporating press-fit connections and ribs on which to lock my bike. I was able to nest all of the pieces and parts onto two sheets fo 4' x 8' plywood.
When nesting geometry, it's important to pay attention to the gap between parts. Since we were going to use a 3/8" bit to do the rough milling, it was imperative to leave at least a 3/8" gap between pieces. However, a 1" space is highly recommended because this extra breathing room around the bit, combined with attention to the size of the pieces and the toolpath, will prevent pieces from coming loose and getting damaged during the machining. On one of my sheets, I had to resort to some 3/8" spaces in order to get all of the pieces to fit.
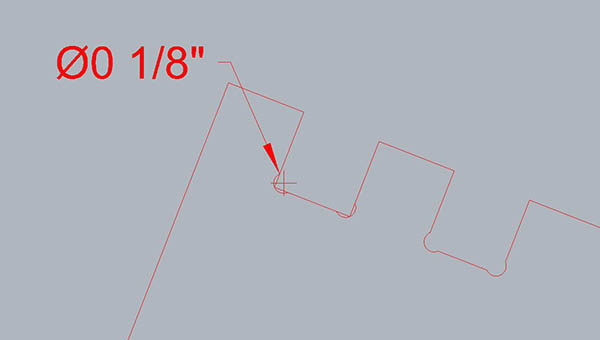
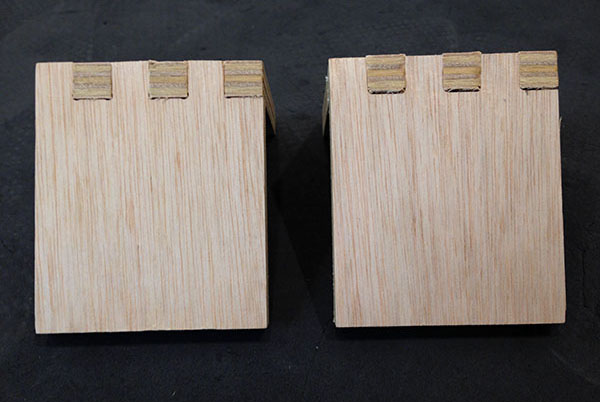
Another recommendation is to use a "dogbone" corner on inside joints. This is essentially rounding off and carving into an inside corner with the shape of the smallest bit of the machine (1/8" diam. in this case), so that press-fit slots fit tightly. I was able to run a test cut to understand the difference (see above, the dogbone cut is on the left). I'm extremely thankful for the course T.A.'s and shop staff for their advice and help on matters like this.
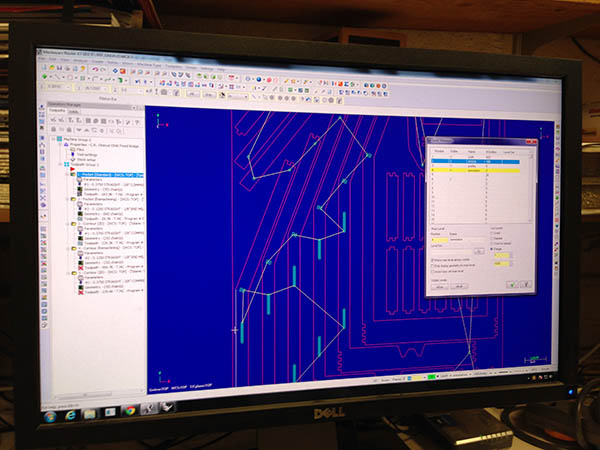
I imported my .3dm cut file directly into Mastercam, where I assigned my geometry onto a few different toolpath settings. Be sure to put inside cuts (like closed slot openings) on a separate layer in Rhino before importing into Mastercam, so that they can be more easily selected and applied onto the proper toolpath (inside cuts typically are the first to be made).

One of the coolest features of Mastercam is that you can animate the toolpaths to see how the router is going to cut, and in what sequence. Once the toolpaths are set, export the geometry to a .NC g-code file (the language the router reads to make its cuts).
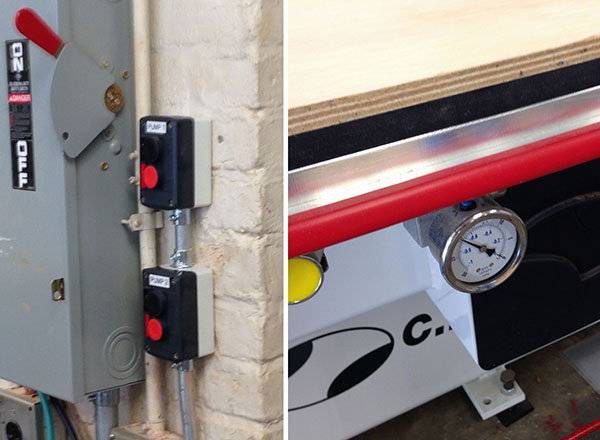
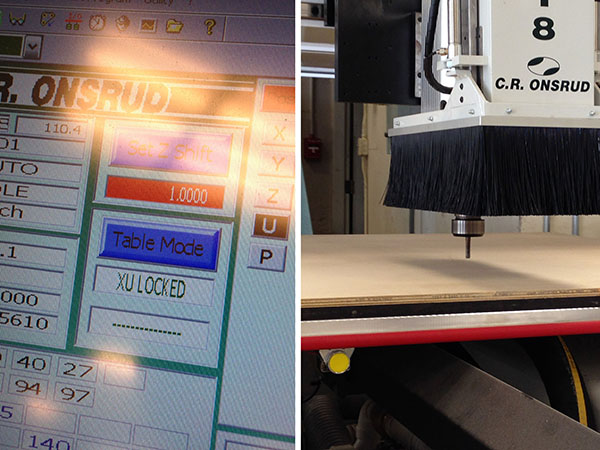
With my plywood securely down on the bed, I set the "Z Shift" to 1 for an "air cut," which is a test run with the bit an inch above the surface, to make sure that the scale and orientation of the cutting path is correct.
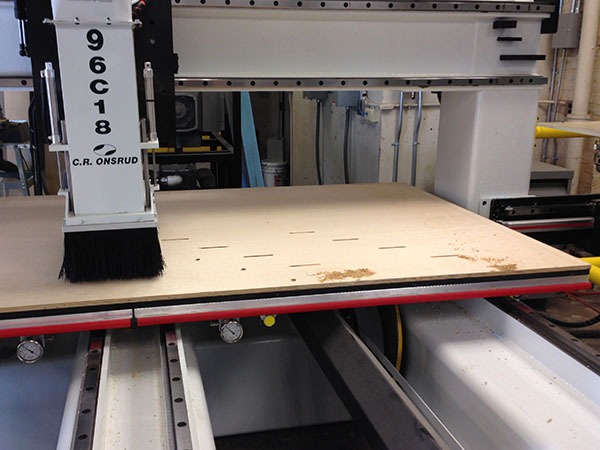
Set the Z Shift back to 0, and send the file. The CNC router begins cutting, first with the interior holes with a 3/8" bit, then interior "remachining" with an 1/8" to create my "dogbone" corners, then an "onion skin" cut on the outer borders of the pieces (leaving an "onion skin" to hold all the pieces to the material), and finally a final pass to fully cut through the plywood.
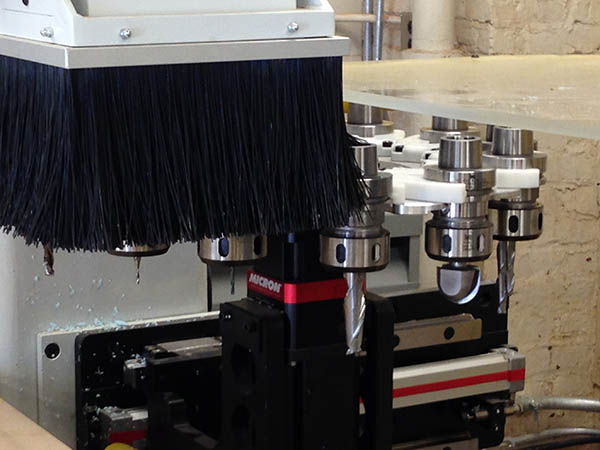
This CNC machine automatically changes the router bits. It's pretty sweet when it happens.
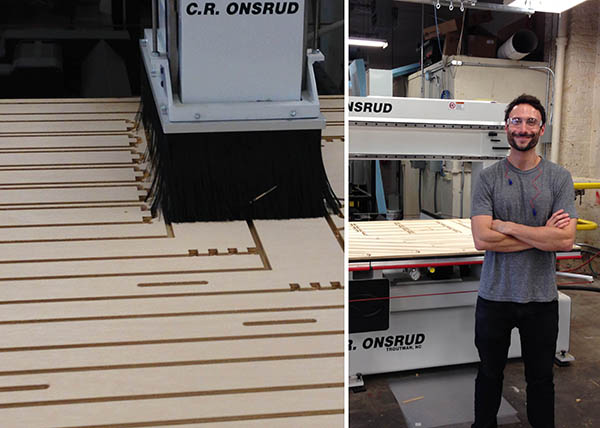
I then cut out my second sheet of plywood and started assembling.

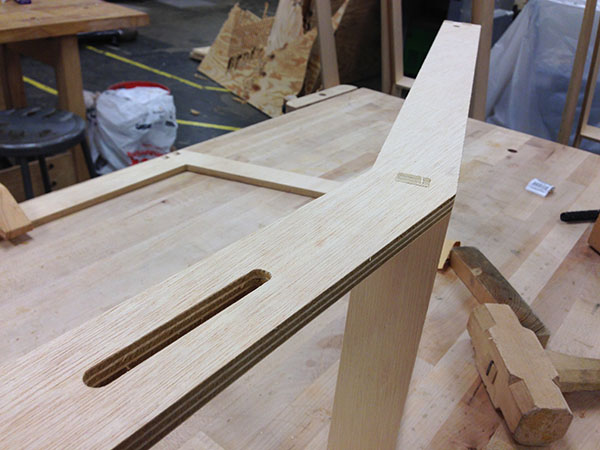
Assembling the pieces was easier for some sections than others. Most of my joints fit very tightly and required malleting (which is good because they stay in place!). The snug joints are the ones that are controlled by the cutting (i.e. slots and tabs that are exactly 0.5"), where as a couple ended up being not so tight (where a 0.5" slot meets a 0.48" tab--the thickness of the plywood).
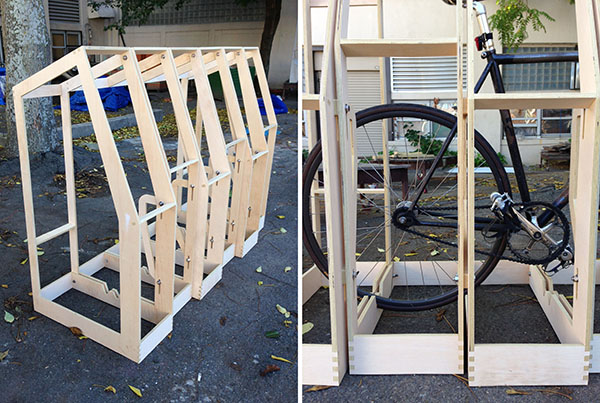
I brought the sections together using bolts and nuts that fit into pre-cut holes and slots, forming double or "sistered" connections that grab single rafters. The idea is that the shelter could be assembled and disassembled for easier transport.
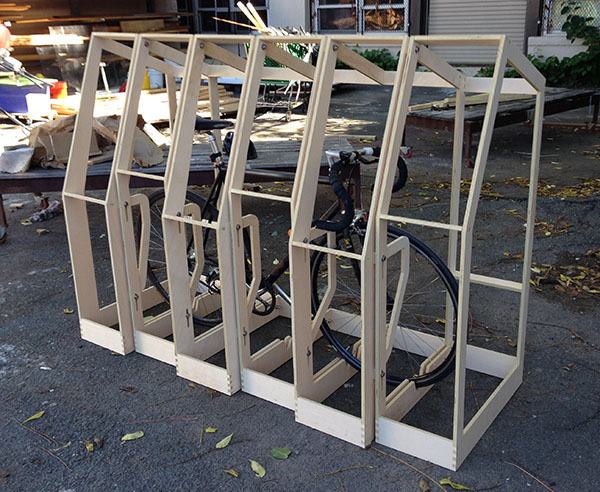
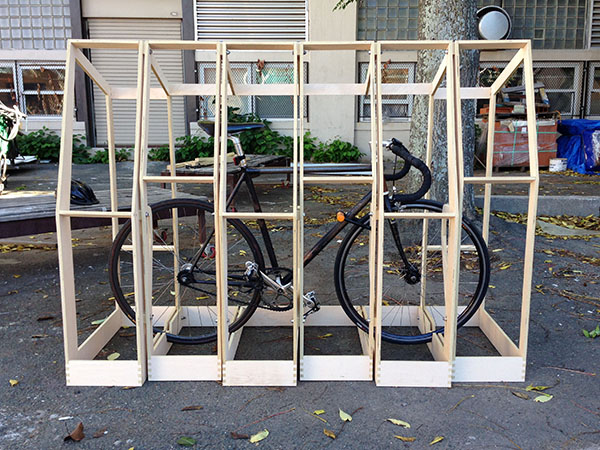
Here's how the current structure stands.

My bike sits on the grooves at the shelter's base and rests against ribs that also act as bars for locking up my frame and wheels.
/ / / / / / / / / / / / / / /
Next Steps:
A lot of work has to be done to make this a functional bike garage for my backyard! This will include structural touchups, finishing, painting, panelling, etc. Here is the current status:
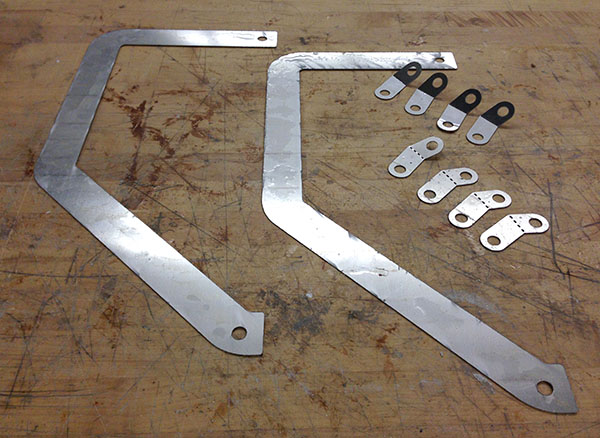
Water jet cut components from the Omax.
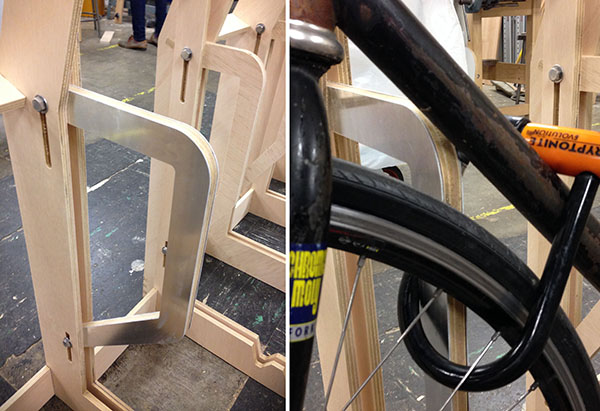
In order to make the bike lock rib more durable, I decided to water-jet cut and laminate two sheets of aluminum to the plywood profile. I'm currently gluing them together in the shop (above pics show the pre-glued mock-up). With the help of the shop staff, I also used the water jet cutter to fabricate a few tension cable fittings that I hope to install in the upcoming weeks to better stabilize the over all structure. Updates to come on those fittings as well as the overall water jet cutting process with the Omax machine!
Since the shelter is a bit laterally unstable, I plan on tighening the structural frame with tension cables. Of course, I also need to make it weather tight. In the next few weeks I plan on sanding down the frame, painting it, placing it on some runners so that it's raised off the ground, and, last but not least, installing some custom translucent roofing panels that I will fabricate during the Composites lesson. Stay tuned!
/ / / / / / / /
Files: