Embedded Programming
Programming in C
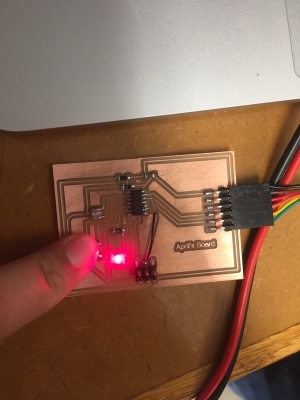
The assignment for this week introduces programming in C. We took the circuit boards from weeks 3 and 5 in order to do this. Since I do not know much about programming, I decided to just make my board do the simplest thing: turn on when the botton is pressed.
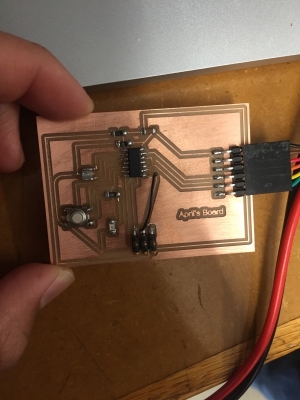
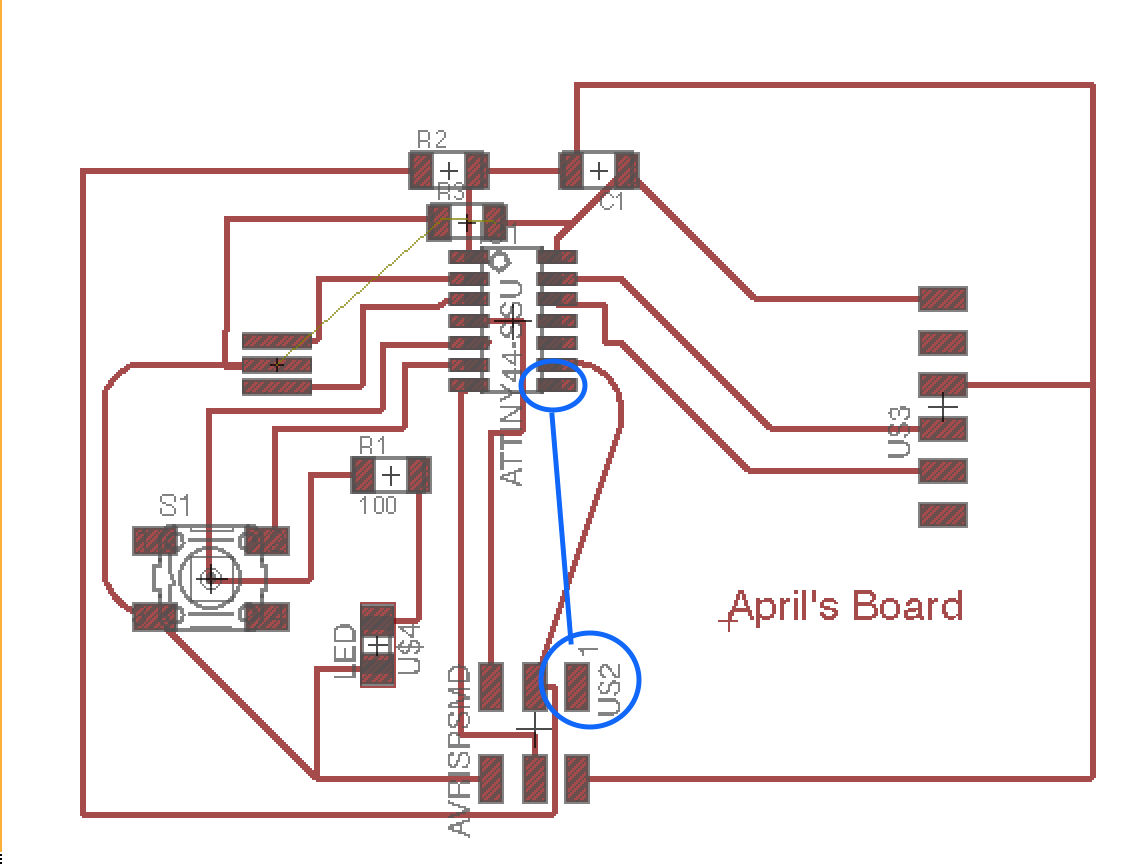
The first problem I encountered when trying to complete this task was that my board from week 5 was not working. I quickly regretted not testing it when I initially made it. Turns out my MISO connections were missing. For some reason, Eagle did not register the connection I made in the schematic and so it did not appear in my actual board design. To fix this issue, I used a wire to connect my MISO ports in the ATtiny and 2x3 header.I highlighted the issue in blue in the images below of my schematic.
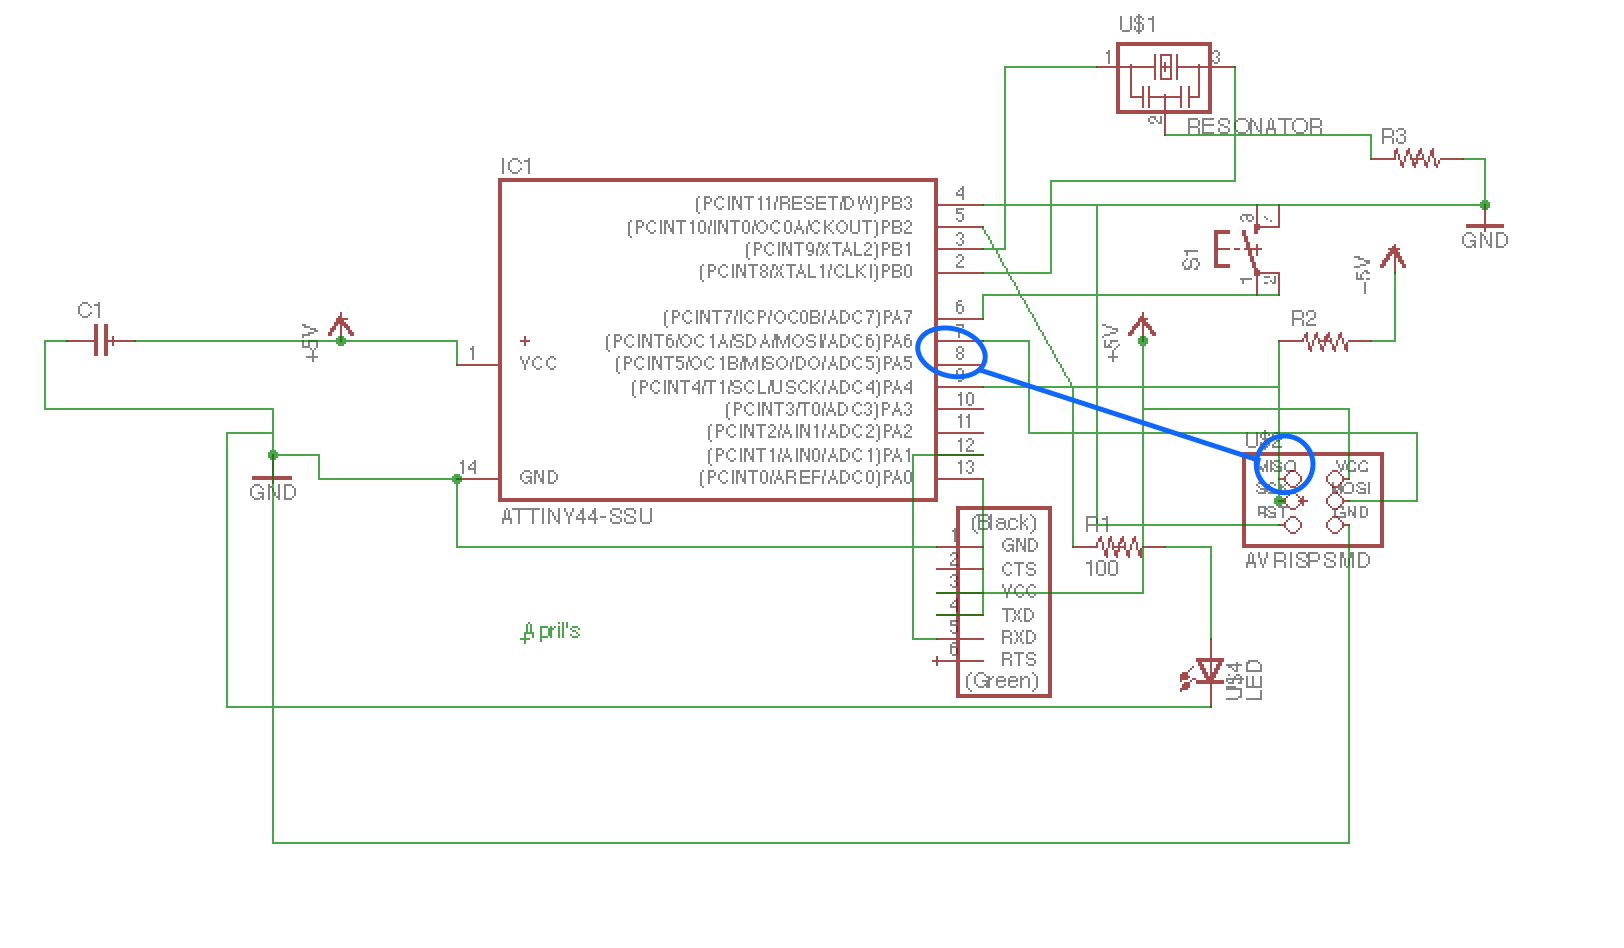
Once my board was working, I was able to begin programming it using the board from week 2 as the programmer. I used the Arduino program. Because I was using a program built for an arduino board, I had to load in the Attiny44 board. I also had to convert the attiny ports to arduino ones. I did that by using the following schematic:

I was able to find a basic code to start with online that would turn on the LED whenever the button was pushed. I had to replace the port numbers and also change INPUT to INPUT_PULLUP because I had my LED attached through a pullup resistor.