Week 3: 3D Printing and 3D Scanning
This week I worked with different 3D printers and 3D scanners. I learned how to 3D print complicated structures which included overhangings and assembly. 3D scanning was totally new and very interesting for me this week.
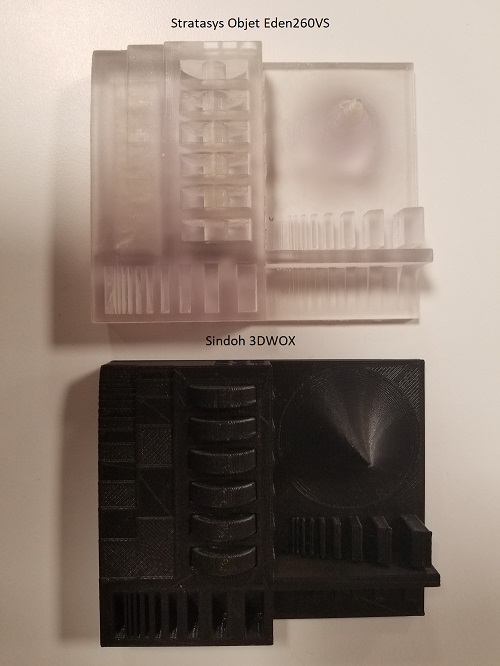
3D Printers: Stratasys Objet Eden260VS with water soluble material. Sindoh 3DWOX with PLA filament.
3D Scanners: Sense 3D Scanner, NextGen Scan Studio 3D Scanner.
CAD Software for 3d Design: Solidworks
Group Assignment: characterize 3D printers
Individual Assignment:
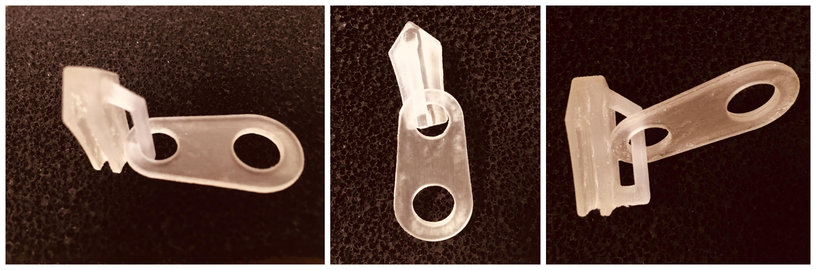
3D Printing: design and 3D print an object that could not be made subtractively
I had to design something that's very small, should occupy little space with the dimensions not exceeding 3cms. I designed a Zipper in solidworks. It cannot be made subtractively, it has overhangings and linkages. My design was within the demension limits. Before printing the part, Tom who is incharge of 3D printing rescaled it so that it doesn't break apart. The final print was still within the dimension limit and it came out good without breaking apart. I used a power blaster to remove the excess material to get the following.
3D Scanning: 3D scan an object
I tried both the 3D scanners available in CBA shop space, one using Sense and the other using Next gen Scan studio.
Using Sense
During the demonstration we scanned a duck (toy), the scanner was fixed to a wooden stick and was rotated so that the scanner didn't move and could focus on the object to be scanned. After multiple tries, we were able to scan the duck well. Interestingly, using sense one can scan heads of people. I wanted to to scan my classmate Ravi Tejwani's head. After a couple of tries, I could scan his head properly without losing a lot of his facial profile. In these attempts, I learned that slow movement of scanner and staying focus on the head play a key role in getting a right profile scan. I found scanning the hair part much more difficult than the face. I felt that it's easy to get lost in scanning hair. Most importantly, once you are out of the correct scanning zone, it's hard to retrace back for hair and much easier for face. Here is the process of scanning using sense followed by the result after solidification.
Using Nextgen Scan Studio
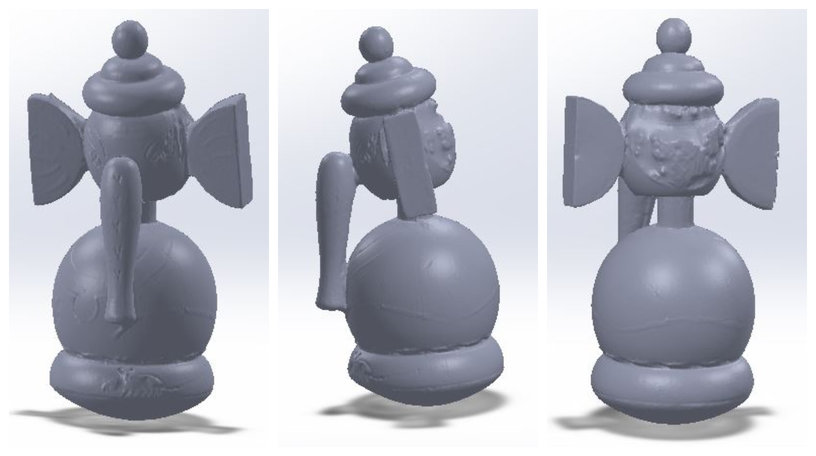
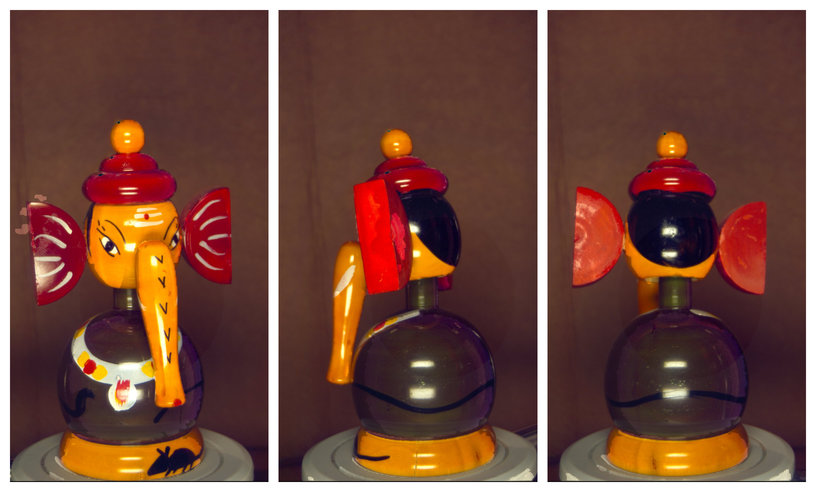
I used Nextgen Scan studio to scan one of the toys made of wood [Chennapatna toys]. I kept the object at a fixed distance, 7.5" away from the scanner. The object is rotated and scanner will take pictures of the object at multiple locations and then outputs a solid file when fused. I failed to take the scan for a couple of trials. I figured out that the background is distracting scanner and so I put a non-reflective black cardboard so that background is fixed throughtout the scan. The number of locations(divisions in this case) affect the scan. I used 6 divisions and 12 divisions, which took 17 minutes and 40 minutes respectively. I could get small features like the eyes, mouse on the lower part very clearly in the scan. The quality of the scan goes up if you do it with more divisions like shown below. For six divisions, the bottom of the object is steep and curved, the back of the head is improper. On the otherhand, the intensity of the above mentioned two is very low for 12 divisions scan. Both the times, the back of head is improper. I concluded that the light reflected by the black color might be a reason for this drawback. I felt the scanner couldn't distinguish the refelction from the object giving an improper scan. I felt Nextgen scan studio gives a fine scan when it comes to objects when compared to Sense.
Original Object
Result of the scan using 6 divisions

Result of the scan after 12 divisions