3D Printing and Scanning
3D Printing
Files: Fish (designed with Fusion 360)
This week’s primary assignment was to design and 3D print something that couldn’t be made subtractively. The design can be nonparametric and sculpting is encouraged. So, I decided to explore curved surfaces and try to start connecting the assignments with my final project, the robotic fish. I know that the robotic fish cannot be 3D printed (its body should be made ideally by a flexible material that will allow it to flex its tail and fins back and forth), but I thought to give it a try and prove this assumption. I also decided to explore materials with different elasticity, i.e. PLA and flexible resin.
Design
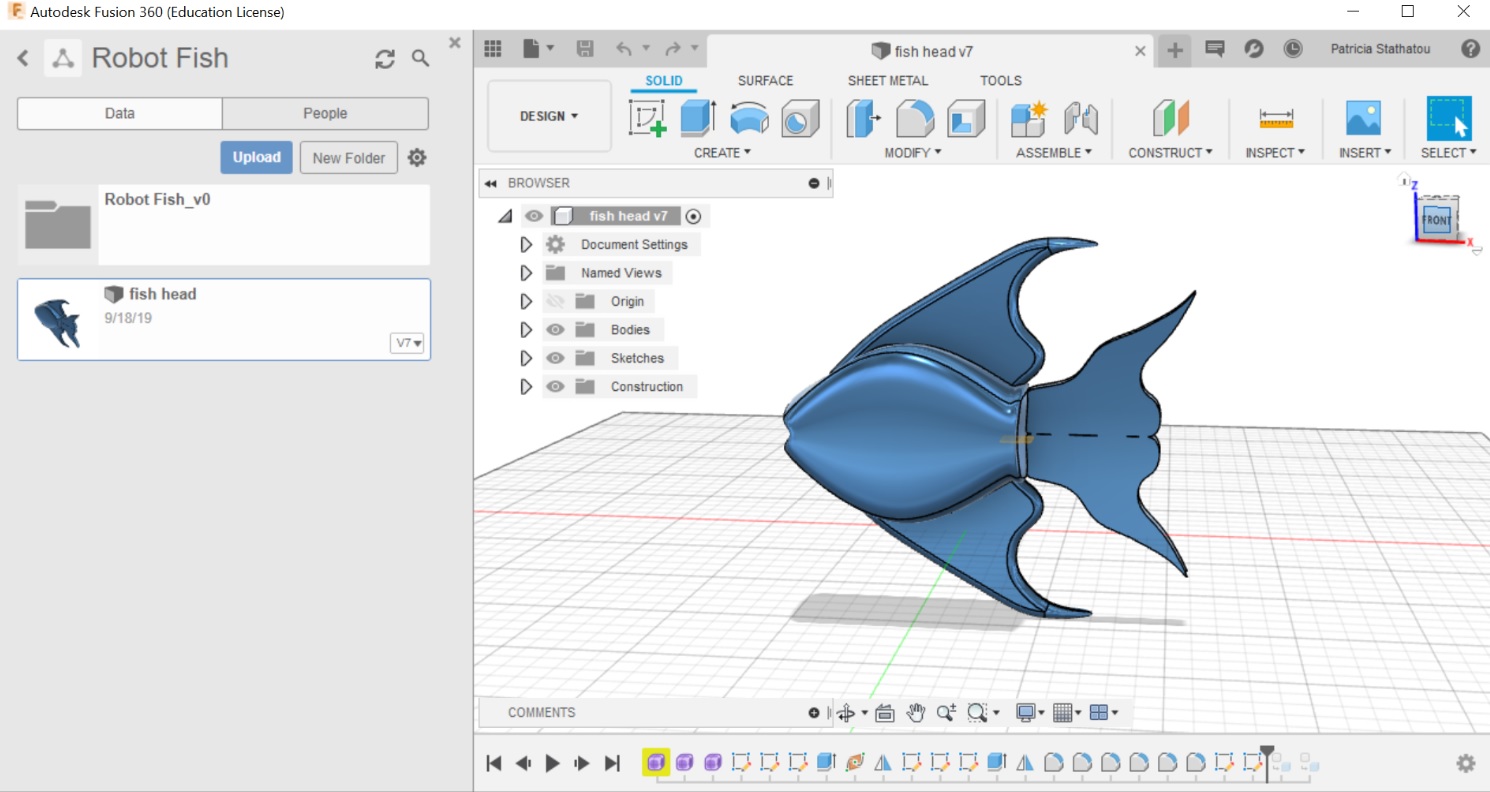
For the head and the main body of the fish I used the "Form" tool of Fusion 360 and I first developed a 3D rectangular box and divided in multiple sections (10 across the length and 2 across the width of the box). I also put mirror panes across its length and width to ensure symmetry in my design in both directions. I edited the individual sections to sculpture the fish, and did a lot of trial and error steps to reach a result that I really liked. After finishing the head and the main body I used polylines to create the fins and the tail. The final result looked like this:
Fabrication
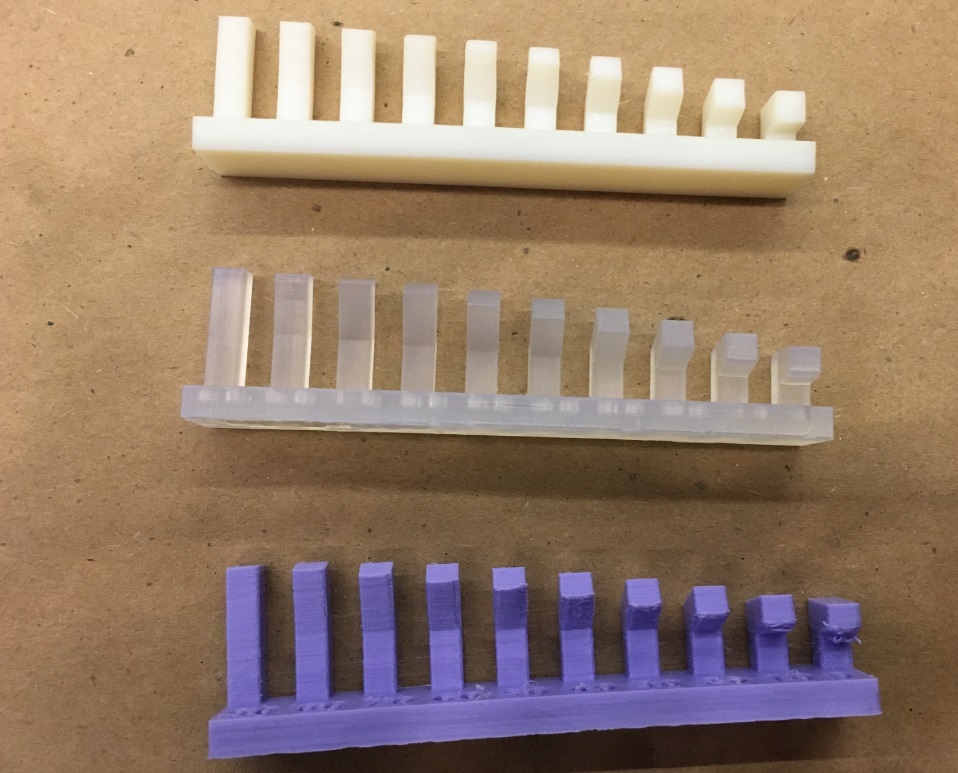
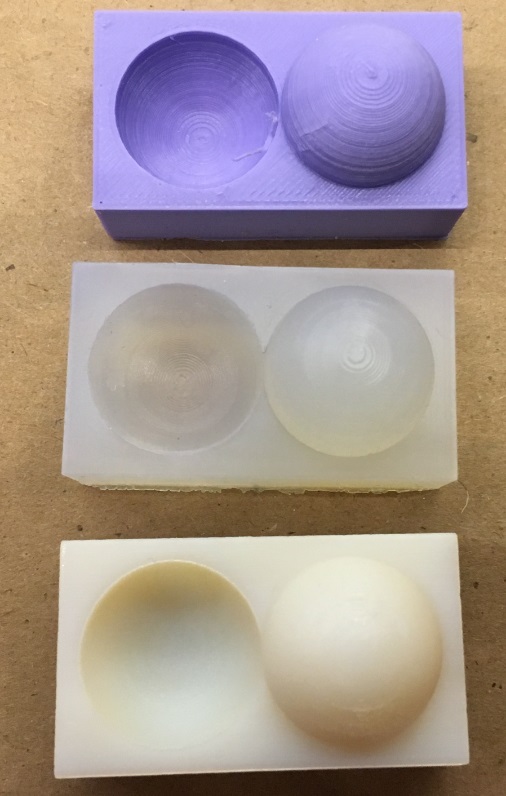
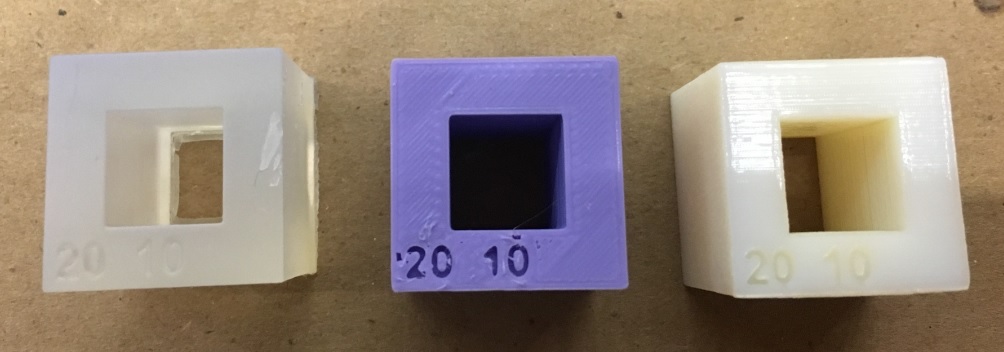
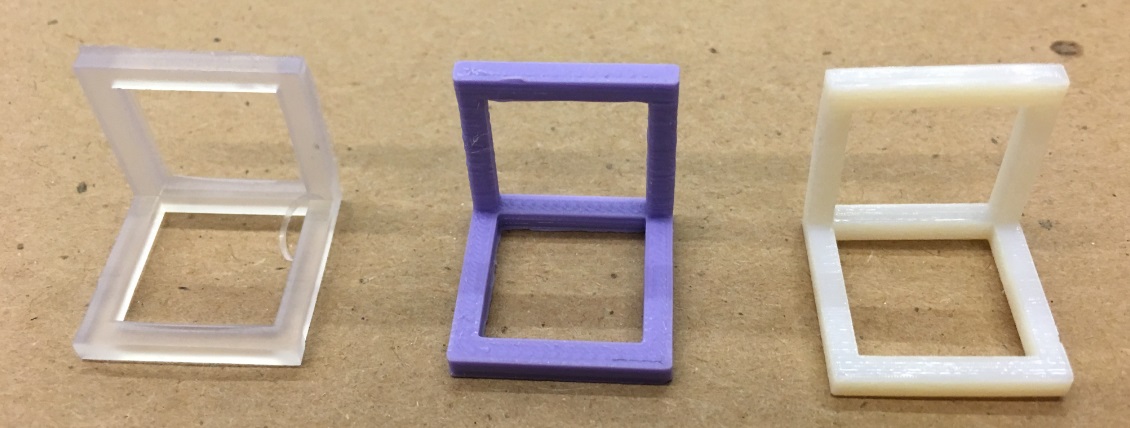
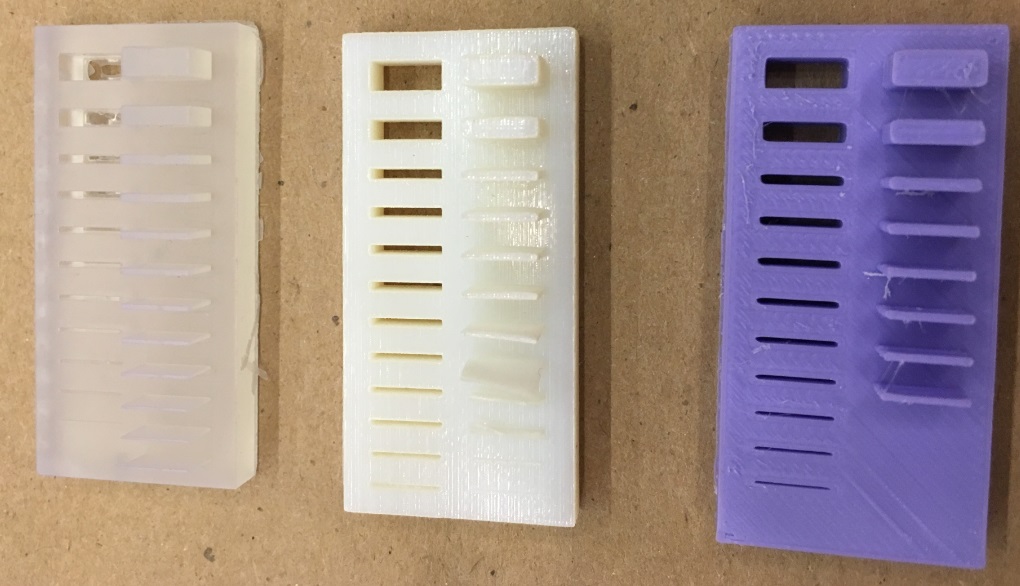
The main printer that we should use this week is the Original Prusa i3 MK3S 3D printer, one of the most easy-to-use Fused Deposition Modeling (FDM) 3D printers, which is completely open source and is mostly made out of 3d printed parts (which it can produce). During the group assignment (team: Aubrey, Jiri, Sabrina and me), we decided to 3D print all the test parts which were propvided as examples in the class to test the design rules for our printer. We didn't put supports in any of the parts that we sent to print. Tom also printed these test parts in the Formlabs Form 3 printer, which is a Low Force Stereolithography (LFS) 3D printer, and in the Stratasys Object260 Connex3 prinetr, which is an ink-ject 3D printer, so we had the opportunity to compare Prusa (purple parts) with the other two different 3D printers as well (Form 3: transparent parts; Connex3: white parts).
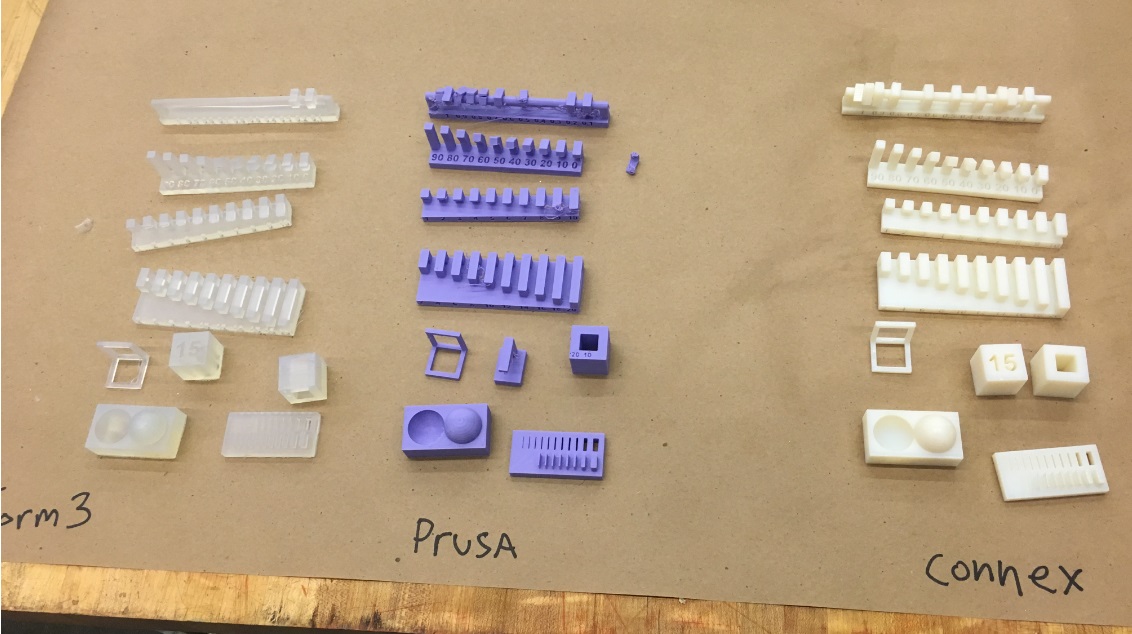
We found out that with the Prusa we were able to separate parts with a clearace down to 0.2 mm, however this test part needed supports in order to print the bottom of the rings properly. Connex3 printed everything perfectly without needing supports, while the 0.2 mm rule applies to it as well. Form 3 needed supports to print this part; only 2 rings came out of the printer and it seems like parts could not be seperated in a clearance of 0.2 mm.

Prusa can print overhang angles down to about 20 degrees without any failure, while Form 3 and Connex3 could print overhang angles perfectly.
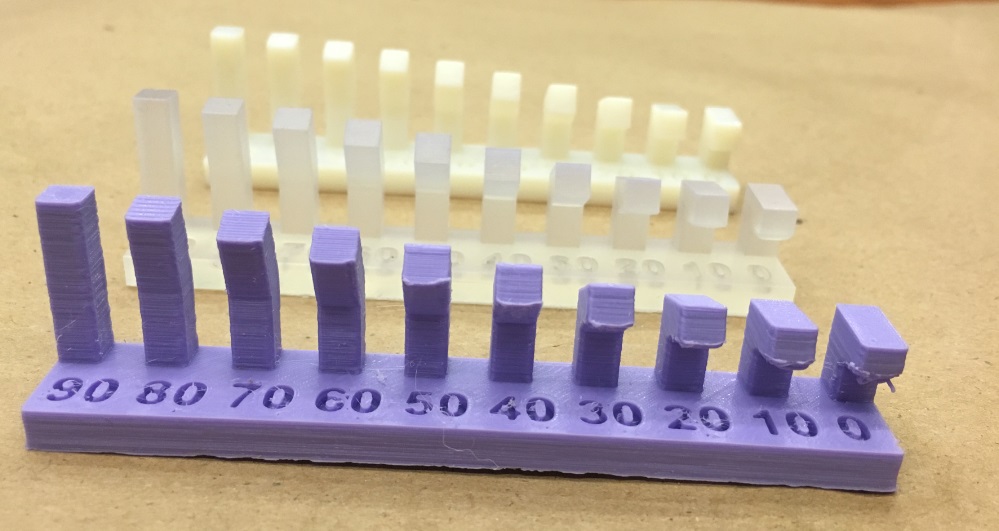
Printing straight out into the void starts to become challenging for Prusa at about 3 mm, while after 8 mm the parts fail completely; supports are needed in these cases. Connex3 printed the parts perfectly, while in Form 3 the first layers flake while printing straight out into the void.
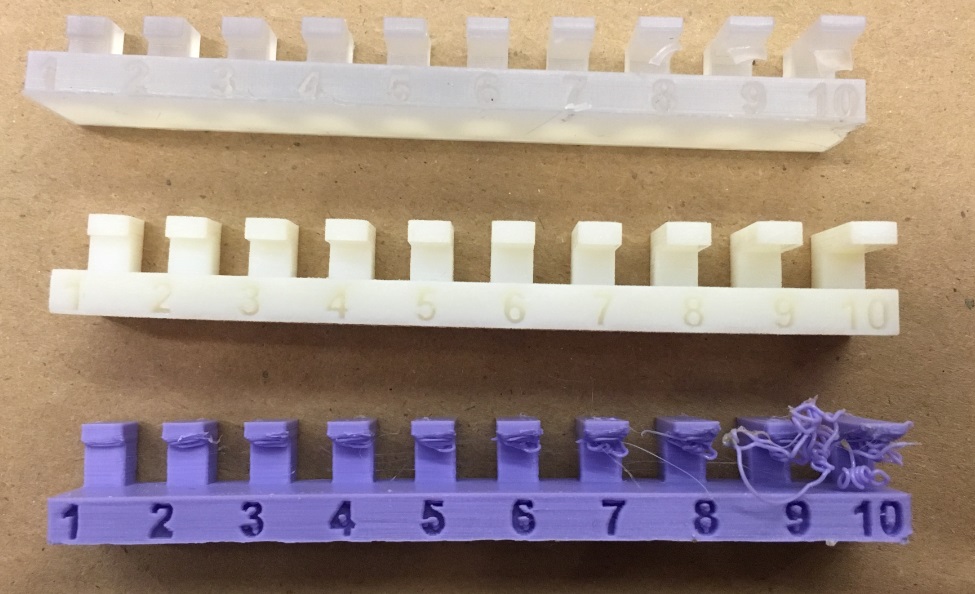
Bridges on the other hand can be printed successfully by Prusa (and by the other two printers), however some loose threads of plastic on the first layers may appear.
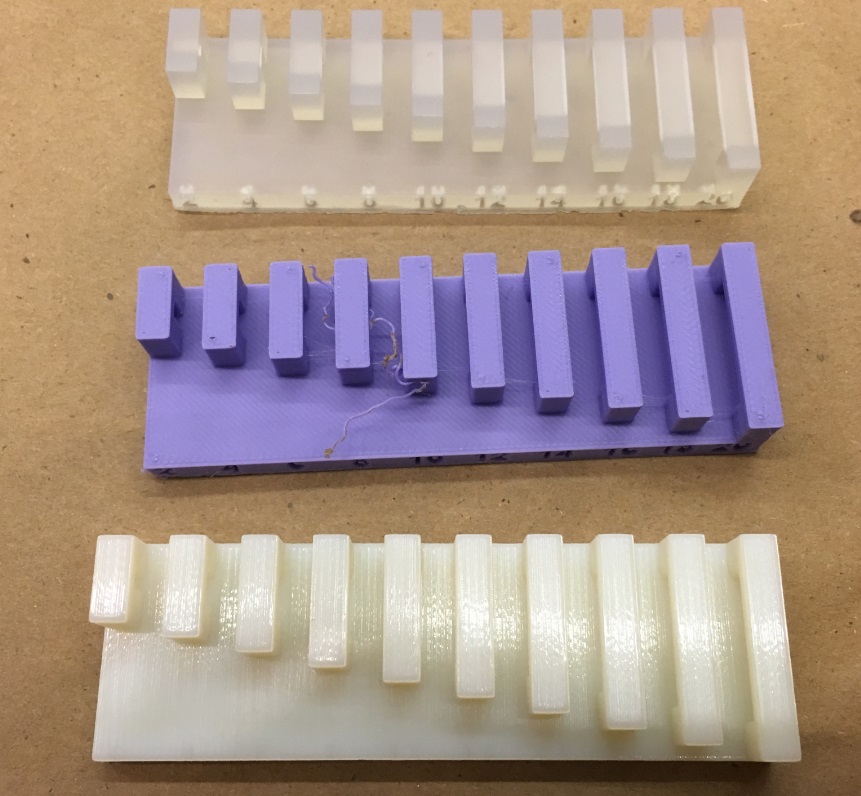
We also found out that with Form 3 and Connex3 we can achieve way more smooth results than with the Prusa (takes way more time to print with them though).
Prusa can leave much finer gaps between material than the width of material it can print, while Form 3 can perfectly print extremely fine parts. Connex3 is doing better than the Prusa but cannot print the finest parts printed by Form 3.
After characterizing the printers I sent my fish for print in the Prusa, by using the Prusa Control Software. I printed the fish two times, one without infill (infill 0%, hollow/shell) and one with 20% standard infill, to see how infill could affect the final result. All the other settings were the same for both prints, i.e. Prusa PLA material, optimal quality - 0.15 mm, supports everywhere and brim on.
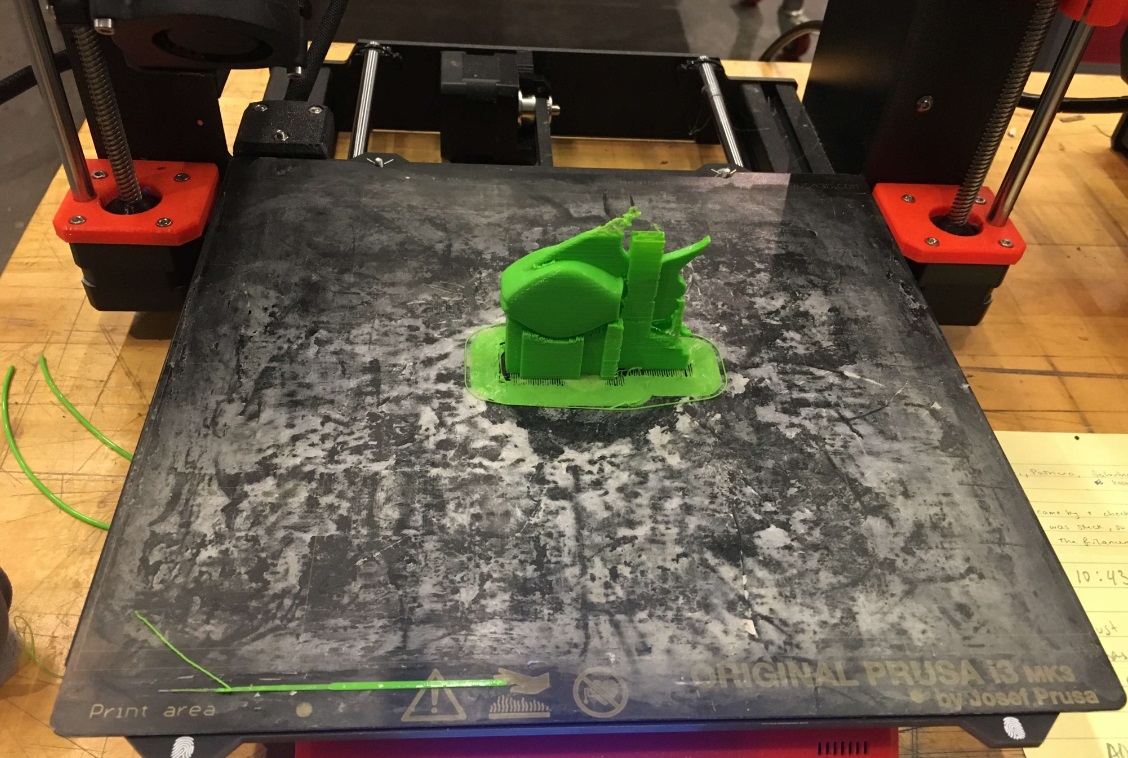
The results are not very satisfacting...
![]()

In the case of the "empty fish" (print duration: about 1 hour) both the fins and the lower part of the tail failed. In the case where I used 20% infill (print duration: about 1 hour and 45 mins) the fins came out almost perfect, but the lower part of the fish failed again, although it was sourounded by supports. I think that the orientation of the fish may affect the print. I chose horizontal orientation of the fish for both prints (fish body parellel to the prinetr bed), but I will try to see what happens in case I chenge the orientation and amke it vertical (fish body perpendicular to the prinetr bed).
I also printed the fish in the Form 3 printer using the Durable photopolymer resin as a material.
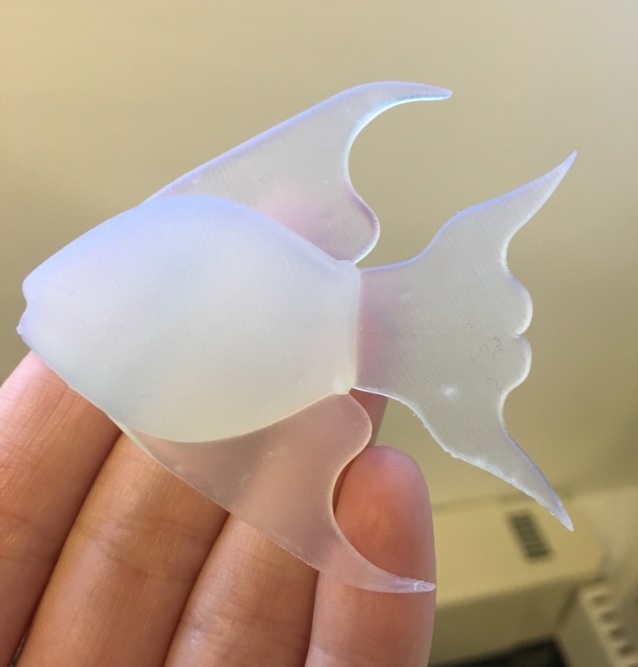
The fish came out perfect (print duration: about 5 hours). The material, although far more elastic than PLA, cannot be used for the development of the robotic fish as it does not allow the movement of fins and tail.
Scanning
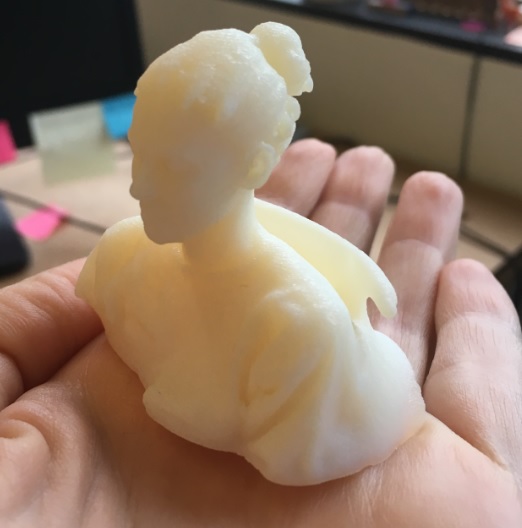
I used the Artec Eva 3D scanner to scan my face! It was really fun!
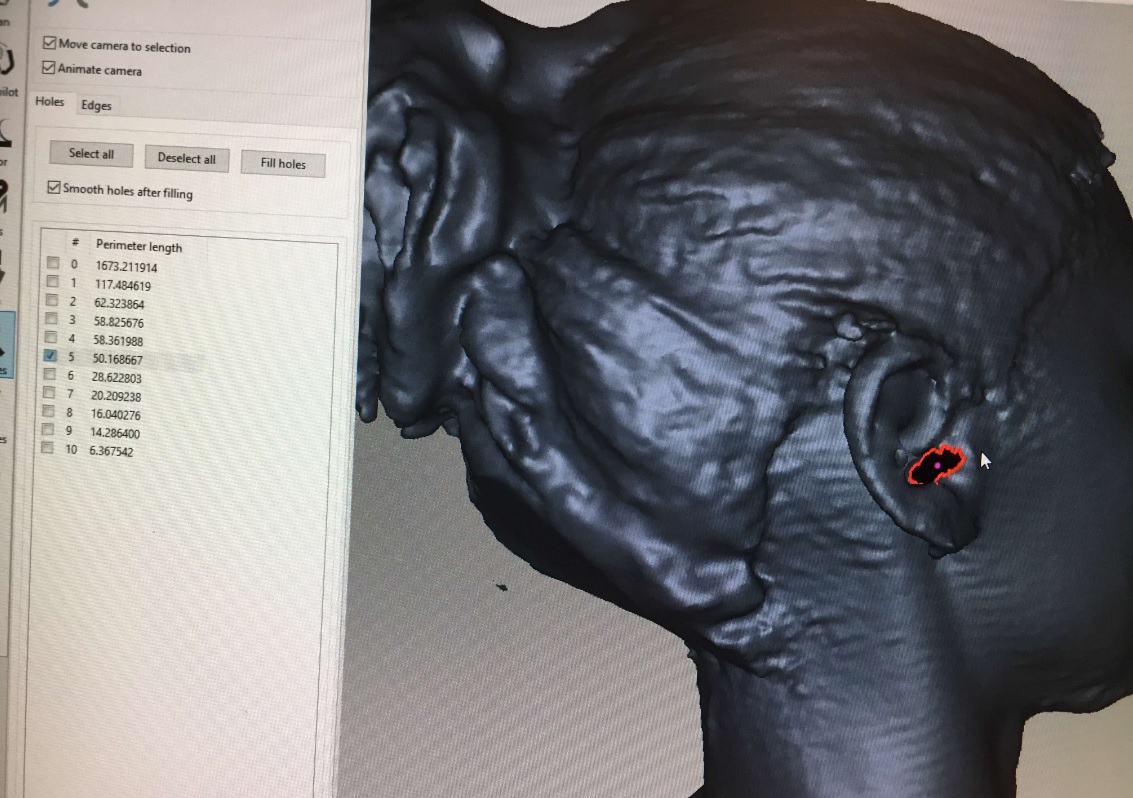
The editing of the file was easy and pretty straightforward using the Artec Studio 13 professional software. I made some areas smoother and filled up some holes in the scanning.
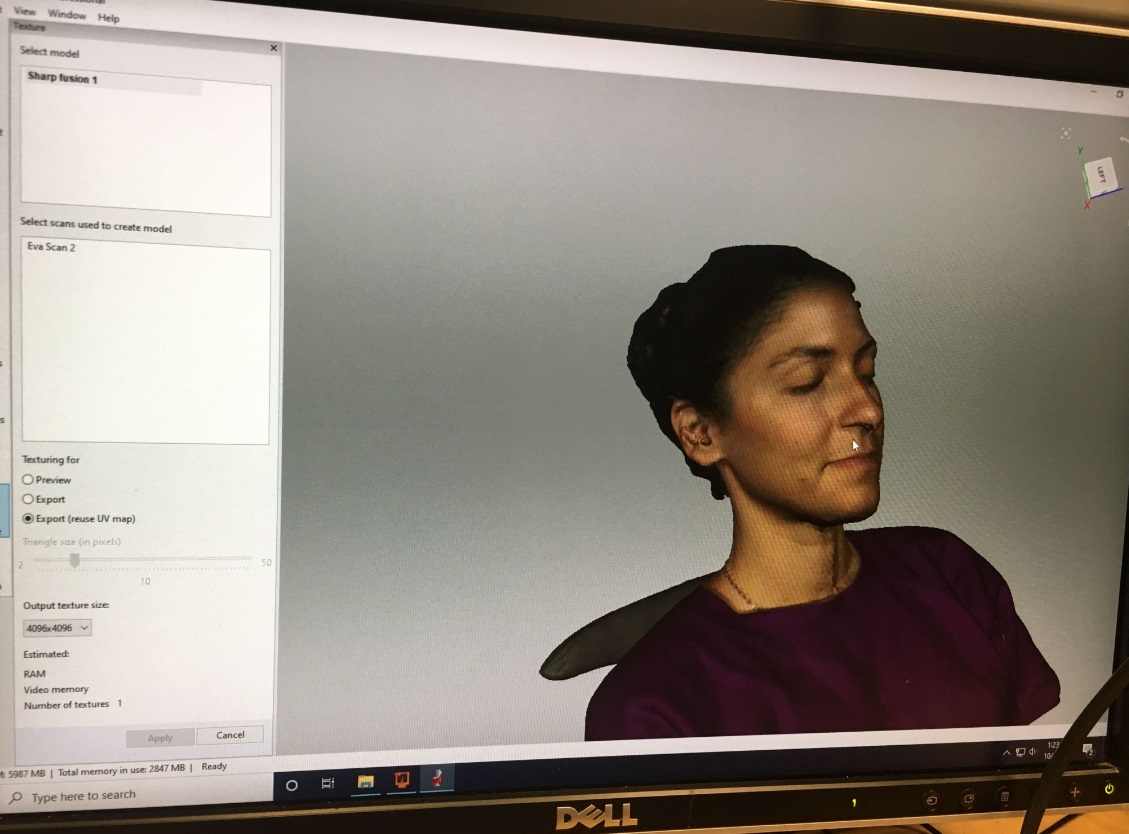
Then, I exported the file (STL format) and sent it to Tom to check it and print it (thanks Tom!).
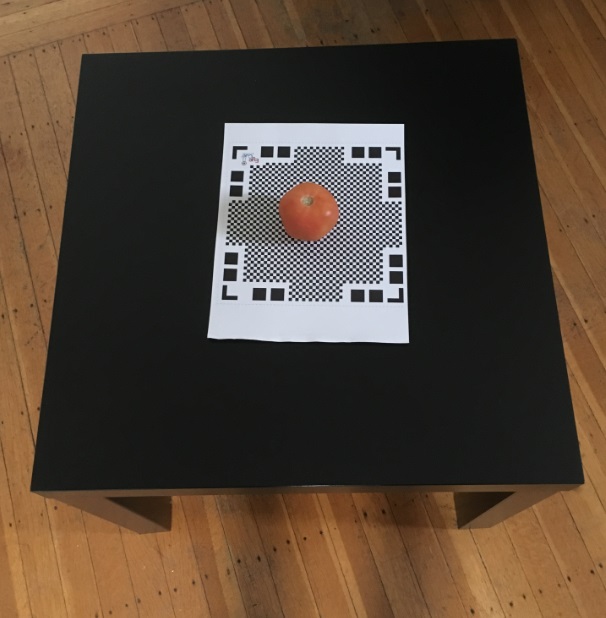
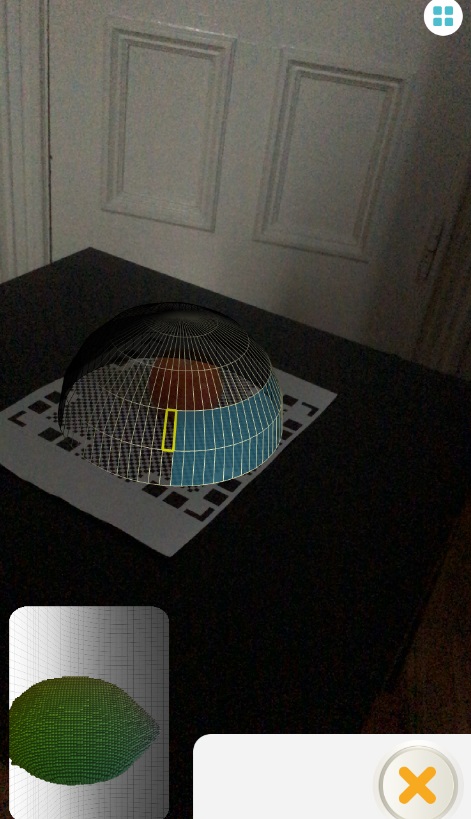
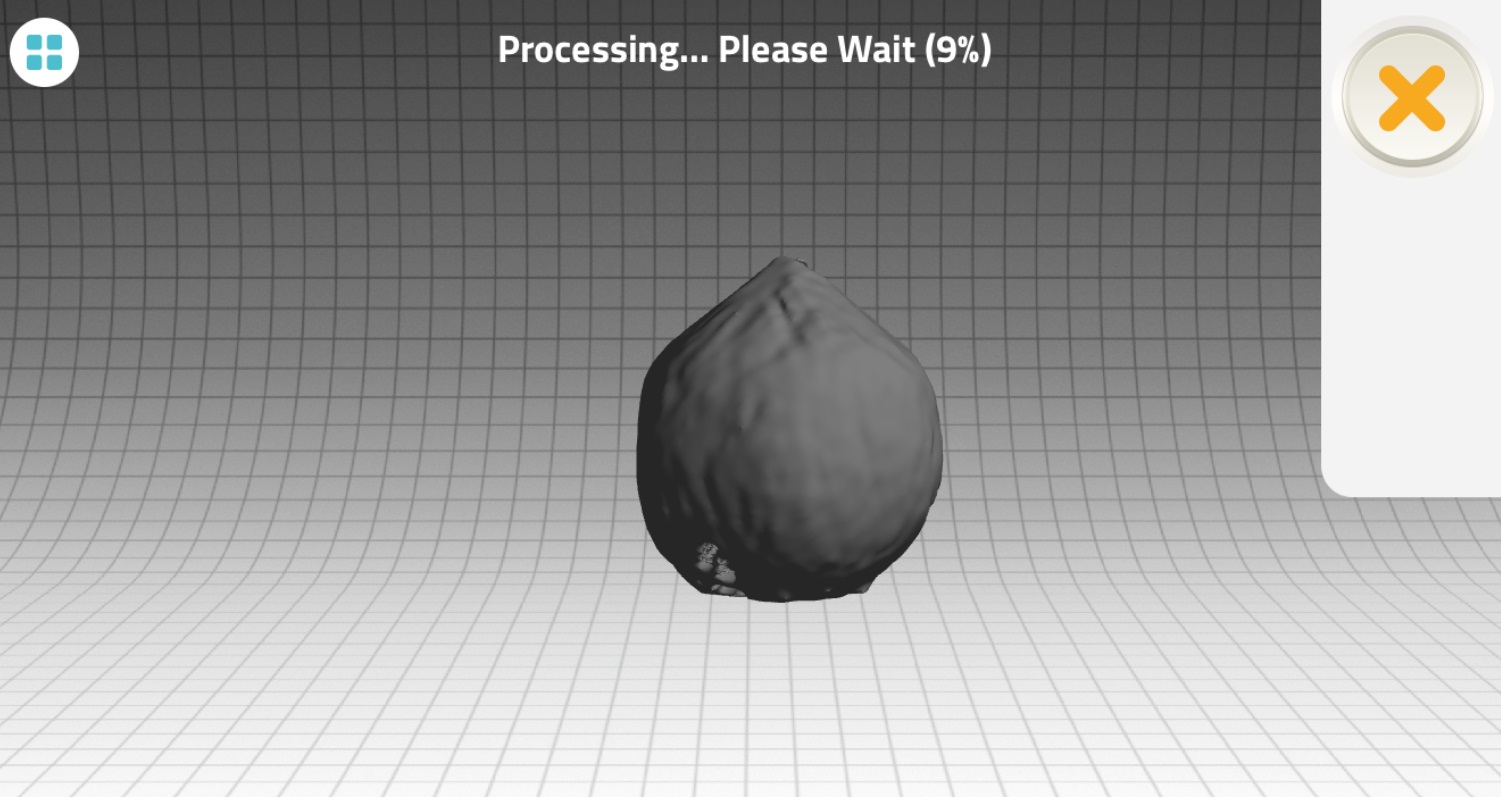
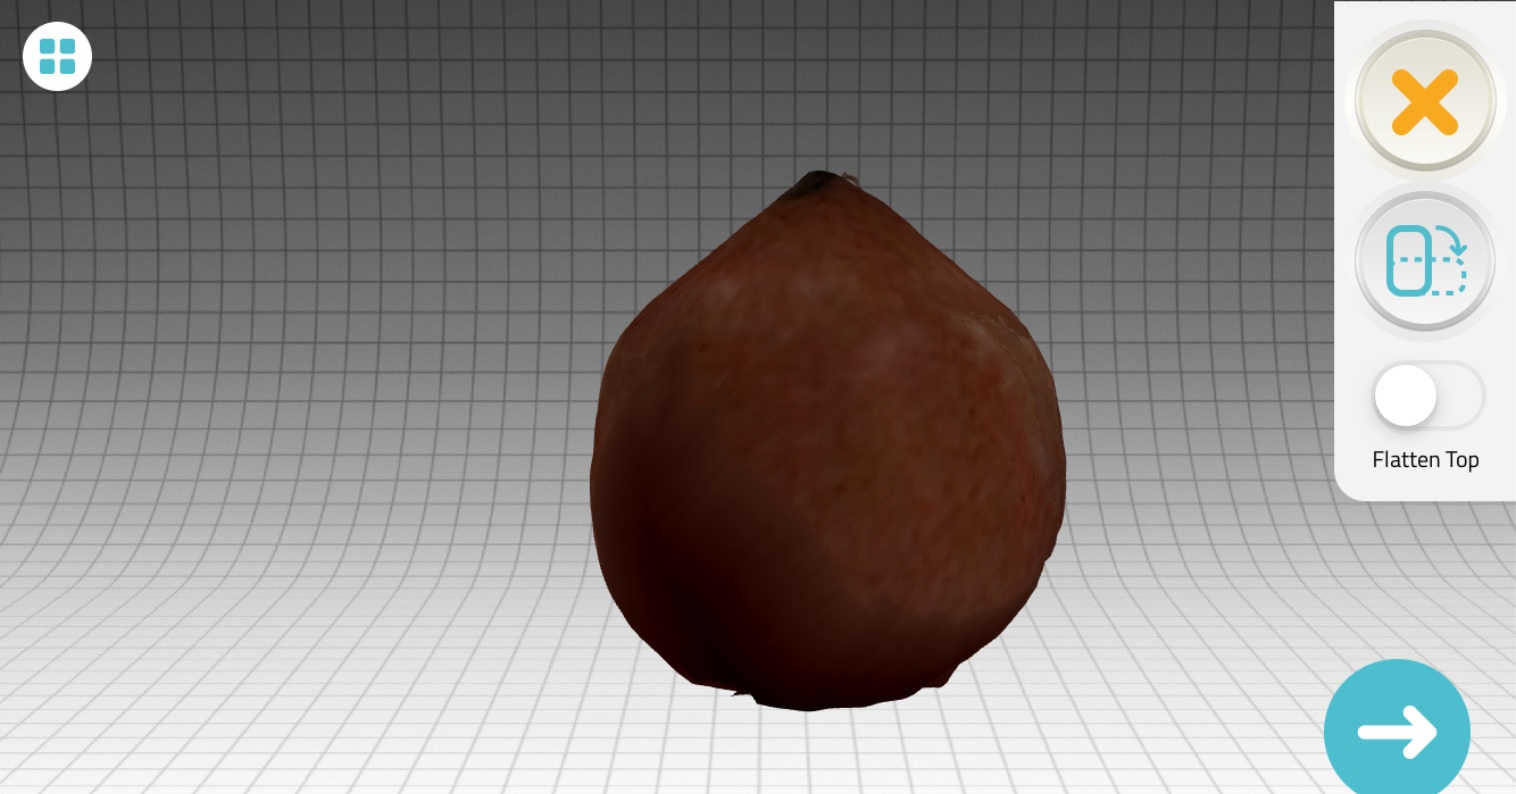
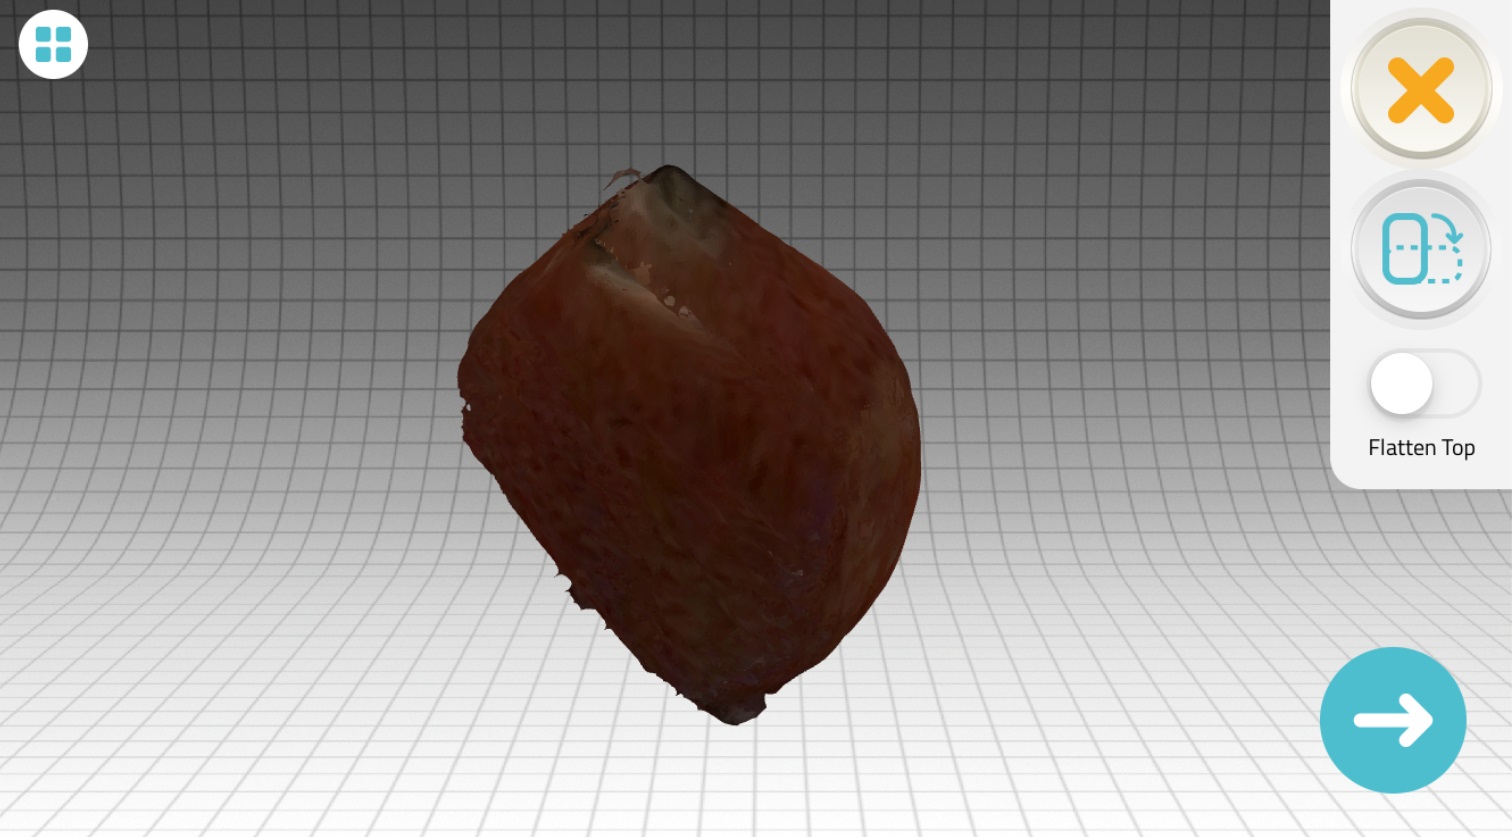
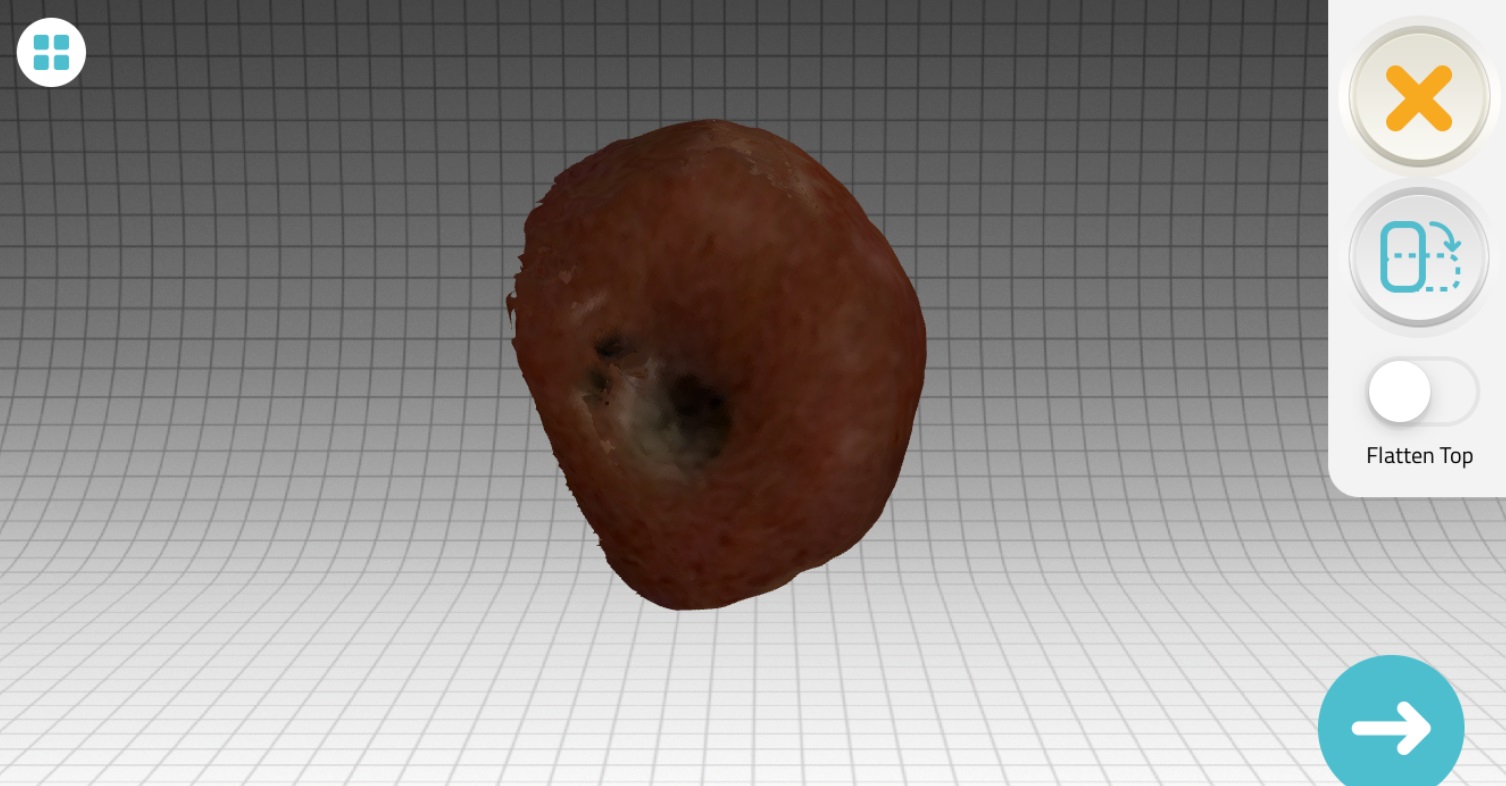
I also tried to scan using the Qlone scanning app. I downloaded the app and printed the Qlone mat to put my object on. I tried to scan 3 different objects but the results were not satisfactory with any of them. First I tried to scan a tiny (4 cm2) pair of wooden Dutch shoes but the scanned model was very unclear and I though that a simpler object may be better. Then I tried a wooden tulip with height approximately 15 cm, but it was too tall to fit the dome created by the app to scan it. So, my last try was a very simple and average sized object, a tomato. As you can see the results are not satisfactory at all, so I quit using this app.