Embedded Programming
This week we had to program the Hello-echo board that we made during the Electronics Design week (Neil’s echo board with an LED and a switch) to do something, with as many different programming languages and programming environments as possible. I will start by doing something simple, i.e. using the button as a constant switch for the LED light, as I am really new to programming.
Using the Button as a Contact Switch
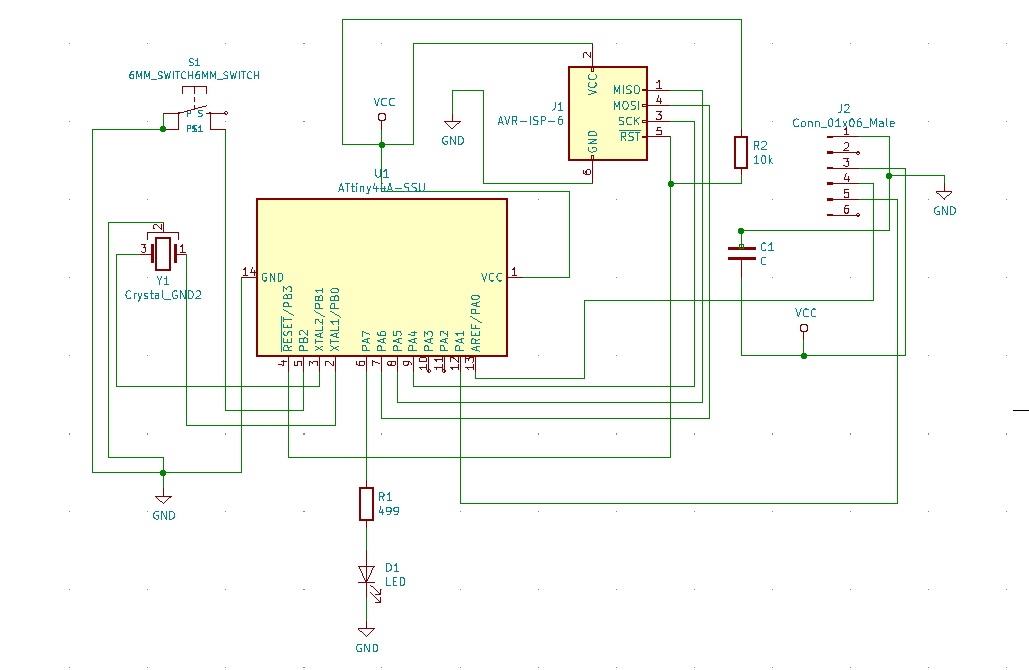
First I have to identify the ports to which the LED and the button are connected. So, I refered to my Kicad schematic. As shown below, the LED is connected to PA7 and the button to PB2.
I decided to try the Arduino IDE as a programming environment, using as a programmer the USBtiny that I developed during the Electronics Production week. I found online the PIN mapping for ATtiny 44 for the Arduino IDE.
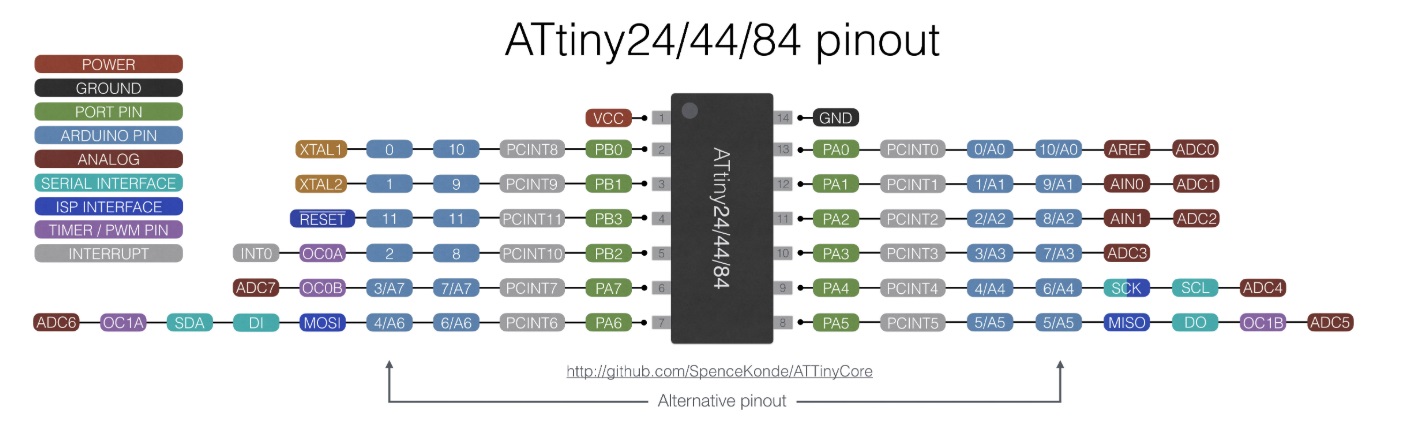
So, according to the Arduino IDE mapping the LED is connected to PIN 7 (PA7) and the button to PIN 8 (PB2).
The Arduino IDE does not contain the Attiny 44 chip library by default, so I had to install it manually. To do so, I followed the steps below:
- Open the Arduino IDE;
- Go to Preferences by clicking File > Preferences;
- In Additional Board Manager URls, add the Following URL: http://drazzy.com/package_drazzy.com_index.json;
- Open the Board Manager by clicking Tools > Board > Board Manager;
- Select ATtiny44 under the ATtiny Microcontrollers in Board Selection;
- Go to Tools, and select appropriate Clock (20MHz External) and Programmer (USBtinyISP).
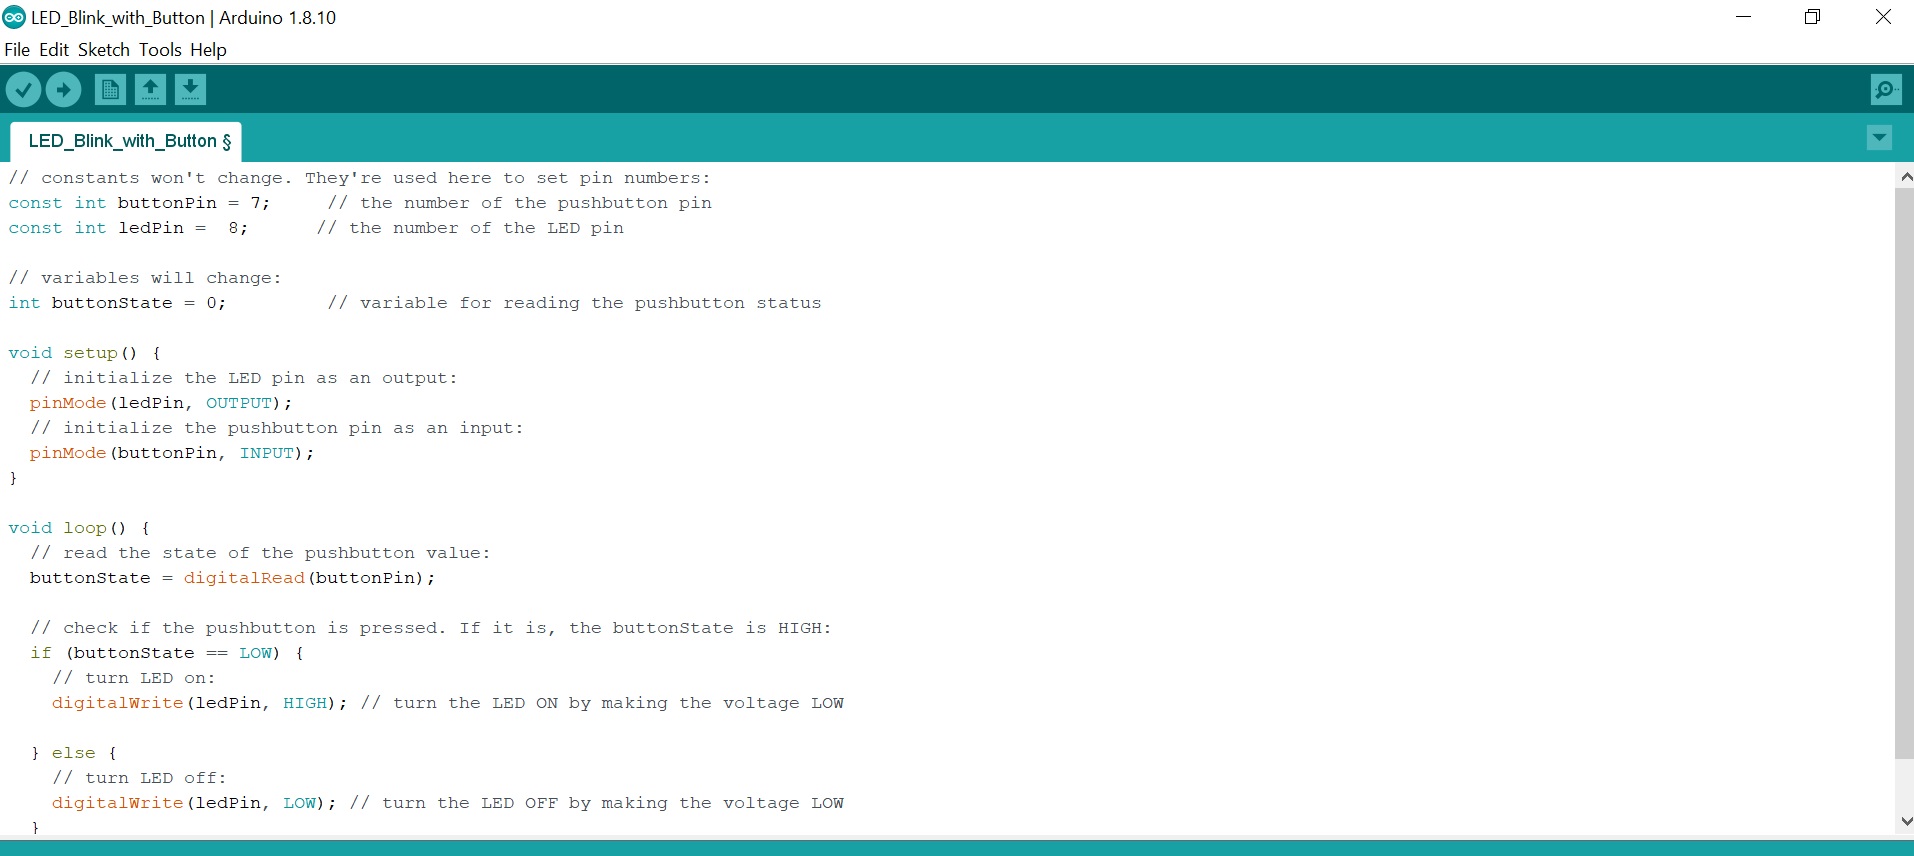
In order to illuminate the LED only for the duration of the button press, PIN 8 (button) should be configured as an input and PIN 7 (LED) as an output. The follwing code was built for this.