Week 10
~ networking ~
This week Hannah learns how to communicate over bluetooth between a device and a computer. In particular, she builds a device that can remotely actuate things like motors, speakers or lights.
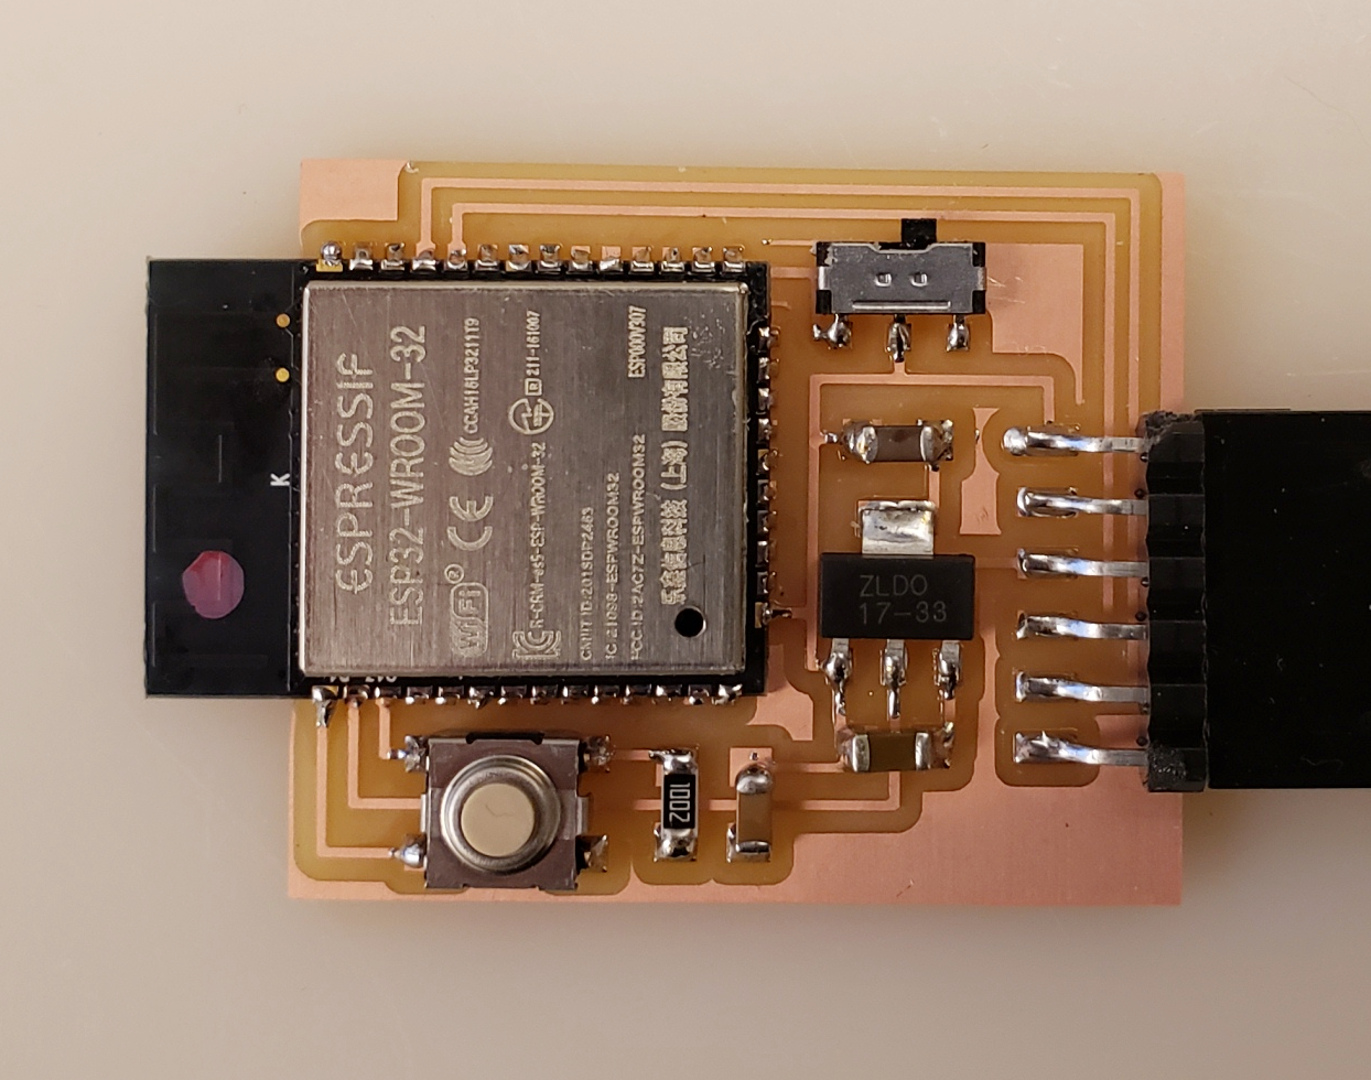
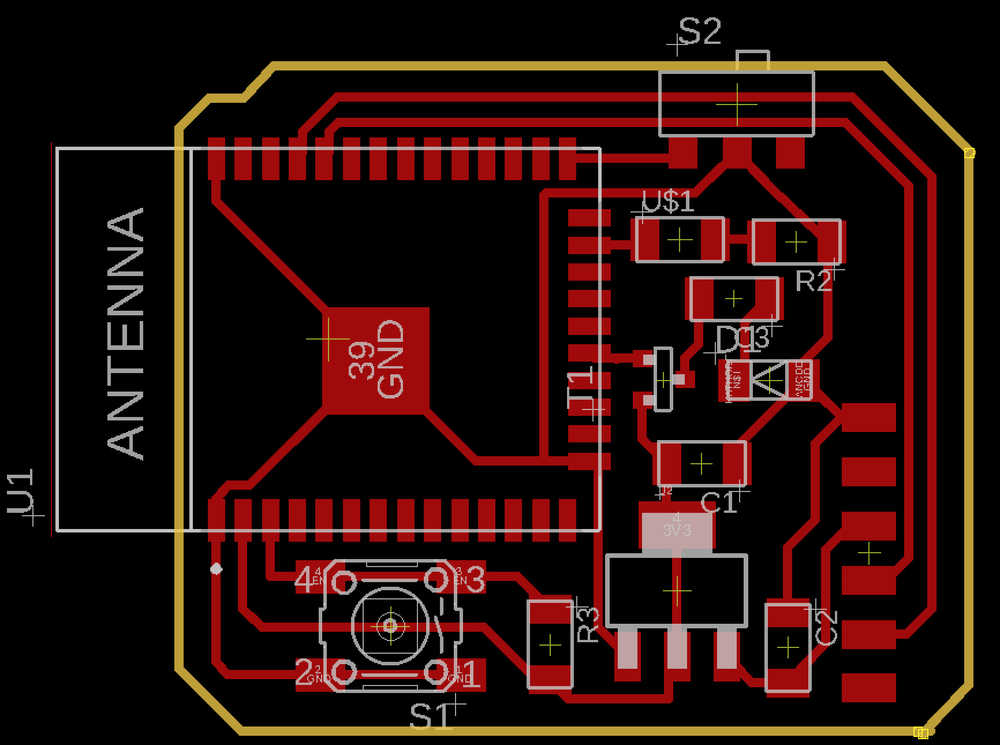
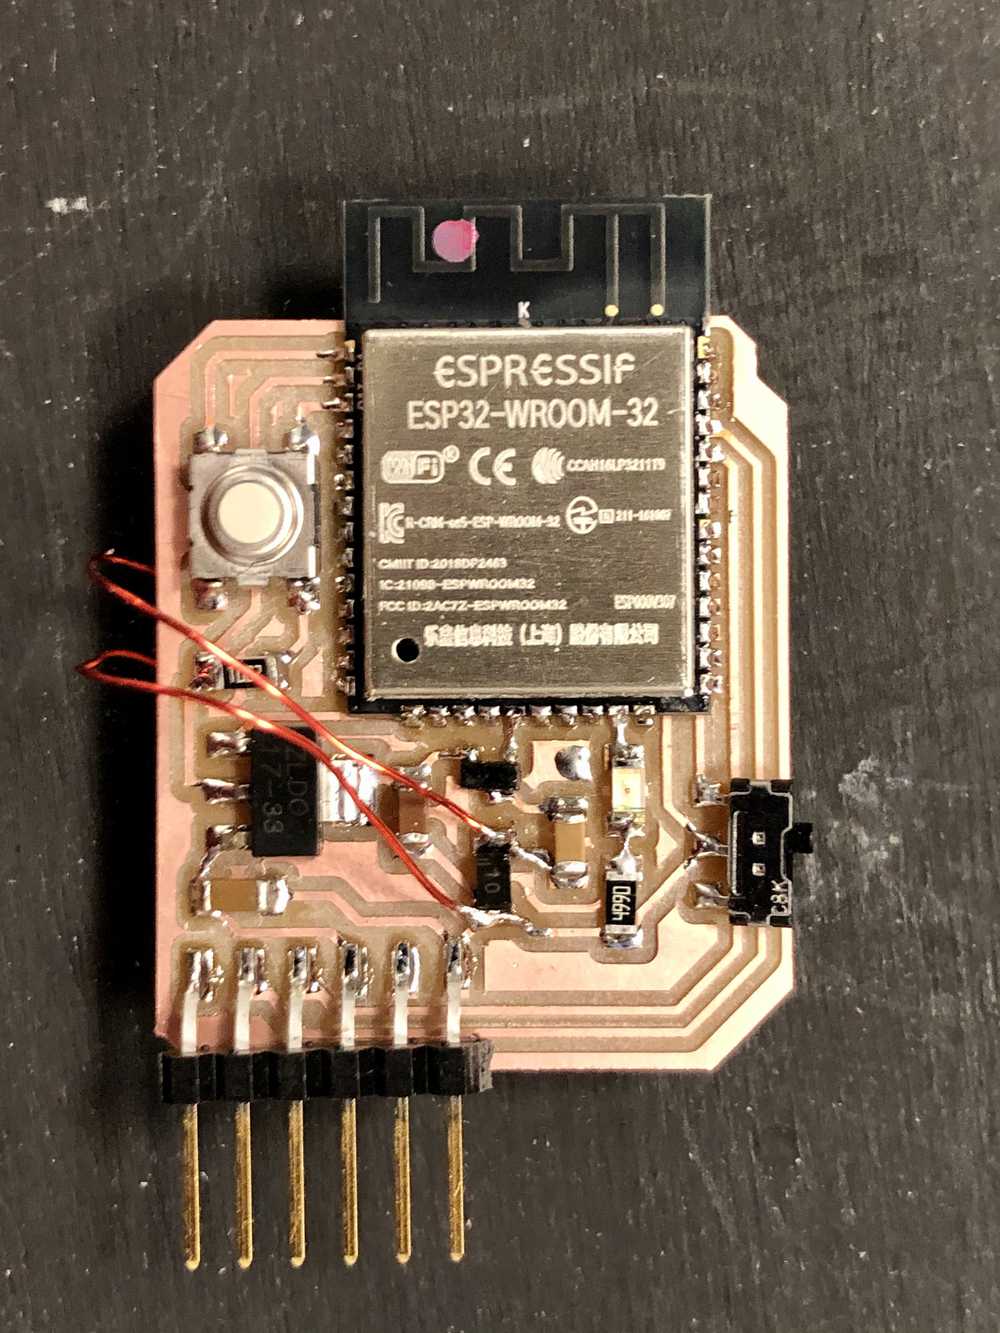
Designing the Board
First I found a library for the ESP32 (bluetooth and wifi module). The symbol and footprint checked out against the datasheet. The only thing that needeed to be changed was making the pads in the footprints smaller (so that they could be milled by a 1⁄64 in. endmill).
For the board itself, I worked off of Neil’s hello board and then added an LED (with a current limiting resistor) as well as a speaker (in series with a mosfet whose gate is one of the GPIO pins.) My goal will be to control these output devices wirelessly from the computer.
I referred to the ESP32 datasheet for details about what pins were capable of or needed what connections.
Programming the Board
To run sketches on the ESP32, you have to move the switch into program mode, push the reset button, upload the program to the ESP32, move the switch out of program rode, and push the reset button once more.
I followed this tutorial to get the ESP32 board ready to use with the Arduino software. The great thing about doing this is that a whole slew of example sketches particular to the ESP32 find their way to the Arduino software once the board is connected!
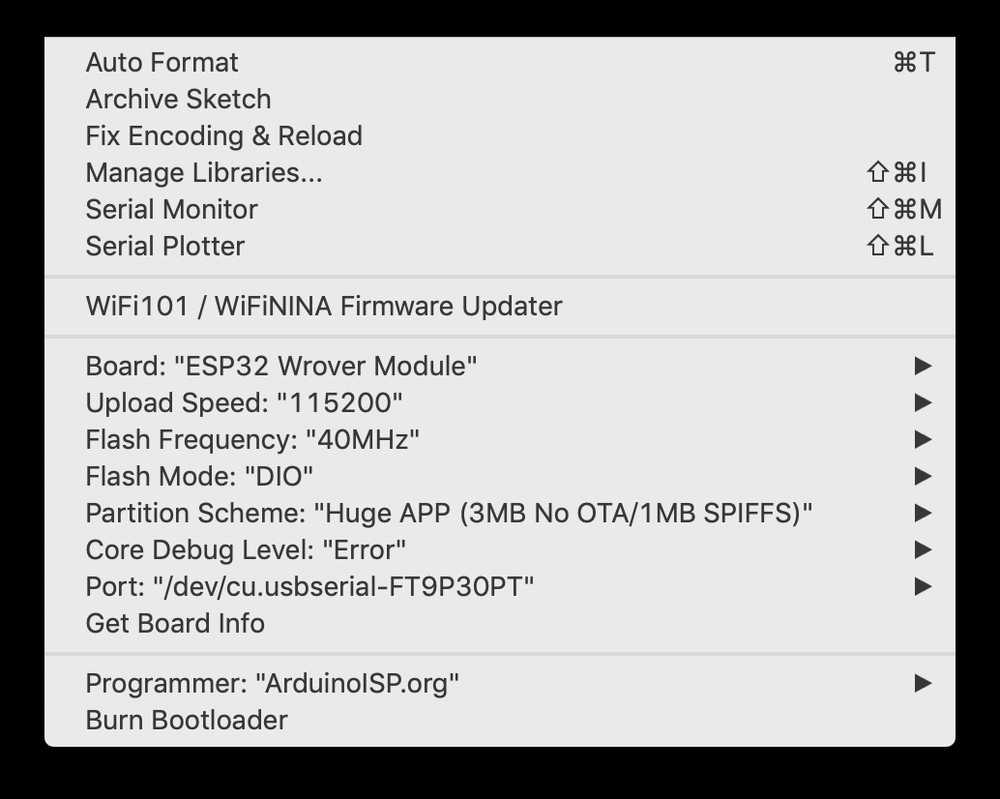
These are my settings in the Arduino -> Tools menu for uploading to the board:
Blink
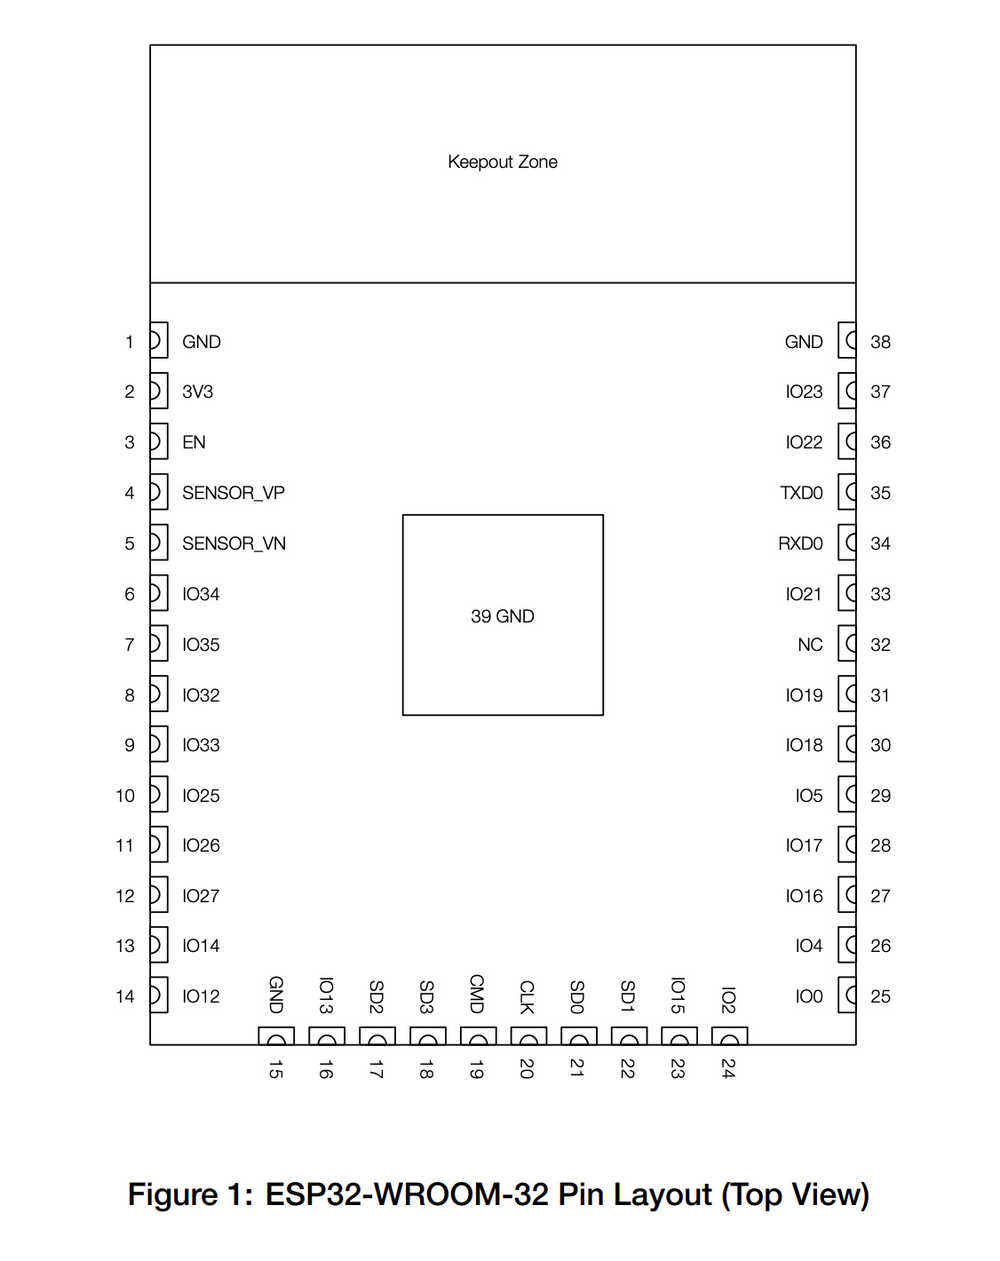
At first I was worried something was wrong with the board, but it turned out that the pin name to use in the Arduino sketch is the number in the IO label on the diagram not the number of the pin itself, e.g., my LED is attached to Pin 23 which is IO15, so I needed to toggle pin 15 in the sketch. And it worked!
Wireless Connectivity
I am particularly excited about this week because I don’t know that much about how the Internet works. It seems like I have a few options for wirelessly controlling the ESP32 board:
- WebSocket
- Bluetooth
- Wifi
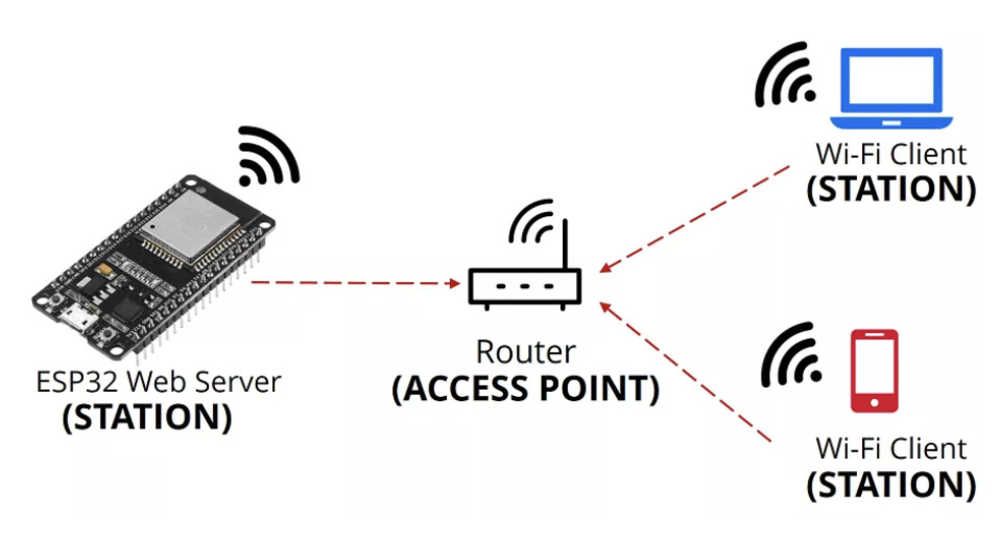
I found a really helpful video on how to use the ESP32 to create with a Web Server. They had the following graphic that helped explain how this would work:
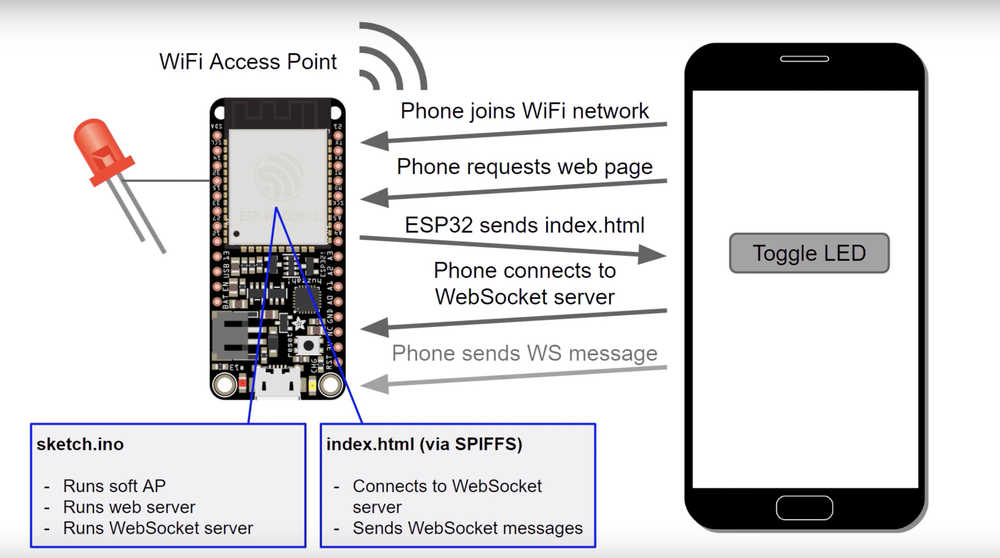
Basically, the ESP32 is a WiFi access point that hosts a web page to which the computer/phone connects to and interacts with. Or, I could host the webpage on the internet and use the ESP32 as a client that connects to the webpage and gets information from it.
Either way, the two example sketches (client and server) both require entering an SSID at the beginning.
So what is an SSID and why is that required? SSID is simply the name for a Wi-Fi network.
To figure out the exact form of SSID that the device would want to use, I uploaded the WifiScan.ino sketch that is an example sketch for the ESP32.
After some research, it turns out that (as expected) when using the ESP32 as a Server, the SSID and password are things you invent yourself (and can be anything). It is only for the ESP32 as a Client (duh) that it needs an actual network name (SSID) and password in order to connect to the internet (although perhaps, a first ESP32 could be a server with an invented SSID and a second could be used as a client to connect to it).
Scan
Results from WifiScan.ino:
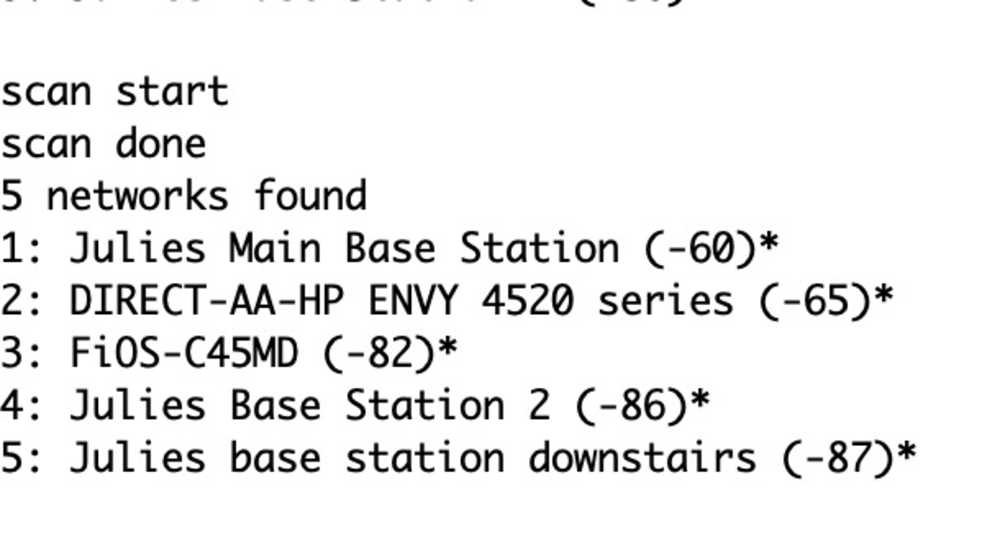
The WifiScan script not only prints SSID names but also something called RSSI, which stands for Received Signal Strength Indicator. A less negative number means better signal strength.
Client
Results from Neil’s client sketch:
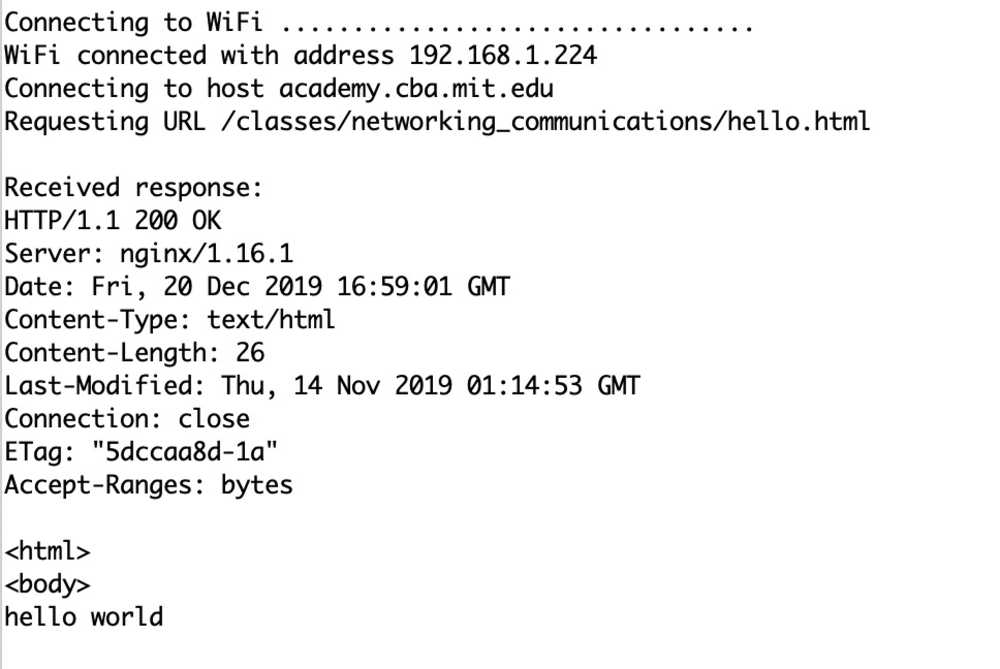
This is good! Basically, if I setup a webpage on my gitlab, I can get data from the webpage, and parse it in order to, for example, control the LED.
Server
The first couple times I tried to setup the ESP32 as an Access Point, it failed. After reading through this tutorial I learned that passwords either need to be Null or at least 8 characters long. Unfortunately, this didn’t fix the problem. After a more careful examination, I realized I was fundamentally misunderstanding what was going on.
There are two methods
(1) ESP32 acts as a server, but all communication happens through the router
(2) ESP32 is its own access point and other devices connect to the network generated by it

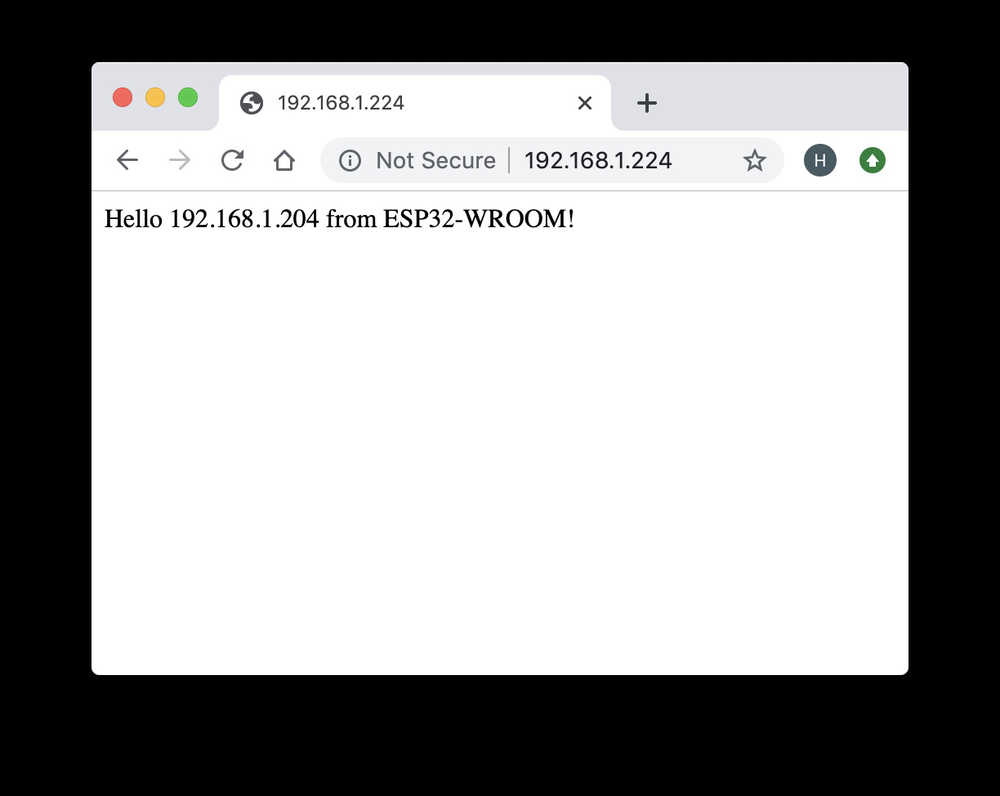
I assumed I was operating as in method 2, but it turns out Neil’s code operates as method 1. Thus, the SSID and password to enter are in fact the SSID network that my computer is on. Still the ESP32 will produce its own IP address, and that is what I will navigate to on the computer, but fundamentally, all the devices need to be connected to the central router. When I entered those details, everything worked:
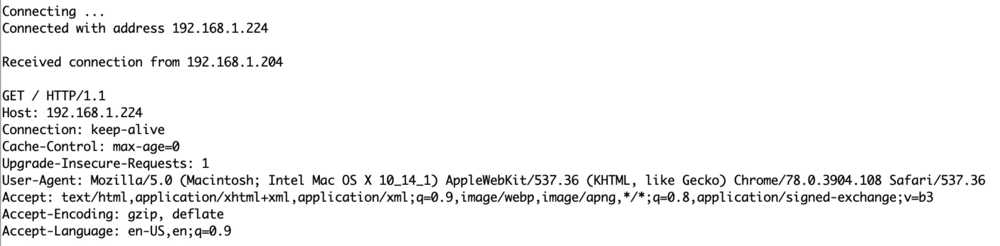
Connected to the router on my computer, I navigated to the ESP32’s IP Address:
When I did, the serial monitor updated for the ESP32 and read:
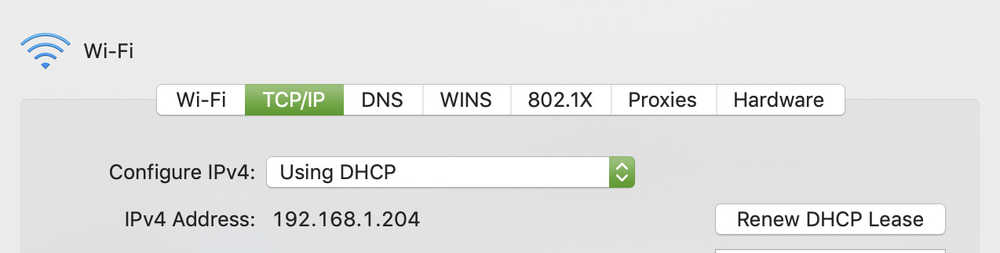
Furthermore, I confirmed that the 192.168.1.204 address was in fact my computer’s IP by checking the Networking settings:
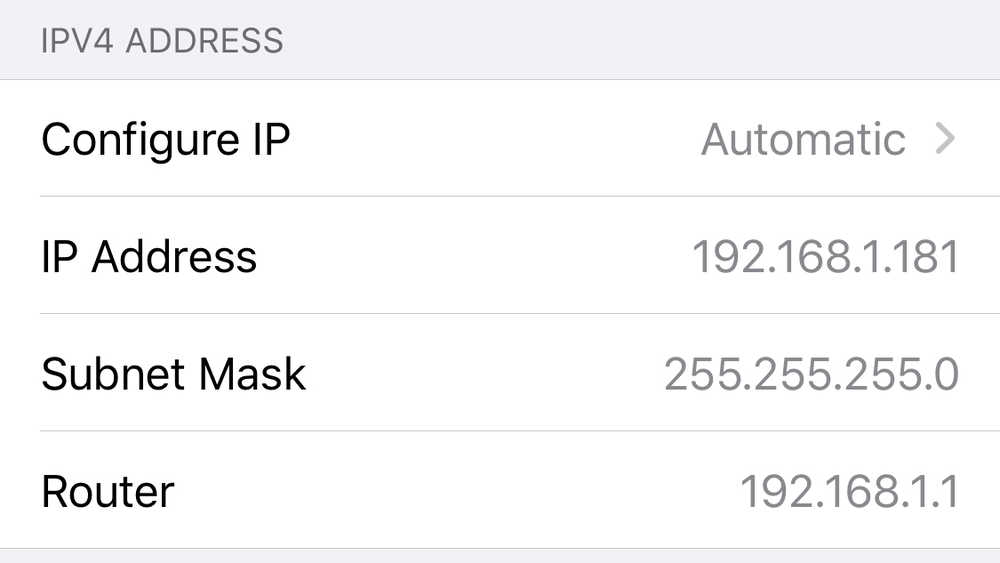
Then, I connected to the router on my phone and navigated to the same address:


And again, I confirmed that this was my phone’s IP address:
Cool!
Access Point
One of the ESP32 example Arduino sketches is called WiFiAccessPoint. This sketch is a fantastic starting point for wireless control as the basic script lets you define a GPIO pin to toggle on and off via a basic web interface. This got up and running quite smoothly!
Bluetooth
Finally, I tested Bluetooth using Neil’s simple bluetooth script.
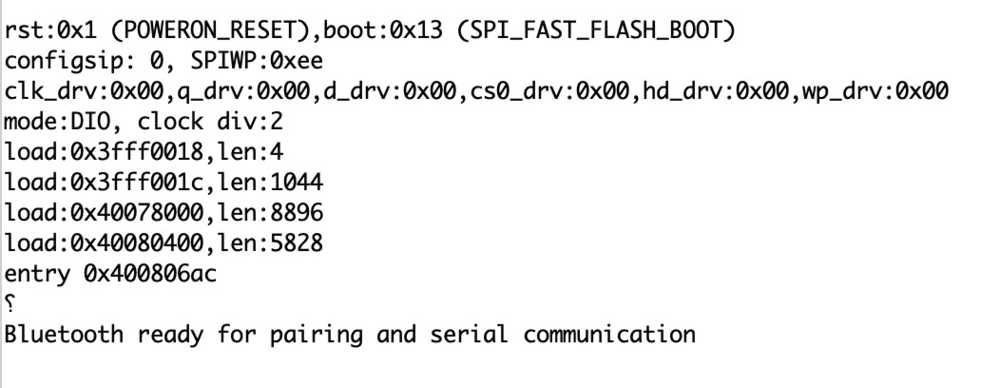

For some reason, as soon as I connected to the ESP32 as a bluetooth device it would say

Sending Data Wirelessly
To summarize I can do this two ways:
Use the ESP32 as a client, host a webpage on gitlab or elsewhere with command functionality to be received by the ESP32 every time it checks the website
Use the ESP32 as a server and create a websocket that enables the ESP32 both to host the website as well as receive data from it
Use Bluetooth
This week definitely left me with a lot of things I would like to try and explore. For my own tracking purposes, I am listing them here: (1) ESP32 as an AP (2) Bluetooth (3) Serial I2C communication