Zijun Wei - How to Make Almost Anything
Week 3.
3D Scanning and printing
This week we learned how to 3D scan an object and 3D print a designed part.
For group assignment, we (Zijun, Elena, Teja and Ravi) characterized the tolerance for the 3DWOX and the Eden in printing steps, troughs and overhanging structures.
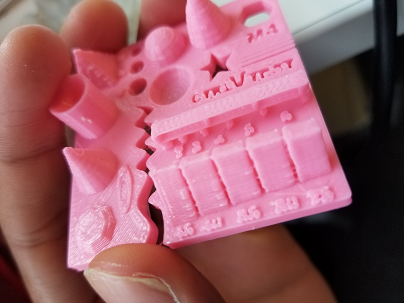
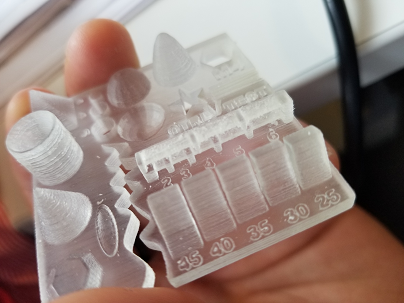
Using a model we found on Thingiverse, we tried to compared the quality of a FDM printer (3DWOX) and a PolyJet printer (Eden).
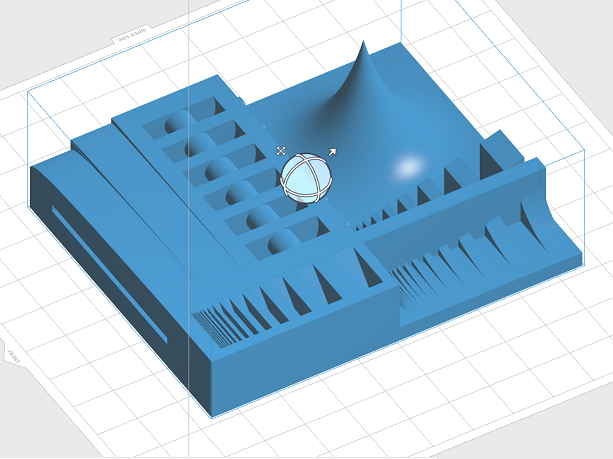
The black ABS print is from 3DWOX. As can be seen, the smallest step can still be produced with the FDM printer, although with varying line width along its length. The Eden PolyJet printer could not produce the same result.
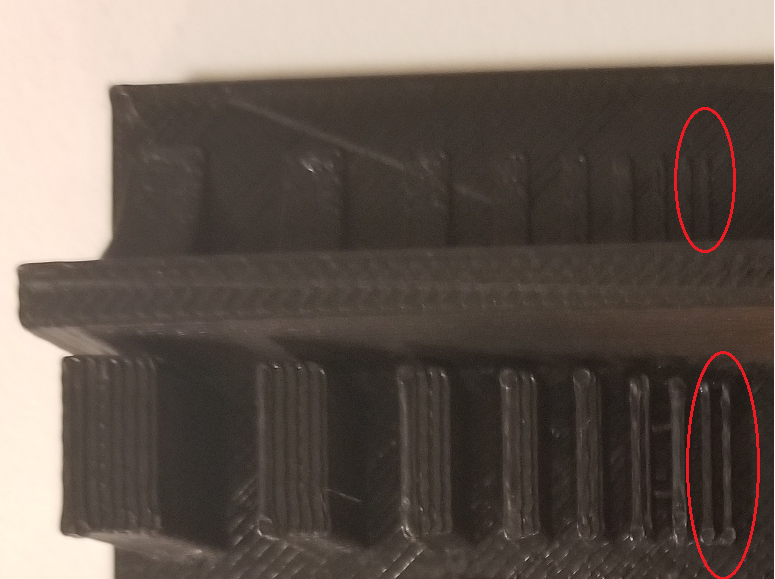
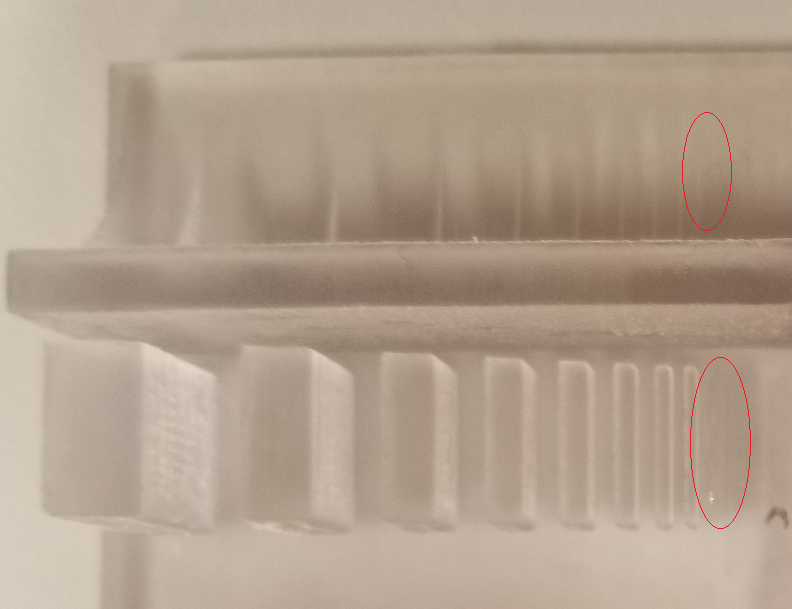
We used another model to test the quality of tilted and overhanging elements.
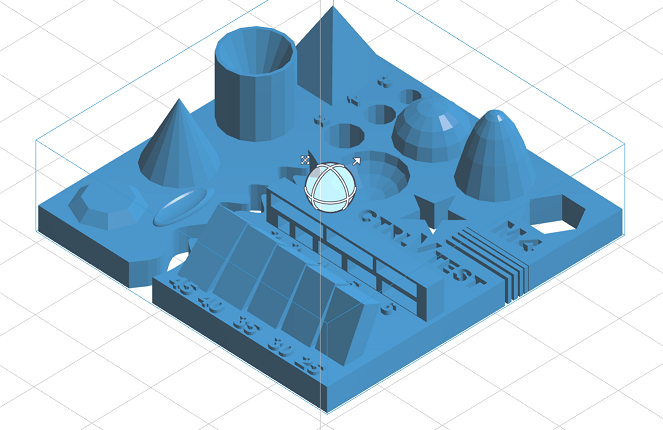
Both printers could resolve the tilted strucutre without collapse. In terms of overhanging elements, the 3DWOD print show a little distortion in thickness, while the Eden print is relatively more uniform. In addtion, the Eden printer can resolve a smooth surface and the milimeter-size letters and numbers, while the 3DWOX print shows cluster of the melted polymer, which roughens the surface and distorted the letters and numbers.
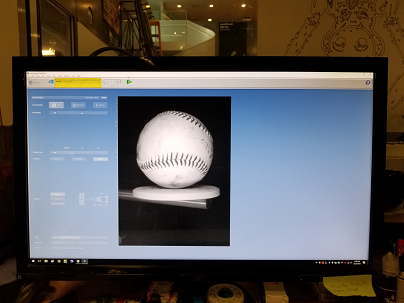
For the scanning individual assignment, I scanned a baseball.
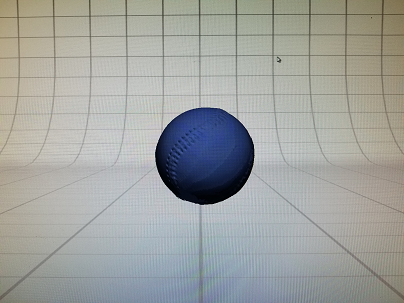
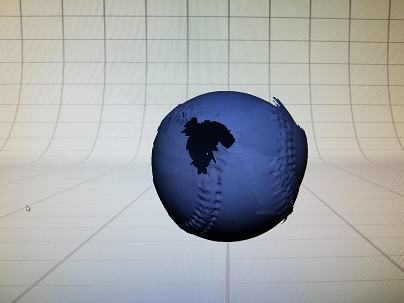
The scan could recover the strips on the outside of the baseball, but it was not perfect in that the shape is distorted a bit into that of a lemon. This artifect is probably due to minor motion of the baseball, as the sticky tape does not work too well in adhering to the ball. Another intrinsic artifact is due to the fact that the top and bottom of the ball will not be scanned and has to be repaired during the solidification. This is how the scanned model looks.
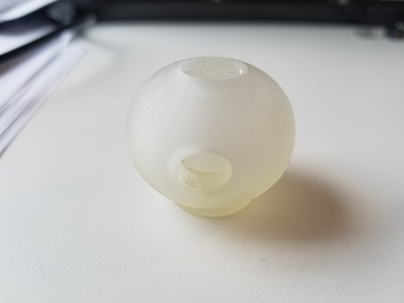
For the printing assignment, I would like to print something like the Halo 343 Guilty Spark, and also got inspiration from ivory sculptures.
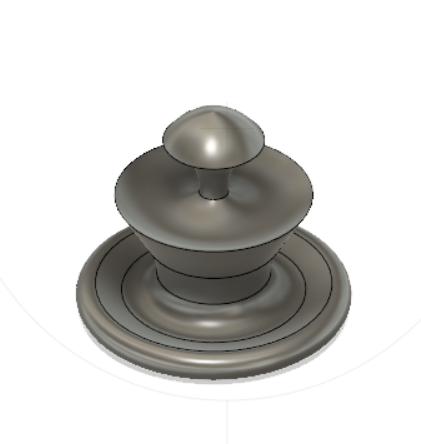
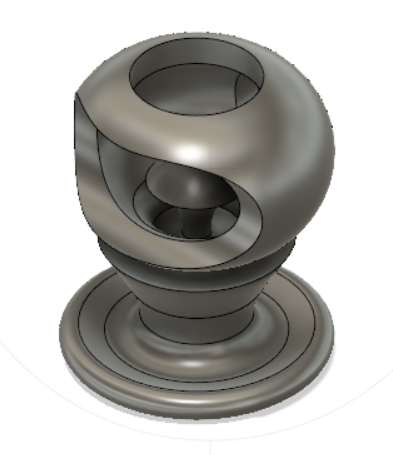
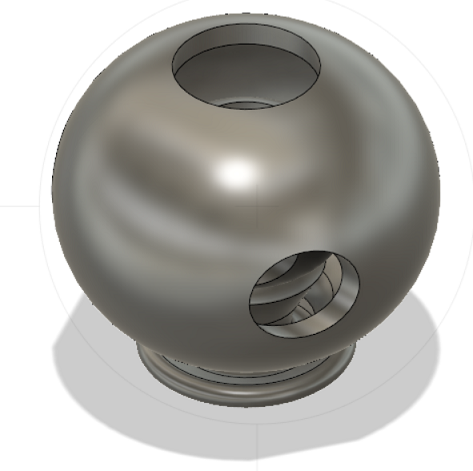
In brief, I draw a structure with a core, a stem and a shell. The stem goes through the shell, and then to the core, and cannot be detached due to its end being thicker than the through holes. Likewise for the core from the shell. I left some tolerance between the parts so that once printed, all the parts can move.
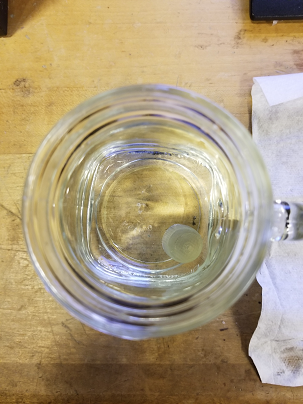
I was initially using the Eden, in hope that the support material can be completely dissolved, leaving a free core and stem. However, the size was a bit small and I was told by the staff that removing the support actully uses high-pressure water to blast it off. This is too violent for the tiny structure and thin walls of my print. Instead, I put the whole structure in water for a few hours to soften the support material and then scrape it off from the print using a tweezer.
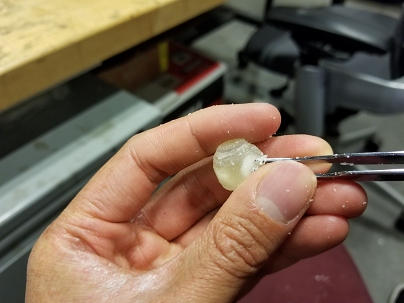
The stem was still broken unfortunately.
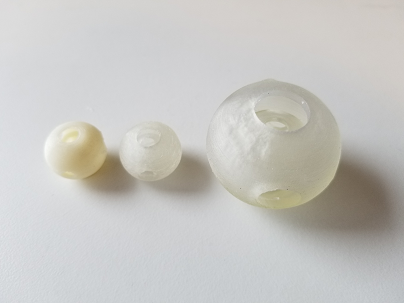
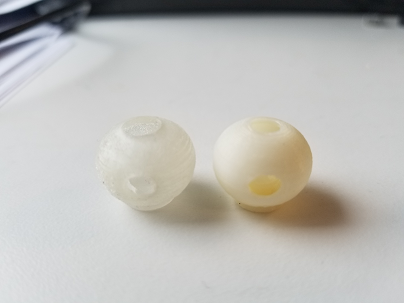
In contrast, the stratsys printer, at the expense of texture details, gave a nice print, with all three parts intact. (Eden print on the left, Stratsys print on the right)
The print was redone with a larger size. This time, still, the stem was broken, but it was because the high-pressure gun was used.