Electronics Production
This week, we ventured in the realm of electronics, by creating our very own ICP programmer from scratch.
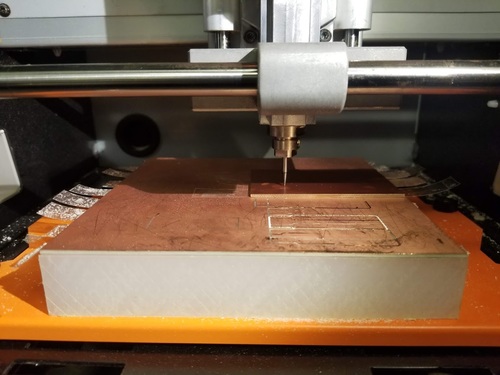
First, as a group, we learned about the PCB milling machine in the shop and how to use it. Together with Filippos, we milled a PCB from scratch. The CBA mods app is quite comfortable to use. You load up the design, and then move the end mill to the correct position by choosing different “origin” coordinates. The last part where the end mill touches the plate is done by hand.
We learned how to set different milling parameters, mostly - how deep to cut and whats the offset. As we add more layers and increase the offset - the milling process takes a longer time.
The base on which the plate resides on (sacrificial layer - cool name) was a bit tilted. We solved that by milling the PCB two layers deep (0.008in).
The individual assignment was to create a programmer by following a very detailed tutorial by Brian.
We first had to mill the PCB, which I have never done before, then solder tiny pieces onto it, which I haven’t done since taking electronics class when i was 10. And then to program it using another programmer. Cool.
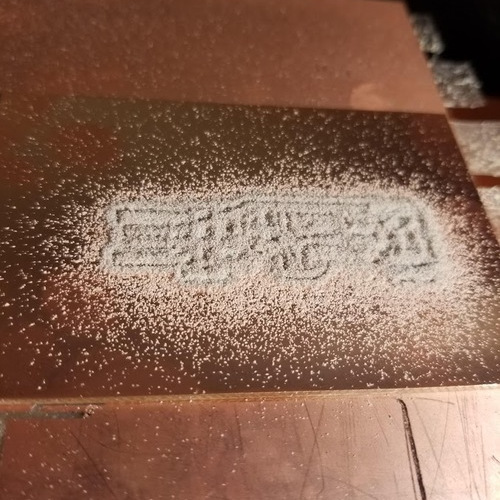
Milling
Nothing complicated here. My settings were:
- 1/64 end mill:
- Cut depth 0.004 in
- Max depth 0.008 in
- Offset 4
- 1/32 end mill:
- Cut depth 0.024 in
- Max depth 0.072 in
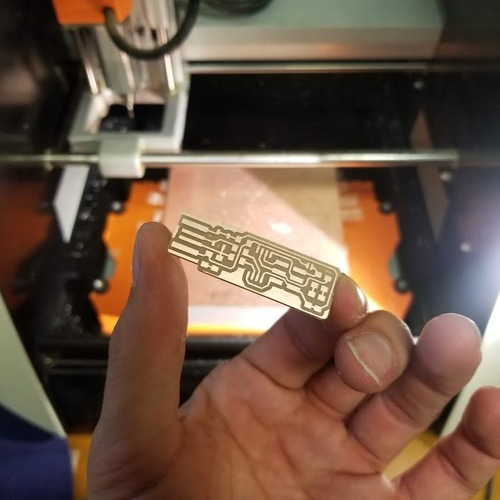
- Offset 1 And it turned out nice:
Soldering
First, I gathered all of the components for a nice photo:
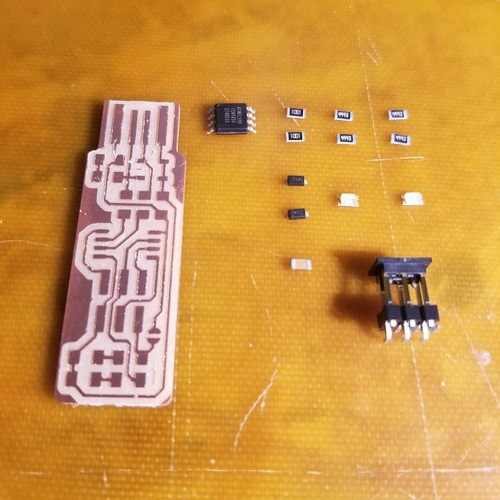
This arrangement survived for exactly one minute, as I became focused on soldering and accidentally scattered the pieces to all corners of the earth.
The keen observer can notice that I had a big mistake here - I picked up the wrong transistor! Luckily, just before soldering, I noticed the label on my transistor was different from Brian’s. Apparently, I almost used a 49.9k Ohm resistor instead of 49.9. Oops. Lucky to catch that before it was soldered.
Soldering such small pieces was challenging but strangely fun. There’s something meditative on narrowing all of your focus to such a tiny space for a long time. It was a dark night, nobody at the shop, all quiet except a classic King Crimson album playing at the background. Not a bad way to do homework.
Some soldering technique tips:
- before I place the piece, to use as an adhesive. This way i could align the piece before I actually start soldering.
- Brian’s tip, I also added solder to the four stripes that connect to the USB port to add more thickness to it.
Result:

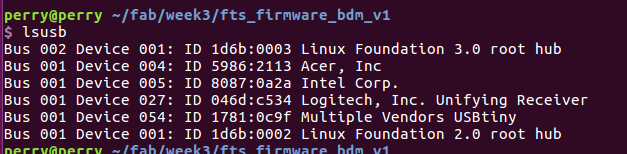
Software
I have a Linux machine, and it all worked quite smoothly. Nothing much to say here, except how happy I was to see this final confirmation:
Removing the solder bridge was not easy though, but eventually managed by quickly putting the solder tip up and down, when the solder is liquid.
The final result:

Waste Report
This week, the sheer amount of waste was small - mostly the copper board from which the programmer was cut off from. Cool.