
Electronics Production
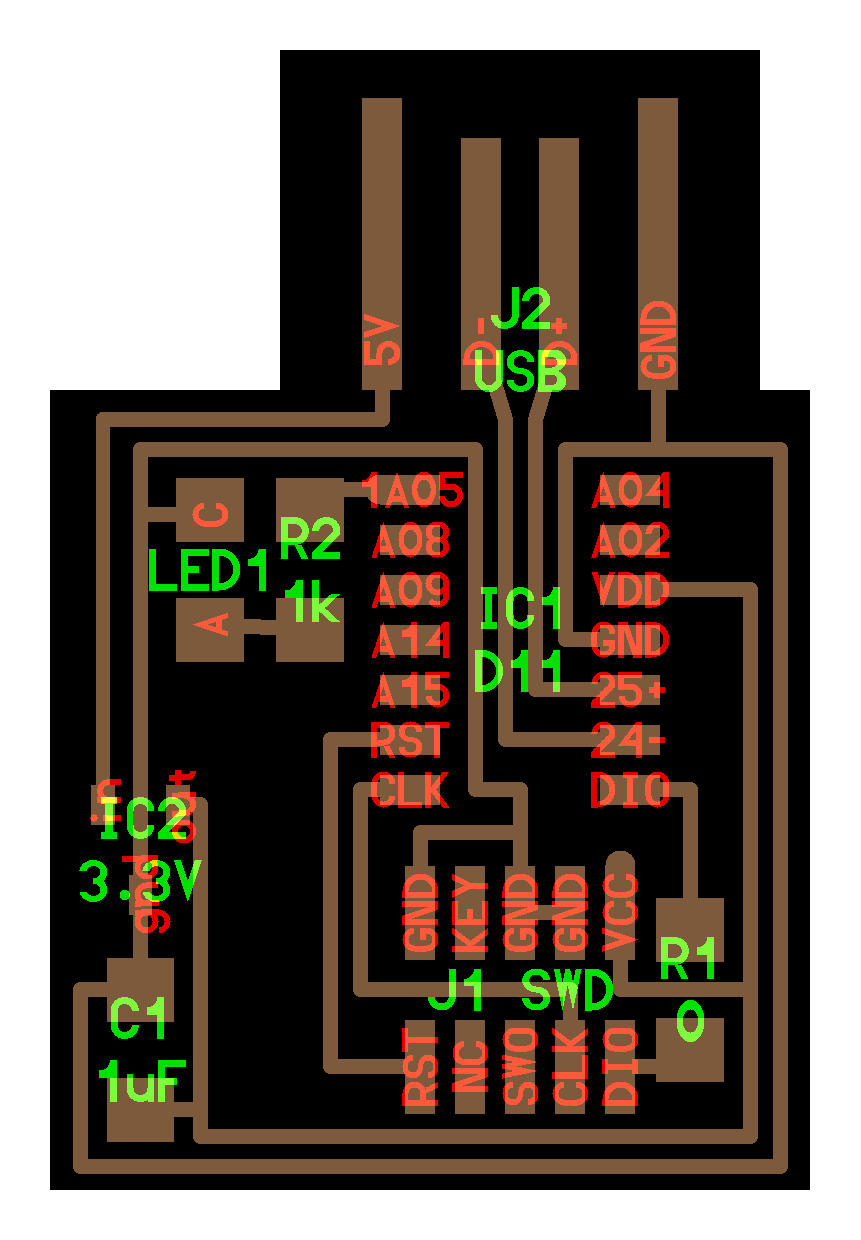
This week's assignment was to make an in-circuit programmer. I decided to use the hello.CMSIS-DAP.10.D11C board upon recommendation by the course staff and customized the design into an octopus using Procreate on the iPad. I made sure to keep the spacing between pins constant, and had fun replacing some connections with squiggly lines. Afterwards, I exported both the outline and the traces in PNG format with 1000x dpi. (I realized later I had created the outline file wrong and had not created a filled-in white shape).


I first tried to mill my design using the OtherMill. I was careful to secure my PCB with tape, and also selected PCB conservative in the tool settings. While the outcome looked pretty, a lot of components were shorted and I grew tired of using a box cutter to remove the copper. I also realized I placed the USB header in a bad spot. I then edited the PNG file to give the connections more spacing and moved the USB header to the top.


The second time around, I used the Roland (for some reason, the traces weren't showing up on the OtherMill). There were still some spacing issues, but I was running low on time and there were less issues popping up than on my first attempt. I milled the design using two drill bit sizes, 1/64" and 1/32".
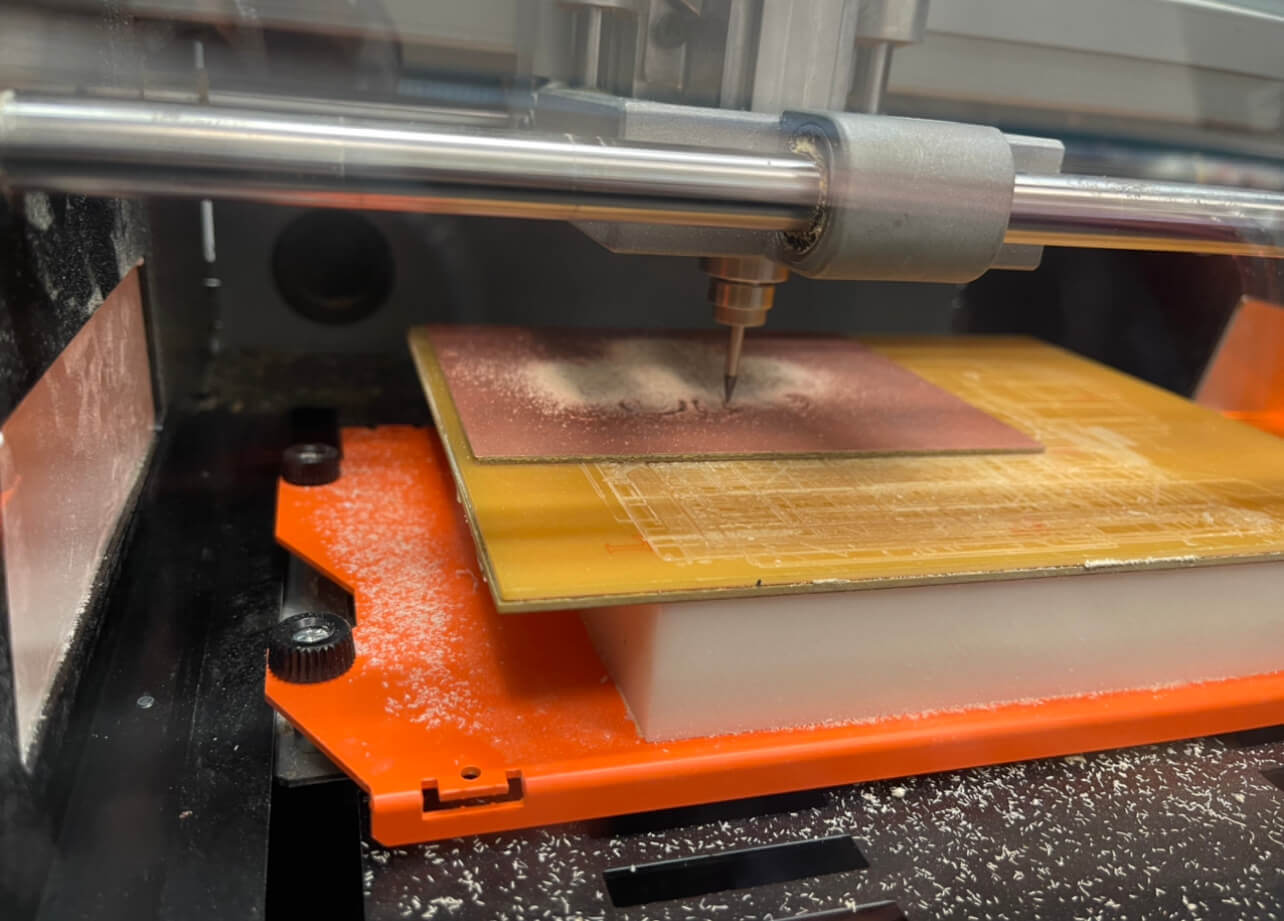
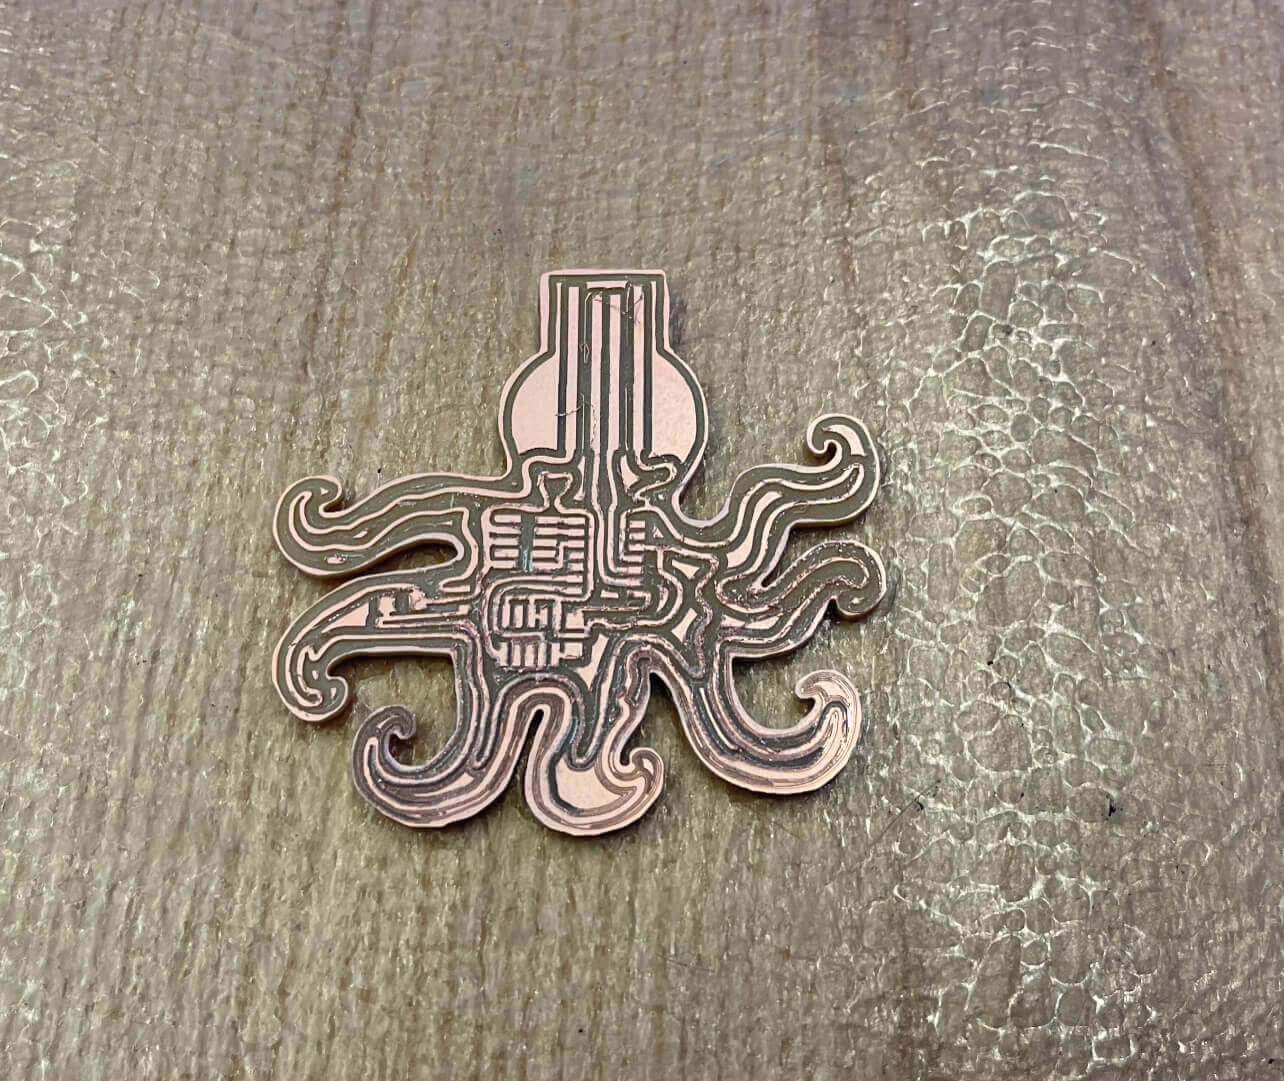
The finished product came out way cleaner on the second attempt! Despite some residual burrs, the spacing was improved. The only issue was that I hadn't mounted the drill bit precisely right, so not all the traces milled all of the way (see the tentacles towards the bottom) but any issue was fixed with a utility knife.
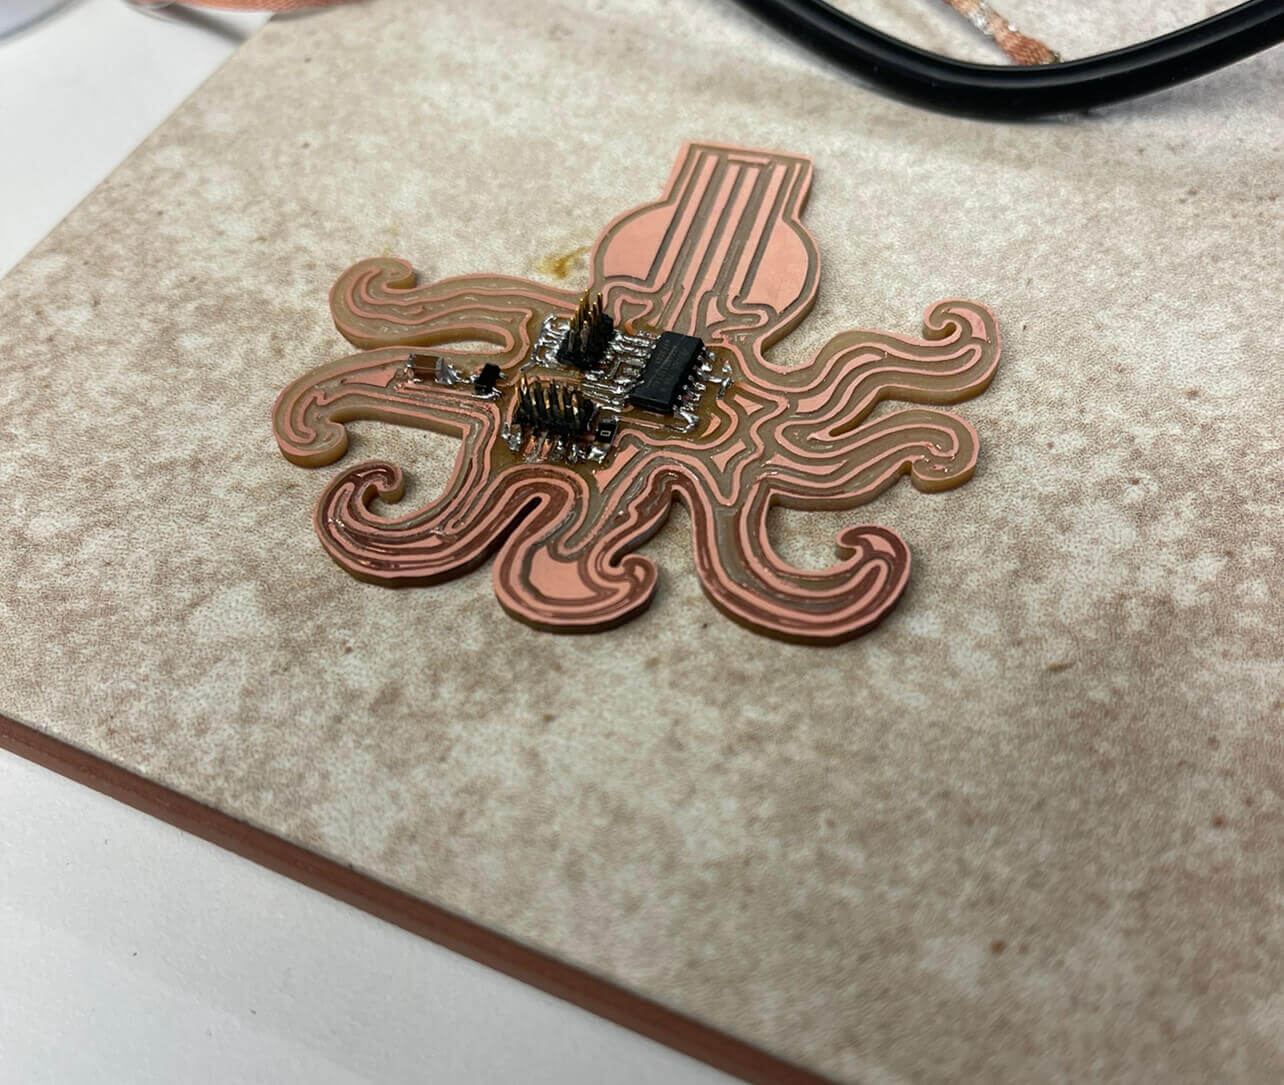
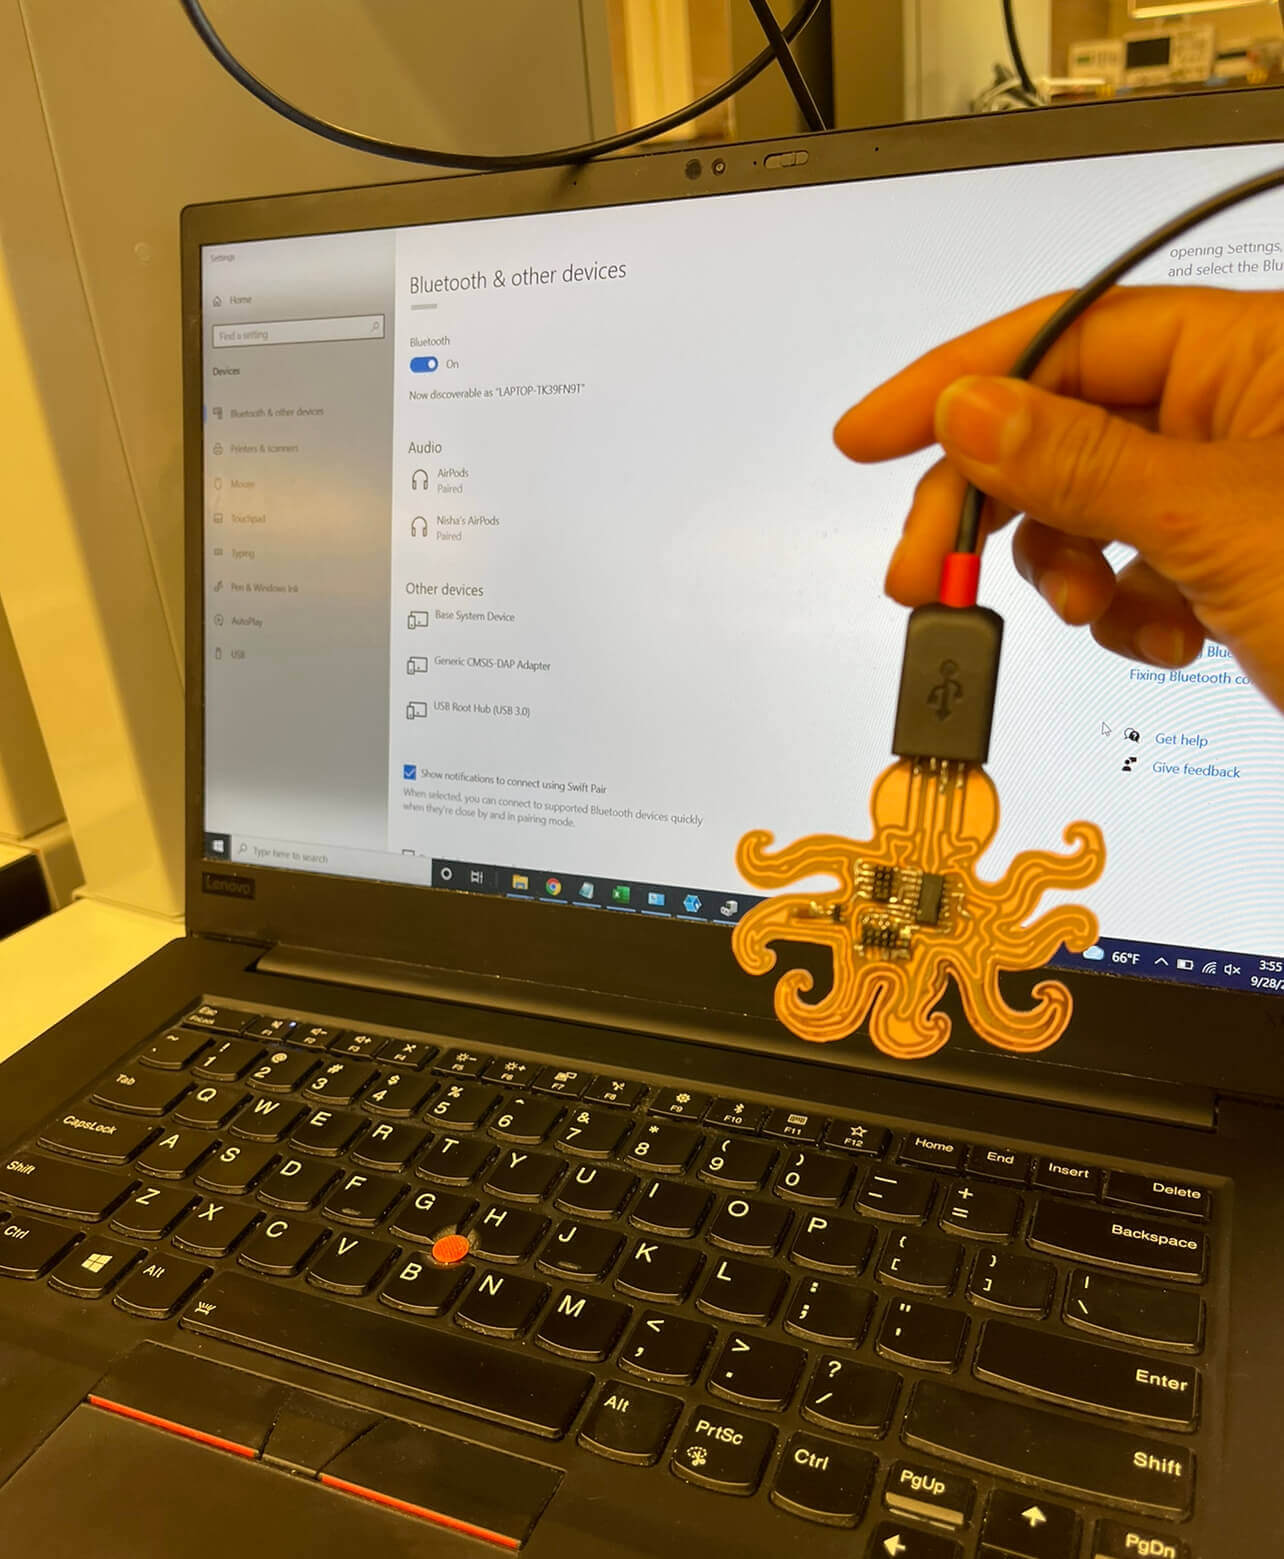
After cleaning up the burrs, I soldered the components (albeit a little messily). Anthony helped me debug some issues, and I was finally able to successfully test and run the circuit! Overall, I learned a lot about PCB milling this week, and learned how to use the Roland and the OtherMill.
Click Image to Expand
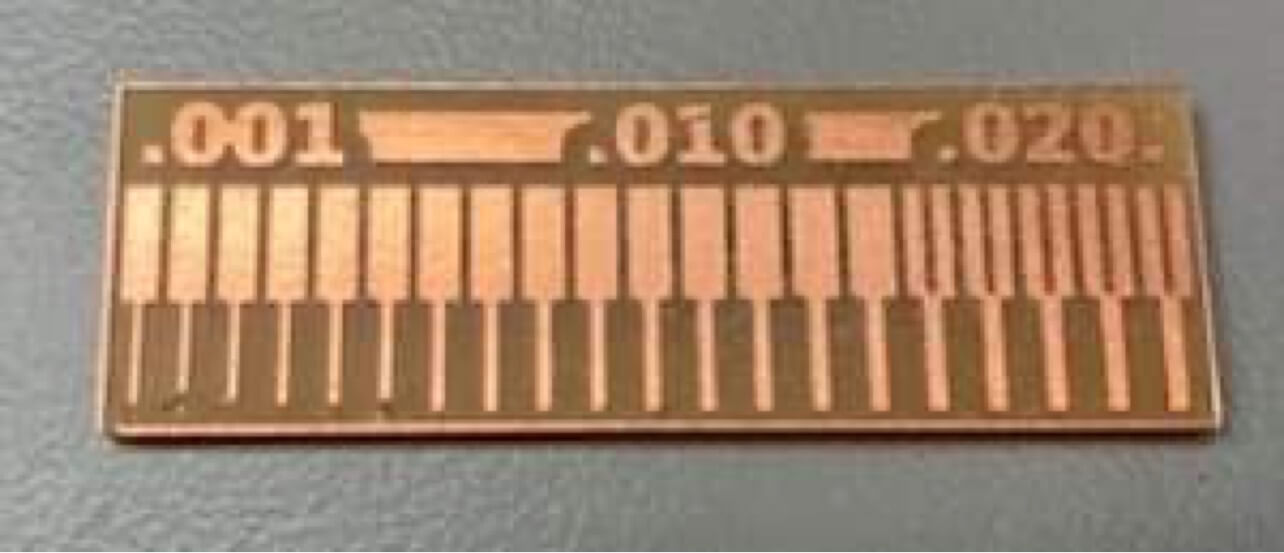
This week's assignment was to characterize the design rules for the PCB production process. This was milled using the Roland using the 1/64" bit. Generally, the traces to the right of the .010 look good to use for designs (especially those near the .02 mark) and the traces to the left of .01 look like they're starting to peel and may be too thin. The group assignment helped me understand why I need to be careful of the spacing between traces!