
Embedded Programming
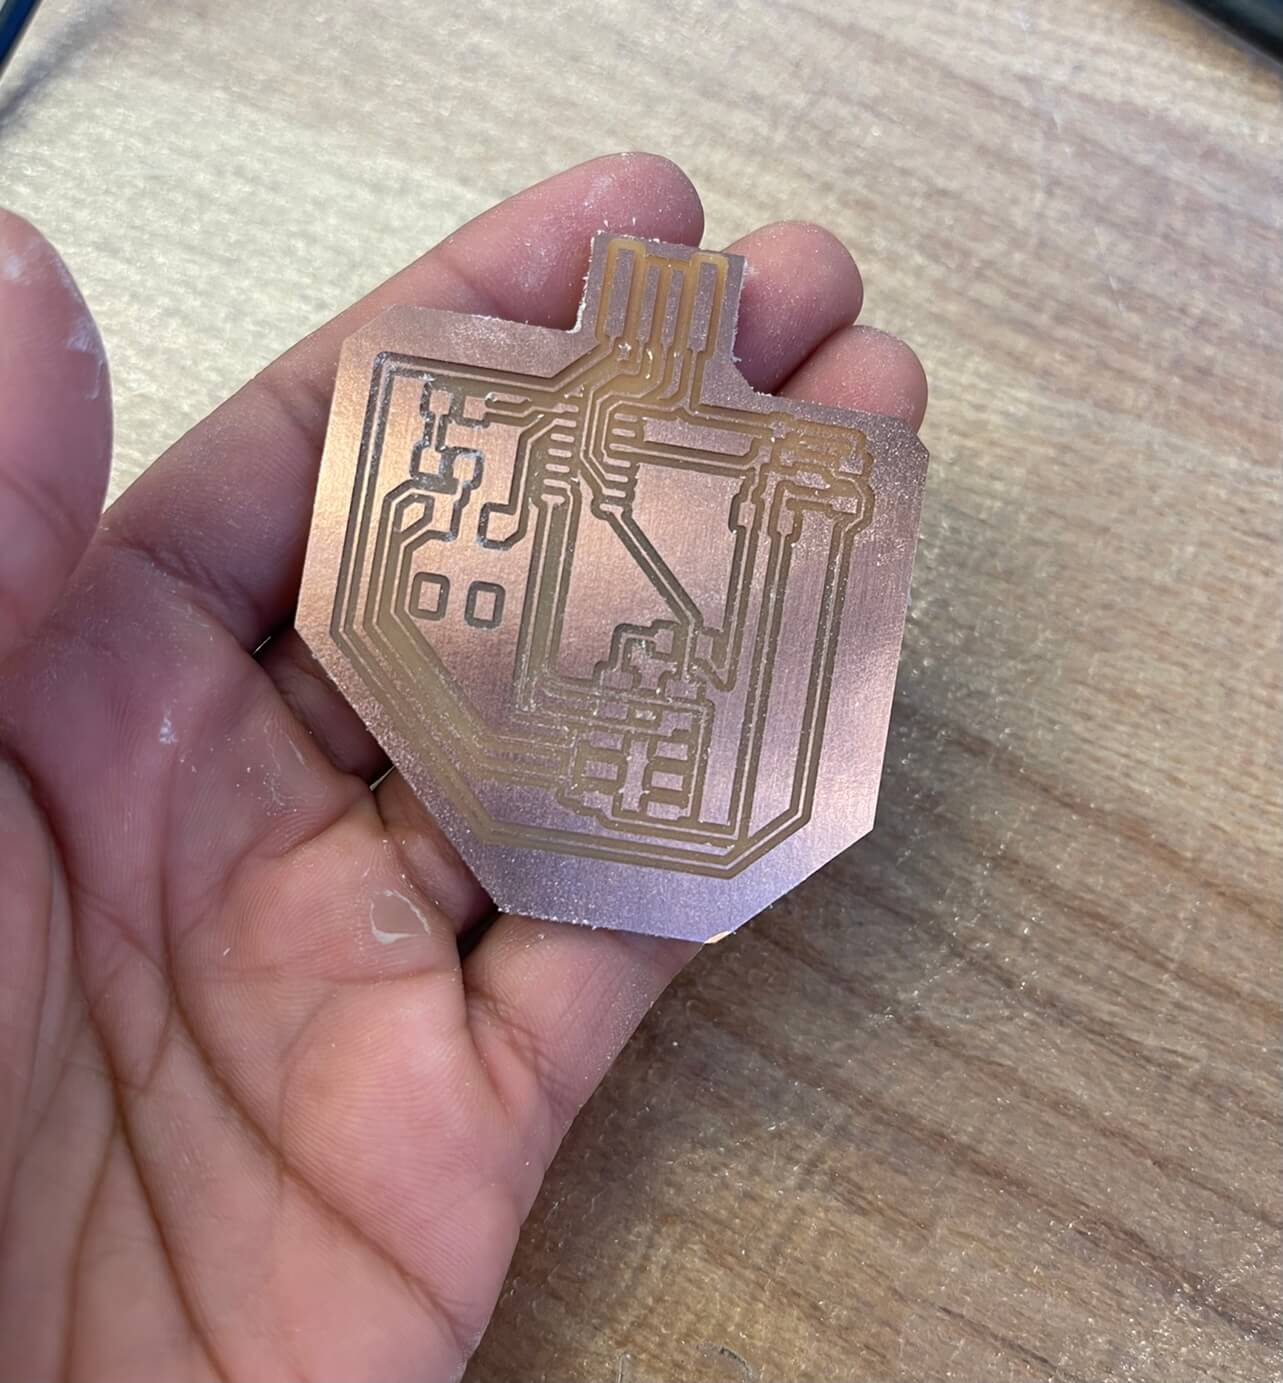
This week, our individual assignment was to program our board from an earlier assignment to do something. Due to external time constrainst and milling issues, I wasn't able to finish milling my board from two weeks ago. After getting Anthony's help and also making sure I used fresh tools, I was finally able to mill the board.
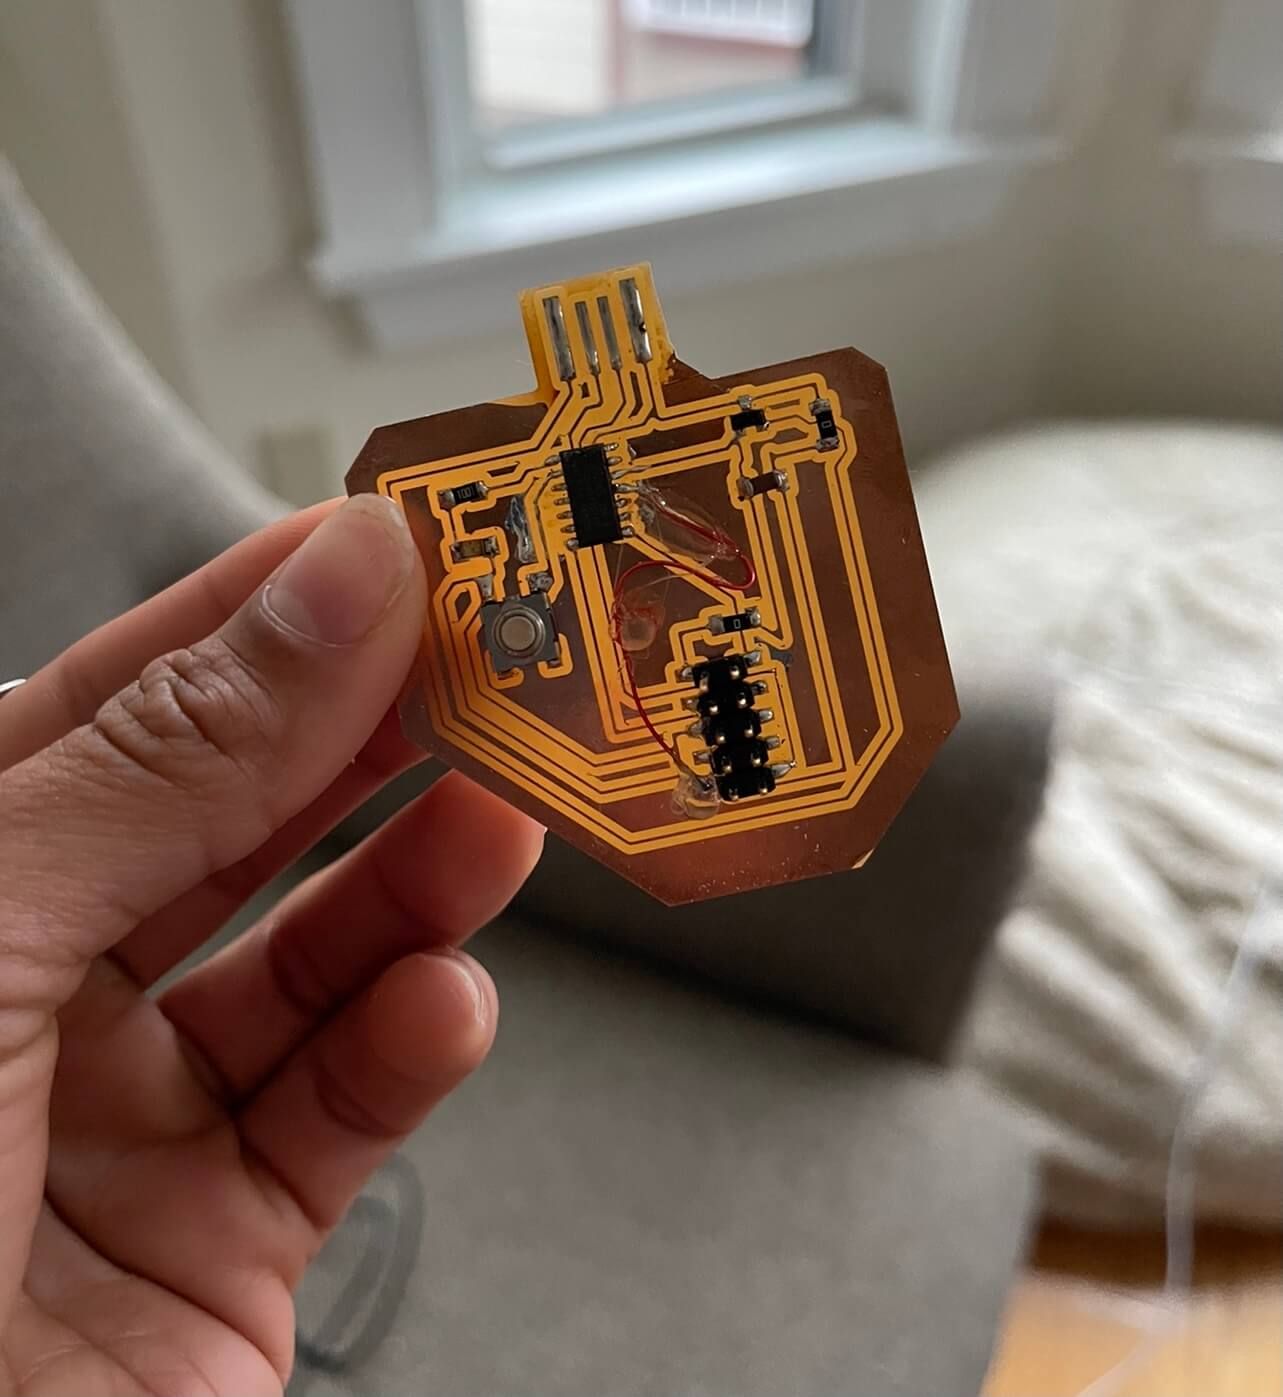
I spent the beginning of the week wrapping up soldering. Unfortunately, I ran into a few issues here and had to spend some time doing hardware debugging (with Anthony's help). While trying to burn the bootloader (which is a special operating system software that loads into the working memory of a computer after start-up and is key to starting up the computer) onto the board, I realized I had accidentally soldered the D11C chip on backwards. While trying to fix that, I also scratched and ruined a trace to GND. After finding the issue, I soldered a piece of wire to run GND to where it was needed, and hot glued the wire in place.

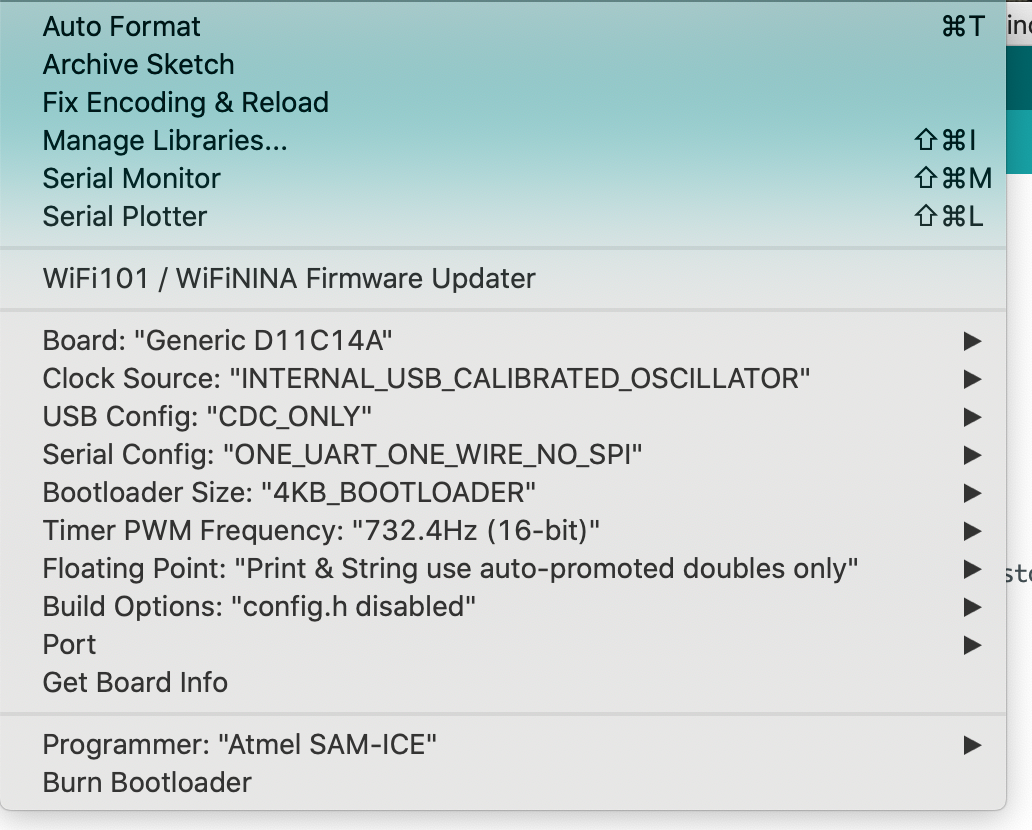
Once these issues were fixed, I tried connecting it to Arduino. I ran into a Port problem, which after a bit of investigation, led me to believe was due to my verison of Arduino (1.9). I switched to 1.8 and it showed up. Now that I was finally at this point, I was able to really start on this week's assignment. By this point, I was starting to run a little short on time (had roughly a day left) because I'd needed to fly out of state for the weekend for an athletics event and I chose not to bring the board with me because I was afraid it might get damaged. Unfortunately, my circuit was also pretty simple (just an additional push button + a singular LED) and I regretted not having a more complex board to work with. I played around with a couple ideas (maybe using the LED to communicate in morse code?). As I was experimenting with some ideas on Tuesday night at my apartment, my board decided to give me some difficulties and stopped registering the Port again.
I tried all the software remedies (restarting/reinstalling Arduino) as well as making sure my board was plugged in correctly. Unfortunately, nothing worked, and due to the storm outside and the late hour, I couldn't go into lab to get help. By this point, I'd only documented my board reacting to a button press and making the LED flash three times (see GIFS and code below; the compression makes the green LED flash look like faded orange).
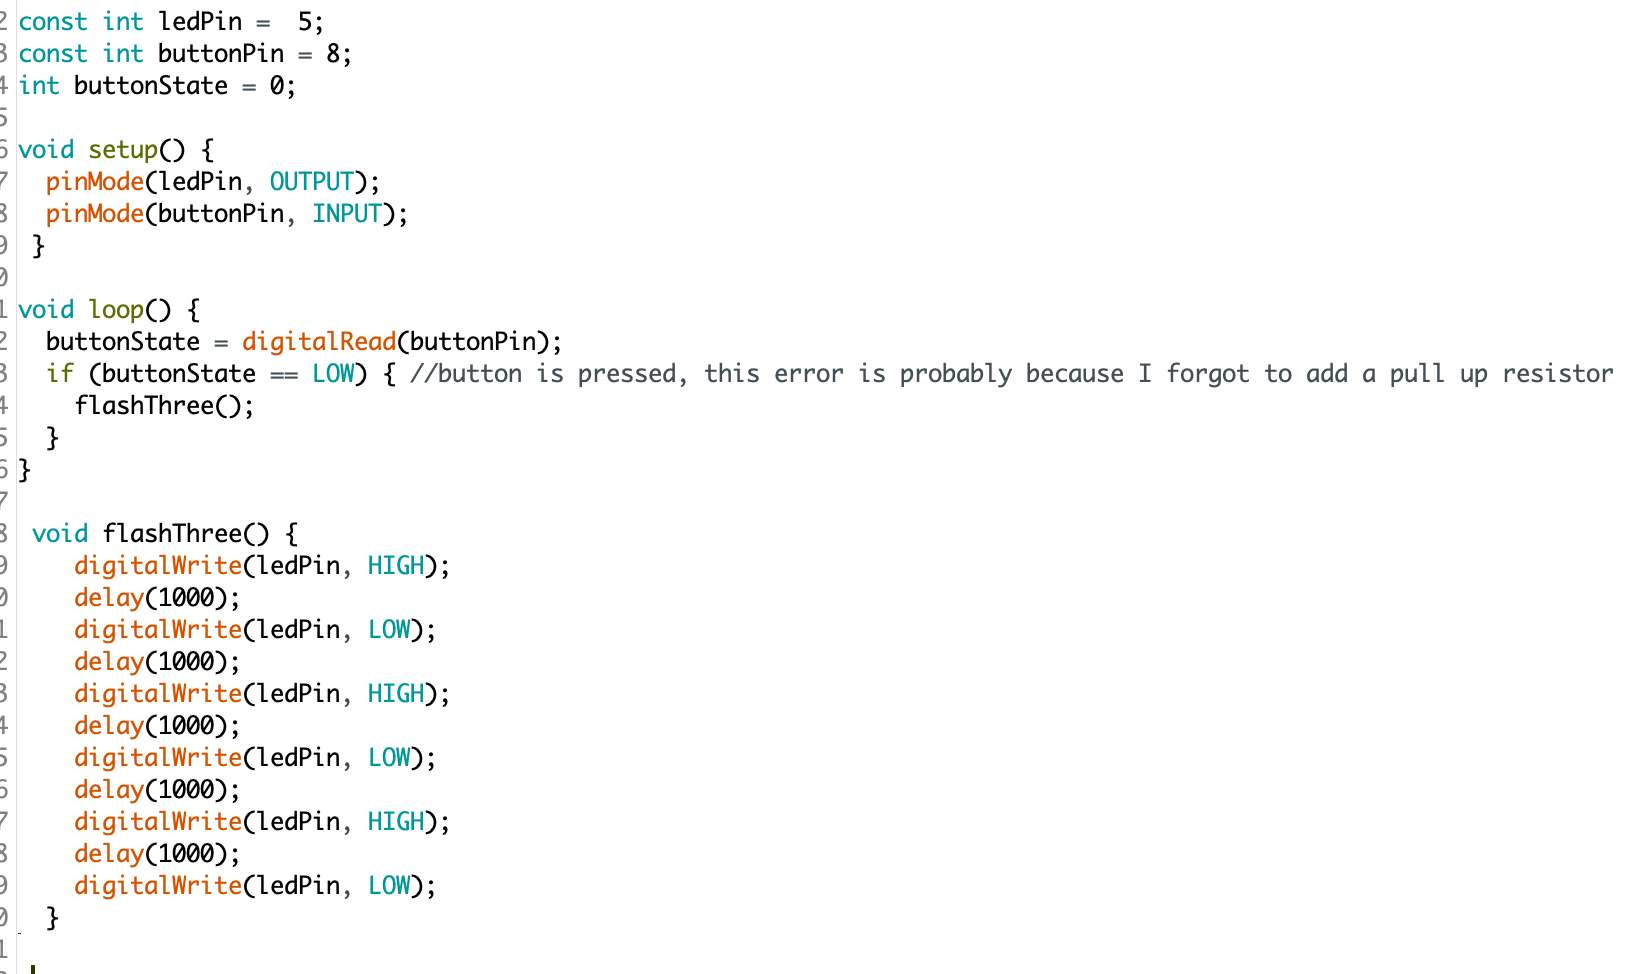
In an effort to make sure my code was still correct, I decided to try simulating a board on TinkerCAD with an UNO instead. I made sure the LED and push button were hooked up to the same pin labels (ex. pin 5 and 8), so my current code for my board could be copy-pasted almost directly and work in the simulator. Given these difficulties, I narrowed down my thought process and decided to try implementing a simple game involving a button press. Once the button is pressed, the game would "start", as indicated by three flashes of the LED. The LED would then stay "ON", indicating that the game was in progress. Once the game started, you have 5 seconds to press the button as many times as possible. After 5 seconds, the LED would flash 3 times again to indicate the game was over, and the serial monitor would print the number of button presses by keeping track of a counter. Here's the code + simulation:
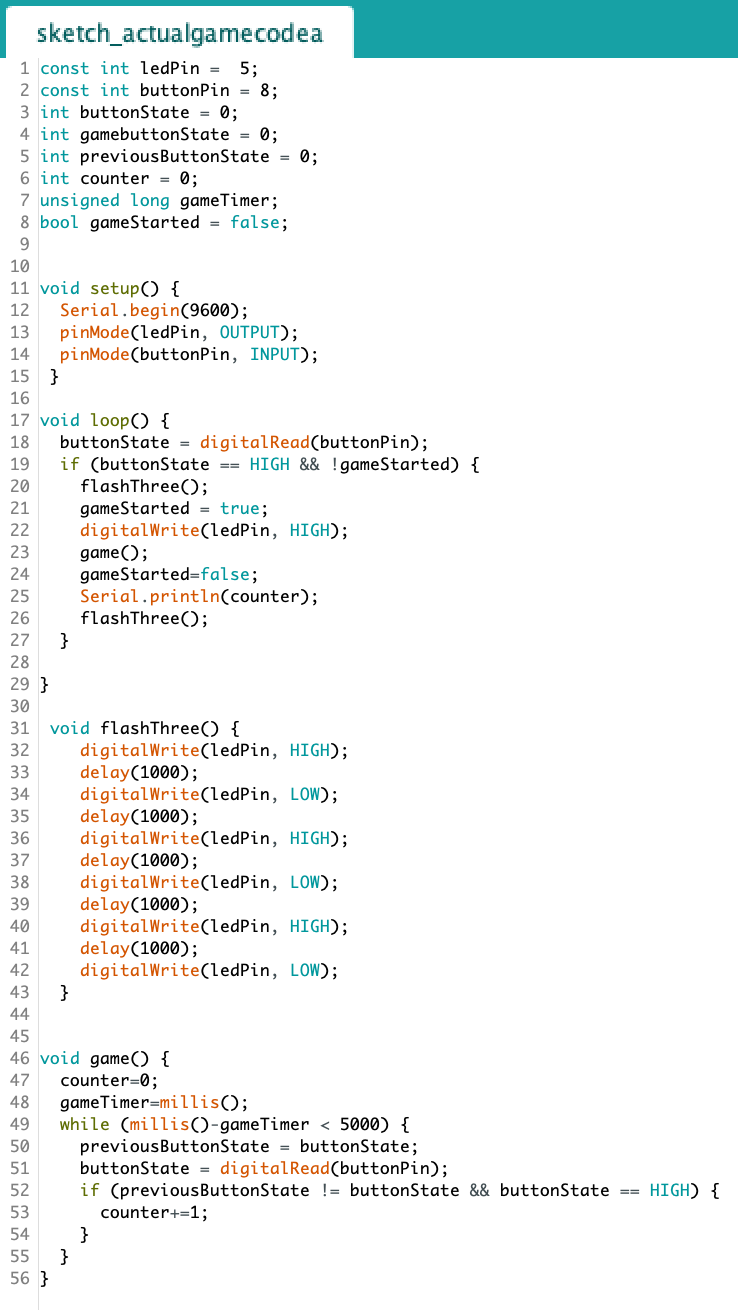
Apart from the setup() and loop() functions, I wrote two additional functions, one to conduct the three flashes, and one for the actual game. I also used functionalities such as millis(), which returns the number of milliseconds passed since the Arduino board began running the current program. One minor bug I ran into was that intiially, I was trying to update the counter everytime the button state was registered as HIGH or pressed. However, I realized this method was not returning accurate results due to how quickly the code was running through the functions compared to how long the button was held with each press. Therefore, I found that the best way to do this was by keeping track of two variables (the current button state and the the previous button state) and then update the counter if there was a change in state. In theory, this code should be able to gnerally be run as-is on the D11C after I fix the port issue. The only changes that will need to be made might be in the baud rate choice for the Serial monitor, as well as reversing the logic in the buttonState bool statements (on my board LOW means pressed while in the simulator HIGH means pressed. This was probably due to me forgetting to include a pull up resistor for the button or a different soldering mistake). Hopefully I'll be able to test this out on a fixed board soon!