
Computer Controlled Machining
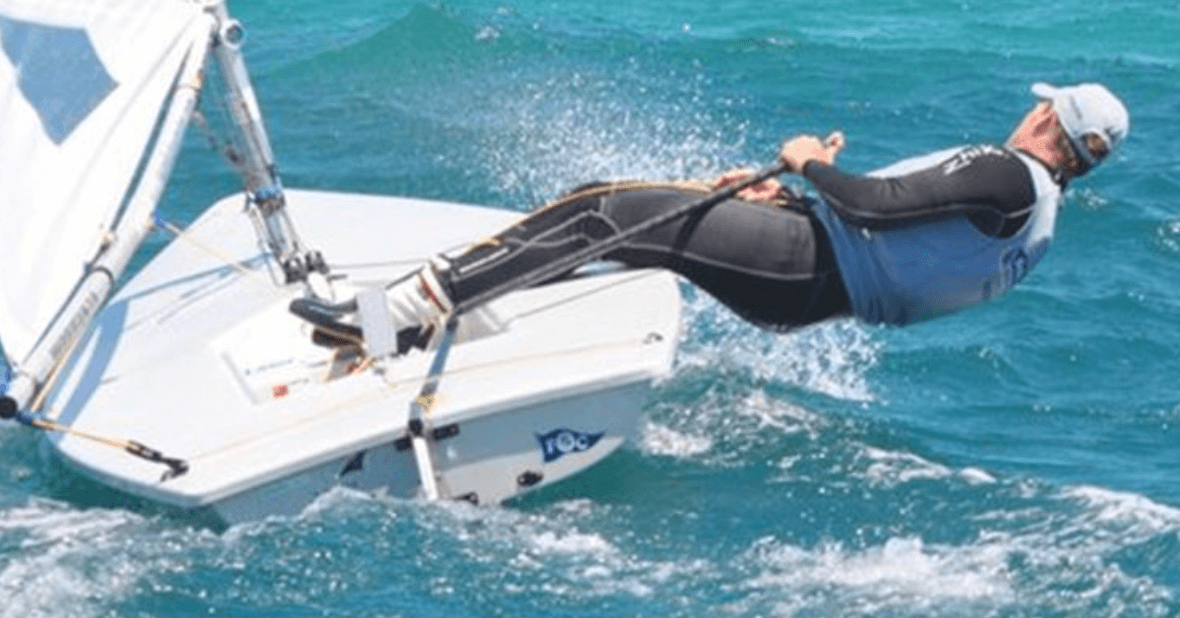
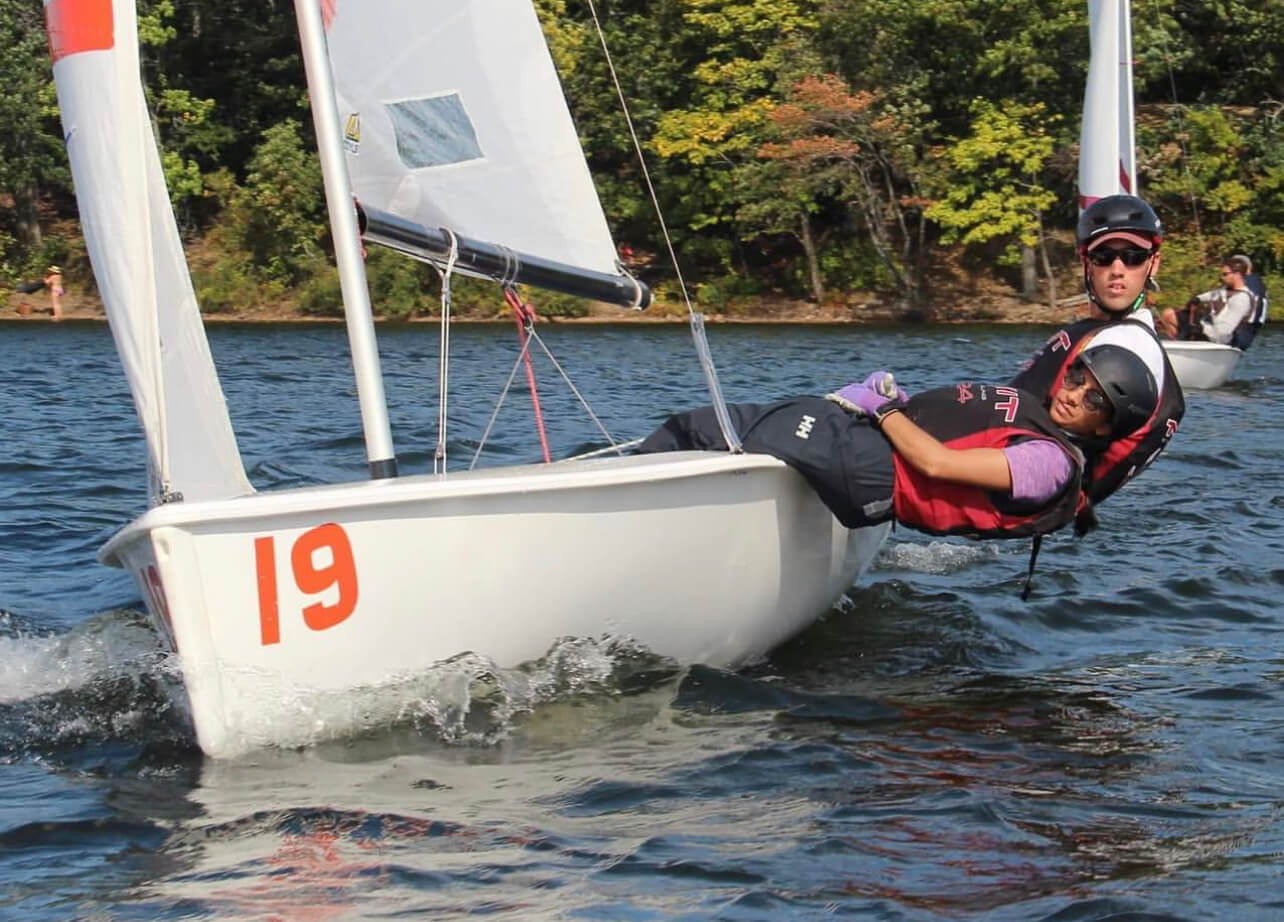
This week, our individual assignment was make (design+mill+assemble) something big (~meter-scale). I wanted to make something practical that I would hopefully use after the class assignment. Due to my sailing background, I decided to make a hiking bench. A hiking bench imitates the movement in sailing called "hiking", which is the action of moving one's body weight as far to windward as possible, in order to decrease the extent the boat heels (leans away from the wind). The movement looks like this and feels somewhat like a plank:
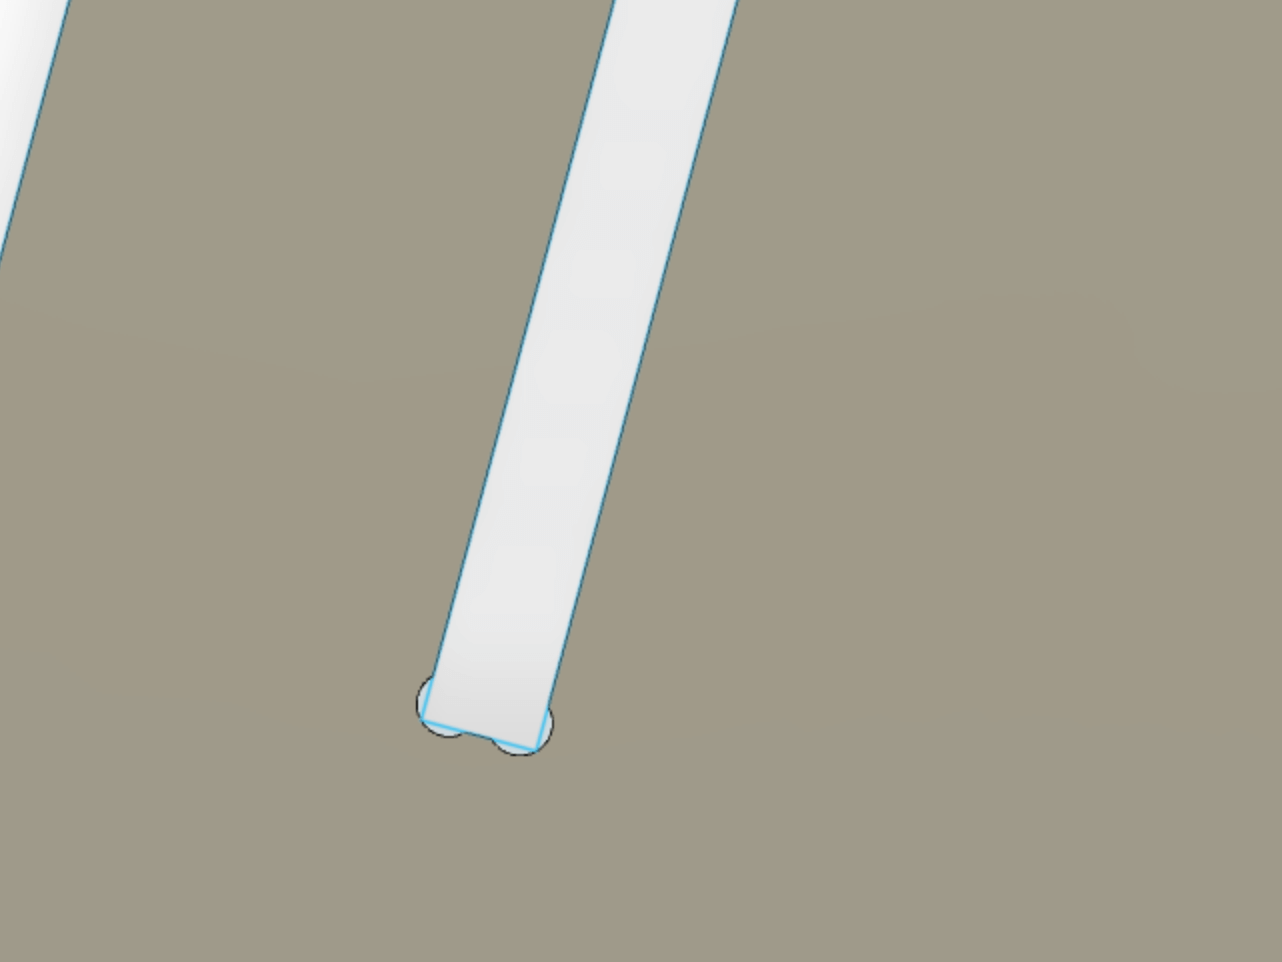
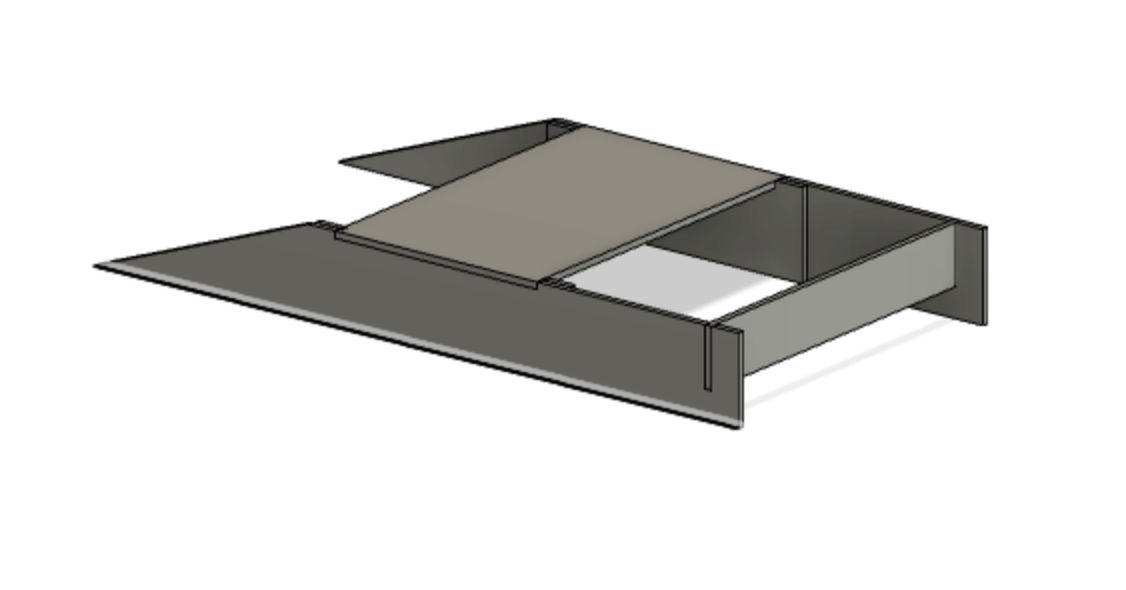
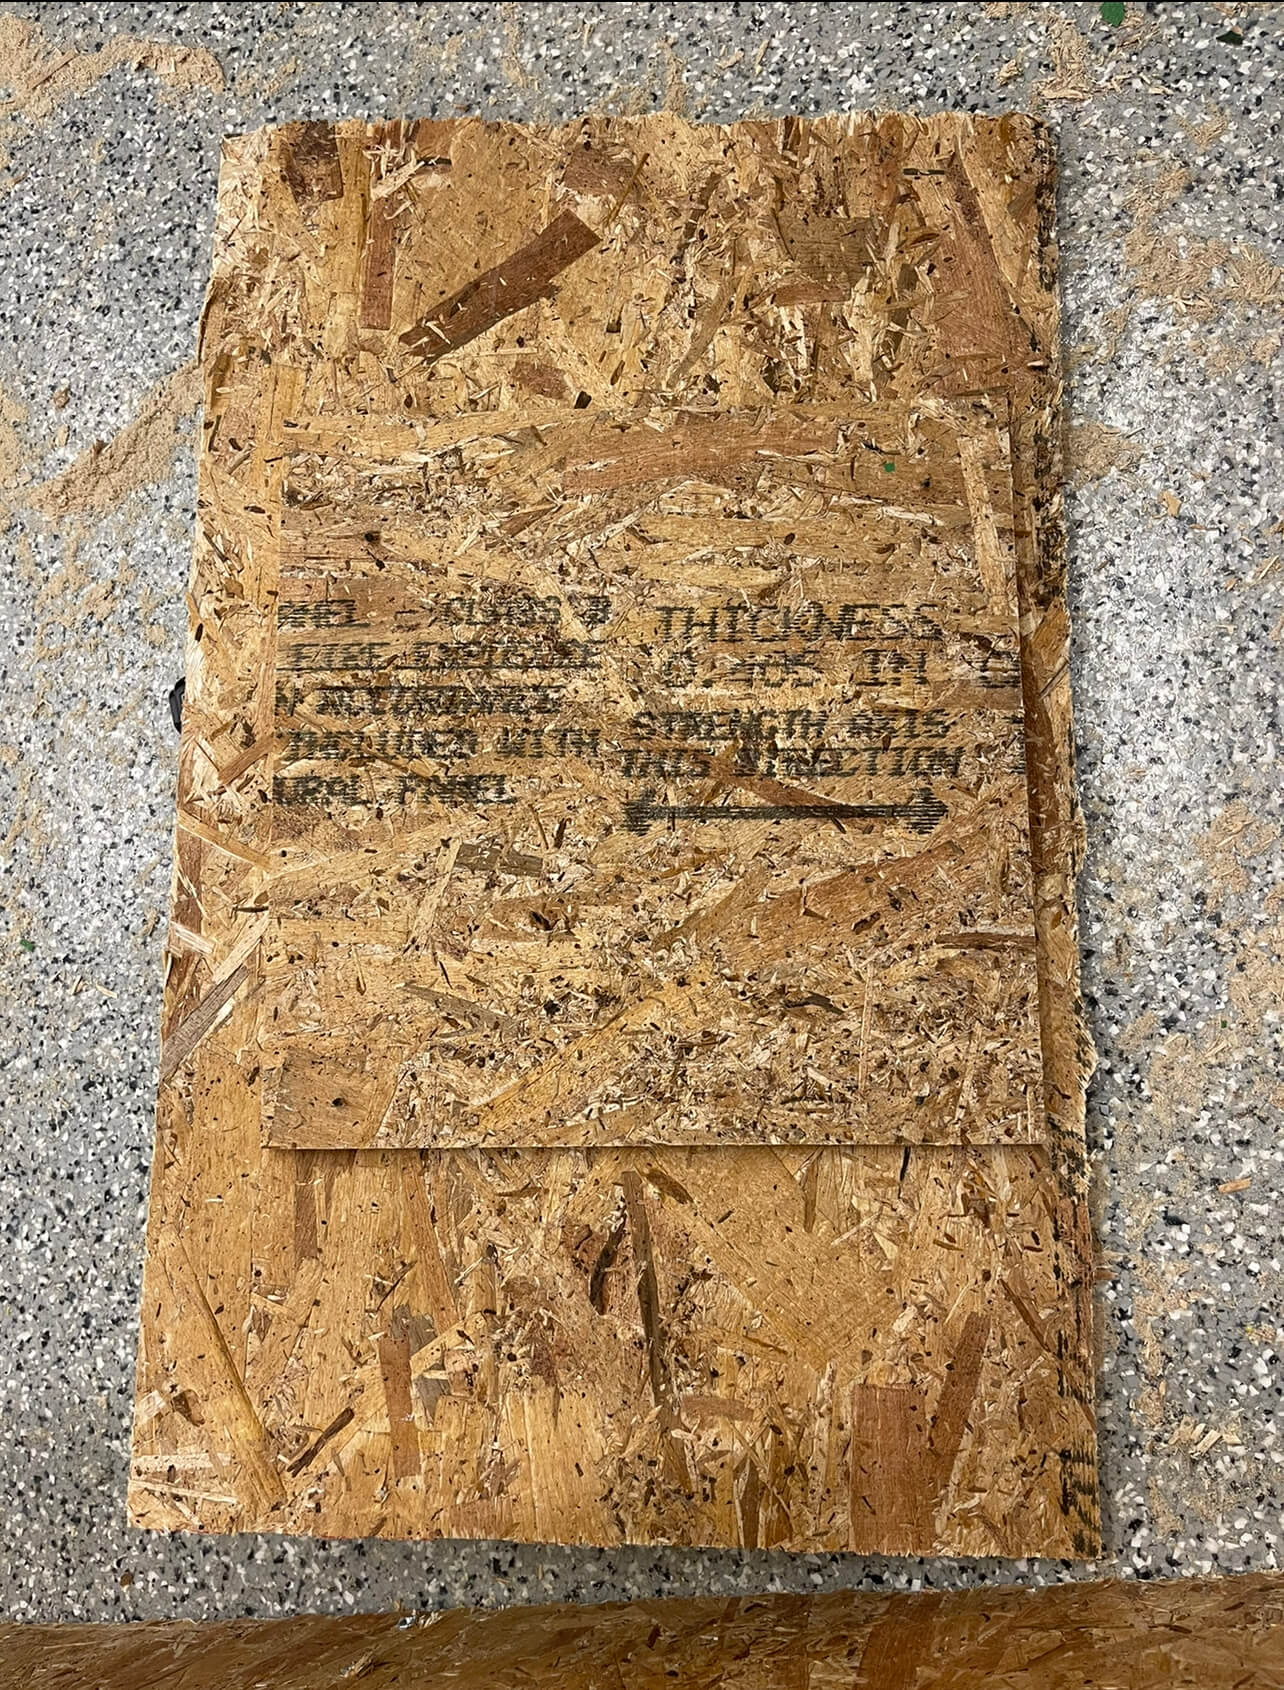
For this assignment, we were given oriented strand board, or OSB with a thickness of roughly .459 inches. I knew how hectic this assignment would be, so I wanted to also avoid machining in other shops this weekend. Therefore, I chose to try to constrain the design to a 4'x4' sheet so I could stay in EDS. I chose to CAD the design in Fusion. I had observed how much trouble people were having with rasping their parts, so I tried to simplify mine as much as possible. I tried to make the joints press-fit, with the intent of adding glue/screws for durability, not design necessity. Generally, there were few internal corners on my design, so dogboning them with an internal radius of .25 (tool radius) was easy (especially with a dogbone extension). After CADding the design, I assembled it in Fusion to make sure it looked like how I intended.
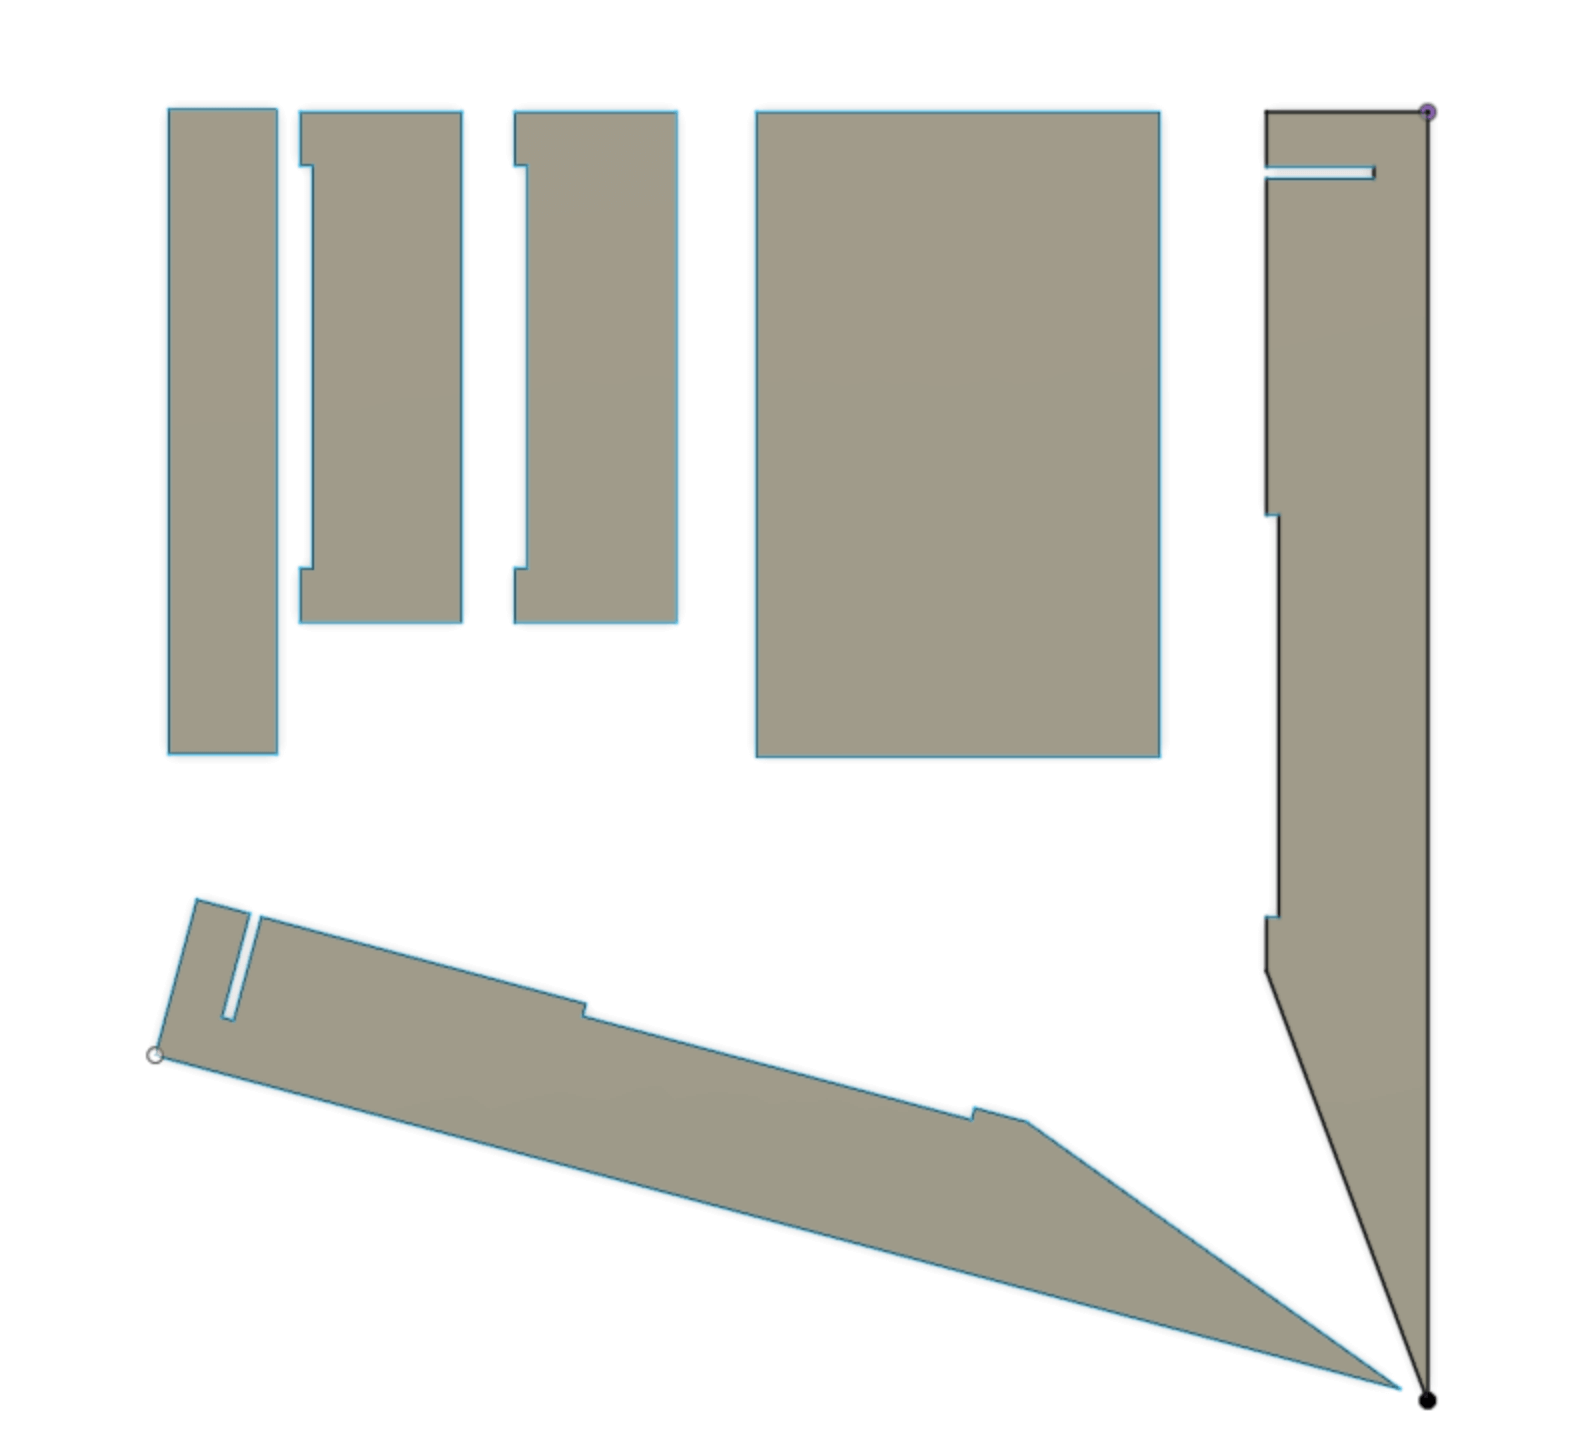
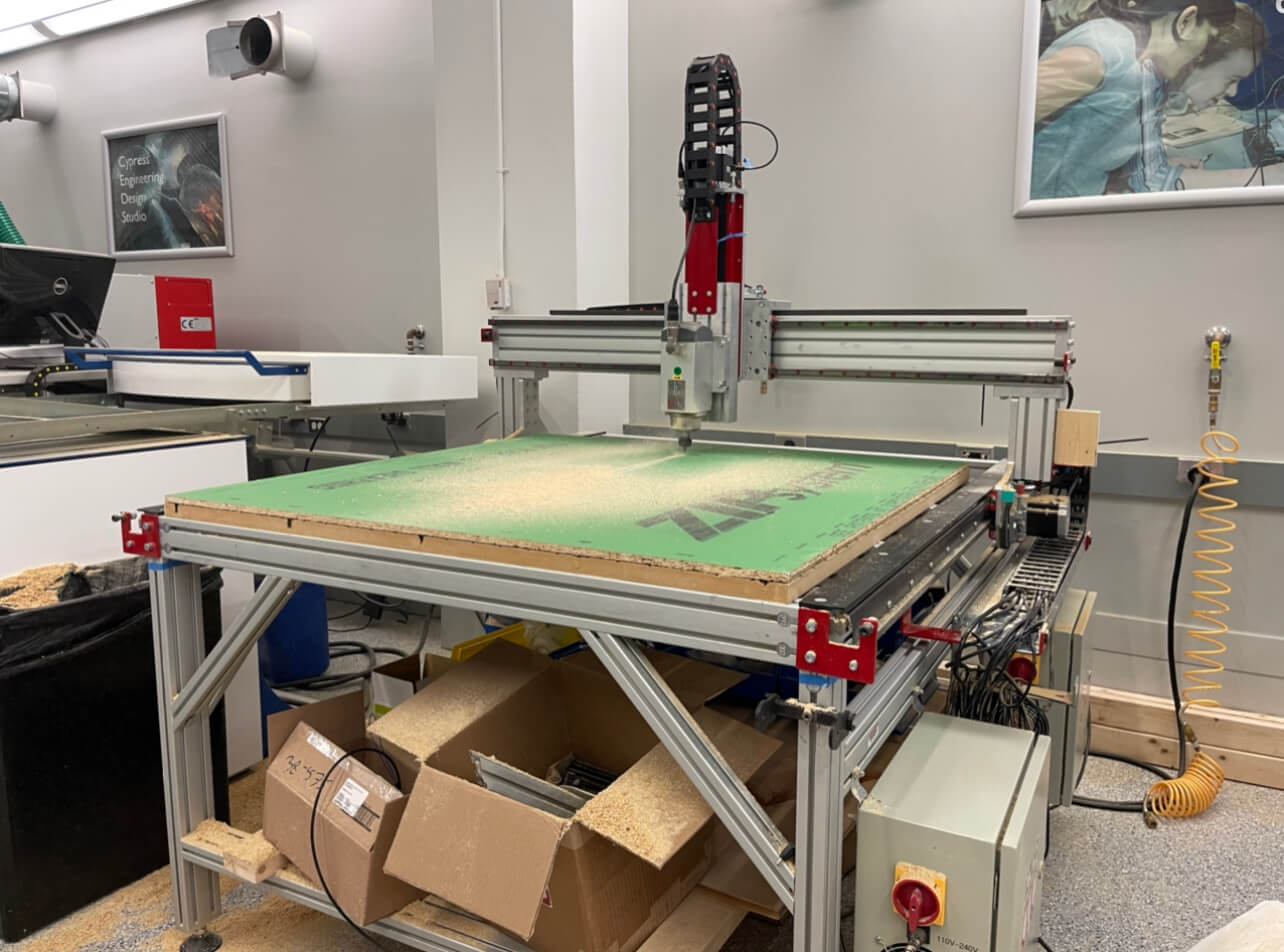
Anthony helped me with the CAM portion. Thankfully, my object of choice naturally avoided organic shapes, so figuring out the CAM path was pretty straightforward, and I didn't need to worry too much about tabs/onion skin. After nailing the OSB to the bed and inserting/calibrating the tool, I was ready to start milling. However, one issue we ran into was that I had laid out the objects to close to the 4'x4' border, so the job accidentally stopped in the middle. I'll definitely remember to give more clearance for boundary limitations next time.
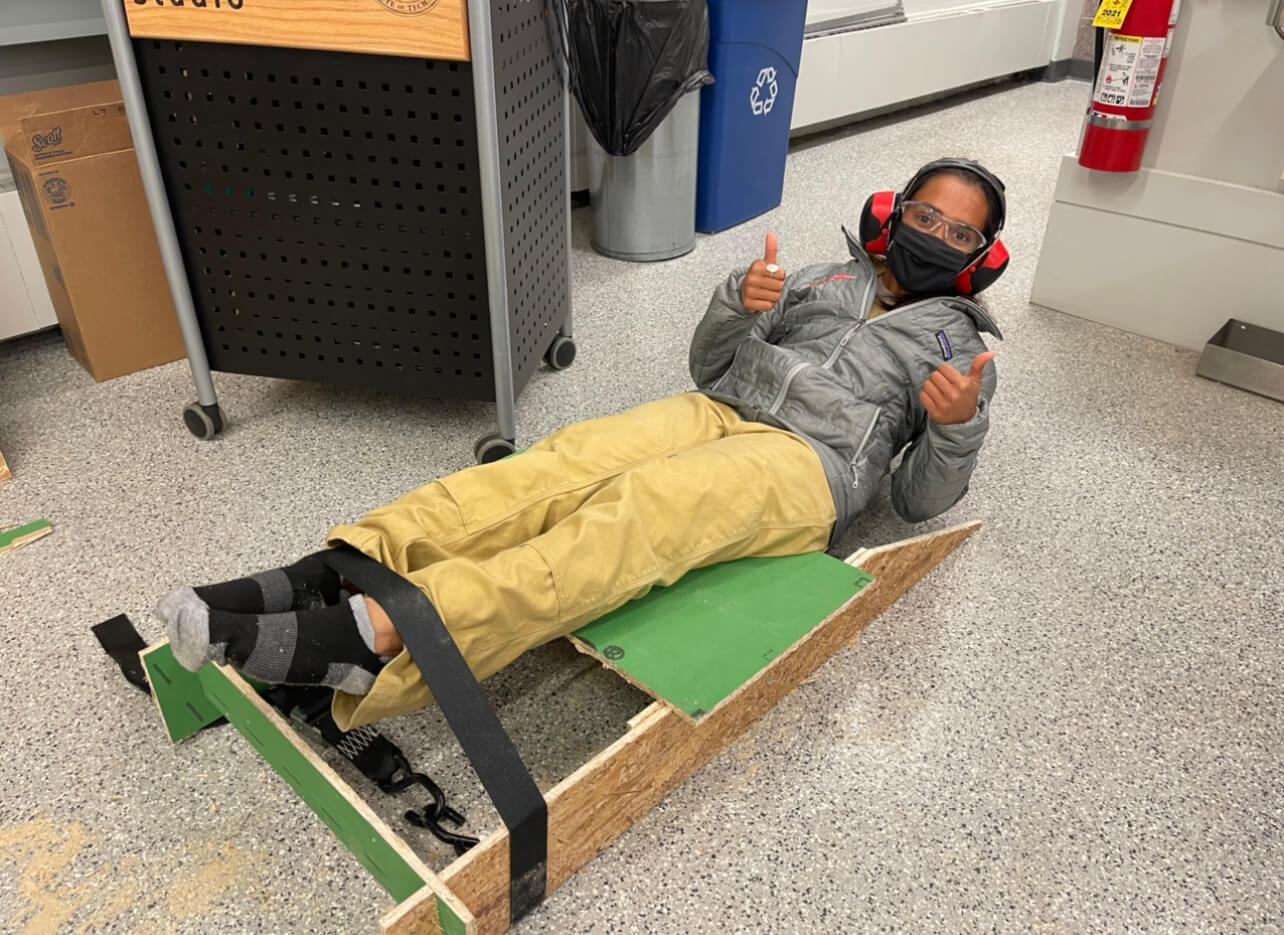
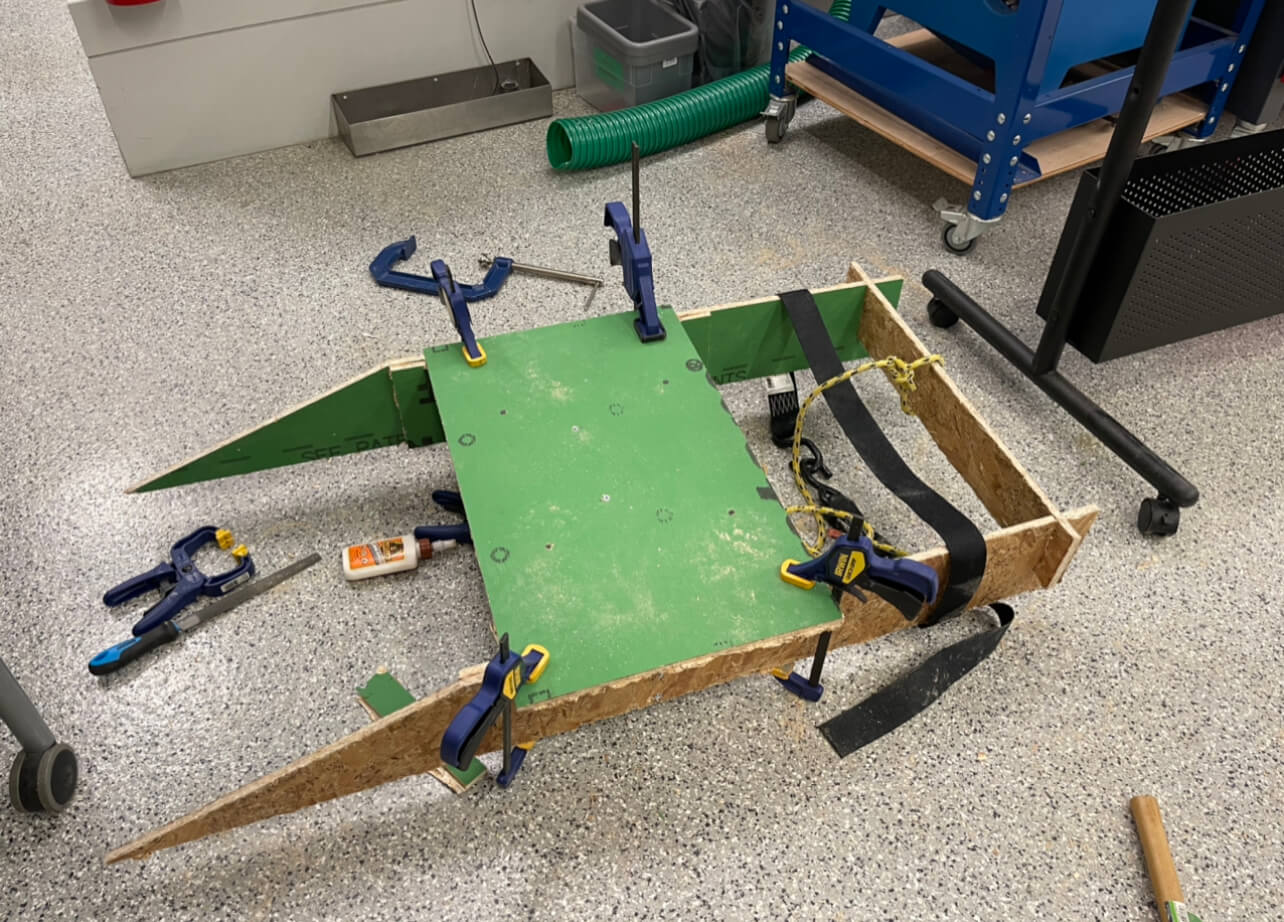
We were able to restart the job after erasing the tool paths for the pieces that had alreaady been milled. After the job was complete, the pieces were removed view crowbar and I began the annoying process of rasping. Thankfully, it didn't take very long, and I was able to assemble the pieces fairly rapidly. Everything mostly fit well, although there was some uneveness caused by my crappy rasping job. After simply press-fitting the pieces together, I was able to stand on it!

I then added a rachet strap for the feet, and tried using it as a proper hiking bench. While the whole contraption was fine for my weight, the corner of the bench away from the tapered end started to lift up slightly. This probably wouldn't be great to hold anyone else's weight on the team.
Therefore, I decided to add an extra scrap of OSB leftover from my job underneath the bench, as well as some chunks of 2"x4" that were lying around EDS. I bandsawed 2"x4" pieces until they fit the necessary dimensions, and then screwed them into place. After that, I added some wood glue and clamped the bench down and left it overnight.

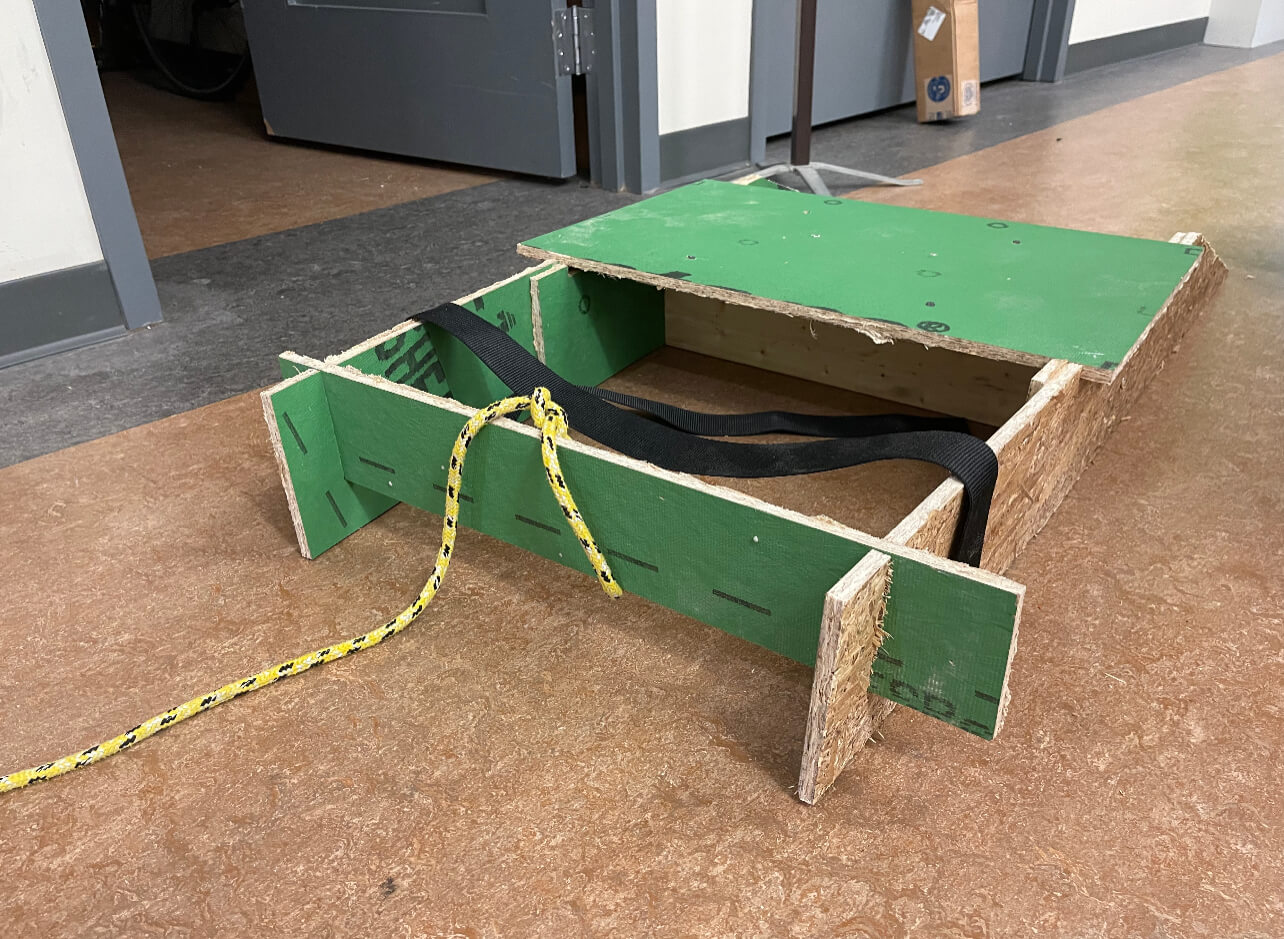
Afterwards, I tested it again the next day with friends and it held up well! I also added a rope to simulate having a sail sheet in your hand, but the part it's tied to isn't super stable to pull on. I think overall it would've been a better design if the legs were taller and longer (I should've gone with a 4'x8' sheet of OSB). Otherwise, this was a fun first attempt at a hiking bench and hopefully I'll build a better one in the future!

Also--many thanks to Anthony for all his help this week! Made a huge difference and I really appreciated it!!