My own video game console
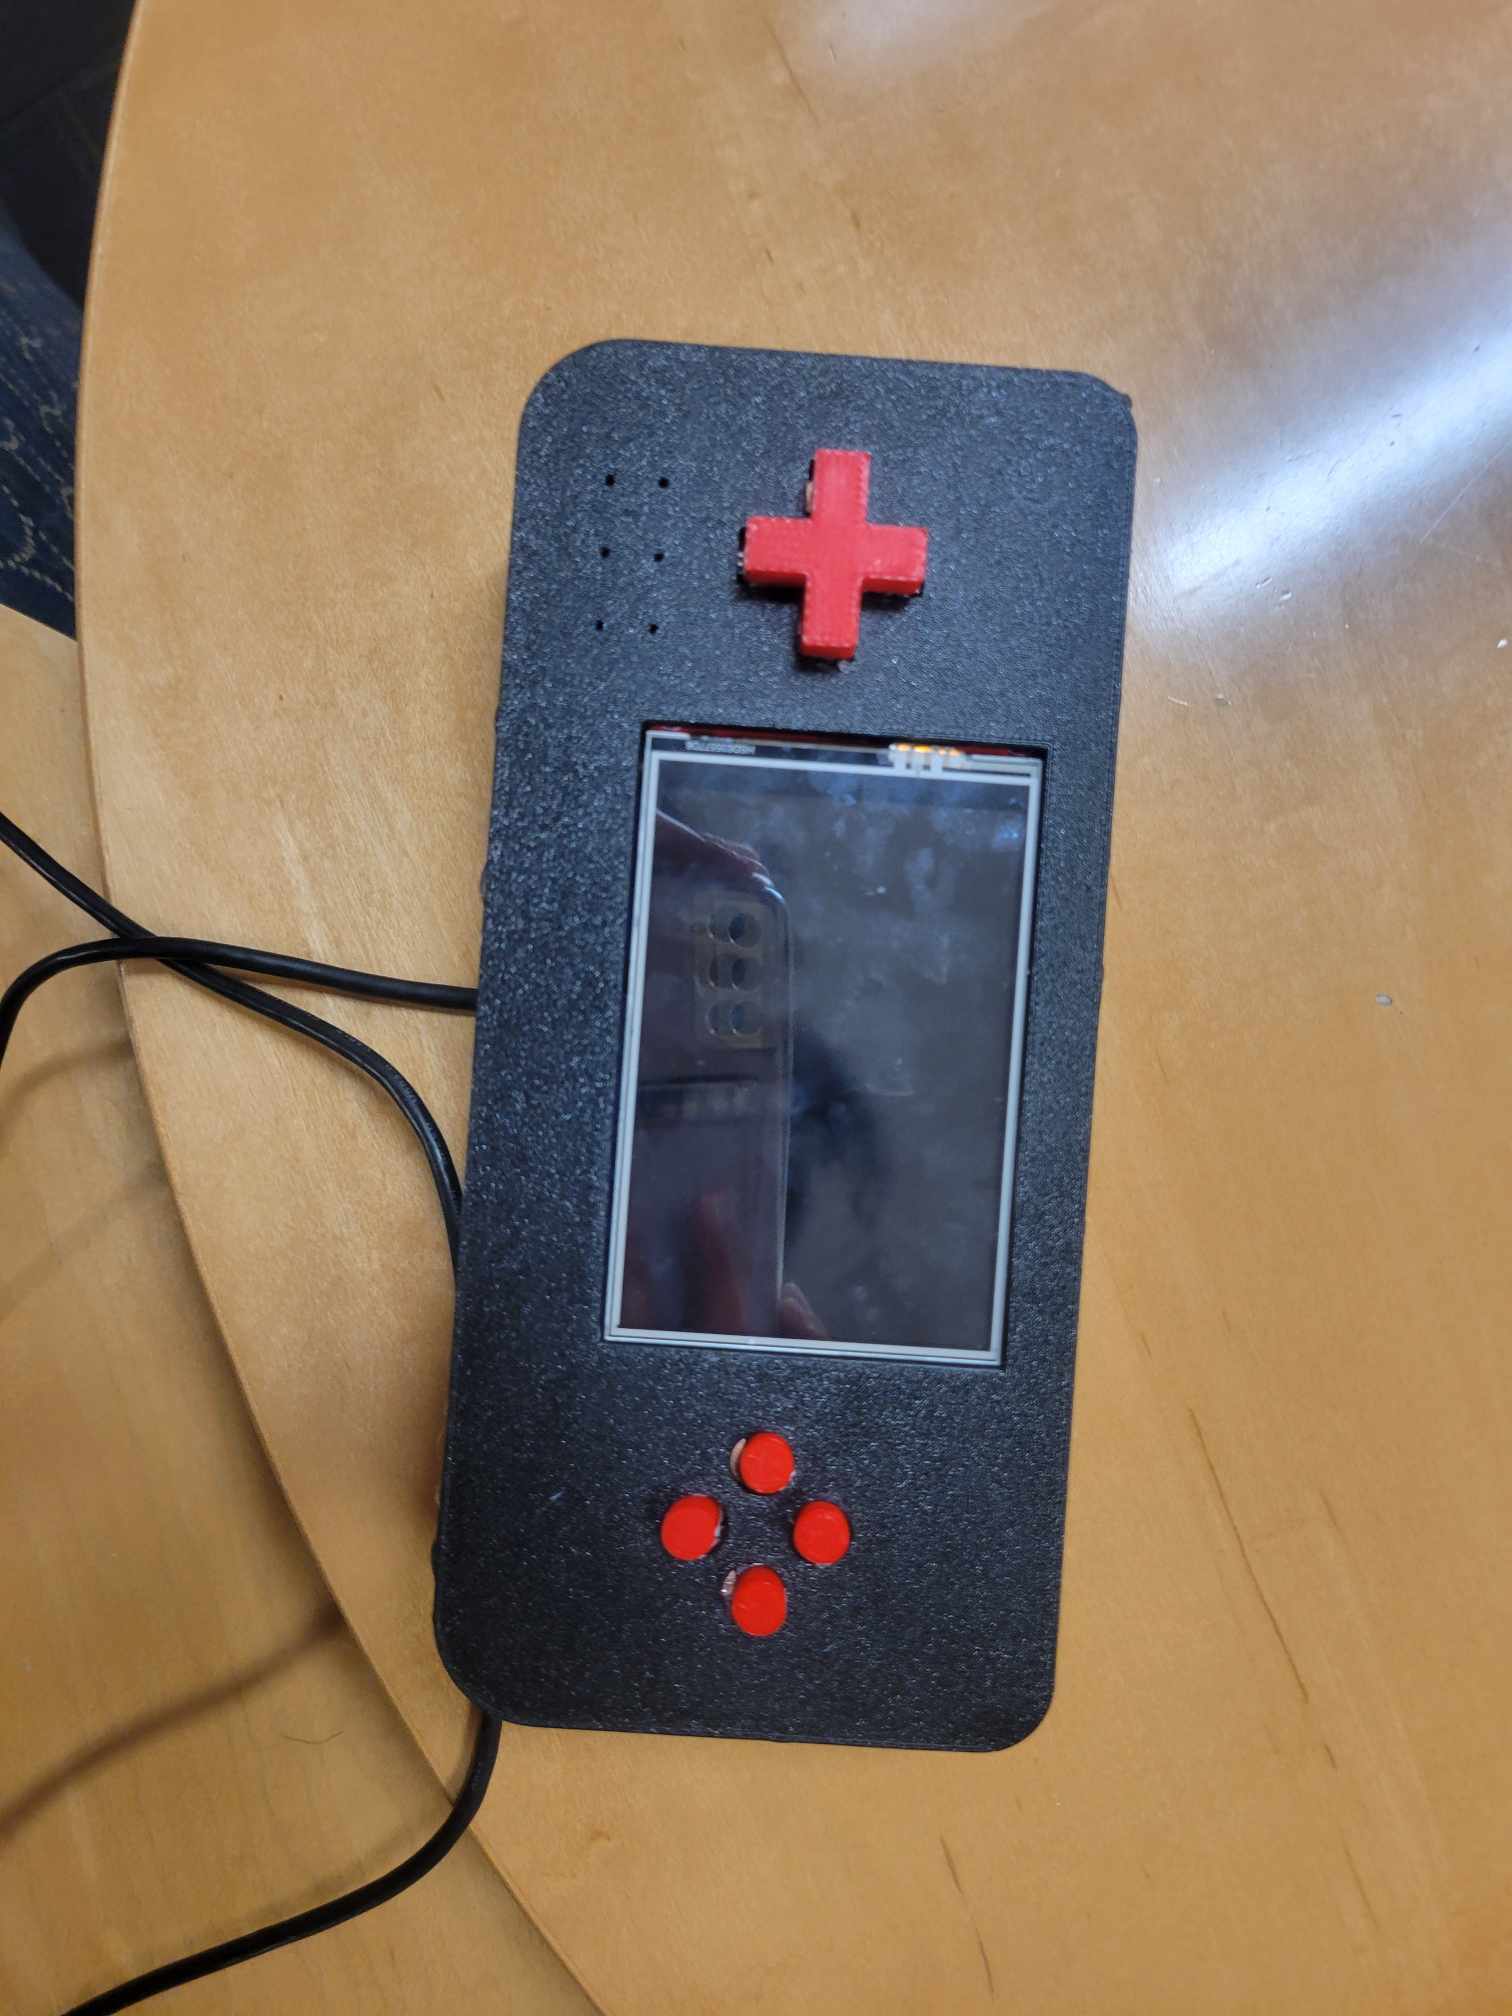
Final result
Here's my own hand-held video game console, right now I can play snake on it!
Summary:
- Used Raspberry Pi Pico W for a microcontroller
- Used a Hosyond 3.5 Inches TFT LCD Touch Screen Shield Display Module, with 480x320 resolution
- Used Arduino IDE to code Snake game in C
- 3D printed case and buttons
Link to presentation
The journey
Inspiration
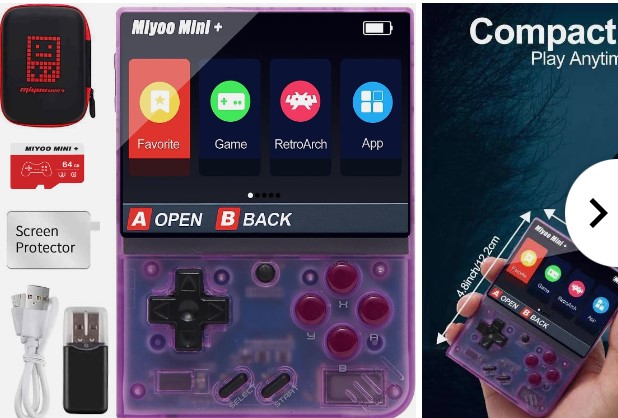
My friend sent me a tiktok for a game console called "miyoo mini plus," where you're able to play older nostalgic and retro games. I loved it; one of my interests is kind of collecting retro and older technology. I recently bought a DVD player and a Nintendo DS. Anyways, I thought instead of buying it, I could make it. In addition, if I can figure out how, I would like to have an extra piece that will be similar to a Wii controller, so I can play old Wii games on this console.
Research
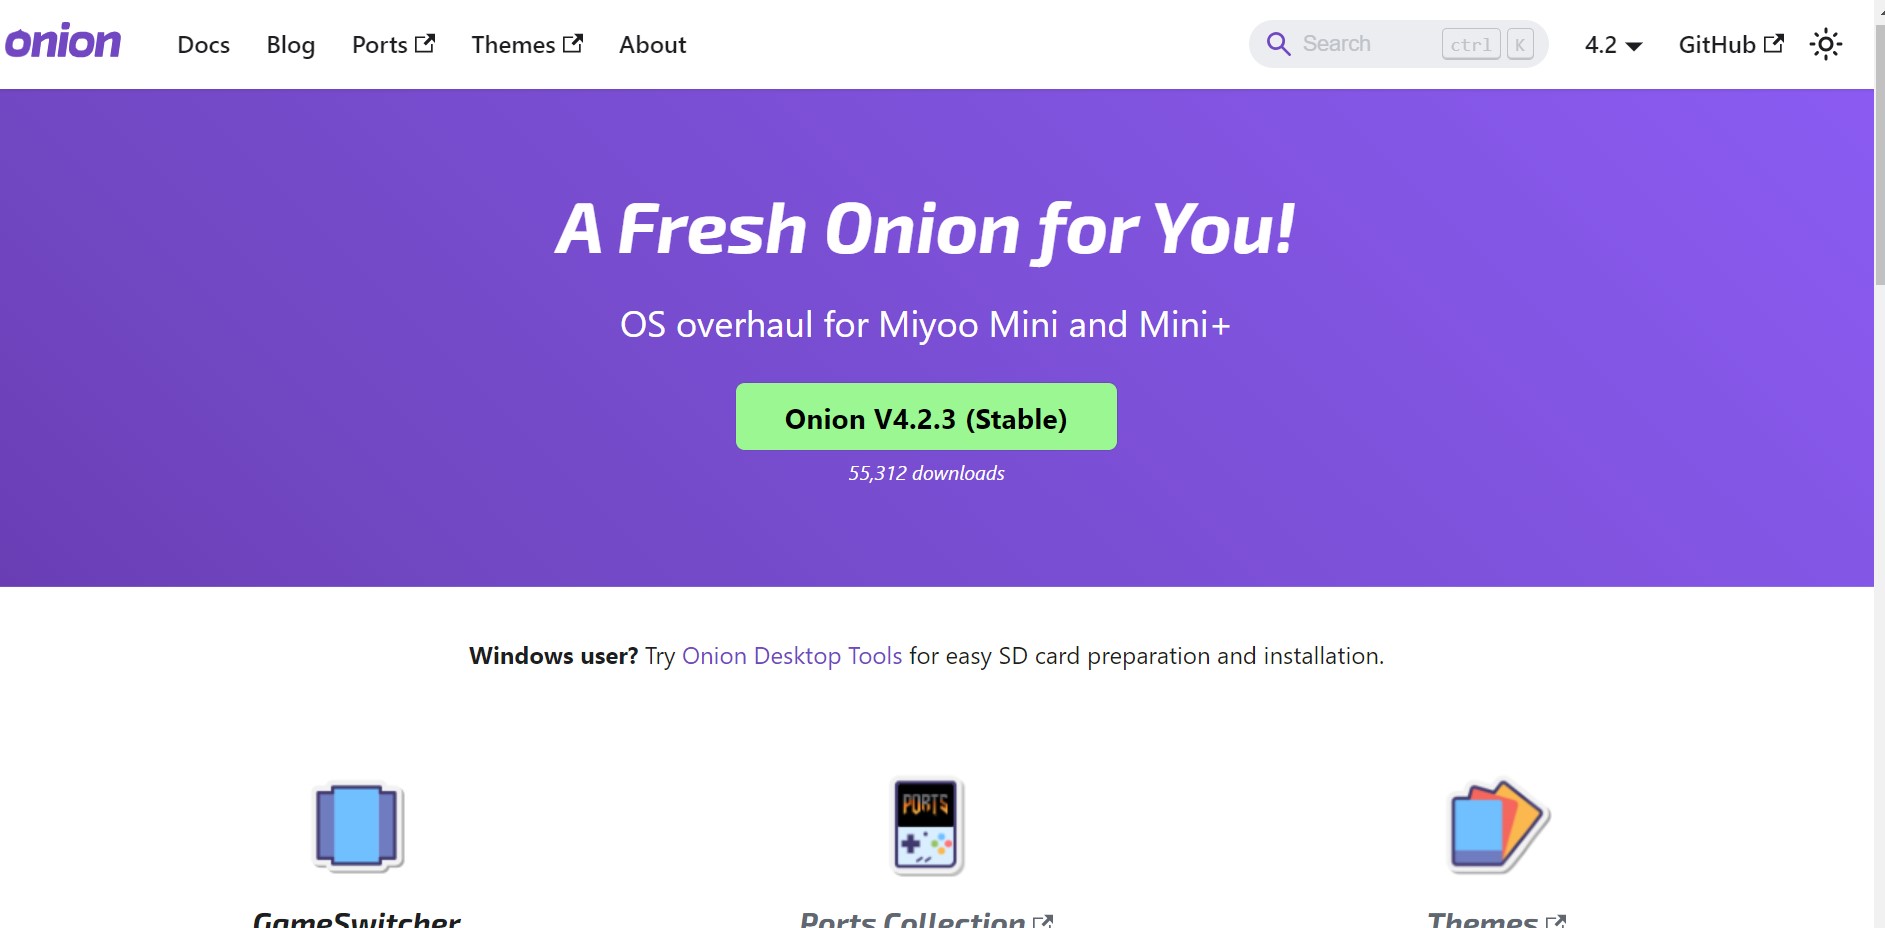
I started researching how exactly it works. First thing I found is that there's a custom operating system called OnionOS that contains emulators and games from a lot of different consoles, and also easy access to different menus. It would be great if I could also use OnionOS, though as I'm reading about it it works directly with the Miyoo firmware. I'm not exactly sure how all this stuff works, I think I'll be learning about it next week. For now, I know I need a SD card reader. I also know I'll need USB-c, headphone jack, buttons, a screen, and I also want bluetooth and wifi.
More research
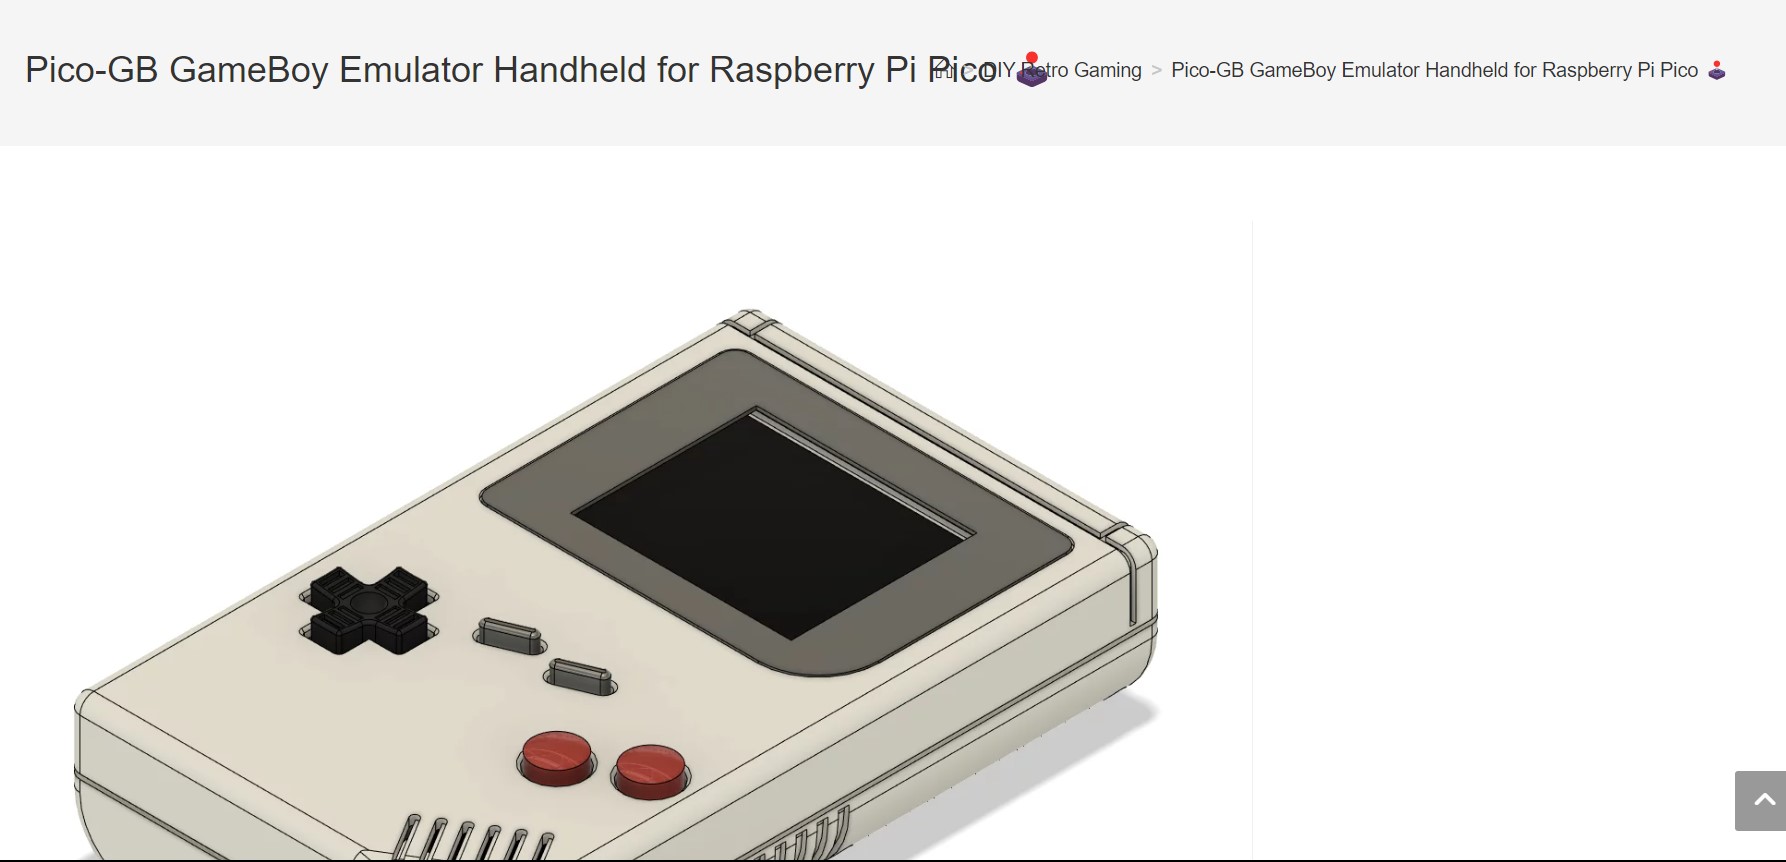
I started doing research on how people have made their own game consoles. Turns out, I have to think a lot about RAM and processing power. Many tutorials I saw used a Raspberry Pi 4, which basically is the same as a desktop computer and has it's own OS. Unfortunately, I don't have a Raspberry Pi 4, instead I decided to use a Raspberry Pi Pico W. The Pico has a RAM of 264kB, which turns out it's more than the GameBoy RAM (and less than more modern consoles). Turns out I also have to think of clock speed, and I learned a new term, "overclocking," which is when you increase the clock speed of your microcontroller more than the recommened amount. Anyways, the main struggle was finding out emulators I could run on the Pico, and I could only find GameBoy emulators due to the processing power of the pico. I also found an Nintendo Entertainment System emulator, but that one required using an HDMI display which I didn't want to use on my hand held. Anyways, I decided on following this tutorial more or less so I can use their emulator.
Making the schematics
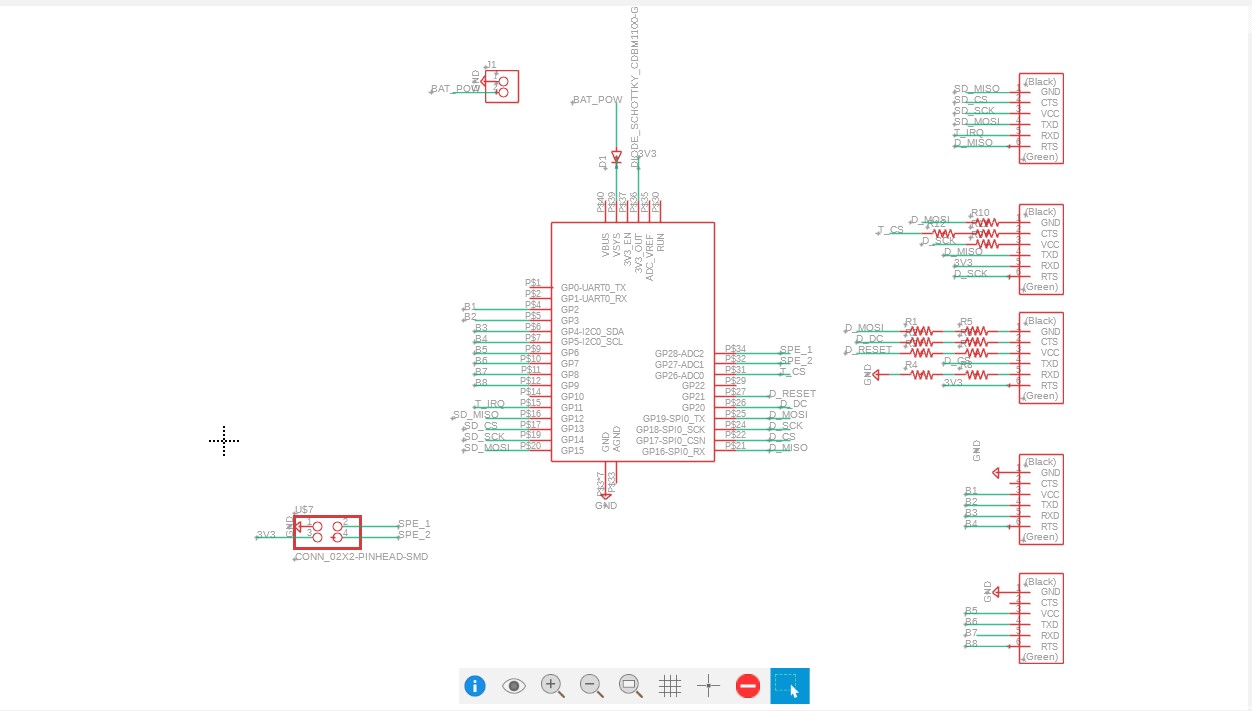
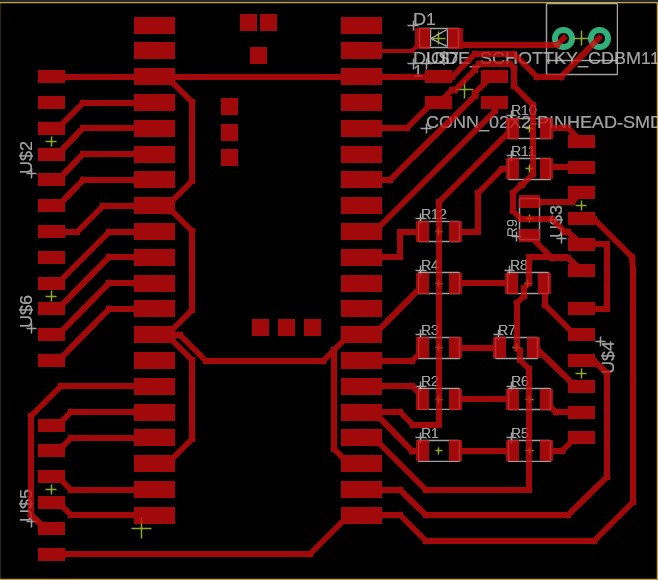
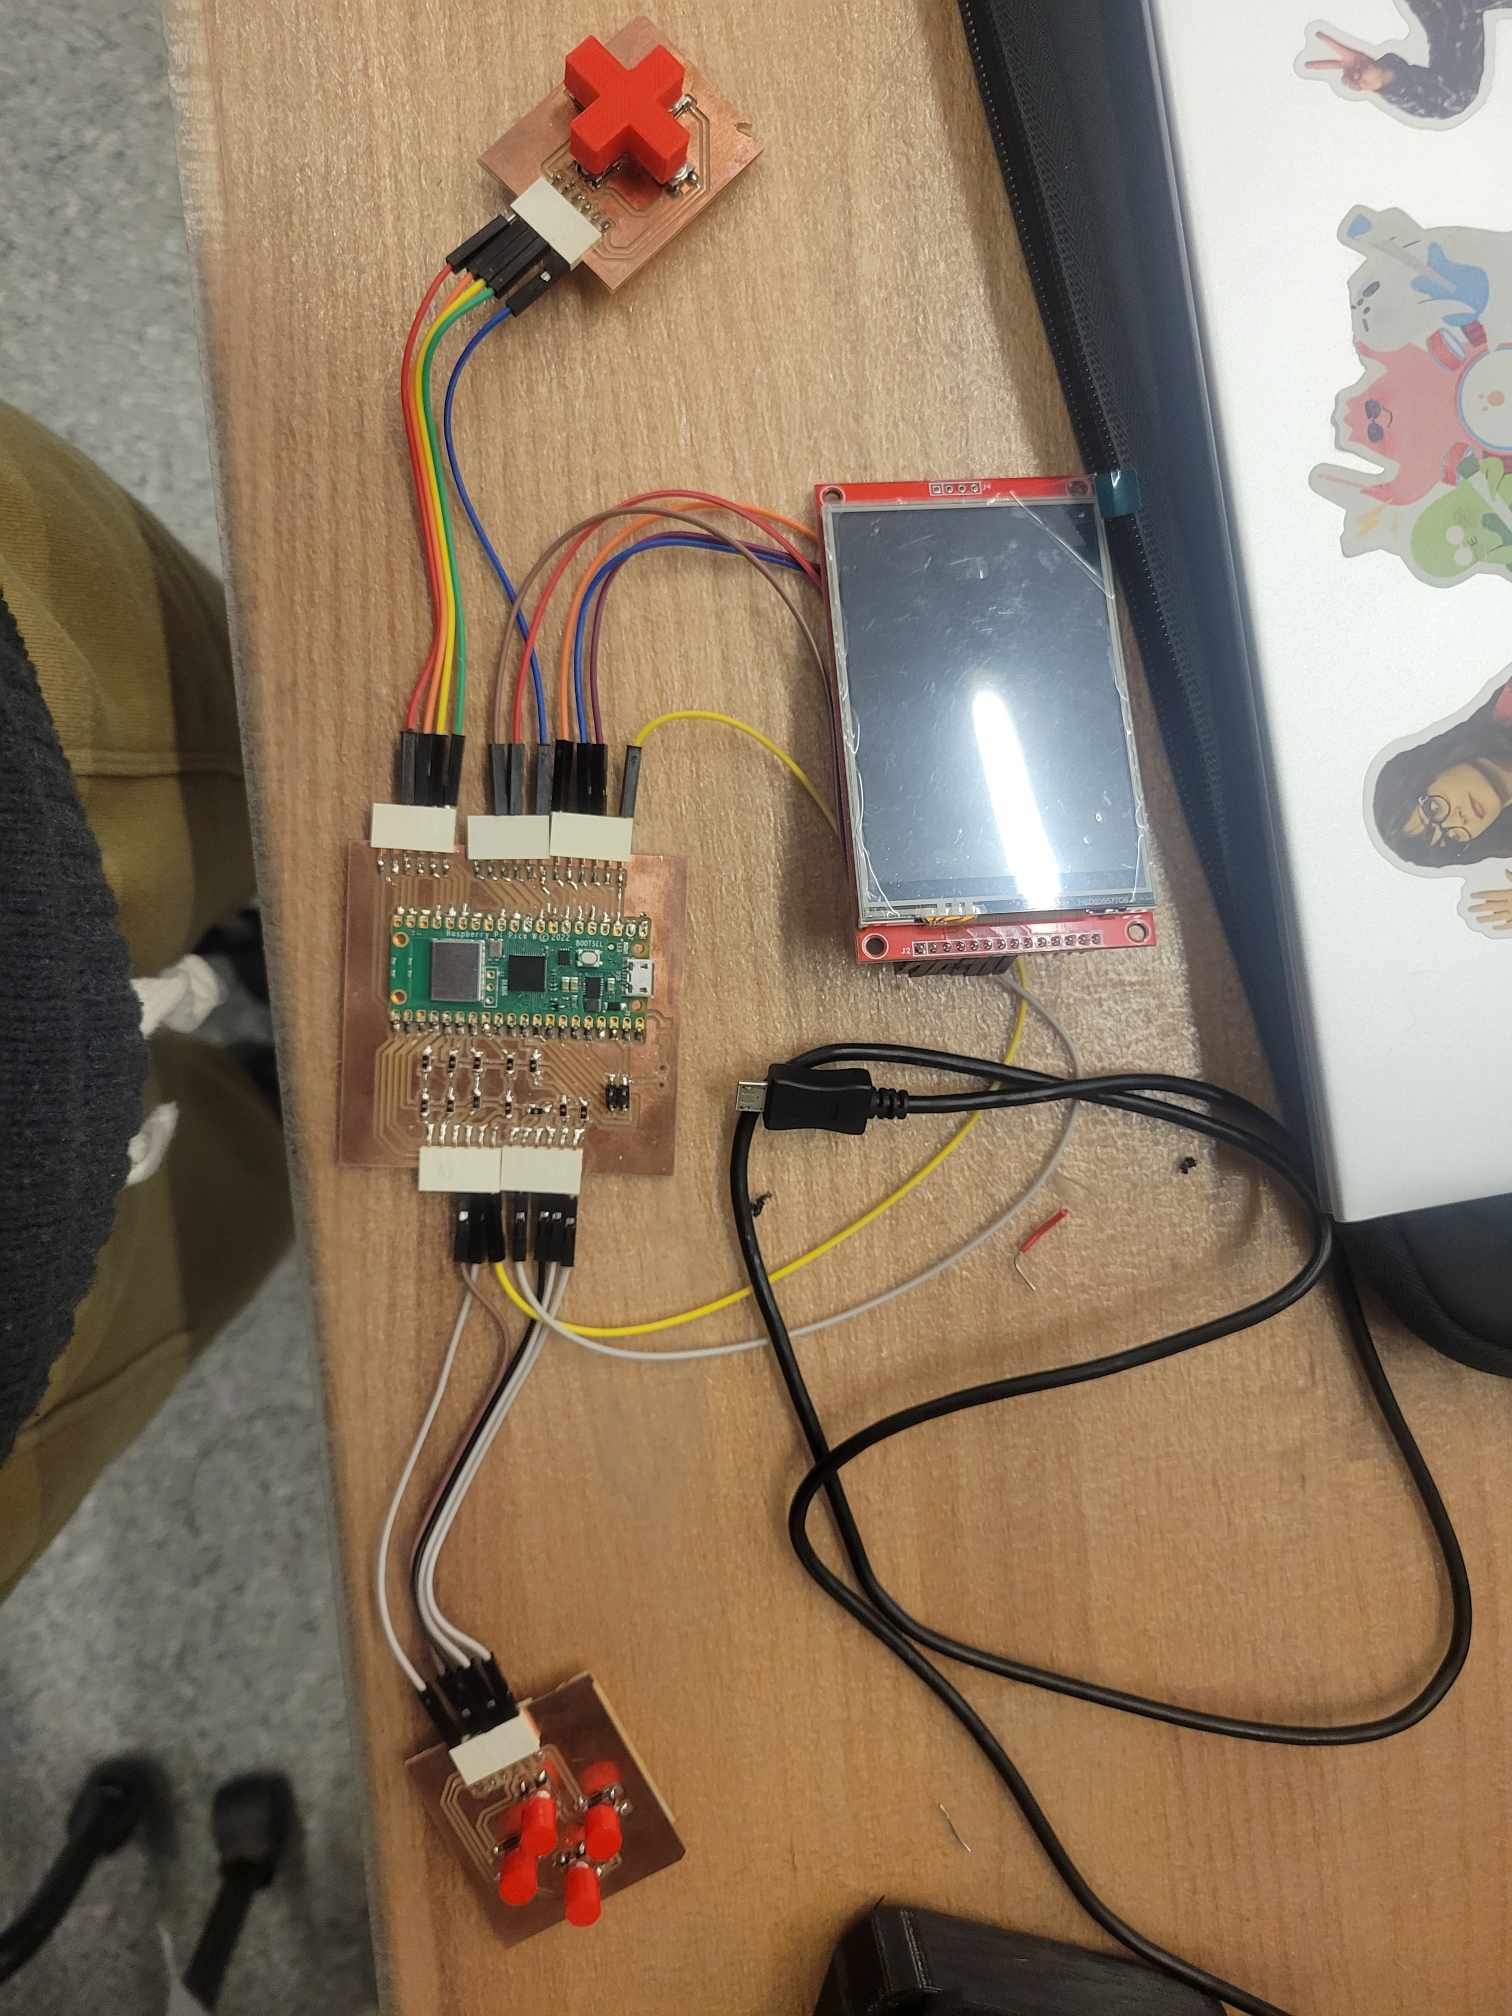
So before making the schematic, I bought a screen with a the best resolution I could find but that also used SPI so I could easily communicate with my pico. I decided on using this screen, a Hosyond 3.5 Inches TFT LCD Touch Screen Shield Display Module, with 480x320 resolution. Since it was touch screen, I thought it would be cool to also incorporate some touch screen games, so I decided to also include those pins in my schematic. Here's my final schematic I did on Fusion 360 (as always fusion files are at the end of the page). There's a 2 pin connector to connect to batteries, a 4 pin connector to connect to a board with a speaker and amplifies, and the first 3 6-pin headers are for an SD card, the touch screen, and the pins of the display, and the last 2 are for the buttons, which there will be 8 overall.
Designing the PCBs
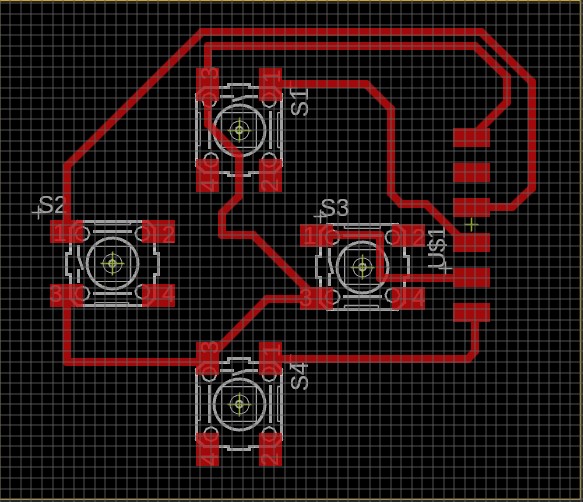
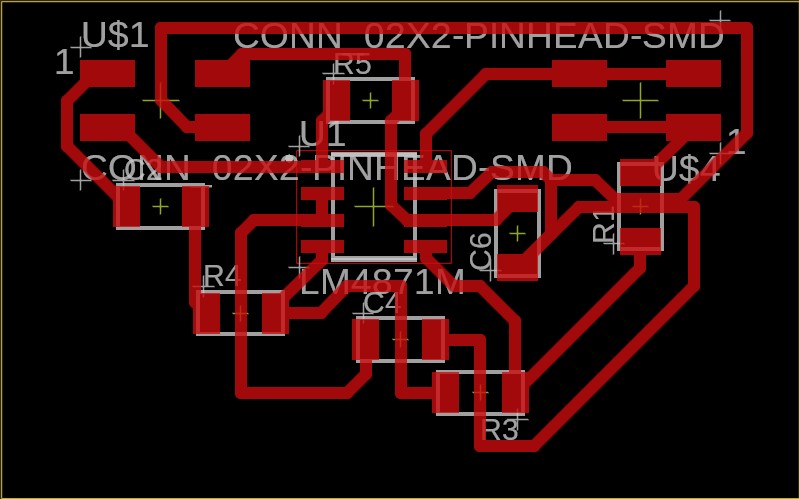
After making the schematic, designing the PCBS was kind of harder than I thought, since due to all the SPI pins needed for the touch, SD, and display I ended up having some pins in the pico being routed to multiple places. It took me hours and many additions of zero resistors to get these boards. The first PCB in the slide is my big connector board, the second one is for my buttons (4 buttons per board), and the last one is for a speaker, which is the same design from Inputs week.
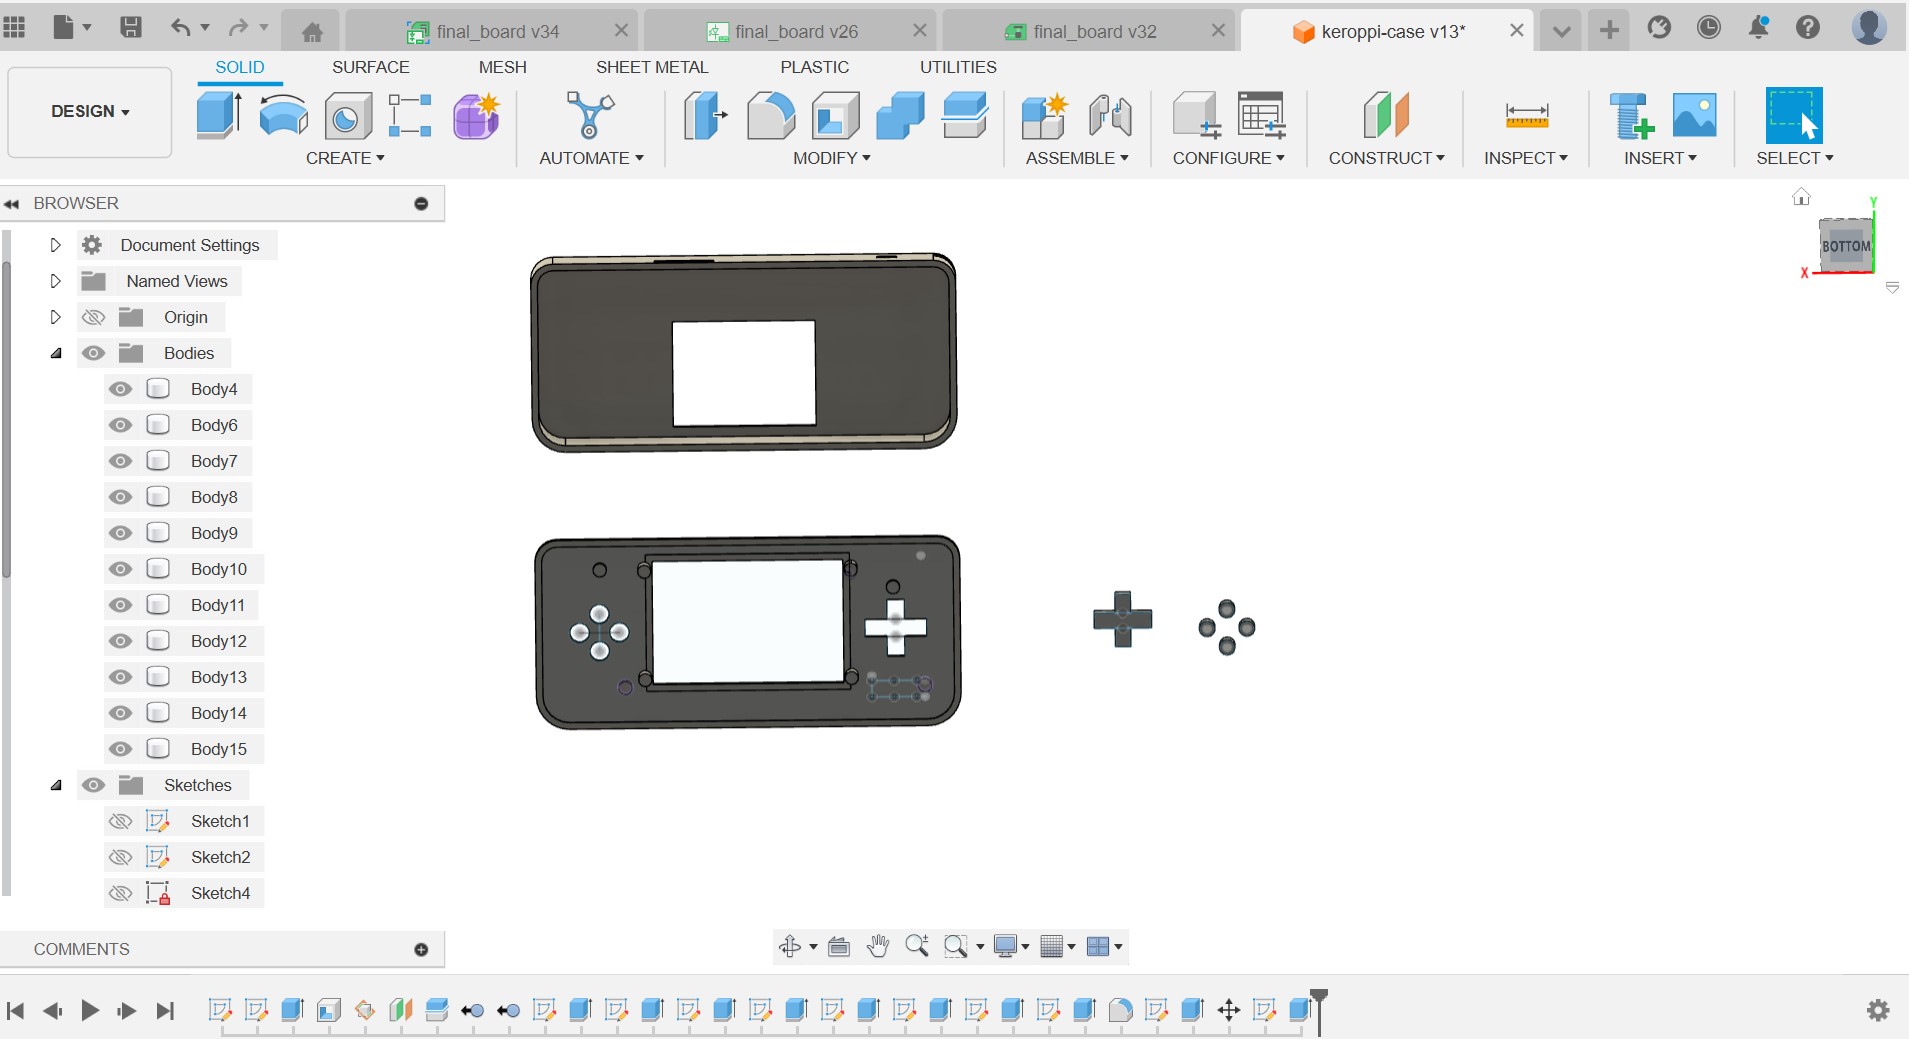
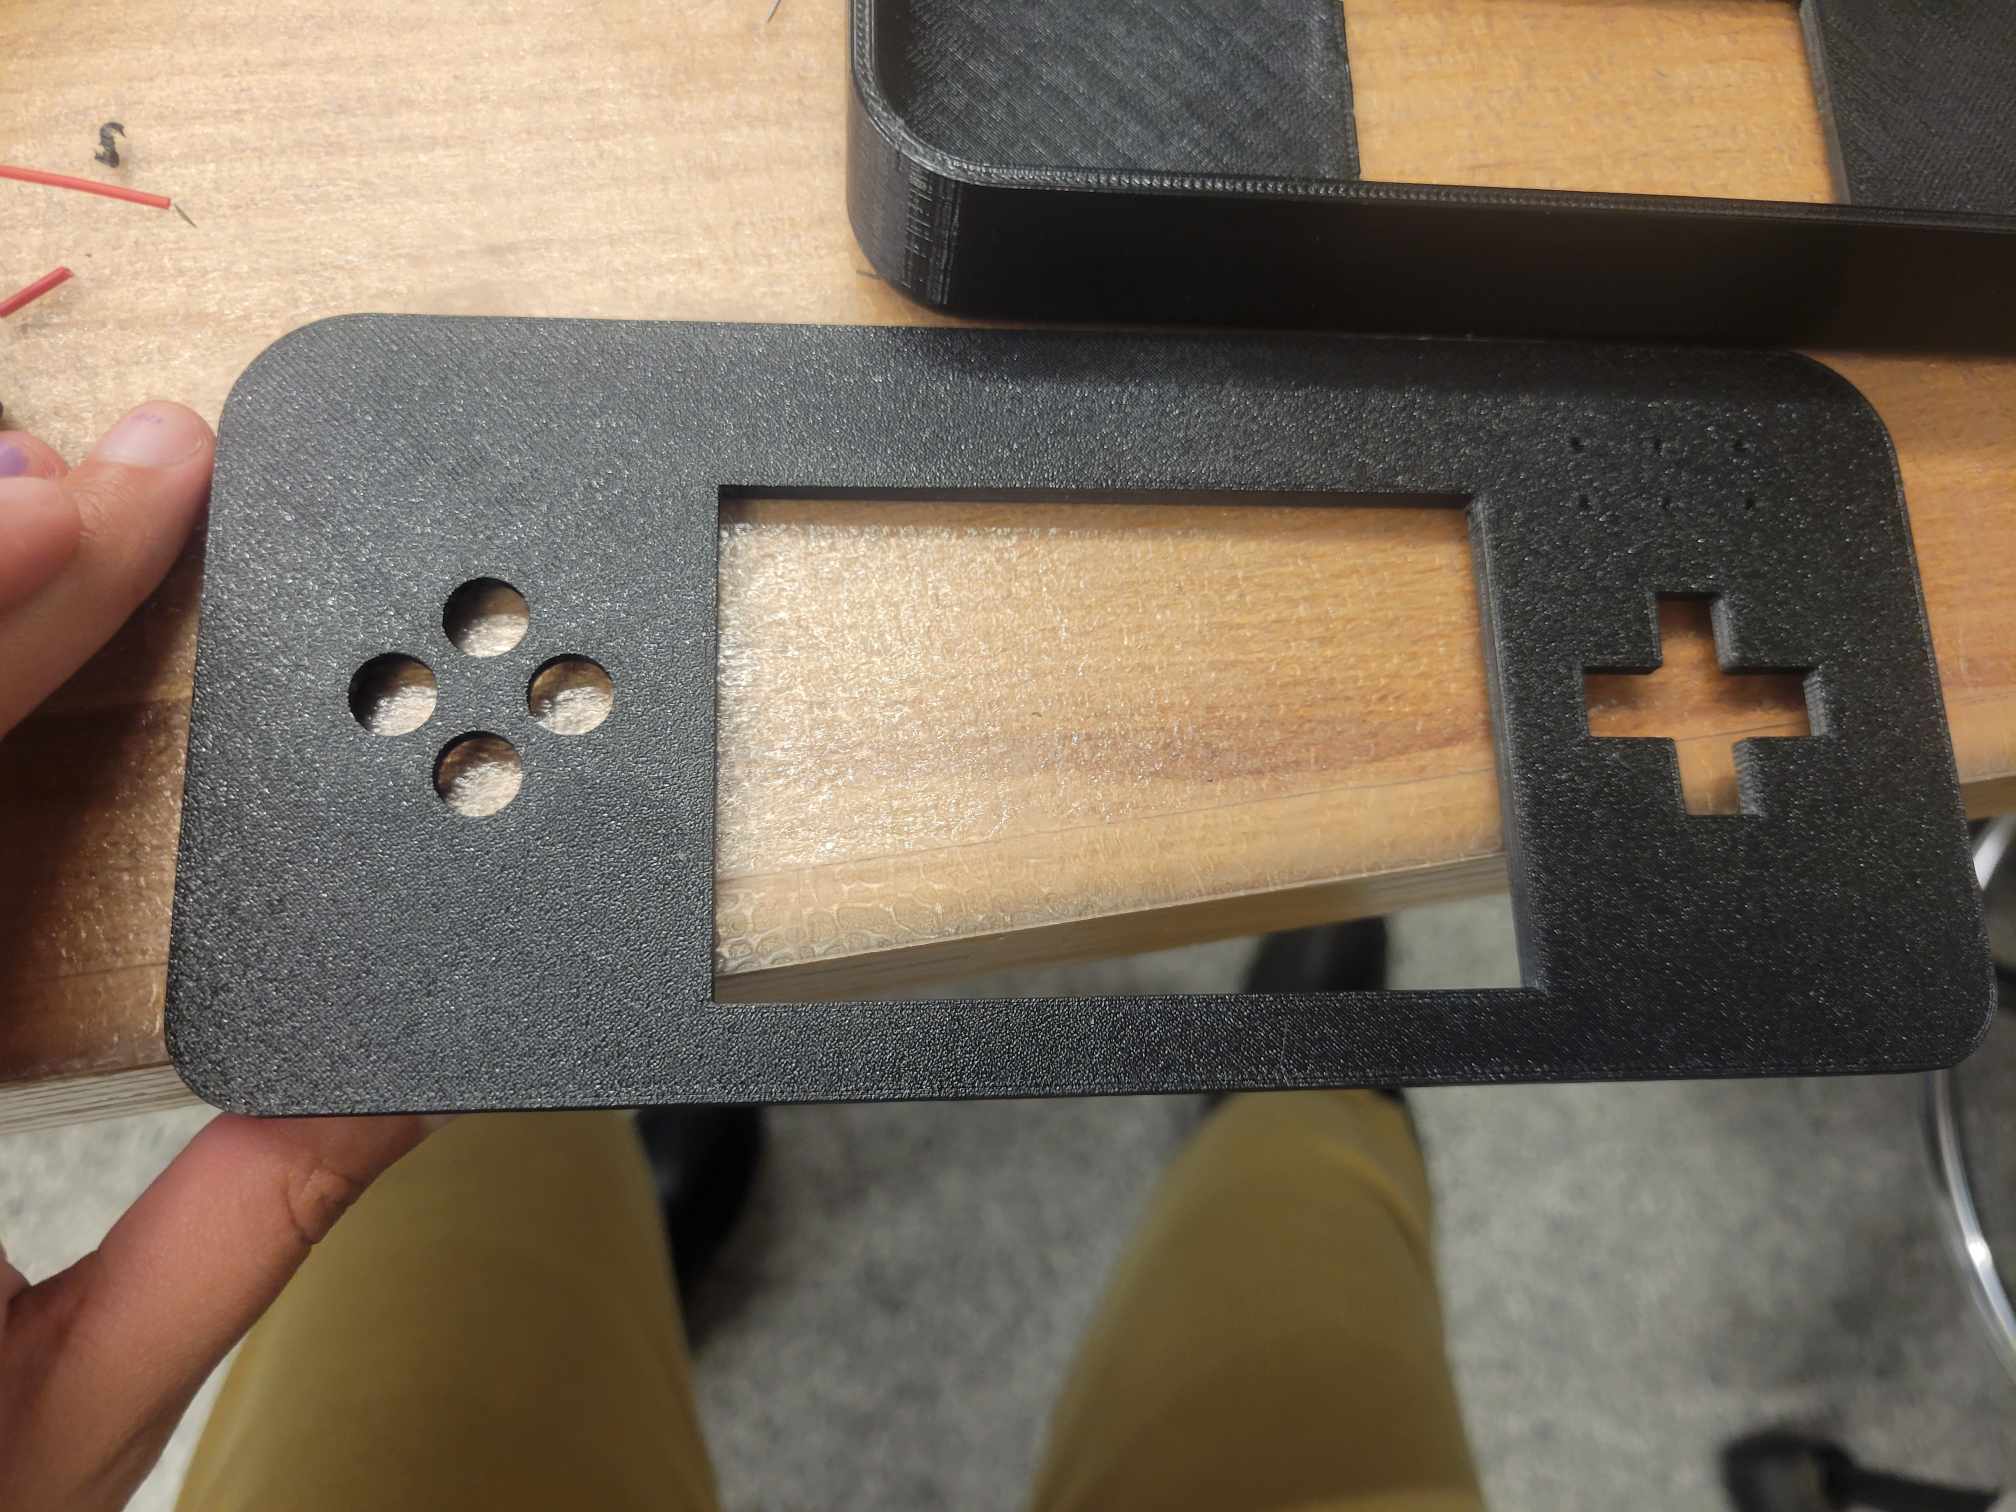
Designing the case
For my case, I really like consoles with buttons on the sides like the switch and DS, rather than under the screen like the Miyoo and GameBoy. So I decided to design my console in this way. It would have arrow key buttons on the left and x, y, a, b buttons on the right. I didn't have time to add the those letters to the right but I think I like the sleek button design with nothing on them better. Here's an image of the cad.
Making the Board
I milled the board using the Bantam machine I've used during the previous weeks, and I soldered everything and used wires to connect all the components. For some reason, probably due to my soldering or maybe my board design wasn't right, some pins in the header on the right hand side are not woking, the ones connecting to GPIO pins 20 and 21, and also pins 16 and 18 are somehow connected. I didn't have time to fix this, since when I milled and solder another board, the Pico wouldn't even connect, so I decided to stick with my first board and change some of my connections. This is what everything looked like at the end. I ended up not implementing the battery power nor the speaker.
Trying the emulator
So I tried using the emulator from the tutorial but I couldn't get it to work for various reasons. First, I couldn't get the SD card component to work, even when I ran the example code for the pico. I'm not sure if it was something wrong with my pins or my SD card. Also the code for the emulator used a different display driver than my display, and I couldn't really understand how it worked. I spent many hours trying to get it to work, but I think there were many bugs and mistakes everywhere, and I didn't give myself enough time to deal with them. But, I had to get something working, so I decided to just code my own arcade games, starting with snake.
Coding my own game
First, I needed to find a good library to help me with my display, since I didn't really understand the examples that the display company gave me. I found this great library that works with a bunch of different drivers, called TFT_eSPI. It was very easy to use. Before doing anything, you first have to edit User_Setup.h to fit your setup, as in has the correct driver and correct pins. Here's my setup here. Once that works, it was pretty easy to display things on the screen since the library has a lot of useful functions. Then, I began by making a menu, so that I can switch between multiple games. I then coded up snake from scratch and integrated it with the menu. Here's a video of me playing it. Also, here are my coding files: main, snake, fonts.
Printing the case
I 3D printed the case using a Prussa, on prototyping mode and with black PLA. It took 3 hours, and it looked pretty nice. However, the holders I had designed to hold the PCBs didn't have the right measurements, so I took them off with a plier.
Putting everything together
I didn't give myself enough time to do things, so when it came to putting everything together, I just hot glued everything. Here's a picture of what it looked like from the top.
Although I'm proud of my project, I know if I had given myself more time I could've done more. Something I learned is that I need to plan ahead more, plan for mistakes, and also plan for rests, since working all day will make you want to do nothing the next day. Overall, I'm happy with my outcome and how far I've come in this class. Before this class, I had never made a PCB, never used Fusion or CAD, never 3D printed, and never coded a microcontroller. I did all of these things by myself just in this project, and I'm proud of myself :)!
Fusion 360 Files
Connecting board Buttons board Speaker board Case and buttons