Laser cutting
My idea: a cute purse
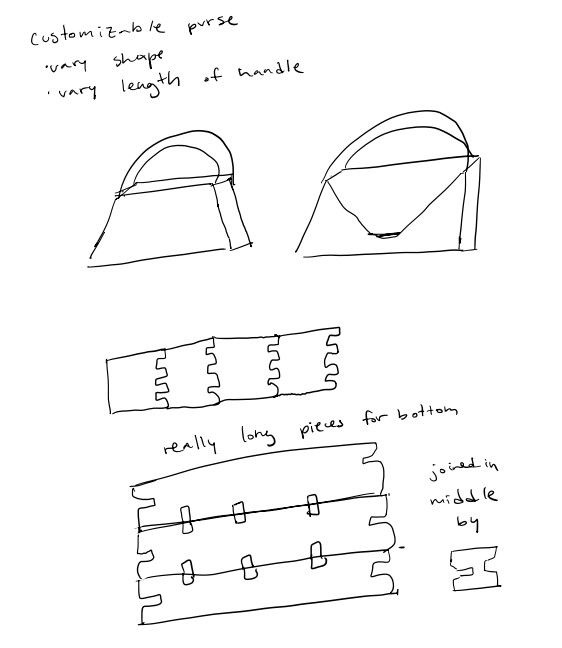
So after thinking of many different ideas, I thought about how a lot of people are making really cute and unique purse recently, so I decided on making a purse! Here are my initial sketches, and the last one is the one I decided to go with. I decided to use the 'living hinges' we saw in lecture in order to allow for the bag to open and close, and also look less rigid.
Learning CAD
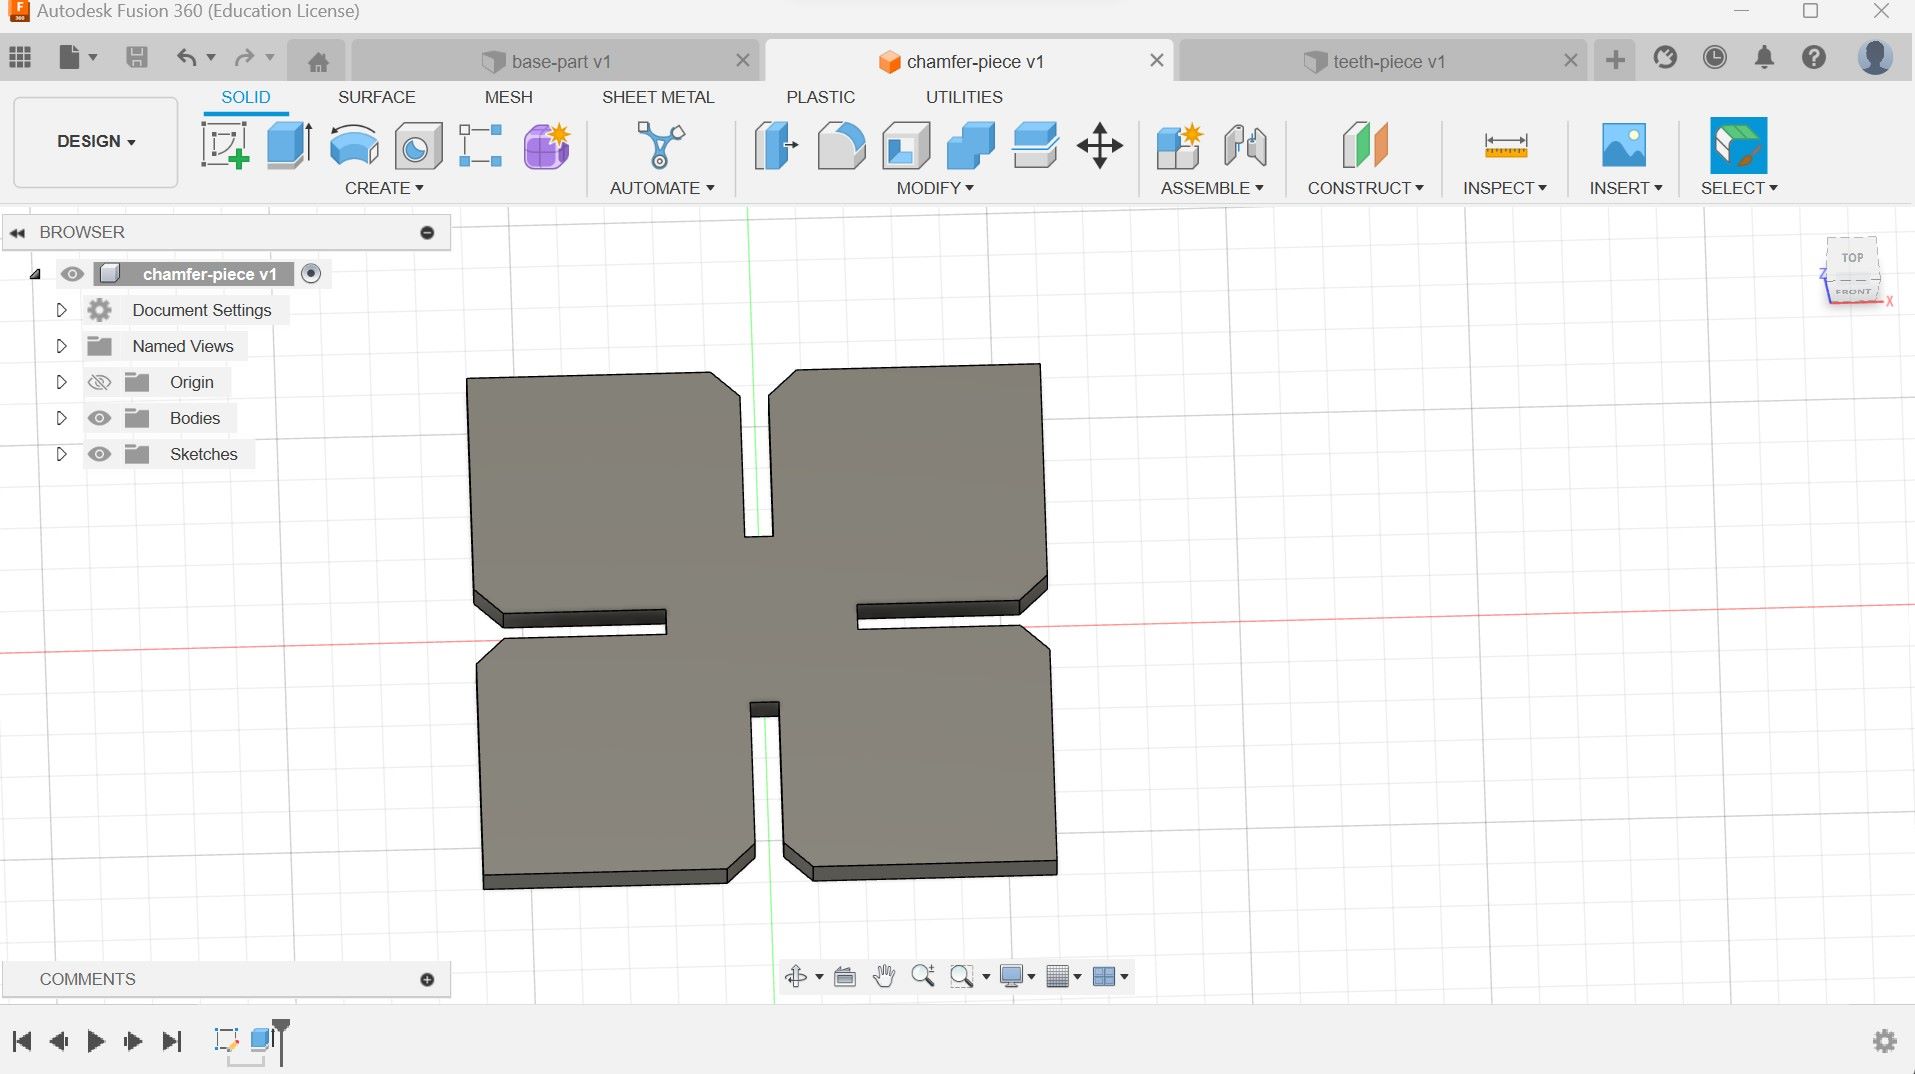
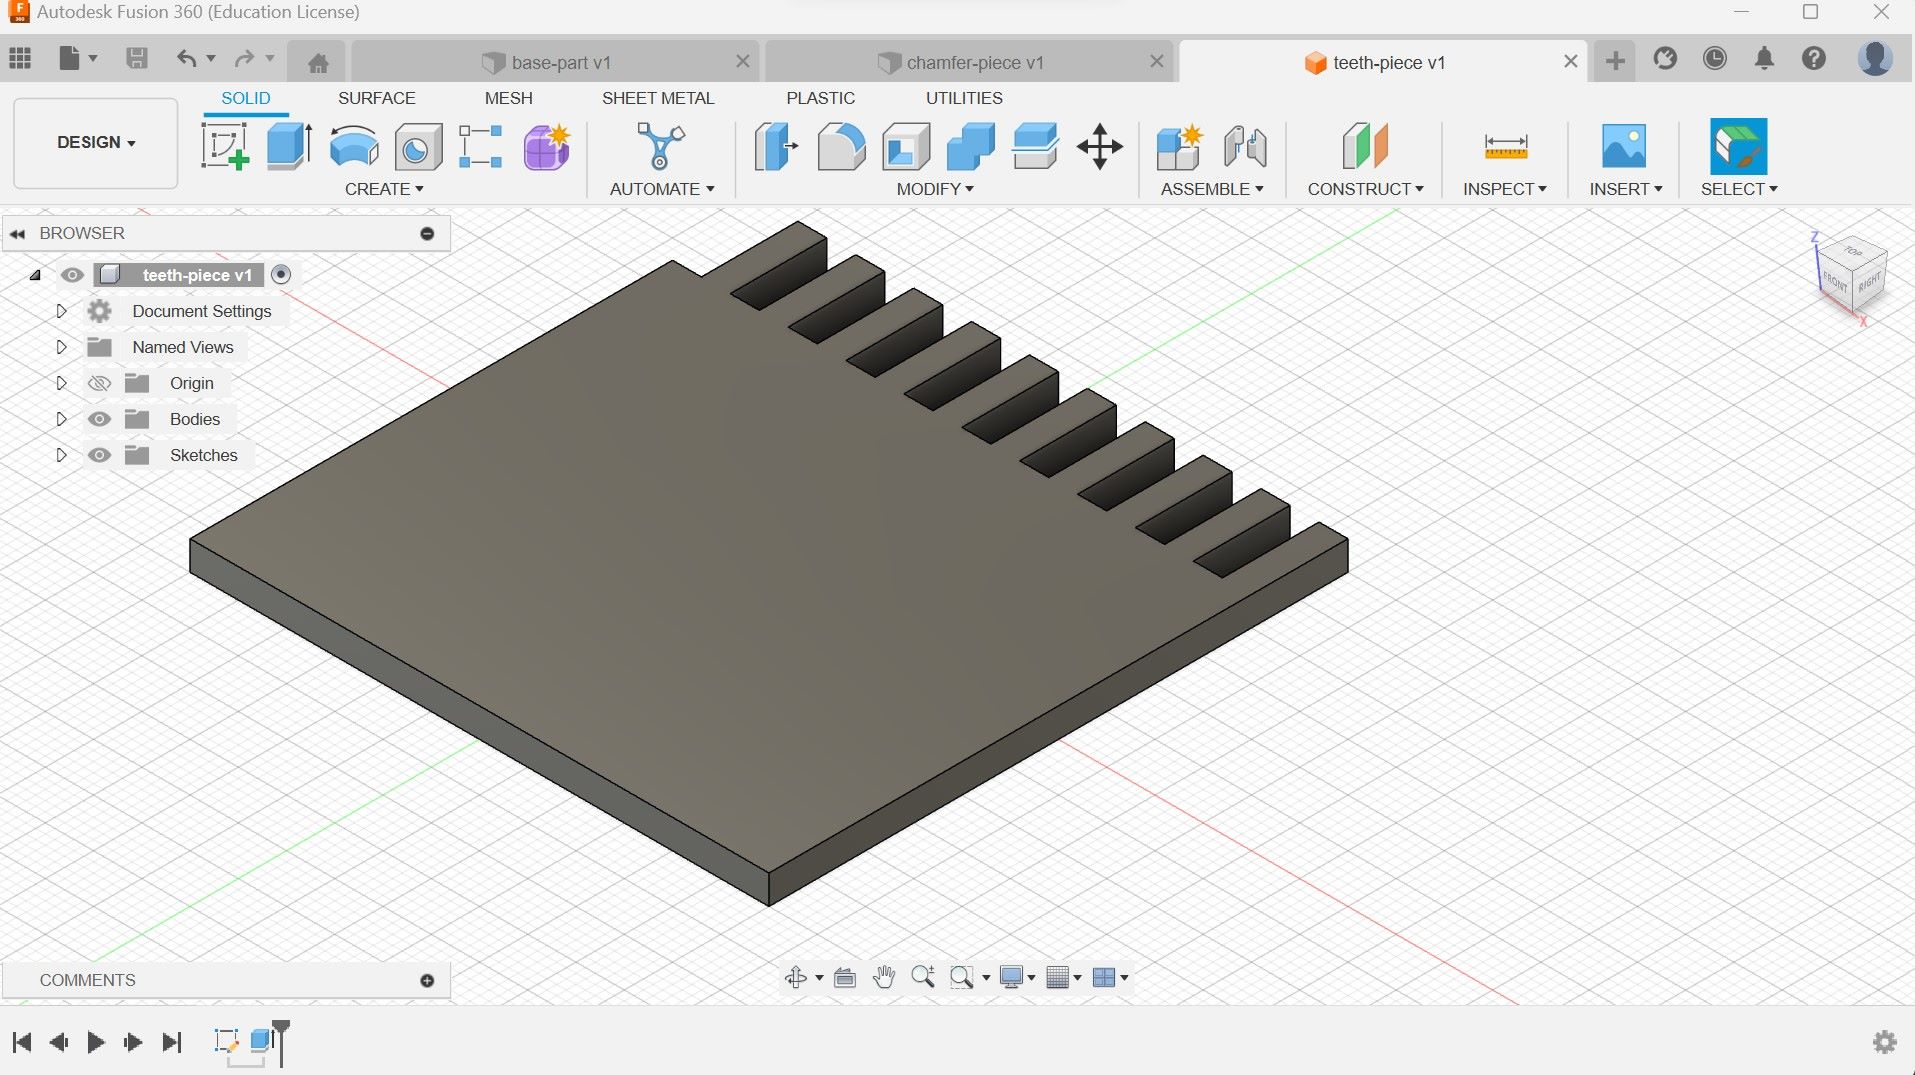
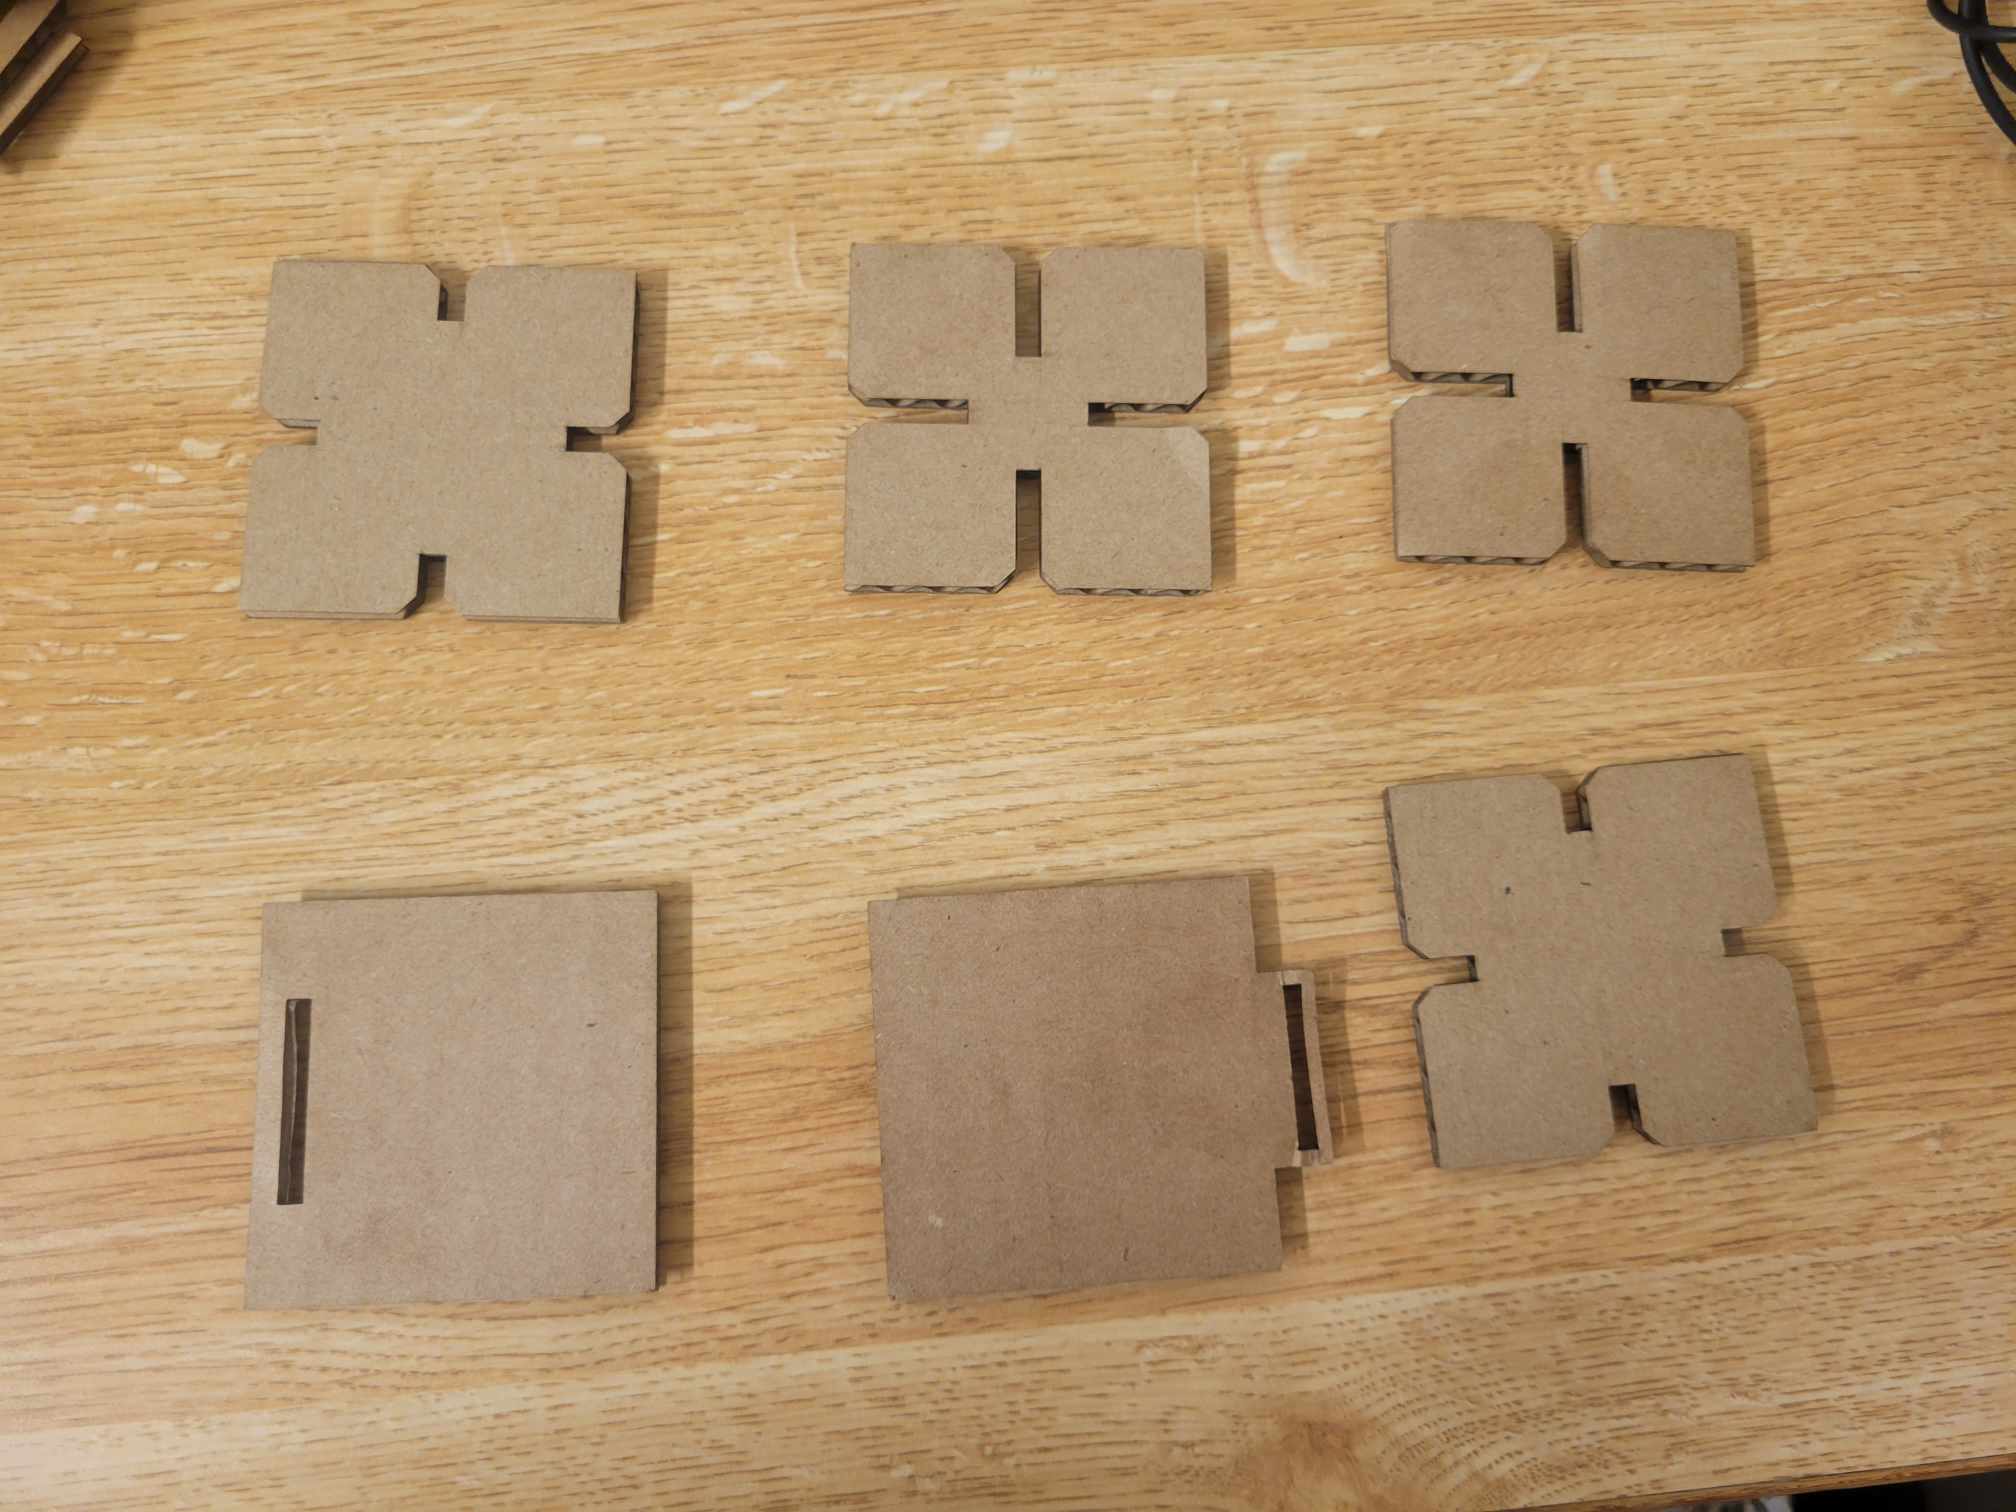
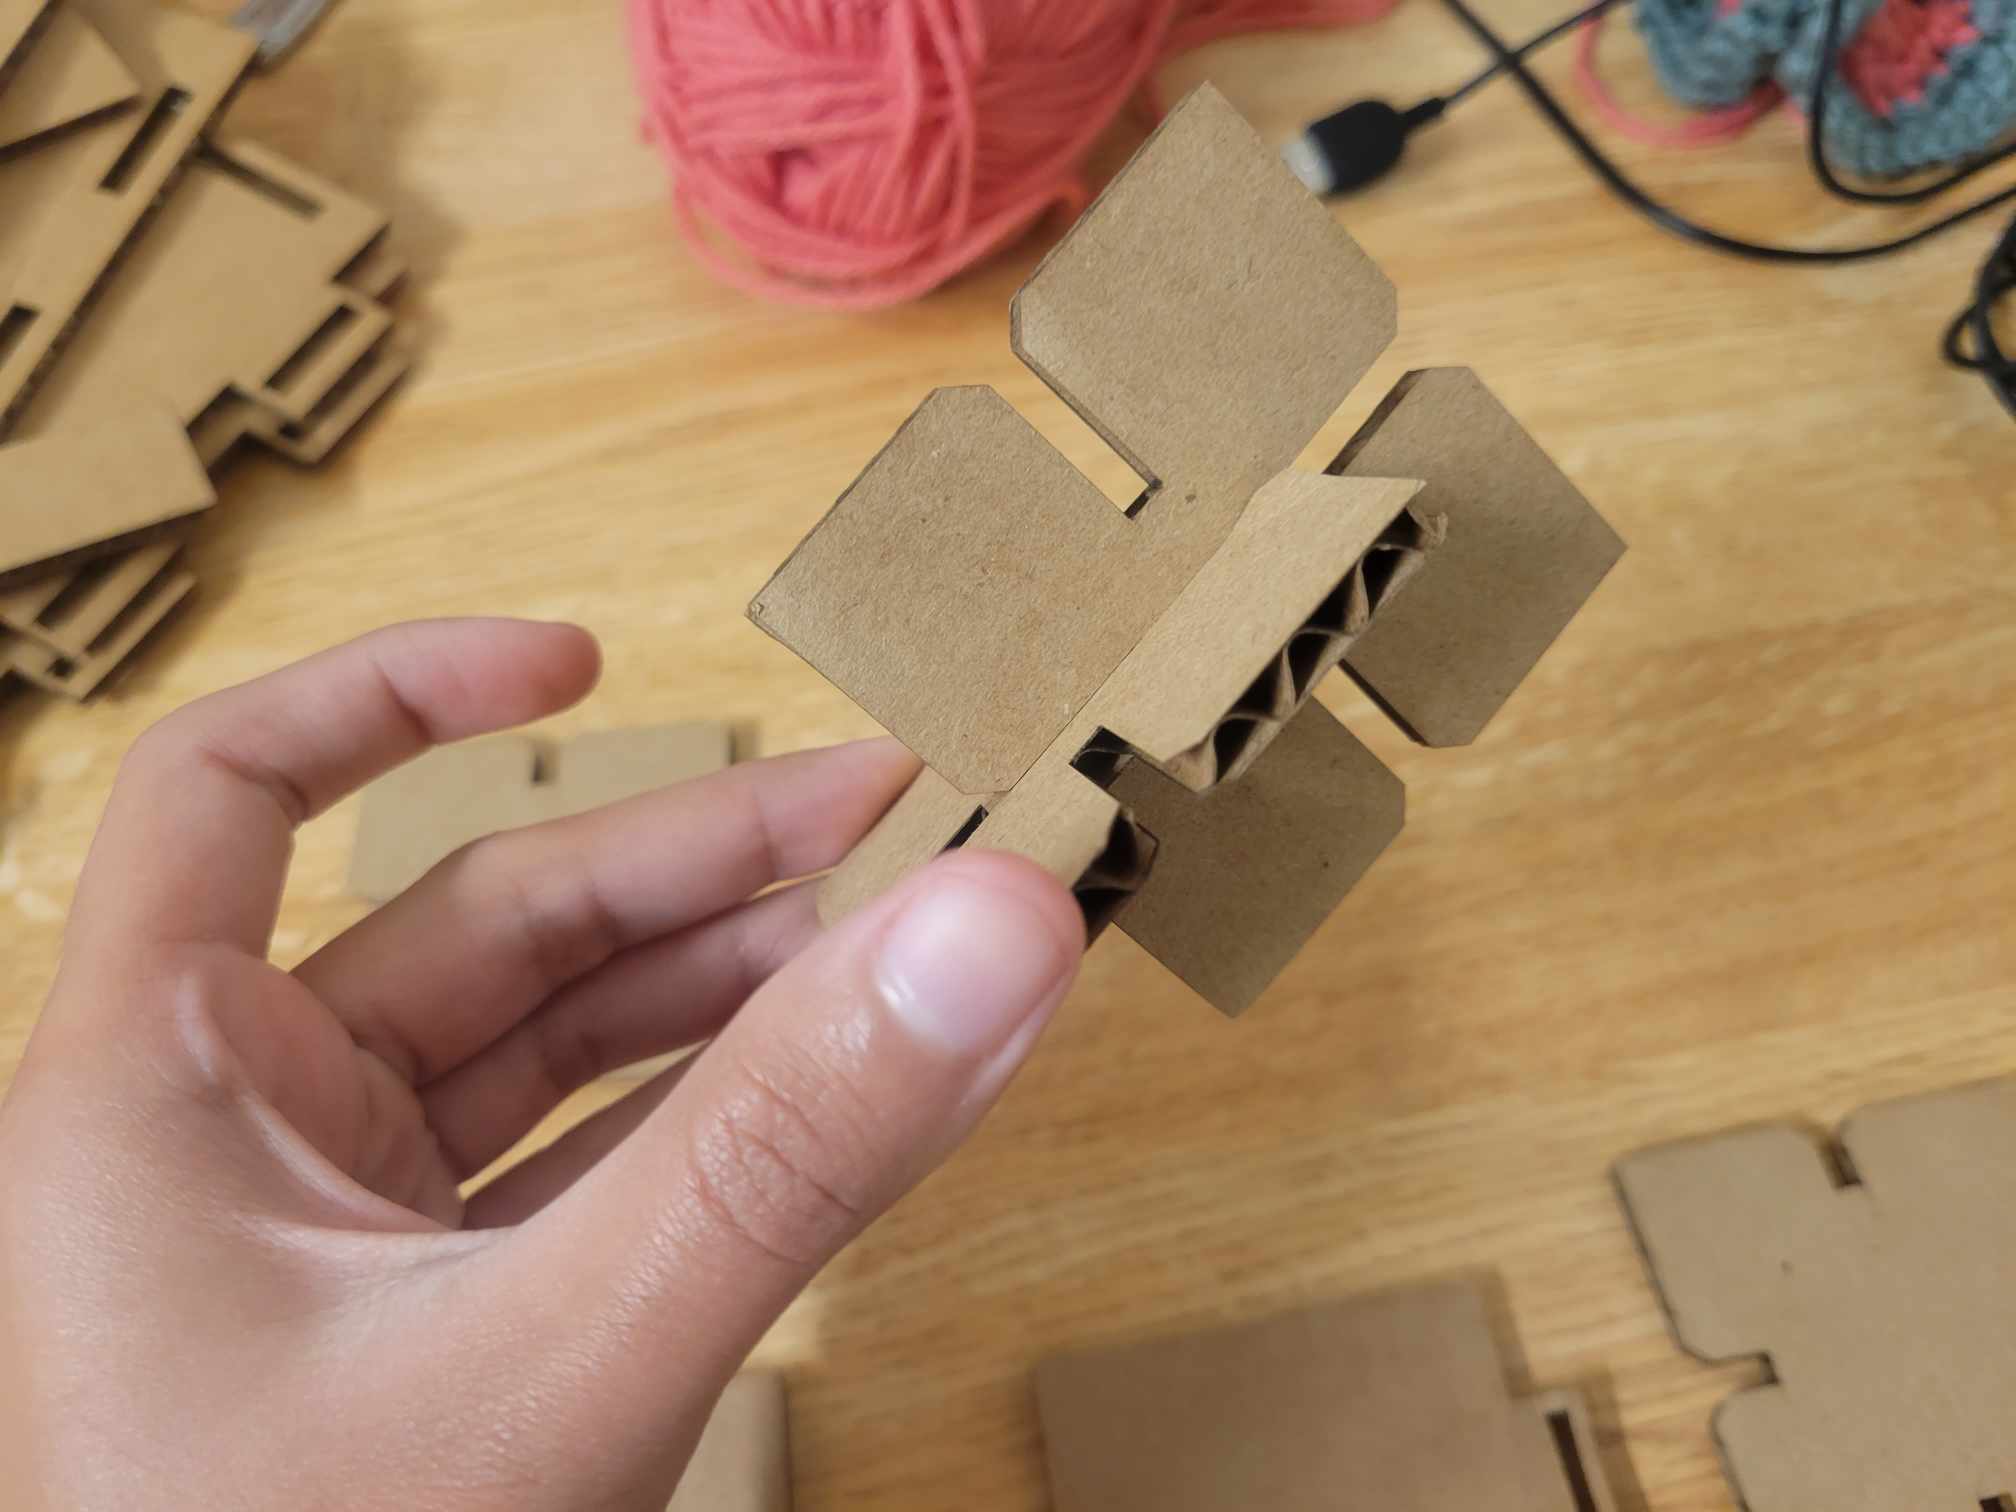
So I've never done any type of CAD before, so this assignment started out with me struggling with Autodesk Fusion. I started by making these three joint pieces, so that I can go the lab and test out laser cutting. I struggled with making the constraints, but I ended up figuring it out for the most part. It took longer than I thought.
Group assignment
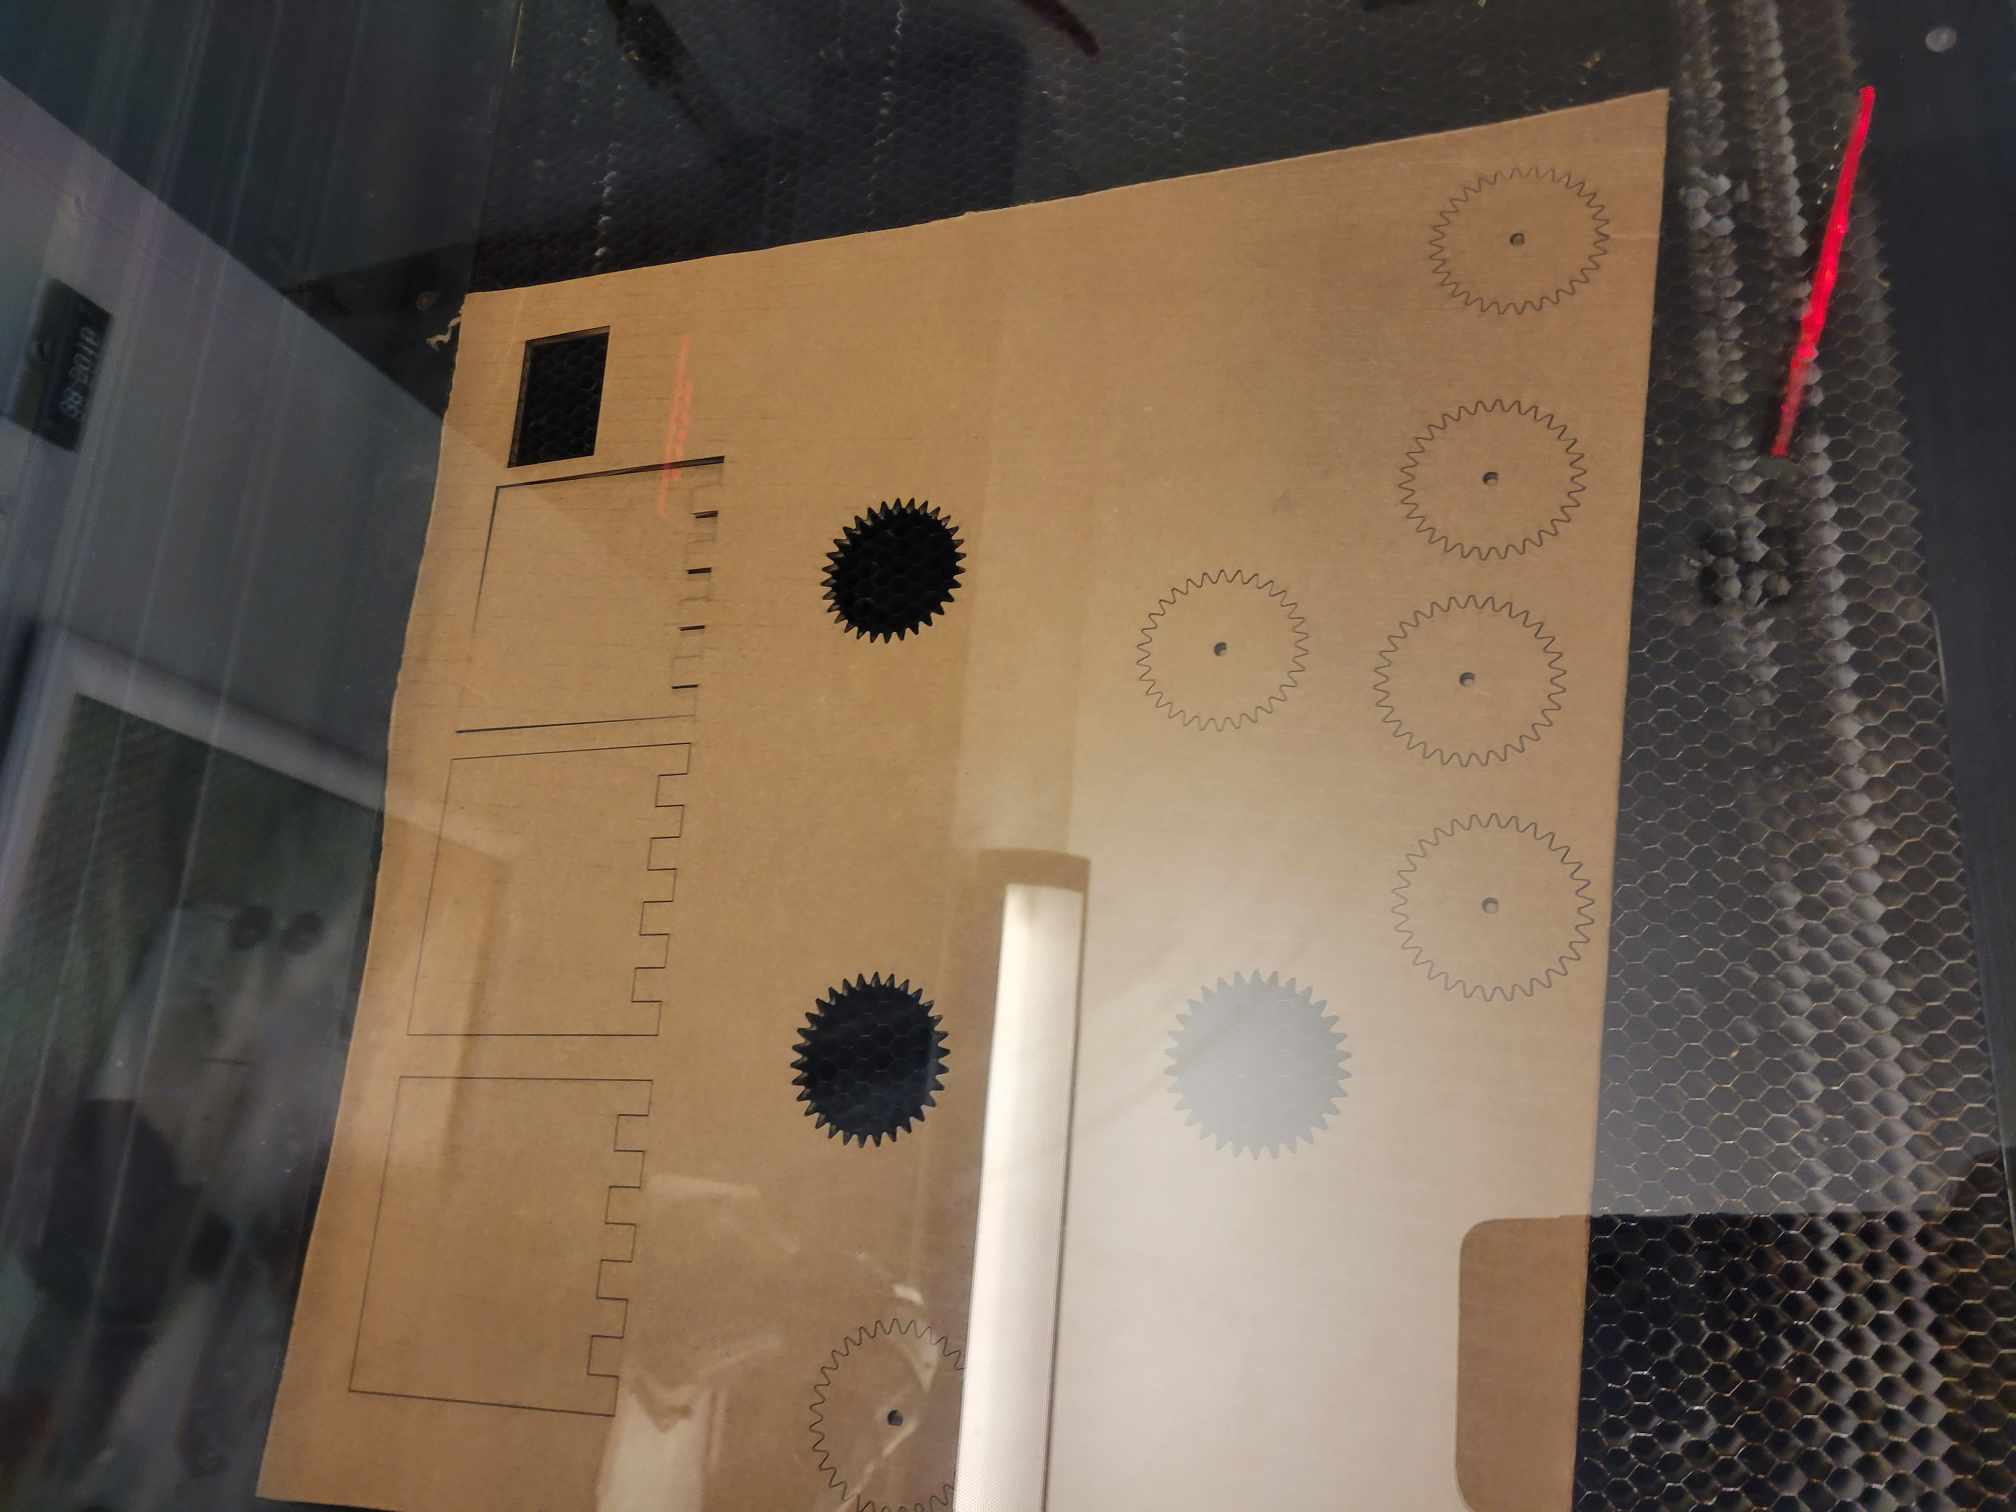
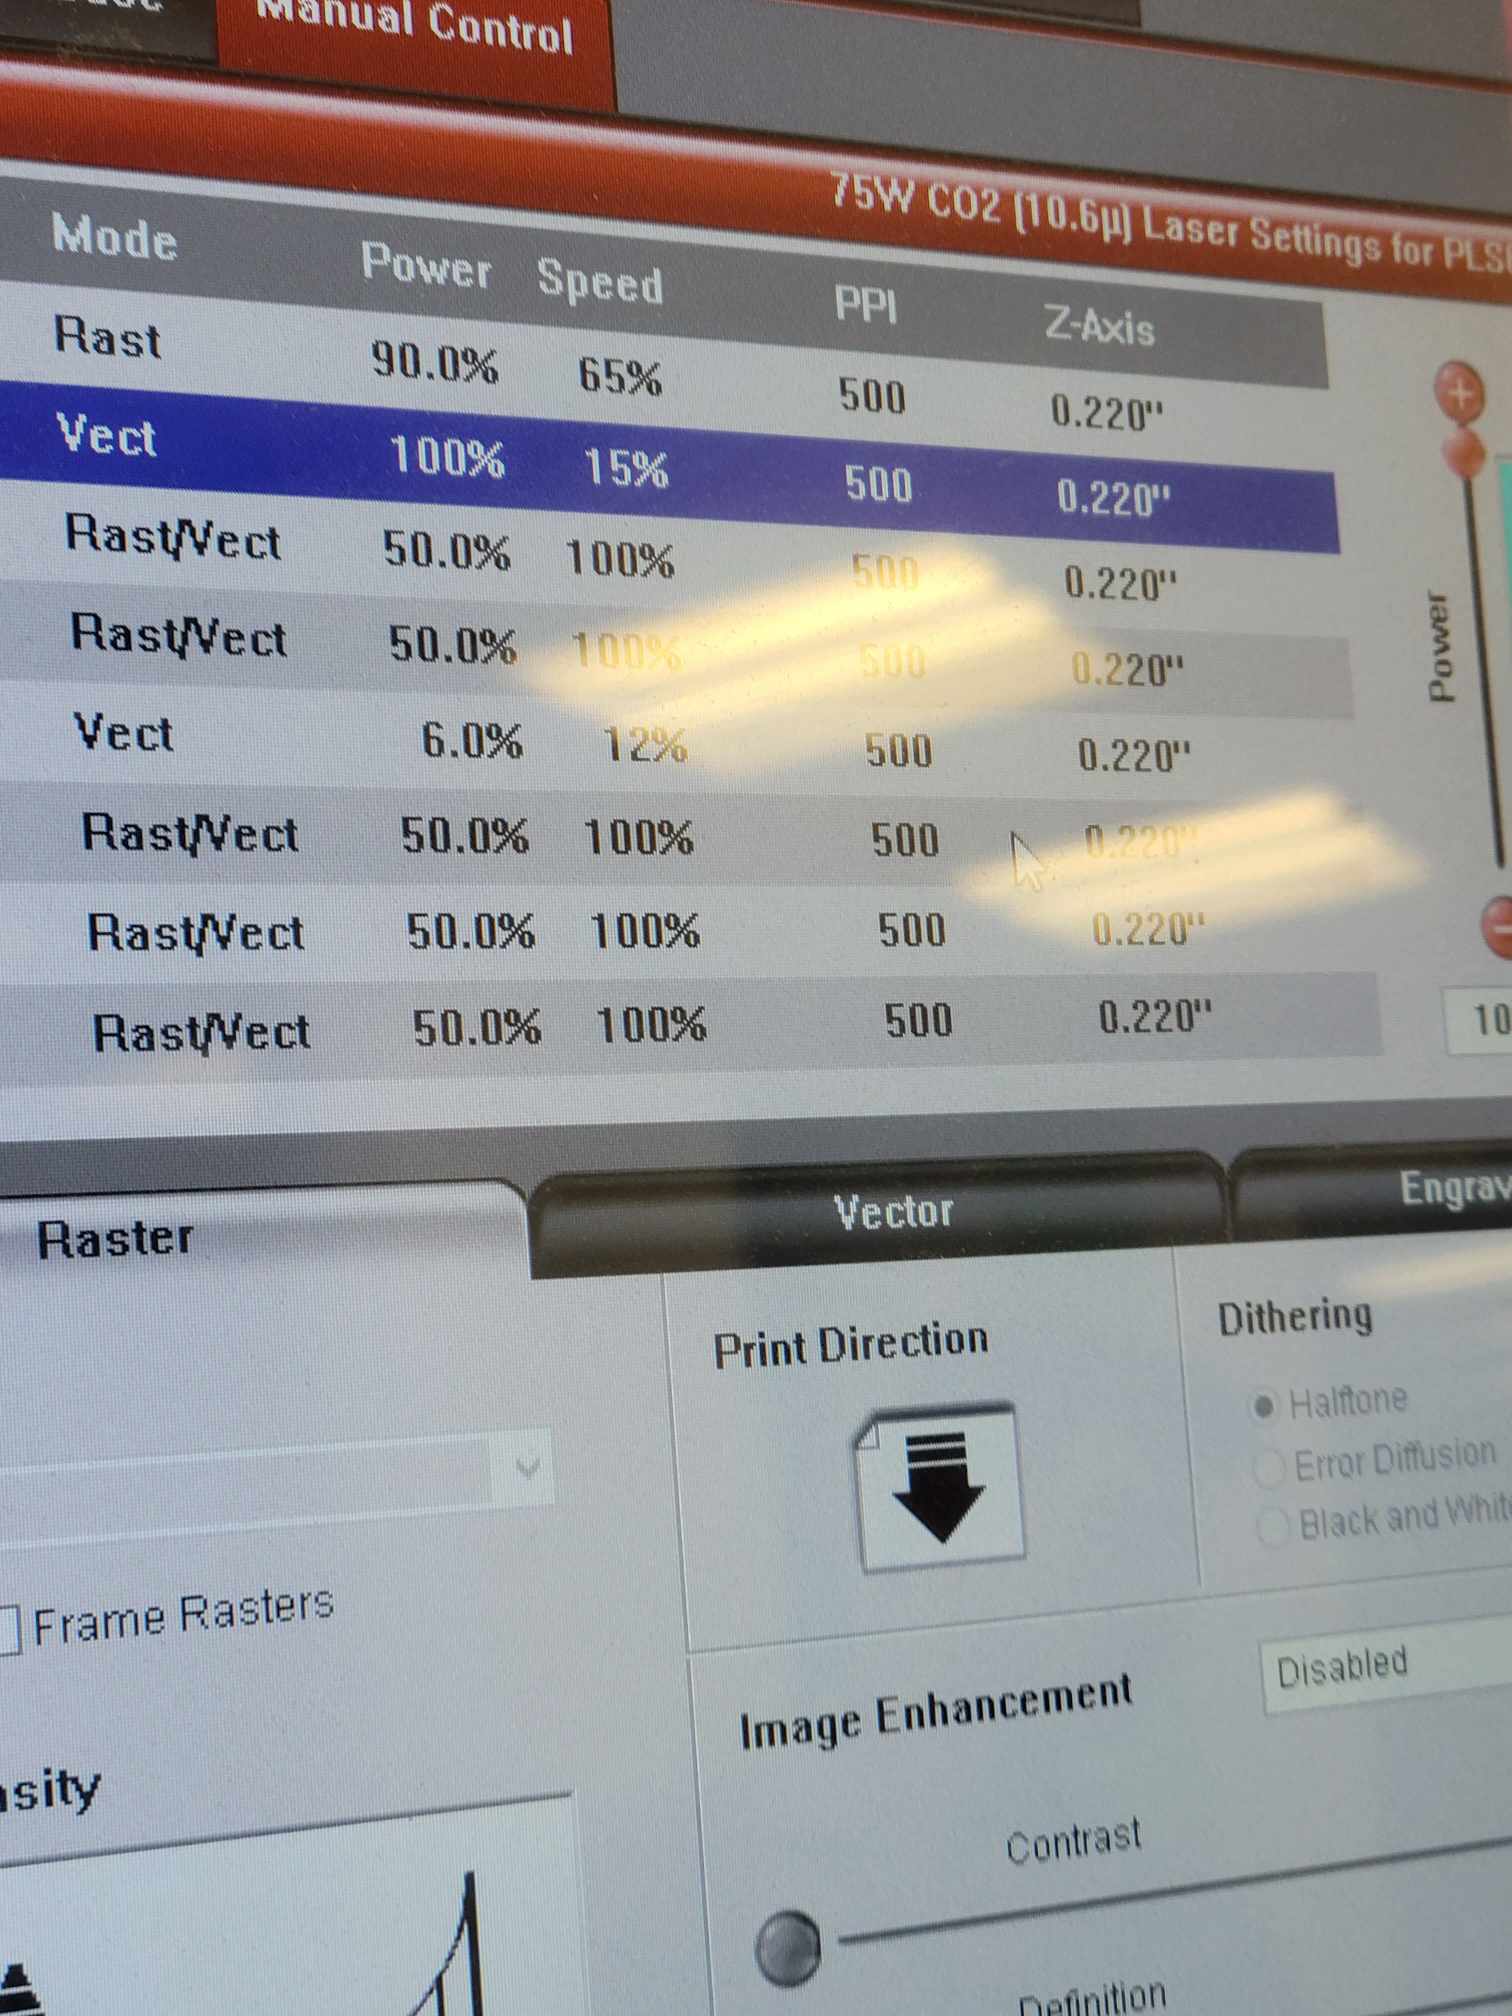
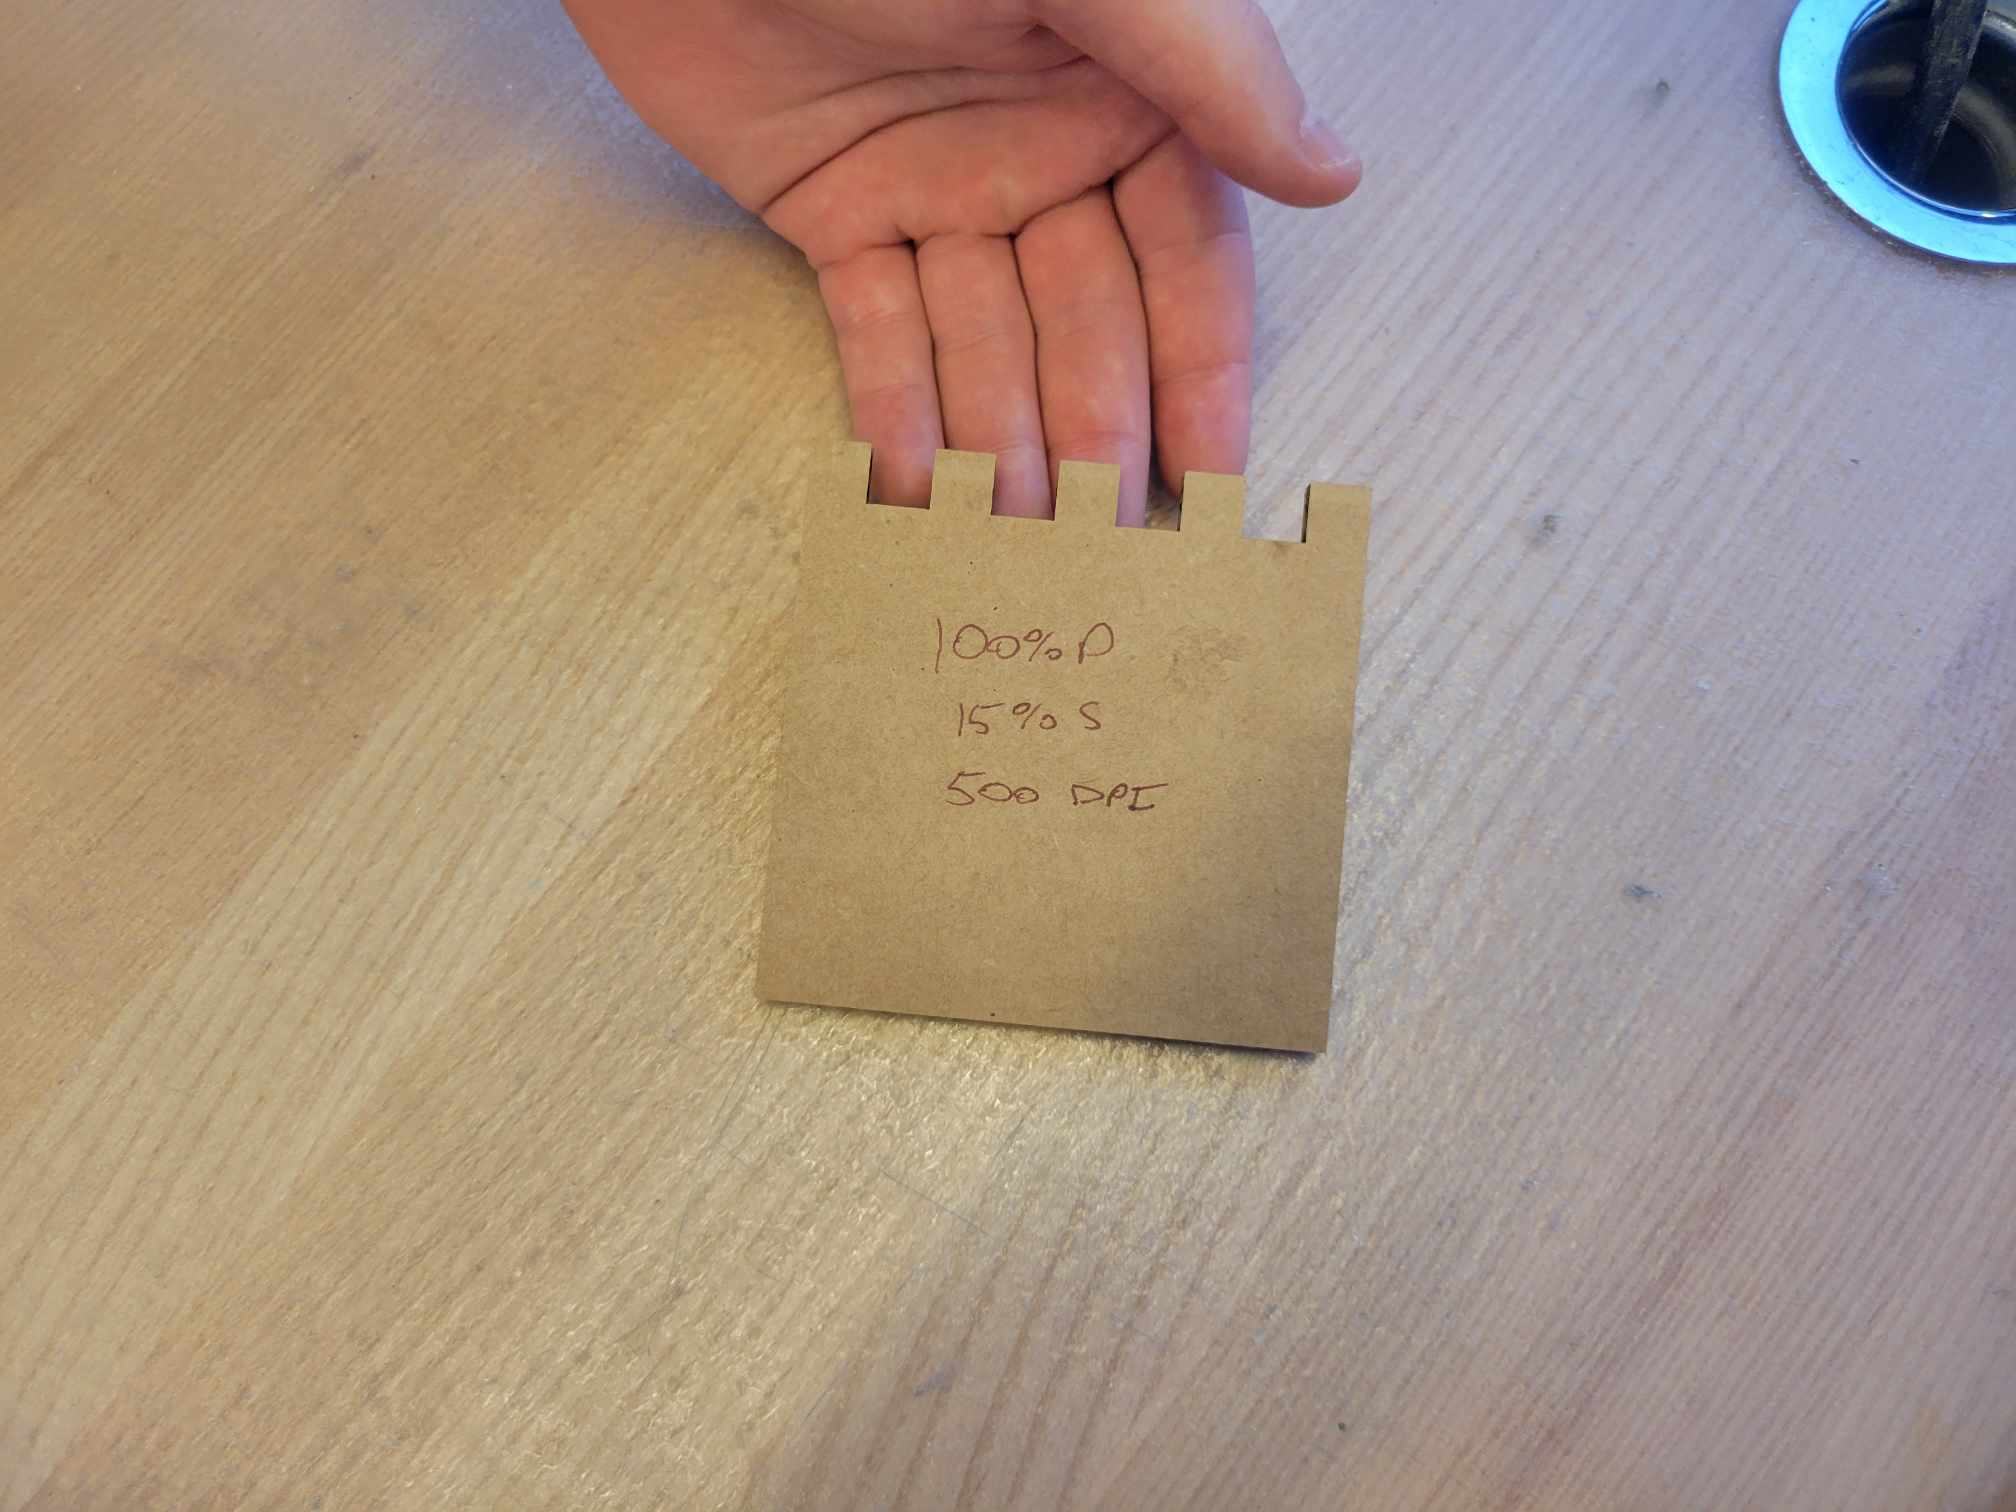
For the group assignment, we tested out a few speeds and found out 15% was a good speed that cut all the way through. We found the kerf to be about 0.5 mm. Using this, I changed my parameters in my CAD to account for the kerf and I cut out some of what I had made.
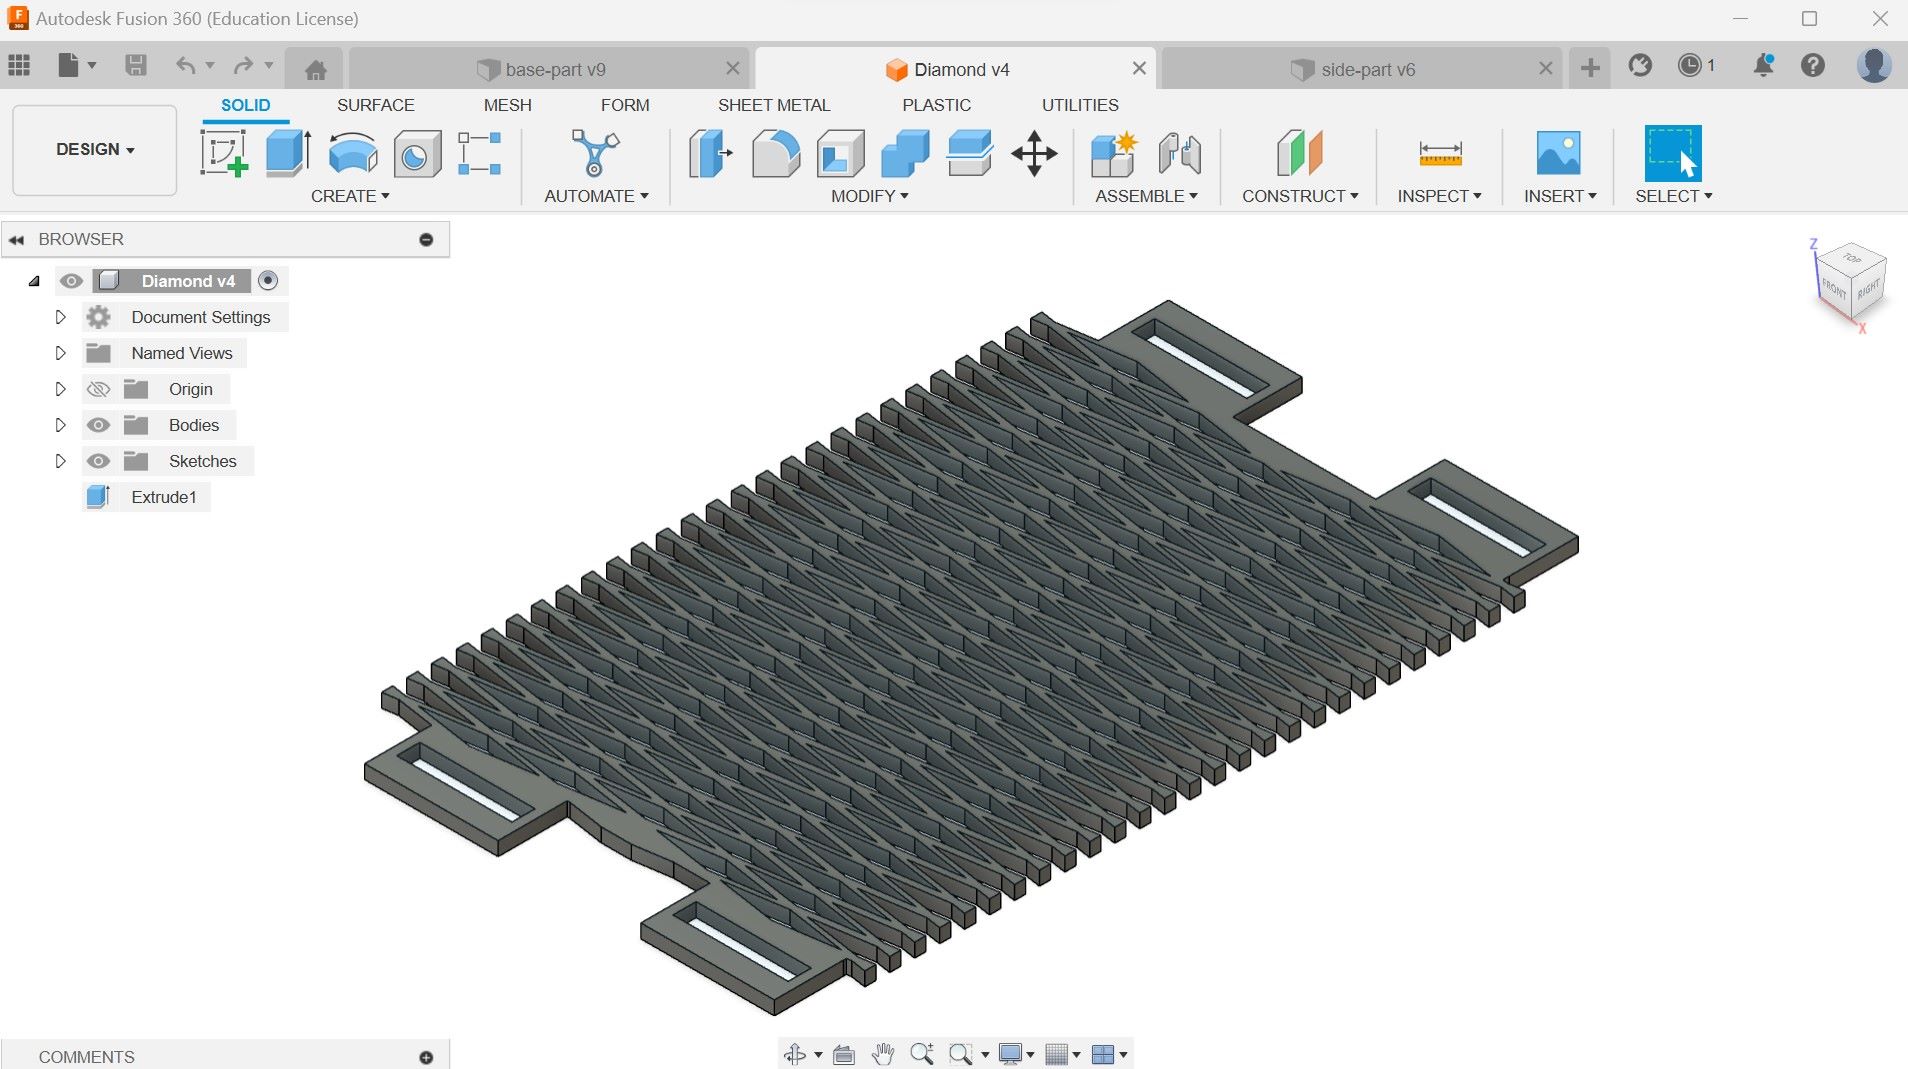
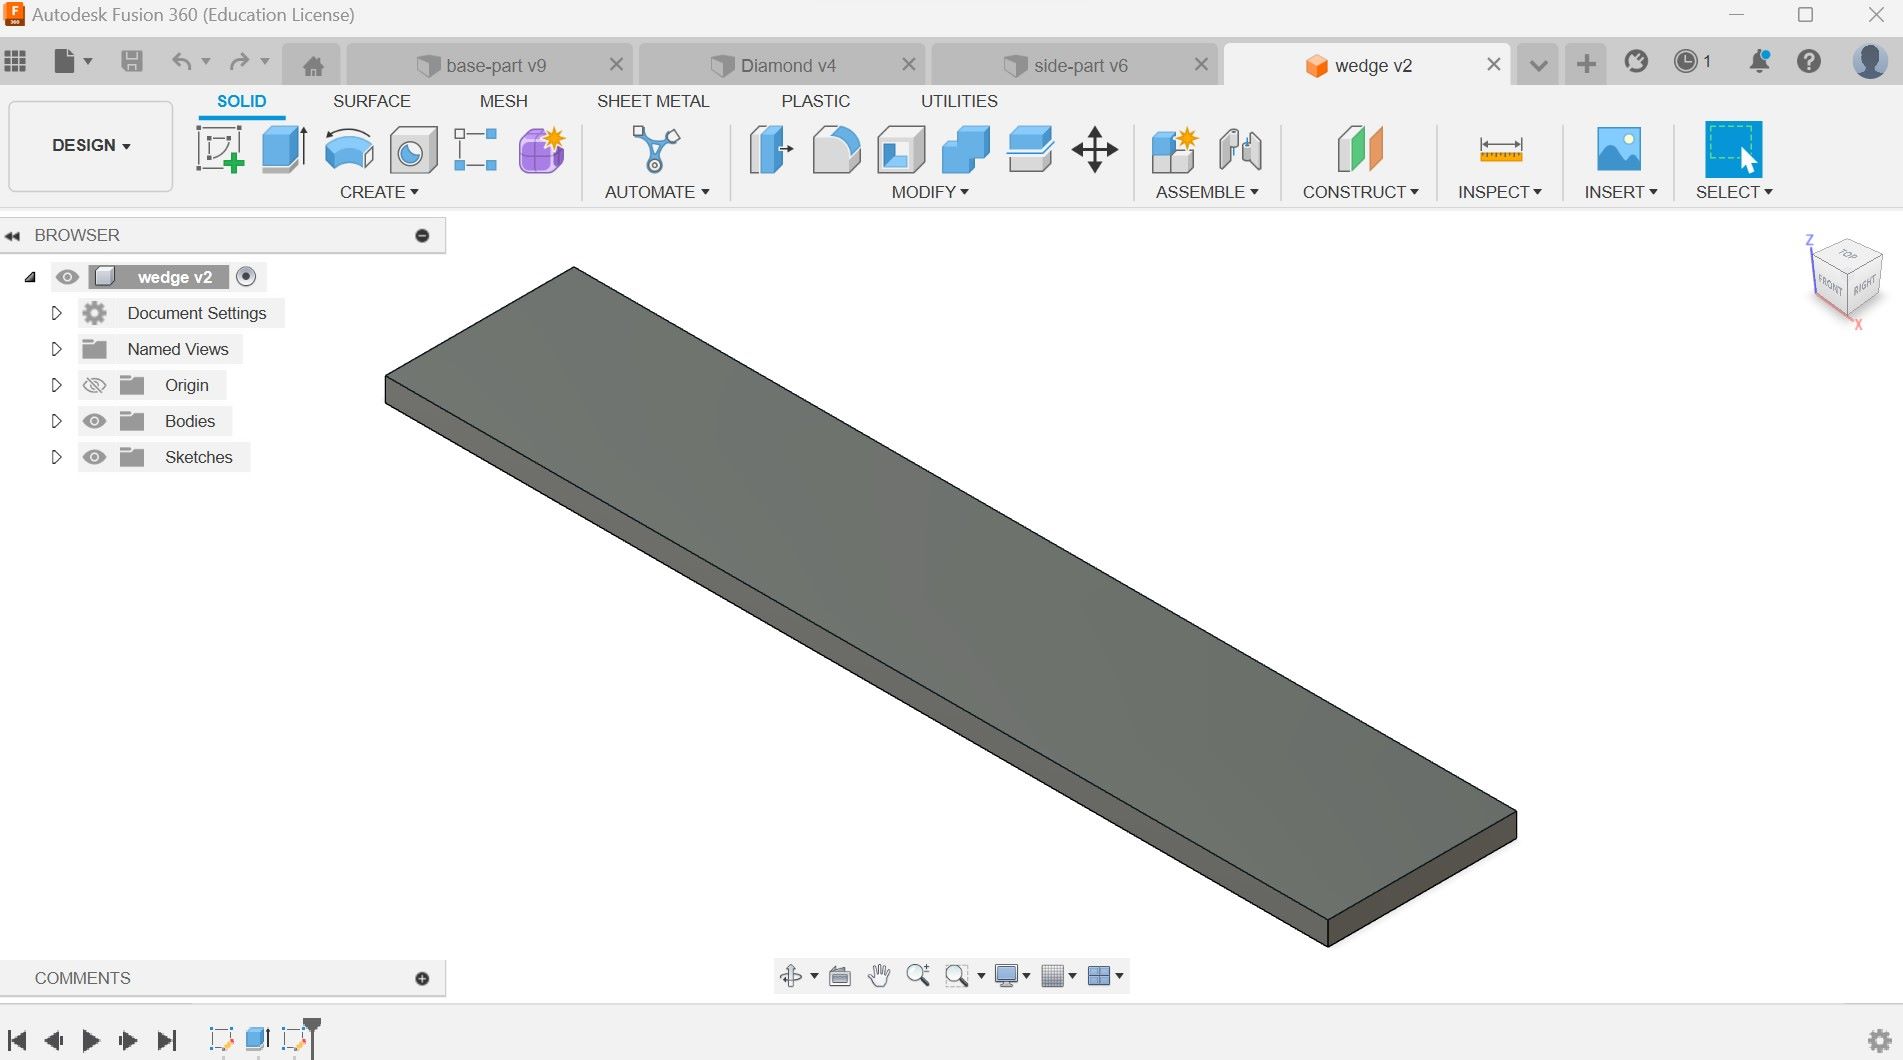
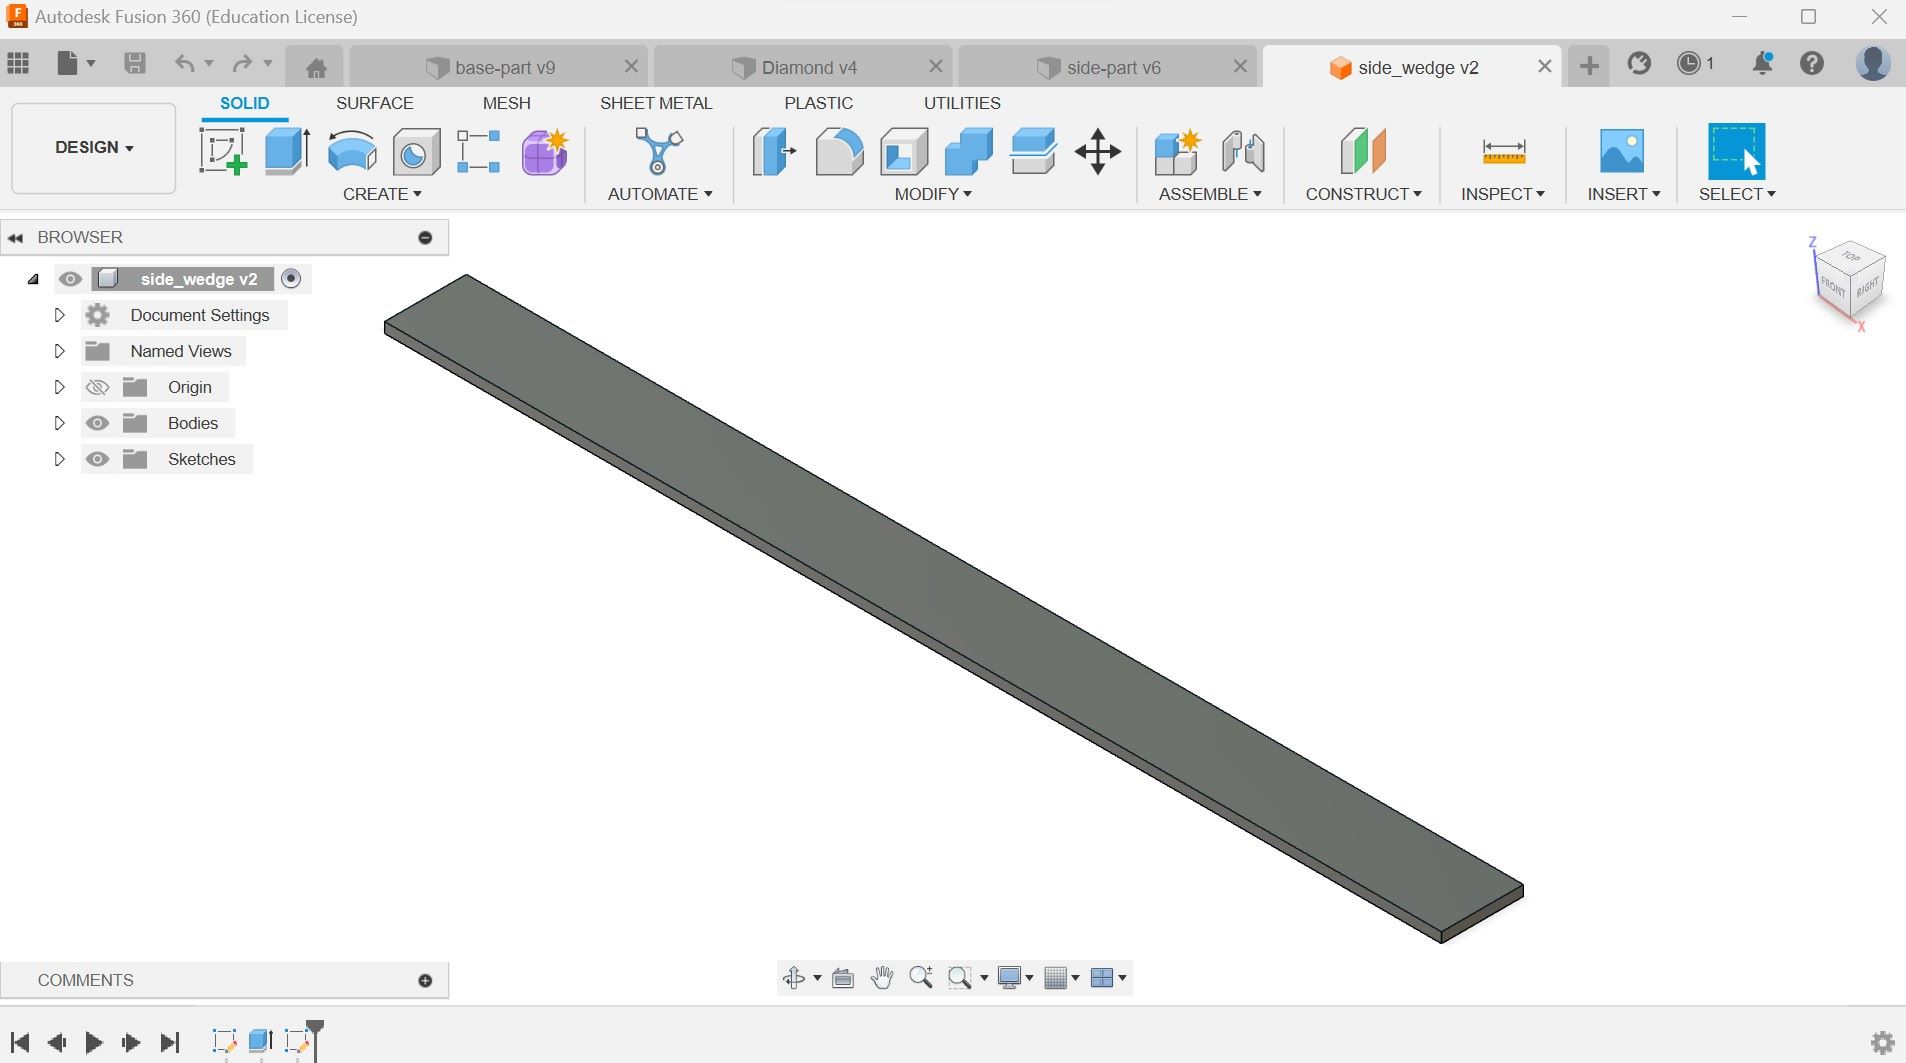
Making the purse on Fusion
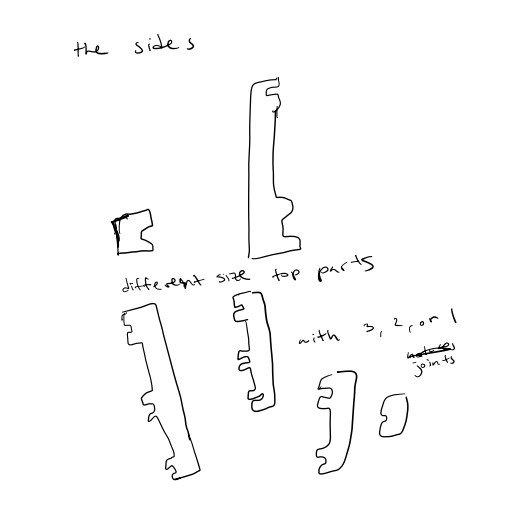
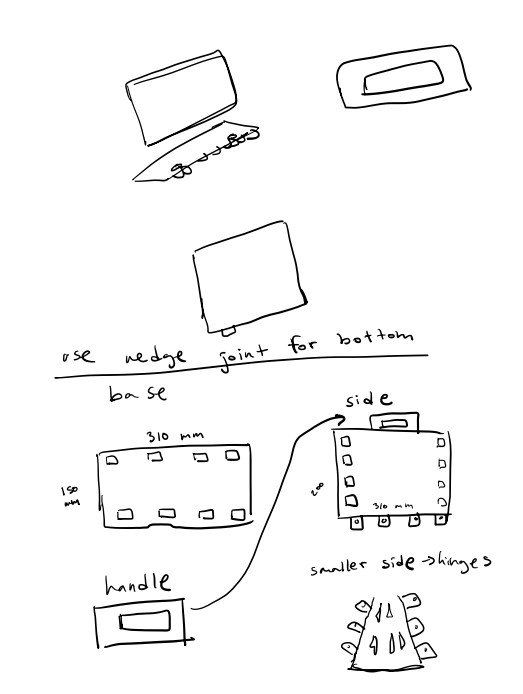
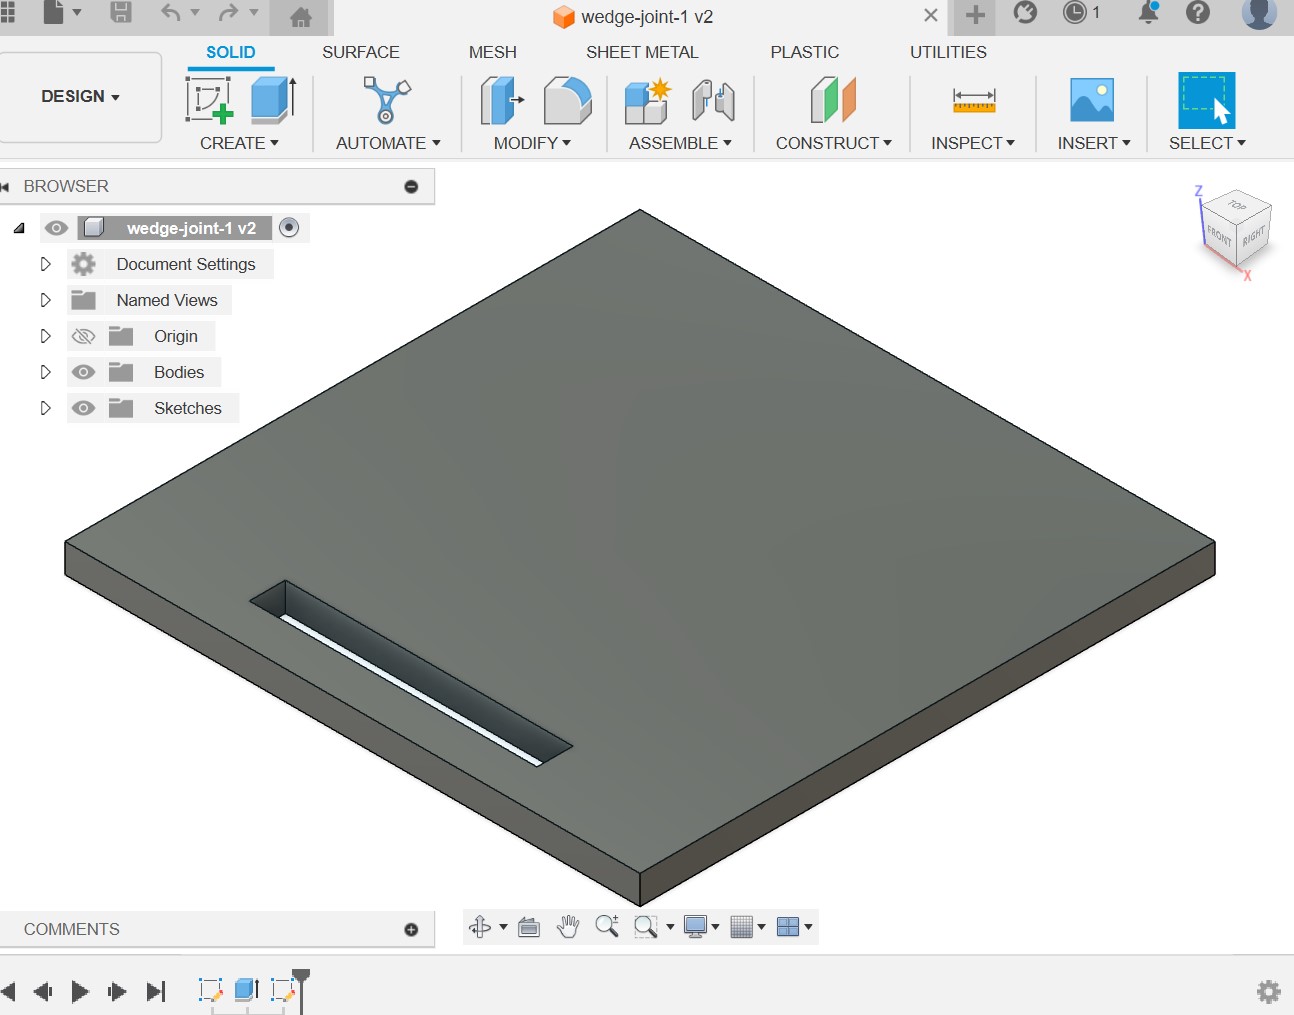
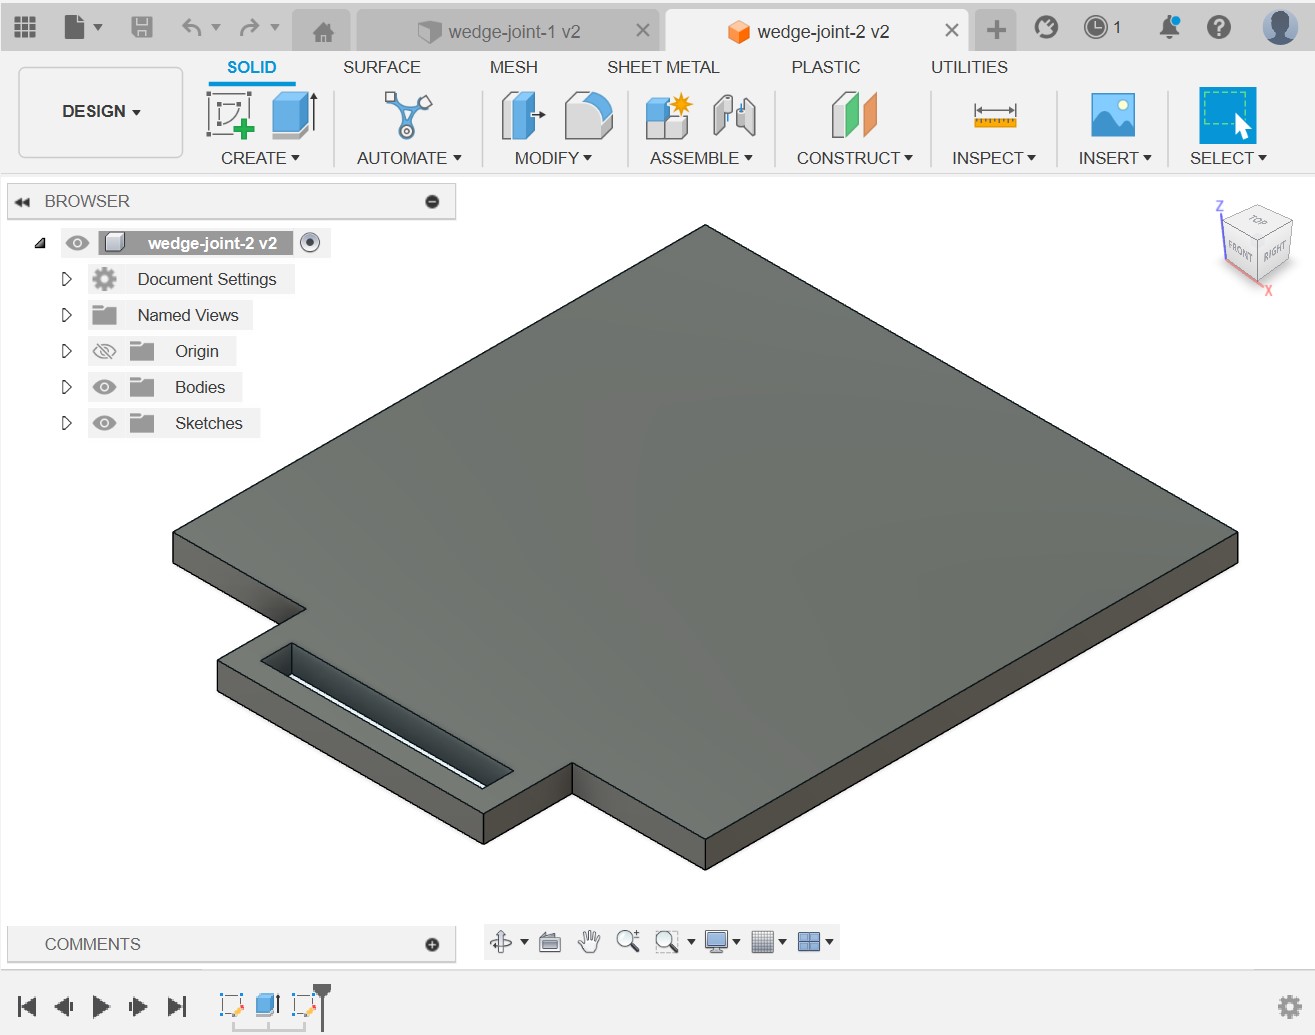
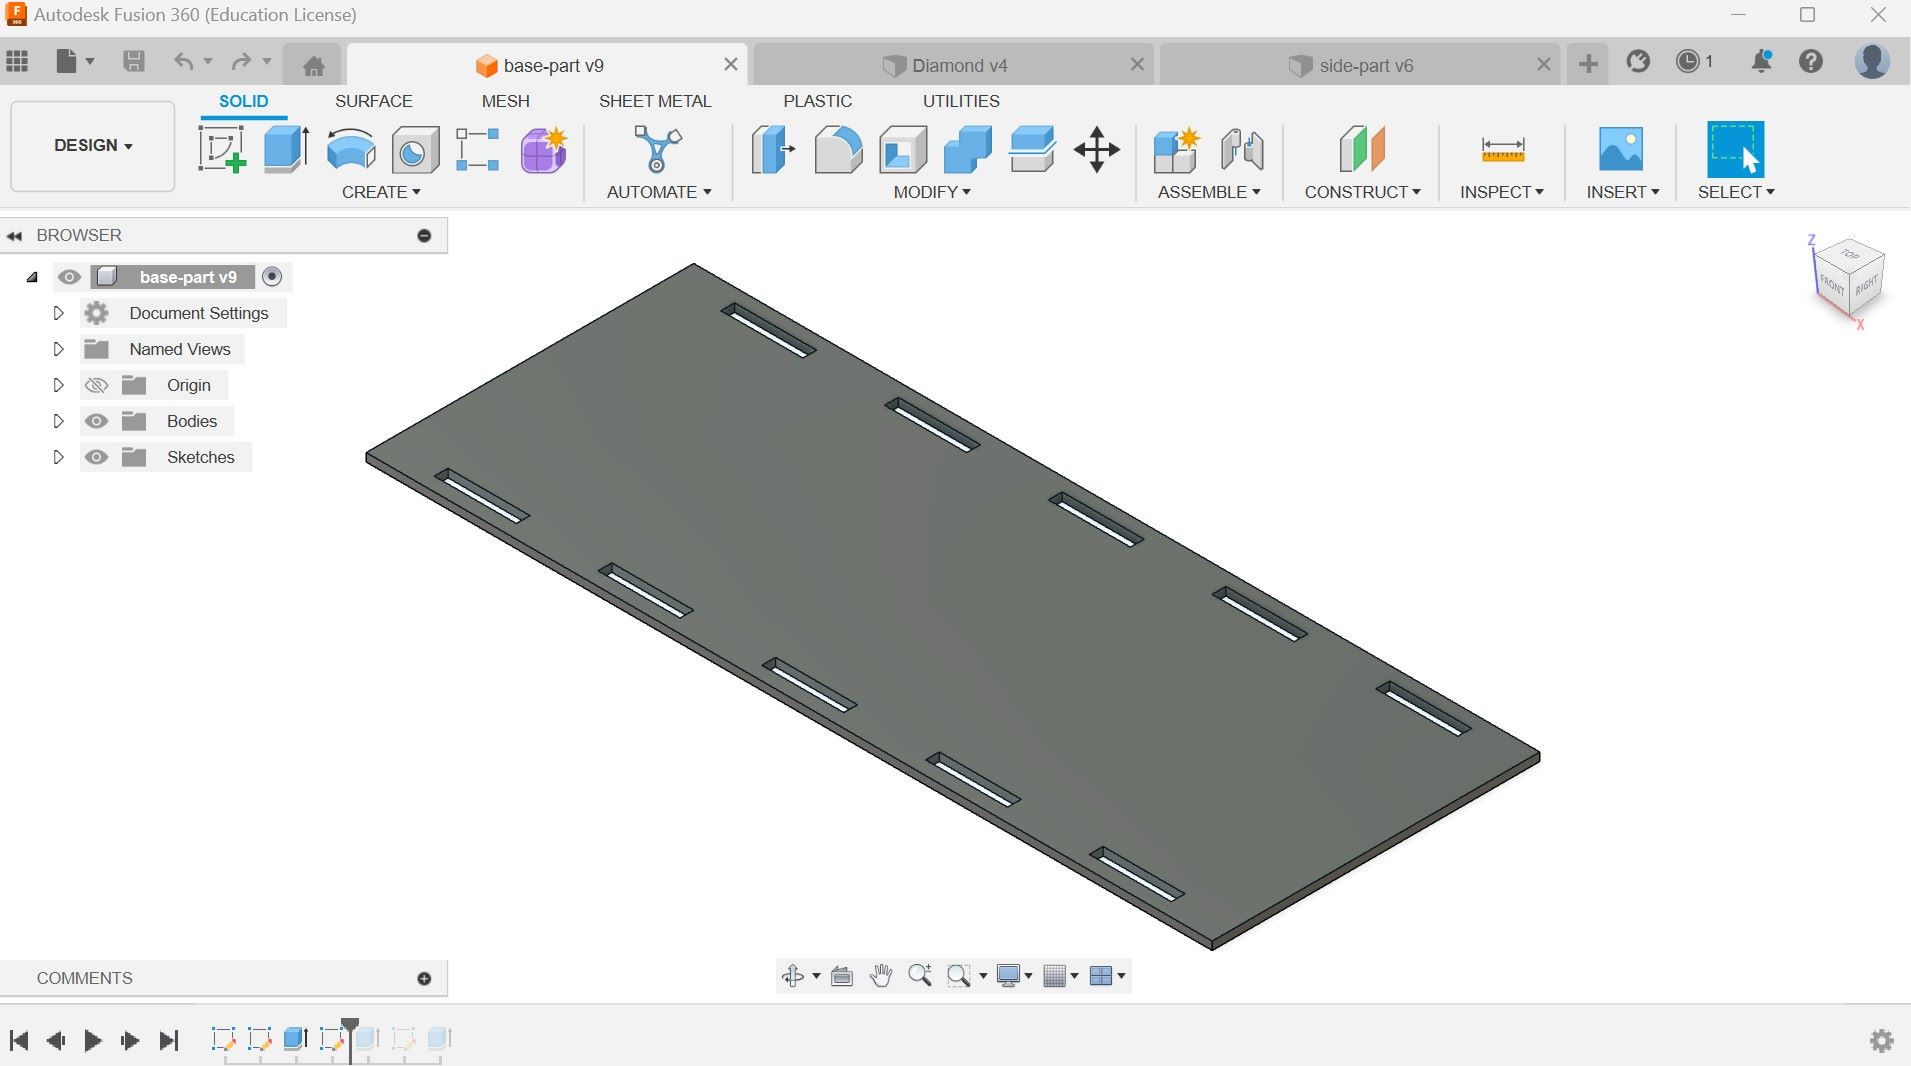
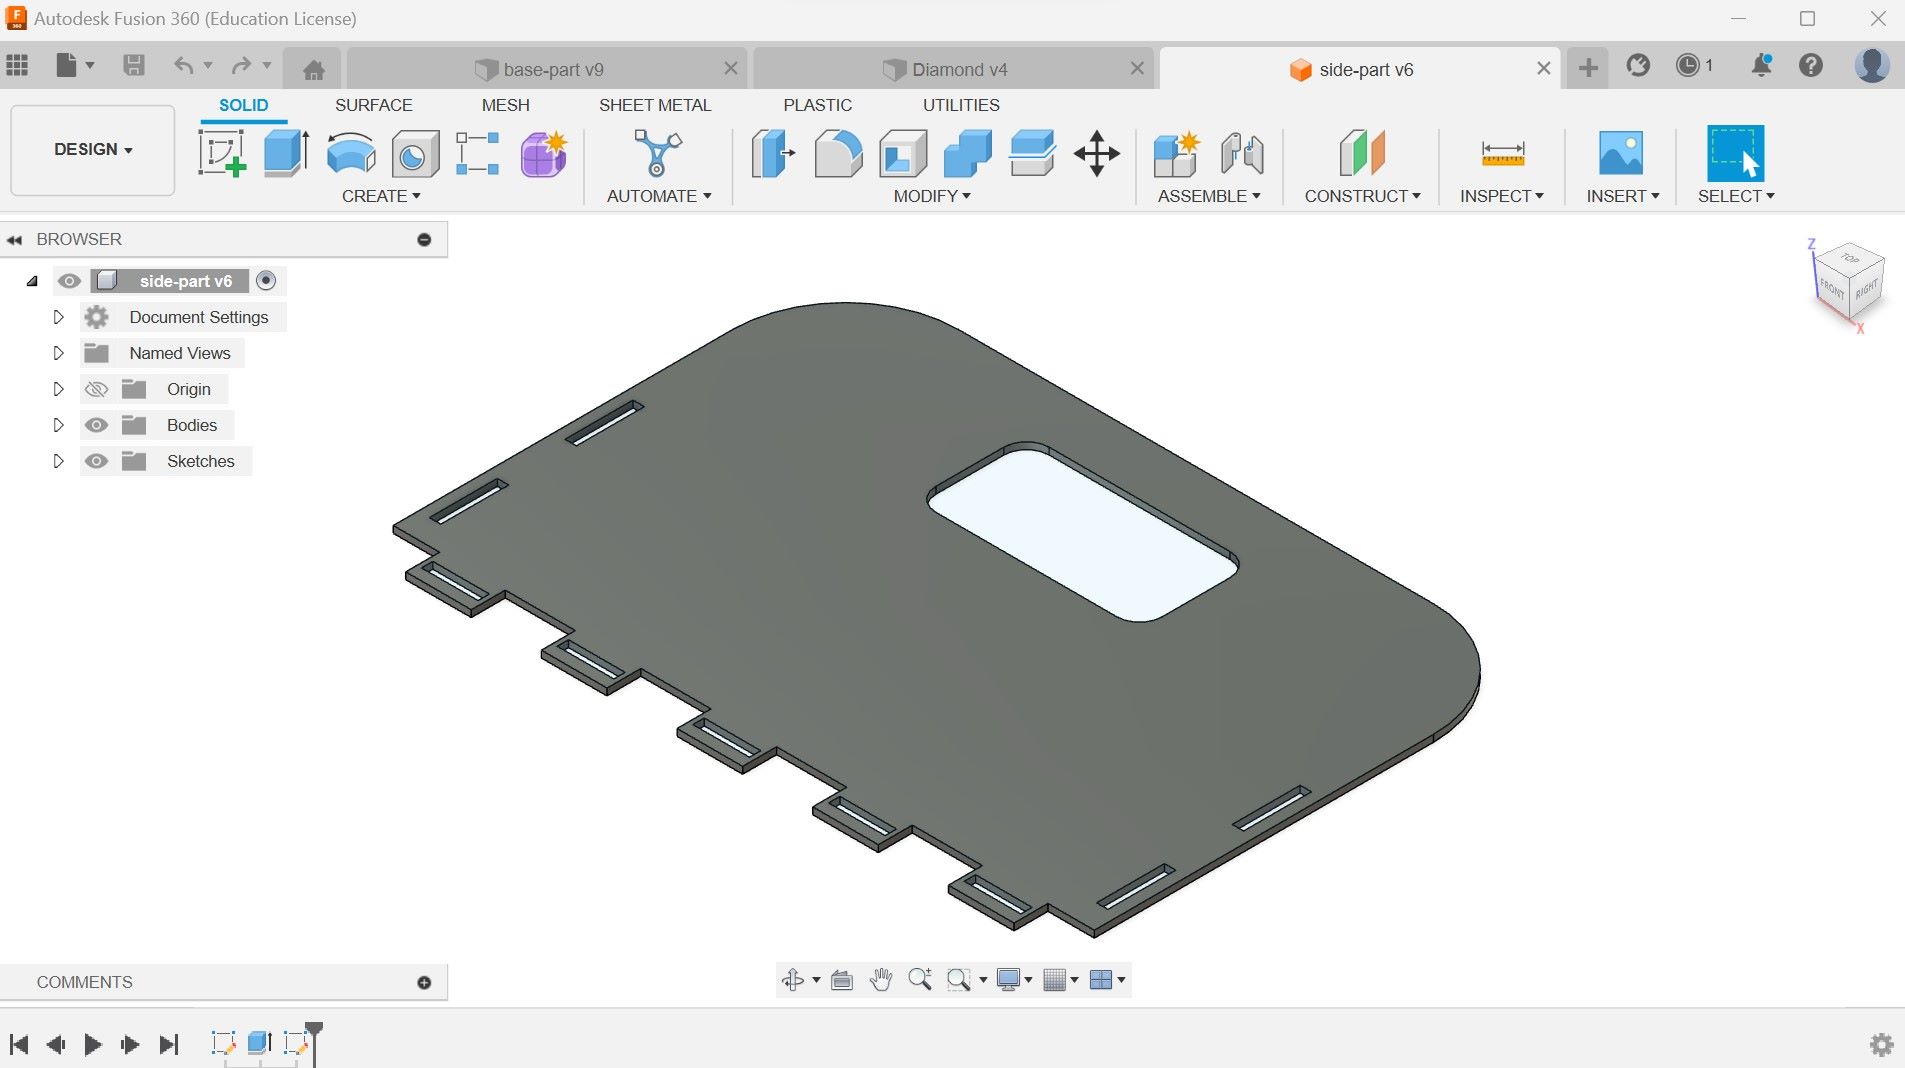
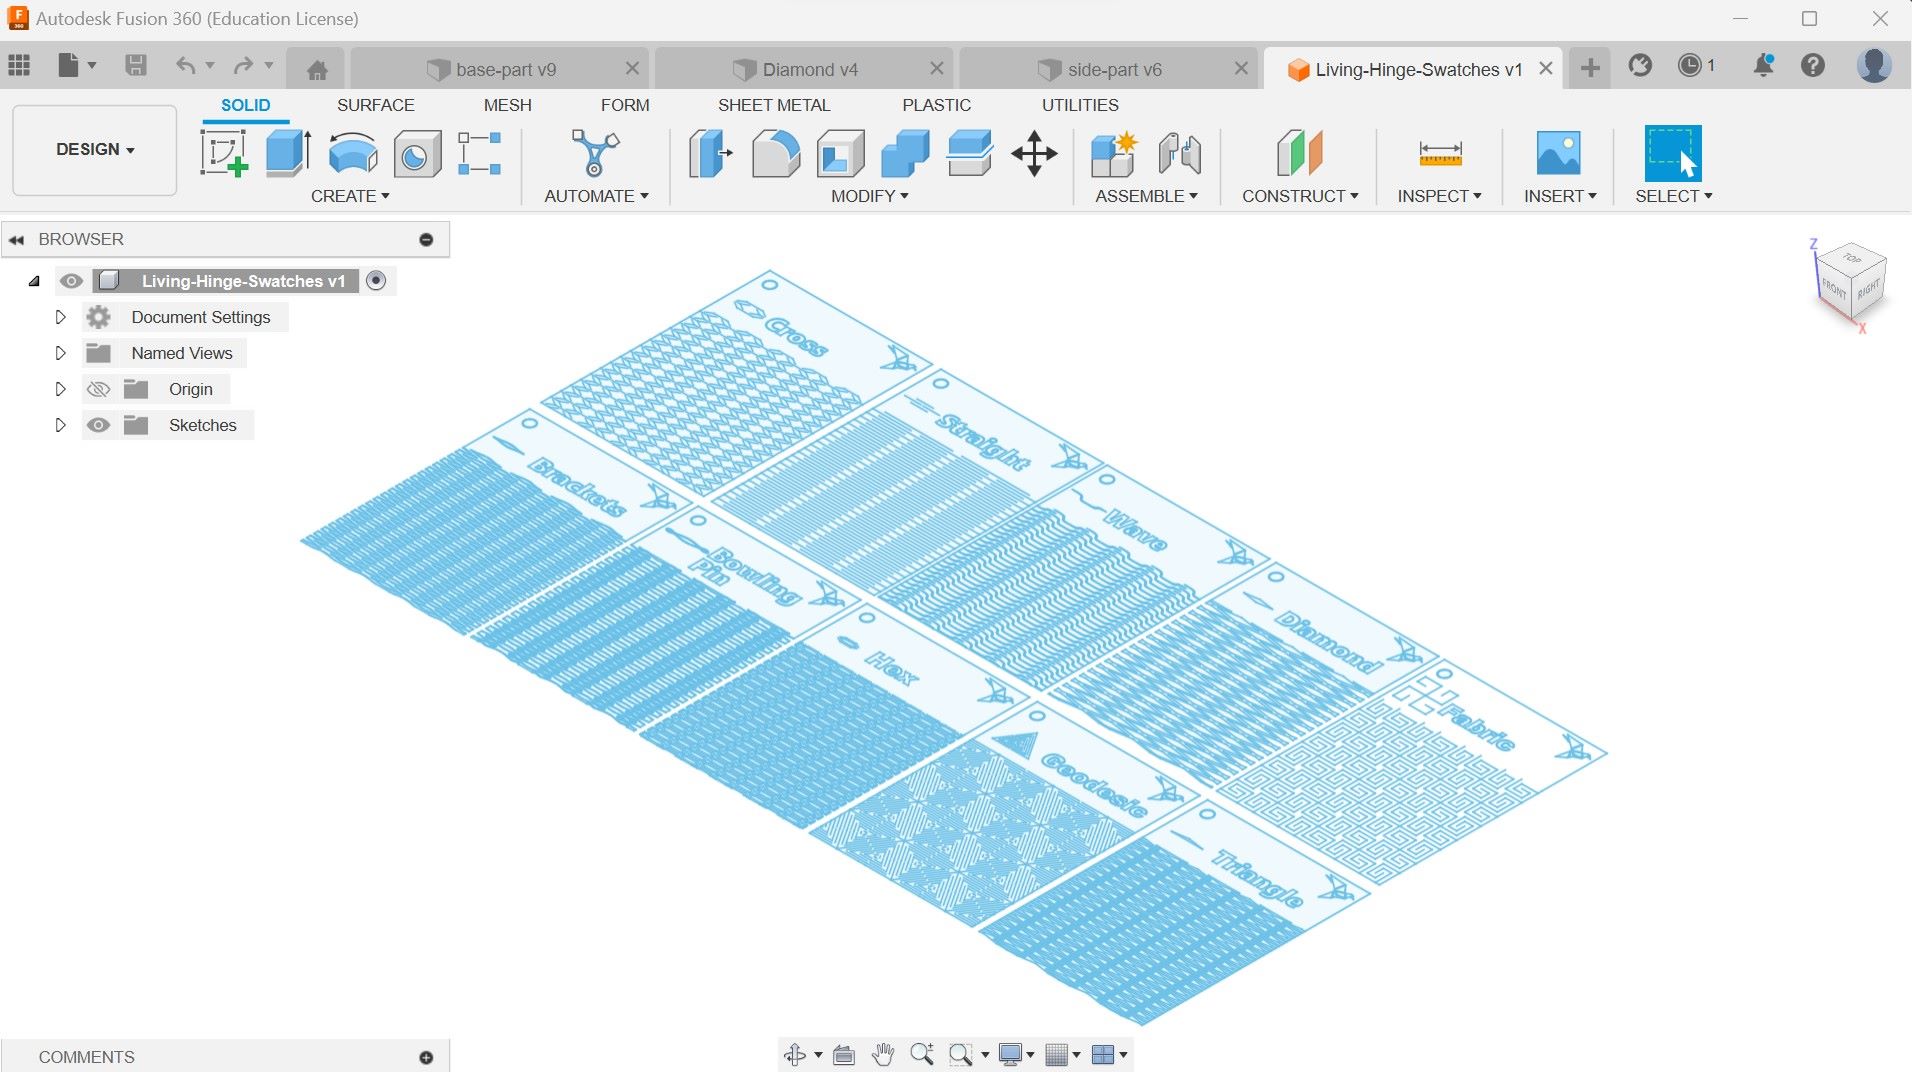
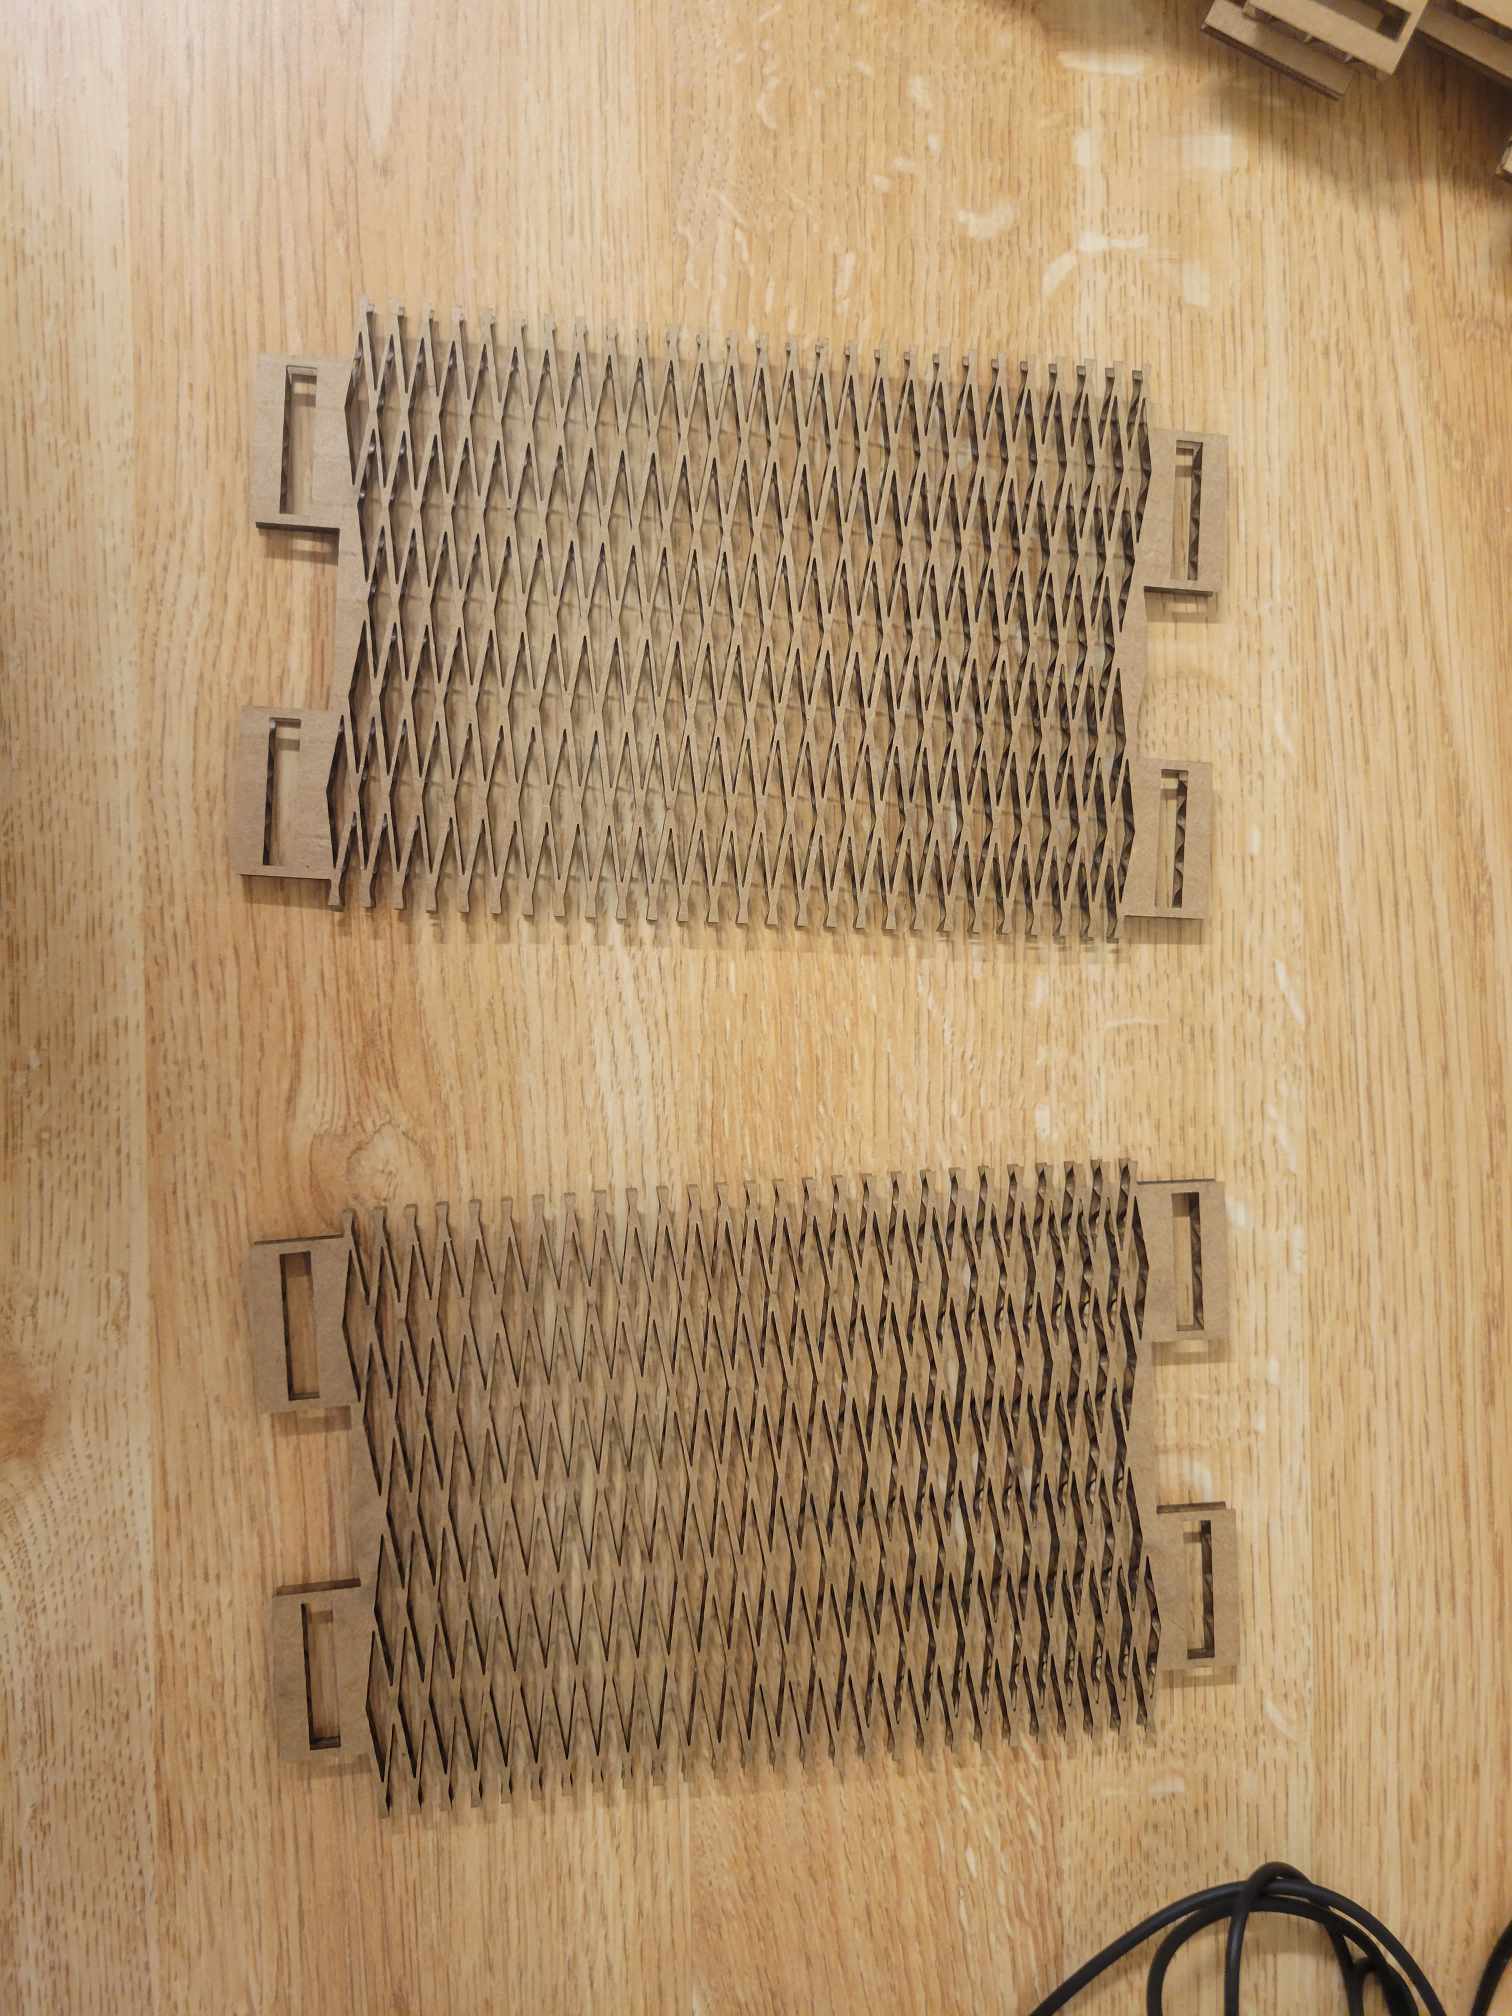
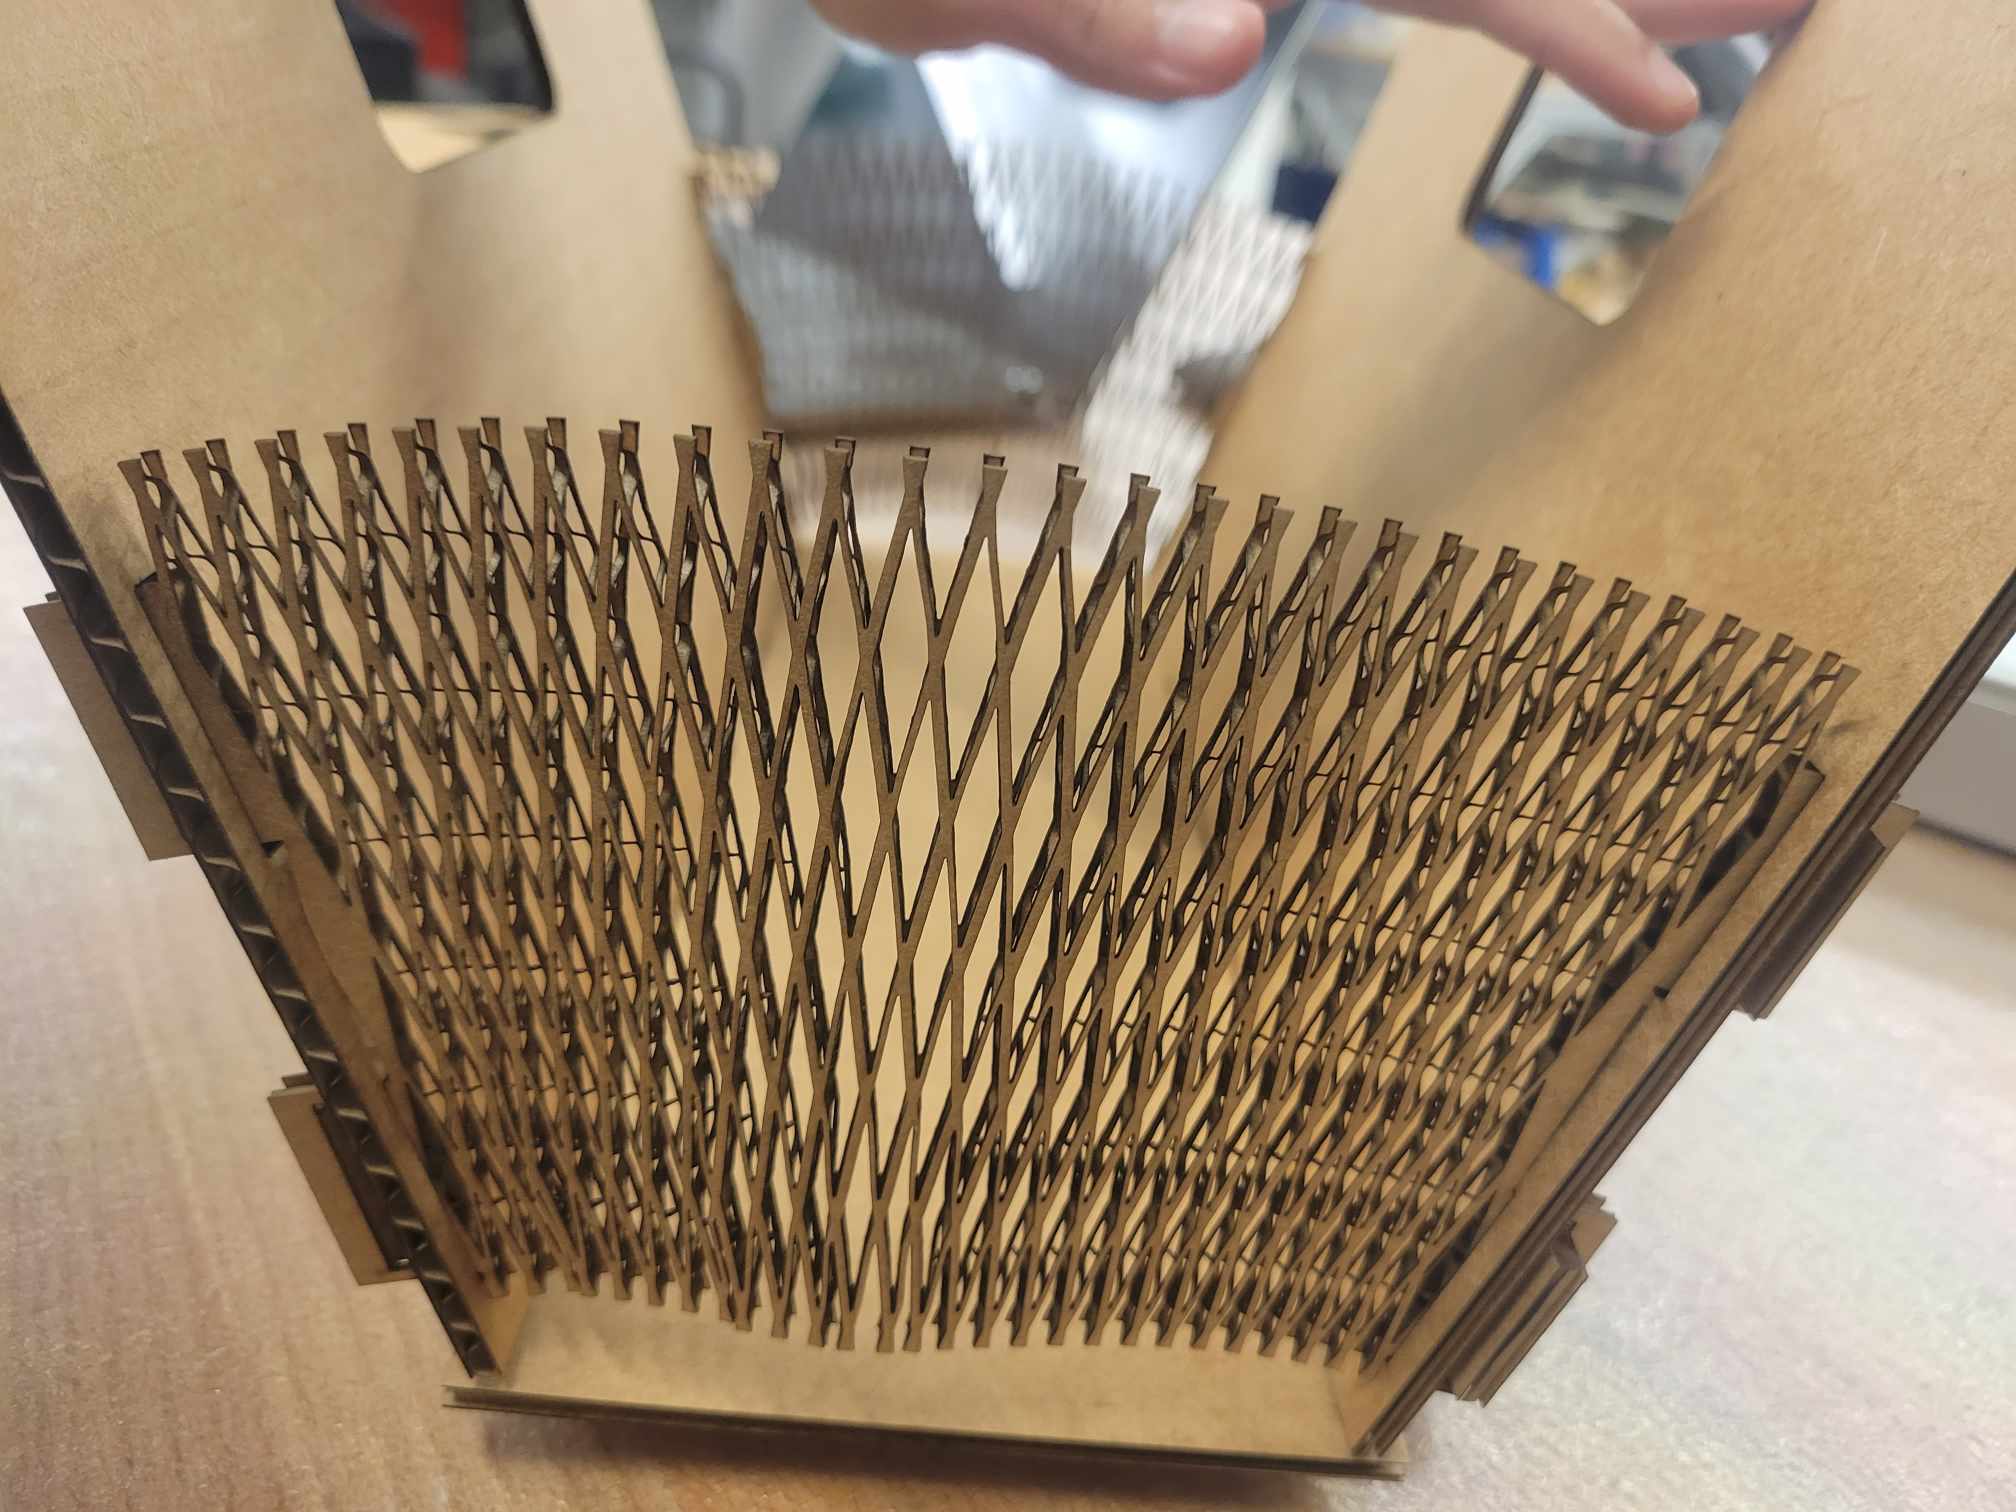
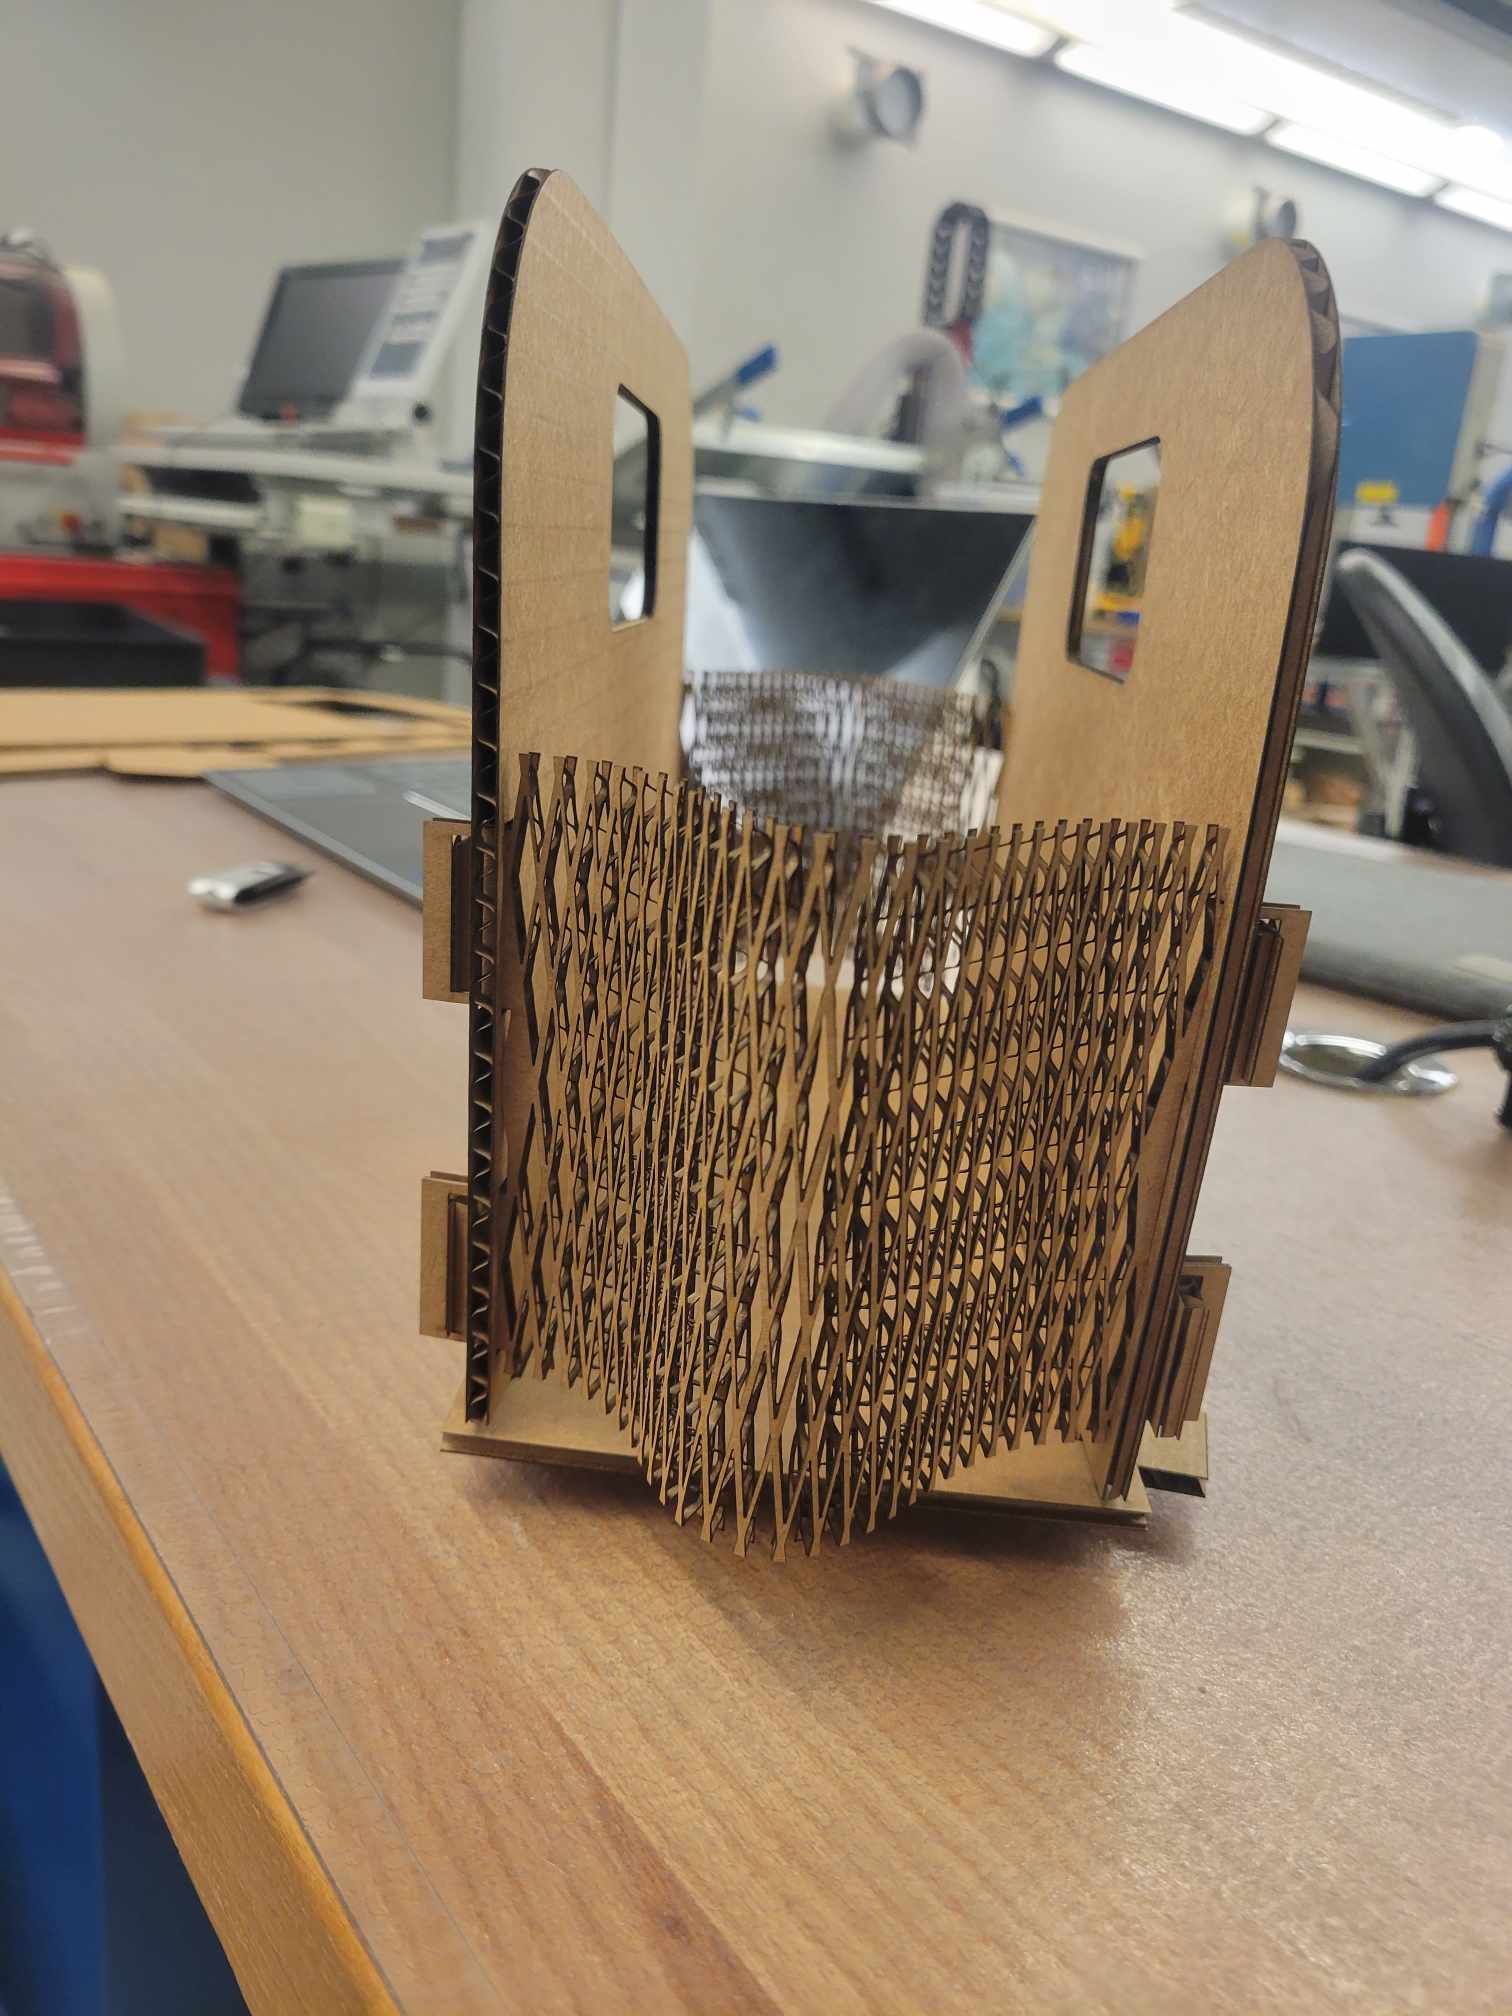
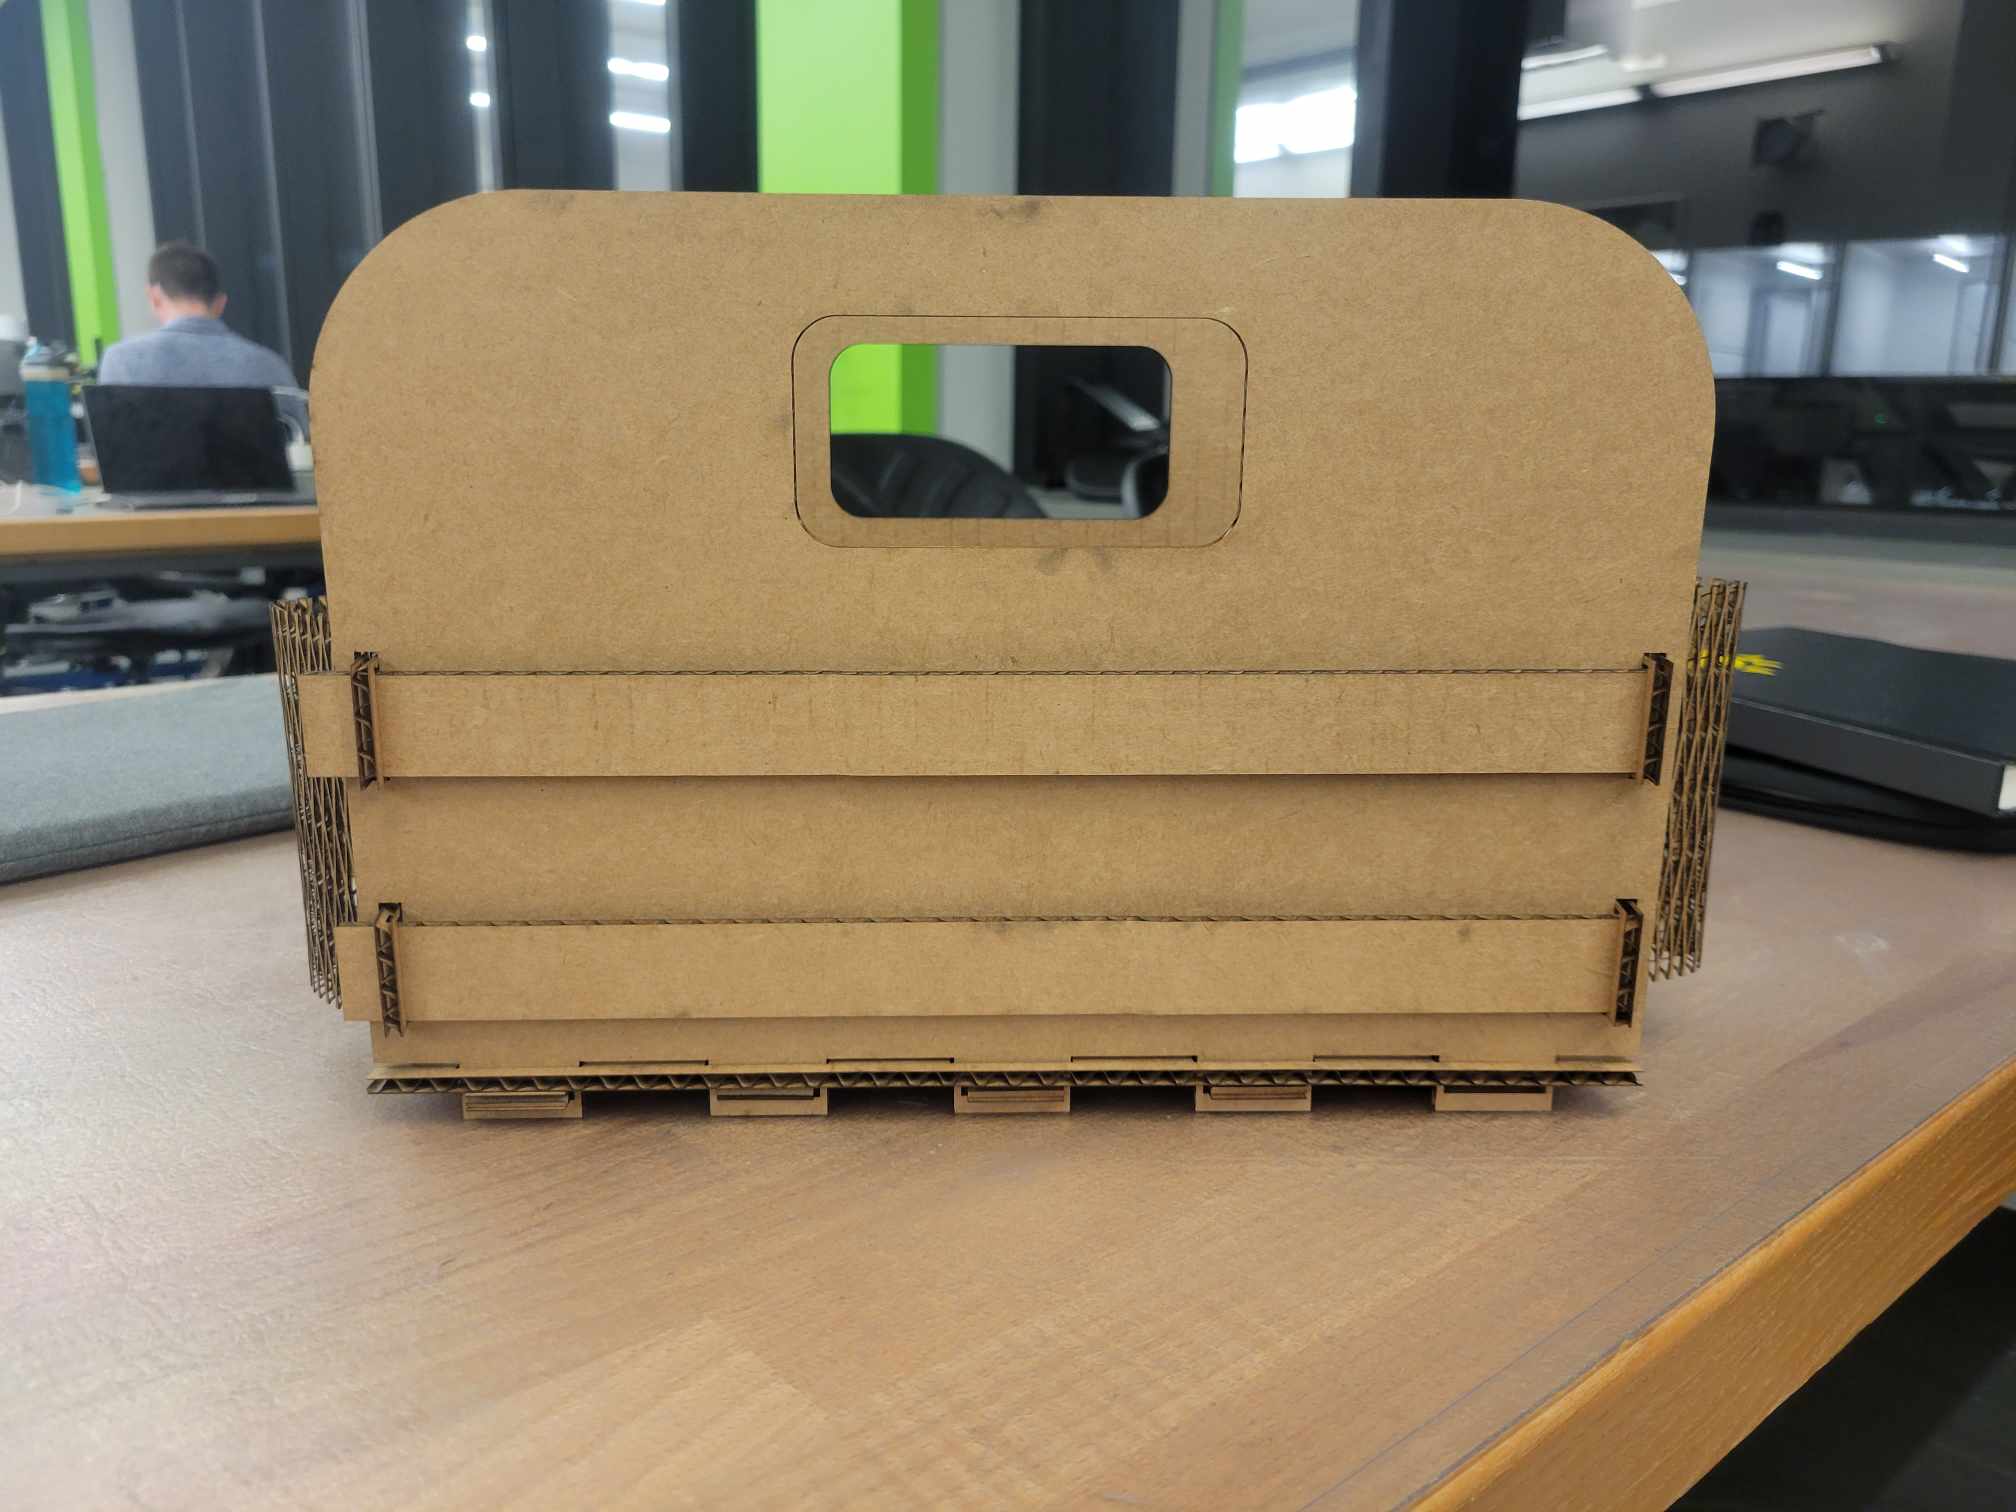
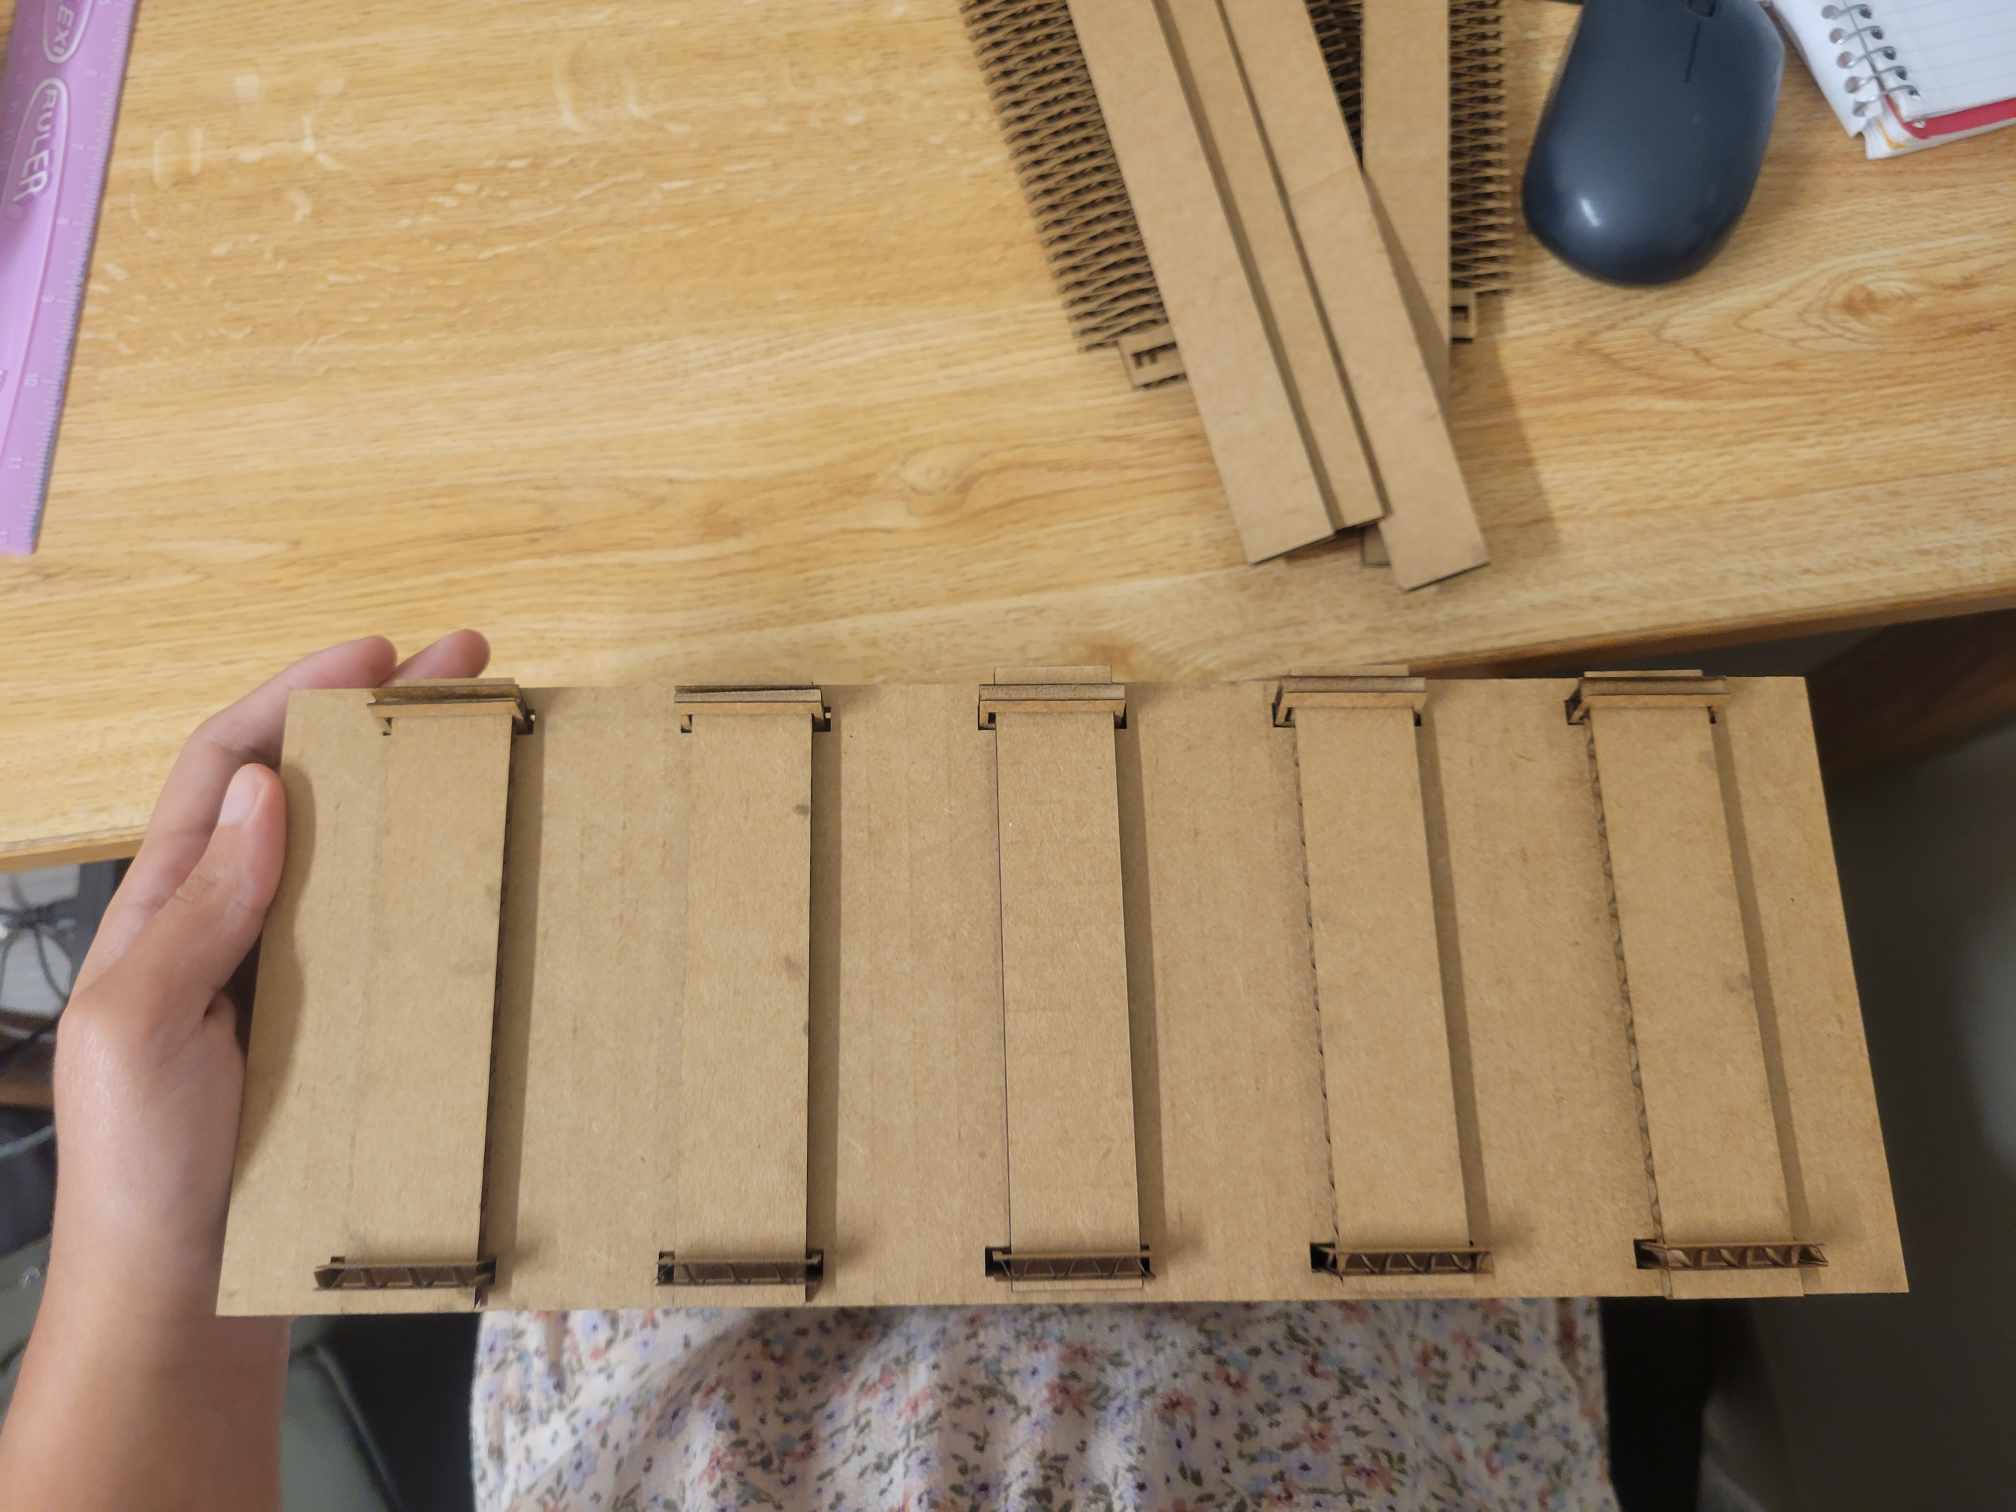
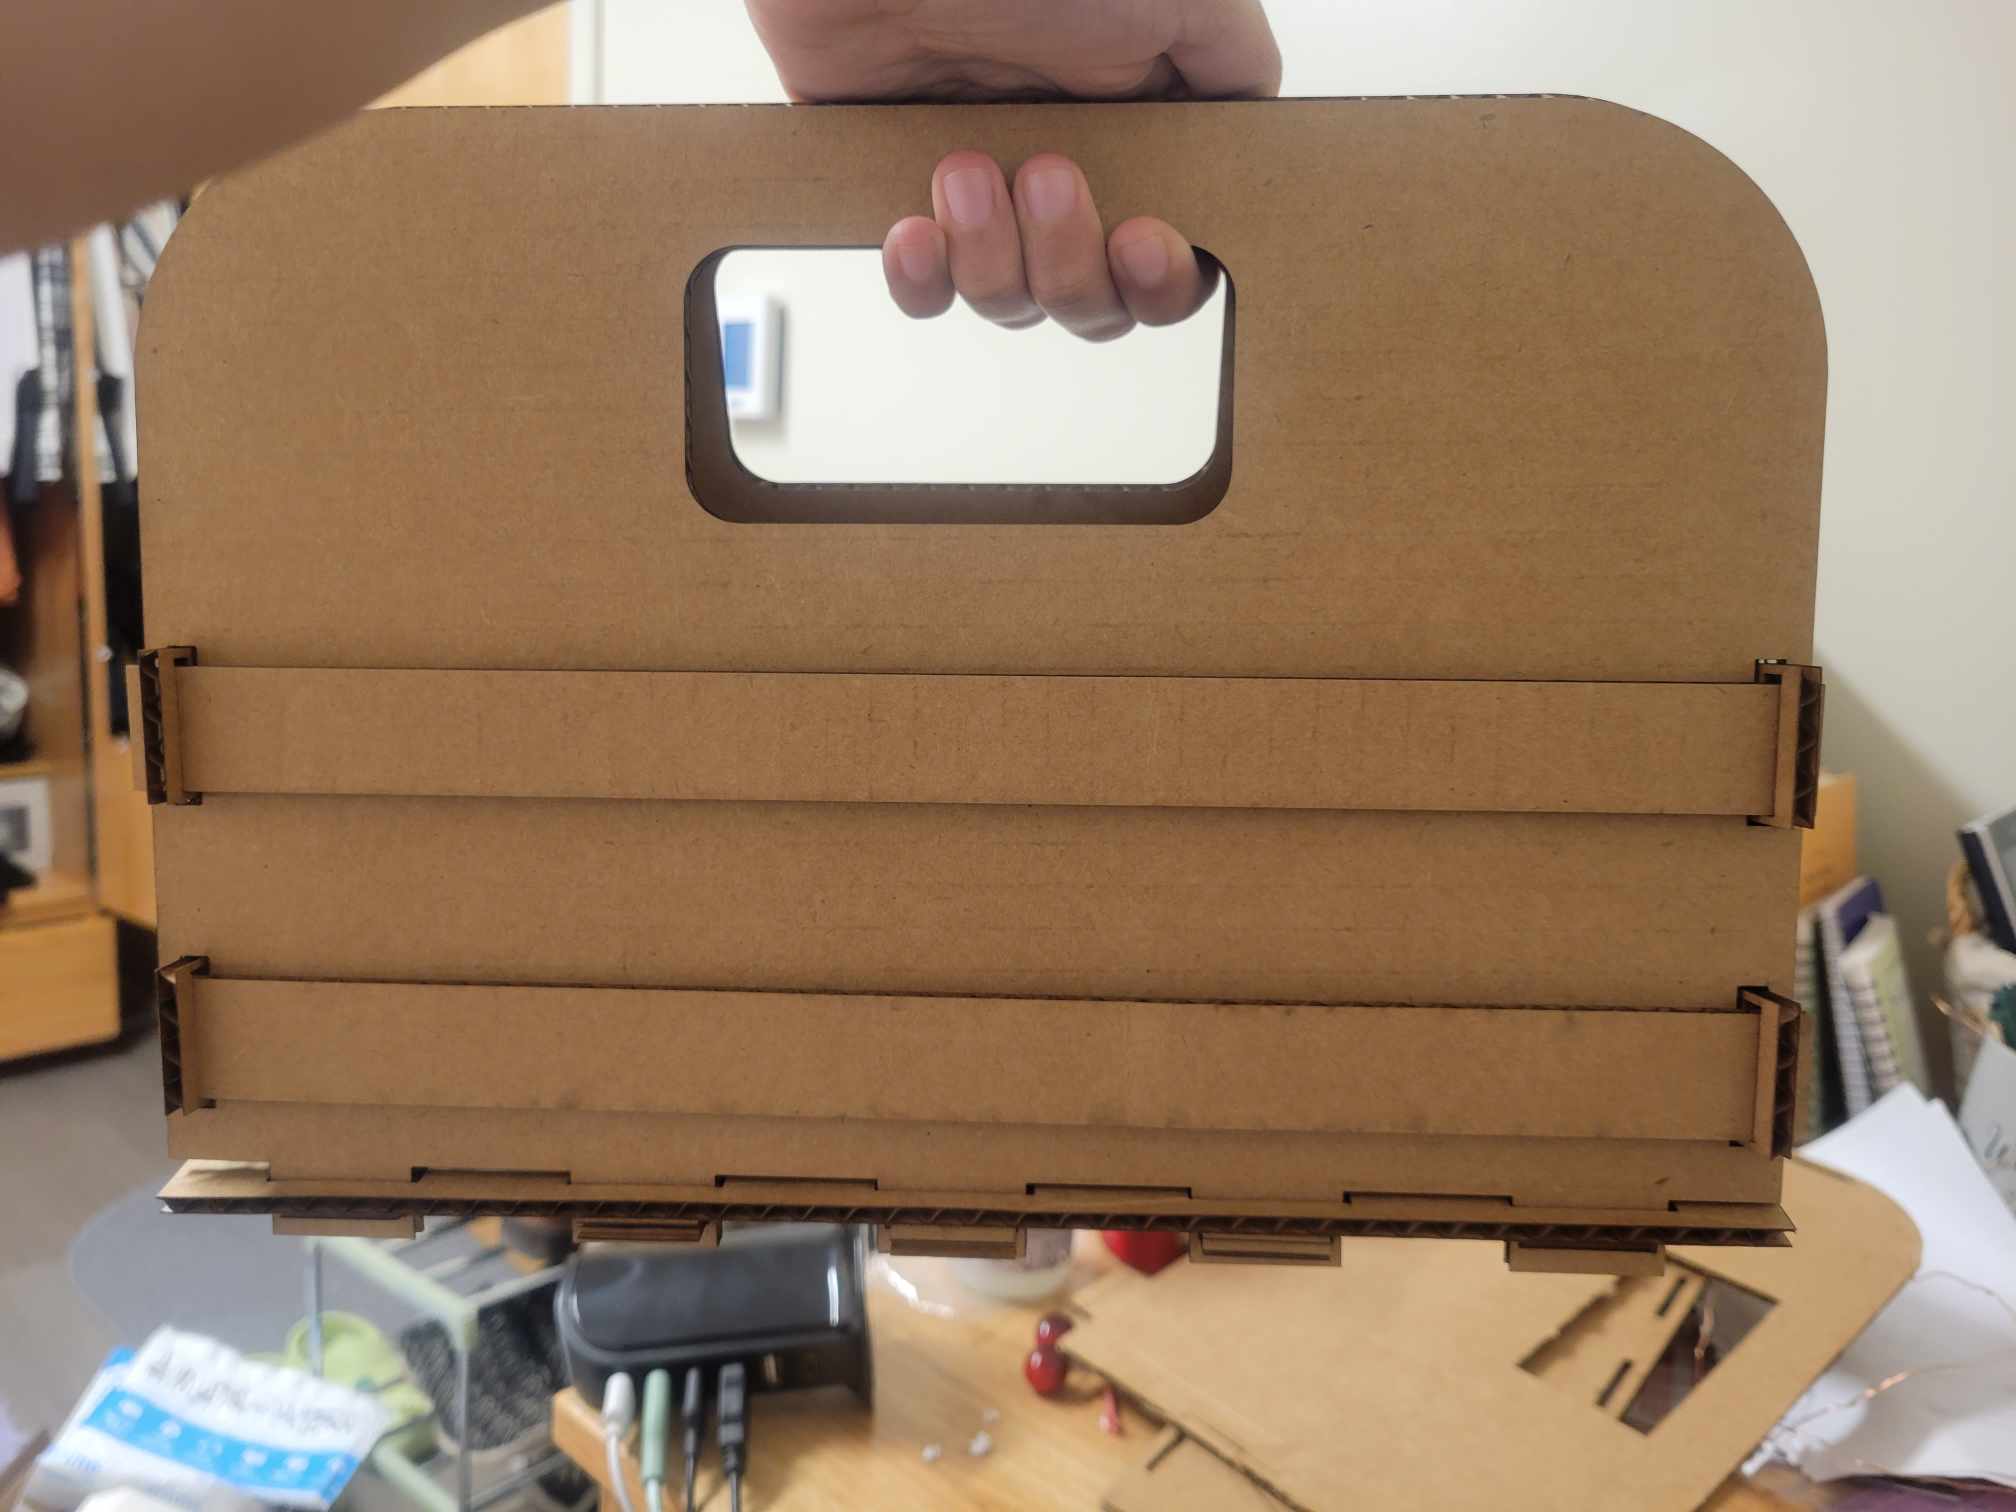
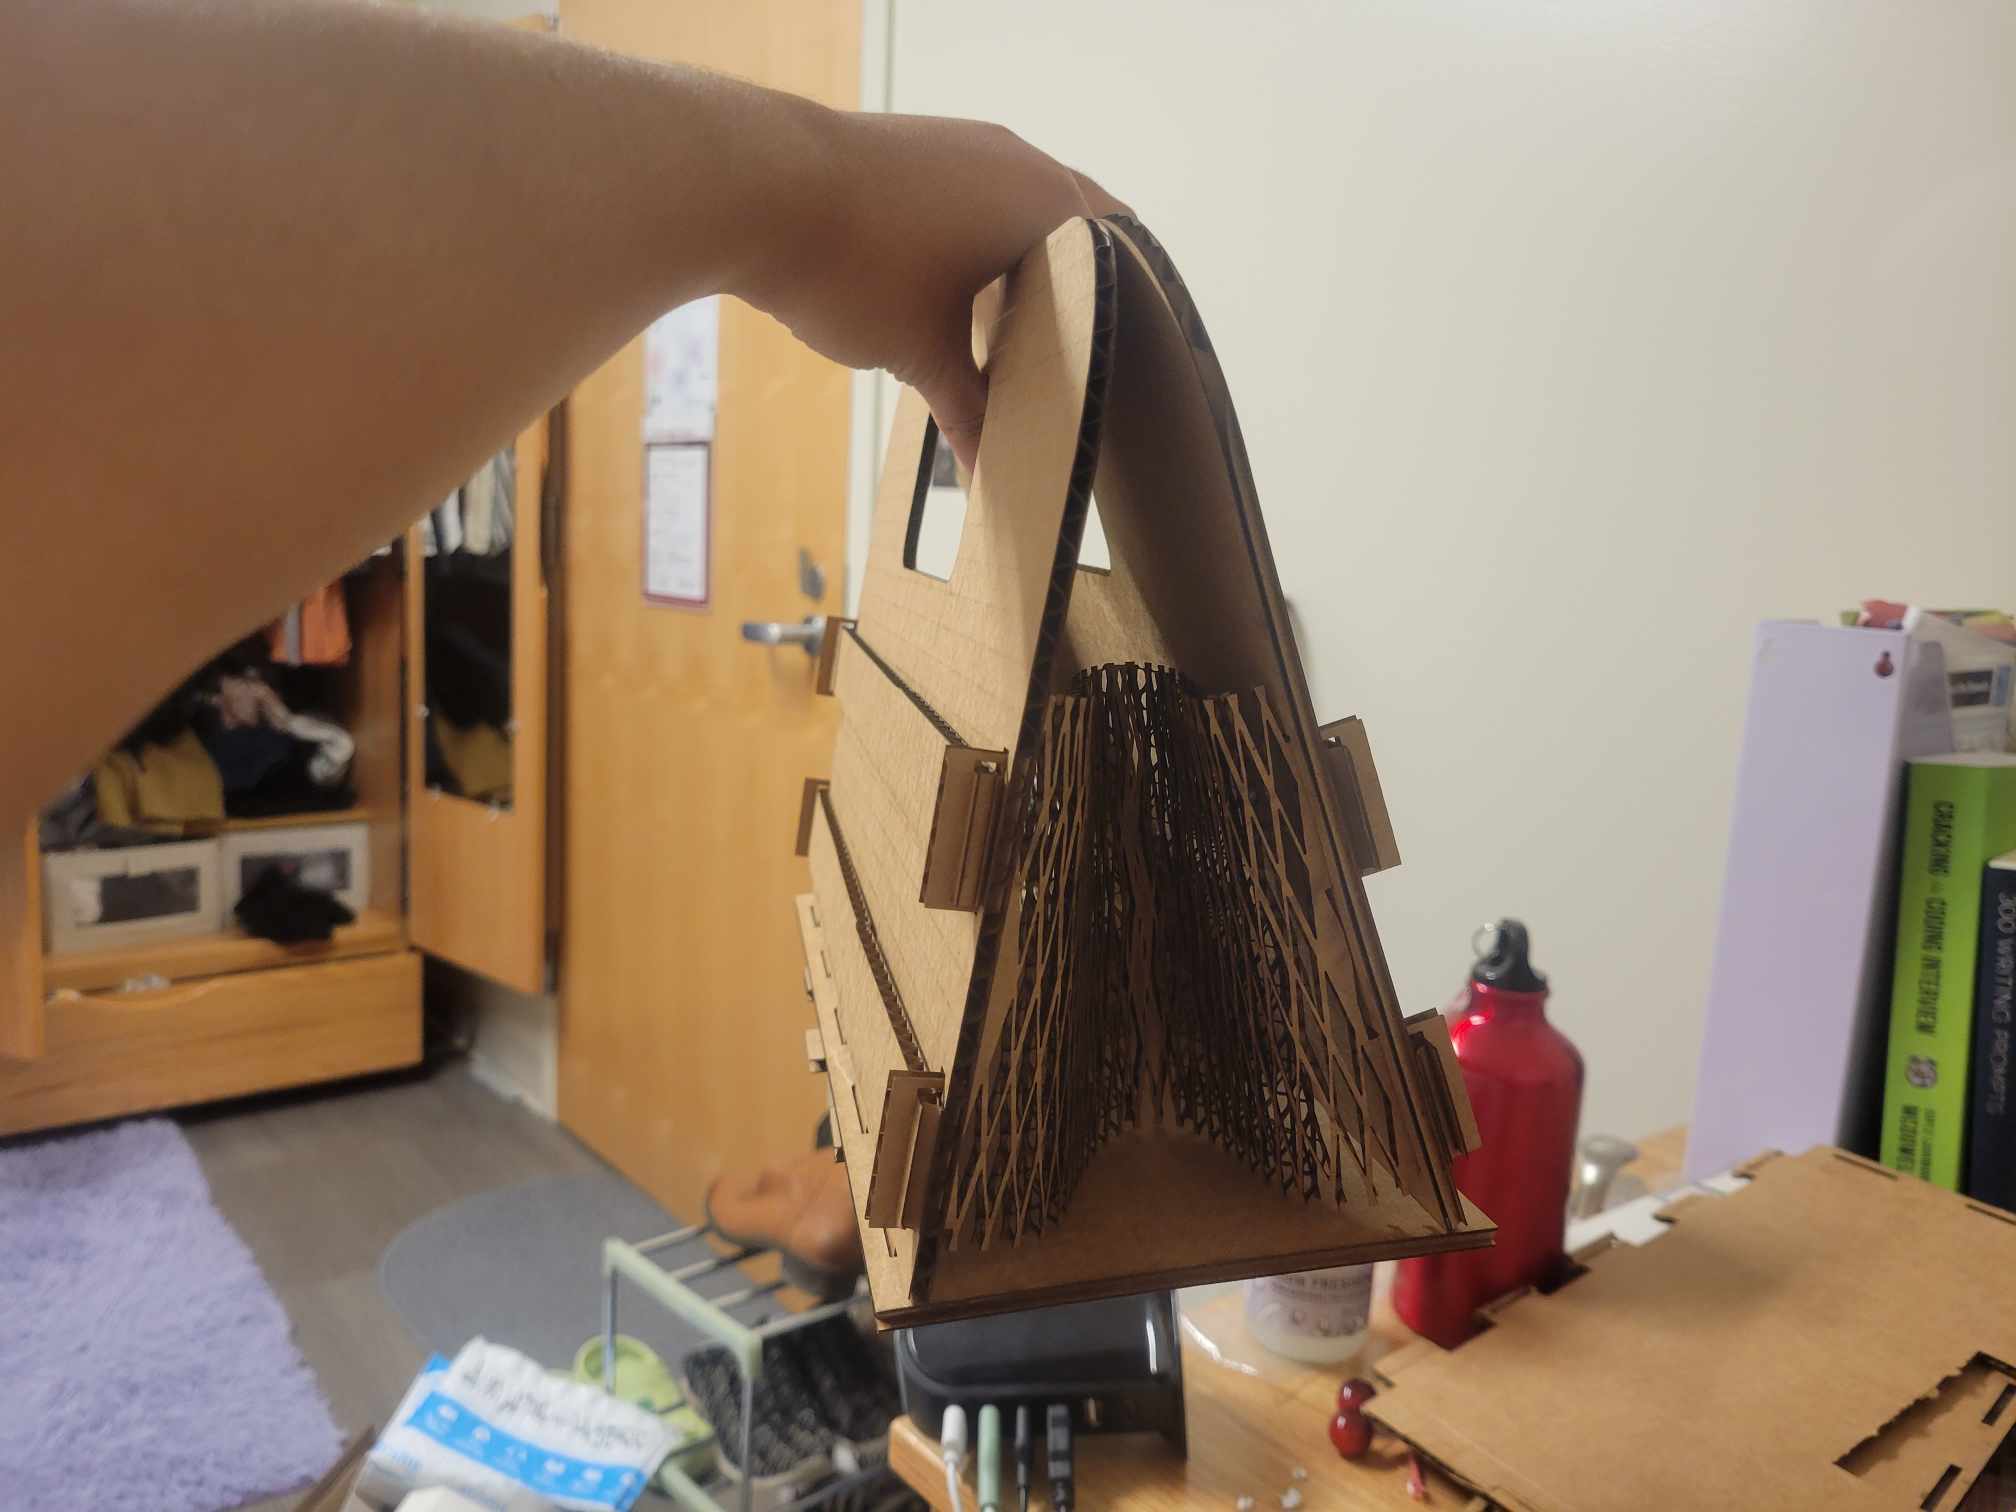
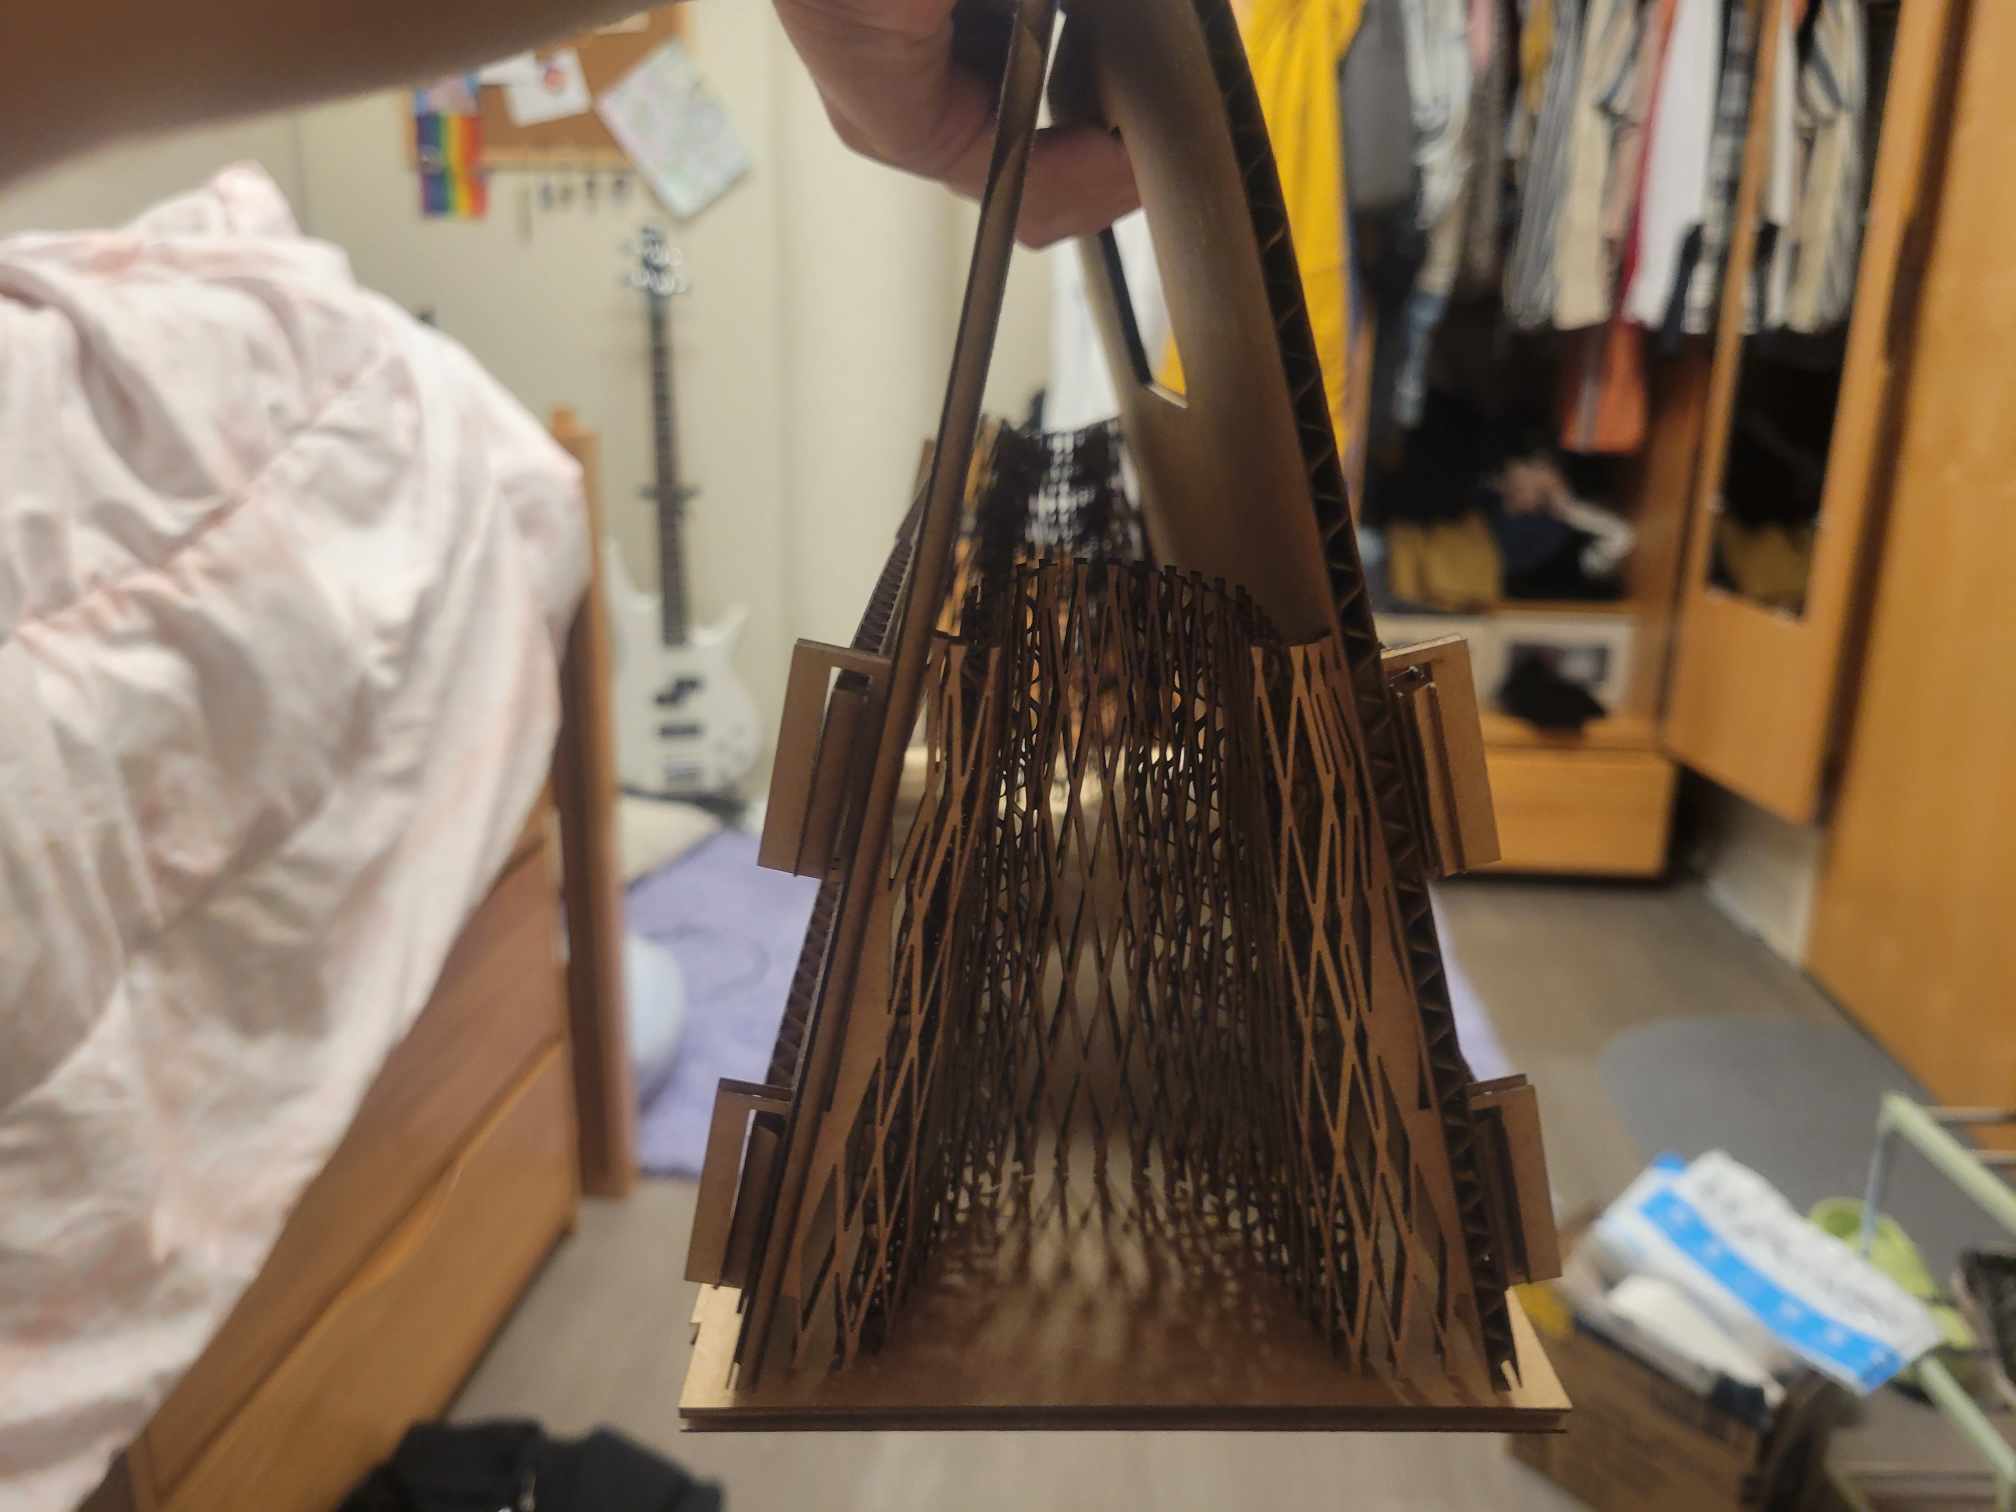
Based on my sketches, I started CADing my purse. I decided on using wedge joints since those seemed the most stable, specially for a bag that has to hold things. There were three parts; the base, the fronts and the side. I wanted to use a 'living hinge' for the sides, so I looked up a template online, then I copied and pasted until I had the length I wanted. It was also hard to keep track of all the lines and making sure they all met at the right place. I then added the wedges to it. Here are pictures of my design.
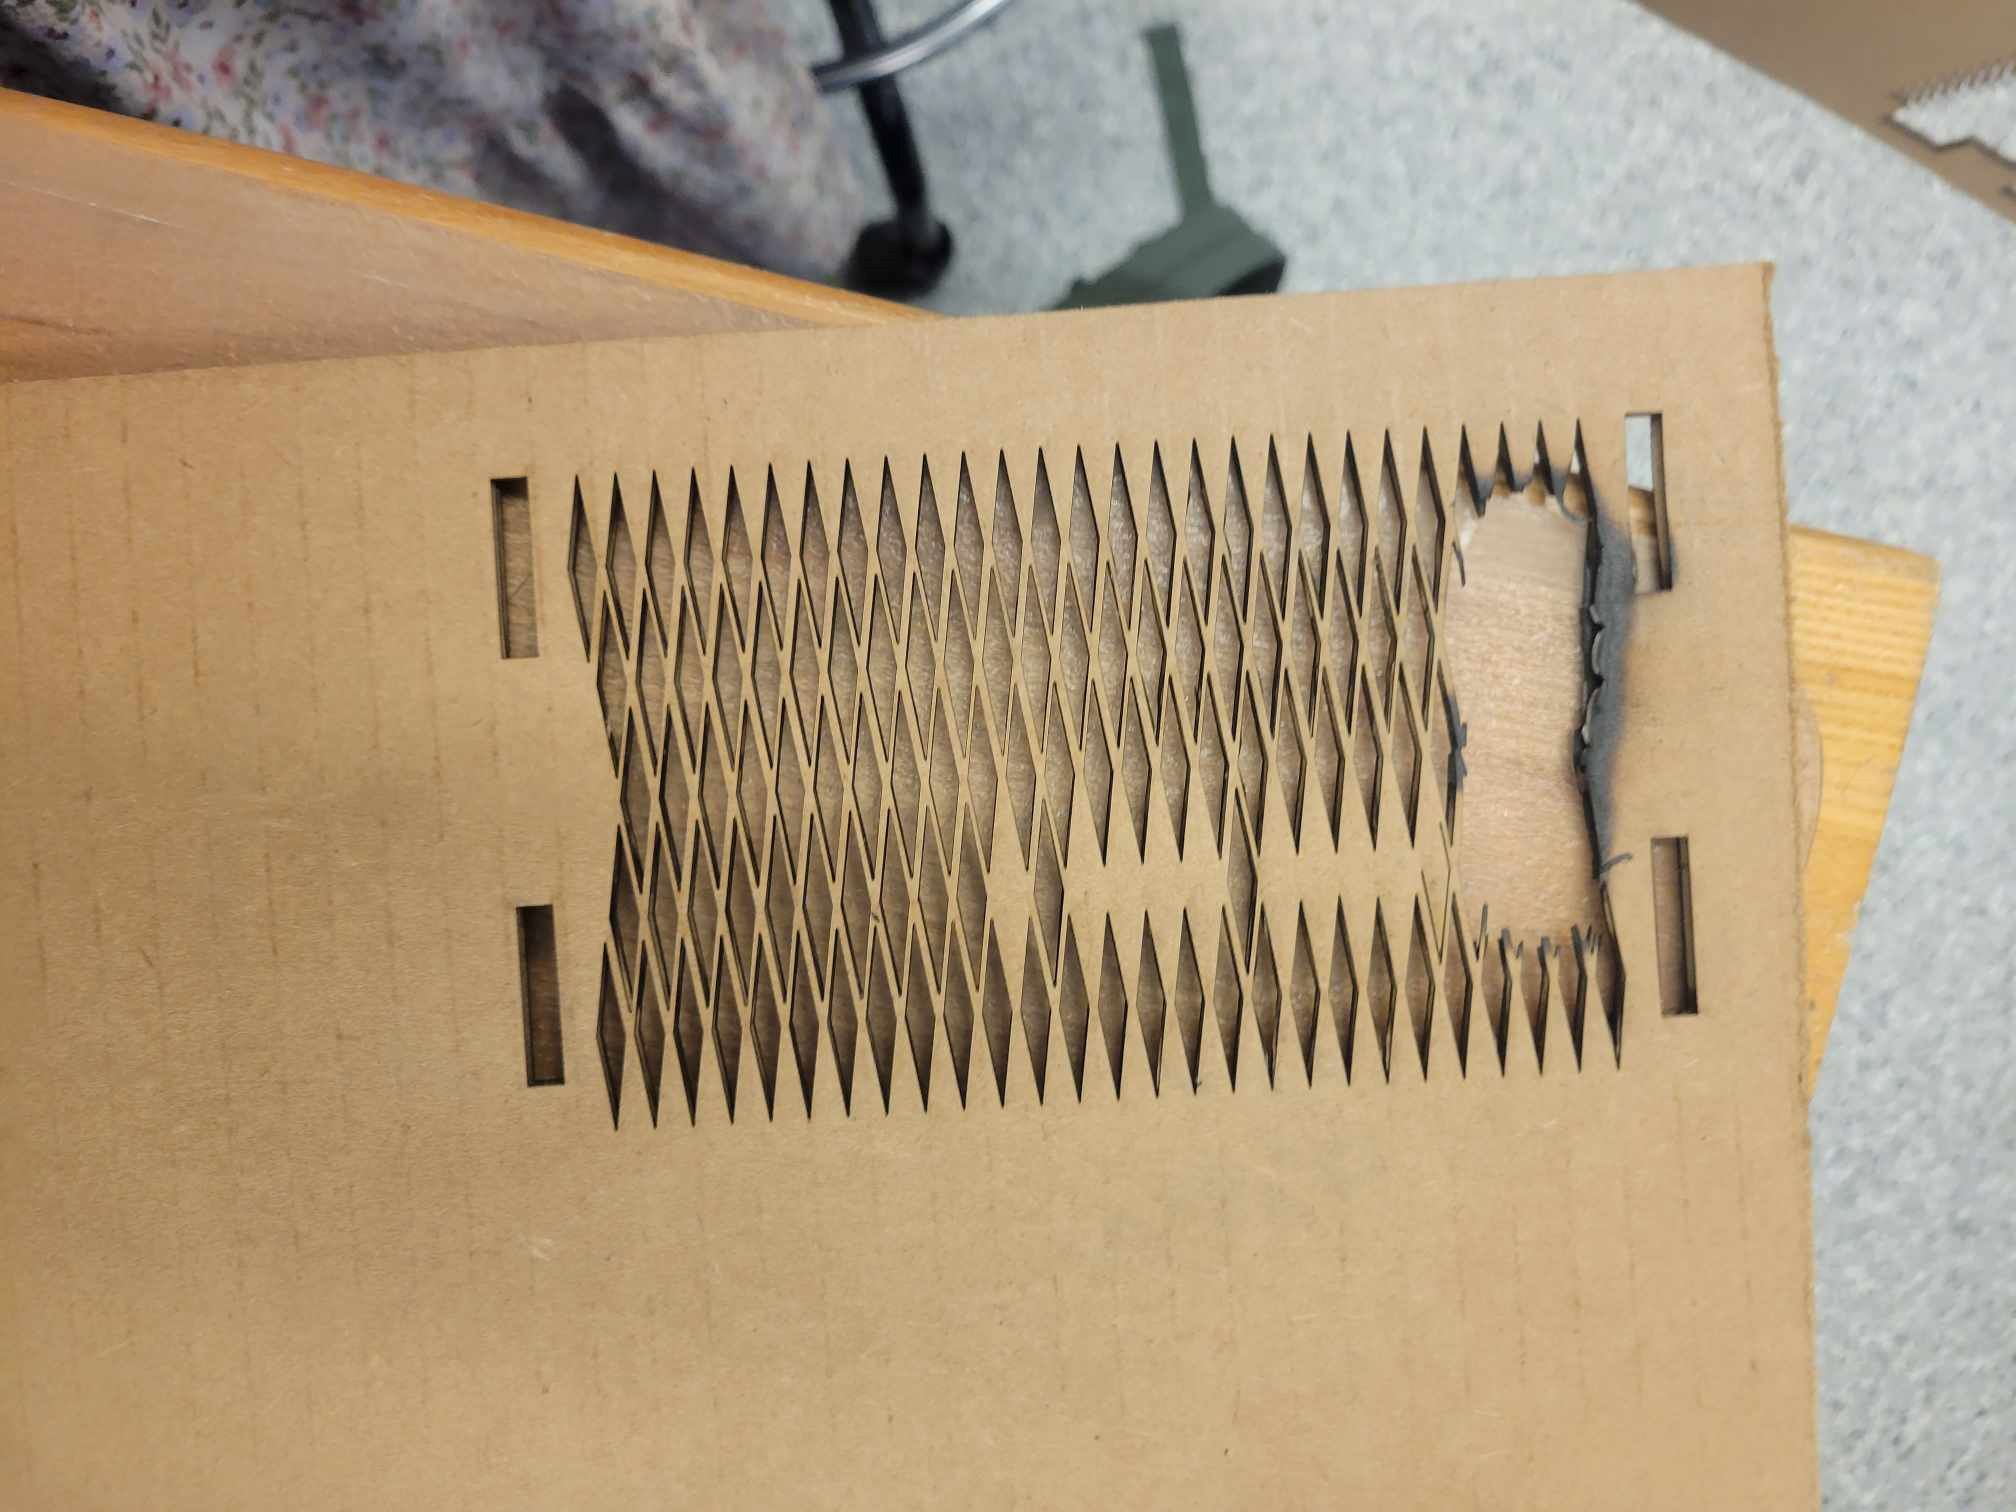
Laser cutting purse + Results
Now that I had my designs, I started cutting my purse. Since I had cut the smaller joint pieces before, I knew I had to make the holes a little bit bigger for the wedge joints, but it ended up being a little too big, so the wedges aren't on very tight. But they do the job. When I was cutting the 'living hinge,' I didn't change the speed (I used 12% speed for cutting the base and front/back sides). Since the lines were really close and really small, my cardboard caught on fire!!! Ahhh!!! Thankfully, Anthony helped me and stomped the fire away quickly. I was scared since fire is one of my biggest fears. Anyway, I learned that for small, intricate pieces like that it's better to cut twice at a faster speed. So I tried again and cut my parts at 30% speed, but I did it twice so it would cut all the way through. Overall, I was really happy with my results!! I was really proud of myself for doing something completely new and finishing the project I wanted to do. If I had more time, I would make the wedges tighter and I would make the purse customizable with more smaller pieces.
Vinylcutter
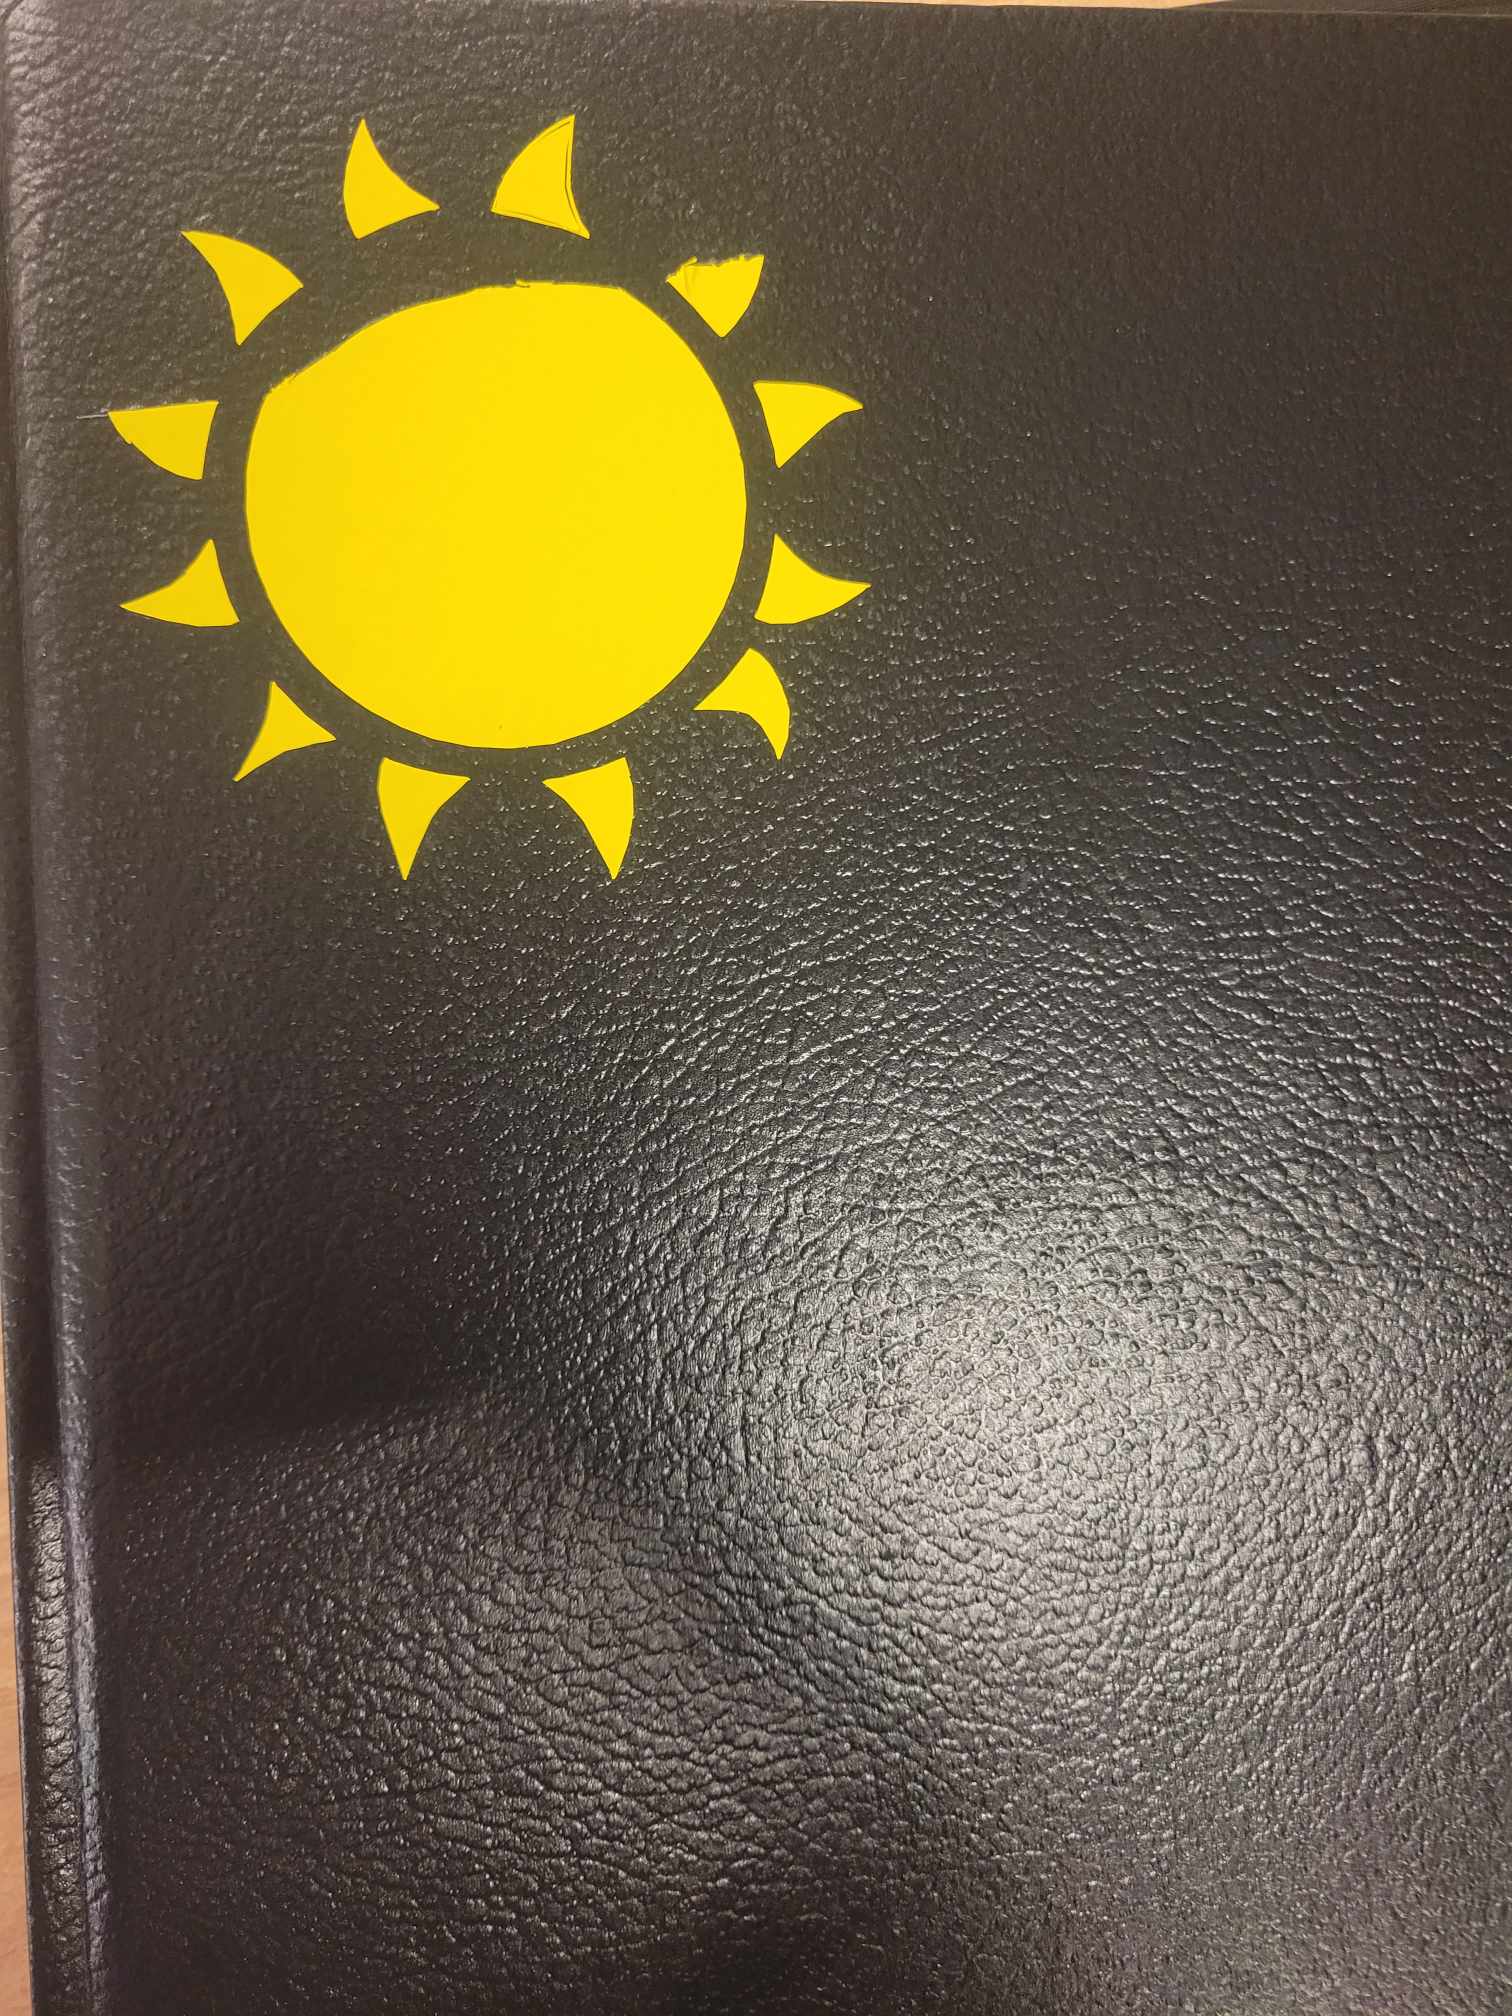
Sticker for sketchbook
I decided to make a sticker for my new sketchbook using the vinylcutter. I didn't take many pictures, but I basically I chose to have a sun on my sketchbook, so I first used the vinylcutter to cut out the png of the sun I gave it, then I used transfer paper so I could more easily put it on my sketchbook, then using tweezers I removed the parts that didn't belong in the image. The vinylcutter didn't cut all the way through for part of it, so it broke a little bit (I still love it though).