Electronics Production
Milling the board from last week:
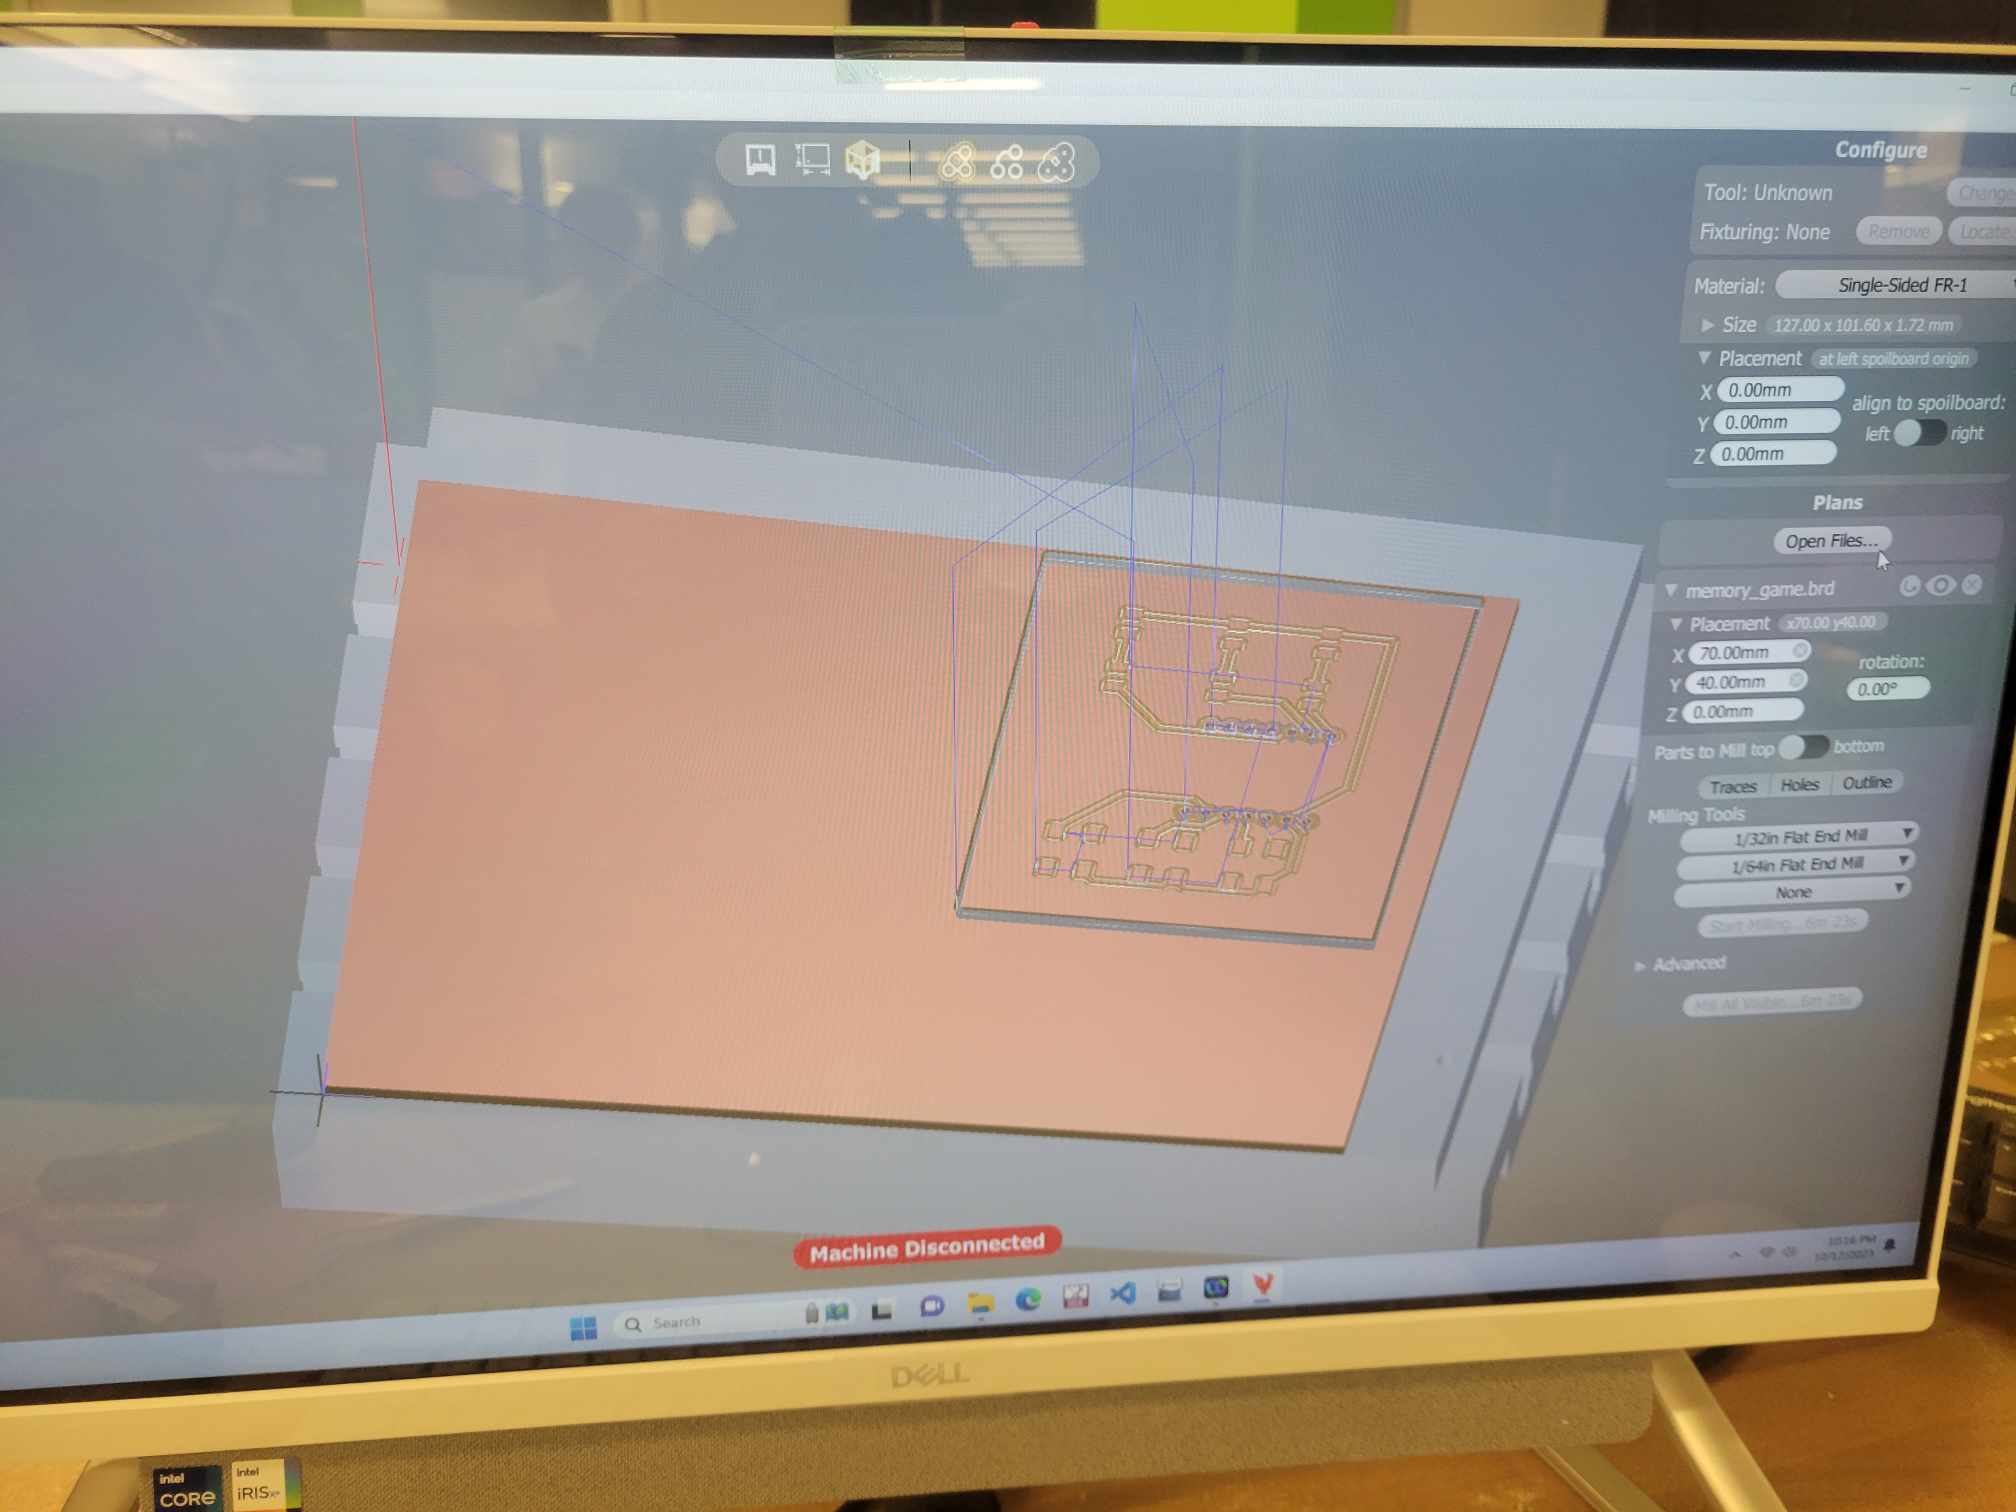
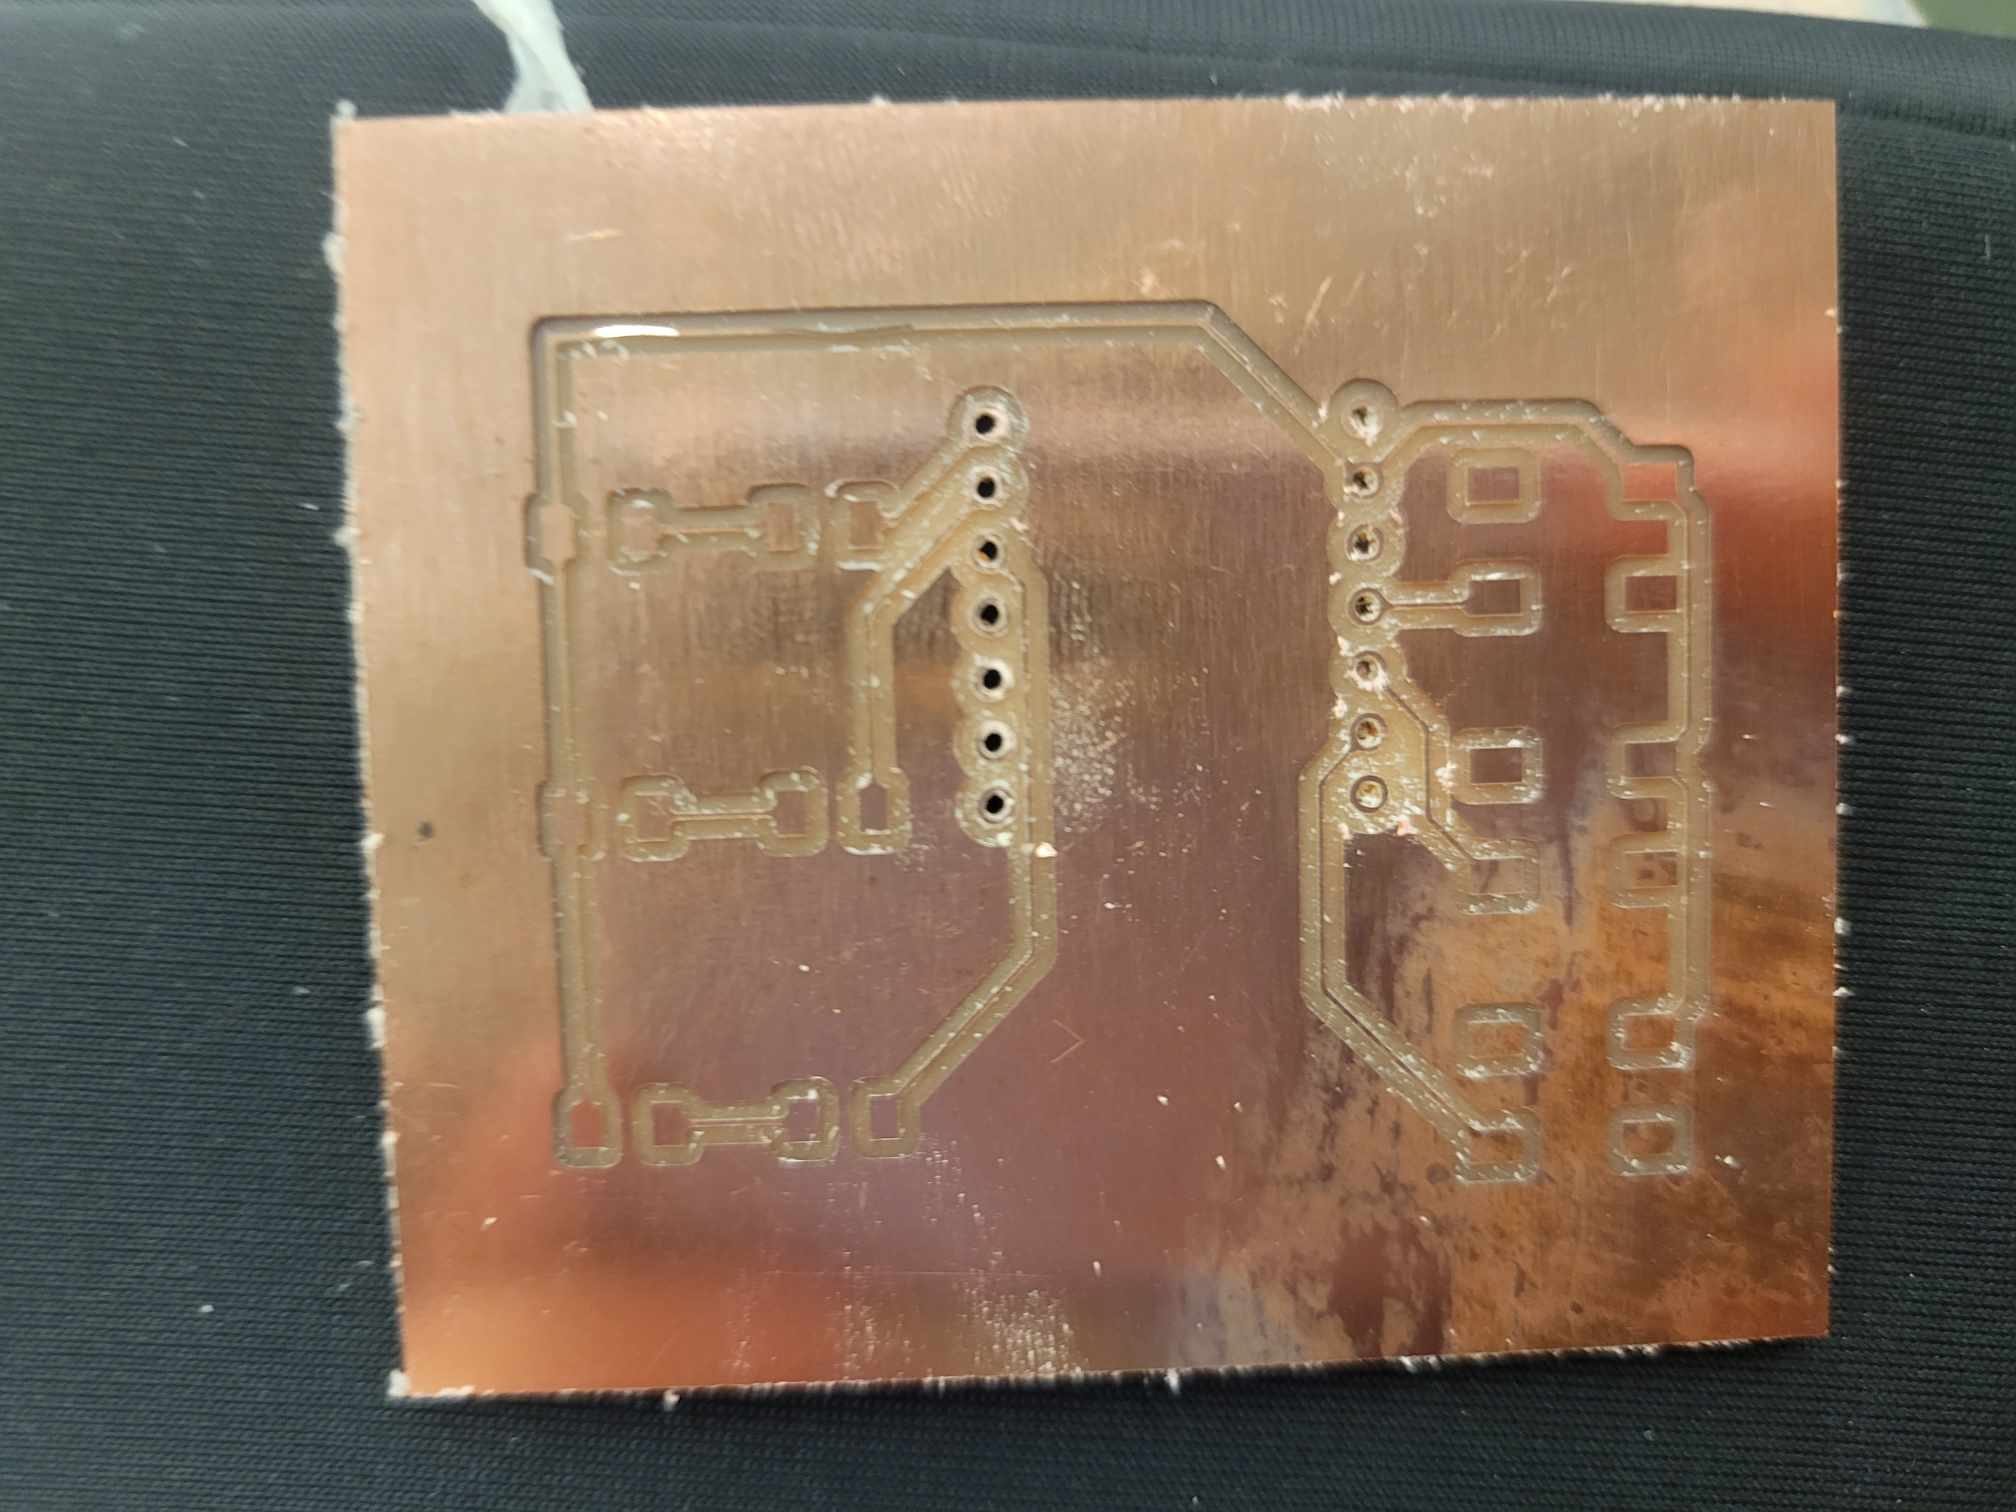
In our section, we use the Bantam Tools CNC mill to mill our boards. The software we're using allows us to import a .brd file, so I simply had to export my fusion PCB design as a .brd file and upload it to the software. This is a picture of what my board looked like. To set up the machine, I used double sided tape to set the copper clad on the machine. I then set up the tool I needed (I started with the 1/64 for the smaller lines and then I change it to 1/32 to do the rest). I run the job and it takes like 10 minutes.
Problems
So as I'm going to start soldering, I ask Anthony for help and he tells me the number of problems with my board. First, I had chosen the footprint with throughput holes for the ESP32C3, so it was going to be hard to solder the controller since the solder will fall right out. Second, my route lines were too thin and were about to break. So, we decided to go back to my schematic and change my footprint and also increase the clearance fro everything to 16 mil.
Soldering
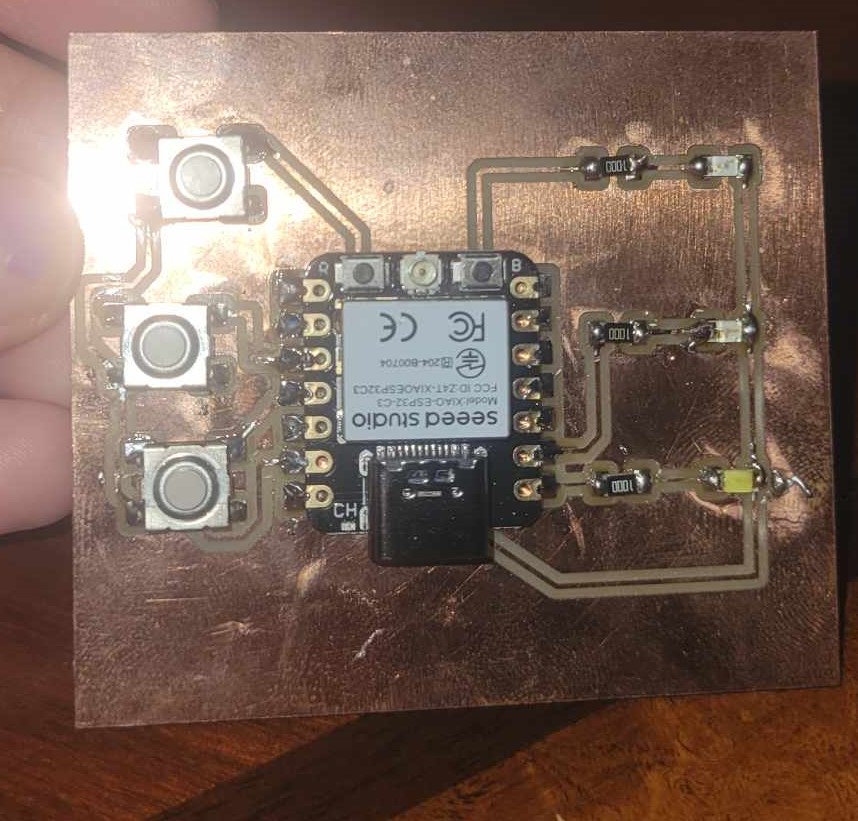
After milling the board again, I could now start soldering. I had never soldered such small pieces before, so I needed a lesson on it. I learned that the way to do it is to put a little solder on one end, take the small component with tweezers and remelt the solder around it to hold it in place. Then you can solder the other end. This part was fun and I really enjoyed it, especially since I could listen to music while I did it. Here's the final result.
Coding the game
Now that the board was done, I started coding the game! I first tested to see if I could code it so that if I pressed a button, the corresponding LED would light up. It worked, so I moved on to coding the memory game. I found some code here that was pretty good but I still had to tweak it for a bit. Here's the final code. And here's a video of me playing the game.